For Whom Walkthrough
☆ Earn bonuses before you start the DLC.
★ Clear campaign & sub-quests | Get max lvl
☆ Learn all the ingredients in this new Gourmet Saga!
★ Get all Beyond the Dawn Trophies with these guides:
☆ Ryugola Weapons | All Portraits | Hero of the Summit
For Whom is a main quest in Tales of Arise' new DLC expansion, Beyond the Dawn. Read on to see a walkthrough for For Whom, as well as each of its objectives and rewards!
| ◀ Previous Chapter | Next Chapter ▶ |
|---|---|
| Faceless | Land of the Beginning |
List of Contents
 Hoot hoot! Hoot hoot! |
!! Spoiler Warning !! This article contains spoilers regarding the story of Tales of Arise' Beyond the Dawn DLC. Proceed at your own risk! |
|---|
For Whom Walkthrough Guide
- Look for Cal Beisel's Base in Shinefall Woods
- Investigate the Mausoleum
- Search for Nazamil
- Fight ??? Boss
- Inspect the Teleporter
- Seal the Innermost Door of the Mausoleum and Escape
Look for Cal Beisel's Base in Shinefall Woods
Fast Travel to Shinefall Woods in Ganath Haros
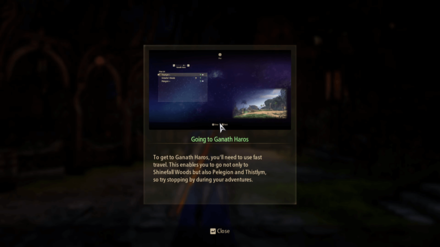
Completing the Faceless main quest will immediately trigger the tool tip informing the player than the only way to get to Ganath Haros is via fast travel.
Fast travel to Shinefall Woods in the Ganath Haros region to get to your next objective.
Search for the Base
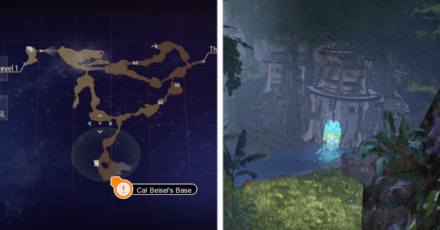
The Cal Beisel organization is actually using the Mausoleum of the Jungle as their hideout.
Head to the southern tip of the Shinefall Woods to arrive at the Mausoleum's location.
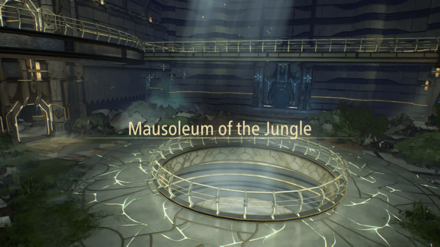
Investigate the Mausoleum
| Notable Loot | |||
|---|---|---|---|
| Equipment | Consumables | Valuables | |
| Highest Attainer Moonlight Revelry Ending Rod Bucks Supreme Shield Aegis Ancient Cloak Unbreakable Mercy |
Black Book of Disaster and Dawn Divine Hand Armor Never-Ending Roar Stout Closer Novus Aetas Initium Lucis |
Orange Gel Elixir Treat Gold Gel |
Astral Flower |
Lower Surface Concretion Layer
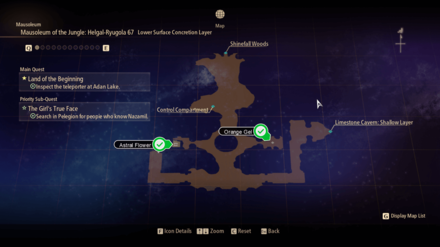
The central-western room houses a chest on a ledge containing an Astral Flower. However, it is unreachable from this floor and you must jump down from a different room to reach it.
Instead, walk into the central-eastern room to grab an Orange Gel and then take the eastern exit to reach the Limestone Cavern: Shallow Layer.
Limestone Cavern: Shallow Layer
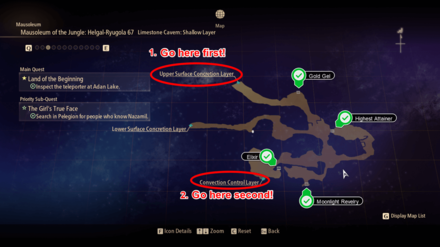
Follow the path eastward and then go south at the first fork. Head south until you see some zeugles and then take the eastern path.
Continue following the eastern path as it winds towards the north and loot the Highest Attainer from a chest before jumping down the ledge.
Head north after jumping down the ledge to spot a Venoflage near a chest containing a Gold Gel.
Continue following the northern path and enter the Upper Surface Concretion Layer.
Upper Surface Concretion Layer
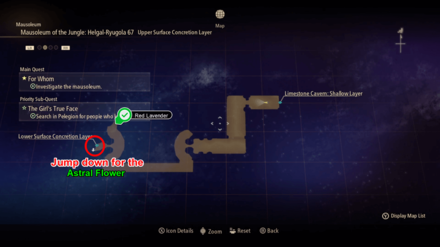
This map is a straightforward path with only 1 entrance and 1 exit. Follow the path ahead and make sure to grab the Red Lavender from the rubble before jumping down to reach the chest containing the Astral Flower from the first room.
Head back to the Limestone Cavern: Shallow Layer after grabbing the Astral Flower.
Limestone Cavern: Shallow Layer - Cont.
Follow the path again until you reach the fork and head south once more. Continue all the way south to acquire the Moonlight Revelry armor and jump down the nearby ledge to follow the path west.
Continue towards the southwestern exit and pick-up the Elixir before entering the next area; the Convection Control Layer.
Convection Control Layer
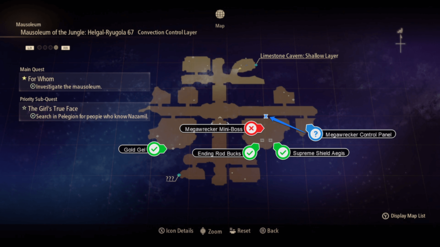
Walk to the southwestern-most room to view a cutscene. After the cutscene, head into the Limestone Cavern: Falls: Upper Level.
Optional Objective:
| Locked Zeugle: Megawrecker | |
|---|---|
| 1 |  Unlock the Room Open the room housing Megawrecker by heading to the eastern room and interacting with the terminal. |
| 2 | 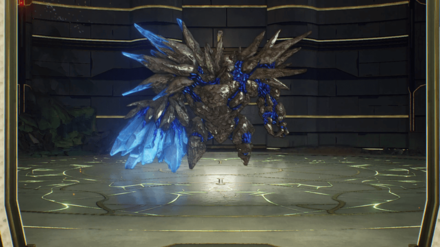 Defeat Megawrecker Challenge and defeat Megawrecker to obtain an Astral Flower. Check out our Megawrecker Boss Guide if this boss is proving to be too difficult. |
| 3 | Loot the Chests
The room housing Megawrecker also contains 2 equipment chests containing Ending Rod Bucks and Supreme Shield Aegis. |
Limestone Cavern: Falls: Upper Level
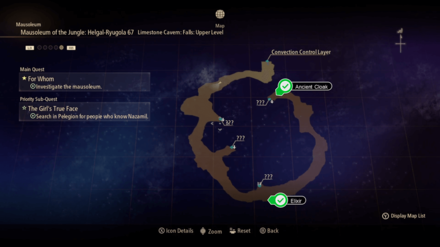
Walk to the souther section of the map to loot an Elixir from a chest.
Next, walk to the northeastern point of the map to grab the Ancient Cloak before jumping down into the Limestone Cavern: Falls: Lower Level.
Limestone Cavern: Falls: Lower Level
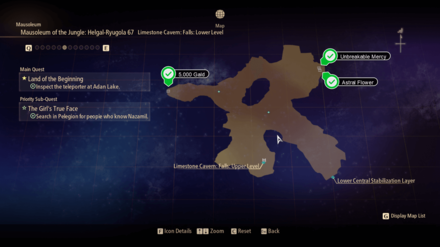
Jump down into the Falls lower level and head to the western end to loot a chest containing 5,000 Gald.
Next, head to the northeastern area and loot two chests containing the Unbreakable Mercy armor and another Astral Flower.
Once you're done exploring the rest of the room, head to the southeastern section of the map and enter the Lower Central Stabilization Layer.
Lower Central Stabilization Layer
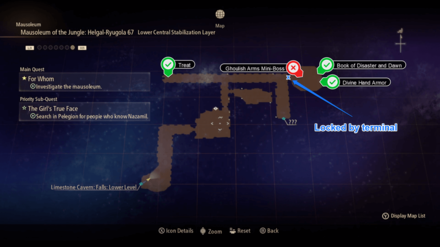
Walk along the corridor into the first room to trigger a cutscene that completes this objective.
Search for Nazamil
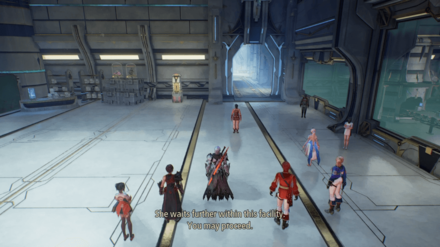
After viewing the cutscene, the party is prompted to continue further into the facility in their search for Nazamil.
Lower Central Stabilization Layer Cont.
Walk ahead and take the western path to loot a chest containing a Treat.
Afterwards, follow the path east to see another Locked Zeugle. You can come back to this later since the terminal to unlock it is located in a different area.
Continue following the path until you reach the eastern exit that leads into the Limestone Cavern: Innermost Area.
Limestone Cavern: Innermost Area
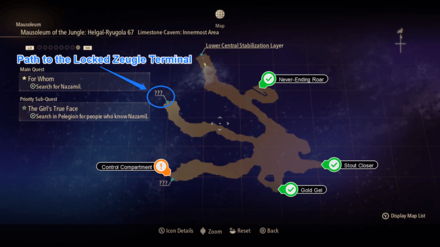
Follow the path and loot the Never-Ending Roar from the nearby ramp.
Next, continue down the path towards the southeastern end of the room to grab the Stout Closer.
From there, head to the southern-most section of the room and loot the Gold Gel from the chest.
Afterwards, take the southwestern exit to continue the quest or challenge the locked zeugle by taking the northwestern exit.
Optional Objective:
| Locked Zeugle: Ghoulish Arms | |
|---|---|
| 1 | 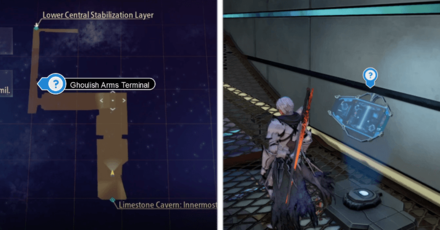 Unlock the Room Open the room housing Ghoulish Arms by passing through the northwestern exit of Limestone Cavern: Innermost Area and entering the Upper Central Stabilization Layer. From there, walk onto the catwalk and search for the terminal that unlocks the path into the room containing Ghoulish Arms. |
| 2 | 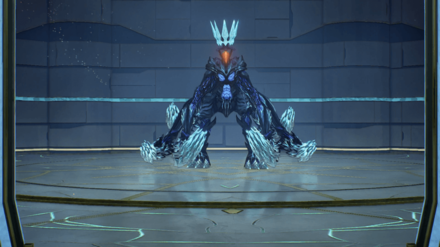 Defeat Ghoulish Arms Challenge and defeat Ghoulish Arms to obtain an Astral Flower. Check out our Ghoulish Arms Boss Guide if this boss is proving to be too difficult. |
| 3 | Loot the Chests
The room housing Ghoulish Arms also contains 2 equipment chests containing the Black Book of Disaster and Dawn and the Divine Hand Armor. |
Control Compartment

Walk along the northeastern corridor to locate Nazamil's Room. Enter the room to view a cutscene, and take the southern exit of the room to continue exploring the control compartment.
Continue towards the southern end of the map and use the healing light to replenish your HP and CP before stepping into the the south exit to challenge the level boss.
Alternatively, you could challenge the third and final locked zeugle.
Optional Objective:
| Locked Zeugle: Nimus Juggernaut | |
|---|---|
| 1 | 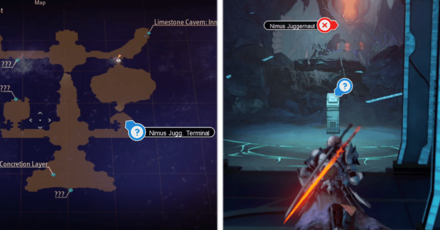 Unlock the Room Open the room housing Nimus Juggernat by passing through the southeastern corridor of the Control Compartment area and entering the small alcove. From there, interact with the terminal that unlocks the path into the room containing Nimus Juggernaut. |
| 2 | 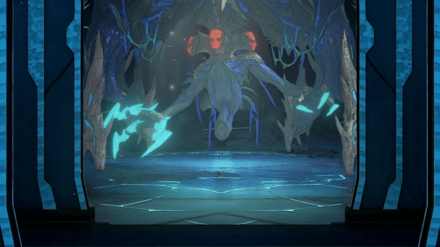 Defeat Nimus Juggernaut Challenge and defeat Nimus Juggernaut to obtain an Astral Flower. Check out our Nimus Juggernaut Boss Guide if this boss is proving to be too difficult. |
| 3 | Loot the Chests
The room housing Nimus Juggernaut also contains 2 equipment chests containing Novus Aetas and Initium Lucis. |
Defeat Nazamil
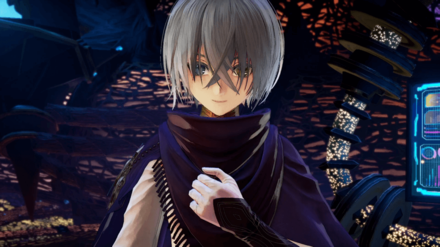
View a cutscene that will reveal how the constant abuse suffered by Nazamil has twisted her understanding of peace and friendship.
This causes Nazamil to come to a head against the party and both sides are forced to fight.
Visit our Nazamil Boss Guide to see strategies on how to beat Nazamil by clicking on the link below.
Inspect the Teleporter
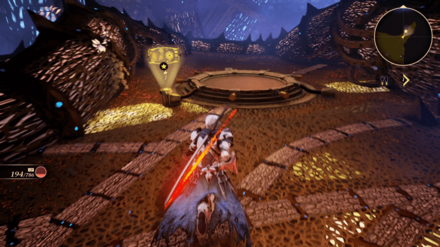
After the fight against the boss, walk towards the teleporter for a cutscene that clears this objective.
Seal the Innermost Door of the Mausoleum and Escape
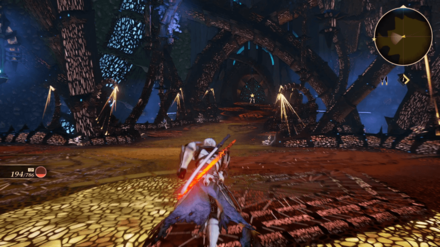
Head towards the door you used to enter the boss room for a final cutscene that completes this main quest.
Tales of Arise Related Guides

All Story Walkthroughs
| All Story Walkthroughs | |
|---|---|
| Tales of Arise Walkthrough | Beyond the Dawn DLC Walkthrough |
List of Beyond the Dawn Main Quests
| Beyond the Dawn Main Quests | |
|---|---|
| 1 | The Lord's Daughter |
| 2 | Warmth |
| 3 | Branded |
| 4 | Free From Pursuit |
| 5 | Budding |
| 6 | Feared |
| 7 | Disappearance and Distress |
| 8 | One's Own Master |
| 9 | Faceless |
| 10 | For Whom |
| 11 | Land of the Beginnings |
| 12 | Beyond the Dawn |
Comment
Author
For Whom Walkthrough
improvement survey
03/2026
improving Game8's site?

Your answers will help us to improve our website.
Note: Please be sure not to enter any kind of personal information into your response.

We hope you continue to make use of Game8.
Rankings
- We could not find the message board you were looking for.
Gaming News
Popular Games

Genshin Impact Walkthrough & Guides Wiki

Honkai: Star Rail Walkthrough & Guides Wiki

Umamusume: Pretty Derby Walkthrough & Guides Wiki

Pokemon Pokopia Walkthrough & Guides Wiki

Resident Evil Requiem (RE9) Walkthrough & Guides Wiki

Monster Hunter Wilds Walkthrough & Guides Wiki

Wuthering Waves Walkthrough & Guides Wiki

Arknights: Endfield Walkthrough & Guides Wiki

Pokemon FireRed and LeafGreen (FRLG) Walkthrough & Guides Wiki

Pokemon TCG Pocket (PTCGP) Strategies & Guides Wiki
Recommended Games

Diablo 4: Vessel of Hatred Walkthrough & Guides Wiki

Cyberpunk 2077: Ultimate Edition Walkthrough & Guides Wiki

Fire Emblem Heroes (FEH) Walkthrough & Guides Wiki

Yu-Gi-Oh! Master Duel Walkthrough & Guides Wiki

Super Smash Bros. Ultimate Walkthrough & Guides Wiki

Pokemon Brilliant Diamond and Shining Pearl (BDSP) Walkthrough & Guides Wiki

Elden Ring Shadow of the Erdtree Walkthrough & Guides Wiki

Monster Hunter World Walkthrough & Guides Wiki

The Legend of Zelda: Tears of the Kingdom Walkthrough & Guides Wiki

Persona 3 Reload Walkthrough & Guides Wiki
All rights reserved
© BANDAI NAMCO Entertainment America Inc. All third party content, brands, names, and logos are used under license and remain property of their respective owners. All rights reserved.
The copyrights of videos of games used in our content and other intellectual property rights belong to the provider of the game.
The contents we provide on this site were created personally by members of the Game8 editorial department.
We refuse the right to reuse or repost content taken without our permission such as data or images to other sites.


![Monster Hunter Stories 3 Review [First Impressions] | Simply Rejuvenating](https://img.game8.co/4438641/2a31b7702bd70e78ec8efd24661dacda.jpeg/thumb)


