Lord Balseph Boss Guide: Recommended Setup and How to Beat
☆ Earn bonuses before you start the DLC.
★ Clear campaign & sub-quests | Get max lvl
☆ Learn all the ingredients in this new Gourmet Saga!
★ Get all Beyond the Dawn Trophies with these guides:
☆ Ryugola Weapons | All Portraits | Hero of the Summit
Lord Balseph is a boss you fight in the Tales of Arise (Beyond the Dawn)! Read on to learn more about tips on how to beat Lord Balseph, as well as stats, weaknesses, attack patterns, and the best party setup including Artes and Equipment in this boss guide!
List of Contents
Lord Balseph Stats and General Info
| Recommended Level: 10 | |||
|---|---|---|---|
 HP: 19,010 |
|||
| Attack | 162 | Defense | 167 |
| Elemental Attack | 177 | Elemental Defense | 86 |
| Penetration | 406 | Resistance | 428 |
| Weakness | Resistance | ||
How to Beat Lord Balseph
To aid in your battle against Lord Balseph, here are some tips that you can utilize in your fight.
- Avoid Charged Axe Attacks
- Play As Alphen
- Keep an Eye On the Fire Avatar
- Disrupt His Gathering of Energy
Avoid His Charged Attacks
Balseph is a pretty powerful boss to come up against that packs several strong attacks. As much as possible, try and avoid getting hit by his attacks that he charges up first, as these often take away good amounts of your HP if you are unable to dodge them.
Play As Alphen
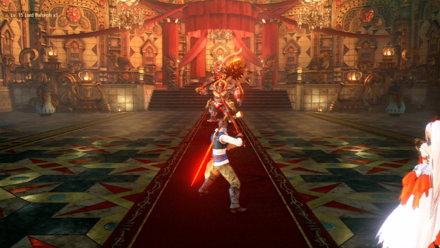
Being able to make use of Alphen's much more agile build against Balseph is the best choice you can make when choosing between which of your currently available party members to control for a majority of the fight.
You can keep Shionne in reserve, or in a role that sees her cast more Artes or use more Items to keep your HP up without direct player intervention.
Keep an Eye On the Fire Avatar
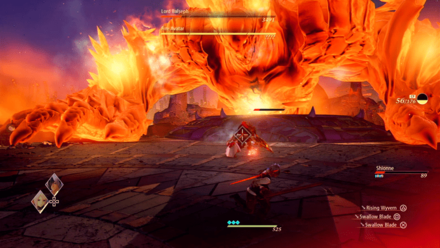
During the second phase of the fight, a Fire Avatar will appear, assisting Balseph in the fight against you. It will send down Fireballs that can quickly drain you of HP if you do not keep moving around the tight area you find yourself in.
Disrupt His Gathering of Energy
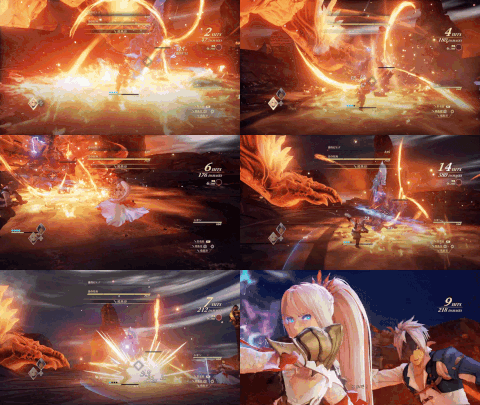
Close to dying, Balseph will try to gather energy for an attack. You can disrupt this instead however by unleashing all that you have against Balseph as he gathers this energy – if you leave him alone, he will cast a powerful attack that sends waves of fire in every direction, which can be difficult to avoid.
Use Boost Attacks until he loses his health, finishing the fight.
Recommended Party Setup for Lord Balseph
Party Members
| Leader | Members |
|---|---|
 Alphen Alphen
Lv. 10 |
 Shionne Shionne
Lv. 10 |
Only Alphen and Shionne
For this fight against Balseph, you will only have Alphen and Shionne available for your party. It is recommended that they be leveled up to 10 prior to engaging in the fight against Balseph, in order to have better stats that can harm the Lord of Calaglia more thoroughly.
Alphen Equipment and Artes
 Alphen Alphen
Lv. 10 |
Equipment |
|---|---|
| Long Sword | |
| Ocean Blue Battle Garb | |
| - | |
| Ground Artes | Aerial Artes |
| Rising Wyvern | Mirage |
| Swallow Blade | - |
| - | - |
Play Through Alphen
Due to the physical nature of this fight, playing through Alphen is essential in order to more effectively take down Balseph. Keep his HP up in order to preserve your CP for the second stage of the fight.
Draw Balseph Away
By using Alphen as your primary damage dealer, it can sometimes leave Shionne wide open to attacks if you're trying to avoid Balseph's hits. Try to lure him away by getting close and attacking the Lord, before moving further away to get Balseph to move further from Shionne.
Shionne Equipment and Artes
 Shionne Shionne
Lv. 10 |
Equipment |
|---|---|
| Noble Rose | |
| Noble Scarlet | |
| - | |
| Ground Artes | Aerial Artes |
| First Aid | - |
| Magna Ray | - |
| - | - |
Keep in Healer Role
Although Shionne deals good amounts of damage against Balseph from afar, her healing abilities are far more useful to you. Keep her out of harm's way by setting the strategy to Heal Only in order to have stand afar from the battle.
Lord Balseph Attack Patterns
Explosion
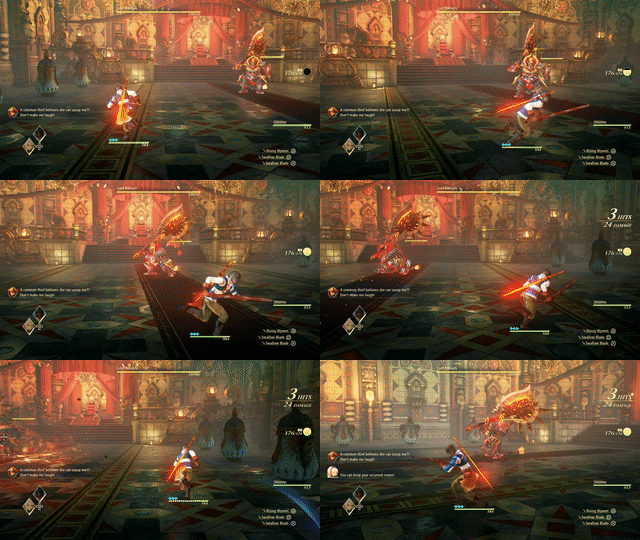
Balseph will close in on himself, glowing a deep shade of red before releasing the energy in a small, outward explosion. This attack causes minimal damage but can, however, stagger you. This leaves you vulnerable to any of his other attacks.
Axe Slam

This attack will see Balseph slam his battleax down to the ground. Getting caught in this attack can easily diminish your HP to critical levels, or outright K.O. you if you do not manage to avoid it. He can also do this attack by jumping in the air before slamming his ax down to the ground.
Jump Attack
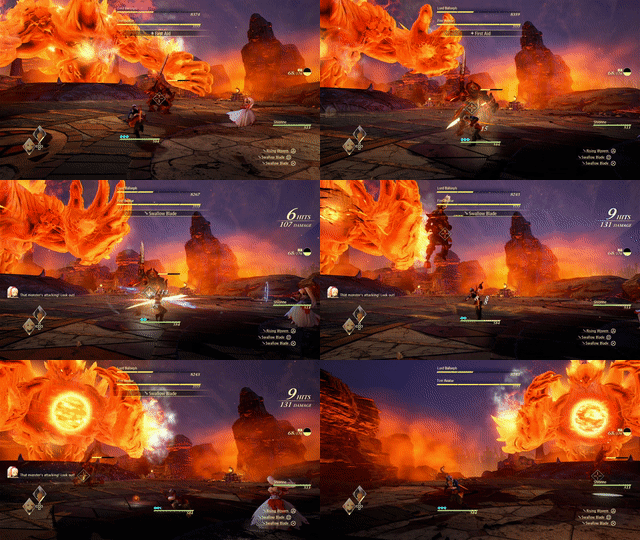
Two variations of this attack exist, both of which can easily be avoided by observing how Balseph moves. Both variations occur in the same manner, but the first variation will create a wave of fire that expands outwards, which can be avoided by jumping.
The second variation does not have the fire wave but instead creates a small explosion that can stagger you if you get caught in the attack.
Swing Attack
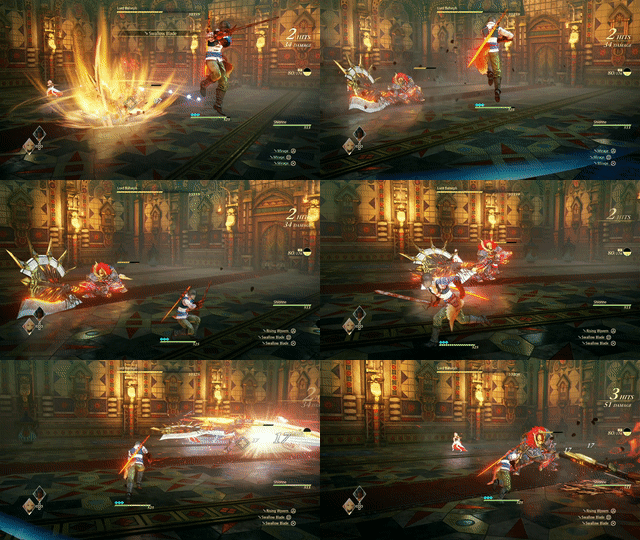
Easy to avoid but difficult to recover from once hit, Balseph will swing his battleax around in a circular formation. The lead-up time to him actually doing the attack is quite long, leaving you enough time to move out of the way before the attack can commence.
Note however that he can do this attack one after the other – it is best to wait for him to raise his battleax back onto his shoulder before resuming any attacks on him.
Axe Charge
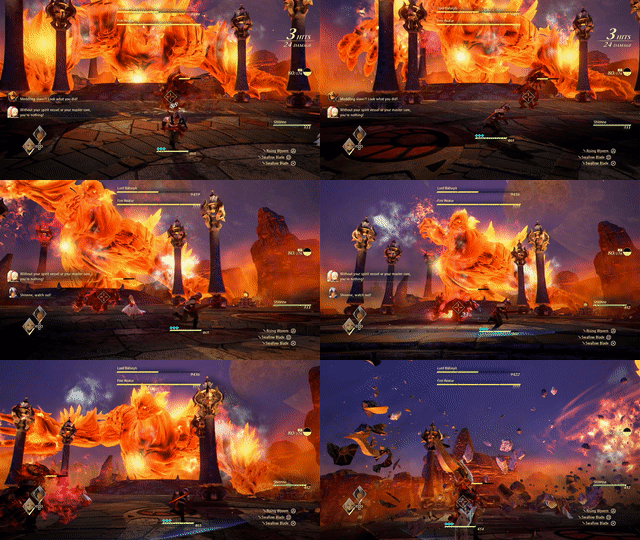
Balseph will charge at you, dragging his ax down on the ground before swinging it in an upwards direction. Three separate prongs of energy will blast out from this attack but can be easily avoided by moving to the side.
Fire Avatar Fireballs
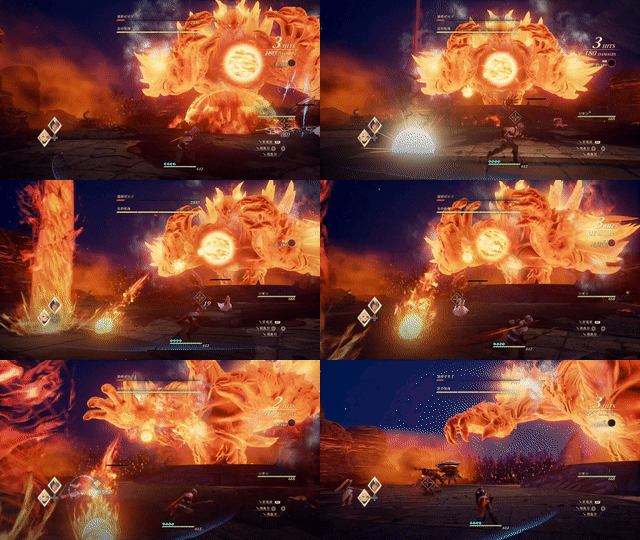
During the second phase of the fight, a giant Fire Avatar will appear. You can ignore this, focusing all your attention instead on Balseph. However, it does possess the ability to attack, shooting fireballs at you that can easily K.O. you if you're not careful.
Other attacks from the Fire Avatar include letting burning rocks fall on top of you and slamming its fist on the ground which can easily be avoided.
Tales of Arise Related Guides
Beyond the Dawn DLC Bosses
Beyond the Dawn Story Bosses
| Story Bosses | |
|---|---|
 Nimus Pandemonium Nimus Pandemonium |
 Venoflage Venoflage |
 Nazamil Nazamil |
 Nazamil Nether Nazamil Nether
|
 Ooze Hive Ooze Hive |
 Nazamil Nether Nazamil Nether (2nd Encounter) |
 Nazamil Nether Nazamil Nether (3rd Encounter) |
 Captive Nazamil Captive Nazamil |
 Oppressor Oppressor |
 Emergence Suppressor Emergence Suppressor |
Beyond the Dawn Optional Bosses
| Optional Bosses | ||
|---|---|---|
 Ruthless Ruthless
|
 Boisterous Roper Boisterous Roper
|
 Cruel Keeper Cruel Keeper |
 Megawrecker Megawrecker |
 Ghoulish Arms Ghoulish Arms |
 Nimus Juggernaut Nimus Juggernaut |
 Grinymuk Grinymuk |
 Mother Boomy Mother Boomy |
- |
Story Bosses
Optional Bosses
Author
Lord Balseph Boss Guide: Recommended Setup and How to Beat
improvement survey
03/2026
improving Game8's site?

Your answers will help us to improve our website.
Note: Please be sure not to enter any kind of personal information into your response.

We hope you continue to make use of Game8.
Rankings
- We could not find the message board you were looking for.
Gaming News
Popular Games

Genshin Impact Walkthrough & Guides Wiki

Honkai: Star Rail Walkthrough & Guides Wiki

Umamusume: Pretty Derby Walkthrough & Guides Wiki

Pokemon Pokopia Walkthrough & Guides Wiki

Resident Evil Requiem (RE9) Walkthrough & Guides Wiki

Monster Hunter Wilds Walkthrough & Guides Wiki

Wuthering Waves Walkthrough & Guides Wiki

Arknights: Endfield Walkthrough & Guides Wiki

Pokemon FireRed and LeafGreen (FRLG) Walkthrough & Guides Wiki

Pokemon TCG Pocket (PTCGP) Strategies & Guides Wiki
Recommended Games

Fire Emblem Heroes (FEH) Walkthrough & Guides Wiki

Diablo 4: Vessel of Hatred Walkthrough & Guides Wiki

Yu-Gi-Oh! Master Duel Walkthrough & Guides Wiki

Super Smash Bros. Ultimate Walkthrough & Guides Wiki

Pokemon Brilliant Diamond and Shining Pearl (BDSP) Walkthrough & Guides Wiki

Elden Ring Shadow of the Erdtree Walkthrough & Guides Wiki

Monster Hunter World Walkthrough & Guides Wiki

The Legend of Zelda: Tears of the Kingdom Walkthrough & Guides Wiki

Persona 3 Reload Walkthrough & Guides Wiki

Cyberpunk 2077: Ultimate Edition Walkthrough & Guides Wiki
All rights reserved
© BANDAI NAMCO Entertainment America Inc. All third party content, brands, names, and logos are used under license and remain property of their respective owners. All rights reserved.
The copyrights of videos of games used in our content and other intellectual property rights belong to the provider of the game.
The contents we provide on this site were created personally by members of the Game8 editorial department.
We refuse the right to reuse or repost content taken without our permission such as data or images to other sites.

 Balseph
 Ice Wolf Leader
 Ooze Hive
 Lord Ganabelt
 Zacarania
 Kisara
 Dohalim
 Venoflage
 Temararus
 Grinymuk
 Almeidrea & Mesmald
 Meria Phein
 Kalmarzel & Kaldinzel
 Vholran
 Eljarania
 Efreet
 Tormented Limbs
 Red Woman
 Valclynimus
 Great Astral Spirit
 Subsumer
 Vholran (Final Boss)
 Toxidillo
 Boisterous Roper
 Polycephus
 Great Dragon
 Relentless Charger
 Flamewrecker
 Alpha Reaper
 Stormbringer
 Elemental
 Regent Bee
 Agony Keeper
 Mother Boomy
 Ruthless
 Thunderite
 Mantis
 Calamity Arms
 Meneiys
 Ezamamuk
 Sword Dancer
 Undine Drop
 Luo Undine
 Grand Gnome & Vas Phein
 Masher Mare & Masher Bull
 Procella Sylph & Sylph Zloa
 Mesmald
 Edna
Edna Nimus Origin
 Eizen
Eizen Edna & Eizen
 Chronos
 Dulneiys, Maleiys, & Vasneiys


![Slay the Spire 2 Review [Early Access] | Still the Deckbuilder to Beat](https://img.game8.co/4433115/44e19e1fb0b4755466b9e516ec7ffb1e.png/thumb)

![Resident Evil Village Review [Switch 2] | Almost Flawless Port](https://img.game8.co/4432790/e1859f64830960ce4248d898f8cd38d9.jpeg/thumb)


