Boisterous Roper Boss Guide
☆ Earn bonuses before you start the DLC.
★ Clear campaign & sub-quests | Get max lvl
☆ Learn all the ingredients in this new Gourmet Saga!
★ Get all Beyond the Dawn Trophies with these guides:
☆ Ryugola Weapons | All Portraits | Hero of the Summit
Boisterous Roper is a Gigant Boss that you can fight in the Tales of Arise (Beyond the Dawn)! Read on to learn how to beat Boisterous Roper, as well as its stats, weaknesses, attack patterns, and the best party setup in this boss guide!
List of Contents
Boisterous Roper Stats and General Info
Boisterous Roper (Beyond the Dawn) Location
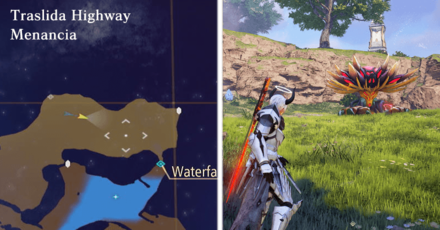
Boisterous Roper can be found in Traslida Highway after you've progressed the story enough.
Boisterous Roper (Beyond the Dawn) Stats
| Recommended Level: 80 | |||
|---|---|---|---|
 HP: 267026 |
|||
| Attack | 5020 | Defense | 2346 |
| Elemental Attack | 4783 | Elemental Defense | 2109 |
| Penetration | 3608 | Resistance | 3802 |
| Weakness | Resistance | ||
Item to Drop
| Astral Flower | Mystical Luminacore (3) |
| Earth Stone (4) |
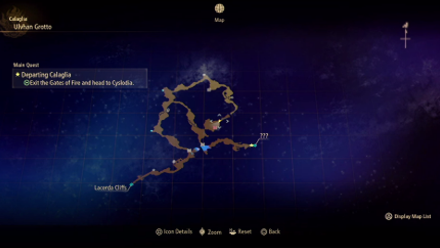
Boisterous Roper Location
| Map | Actual Location |
|---|---|
 |
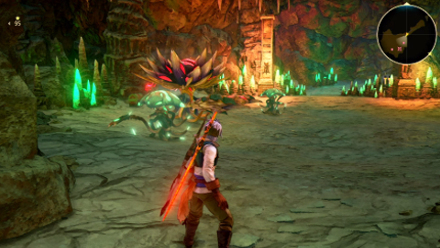 |
Boisterous Roper can be found deep within Ulvhan Grotto shortly after departing Calaglia as you make your way towards Cyslodia. It will be accompanied by two other Ropers.
Boisterous Roper Stats
| Recommended Level: 10 | |||
|---|---|---|---|
 HP: 24790 |
|||
| Attack | 233 | Defense | 198 |
| Elemental Attack | 222 | Elemental Defense | 179 |
| Penetration | 335 | Resistance | 353 |
| Weakness | Resistance | ||
Item to Drop
| Strange Core (1) | Astral Flower |
| Earth Seed (2) |
How to Beat Boisterous Roper
To aid in your battle against Boisterous Roper, here are some tips that you can utilize in your fight.
Take Out the Ropers First
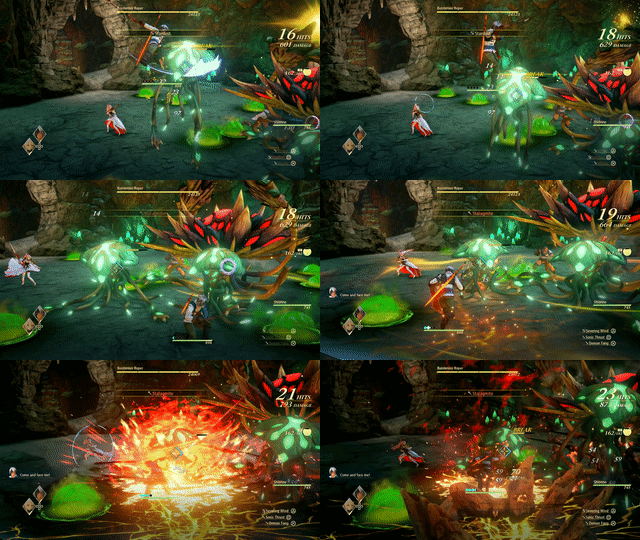
Accompanying the Boisterous Roper will be two other Ropers that prove to be tough distractions for you to fight against, particularly on lower levels. While in the first phase of the fight, take them out first, allowing you to more freely move around the area without having to worry about any of their poisonous attacks.
In the Beyond the Dawn DLC, the Ropers are replaced by Forest Ropers, a slightly stronger variant of Roper.
Jump Over Seismic Wave
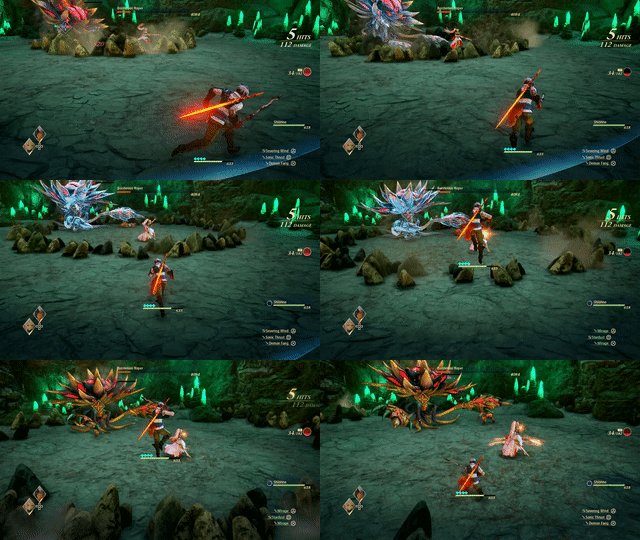
Although tricky, it is entirely possible to jump over the Seismic Wave attacks the Boisterous Roper can do. Wait until the edge of the wave is just about to hit you before jumping – alternatively, you can run towards the wave and jump, allowing the momentum in your movement to carry you over the rocks.
Use Wind Attacks
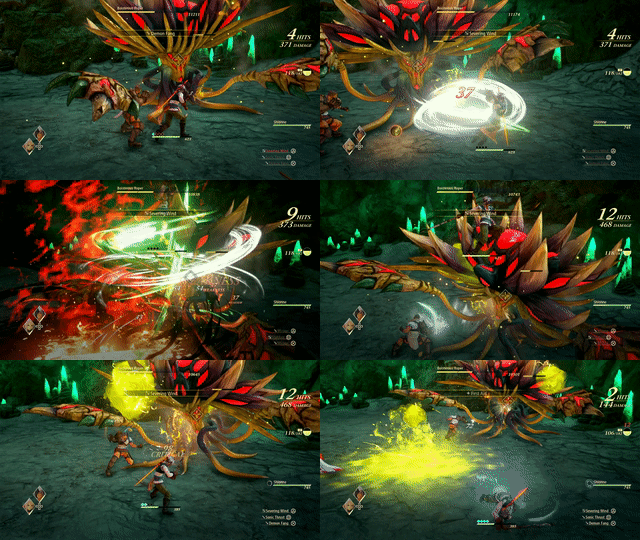
At this stage in the game, Alphen's Severing Wind attack should be available for use. Freely use it against Boisterous Roper to provide significant elemental damage against the Gigant.
Recommended Party Setup for Boisterous Roper
Party Members
Be Patient With Attacks
Due to your level at this stage in the game, some of Boisterous Roper's hits can easily K.O. you if you're not careful. It is also easy to get inflicted with the Poison Physical Ailment from the boss or other Ropers poison attacks.
Take a moment to observe the boss' movements before going on the offensive, as allowing it to attack first can help to conserve healing items you'll need later on.
Alphen Equipment and Artes
 Alphen AlphenLv. 86 | Equipment |
|---|---|
| Novus Aetas Dawn | |
| Shining Armor of Dawn | |
| Warrior Emblem | |
| Ground Artes | Aerial Artes |
| First Set | |
| Severing Wind | Mirage |
| Mega Sonic Thrust | Luna Rondo |
| Double Demon Fang | Stardust |
| Second Set | |
| Eternal Devastation | Soaring Light Spear |
| Rising Wyvern | Hurricane Thrust |
| Sword Rain: Alpha | Rising Falcon |
 Alphen AlphenLv.11 | Equipment |
|---|---|
| Crude Sword | |
| Bone Fragment Armor | |
| Warrior Emblem | |
| Ground Artes | Aerial Artes |
| Severing Wind | Mirage |
| Sonic Thrust | Stardust |
| Demon Fang | - |
Primary Attacker
At this stage in the game, Alphen's only elemental Artes will be Wind-based. Due to this, he can be used to deal most of the damage against Boisterous Roper, while having Shionne as a backup.
Shionne Equipment and Artes
 Shionne ShionneLv. 86 | Equipment |
|---|---|
| Sacred Karma | |
| Unbreakable Mercy | |
| Resist Ring | |
| Ground Artes | Aerial Artes |
| First Set | |
| Healing Circle | Scorched Earth |
| Flare Tornado | Toxicity |
| Freeze Lancer | Displode |
| Second Set | |
| Resurrection | Aranea Celestra |
| Gravitas Field | Tres Ventos |
| Tonitus Celestra | Scorched Earth |
 Shionne ShionneLv.11 | Equipment |
|---|---|
| Noble Rose | |
| Noble Scarlet | |
| Garnet | |
| Ground Artes | Aerial Artes |
| First Aid | Toxicity |
| Gemini Aqua | - |
| Magna Ray | - |
Focus on Healing
Although some of Shionne's attacks can be quite powerful, such as her Boost Attacks, she should be used primarily as a support character at this stage of the game – keep enemies away from her by distracting them with Alphen, allowing her to cast healing Artes to keep Alphen alive.
Dohalim Equipment and Artes
 Dohalim Dohalim
Lv. 86 |
Equipment |
|---|---|
| Ending Rod Dionysus | |
| Moonlight Revelry | |
| Pierce Emblem | |
| Ground Artes | Aerial Artes |
| First Set | |
| Cure | Tornado Drive |
| Stalagmite | Rotating Piledriver |
| Seismic Rupture | Soaring Blast |
| Second Set | |
| Ground Dasher | Tornado Drive |
| Execution | Rotating Piledriver |
| Resurrection | - |
Elemental Artes Attacker
Dohalim is a decent choice for both offense and defense because of his elemental and healing artes. Keep a close eye on Dohalim's HP as a secondary attacker so you can use him as a reserve healer in case Shionne goes down.
Kisara Equipment and Artes
 Kisara Kisara
Lv. 86 |
Equipment |
|---|---|
| Supreme Shield Aegis | |
| The Impregnable | |
| Black Onyx | |
| Ground Artes | Aerial Artes |
| First Set | |
| Inferno Crossing | Lightning Streak |
| Glacial Pyre | - |
| Slag Assault | - |
| Second Set | |
| Piercing Roar | Lightning Streak |
| Hurricane Slice | - |
| Flaming Meteor | - |
Tank and Support Attacker
Kisara will have to take on most of the attacks and shield Dohalim and Shionne so they can heal the party and make sure that everybody stays alive.
Boisterous Roper Attack Patterns
Stalagmite
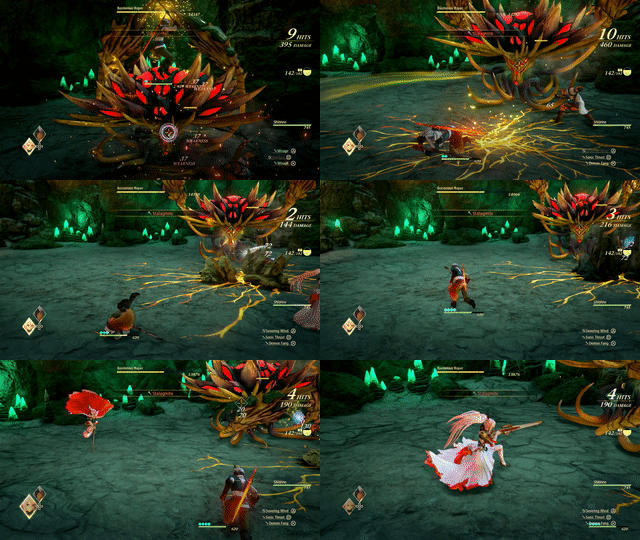
A common but dangerous attack, Boisterous Roper will cause a rock formation to burst out of the ground beneath wherever your player-controlled character is, causing knock back and a considerable amount of damage.
Poison Blobs
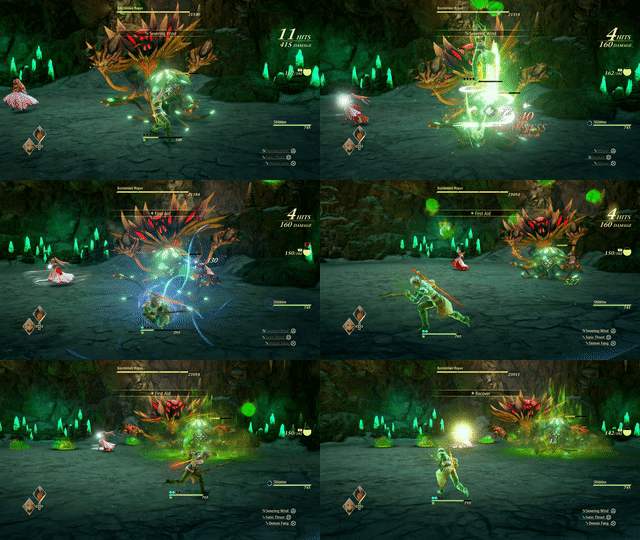
Similar to other Ropers, Boisterous Roper can also spew blobs of poison around itself, leaving a lingering poisonous spot on the ground. Getting hit or damaged by the these spots too often can cause the Poison Physical Ailment.
Melee Swipes
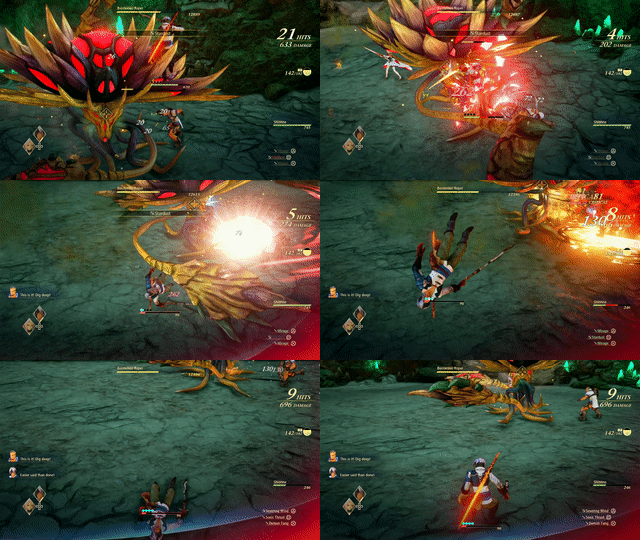
As a defensive measure, the Gigant will be able to swing its arms around to ward you off. This attack knocks you back as well as takes out a significant portion of your HP, so be careful and time your dodges to avoid taking any damage.
Seismic Wave
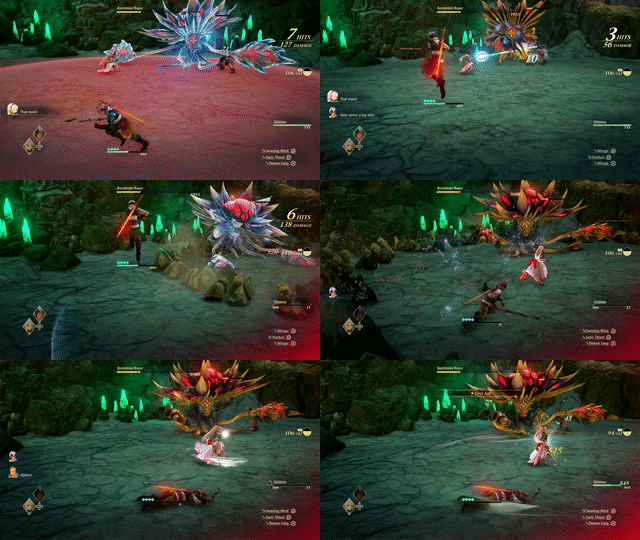
During the second phase of the fight, the boss can slam the ground to create a seismic wave. The area of effect will be shown in red before a wave of rock surges outward from the boss' position. You can avoid taking any damage from this by jumping over the wave.
Tales of Arise (Beyond the Dawn) Related Guides
Beyond the Dawn DLC Bosses
Beyond the Dawn Story Bosses
| Story Bosses | |
|---|---|
 Nimus Pandemonium Nimus Pandemonium |
 Venoflage Venoflage |
 Nazamil Nazamil |
 Nazamil Nether Nazamil Nether
|
 Ooze Hive Ooze Hive |
 Nazamil Nether Nazamil Nether (2nd Encounter) |
 Nazamil Nether Nazamil Nether (3rd Encounter) |
 Captive Nazamil Captive Nazamil |
 Oppressor Oppressor |
 Emergence Suppressor Emergence Suppressor |
Beyond the Dawn Optional Bosses
| Optional Bosses | ||
|---|---|---|
 Ruthless Ruthless
|
 Boisterous Roper Boisterous Roper
|
 Cruel Keeper Cruel Keeper |
 Megawrecker Megawrecker |
 Ghoulish Arms Ghoulish Arms |
 Nimus Juggernaut Nimus Juggernaut |
 Grinymuk Grinymuk |
 Mother Boomy Mother Boomy |
- |
Story Bosses
Optional Bosses
Author
Boisterous Roper Boss Guide
improvement survey
03/2026
improving Game8's site?

Your answers will help us to improve our website.
Note: Please be sure not to enter any kind of personal information into your response.

We hope you continue to make use of Game8.
Rankings
- We could not find the message board you were looking for.
Gaming News
Popular Games

Genshin Impact Walkthrough & Guides Wiki

Honkai: Star Rail Walkthrough & Guides Wiki

Umamusume: Pretty Derby Walkthrough & Guides Wiki

Pokemon Pokopia Walkthrough & Guides Wiki

Resident Evil Requiem (RE9) Walkthrough & Guides Wiki

Monster Hunter Wilds Walkthrough & Guides Wiki

Wuthering Waves Walkthrough & Guides Wiki

Arknights: Endfield Walkthrough & Guides Wiki

Pokemon FireRed and LeafGreen (FRLG) Walkthrough & Guides Wiki

Pokemon TCG Pocket (PTCGP) Strategies & Guides Wiki
Recommended Games

Diablo 4: Vessel of Hatred Walkthrough & Guides Wiki

Fire Emblem Heroes (FEH) Walkthrough & Guides Wiki

Yu-Gi-Oh! Master Duel Walkthrough & Guides Wiki

Super Smash Bros. Ultimate Walkthrough & Guides Wiki

Pokemon Brilliant Diamond and Shining Pearl (BDSP) Walkthrough & Guides Wiki

Elden Ring Shadow of the Erdtree Walkthrough & Guides Wiki

Monster Hunter World Walkthrough & Guides Wiki

The Legend of Zelda: Tears of the Kingdom Walkthrough & Guides Wiki

Persona 3 Reload Walkthrough & Guides Wiki

Cyberpunk 2077: Ultimate Edition Walkthrough & Guides Wiki
All rights reserved
© BANDAI NAMCO Entertainment America Inc. All third party content, brands, names, and logos are used under license and remain property of their respective owners. All rights reserved.
The copyrights of videos of games used in our content and other intellectual property rights belong to the provider of the game.
The contents we provide on this site were created personally by members of the Game8 editorial department.
We refuse the right to reuse or repost content taken without our permission such as data or images to other sites.

 Balseph
 Ice Wolf Leader
 Ooze Hive
 Lord Ganabelt
 Zacarania
 Kisara
 Dohalim
 Venoflage
 Temararus
 Grinymuk
 Almeidrea & Mesmald
 Meria Phein
 Kalmarzel & Kaldinzel
 Vholran
 Eljarania
 Efreet
 Tormented Limbs
 Red Woman
 Valclynimus
 Great Astral Spirit
 Subsumer
 Vholran (Final Boss)
 Toxidillo
 Polycephus
 Great Dragon
 Relentless Charger
 Flamewrecker
 Alpha Reaper
 Stormbringer
 Elemental
 Regent Bee
 Agony Keeper
 Mother Boomy
 Ruthless
 Thunderite
 Mantis
 Calamity Arms
 Meneiys
 Ezamamuk
 Sword Dancer
 Undine Drop
 Luo Undine
 Grand Gnome & Vas Phein
 Masher Mare & Masher Bull
 Procella Sylph & Sylph Zloa
 Mesmald
 Edna
Edna Nimus Origin
 Eizen
Eizen Edna & Eizen
 Chronos
 Dulneiys, Maleiys, & Vasneiys


![Everwind Review [Early Access] | The Shaky First Step to A Very Long Journey](https://img.game8.co/4440226/ab079b1153298a042633dd1ef51e878e.png/thumb)

![Monster Hunter Stories 3 Review [First Impressions] | Simply Rejuvenating](https://img.game8.co/4438641/2a31b7702bd70e78ec8efd24661dacda.jpeg/thumb)


