Zacarania Boss Guide: Recommended Setup and How to Beat
☆ Earn bonuses before you start the DLC.
★ Clear campaign & sub-quests | Get max lvl
☆ Learn all the ingredients in this new Gourmet Saga!
★ Get all Beyond the Dawn Trophies with these guides:
☆ Ryugola Weapons | All Portraits | Hero of the Summit
Zacarania is a boss you fight in the Tales of Arise (Beyond the Dawn)! Read on to learn more about tips on how to beat Zacarania, as well as stats, weaknesses, attack patterns, and the best party setup including Artes and Equipment in this boss guide!
List of Contents
Zacarania Stats and General Info
| Recommended Level: 19 | |||
|---|---|---|---|
 HP: 61280 |
|||
| Attack | 552 | Defense | 298 |
| Elemental Attack | 635 | Elemental Defense | 331 |
| Penetration | 484 | Resistance | 410 |
| Weakness | Resistance | ||
How to Beat Zacarania
To aid in your battle against Zacarania, here are some tips that you can utilize in your fight.
Wait for the Tentacles to Stop Moving
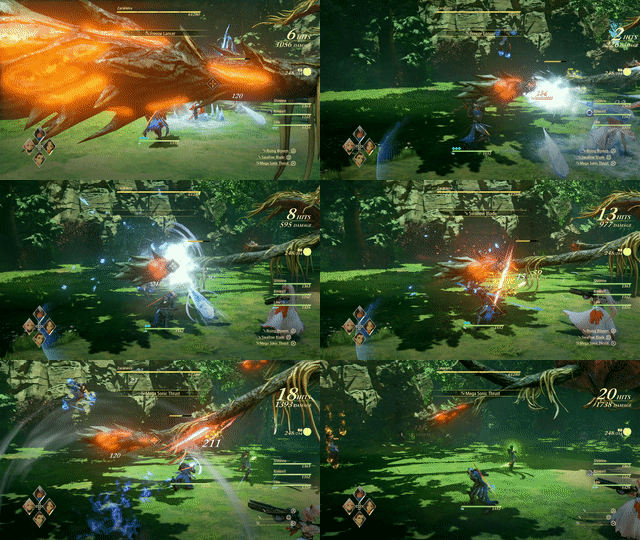
Zacarania has several tentacles protruding from its body with Weak Spots on their ends. As the main body of the monster can rise above the ground, it is difficult to attack it to cause significant damage. Instead, wait for the tentacles to stop moving to attack it while controlling melee characters.
Use Wind Attacks
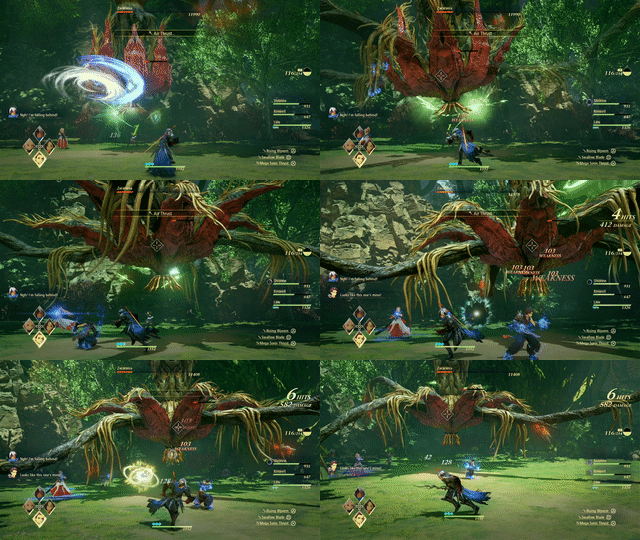
Zacarania is weak to Wind-based attacks and luckily, Rinwell has a great arsenal of Wind attacks that can be used against it. Arm her and your entire party with any wind-based Artes before heading into the clearing where Zacarania waits in. Begin hammering away with Wind Artes while targeting it's weakpoints to deal high amounts of damage.
Eliminate the Forest Ropers
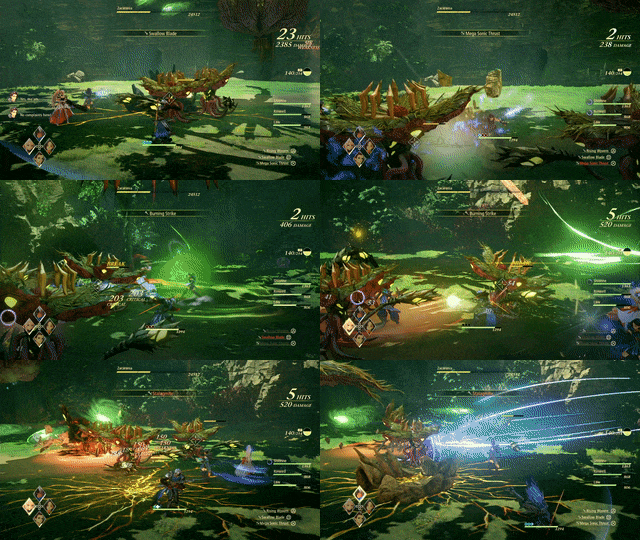
In the second half of the battle, Forest Ropers will appear on the battlefield. These new enemies in addition to the boss can be hard to manage. Prioritize the well-being of Rinwell and Shionne, as they act as your party's main elemental damage dealer and support character respectively. Use Alphen and Law to take care of them or lure them away, freeing Rinwell to attack Zacarania directly.
Recommended Party Setup for Zacarania
Party Members
| Leader | Members | ||
|---|---|---|---|
 Rinwell Rinwell
Lv.19 |
 Shionne Shionne
Lv.19 |
 Alphen Alphen
Lv.19 |
 Law Law
Lv.19 |
Arm the Party with Wind Artes
All the enemies that will appear in the battle are all weak to Wind-based attacks. Arm your entire party in with Wind-based Artes to more easily deal with the crowd and Zacarania effectively.
Rinwell Equipment and Artes
 Rinwell Rinwell
Lv.19 |
Equipment |
|---|---|
| Nature's Beauty | |
| Zeugle Shell Mage Coat | |
| Ground Artes | Aerial Artes |
| Air Thrust | Razor Cyclone |
| Gale Force | Cyclone's Flight |
| Tempest Whirl | - |
Have Rinwell Focus on Dealing Damage
To win the fight faster, you can use Rinwell to aggressively attack Zacarania with her wind-based Artes. As the only one in your party with multiple Wind Artes, she can string together combos for a more even spread of damage.
Shionne Equipment and Artes
 Shionne Shionne
Lv.19 |
Equipment |
|---|---|
| Blackthorn | |
| Middy Blouse | |
| Ground Artes | Aerial Artes |
| First Aid | Toxicity |
| Flare Tornado | - |
| Ignis Celestra | - |
Use as a Healer
Shionne can be kept in reserve as a healer for the entire party, as her attacks only aid a little in the fight against Zacarania. She can more than adequately perform the role, as Zacarania's attacks can easily be anticipated beforehand, lowering the need to heal multiple people at once if you can manage to guide characters away from dangers.
Alphen Equipment and Artes
 Alphen Alphen
Lv.19 |
Equipment |
|---|---|
| Flare Claw | |
| Sincleaver Armor | |
| Poison Charm | |
| Ground Artes | Aerial Artes |
| Severing Wind | Mirage |
| Swallow Blade | Stardust |
| Mega Sonic Thrust | - |
Good Crowd Control Character
Alphen has in his possession several Wind Artes that can be used against Zacarania himself. When the Forest Ropers come to fight during the second phase, you can redirect Alphen to take care of them due to their own weakness to Wind-based attacks, which frees up other characters to concentrate on Zacarania.
Law Equipment and Artes
 Law Law
Lv.19 |
Equipment |
|---|---|
| Winged Gauntlets | |
| Silver Wolf Vest | |
| Poison Charm | |
| Ground Artes | Aerial Artes |
| Steel | Glimmer Dragon |
| Talon Storm | - |
| Fang Blast | - |
Support Brawler
Despite having no available Wind attacks, Law's brute strength alone can more than allow him to keep up with attacking Zacarania. His fast attacks are a good addition when attacking the large monster – capable of chipping away hundreds of the enemy's HP in one continuous combo.
Zacarania Attack Patterns
Energy Beams

Zacarania's tentacles will flail about for a few moments before the tips point down straight to the ground, firing beams of energy that it then moves around. This attack deals small amounts of damage and can easily be dodged by moving far away from the tentacles when they begin to flail.
Rising Shafts
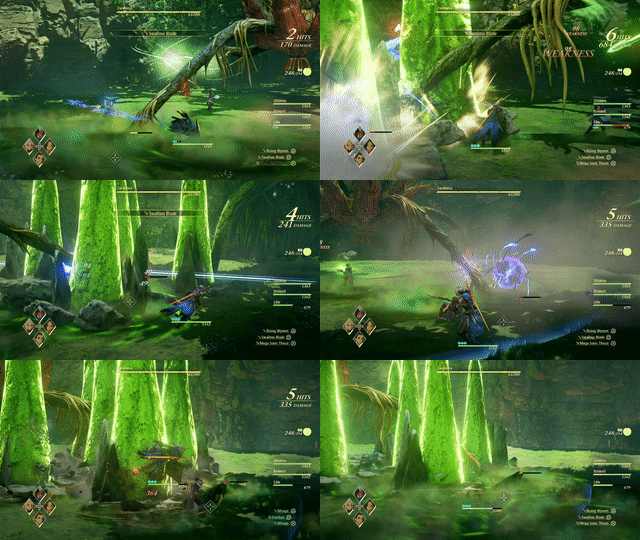
All the monster's tentacles will bore into the ground, hiding the Weak Spots on their tips away from you. The ground will begin to glow a hazy green before shafts rise up from the ground. These attacks come one after the other with a small delay in between – getting caught in one of the shafts can knock you to the ground, which can make it difficult for you to avoid the next strike if you do not move away quickly enough.
Ground Smash
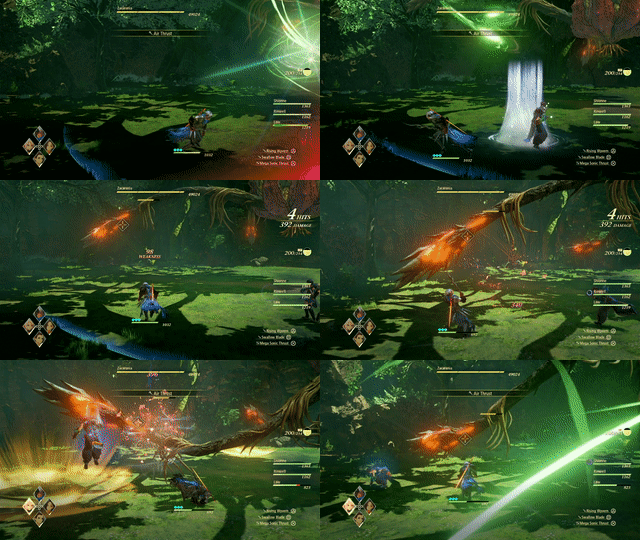
All the appendages will extend out from Zacarania's body, straightening out just above the ground before slamming down upon it in vicious strikes. You can target the Weak Spots on the ends of the appendages once the attack ceases to cause some damage.
Tales of Arise Related Guides
Beyond the Dawn DLC Bosses
Beyond the Dawn Story Bosses
| Story Bosses | |
|---|---|
 Nimus Pandemonium Nimus Pandemonium |
 Venoflage Venoflage |
 Nazamil Nazamil |
 Nazamil Nether Nazamil Nether
|
 Ooze Hive Ooze Hive |
 Nazamil Nether Nazamil Nether (2nd Encounter) |
 Nazamil Nether Nazamil Nether (3rd Encounter) |
 Captive Nazamil Captive Nazamil |
 Oppressor Oppressor |
 Emergence Suppressor Emergence Suppressor |
Beyond the Dawn Optional Bosses
| Optional Bosses | ||
|---|---|---|
 Ruthless Ruthless
|
 Boisterous Roper Boisterous Roper
|
 Cruel Keeper Cruel Keeper |
 Megawrecker Megawrecker |
 Ghoulish Arms Ghoulish Arms |
 Nimus Juggernaut Nimus Juggernaut |
 Grinymuk Grinymuk |
 Mother Boomy Mother Boomy |
- |
Story Bosses
Optional Bosses
Author
Zacarania Boss Guide: Recommended Setup and How to Beat
improvement survey
03/2026
improving Game8's site?

Your answers will help us to improve our website.
Note: Please be sure not to enter any kind of personal information into your response.

We hope you continue to make use of Game8.
Rankings
- We could not find the message board you were looking for.
Gaming News
Popular Games

Genshin Impact Walkthrough & Guides Wiki

Honkai: Star Rail Walkthrough & Guides Wiki

Umamusume: Pretty Derby Walkthrough & Guides Wiki

Pokemon Pokopia Walkthrough & Guides Wiki

Resident Evil Requiem (RE9) Walkthrough & Guides Wiki

Monster Hunter Wilds Walkthrough & Guides Wiki

Wuthering Waves Walkthrough & Guides Wiki

Arknights: Endfield Walkthrough & Guides Wiki

Pokemon FireRed and LeafGreen (FRLG) Walkthrough & Guides Wiki

Pokemon TCG Pocket (PTCGP) Strategies & Guides Wiki
Recommended Games

Diablo 4: Vessel of Hatred Walkthrough & Guides Wiki

Fire Emblem Heroes (FEH) Walkthrough & Guides Wiki

Yu-Gi-Oh! Master Duel Walkthrough & Guides Wiki

Super Smash Bros. Ultimate Walkthrough & Guides Wiki

Pokemon Brilliant Diamond and Shining Pearl (BDSP) Walkthrough & Guides Wiki

Elden Ring Shadow of the Erdtree Walkthrough & Guides Wiki

Monster Hunter World Walkthrough & Guides Wiki

The Legend of Zelda: Tears of the Kingdom Walkthrough & Guides Wiki

Persona 3 Reload Walkthrough & Guides Wiki

Cyberpunk 2077: Ultimate Edition Walkthrough & Guides Wiki
All rights reserved
© BANDAI NAMCO Entertainment America Inc. All third party content, brands, names, and logos are used under license and remain property of their respective owners. All rights reserved.
The copyrights of videos of games used in our content and other intellectual property rights belong to the provider of the game.
The contents we provide on this site were created personally by members of the Game8 editorial department.
We refuse the right to reuse or repost content taken without our permission such as data or images to other sites.

 Balseph
 Ice Wolf Leader
 Ooze Hive
 Lord Ganabelt
 Zacarania
 Kisara
 Dohalim
 Venoflage
 Temararus
 Grinymuk
 Almeidrea & Mesmald
 Meria Phein
 Kalmarzel & Kaldinzel
 Vholran
 Eljarania
 Efreet
 Tormented Limbs
 Red Woman
 Valclynimus
 Great Astral Spirit
 Subsumer
 Vholran (Final Boss)
 Toxidillo
 Boisterous Roper
 Polycephus
 Great Dragon
 Relentless Charger
 Flamewrecker
 Alpha Reaper
 Stormbringer
 Elemental
 Regent Bee
 Agony Keeper
 Mother Boomy
 Ruthless
 Thunderite
 Mantis
 Calamity Arms
 Meneiys
 Ezamamuk
 Sword Dancer
 Undine Drop
 Luo Undine
 Grand Gnome & Vas Phein
 Masher Mare & Masher Bull
 Procella Sylph & Sylph Zloa
 Mesmald
 Edna
Edna Nimus Origin
 Eizen
Eizen Edna & Eizen
 Chronos
 Dulneiys, Maleiys, & Vasneiys


![Everwind Review [Early Access] | The Shaky First Step to A Very Long Journey](https://img.game8.co/4440226/ab079b1153298a042633dd1ef51e878e.png/thumb)

![Monster Hunter Stories 3 Review [First Impressions] | Simply Rejuvenating](https://img.game8.co/4438641/2a31b7702bd70e78ec8efd24661dacda.jpeg/thumb)


