Edna & Eizen Boss Guide: Recommended Setup and How to Beat
☆ Earn bonuses before you start the DLC.
★ Clear campaign & sub-quests | Get max lvl
☆ Learn all the ingredients in this new Gourmet Saga!
★ Get all Beyond the Dawn Trophies with these guides:
☆ Ryugola Weapons | All Portraits | Hero of the Summit
This is a guide on how to beat Edna & Eizen in Tales of Arise! Learn more about Edna & Eizen's stats, weaknesses, attack patterns, and the best party setup including Artes and Equipment for this boss fight!
List of Contents
Edna & Eizen Stats and General Info
Edna & Eizen Location
| Map | Actual Location |
|---|---|
 |
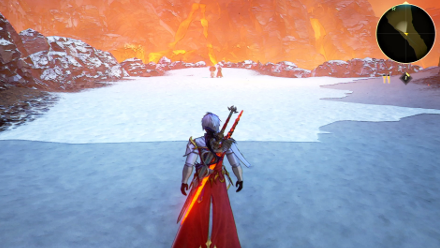 |
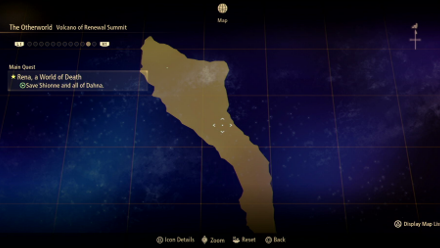
Both Edna and Eizen can be found in the Volcano Renewal Summit in The Otherworld during the Sub-Quest Otherworldly Visitors. They will both simultaneously try to fight you, so prepare plenty of healing items and strong equipment before engaging them.
Otherworldly Visitors Sub-Quest Walkthrough: Rewards and How to Clear
Edna Stats
| Recommended Level: 81 | |||
|---|---|---|---|
 HP: 264420 |
|||
| Attack | ? | Defense | ? |
| Elemental Attack | ? | Elemental Defense | ? |
| Penetration | ? | Resistance | ? |
| Weakness | Resistance | ||
| Edna's stats are unknown throughout the fight. |
Edna Boss Guide: Recommended Setup and How to Beat
Eizen Stats
| Recommended Level: 81 | |||
|---|---|---|---|
 HP: 271110 |
|||
| Attack | ? | Defense | ? |
| Elemental Attack | ? | Elemental Defense | ? |
| Penetration | ? | Resistance | ? |
| Weakness | Resistance | ||
| Eizen's stats are unknown throughout the fight. |
Eizen Boss Guide: Recommended Setup and How to Beat
Item to Drop
| Damonisch Core |
How to Beat Edna & Eizen
| Tips |
|---|
Focus on One
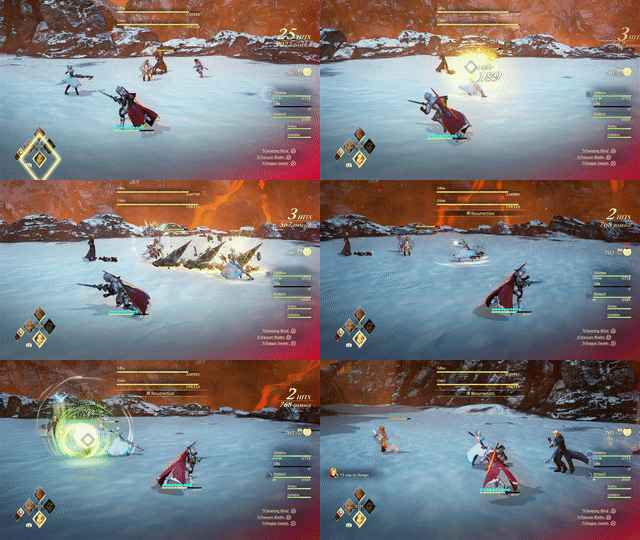
Due to the presence of two enemies to fight against once more, you can focus all your efforts on fighting just one of them until they're knocked out. It is recommended that you go after Edna first due to her smaller HP pool, allowing you to finish her off far faster than you could with Eizen.
Use Wind-based Artes

Both Edna and Eizen are weak to any Wind attacks you can use against them. Equip any Wind-based Artes you may have and use them against the two – long-ranged Artes will be particularly useful, as both Edna and Eizen are proficient in using attacks up-close.
Use Alphen or Rinwell's Boost Attacks
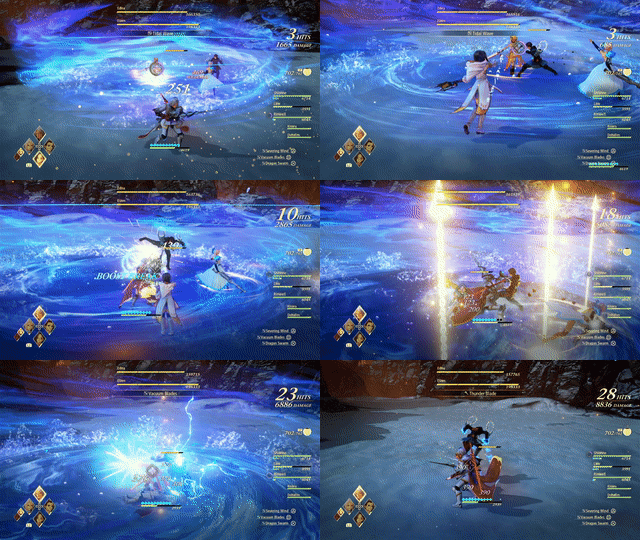
Whenever Edna or Eizen tries to cast their Artes, hit them with either Alphen or Rinwell's Boost Attacks to prevent them from finishing. In cases where you are unable to, you can still easily dodge these attacks or avoid them completely by simply running around the area.
Recommended Party Setup for Edna & Eizen
Party Members
| Leader | Members | ||
|---|---|---|---|
 Shionne Shionne
Lv.81 |
 Alphen Alphen
Lv.81 |
 Law Law
Lv.81 |
 Rinwell Rinwell
Lv.81 |
Avoid Long Combos
Throughout the majority of the fight, it is recommended that long combos be avoided due to the power and speed that both Edna and Eizen can muster to perform their attacks. It is best to perform three to four Artes attacks alongside two hits of regular ones before moving out of the way.
This will allow either of your enemies to become aggressive towards your controlled character, shifting away from their attention from your allies.
Shionne Equipment and Artes
 Shionne Shionne
Lv.81 |
Equipment |
|---|---|
| Sacred Karma | |
| Renas Superbia | |
| Magic Emblem | |
| Ground Artes | Aerial Artes |
| First Set | |
| Spread | Displode |
| Freeze Lancer | Tres Ventos |
| Gemini Aqua | Aqueous Impact |
| Second Set | |
| Healing Circle | Spear Sweep |
| Flare Tornado | Toxicity |
| - | Glacio Celestra |
Spam Tres Ventos
The Arte Tres Ventos can be repeatedly used as a means to deal elemental-based damage against both Edna and Eizen throughout the fight. It can also be used from a distance, making it extremely useful when trying to avoid any attacks performed by the duo.
Alphen Equipment and Artes
 Alphen Alphen
Lv.81 |
Equipment |
|---|---|
| Realm Unifier | |
| Heavenly Armor | |
| Protect Ring | |
| Ground Artes | Aerial Artes |
| First Set | |
| Severing Wind | Rising Falcon |
| Vacuum Blades | Stardust |
| Dragon Swarm | Mirage |
| Second Set | |
| Sword Rain: Alpha | Luna Rondo |
| Shockwave Slash | Devastation |
| Thunder Fang | Soaring Light Spear |
Primary Attacker
Despite having Shionne as your leader, you can easily slip into directly controlling Alphen to have more control over how your party attacks Edna or Eizen up-close. Alphen's Boost Attack gives him some layer of protection by allowing him to cause either of the two enemies to fall into a stunned state, allowing you to attack them further.
Law Equipment and Artes
 Law Law
Lv.81 |
Equipment |
|---|---|
| Oblivion Gauntlets | |
| Virtuous Wolf Vest | |
| Protect Ring | |
| Ground Artes | Aerial Artes |
| First Set | |
| Dragon Shot | Eagle Dive |
| Talon Storm | Glimmer Dragon |
| Fang Blast | Death Blossom |
| Second Set | |
| Super Swallow Dance | Fang Bolero |
| Talon Hurricane | Eagle Assault |
| Whirlwind Snap | - |
Replaceable with Dohalim
If you choose to control Shionne through the entire fight, it is advised that you replace Law with Dohalim to take away healer responsibilities from Shionne. If you choose not to do this, however, you can simply allow Law to perform whatever attacks he chooses.
Rinwell Equipment and Artes
 Rinwell Rinwell
Lv.81 |
Equipment |
|---|---|
| Oblivion Ring | |
| Dahnas Animus | |
| Pierce Emblem | |
| Ground Artes | Aerial Artes |
| First Set | |
| Galeforce | Swallow's Flight |
| Air Thrust | Razor Cyclone |
| Cyclone | Placid Pool |
| Second Set | |
| Tidal Wave | Celestial Hammer |
| Shooting Star | Electric Discharge |
| Maelstrom | Subzero Confinement |
Disable All Other Artes
Rinwell will have several Artes capable of dealing elemental damage against Edna and Eizen. Unless you control her directly, you can disable all her Artes that aren't Wind-based to cause her to only make use of Wind attacks.
Edna & Eizen Attack Patterns
Elemental Attacks
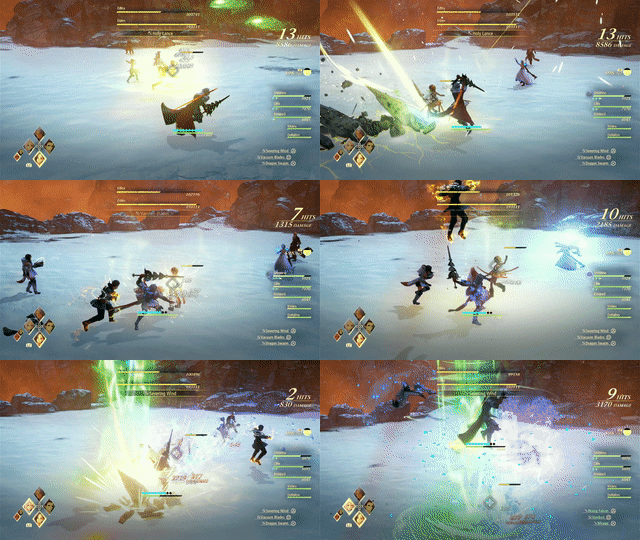
Both Edna & Eizen are capable of performing many different types of elemental attacks. These attacks take the form of short and long-ranged attacks, focusing on whichever character you are directly controlling.
Shooting Star
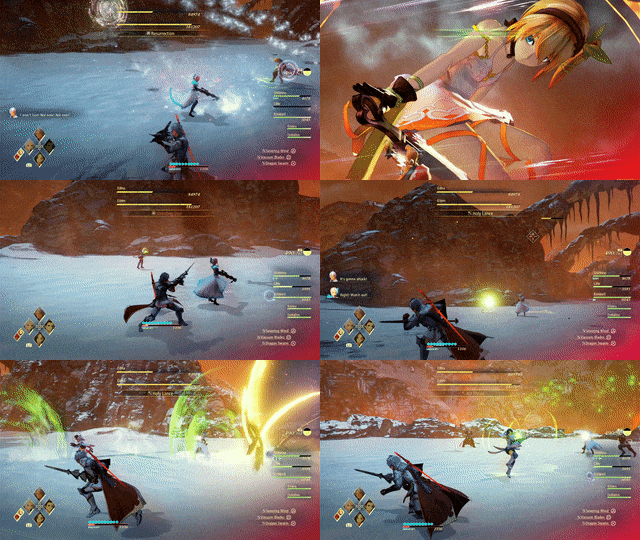
Edna's Mystic Artes will cause a large ball of energy to descend slowly down to the ground. This attack can be easily avoided if you simply avoid the area around where the ball will fall.
Dragon Howling
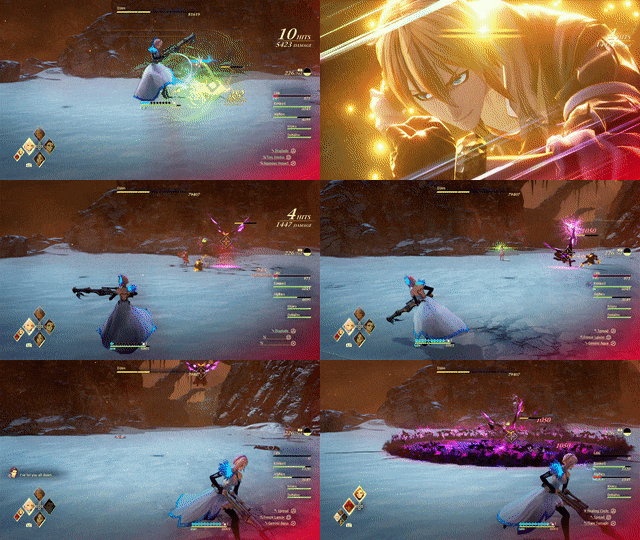
The Mystic Artes of Eizen, where he will repeatedly jump up and down on the ground, causing a wave of Dark energy to flow out. You can jump over this wave, or simply move as far away from its effective range to avoid damage.
Tales of Arise Related Guides
Beyond the Dawn DLC Bosses
Beyond the Dawn Story Bosses
| Story Bosses | |
|---|---|
 Nimus Pandemonium Nimus Pandemonium |
 Venoflage Venoflage |
 Nazamil Nazamil |
 Nazamil Nether Nazamil Nether
|
 Ooze Hive Ooze Hive |
 Nazamil Nether Nazamil Nether (2nd Encounter) |
 Nazamil Nether Nazamil Nether (3rd Encounter) |
 Captive Nazamil Captive Nazamil |
 Oppressor Oppressor |
 Emergence Suppressor Emergence Suppressor |
Beyond the Dawn Optional Bosses
| Optional Bosses | ||
|---|---|---|
 Ruthless Ruthless
|
 Boisterous Roper Boisterous Roper
|
 Cruel Keeper Cruel Keeper |
 Megawrecker Megawrecker |
 Ghoulish Arms Ghoulish Arms |
 Nimus Juggernaut Nimus Juggernaut |
 Grinymuk Grinymuk |
 Mother Boomy Mother Boomy |
- |
Story Bosses
Optional Bosses
Author
Edna & Eizen Boss Guide: Recommended Setup and How to Beat
improvement survey
03/2026
improving Game8's site?

Your answers will help us to improve our website.
Note: Please be sure not to enter any kind of personal information into your response.

We hope you continue to make use of Game8.
Rankings
- We could not find the message board you were looking for.
Gaming News
Popular Games

Genshin Impact Walkthrough & Guides Wiki

Honkai: Star Rail Walkthrough & Guides Wiki

Umamusume: Pretty Derby Walkthrough & Guides Wiki

Pokemon Pokopia Walkthrough & Guides Wiki

Resident Evil Requiem (RE9) Walkthrough & Guides Wiki

Monster Hunter Wilds Walkthrough & Guides Wiki

Wuthering Waves Walkthrough & Guides Wiki

Arknights: Endfield Walkthrough & Guides Wiki

Pokemon FireRed and LeafGreen (FRLG) Walkthrough & Guides Wiki

Pokemon TCG Pocket (PTCGP) Strategies & Guides Wiki
Recommended Games

Fire Emblem Heroes (FEH) Walkthrough & Guides Wiki

Diablo 4: Vessel of Hatred Walkthrough & Guides Wiki

Yu-Gi-Oh! Master Duel Walkthrough & Guides Wiki

Super Smash Bros. Ultimate Walkthrough & Guides Wiki

Pokemon Brilliant Diamond and Shining Pearl (BDSP) Walkthrough & Guides Wiki

Elden Ring Shadow of the Erdtree Walkthrough & Guides Wiki

Monster Hunter World Walkthrough & Guides Wiki

The Legend of Zelda: Tears of the Kingdom Walkthrough & Guides Wiki

Persona 3 Reload Walkthrough & Guides Wiki

Cyberpunk 2077: Ultimate Edition Walkthrough & Guides Wiki
All rights reserved
© BANDAI NAMCO Entertainment America Inc. All third party content, brands, names, and logos are used under license and remain property of their respective owners. All rights reserved.
The copyrights of videos of games used in our content and other intellectual property rights belong to the provider of the game.
The contents we provide on this site were created personally by members of the Game8 editorial department.
We refuse the right to reuse or repost content taken without our permission such as data or images to other sites.

 Balseph
 Ice Wolf Leader
 Ooze Hive
 Lord Ganabelt
 Zacarania
 Kisara
 Dohalim
 Venoflage
 Temararus
 Grinymuk
 Almeidrea & Mesmald
 Meria Phein
 Kalmarzel & Kaldinzel
 Vholran
 Eljarania
 Efreet
 Tormented Limbs
 Red Woman
 Valclynimus
 Great Astral Spirit
 Subsumer
 Vholran (Final Boss)
 Toxidillo
 Boisterous Roper
 Polycephus
 Great Dragon
 Relentless Charger
 Flamewrecker
 Alpha Reaper
 Stormbringer
 Elemental
 Regent Bee
 Agony Keeper
 Mother Boomy
 Ruthless
 Thunderite
 Mantis
 Calamity Arms
 Meneiys
 Ezamamuk
 Sword Dancer
 Undine Drop
 Luo Undine
 Grand Gnome & Vas Phein
 Masher Mare & Masher Bull
 Procella Sylph & Sylph Zloa
 Mesmald
 Nimus Origin
 Edna & Eizen
 Chronos
 Dulneiys, Maleiys, & Vasneiys


![Slay the Spire 2 Review [Early Access] | Still the Deckbuilder to Beat](https://img.game8.co/4433115/44e19e1fb0b4755466b9e516ec7ffb1e.png/thumb)

![Resident Evil Village Review [Switch 2] | Almost Flawless Port](https://img.game8.co/4432790/e1859f64830960ce4248d898f8cd38d9.jpeg/thumb)


