
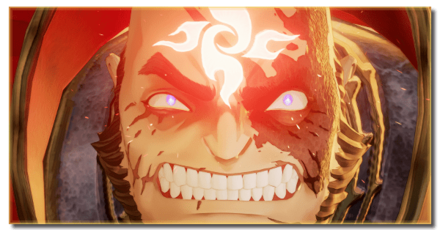
 Balseph
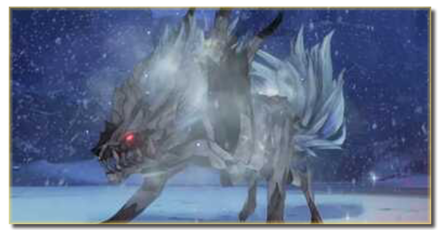 Ice Wolf Leader
 Ooze Hive
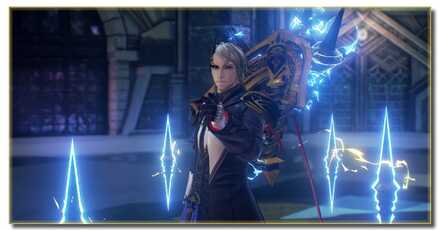 Lord Ganabelt
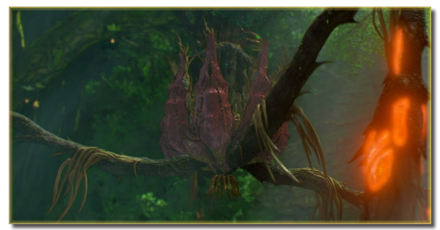 Zacarania
 Kisara
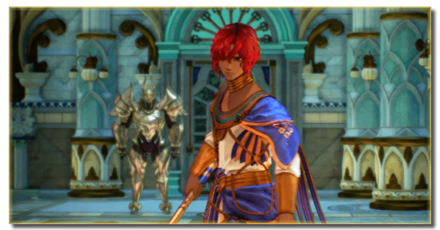 Dohalim
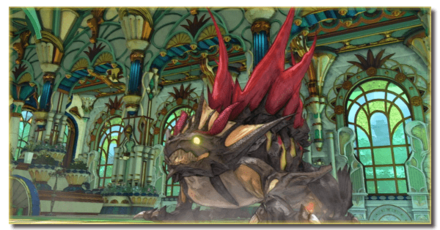 Venoflage
 Temararus
 Grinymuk
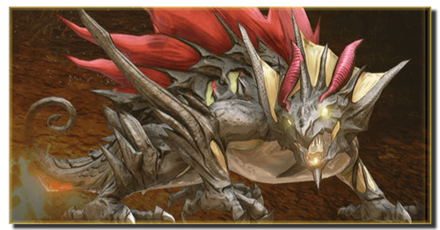
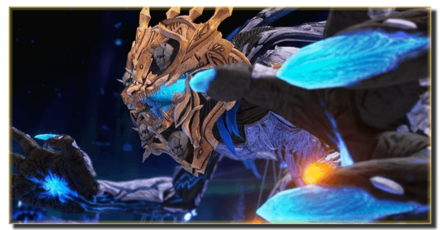
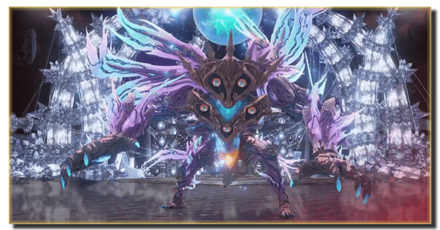
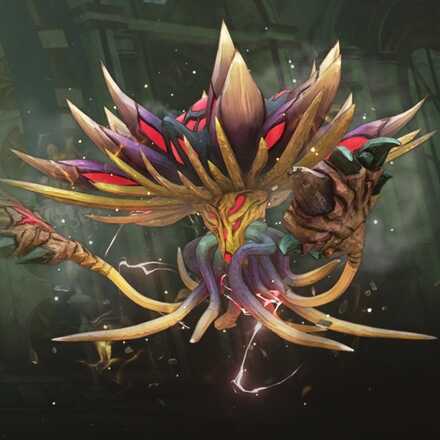
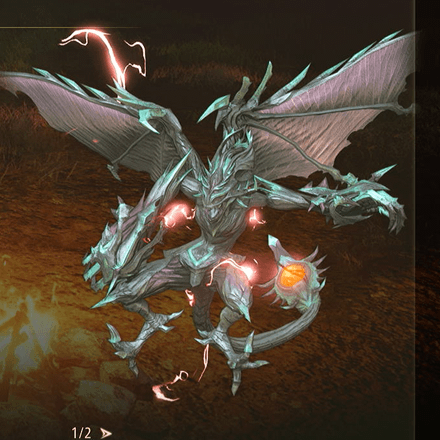
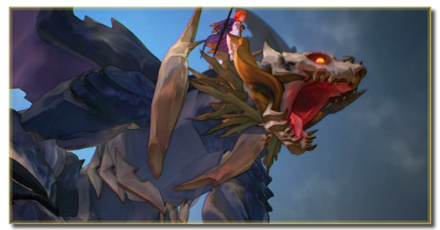 Almeidrea & Mesmald
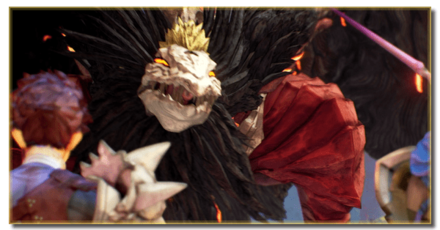 Meria Phein
 Kalmarzel & Kaldinzel
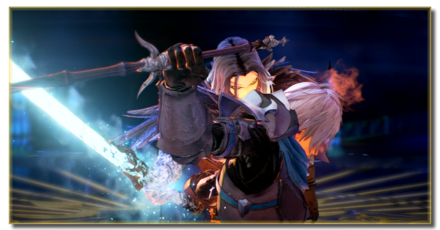 Vholran
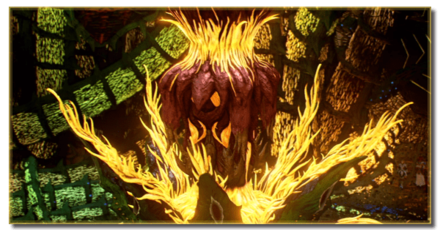 Eljarania
 Efreet
 Tormented Limbs
 Red Woman
 Valclynimus
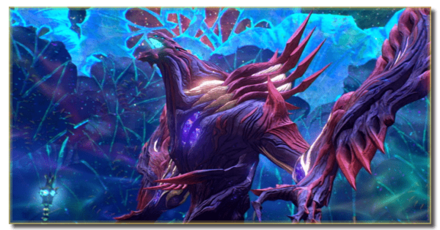 Great Astral Spirit
 Subsumer
 Vholran (Final Boss)
 Toxidillo
 Boisterous Roper
 Polycephus
 Great Dragon
 Relentless Charger
 Flamewrecker
 Alpha Reaper
 Stormbringer
 Elemental
 Regent Bee
 Agony Keeper
 Mother Boomy
 Ruthless
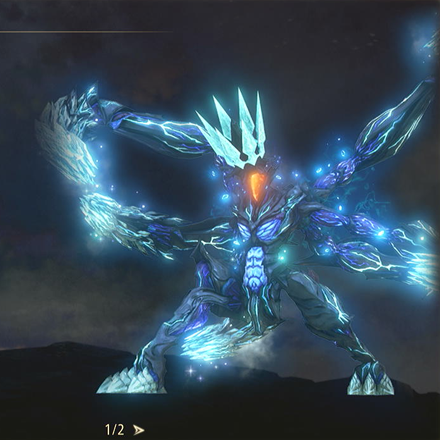
 Thunderite
 Mantis
 Calamity Arms
 Meneiys
 Ezamamuk
 Sword Dancer
 Undine Drop
 Luo Undine
 Grand Gnome & Vas Phein
 Masher Mare & Masher Bull
 Procella Sylph & Sylph Zloa
 Mesmald
 Edna
Edna Nimus Origin
 Eizen
Eizen Edna & Eizen
 Chronos
 Dulneiys, Maleiys, & Vasneiys
This survey will take about 1 minute.
Your answers will help us to improve our website.
Tales of Arise
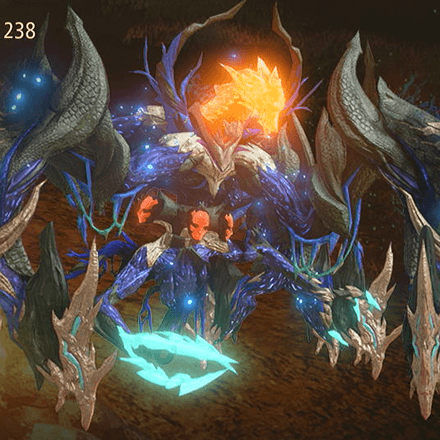
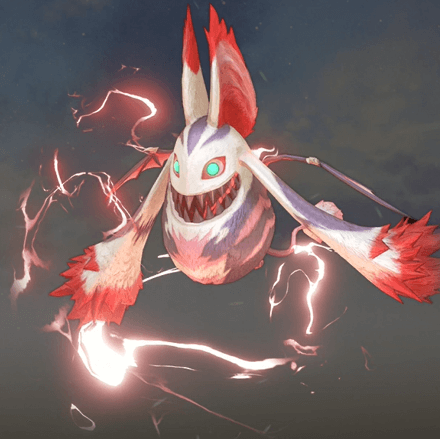
Almeidrea & Mesmald Boss Guide: Recommended Setup and How to Beat
☆ Earn bonuses before you start the DLC.
★ Clear campaign & sub-quests | Get max lvl
☆ Learn all the ingredients in this new Gourmet Saga!
★ Get all Beyond the Dawn Trophies with these guides:
☆ Ryugola Weapons | All Portraits | Hero of the Summit
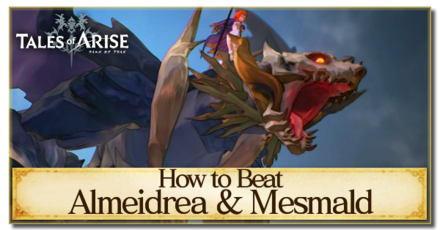
Almeidrea & Mesmald is a boss you fight in the Tales of Arise (Beyond the Dawn)! Read on to learn more about tips on how to beat Almeidrea & Mesmald, as well as stats, weaknesses, attack patterns, and the best party setup including Artes and Equipment in this boss guide!
List of Contents
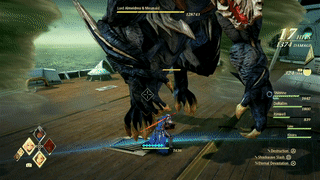
Almeidrea & Mesmald Stats and General Info
| Recommended Level: 29 | |||
|---|---|---|---|
 HP: 160420 |
|||
| Attack | 968 | Defense | 430 |
| Elemental Attack | 1028 | Elemental Defense | 525 |
| Penetration | 1198 | Resistance | 1262 |
| Weakness | Resistance | ||
How to Beat Almeidrea & Mesmald
To aid in your battle against Almeidrea & Mesmald, here are some tips that you can utilize in your fight.
Bring Plenty of Recovery Items
The fight against both Almeidrea and Mesmald is a very extensive one due to their high HP. While attacks against them are not insignificant so long as you keep up with equipment and levels, they can still cause you tremendous amounts of damage and even a few K.O.'s if you're not careful.
Bring with you a good amount of Recovery items – not just ones that recover HP, but also CP as well. This will help take the load off of healers in your group should you make use of them, and preserves the much-needed CP for the much more difficult second phase of the fight later on.
Run Away During God's Breath
When the God's Breath has been unleashed, the cyclones that come down will focus on the character you're directly controlling. To not spread its damage around to other characters in your party, move as far away as possible until the attack ends. Your allies in the meantime will be free to attack Mesmald as he stands around momentarily as the attack is occurring.
Equip Elemental Defense Accessories
A large majority of Mesmald's attacks will be focused around the elements. To reduce the amount of damage you take from it, equip your party with elemental defense accessories such as the Resist Ring.
Recommended Party Setup for Almeidrea & Mesmald
Party Members
| Leader | Members | ||
|---|---|---|---|
 Alphen Alphen
Lv.29 |
 Law Law
Lv.29 |
 Rinwell Rinwell
Lv.29 |
 Dohalim Dohalim
Lv.29 |
Prioritize Heavy Hitters
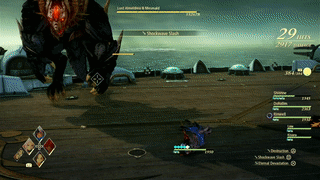
While there are two health bars for you to pay attention to, you only need to really finish off Mesmald to end the fight. Due to its high pool of HP however, you will need your active party to be comprised of party members who can contribute significant amounts of damage.
This tactic works well when bringing along enough recovery consumables to keep your party alive. Having Dohalim in your party allows for the limited use of healing Artes, but should the need arise for greater healing than what Dohalim can provide, you can swap him out for Shionne during the fight.
Alphen Equipment and Artes
|
Alphen
Lv.29 |
Equipment |
|---|---|
| Aurum Long Sword | |
| Topaz Mail | |
| Resist Ring | |
| Ground Artes | Aerial Artes |
| First Set | |
| Destruction | Rising Falcon |
| Shockwave Slash | Stardust |
| Eternal Devastation | Mirage |
| Second Set | |
| Swallow Bade | - |
| Demon Fang | - |
| Severing Wind | - |
Save His Boost Attacks
Alphen's Boost Attacks is enough to stagger Mesmald while dealing it significant damage. It is recommended to save his or Rinwell's Boost Attacks for when Almeidrea will try to cast the God's Breath attack, allowing you to disrupt it.
Law Equipment and Artes
|
Law
Lv.29 |
Equipment |
|---|---|
| Refined Flaming Knights | |
| Natural Vest | |
| Resist Ring | |
| Ground Artes | Aerial Artes |
| First Set | |
| Talon Storm | Eagle Dive |
| Tectonic Punch | Eagle Assault |
| Fang Blast | Death Blossom |
| Second Set | |
| Super Swallow Dance | Glimmer Dragon |
| Talon Hurricane | - |
| Dragon Shot | - |
Fast Damage
While Law does not provide that much damage against Mesmald unless the party has been leveled up above Mesmald's own level, he is capable of inflicting fast damage against it, however. With Mesmald's large HP pool, having a fast attacker like Law can more speedily lower the HP gauge in time for a well-placed Boost Strike.
Rinwell Equipment and Artes
|
Rinwell
Lv.29 |
Equipment |
|---|---|
| Artes of the Cosmos | |
| White Cloak | |
| Magic Emblem | |
| Ground Artes | Aerial Artes |
| First Set | |
| Spread | Placid Pool |
| Freeze Lancer | - |
| Thunder Blade | - |
| Second Set | |
| Lightning Orb | - |
| Sharpness | - |
| Photon Flash | - |
Long Ranged Attacker
Rinwell is an invaluable member of the party to have, able to cause damage against Mesmald from afar. The only dangers Mesmald presents to her would be its attacks that surround its immediate area, like its Cyclone attacks. By controlling Rinwell from time to time to avoid these attacks, you can more easily manage her HP by attacking from a safe distance.
Dohalim Equipment and Artes
|
Dohalim
Lv.29 |
Equipment |
|---|---|
| Columna Latio | |
| Stonewing Mantle | |
| Magic Emblem | |
| Ground Artes | Aerial Artes |
| Stalagmite | Tornado Drive |
| Air Pressure | - |
| Solitary Captivity | - |
| Second Set | |
| Seismic Rupture | - |
| Crescent Flash | - |
| Tempest | - |
Can Be Changed With Shionne
While Dohalim's added attacks can contribute to the faster defeat of the Almeidrea & Mesmald, he can be swapped out of the party at any given time for Shionne should you need her healing abilities. Alternatively, Dohalim can also provide healing to the party, but only to one character at a time.
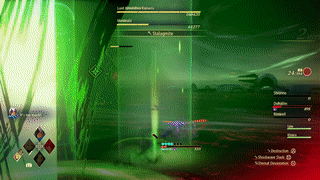
Almeidrea & Mesmald Attack Patterns
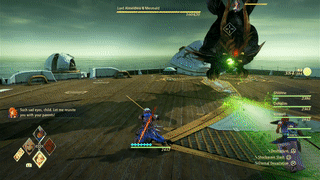
Claw Attack
Mesmald's most ordinary attack, where it will sweep its claws to the side to hit you. This attack causes decent damage against you, but can otherwise be avoided as Mesmald telegraphs this attack easily.
Fire Breath
Another common attack, particularly in the first phase of the fight, is where Mesmald will fly high above you, breathing fire down to where you are. Mesmald will commonly focus this attack on whichever character you are directly controlling.
Wind Beams
Commonly done right at the very start of the battle, where Mesmald will immediately shoot a beam of Wind energy across the ground and upwards towards your party. This can be easily dodged and does not have a wide area of effect like its Fire Breath counterpart.
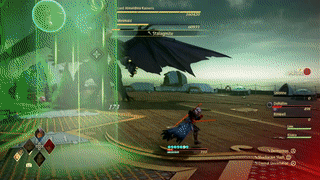
Cyclones

One of its more devastating attacks, Mesmald will use cyclones to surround a large portion of the area around it. Getting caught in these cyclones will cause massive damage, but can be easily avoided as they stand still. He can also directly target these cyclones by shooting a ball of energy from its mouth – wherever the energy lands, a cyclone will appear.
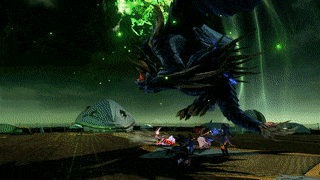
God's Breath

Similar to cyclones that surround it, God's Breath will focus down beams of wind energy down on top of whichever character you are controlling. Having said character near your other party members can cause them damage as well, so it is better to move away from them, allowing the beams of energy to follow your controlled character.
Fireballs
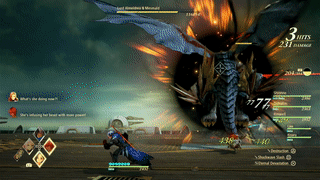
Near the end of the first phase, Almeidrea will gather energy into Mesmald, allowing the dragon to cause fireballs to fall down to the ship. The landing points for these balls of fire can be seen by the faint glow on the ground – move away from these before the fire falls.
Chaotic Disaster
Its end-game strategy that it uses, Chaotic Disaster will see even more cyclones appear around Mesmald in a tightly formed circle. This can be quite difficult to avoid, due to your party member's insistence on attacking Mesmald. It is better to have your directly controlled character stand outside, allowing you to heal anyone that may need it until the danger comes to pass.
Almeidrea will continue performing this attack until the fight ends.
Tales of Arise Related Guides
Beyond the Dawn DLC Bosses
Beyond the Dawn Story Bosses
| Story Bosses | |
|---|---|
 Nimus Pandemonium Nimus Pandemonium |
 Venoflage Venoflage |
 Nazamil Nazamil |
 Nazamil Nether Nazamil Nether
|
 Ooze Hive Ooze Hive |
Nazamil Nether (2nd Encounter) |
| Nazamil Nether (3rd Encounter) |
 Captive Nazamil Captive Nazamil |
 Oppressor Oppressor |
 Emergence Suppressor Emergence Suppressor |
Beyond the Dawn Optional Bosses
| Optional Bosses | ||
|---|---|---|
 Ruthless Ruthless
|
 Boisterous Roper Boisterous Roper
|
 Cruel Keeper Cruel Keeper |
 Megawrecker Megawrecker |
 Ghoulish Arms Ghoulish Arms |
 Nimus Juggernaut Nimus Juggernaut |
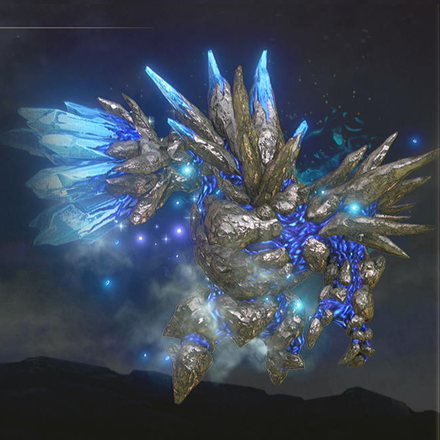
 Grinymuk Grinymuk |
 Mother Boomy Mother Boomy |
- |
Story Bosses
Optional Bosses
Author
Almeidrea & Mesmald Boss Guide: Recommended Setup and How to Beat
Please participate in our site
improvement survey
03/2026
improvement survey
03/2026
Would you assist in
improving Game8's site?
improving Game8's site?

×
We are listening to our users' valuable opinions and discussing how to act on them.
The information collected through this survey will be used for the purpose of improving our services. In addition, the information will only be disclosed a part of a statistic in a format that will not allow identification of personal information.
Begin Survey
Not Now
×
Please rate each item regarding Game8.co's Advertisements.
Amount of Ads
Very Dissatisfied
Somewhat Dissatisfied
Fine
Somewhat Satisfied
Highly Satisfied
Placement of Ads
Timing of Ad Display
Ad Loading Speed
Safeness of Ads
Content of Ads
×
Please rate each item regarding Game8.co's Quality of Articles.
Amount of information
Very Dissatisfied
Somewhat Dissatisfied
Fine
Somewhat Satisfied
Highly Satisfied
Frequency of updates
Speed of new information
Accuracy of articles
Understandibility of articles
Readability of sentences
×
Please rate each item regarding Game8.co's Usability of the Site.
Ease of finding information
Very Dissatisfied
Somewhat Dissatisfied
Fine
Somewhat Satisfied
Highly Satisfied
Loading Speed
Use of Color
Font Size
Visibility of Images
Easy to Understand Layout
×
Please rate each item regarding Game8.co's Message Boards, Comments.
Ease of Writing
Very Dissatisfied
Somewhat Dissatisfied
Fine
Somewhat Satisfied
Highly Satisfied
Readability
Ease in Finding Information
Comment Quality
Comment Quantity
Admin Response
×
Please rate each item regarding Game8.co's Site's new design.
Please rate our site's new design
Very Dissatisfied
Somewhat Dissatisfied
Fine
Somewhat Satisfied
Highly Satisfied
Do you think that the website's design change makes the site easier to use?
Has the new design made it easier for you to find information on the site?
Has the new design improved the overall visual appeal of the site?
How would you rate your overall satisfaction with the new design of the site?
×
How likely are you to recommend Game8 to someone you know?
Very Unlikely
0
1
2
3
4
5
6
7
8
9
10
Very Likely
If you have other opinions regarding potential improvement to the website, please share them with us. We would appreciate your honest opinion.
Note: This is a free response section, so you can proceed without entering anything.
Note: Please be sure not to enter any kind of personal information into your response.
Note: Please be sure not to enter any kind of personal information into your response.
×
Thank You
×
Thank you for participating in our survey! Your answers will help us to improve the quality of our website and services.
We hope you continue to make use of Game8.
We hope you continue to make use of Game8.
Close
Rankings
- We could not find the message board you were looking for.
Gaming News


![Monster Hunter Stories 3 Review [First Impressions] | Simply Rejuvenating](https://img.game8.co/4438641/2a31b7702bd70e78ec8efd24661dacda.jpeg/thumb)

Popular Games

Genshin Impact Walkthrough & Guides Wiki
Honkai: Star Rail Walkthrough & Guides Wiki
Umamusume: Pretty Derby Walkthrough & Guides Wiki
Pokemon Pokopia Walkthrough & Guides Wiki
Resident Evil Requiem (RE9) Walkthrough & Guides Wiki
Monster Hunter Wilds Walkthrough & Guides Wiki
Wuthering Waves Walkthrough & Guides Wiki
Arknights: Endfield Walkthrough & Guides Wiki
Pokemon FireRed and LeafGreen (FRLG) Walkthrough & Guides Wiki
Pokemon TCG Pocket (PTCGP) Strategies & Guides Wiki


Recommended Games
Diablo 4: Vessel of Hatred Walkthrough & Guides Wiki
Fire Emblem Heroes (FEH) Walkthrough & Guides Wiki
Yu-Gi-Oh! Master Duel Walkthrough & Guides Wiki
Super Smash Bros. Ultimate Walkthrough & Guides Wiki
Pokemon Brilliant Diamond and Shining Pearl (BDSP) Walkthrough & Guides Wiki
Elden Ring Shadow of the Erdtree Walkthrough & Guides Wiki
Monster Hunter World Walkthrough & Guides Wiki
The Legend of Zelda: Tears of the Kingdom Walkthrough & Guides Wiki
Persona 3 Reload Walkthrough & Guides Wiki
Cyberpunk 2077: Ultimate Edition Walkthrough & Guides Wiki


All rights reserved
© BANDAI NAMCO Entertainment America Inc. All third party content, brands, names, and logos are used under license and remain property of their respective owners. All rights reserved.
The copyrights of videos of games used in our content and other intellectual property rights belong to the provider of the game.
The contents we provide on this site were created personally by members of the Game8 editorial department.
We refuse the right to reuse or repost content taken without our permission such as data or images to other sites.