This survey will take about 1 minute.
Your answers will help us to improve our website.
Tales of Arise
Beyond the Dawn Walkthrough
☆ Earn bonuses before you start the DLC.
★ Clear campaign & sub-quests | Get max lvl
☆ Learn all the ingredients in this new Gourmet Saga!
★ Get all Beyond the Dawn Trophies with these guides:
☆ Ryugola Weapons | All Portraits | Hero of the Summit
Beyond the Dawn is also the name of the final main quest in Tales of Arise' new DLC expansion, Beyond the Dawn. Read on to see a walkthrough for Beyond the Dawn, as well as each of its objectives and rewards!
| ◀ Previous Chapter |
|---|
| Land of the Beginnings |
List of Contents
 Hoot hoot! Hoot hoot! |
!! Spoiler Warning !! This article contains spoilers regarding the story of Tales of Arise' Beyond the Dawn DLC. Proceed at your own risk! |
|---|
Beyond the Dawn Walkthrough Guide
- Get to the Keystone
- Go Into the Depths of the Keystone pt.1
- Flame Palace
- Go Into the Depths of the Keystone pt.2
- Whirlpool Palace
- Whirlwind Palace
- Go Into the Depths of the Keystone pt.3
- Stone Palace
- Ziern Shrine
- Helgan Shrine
- Set Nazamil Free and Save the World
Go to the Keystone
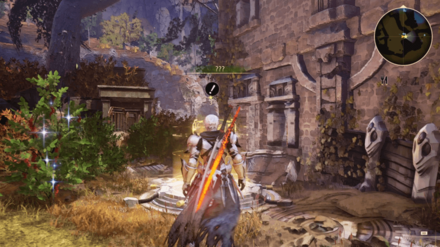
Interact with the teleporter in Adan Lake to transport the party into the Keystone dungeon and complete this objective.
Go Into the Depths of the Keystone pt.1
| Notable Loot | ||
|---|---|---|
| Equipment | Consumables | |
| Shining Armor of Dawn Pure White Heritage Panta Rhei Robe |
The Impregnable Wrapping Cunabula Aurum Lupus |
Heavy Treat Gold Gel Pineapple Gel Elixir Omega Elixir |
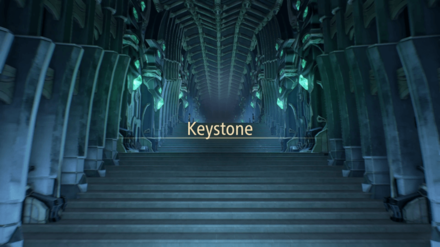
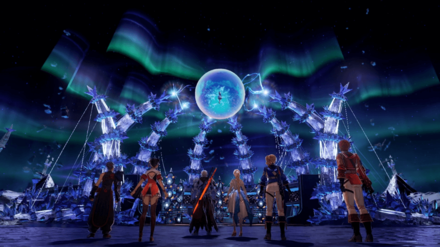
Interacting with the teleporter will transport the party into the interior of the keystone where another cutscene will play out.
After the cutscene, you are free to begin your progress through the dungeon.
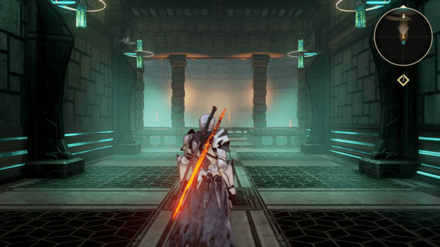
Gate Room: Lower Level
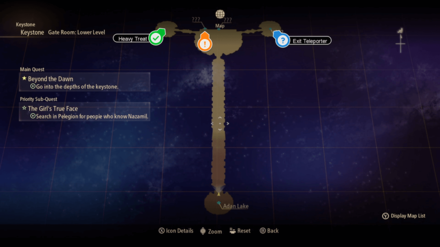
The gate room is the first map that you will arrive in when entering the keystone.
Walk along the hallway to eventually reach a shimmer, ornate, multi-colored door. This door can only be unlocked by progressing through the other sections of the keystone, so leave it be for now.
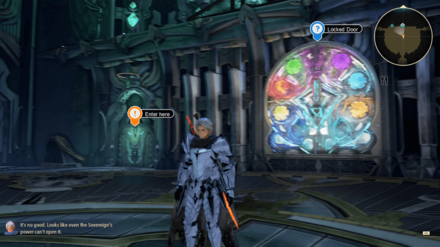
Instead, walk into the northwestern room and loot a Heavy Treat from the chest before entering the door beside the locked one to reach the Revolving Ring: Lower Level.
Revolving Ring: Lower Level
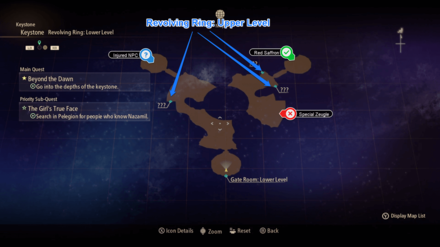
Head to the round room situated on the northwestern corner to to heal an injured NPC for 39CP. Doing so will net you a Gold Gel.
Next, walk up the ramp to reach the Revolving Ring: Upper Level.
Revolving Ring: Upper Level
Walk into the round room in the southwest to loot a Pineapple Gel from a chest.
Backtrack out of the room and follow the path until you can enter the southeastern corridor that ends with another door.
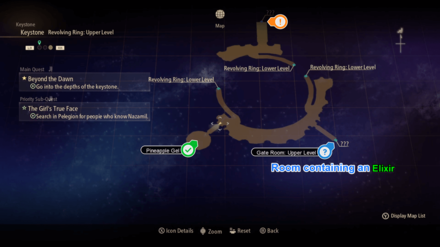
Enter the door to arrive at the Gate Room: Upper Level where you can loot a chest containing an Elixir.
Jump down the ledge to return to the Gate Room: Lower Level or head back through the door you came to re-enter the Revolving Ring: Upper Level.
Continue your progress from the Revolving Ring: Upper Level and walk down the ramp to re-enter the Revolving Ring: Lower Level.
Revolving Ring: Lower Level - Cont.
Heading back down to this map from the upper level will have players arrive eastern side of the map.
Head into the lone room to grab a Red Saffron from the rubble before exiting this map by walking up the ramp opposite of the one you just came down from.
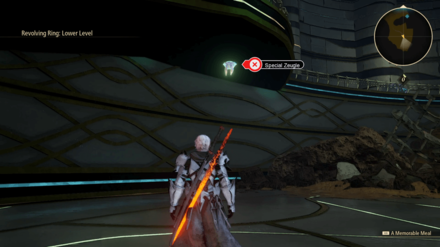
Alternatively, you could head to the southern portion of the map to challenge the special zeugle that's hiding on the ceiling.
Revolving Ring: Upper Level - Cont.
After re-entering the upper level via the north-leading ramp from the lower level, head to the northern-most corridor and take the exit to reach the Newborn Floor: Sloped Corridor.
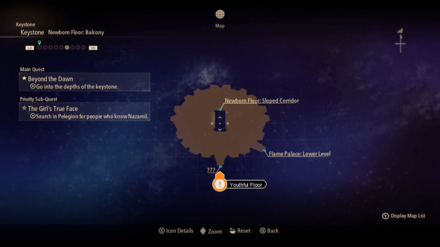
Newborn Floor: Sloped Corridor & Balcony
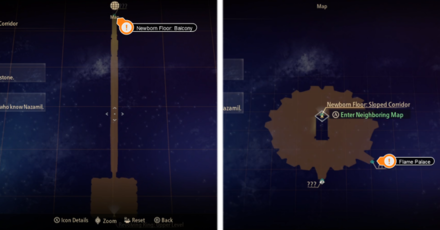
The sloped corridor is essentially just a long hallway of stairs that leads up to the balcony. Head to the balcony and take the unlocked door in the south east to enter the Flame Palace.
Flame Palace
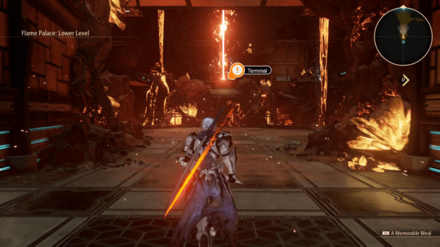
The Flame Palace is one of the pseudo-puzzle sections of the Keystone dungeon. Head inside and interact with the terminal at the end to clear this area and unlock the orange seal on the multi-colored door.
Flame Palace: Lower Level

Walk along the catwalk on the eastern side of the room and take the upwards leading ramp to reach the Flame Palace: Upper Level.
Flame Palace: Upper Level
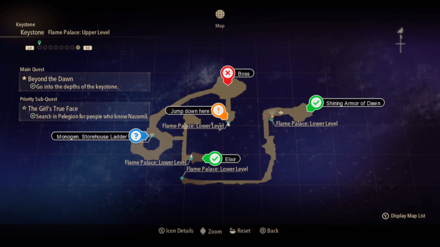
Take the immediate right to disperse a flame wall with the blazing sword for 39CP. Head inside the room to face a Magmalem and 2 Executors and loot the chest containing the Shining Armor of Dawn.
Follow along the southern path, past some Flaming Masses and keep walking until the path leads back down into the lower level.
Enter the door on the left to reach the Monogeneric Storehouse, where you will find a ladder that leads back up into the upper level.
Take the east exit from the room with the ladder and jump down to loot a chest containing an Elixir before jumping down again. Return to the upper levels through the monogeneric storehouse afterwards.
Follow the northern path after re-climbing the ladder for your first encounter against the Nazamil Nether boss.
Defeat Nazamil Nether Boss
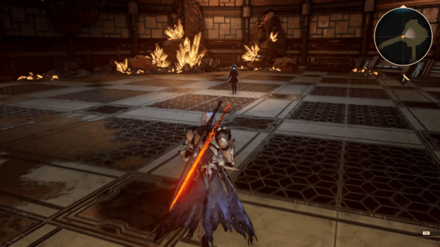
Approach the shade to begin the boss battle. This boss will function similarly to the first Nazamil boss with the addition of summons.
Head over to our boss guide by clicking the link below for tips and strategies.
Flame Palace - Cont.

After defeating the Nazamil Nether boss, follow the path until you can jump back down into the lower levels. Immediately turn around and purify the miasma for 39CP to claim The Impregnable and 10x Adan Peppers from the chests within.
After looting the chests, turn around and operate with the terminal on the other end of the walkway to unlock one of the colored seals.
Head back out to the Newborn Floor: Sloped Corridor and take the newly unlocked south exit to enter the Youthful Floor: Sloped Corridor.
Go Into the Depths of the Keystone pt. 2
Youthful Floor: Sloped Corridor and Balcony
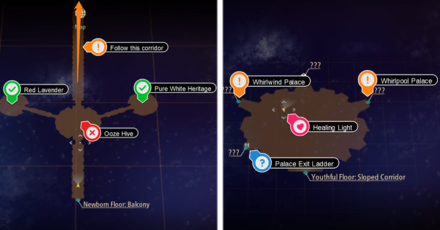
Head north to the large circular room in the middle to come face to face with the Ooze Hive boss.
Defeat the boss and head into the left room to loot a Red Lavender and then into the right room for the Pure White Heritage armor.
Once you've gathered your loot, follow the northern corridor all the way up until you reach the Youthful Floor: Balcony.
Enter the Whirlpool Palace on the right side first.
Whirlpool Palace
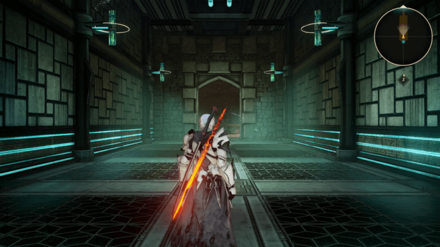
The Whirlpool Palace is the second pseudo-puzzle section within the Keystone dungeon. Similar to the Flame Palace, players must interact with the terminal inside this area to unlock one of the seals on the multi-colored door.
Whirlpool Palace: Level 2
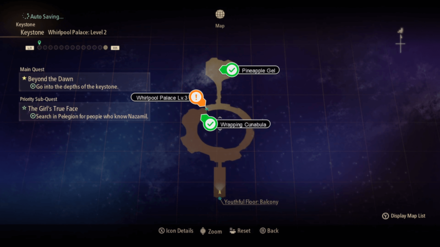
Take the left path first and reach the end to acquire the Wrapping Cunabula armor from a chest.
After, back track and head up the stairs on the right side until you can enter the hole in the wall with a chest that contains a Pineapple Gel.
Continue up the steps to reach Whirlpool Palace: Level 3.
Whirlpool Palace: Level 3
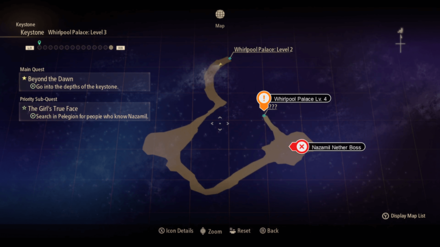
Follow along the path until you reach the large opening with a Nazamil Nether boss awaiting inside.
Defeat the boss and exit through the northwestern path to arrive at Whirlpool Palace: Level 4.
Whirlpool Palace: Level 4
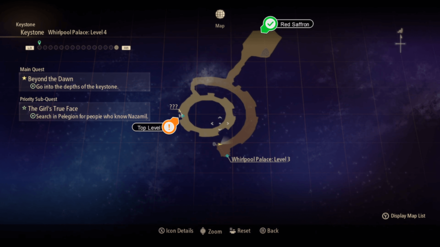
Grab the Red Saffron from the only room on this level and take the ladder that leads up to Whirlpool Palace: Top Level.
Whirlpool Palace: Top Level
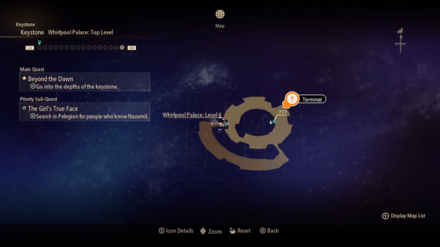
Head up the stairs and operate the terminal to unseal the multi-colored door and jump through the gap in the center of the room to arrive at Whirlpool Palace: Level 1.
Whirlpool Palace: Level 1
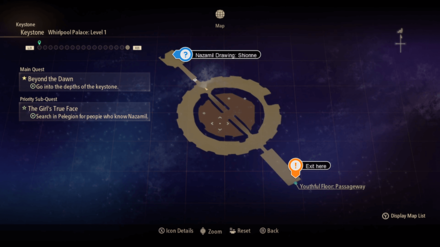
Head to the northwestern room and absorb the magic barrier for 39CP. Head inside to see another of Nazamil's drawings and exit the palace via the southeastern corridor.
Follow the path and climb the ladder to return to the Youthful Floor: Balcony and head inside the door on the left side to reach the Whirlwind Palace.
Whirlwind Palace
The Whirlwind Palace is the third pseudo-puzzle section within the Keystone dungeon. Just like the two palaces before this one, players navigate this section to interact with the terminal inside this area to unlock one of the seals on the multi-colored door.
Whirlwind Palace - Main
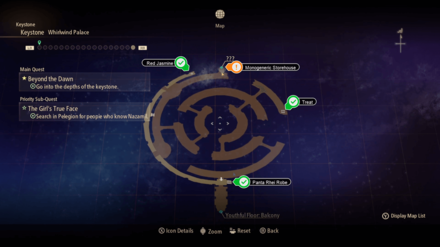
Follow the path northeastward and grab the Treat from the northeastern side.
Next, make your way to the southwest and climb the ladder to reach some Red Jasmine on the northern end of the upper level, and then the Panta Rhei Robe on the southern end.
Be mindful of falling through the gaps as you attempt to jump across.
Lastly, take the north exit to enter the Whirlwind Palace: Monogeneric Storehouse.
Whirlwind Palace: Monogeneric Storehouse

Examine the drawing of Rinwell on the right side of the room before operating the terminal to unseal the door.
Exit the room and return to the Youthful Floor: Balcony once you're finished.
Go Into the Depths of the Keystone pt. 3
After returning to the Youthful Floor: Balcony, take the northern middle door to end up in the Aged Floor: Sloped Corridor
Aged Floor: Sloped Corridor and Balcony
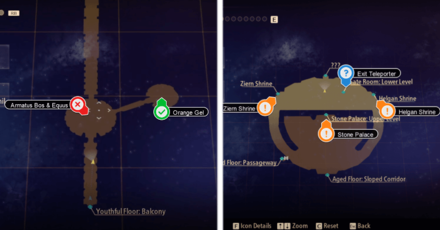
Enter the central circular room and defeat the twin enemies, Armatus Bos and Armatus Equus.
Once they've been dealt with, head into the right room and grab an Orange Gel from the chest before continuing north to reach the Aged Floor: Balcony.
Enter the first door right before you to reach the Stone Palace.
Stone Palace
The Stone Palace is the fourth and final palace inside the Keystone dungeon. Within, you will find the fourth terminal required to unseal the rainbow door.
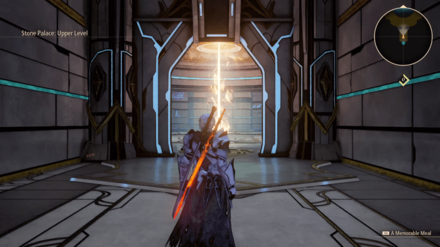
Stone Palace: Upper Level
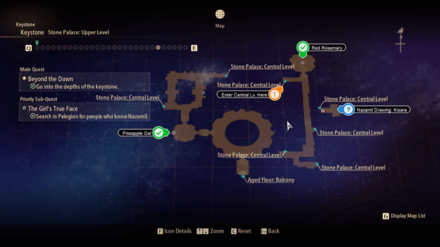
Follow the path and enter the circular room on the left to loot a Pineapple Gel from the chest.
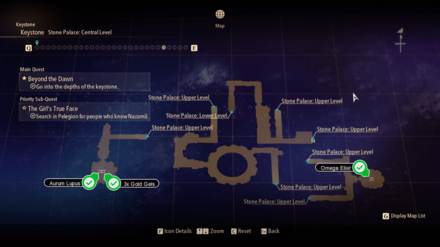
Continue north and take the immediate left to go down one level. Face south to see a forcefield that you can tear down for 39CP. Doing so will allow you to access the Aurum Lupus armor 3x Gold Gels waiting insnde.
Head back up and then take the northern path to arrive at the Stone Palace: Central Level.
Walk around the roundabout and head up the stairs to return to the upper level.
Take the first branch leading south and head down to a secluded portion of the central level.
Here you'll find a singular room housing a chest with an Omega Elixir inside of it.
Head back up the stairs and walk into the northeastern room to loot a Red Rosemary from the chest before continuing down the westward path that leads to the main area of the central level.
Stone Palace: Central Level
Head east to locate some ivy that you can use to construct an ivy ladder for 39CP. This leads into another secluded portion of the upper level where you can find a drawing of Kisara on the wall.
Head back down and walk west to reach the Stone Palace: Lower Level.
Stone Palace: Lower Level
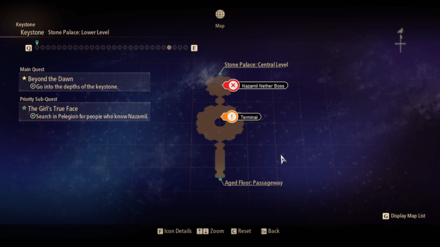
Walk ahead to see a Nazamil Nether boss waiting within the very first room. Defeat her and continue south to see the terminal required to unseal the door.
Exit south and head back up the ladder to re-enter the Aged Floor: Balcony. From there, enter the northeastern door to arrive at the Ziern Shrine.
Ziern Shrine

The Ziern Shrine is one of two Shrine sections within the Keystone dungeon. These areas also house terminals needed to unseal the rainbow door, but are much simpler and smaller when compared to the previous four palaces.
Ziern Shrine - Main
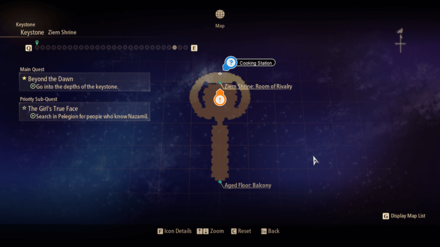
Enter the Shrine area and walk to the far northside to locate some cooking stations that you can use to cook any food that you have the ingredients for.
Once you're finished, head back down either side of the ramp and enter the door to arrive at the Ziern Shrine: Room of Rivalry.
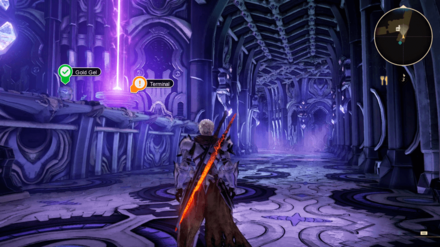
Ziern Shrine: Room of Rivalry
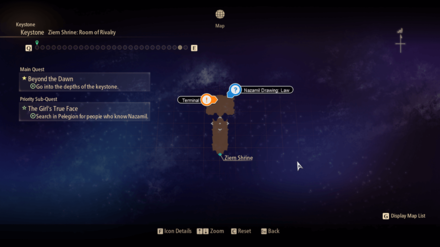
Walk towards the right side of the north wall of the room to locate a drawing of Law before operating the terminal and making your exit all the way back to the Aged Floor: Balcony.
Once you've returned to the balcony, head into the northeastern room to reach the Helgan Shrine.
Helgan Shrine
The Helgan Shrine is the second shrine found within the Keystone dungeon. Similar to the Ziern Shrine, the Helgan Shrine also houses a terminal but is much smaller than a palace.
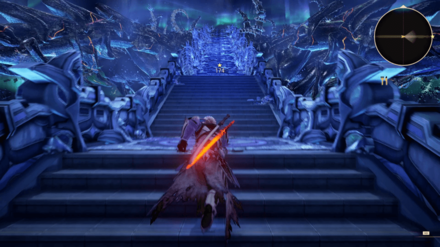
Helgan Shrine - Main
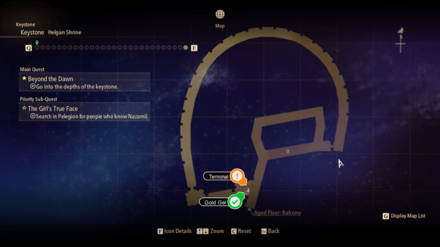
Take the eastern path and walk all the way around the roundabout to reach the terminal and a chest containing a Gold Gel.
Exit the Helgan Shrine and return to the Aged Floor: Balcony once you're finished.
Set Nazamil Free and Save the World
With all terminals opened and all seals unlocked, you are free to enter the final room, the Bond Room.
Make sure to heal your party before climbing all the way up the steps since there is a three-part final boss up ahead.
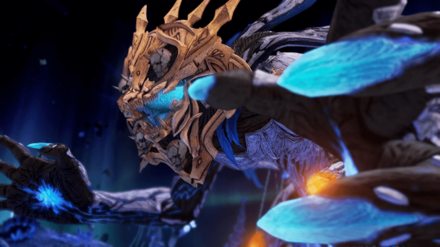
Defeat Captive Nazamil
Watch the cutscene and attempt to subdue the Captive Nazamil to free her from the mask!
Defeat the Oppressor
Defeat Emergence Suppressor
The 3rd and final phase of this boss battle is a scripted event wherein the boss will automatically lose after a short while.
Defeating this boss will trigger a final cutscene and will roll the credits shortly.
Emergence Suppressor Boss Guide
Tales of Arise Related Guides

All Story Walkthroughs
| All Story Walkthroughs | |
|---|---|
| Tales of Arise Walkthrough | Beyond the Dawn DLC Walkthrough |
List of Beyond the Dawn Main Quests
| Beyond the Dawn Main Quests | |
|---|---|
| 1 | The Lord's Daughter |
| 2 | Warmth |
| 3 | Branded |
| 4 | Free From Pursuit |
| 5 | Budding |
| 6 | Feared |
| 7 | Disappearance and Distress |
| 8 | One's Own Master |
| 9 | Faceless |
| 10 | For Whom |
| 11 | Land of the Beginnings |
| 12 | Beyond the Dawn |
Comment
Author

Beyond the Dawn Walkthrough
Please participate in our site
improvement survey
03/2026
improvement survey
03/2026
Would you assist in
improving Game8's site?
improving Game8's site?

×
We are listening to our users' valuable opinions and discussing how to act on them.
The information collected through this survey will be used for the purpose of improving our services. In addition, the information will only be disclosed a part of a statistic in a format that will not allow identification of personal information.
Begin Survey
Not Now
×
Please rate each item regarding Game8.co's Advertisements.
Amount of Ads
Very Dissatisfied
Somewhat Dissatisfied
Fine
Somewhat Satisfied
Highly Satisfied
Placement of Ads
Timing of Ad Display
Ad Loading Speed
Safeness of Ads
Content of Ads
×
Please rate each item regarding Game8.co's Quality of Articles.
Amount of information
Very Dissatisfied
Somewhat Dissatisfied
Fine
Somewhat Satisfied
Highly Satisfied
Frequency of updates
Speed of new information
Accuracy of articles
Understandibility of articles
Readability of sentences
×
Please rate each item regarding Game8.co's Usability of the Site.
Ease of finding information
Very Dissatisfied
Somewhat Dissatisfied
Fine
Somewhat Satisfied
Highly Satisfied
Loading Speed
Use of Color
Font Size
Visibility of Images
Easy to Understand Layout
×
Please rate each item regarding Game8.co's Message Boards, Comments.
Ease of Writing
Very Dissatisfied
Somewhat Dissatisfied
Fine
Somewhat Satisfied
Highly Satisfied
Readability
Ease in Finding Information
Comment Quality
Comment Quantity
Admin Response
×
Please rate each item regarding Game8.co's Site's new design.
Please rate our site's new design
Very Dissatisfied
Somewhat Dissatisfied
Fine
Somewhat Satisfied
Highly Satisfied
Do you think that the website's design change makes the site easier to use?
Has the new design made it easier for you to find information on the site?
Has the new design improved the overall visual appeal of the site?
How would you rate your overall satisfaction with the new design of the site?
×
How likely are you to recommend Game8 to someone you know?
Very Unlikely
0
1
2
3
4
5
6
7
8
9
10
Very Likely
If you have other opinions regarding potential improvement to the website, please share them with us. We would appreciate your honest opinion.
Note: This is a free response section, so you can proceed without entering anything.
Note: Please be sure not to enter any kind of personal information into your response.
Note: Please be sure not to enter any kind of personal information into your response.
×
Thank You
×
Thank you for participating in our survey! Your answers will help us to improve the quality of our website and services.
We hope you continue to make use of Game8.
We hope you continue to make use of Game8.
Close
Rankings
- We could not find the message board you were looking for.
Gaming News


![Monster Hunter Stories 3 Review [First Impressions] | Simply Rejuvenating](https://img.game8.co/4438641/2a31b7702bd70e78ec8efd24661dacda.jpeg/thumb)
Popular Games

Genshin Impact Walkthrough & Guides Wiki
Honkai: Star Rail Walkthrough & Guides Wiki
Umamusume: Pretty Derby Walkthrough & Guides Wiki
Pokemon Pokopia Walkthrough & Guides Wiki
Resident Evil Requiem (RE9) Walkthrough & Guides Wiki
Monster Hunter Wilds Walkthrough & Guides Wiki
Wuthering Waves Walkthrough & Guides Wiki
Arknights: Endfield Walkthrough & Guides Wiki
Pokemon FireRed and LeafGreen (FRLG) Walkthrough & Guides Wiki
Pokemon TCG Pocket (PTCGP) Strategies & Guides Wiki


Recommended Games
Diablo 4: Vessel of Hatred Walkthrough & Guides Wiki
Cyberpunk 2077: Ultimate Edition Walkthrough & Guides Wiki
Fire Emblem Heroes (FEH) Walkthrough & Guides Wiki
Yu-Gi-Oh! Master Duel Walkthrough & Guides Wiki
Super Smash Bros. Ultimate Walkthrough & Guides Wiki
Pokemon Brilliant Diamond and Shining Pearl (BDSP) Walkthrough & Guides Wiki
Elden Ring Shadow of the Erdtree Walkthrough & Guides Wiki
Monster Hunter World Walkthrough & Guides Wiki
The Legend of Zelda: Tears of the Kingdom Walkthrough & Guides Wiki
Persona 3 Reload Walkthrough & Guides Wiki


All rights reserved
© BANDAI NAMCO Entertainment America Inc. All third party content, brands, names, and logos are used under license and remain property of their respective owners. All rights reserved.
The copyrights of videos of games used in our content and other intellectual property rights belong to the provider of the game.
The contents we provide on this site were created personally by members of the Game8 editorial department.
We refuse the right to reuse or repost content taken without our permission such as data or images to other sites.