Grinymuk Boss Guide: Recommended Setup and How to Beat
☆ Earn bonuses before you start the DLC.
★ Clear campaign & sub-quests | Get max lvl
☆ Learn all the ingredients in this new Gourmet Saga!
★ Get all Beyond the Dawn Trophies with these guides:
☆ Ryugola Weapons | All Portraits | Hero of the Summit
Grinymuk is a boss you fight in the Tales of Arise (Beyond the Dawn)! Read on to learn more about tips on how to beat Grinymuk , as well as stats, weaknesses, attack patterns, and the best party setup including Artes and Equipment in this boss guide!
List of Contents
Grinymuk Stats and General Info
Grinymuk (Beyond the Dawn) Location
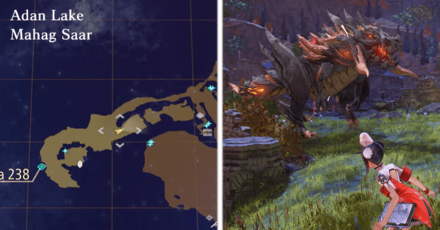
Grinymuk can be found just outside the entrance to Helgal-Ryugola 238 in Adan Lake.
Grinymuk (Beyond the Dawn) Stats
| Recommended Level: 80 | |||
|---|---|---|---|
 HP: 278670 |
|||
| Attack | 5928 | Defense | 1628 |
| Elemental Attack | 5390 | Elemental Defense | 1543 |
| Penetration | 5032 | Resistance | 5300 |
| Weakness | Resistance | ||
Item to Drop
| Astral Flower |
Grinymuk Base Game Stats
| Recommended Level: 28 | |||
|---|---|---|---|
 HP: 150280 |
|||
| Attack | 959 | Defense | 439 |
| Elemental Attack | 872 | Elemental Defense | 416 |
| Penetration | 1163 | Resistance | 1225 |
| Weakness | Resistance | ||
How to Beat Grinymuk
To aid in your battle against Grinymuk, here are some tips that you can utilize in your fight.
Focus on its Weak Point
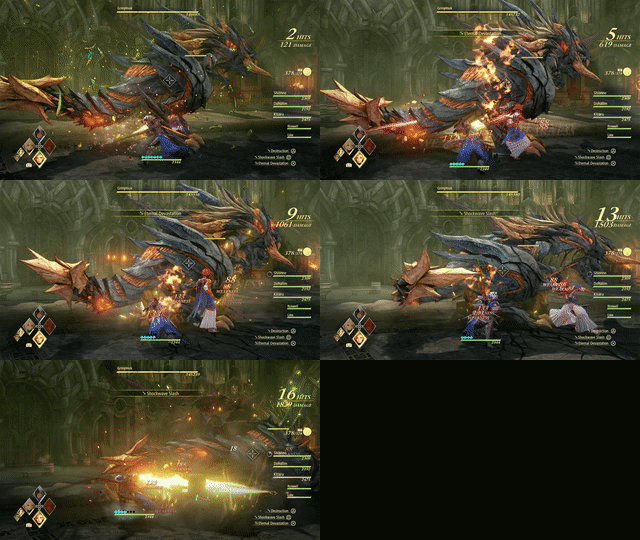
The primary means of attacking that Grinymuk uses is also its Weak Point, which is located on its tail. It will take nearly a third of its overall HP before it can completely be severed, and will require you to pay attention to its movements to avoid any of its attacks that cause massive amounts of damage.
Use Earth-based Attacks
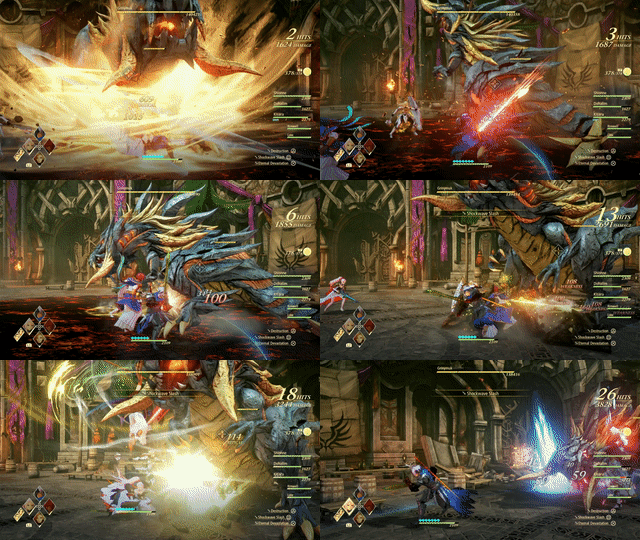
Grinymuk is weak towards Earth-based Attacks. Both Dohalim and Alphen have a great list of Earth-based Artes that can cause it great damage, so having them in your active party is a good way to deal significant amounts of damage.
Inflict Consecutive Damage
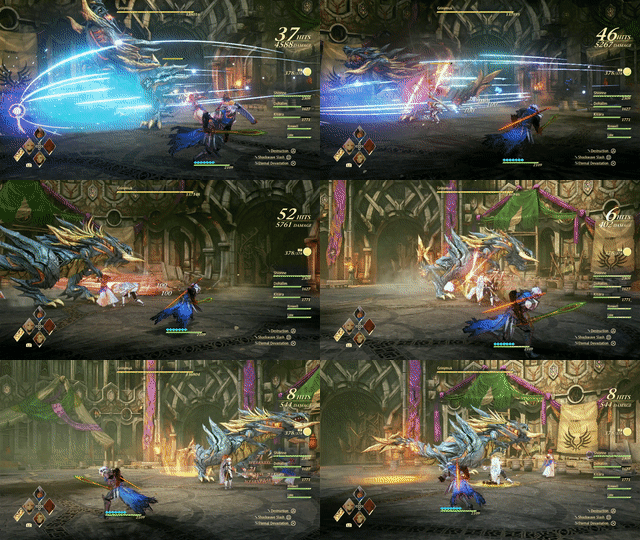
Due to Grinymuk's high amount of HP, you will need attackers that can inflict considerable amounts of damage done quickly. Having characters like Dohalim whose regular attacks are quick and efficient will help to take down Grinymuk before your party runs out of healing items and CP.
Recommended Party Setup for Grinymuk
Party Members
Have Close-ranged Attackers Distract It
By having two characters between Alphen, Dohalim, and Law, you can better have Grinymuk's focus be diverted towards them as you have long-ranged attackers like Rinwell and Shionne cause it damage from afar.
Leader Equipment and Artes
 Alphen AlphenLv. 81 | Equipment |
|---|---|
| El Vahf | |
| Highest Attainer | |
| Warrior Emblem | |
| Ground Artes | Aerial Artes |
| First Set | |
| Lightning Thrust | Mirage |
| Dragon Swarm | Luna Rondo |
| Double Demon Fang | Stardust |
| Second Set | |
| Eternal Devastation | Soaring Light Spear |
| Rising Wyvern | Hurricane Thrust |
| Sword Rain: Alpha | Rising Falcon |
 Rinwell RinwellLv.28 | Equipment |
|---|---|
| Artes of the Cosmos | |
| White Cloak | |
| Magic Emblem | |
| Ground Artes | Aerial Artes |
| First Set | |
| Spread | Placid Pool |
| Freeze Lancer | - |
| Thunder Blade | - |
| Second Set | |
| Lightning Orb | - |
| Sharpness | - |
| Photon Flash | - |
Beyond the Dawn Tactics
Use As Your Primary Brawler - With his attacks enhanced by the Warrior Emblem, focus all of Alphen's efforts to Grinymuk's tail. Alphen's only task is to deal as much damage and boost attacks to help his teammates.
Base Game Tactics
Attack From a Distance - Due to Grinymuk's advantage in close quarters, it is ideal to have one powerful long-ranged attacker – that attacker being Rinwell. Use her ability to cast Artes to deal significant damage to Grinymuk from a safe distance.
Member Equipment and Artes
 Shionne ShionneLv. 81 | Equipment |
|---|---|
| Deep Red Noble Rose | |
| Witch Dress | |
| Resist Ring | |
| Ground Artes | Aerial Artes |
| First Set | |
| Healing Circle | Scorched Earth |
| Ignis Celestra | Toxicity |
| Annihilation | Displode |
| Second Set | |
| Resurrection | Aranea Celestra |
| Flare Tornado | Tres Ventos |
| Burning Strike | Scorched Earth |
 Alphen AlphenLv.28 | Equipment |
|---|---|
| Aurum Long Sword | |
| Topaz Mail | |
| Protect Ring | |
| Ground Artes | Aerial Artes |
| First Set | |
| Destruction | Rising Falcon |
| Shockwave Slash | Stardust |
| Eternal Devastation | Mirage |
| Second Set | |
| Swallow Bade | - |
| Demon Fang | - |
| Severing Wind | - |
Beyond the Dawn Tactics
Ranged Healer - Shionne won't be able to help much offensively, but defensively keep her out of harm's way and have her spam her Water and Fire Artes while keeping an eye on everybody's health.
Base Game Tactics
Use As Your Primary Brawler - With his defenses enhanced by the Protect Ring, Alphen can more than easily come close to Grinymuk for close-ranged elemental attacks with his Earth-based Artes. Focus all of his attacks on Grinymuk's tail to sever it later in the fight.
Member Equipment and Artes
 Kisara KisaraLv. 81 | Equipment |
|---|---|
| Supreme Shield Aegis | |
| Stout Closer | |
| Protect Ring | |
| Ground Artes | Aerial Artes |
| First Set | |
| Rolling Thunder | Lightning Streak |
| Tiger Blade | - |
| Slag Assault | - |
| Second Set | |
| Inferno Crossing | Lightning Streak |
| Slag Assault | - |
| Flaming Meteor | - |
 Dohalim DohalimLv.28 | Equipment |
|---|---|
| Columna Latio | |
| Stonewing Mantle | |
| Protect Ring | |
| Ground Artes | Aerial Artes |
| First Set | |
| Stalagmite | Tornado Drive |
| Air Pressure | - |
| Solitary Captivity | - |
| Second Set | |
| Seismic Rupture | - |
| Crescent Flash | - |
| Tempest | - |
Beyond the Dawn Tactics
Tank and Support Attacker - Kisara will have to take on most of the attacks and shield Dohalim and Shionne so they can heal the party and make sure that everybody stays alive.
Base Game Tactics
Secondary Brawler - In a similar role as Alphen, Dohalim can be used as one of the group's primary damage dealers up close with his Earth-based Artes.
Member Equipment and Artes
 Dohalim DohalimLv. 81 | Equipment |
|---|---|
| Ending Rod Bucks | |
| Moonlight Revelry | |
| Pierce Emblem | |
| Ground Artes | Aerial Artes |
| First Set | |
| Elusive Deity | Tornado Drive |
| Stalagmite | Rotating Piledriver |
| Seismic Rupture | Tornado Drive |
| Second Set | |
| Ground Dasher | Tornado Drive |
| Seismic Rupture | Rotating Piledriver |
| Resurrection | - |
 Shionne ShionneLv.28 | Equipment |
|---|---|
| Refined Blackthorn | |
| Magical Tunic | |
| Magic Emblem | |
| Ground Artes | Aerial Artes |
| First Set | |
| First Aid | Toxicity |
| Gravitas Field | Spear Sweep |
| Tonitus Celestra | Glacio Celestra |
| Second Set | |
| Healing Circle | - |
| Luke Celestra | - |
| Freeze Lancer | - |
Beyond the Dawn Tactics
Elemental Artes Attacker - Dohalim is your best choice for elemental artes that can take advantage of Grinymuk's weakness to Earth-based attacks. However keep a close eye on Dohalim's HP as he is not only a secondary attacker but a reserve healer in case Shionne goes down.
Base Game Tactics
Primary Healer - At a similar distance from Rinwell, Shionne can stay away from the thick of the combat, focusing only on healing the rest of the party. She can be controlled to give special attention to both Alphen and Dohalim, as they will inevitably take damage from Grinymuk's many attacks.
Grinymuk Attack Patterns
Fire Breath
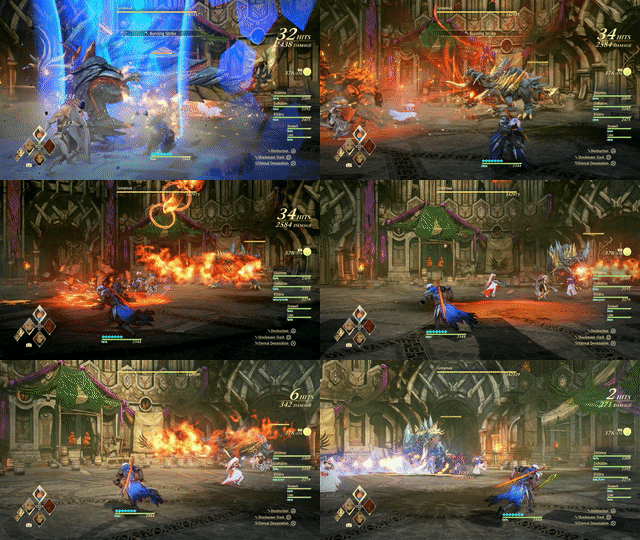
From a distance, Grinymuk will open its jaws to unleash a stream of fire that it sweeps from side to side. This attack causes a great deal of damage but is easily avoidable by simply staying back and away from the fire's area of effect.
Tail Attacks
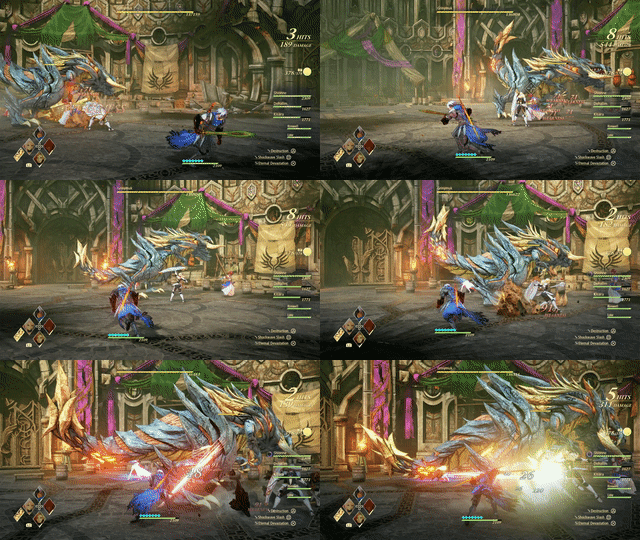
There are two variants of Tail Attacks that Grinymuk can use against you – the first being a wide sweep of its tail all across the ground which can cause major damage to any of your party members standing in the way, and another where it will slam its tail down on the ground behind it multiple times.
While the second variant is easy enough to avoid, the first will require more precise timing in your dodges as spotting it is difficult to do. It is worthwhile to invest in trying to get Perfect Dodges against its tail sweeps too for the counterattacks that you can do.
Cyclones
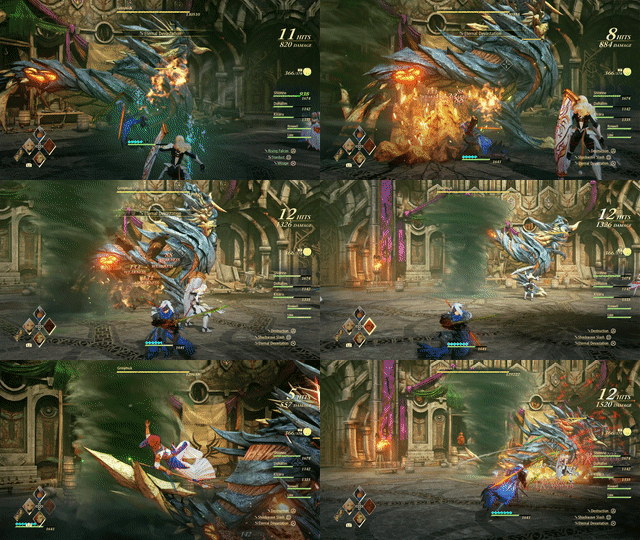
Once again with its tail, Grinymuk will sink it deep beneath the ground, causing a cyclone to appear just behind it. In instances such as these, it is recommended to try and get your party members to stop attacking it, as getting caught in the cyclone will cause a great amount of damage to you.
It is recommended that Grinymuk be allowed to move about before attacking it once more to stay away from the effects of the cyclone.
Wind Beams
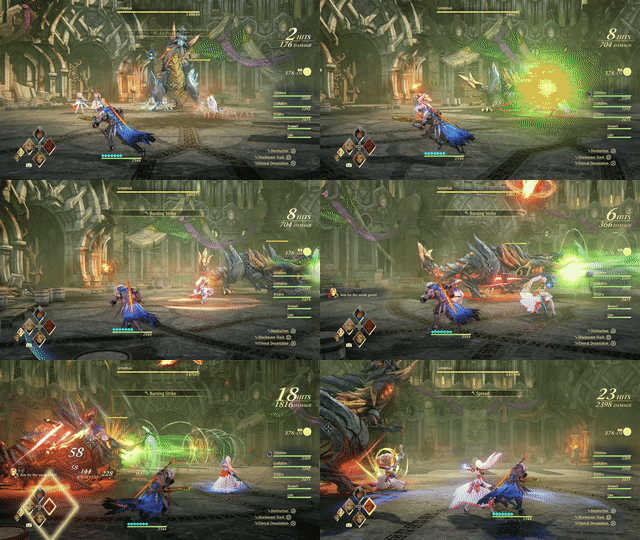
One of its final forms of attacks is its Wind Beams. These attacks are generally easy to avoid, as Ginymuk will only concentrate its fire into one direction.
Tales of Arise Related Guides
Beyond the Dawn DLC Bosses
Beyond the Dawn Story Bosses
| Story Bosses | |
|---|---|
 Nimus Pandemonium Nimus Pandemonium |
 Venoflage Venoflage |
 Nazamil Nazamil |
 Nazamil Nether Nazamil Nether
|
 Ooze Hive Ooze Hive |
 Nazamil Nether Nazamil Nether (2nd Encounter) |
 Nazamil Nether Nazamil Nether (3rd Encounter) |
 Captive Nazamil Captive Nazamil |
 Oppressor Oppressor |
 Emergence Suppressor Emergence Suppressor |
Beyond the Dawn Optional Bosses
| Optional Bosses | ||
|---|---|---|
 Ruthless Ruthless
|
 Boisterous Roper Boisterous Roper
|
 Cruel Keeper Cruel Keeper |
 Megawrecker Megawrecker |
 Ghoulish Arms Ghoulish Arms |
 Nimus Juggernaut Nimus Juggernaut |
 Grinymuk Grinymuk |
 Mother Boomy Mother Boomy |
- |
Story Bosses
Optional Bosses
Author
Grinymuk Boss Guide: Recommended Setup and How to Beat
improvement survey
03/2026
improving Game8's site?

Your answers will help us to improve our website.
Note: Please be sure not to enter any kind of personal information into your response.

We hope you continue to make use of Game8.
Rankings
- We could not find the message board you were looking for.
Gaming News
Popular Games

Genshin Impact Walkthrough & Guides Wiki

Honkai: Star Rail Walkthrough & Guides Wiki

Umamusume: Pretty Derby Walkthrough & Guides Wiki

Pokemon Pokopia Walkthrough & Guides Wiki

Resident Evil Requiem (RE9) Walkthrough & Guides Wiki

Monster Hunter Wilds Walkthrough & Guides Wiki

Wuthering Waves Walkthrough & Guides Wiki

Arknights: Endfield Walkthrough & Guides Wiki

Pokemon FireRed and LeafGreen (FRLG) Walkthrough & Guides Wiki

Pokemon TCG Pocket (PTCGP) Strategies & Guides Wiki
Recommended Games

Diablo 4: Vessel of Hatred Walkthrough & Guides Wiki

Fire Emblem Heroes (FEH) Walkthrough & Guides Wiki

Yu-Gi-Oh! Master Duel Walkthrough & Guides Wiki

Super Smash Bros. Ultimate Walkthrough & Guides Wiki

Pokemon Brilliant Diamond and Shining Pearl (BDSP) Walkthrough & Guides Wiki

Elden Ring Shadow of the Erdtree Walkthrough & Guides Wiki

Monster Hunter World Walkthrough & Guides Wiki

The Legend of Zelda: Tears of the Kingdom Walkthrough & Guides Wiki

Persona 3 Reload Walkthrough & Guides Wiki

Cyberpunk 2077: Ultimate Edition Walkthrough & Guides Wiki
All rights reserved
© BANDAI NAMCO Entertainment America Inc. All third party content, brands, names, and logos are used under license and remain property of their respective owners. All rights reserved.
The copyrights of videos of games used in our content and other intellectual property rights belong to the provider of the game.
The contents we provide on this site were created personally by members of the Game8 editorial department.
We refuse the right to reuse or repost content taken without our permission such as data or images to other sites.

 Balseph
 Ice Wolf Leader
 Ooze Hive
 Lord Ganabelt
 Zacarania
 Kisara
 Dohalim
 Venoflage
 Temararus
 Grinymuk
 Almeidrea & Mesmald
 Meria Phein
 Kalmarzel & Kaldinzel
 Vholran
 Eljarania
 Efreet
 Tormented Limbs
 Red Woman
 Valclynimus
 Great Astral Spirit
 Subsumer
 Vholran (Final Boss)
 Toxidillo
 Boisterous Roper
 Polycephus
 Great Dragon
 Relentless Charger
 Flamewrecker
 Alpha Reaper
 Stormbringer
 Elemental
 Regent Bee
 Agony Keeper
 Mother Boomy
 Ruthless
 Thunderite
 Mantis
 Calamity Arms
 Meneiys
 Ezamamuk
 Sword Dancer
 Undine Drop
 Luo Undine
 Grand Gnome & Vas Phein
 Masher Mare & Masher Bull
 Procella Sylph & Sylph Zloa
 Mesmald
 Edna
Edna Nimus Origin
 Eizen
Eizen Edna & Eizen
 Chronos
 Dulneiys, Maleiys, & Vasneiys


