Old Capital Metro Guide
☆ New: Tier List Maker & Co-Op Board!
★ 2.7: Nangong Yu, Cissia, & 2.7 Livestream
☆ 2.6 Phase 1: Sunna & Yixuan
★ 2.6 Phase 2: Aria & Yuzuha
☆ Tier Lists: Agents | W-Engines | Bangboos | Teams
★ Redeem Codes for free Polychromes!
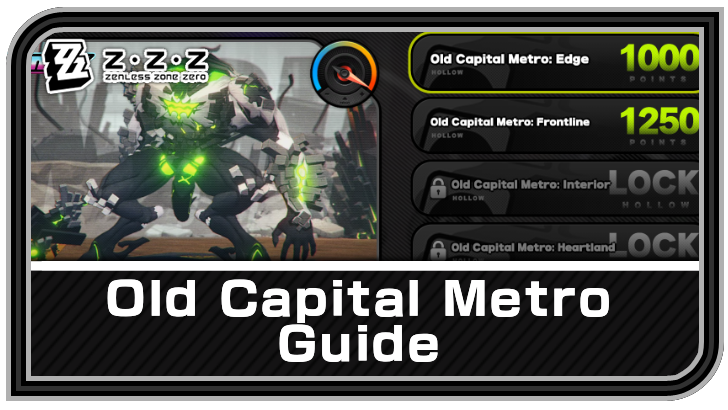
Old Capital Metro is the second zone in Hollow Zero Withered Domain in Zenless Zone Zero (ZZZ). See the recommended level, all enemies and bosses, best characters, Resonia, and floor walkthroughs for Zone 1 here!
| Hollow Zero Withered Domain Guides | ||
|---|---|---|
 Qualification Assessment Qualification Assessment |
 Old Capital Metro Old Capital Metro |
 Construction Ruins Construction Ruins |
 Abandoned Skyscraper Abandoned Skyscraper |
 Withering Garden Withering Garden |
 Inferno Reap Inferno Reap |
List of Contents
How to Unlock Old Capital Metro
Reach Inter-Knot Level 21 and Clear Old Capital Metro Frontline
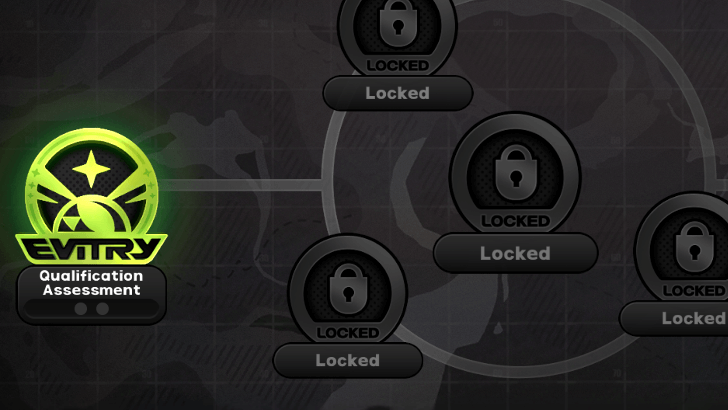
Old Capital Metro will only unlock after reaching Inter-Knot Level 21 and completing the Old Capital Metro: Frontline in Hollow Zero.
The other stages in Old Capital Metro will become available after reaching levels 25, 30, and 40, respectively, and completing some commissions in the Main Story.
Old Capital Metro Best Characters
Hollow Zero Withered Domain Stage 2 Agents
| DPS | |
|---|---|
| Sub-DPS | |
| Stun | |
| Support |
These are the best Agents to use for the Old Capital Metro stage in Withered Domain.
Old Capital Metro Core Guide
Old Capital Metro Core Enemies
| Enemies | Weakness | Resistance |
|---|---|---|
| None | ||
| None | ||
| None | ||
| None | ||
| None |
Old Capital Metro Core Floor 1 Walkthrough
| # | Floor 1 Walkthrough |
|---|---|
| 1 | 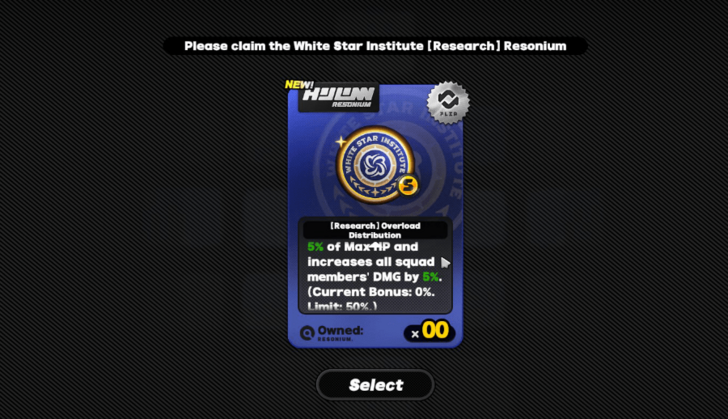 You will start the stage with a [Research] Overload Distribution Resonium that will heal your characters and increase their damage every time pressure reaches 100, which causes an overload and results in a Corruption. |
| 2 | 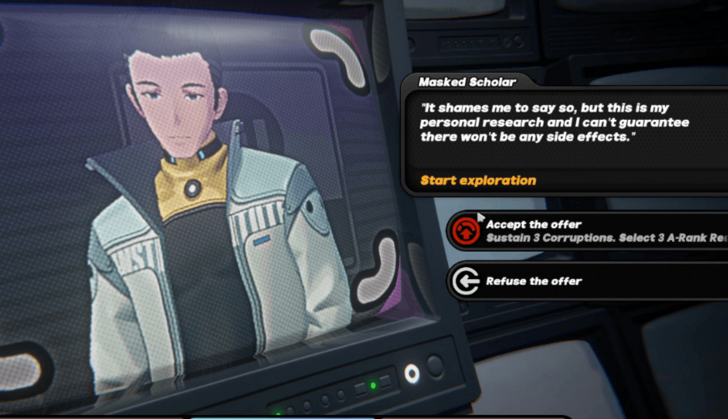 The Masked Scholar will appear after getting the Resonium and offer you three A-Rank Resonium in exchange for three Corruptions. You will get value out of getting the Corruptions because of the Research Resonium you get earlier. |
| 3a |  After talking to the Masked Scholar, you will spawn at the top left part of the area, far away from the exit at the bottom left. It's best to clear all the tiles before heading to the exit to get all the buffs and increase the number of Corruptions. |
| 3b | 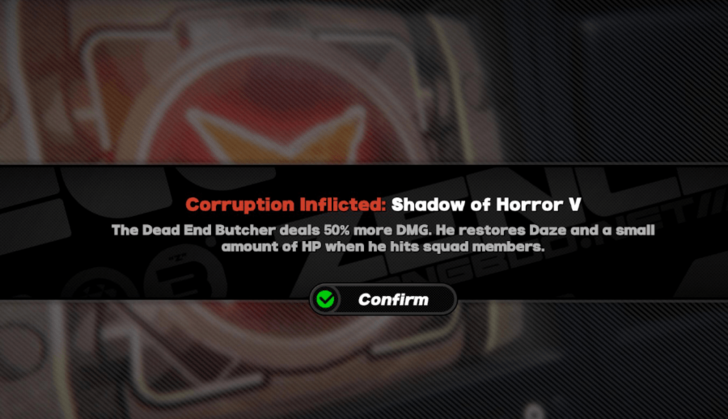 Increasing or maxing out the number of Corruptions will get you more help from the Masked Scholar on the next floor. |
| 4 | 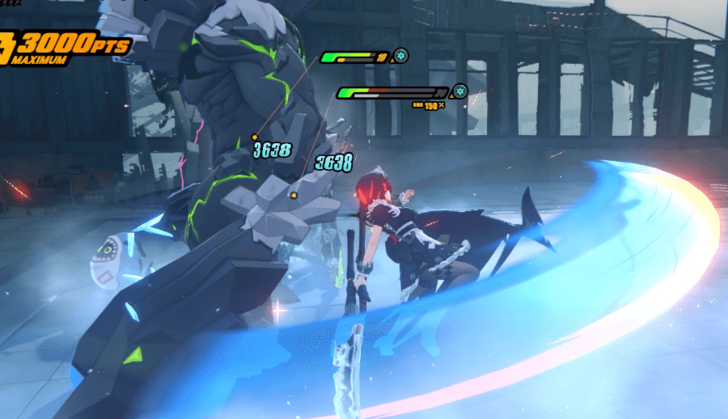 Head to the exit and defeat the Goblin and Notorious Thanatos to reach the next floor. |
Old Capital Metro Core Floor 2 Walkthrough
| # | Floor 2 Walkthrough |
|---|---|
| 1 | 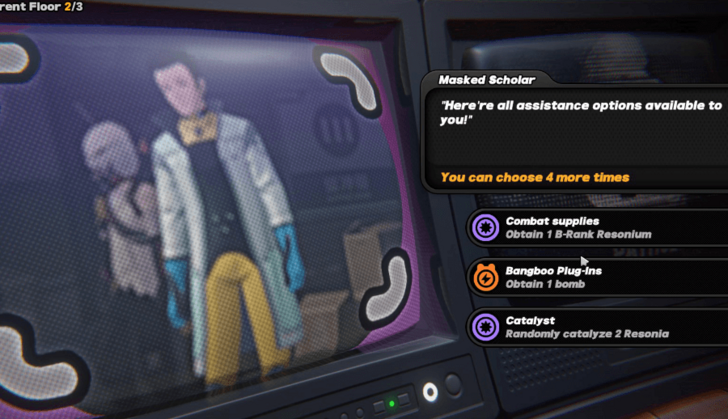 Floor 2 will start in a safe area where you will have no choice but to meet the Masked Scholar again. He will offer you a number of assistance based on the number of Corruptions you have (maximum of 5). |
| 2 | 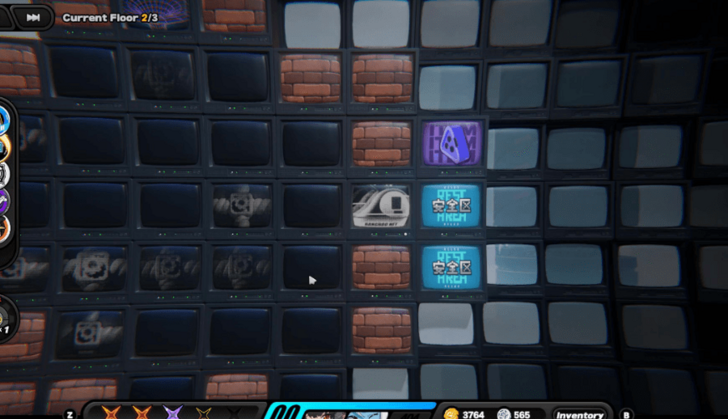 Collect all the rewards in the area after talking to the Masked Scholar. You should also get the rewards on the right if you cleared floor 1 with an S rating or grade. Head to the transmission above once you're done! |
| 3a | 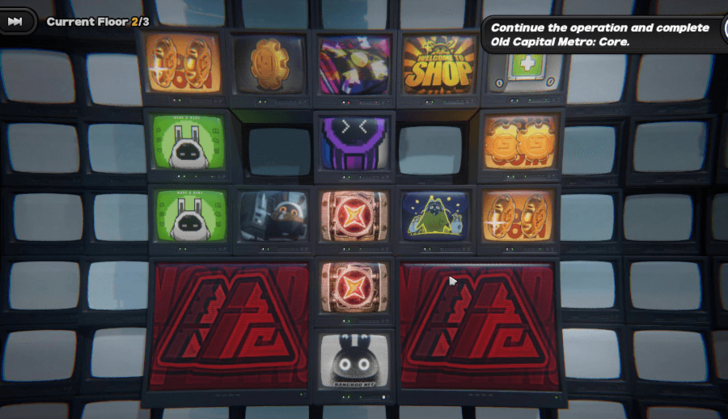 You will spawn at the bottom middle, surrounded by two Double Crisis tiles and Vault tiles (Quarantine Gates). The exit will be on the opposite side, and you can get there quickly by going straight upward. |
| 3b | 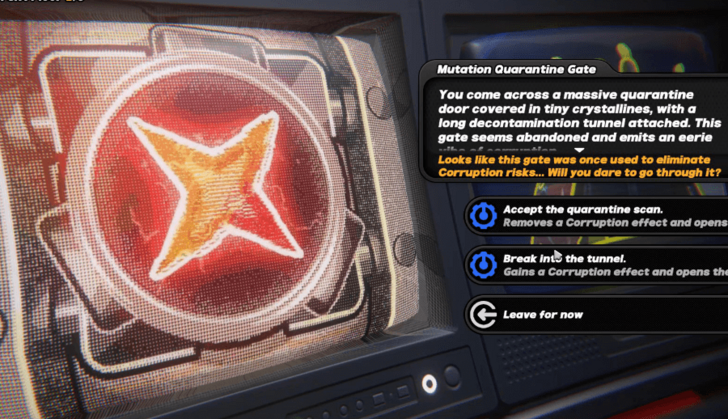 You can choose to clear all other tiles in the area and start removing some of your Corruptions to make it a little easier when fighting enemies and the floor boss. Otherwise, continue building up Corruptions to get more value from your Resonium. |
| 4 | 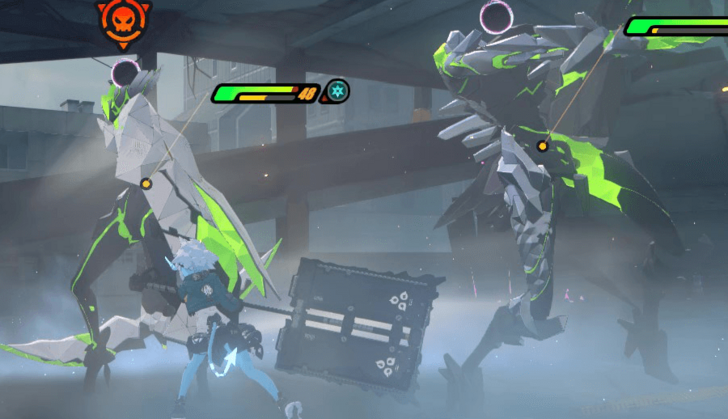 Once you reach the exit, you will face Thanatos and Notorious Dullahan. Defeat them to reach the final floor. |
Old Capital Metro Core Floor 3 Walkthrough
| # | Floor 3 Walkthrough |
|---|---|
| 1 |  Same with Floor 2, you will start in a safe area where the Masked Scholar is blocking the way. He will give you the same help as well once you talk to him. |
| 2 | 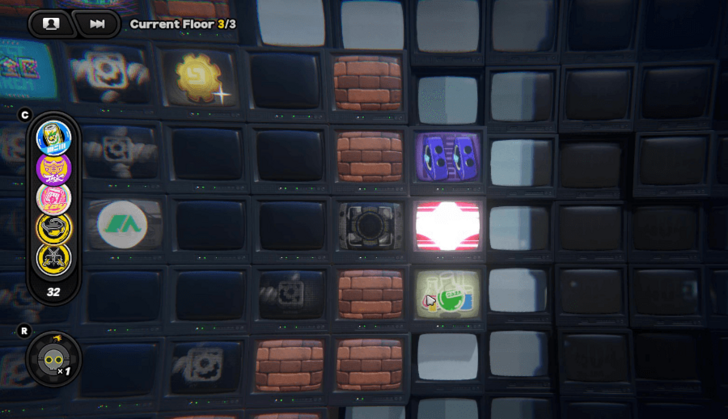 Explore the area and don't forget to claim your rewards on the right if you get an S rating or grade in the previous floor! Head to the transmission to proceed to the next area. |
| 3a | 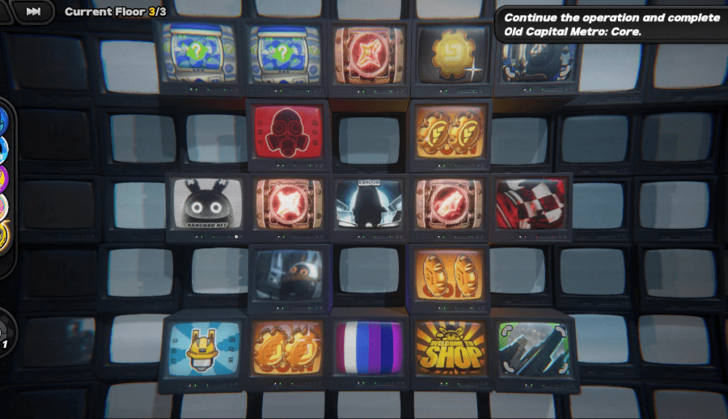 You will spawn on the left in the middle in the next area, while the exit will be on the opposite side of your position. You can reach the exit quickly if you go straight to the right. |
| 3b | 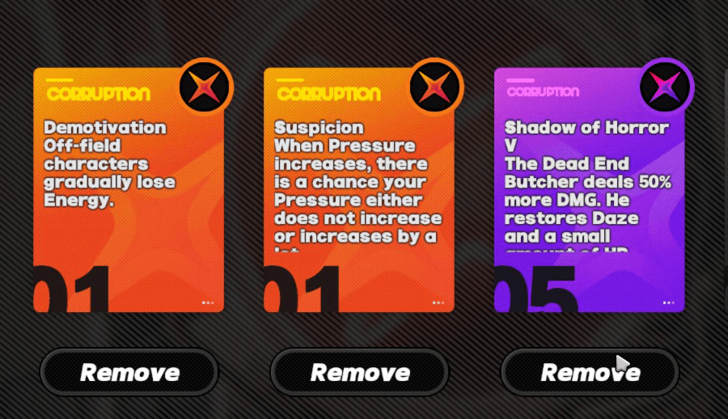 It's best to remove all your Corruptions at this point to reduce the difficulty of the boss fight. Aim to remove the Shadow Horror V as it boosts the damage of the Newborn Dead End Butcher, which can be fatal for undergeared characters if they get hit. |
| 4 | 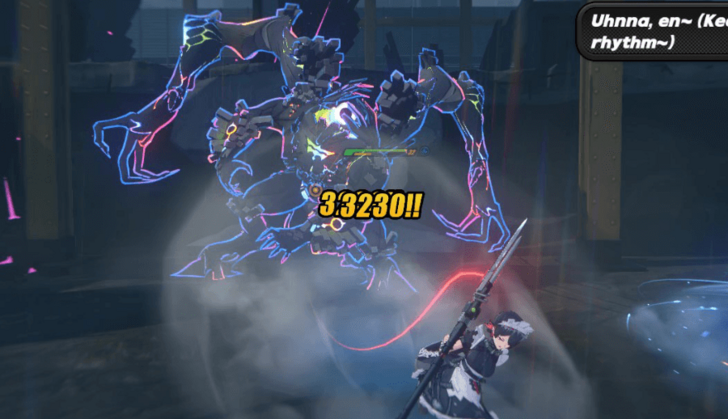 Defeat the Newborn Dead End Butcher at the exit to clear the stage and get all of its rewards! |
Old Capital Metro Heartland Guide
Old Capital Metro Heartland Enemies
| Enemies | Weakness | Resistance |
|---|---|---|
| None | ||
| None | ||
| None |
Old Capital Metro Heartland Floor 1 Walkthrough
| # | Floor 1 Walkthrough |
|---|---|
| 1 | 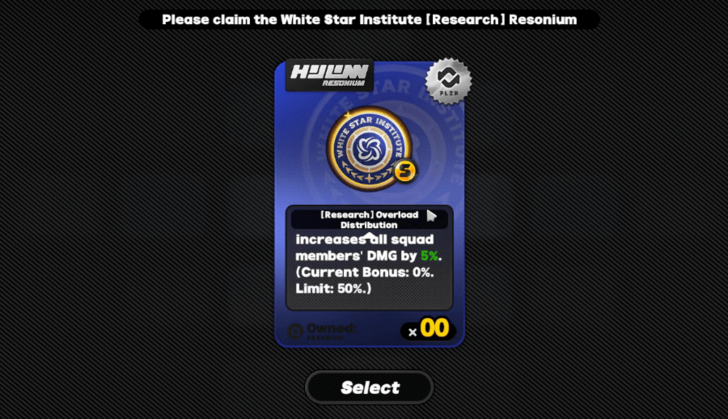 You will start the stage with a [Research] Overload Distribution Resonium, which heals your squad and increases their damage for each Pressure Overload you get in this stage. |
| 2 | 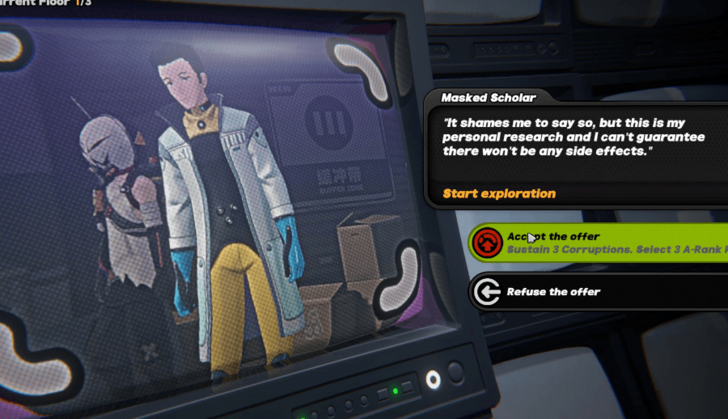 The Masked Scholar will pop up after getting the Resonium. He will offer you to get 3 Corruptions right from the get-go in exchange for 3 A-Rank Resonium. If you still have those Corruptions at the start of Floor 2, you can get additional help from the Masked Scholar when you meet him. |
| 3a | 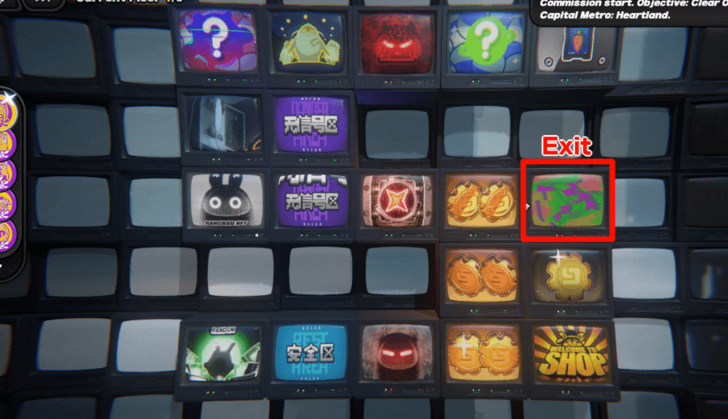 The first area will look like an "S" shape. You will spawn in the middle left, while the exit will be on the opposite side of your position. |
| 3b | You can head straight to the exit if you want to save time and get to the next floor quickly, or you can pass through all the tiles and get as many Resonium as you can to get stronger. |
| 4 | 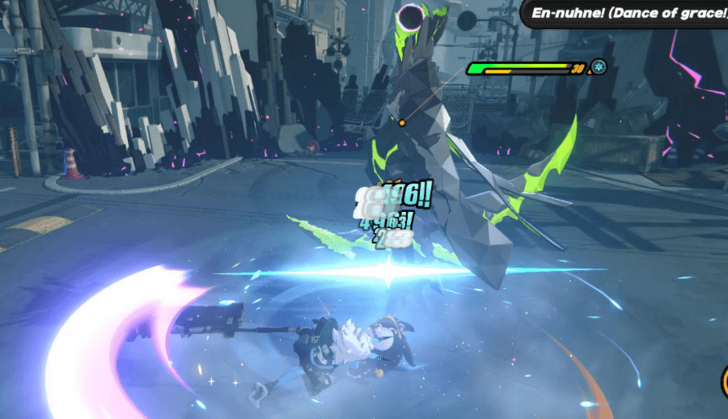 You will face one Thanatos once you reach the floor exit. Defeat it and proceed to the next floor. |
Old Capital Metro Heartland Floor 2 Walkthrough
| # | Floor 2 Walkthrough |
|---|---|
| 1 | 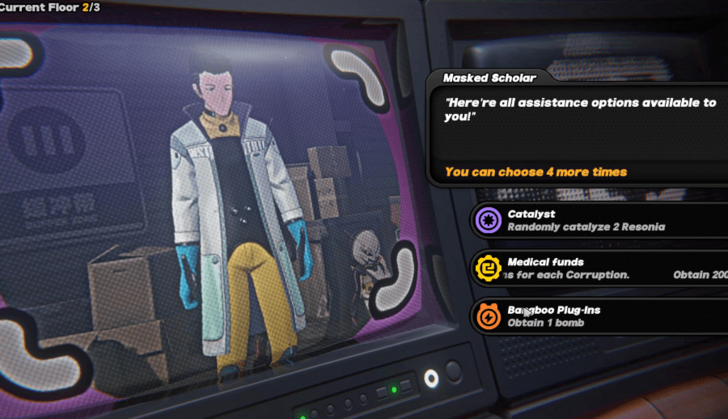 You will meet the Masked Scholar at the start of Floor 2. He will give you a number of support depending on how many Corruptions you have. |
| 2 | 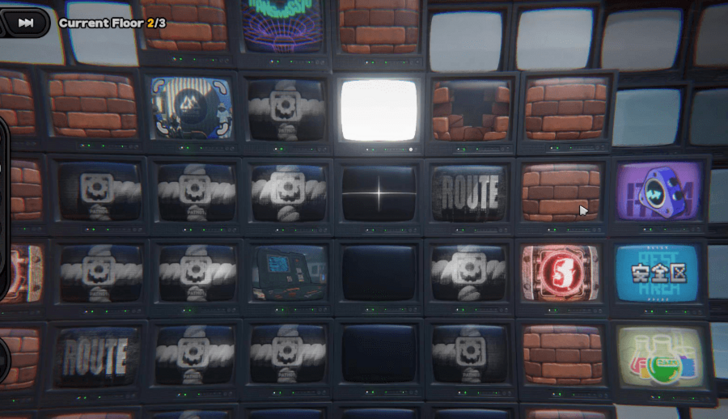 Explore all the tiles after talking to the Masked Scholar so that you can get all the rewards before proceeding to the next area. Don't forget to grab the rewards on the right if you got an S rating on the first floor. |
| 3a | 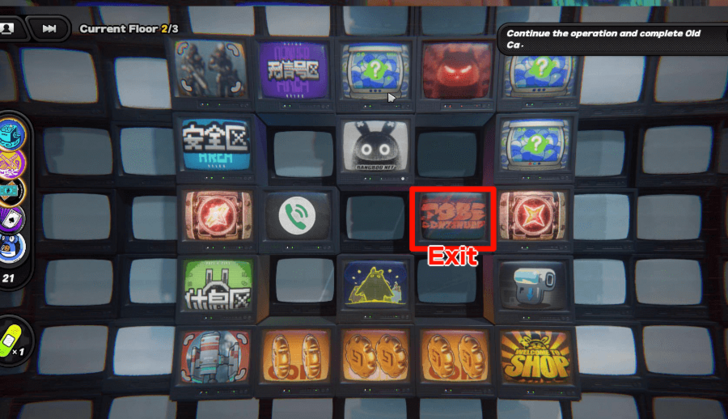 Head to the transmission after exploring to enter the next area. You will spawn in the middle once you enter the transmission. |
| 3b | You can reach the exit quickly if you take the path above and move to the right. You can also explore the other tiles and get more Resonium to strengthen your squad before taking on the floor boss. |
| 4 |  You will face two Armored Hati once you reach the exit. Defeat them to get to Floor 3. |
Old Capital Metro Heartland Floor 3 Walkthrough
| # | Floor 3 Walkthrough |
|---|---|
| 1 | 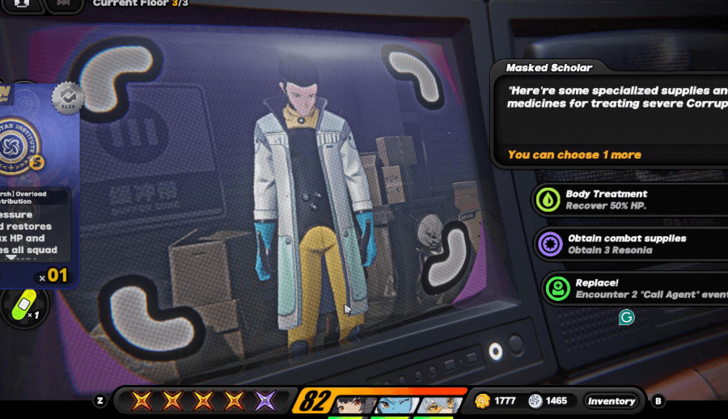 Same with the start of Floor 2, the Masked Scholar will be at the start of Floor 3 as well. He will offer you a number of help depending on the number of Corruptions you have again. He will also catalyze the [Research] Overload Distribution to boost its effect. |
| 2 | 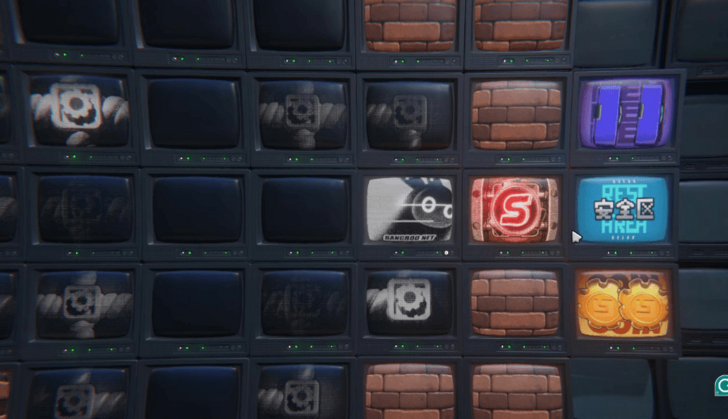 Explore the area after talking to the Masked Scholar to power-up your squad more before moving to the next area. Don't forget to claim the rewards on the right if you cleared the previous floor with an S rating! |
| 3a | 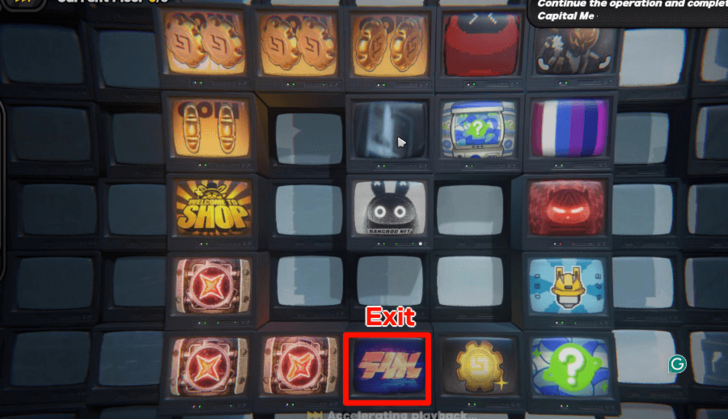 The next area will be the last for this stage. You will spawn in the middle, and the exit will be at the bottom middle part. |
| 3b | You can either take the path to the left for a safer way to get to the exit, or go to the right and face an enemy there. You can also take both if you want to maximize the power-ups you can get before fighting the last boss! |
| 4 | 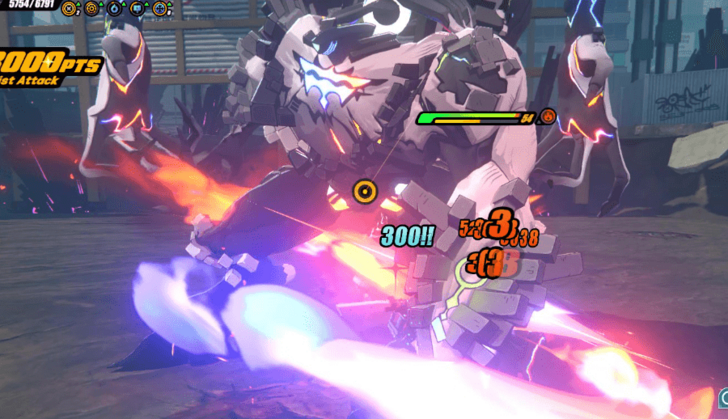 The Dead End Butcher will be waiting at the exit. Defeat it in a two-phase boss battle to clear the stage. |
Old Capital Metro Interior Guide
Old Capital Metro Interior Enemies
| Enemies | Weakness | Resistance |
|---|---|---|
| None | ||
| None | ||
| None | ||
| None |
Old Capital Metro Interior Floor 1 Walkthrough
| # | Floor 1 Walkthrough |
|---|---|
| 1 |  You will start the stage with a [Research] Overload Distribution Resonium that heals and increases your team's overall damage depending on the number of Corruption you currently have. You will also get a random set of Resonium that you can pick from. |
| 2 | 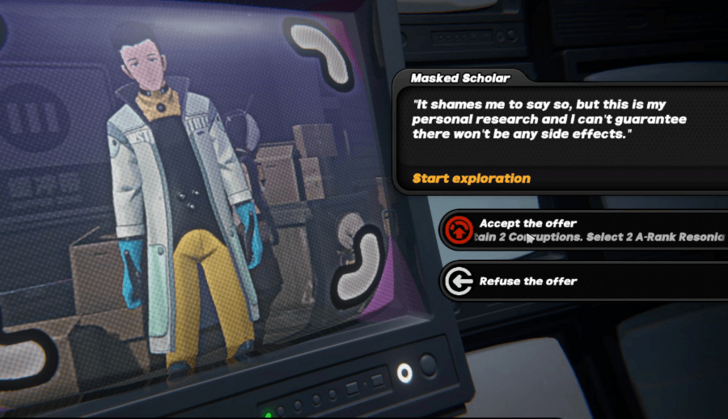 The Masked Scholar will appear afterward and offer you 2 A-Rank Resonium in exchange for having two Corruptions. Accepting his deal will allow you to get early Corruption and get more value out of the [Research] Overload Distribution. |
| 3a | 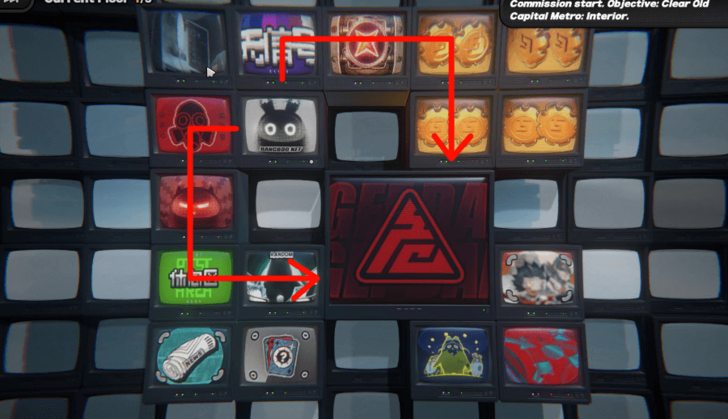 You will get to the first area after talking to the Masked Scholar. You can take two paths here, but you won't be able to avoid a fight on the Double Crisis Tile whichever path you take. |
| 3b |  You can also pass all the tiles here before heading to the exit and get at least one more Corruption to get a buff from the Research Resonium and also get more rewards in Floor 2 from the Masked Scholar. If you want more Corruption, you can use the Medicine Information Leaflet to get more. |
| 4 | 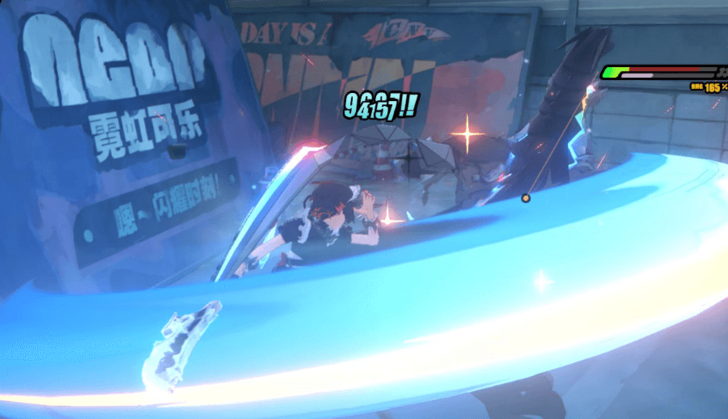 You will face an Armored Hati at the exit. Defeat it to get to the next floor. |
Old Capital Metro Interior Floor 2 Walkthrough
| # | Floor 1 Walkthrough |
|---|---|
| 1 |  The Masked Scholar will be blocking the way at the start of Floor 2. He will offer you a number of "help" that will depend on how many Corruptions you have. |
| 2 | 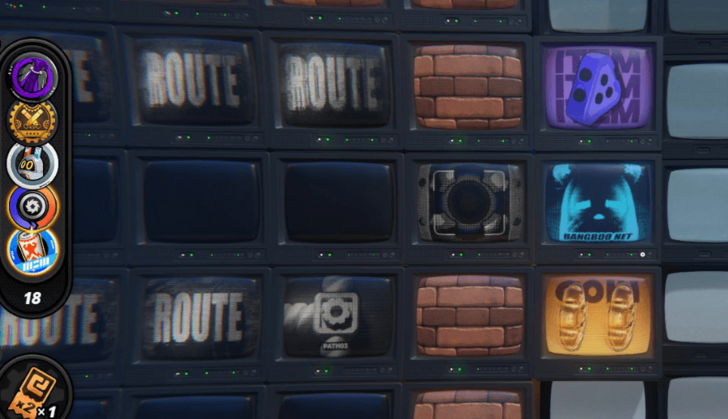 After receiving a help from the Masked Scholar, explore the area and start collecting the rewards. Don't forget to claim the rewards on the right side as well if you get an S rating from the previous floor! |
| 3a | 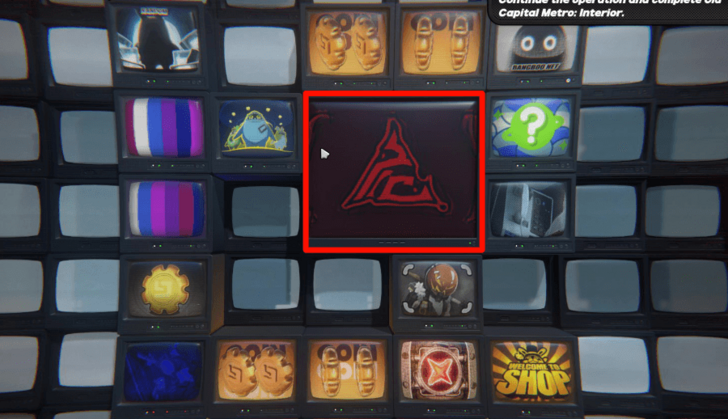 The next area will have two paths leading to the exit. You won't be able to avoid fighting on the Double Crisis Tile whichever path you choose, similar to Floor 1. |
| 3b | If you have 5 Corruptions already, you shouldn't have to worry if you walk on all the tiles to get all the rewards. Otherwise, you can just follow the shortest path if you want to reach the exit quickly. |
| 4 | 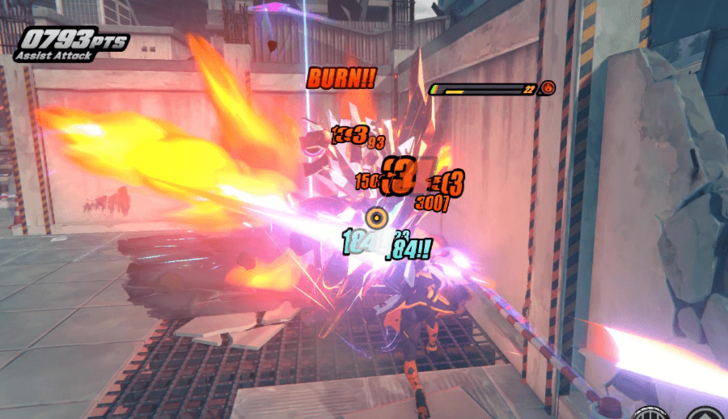 You need to defeat the Dullahan at the exit to proceed to the last floor. |
Old Capital Metro Interior Floor 3 Walkthrough
| # | Floor 3 Walkthrough |
|---|---|
| 1 |  You will enter the area similar to Floor 2. You will be blocked by the Masked Scholar and you can claim all the rewards before heading to the final area. |
| 2a |  The final area consists of two paths to the exit in the middle. You can go all through the tiles and try to get more Resonium to help you with the boss fight, or you can take the safe route to the right until you reach the exit. |
| 2b | 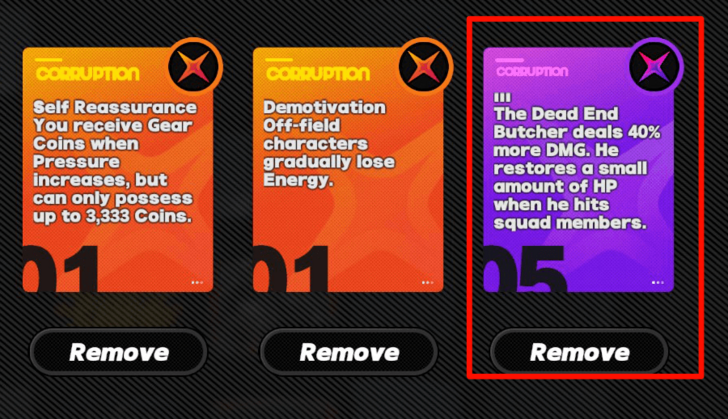 You can also consider getting rid of the Corruptions you have from the tiles in the area. It might hinder you from the boss fight, especially if you have the Purple Corruption that boosts the damage and heals the Dead End Butcher. |
| 3 | 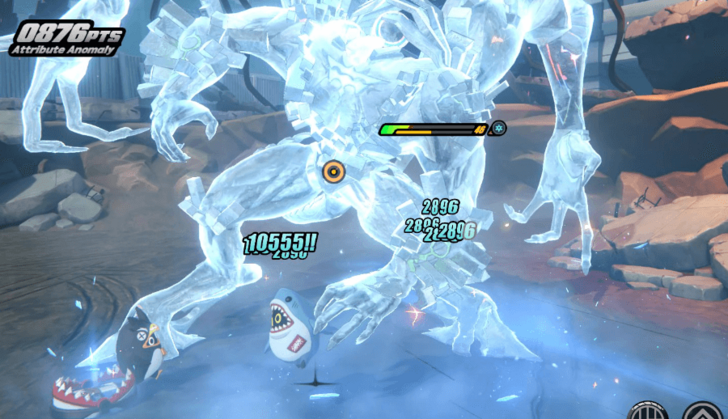 Fight and defeat the Dead End Butcher in a two-phase boss fight once you reach the exit to complete the stage! |
Old Capital Metro Frontline Guide
Old Capital Metro Frontline Enemies
| Enemies | Weakness | Resistance |
|---|---|---|
| None | ||
| None | ||
| None |
Old Capital Metro Frontline Floor 1 Walkthrough
| # | Floor 1 Walkthrough |
|---|---|
| 1 | 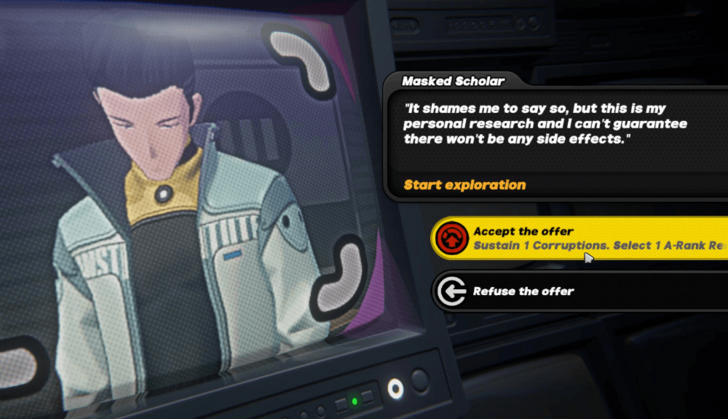 You will encounter Masked Scholar at the start. You can take his offer to get a Resonium, but it comes with a Corruption, or reject it and proceed to the next area. |
| 2a | 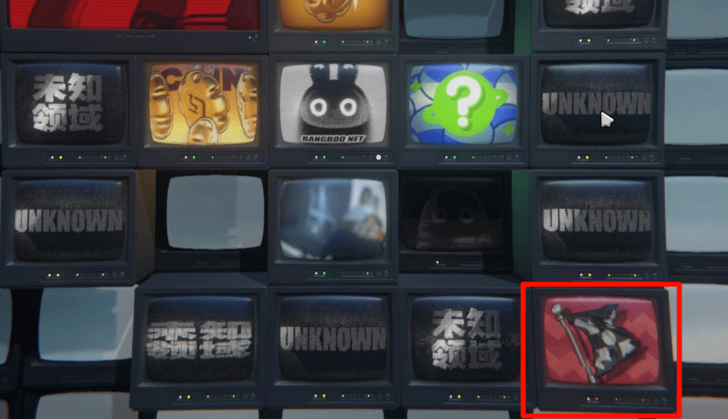 You will be a bit closer to the exit, which is in the lower right corner. You can go there immediately to save time, but you won't get as many Resonia and other helpful items if you do. |
| 2b |  If you decide not to go to the exit immediately, you can go to the huge red tile (Double Crisis Tile) to fight enemies and get multiple rewards from the nearby tiles it occupies. You can also fight the remaining enemies and the tiles they block for additional rewards. |
| 3 | 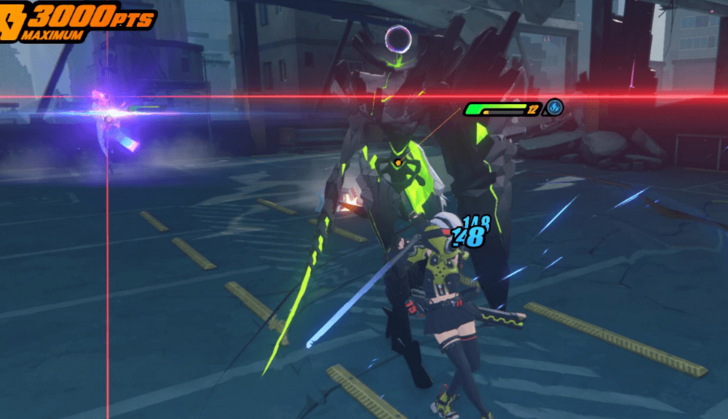 Once you reach the exit, you will fight two elites, Dullahan and Thanatos. Defeat both to get to the next floor. |
Old Capital Metro Frontline Floor 2 Walkthrough
| # | Floor 2 Walkthrough |
|---|---|
| 1 | 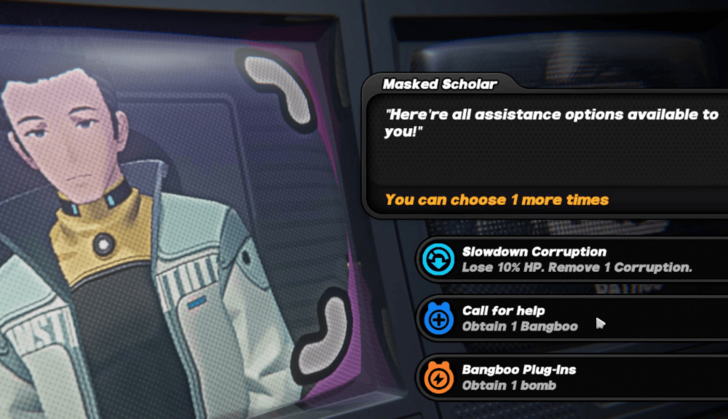 You will be blocked by the Masked Scholar again at the start of Floor 2. This time, he will offer you items that mostly give positive effects for your run. |
| 2a |  Explore the whole area and don't forget to claim the rewards on the right if you cleared the first floor with an S grade. |
| 2b | 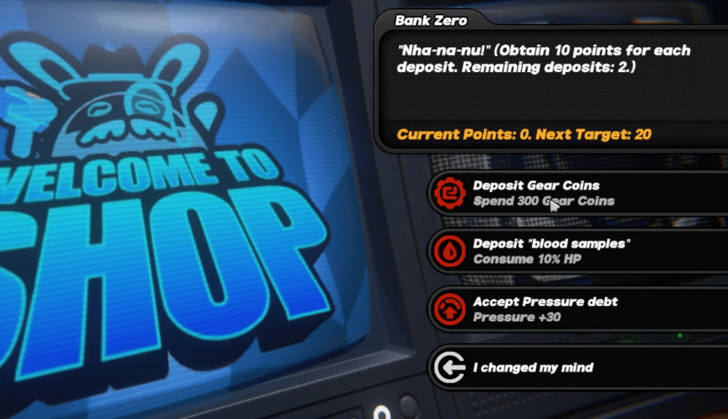 You can also unlock the Bank Zero on the left, where you can deposit items to earn points and withdraw rewards. |
| 2c | 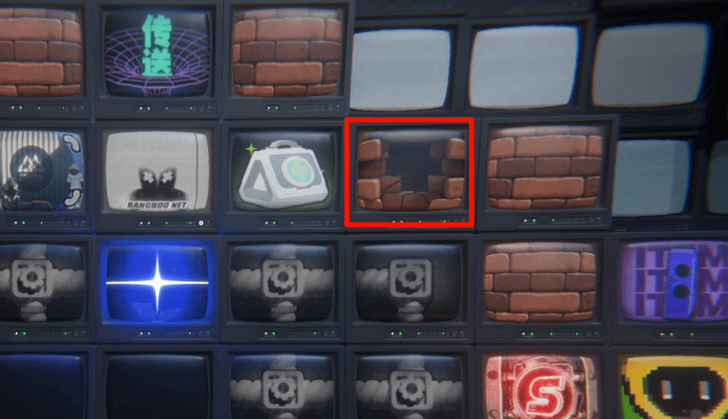 Additionally, check for breakable walls in the area as they always contain useful rewards. |
| 3 | 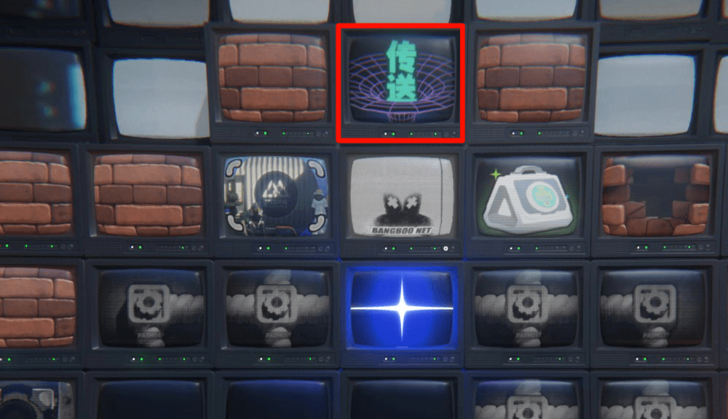 Once you're done exploring the area, go to the transmission above to get to the final area where the exit is located. |
| 4a | 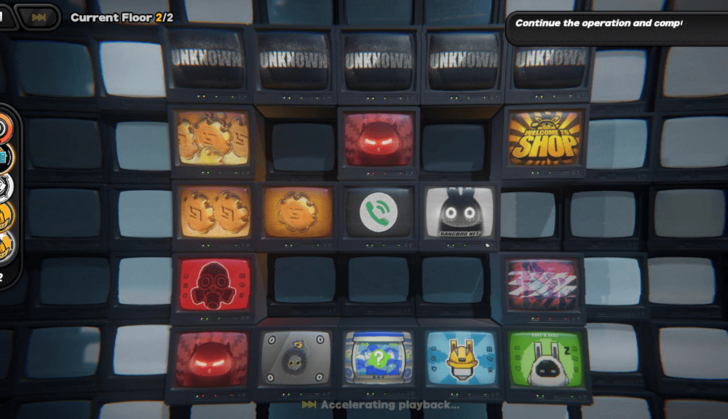 In the next area, you can head down and go straight to the exit to fight the boss or go up and try to reach the Shop on the other side to use your remaining Gear Coins. |
| 4b |  If you decided to go to the Shop, note that you will pass through Unknown Tiles that contain randomized tiles that can be good or bad for your run. |
| 5 | You will need to defeat the Dead End Butcher at the exit to complete the stage and get your rewards! |
Old Capital Metro Edge Guide
Old Capital Metro Edge Enemies
| Enemies | Weakness | Resistance |
|---|---|---|
| None | ||
| None | ||
| None |
Old Capital Metro Edge Floor 1 Walkthrough
| # | Floor 1 Walkthrough |
|---|---|
| 1 | 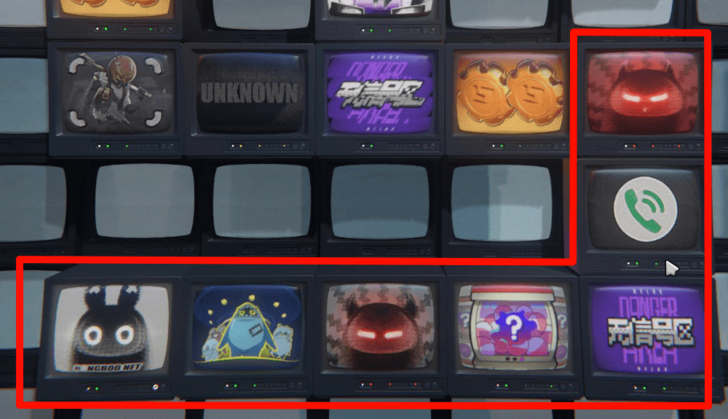 Follow the path until you pass the second enemy tile on the screen. You will get a few rewards like a Bangboo, Artifice Resonium, and a character. |
| 2a |  After defeating the last enemy tile on the board, you can immediately go to the exit or pass all the tiles to get the other rewards. |
| 2b |  If you decide to pass through all the tiles, you will eventually hit a Random Tile in the middle. This will take you to a random separate area, like the Codenamed: 0011, 0020, and 7777, where you can get more rewards. |
| 3 | 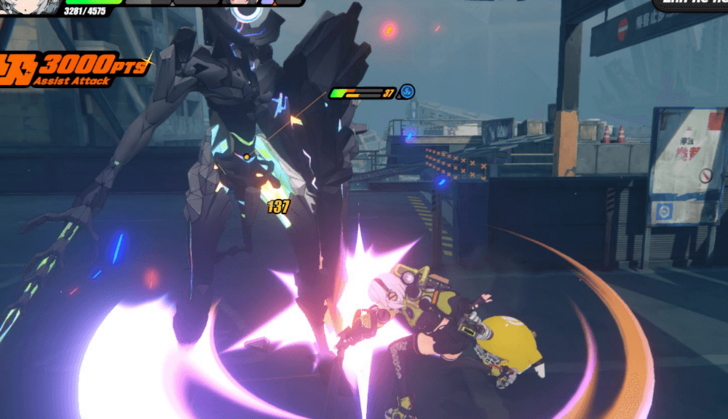 Defeat the bosses at the exit, Dullahan and Thanatos, to reach the next floor. |
Old Capital Metro Edge Floor 2 Walkthrough
| # | Floor 2 Walkthrough |
|---|---|
| 1 | 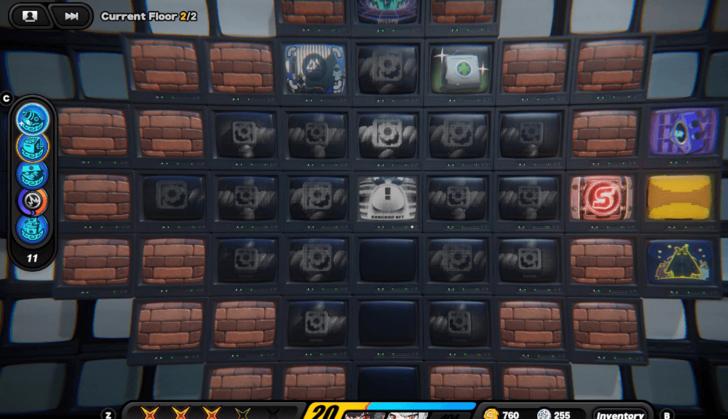 The starting area in Floor 2 doesn't have any enemies on it. Collect all the rewards and pass through all events, including the ones on the right if you finish Floor 1 with an S grade. |
| 2a | 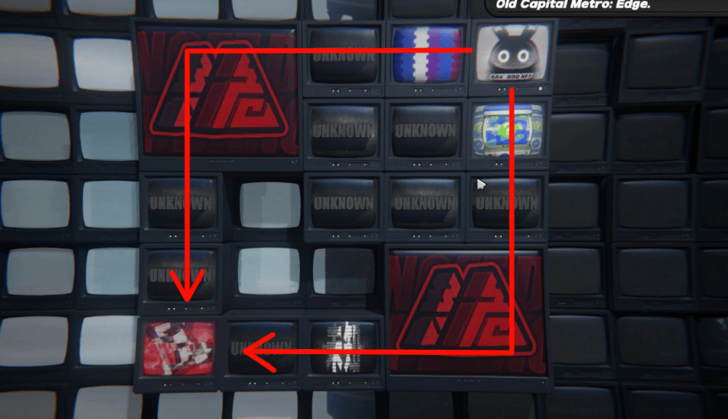 Proceed to the transmission tile above to get to the next area. It will have 2 paths leading to the final exit. You can go through all of them for extra rewards if you want, but be prepared to fight enemies on the red tiles. |
| 2b | 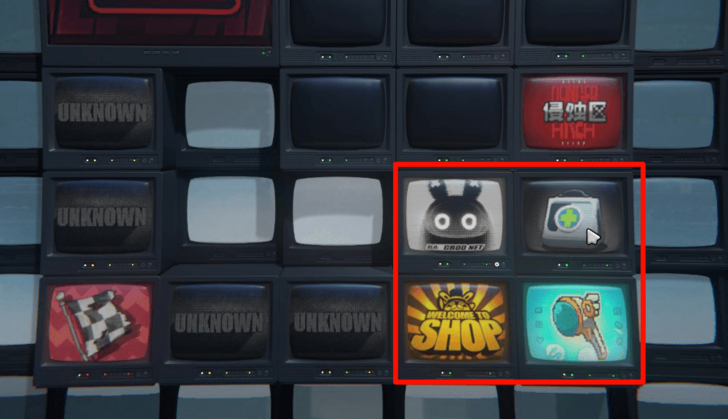 The big two tiles (Double Crisis Tiles) on the edges will spawn rewards after beating the enemies. |
| 3 | 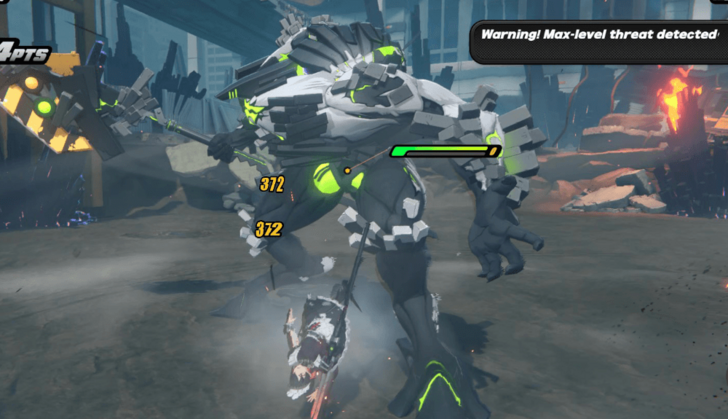 Head to the exit and defeat Dead End Butcher to clear the stage. |
Old Capital Metro Recommended Resonia
Use Freeze and Ether Resonia
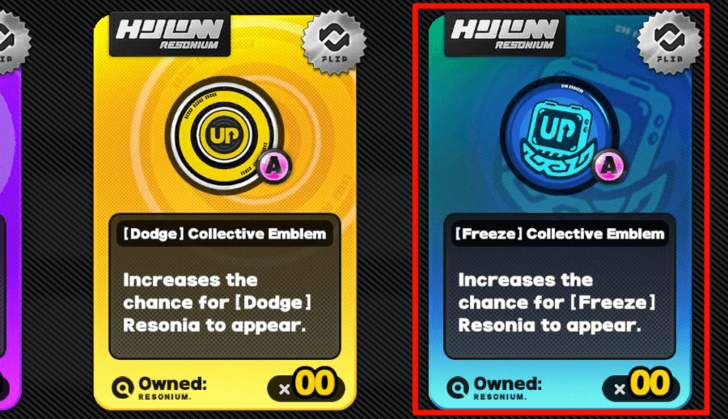
You should aim for Freeze (Ice) or Ether Resonia, as they are the best attributes in Old Capital Metro stages. It will boost the power and add more abilities for the Characters with the same attribute.
List of Ice and Ether Resonia
| Resonia | Effects |
|---|---|
|
|
Agent Ice DMG increases by 15% |
|
Upon triggering Shatter, the Agent inflicts additional Daze equal to 140% of Impact on the target if the target is not Stunned. |
|
Freezing an enemy increases the Agent's DEF by 5%, stacking up to 4 times. |
|
Launching an EX Special Attack grants the Agent 8 stacks of Ice Mark. |
|
When an Ultimate hits an enemy and deals Ice DMG, the Agent gains 36 stacks of Ice Mark. |
|
Freezing an enemy increases all squad members' CRIT DMG by 40% for 15s. |
|
Shatter DMG increases by 50%. When Shatter is triggered, hitting enemies increases the Agent's Ice Anomaly Buildup Rate by 20% for 5s. |
|
Triggering Shatter leaves an icy mist that lasts 10s. This effect can trigger once every 10s. Ice DMG against enemies caught in the mist deal 80% more CRIT DMG. |
|
Freeze lasts 2s longer. |
|
Freezing an enemy grants all squad members 12 stacks of Ice Mark. |
|
Triggering Ice Mark increases the Agent's Ice Anomaly Buildup Rate by 30%. |
|
All squad members' Ether DMG increases by 15%. |
|
All squad members' Ice DMG increases |
|
All squad members' Ether DMG increases by 15%. |
|
All squad members' Ice DMG increases by 15%. |
|
Each point of Anomaly Proficiency increases the Agent's Ether DMG by 0.2%, up to a maximum increase of 30%. |
|
Corruption DMG increases by 40% |
|
Agents deal 30% more DMG to Corrupted enemies. |
|
Inflicting Corruption on an enemy grants 1 stack of Activity to all squad members. Corrupted enemies have their Ether Res reduced by 20%. |
|
Dealing Ether DMG to an enemy increases Attribute Anomaly DMG 50% against the target for 10s. |
|
Increases the chance for [Ether] Resonia to appear. |
|
Agent Ether DMG increases by 15%. |
|
Agent Ether Anomaly Buildup Rate increases by 15%. |
|
Launching a Chain Attack increases all squad members' Anomaly Proficiency by 25 for 15s. |
|
Corrupted enemies have their ATK reduced by 15%. |
|
Dealing Ether DMG grants all squad members 1 stack of Activity. This effect can trigger once every 10s. |
|
Launching an EX Special Attack grants 1 stack of Activity to all squad members. |
|
Corruption lasts 2s longer. |
|
Each Standard Ether type Resonium owned increases Agent Ether Anomaly Buildup Rate by 4%, up to a maximum increase of 32%. |
Consider Getting Assist and Dodge Resonia
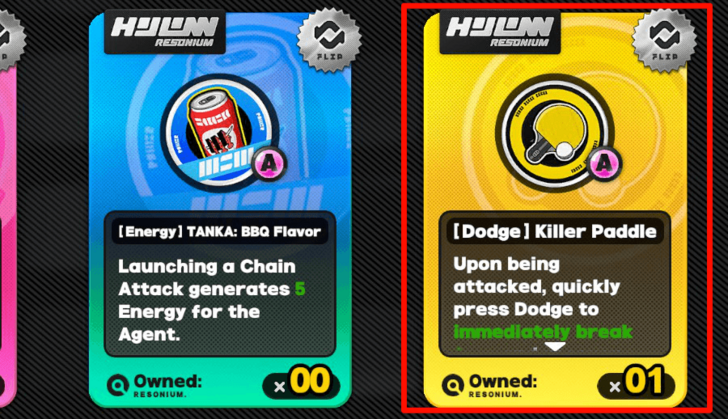
Since the set of Resonia that will appear is mostly random, you can also get Assist or Dodge Resonia. They will be good against the bosses in this stage, especially against their numerous attacks!
List of Assist and Dodge Resonia
| Resonia | Effects |
|---|---|
|
|
Triggering Perfect Assist increases all squad memers' CRIT DMG by 15% for 10s. |
|
Triggering Perfect Assist grants the Agent a Shield equal to 6% of their Max HP for 10s. |
|
Triggering Perfect Assist grants all squad members 1 stack of Insight. |
|
Triggering Perfect Assist increases all squad members' CRIT DMG by 48% for 30s. All squad members gain 1 stack of Acuity. |
|
Triggering Perfect Assist increases all squad members' CRIT DMG by 20% for 10s. |
|
Triggering a Perfect Assist increases all squad members' Anomaly Buildup Rate by 20% for 10s. |
|
Triggering Perfect Assist generates 5 Energy for the Agent. This effect can trigger once every 5s. |
|
Triggering Perfect Assist generates 5% Decibels. |
|
Hitting enemies with an Assist Follow-Up increases all squad members' PEN Ratio by 10% for 15s. |
|
Assist Follow-Up DMG increases by 70%. |
|
Triggering Perfect Assist grants all squad members 1 stack of Rush |
|
Vital View triggered by Evasive Assist lasts 5s. Defensive Assist inflicts 30% more Daze. |
|
Using Dodge increases the Agent's DEF by 20% for 5s. |
|
On triggering a Perfect Dodge, all squad members gain 1 stack of Agility, and DMG dealt is increased by 30 for 15s. |
|
On triggering Perfect Dodge, Agents gain 1 stack of Agility and enter Vital View for 4s This effect can trigger once every 10s. |
|
Dodge Counter DMG increases by 35% |
|
When in the Counter state, Anomaly Buildup Rate increases by 20% and CRIT DMG increases by 40%. |
|
Triggering a Dodge Counter generates 5 Energy for the Agent. |
|
Perfect Dodge is easier to trigger |
|
The post-Dodge Dash Attack is replaced by Dodge Counter. This effect can trigger once every 5s. Triggering this effect grants the Agent 1 stack of Agility. |
|
When entering Vital View by triggering Perfect Dodge, the post-Dodge Dash Attack is replaced by Dodge Counter that can be used repeatedly up to 4 times. |
|
Extends the duration of the Counter state by 5s. |
|
Upon being attacked, quickly press Dodge to immediately break free and recover 50% of the DMG taken as HP. This effect can trigger once every 6s. |
|
When in the Counter state, Agent EX Special Attacks and Dodge Counter Interrupt level is increased, and all Agents' DMG increases by 50%. |
|
Triggering Perfect Dodge or Chain Attack additionally restores 1 Assist Point and increases the Agent's DMG by 45% for 128. |
|
Dodge Counter DMG increases by 50% and Daze inflicted increases by 30%. |
Most Resonia That Will Appear is Random
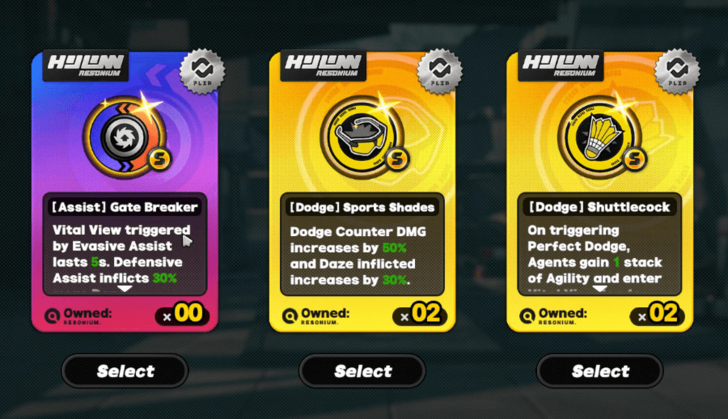
Most of the Resonia you will get are random unless they are indicated in the Shop or special event tiles. It means you won't have full control over which Resonia will appear, but you can always refresh it if you have unlocked Resonium Converters from the Combat Configuration!
Old Capital Metro Rewards
First Clear Rewards
| Stage | Rewards |
|---|---|
| Edge |
|
| Frontline |
|
Regular Rewards
| Regular Rewards |
|---|
|
|
Old Capital Metro Recommended Level
Around Level 25 to 45
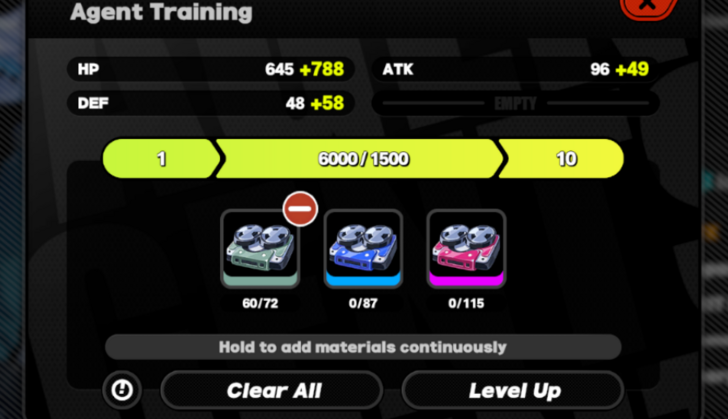
The level you should aim for when taking on the Qualification Assessment should be around 25 to 45 for both Characters and W-Engines to survive and finish all the stages.
Use the necessary level-up and promotion (ascension) materials to increase their level. You can use the Combat Simulation to get those rewards if you don't have enough!
Zenless Zone Zero Related Guides

All Hollow Zero Game Modes
| Hollow Zero Modes | |
|---|---|
 Lost Void Lost Void |
 Withered Domain Withered Domain |
Lost Void Stages
| All Lost Void Stages | |
|---|---|
| Task Force Investigation | Perpetrator Battle |
| Shadow Operation | Battlefront Purge |
| Operation Matrix | - |
Withered Domain Stages
| All Withered Domain Stages | |
|---|---|
| Qualification Assessment | Old Capital Metro |
| Construction Ruins | Abandoned Skyscraper |
| Withering Garden | Inferno Reap |
Other Hollow Zero Guides
| Hollow Zero Upgrades and Mechanics | |
|---|---|
| Resonia | Corruption |
Comment
Author
Old Capital Metro Guide
improvement survey
03/2026
improving Game8's site?

Your answers will help us to improve our website.
Note: Please be sure not to enter any kind of personal information into your response.

We hope you continue to make use of Game8.
Rankings
- We could not find the message board you were looking for.
Gaming News
Popular Games

Genshin Impact Walkthrough & Guides Wiki

Honkai: Star Rail Walkthrough & Guides Wiki

Umamusume: Pretty Derby Walkthrough & Guides Wiki

Pokemon Pokopia Walkthrough & Guides Wiki

Resident Evil Requiem (RE9) Walkthrough & Guides Wiki

Monster Hunter Wilds Walkthrough & Guides Wiki

Wuthering Waves Walkthrough & Guides Wiki

Arknights: Endfield Walkthrough & Guides Wiki

Pokemon FireRed and LeafGreen (FRLG) Walkthrough & Guides Wiki

Pokemon TCG Pocket (PTCGP) Strategies & Guides Wiki
Recommended Games

Diablo 4: Vessel of Hatred Walkthrough & Guides Wiki

Fire Emblem Heroes (FEH) Walkthrough & Guides Wiki

Yu-Gi-Oh! Master Duel Walkthrough & Guides Wiki

Super Smash Bros. Ultimate Walkthrough & Guides Wiki

Pokemon Brilliant Diamond and Shining Pearl (BDSP) Walkthrough & Guides Wiki

Elden Ring Shadow of the Erdtree Walkthrough & Guides Wiki

Monster Hunter World Walkthrough & Guides Wiki

The Legend of Zelda: Tears of the Kingdom Walkthrough & Guides Wiki

Persona 3 Reload Walkthrough & Guides Wiki

Cyberpunk 2077: Ultimate Edition Walkthrough & Guides Wiki
All rights reserved
Copyright © 2024 HoYoverse, COGNOSPHERE. All Rights Reserved.
The copyrights of videos of games used in our content and other intellectual property rights belong to the provider of the game.
The contents we provide on this site were created personally by members of the Game8 editorial department.
We refuse the right to reuse or repost content taken without our permission such as data or images to other sites.


![Everwind Review [Early Access] | The Shaky First Step to A Very Long Journey](https://img.game8.co/4440226/ab079b1153298a042633dd1ef51e878e.png/thumb)

![Monster Hunter Stories 3 Review [First Impressions] | Simply Rejuvenating](https://img.game8.co/4438641/2a31b7702bd70e78ec8efd24661dacda.jpeg/thumb)


