Withering Garden Guide
☆ New: Tier List Maker & Co-Op Board!
★ 2.7: Nangong Yu, Cissia, & 2.7 Livestream
☆ 2.6 Phase 1: Sunna & Yixuan
★ 2.6 Phase 2: Aria & Yuzuha
☆ Tier Lists: Agents | W-Engines | Bangboos | Teams
★ Redeem Codes for free Polychromes!
Withering Garden is the fifth zone of Hollow Zero in Zenless Zone Zero (ZZZ). See how to unlock Withering Garden, detailed walkthrough, stage info, best characters, best Resonia, and rewards here!
| Hollow Zero Withered Domain Guides | ||
|---|---|---|
 Qualification Assessment Qualification Assessment |
 Old Capital Metro Old Capital Metro |
 Construction Ruins Construction Ruins |
 Abandoned Skyscraper Abandoned Skyscraper |
 Withering Garden Withering Garden |
 Inferno Reap Inferno Reap |
List of Contents
How to Unlock Withering Garden
Reach Inter-Knot Level 45
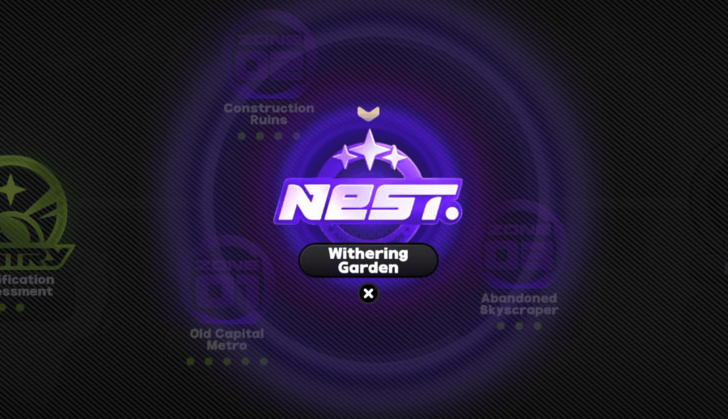
Withering Garden is considered Zone 5 or Nest of Hollow Zero, and you can unlock it after reaching Inter-Knot Level 45. Complete the Enchanting and Stunning, Withering Commission to access the Withering Garden zone with the Ether Activity modifier.
Withering Garden Best Characters
Hollow Zero Withered Domain Stage 5 Agents
| DPS | |
|---|---|
| Sub-DPS | |
| Stun | |
| Support |
Withering Garden Guide
Withering Garden Enemies
| Enemies | Weakness | Resistance |
|---|---|---|
| None | ||
| None | ||
| None | ||
| None | ||
| None | ||
| None | ||
| None | None |
Ether Activity
Ether Activity is a modifier that can make the Withering Garden more difficult in exchange for obtaining additional rewards such as Hi-Fi Master Copy, Ether Plating Agent, and Polychromes! Most modifiers are unavailable initially, and you must activate and clear the set before them to unlock them.
Exploration Mode
| # | Ether Activity |
|---|---|
| 1 | Normal and elite enemies' ATK increased by 50%. |
| 2 | All items in the store become 50% more expensive. |
| 3 | Gain 50 Pressure upon entering a new floor. |
| 4 | Elite and boss enemies gain 30% additional Max HP and Anomaly Buildup RES. |
| 5 | Bosses gain increased ATK over time, up to 100%. |
| 6 | Reduces HP recovery and Pressure reduction by 35%. |
| 7 | Bosses have 50% higher max Daze and recover from Stun 100% faster. |
| 8 | [Chance Encounter] A series of events entailing unavoidable risks. |
| 9 | Agents take 50% more DMG when holding fewer than 1,500 Gear Coins. |
| 10 | Attacks from elite and boss enemies reduce characters' Energy and Decibels |
| 11 | All enemies are enhanced in all aspects. |
Blitz Mode
| # | Ether Activity |
|---|---|
| 1 | Increases ATK of all enemies by 50%. |
| 2 | Increases max Daze of all enemies by 30%. |
| 3 | Elites no longer display gold or red flash indicators when attacking. |
| 4 | Increases Anomaly RES of all enemies by 40%. |
| 5 | Energy generation rate for Agents on-field is reduced by 40%. |
| 6 | Agents consume one additional Assist Point when triggering Perfect Assists. |
| 7 | Bosses gain increased ATK over time, up to 200%. |
| 8 | Bosses have 30% higher max Daze and recover from Stun 50% faster. |
| 9 | Energy Regen of off-field Agents is reduced by 50%. |
| 10 | Normal and elite enemies will be upgraded to their elite forms. |
| 11 | All enemy stats have been enhanced. |
Exploration Mode Walkthrough
Exploration Mode Floor 1 Walkthrough
| # | Floor 1 Walkthrough |
|---|---|
| 1 | 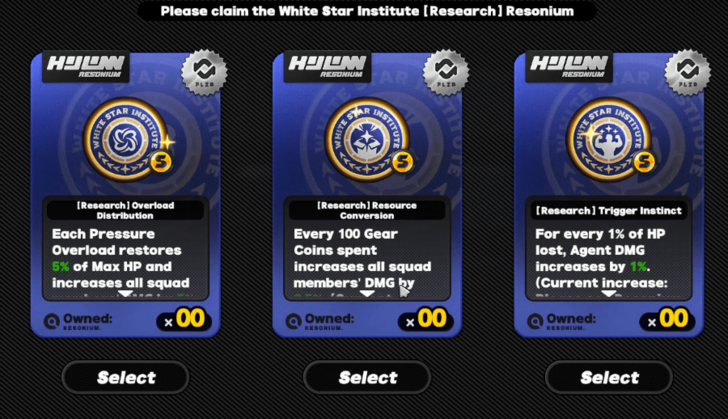 You will start the stage by picking one of the three Research Resonia, which are the [Research] Trigger Instinct, [Research] Overload Distribution, and [Research] Resource Conversion. Choose whichever you think suits your playstyle better. |
| 2 | 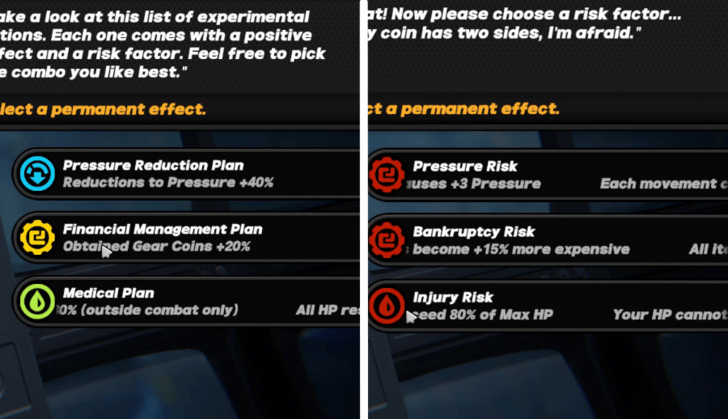 The suspicious people from each Hollow Zero zone will appear together after picking your Research Resonia, offering a permanent buff and debuff. Try to match your selection based on your Research Resonium to get more value out of it. |
| 3 |  You will start the stage on an area similar to Abandoned Skyscraper, which you can only choose one path over the other until you reach the exit and gain access to the next floor. |
| 4 | 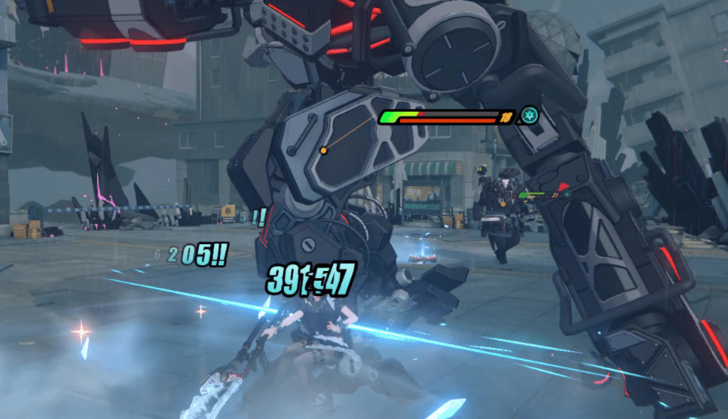 At the exit, you will fight at least two boss enemies before you can get to the next floor. ▶ Withering Garden Enemies |
Exploration Mode Floor 2 Walkthrough
| # | Floor 2 Walkthrough |
|---|---|
| 1a |  Just like other zones in Hollow Zero, you will begin in a safe area at the start of Floor 2. You will also meet the three suspicious people from the first floor in this area, offering you a service that comes with a "Risk Factor". |
| 1b | 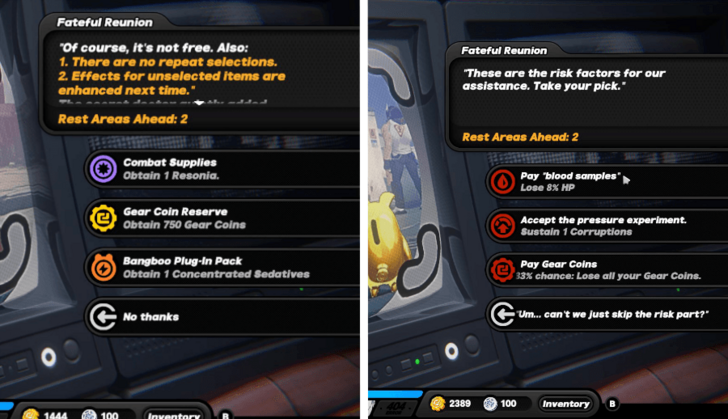 The helpful items you can pick are random for each run, but the risk factor in exchange for that is fixed. You can either lose a portion of your Gear Coins, lose some HP, or sustain Corruptions. You can avoid the risk factor for one time, but it's best to save it for the last floor or rest area. |
| 2 |  Collect all other rewards before heading to the transmission and then to the next area. You can also get the ones on the right if you cleared the previous floor with an S-rating! |
| 3 |  The next area that will appear is random, but you can expect it to be similar to one of the stages you cleared before. Move around the tiles and try to get the most rewards until you reach the exit. |
| 4 | 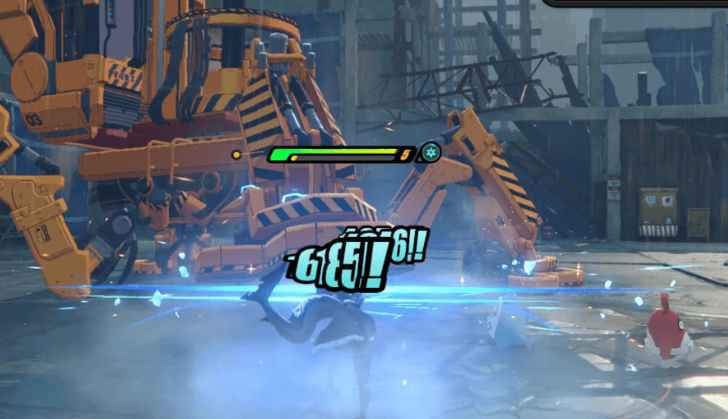 You will fight a boss enemy at the end of the floor. Note that you might fight two or three enemies at once. ▶ Withering Garden Enemies |
Exploration Mode Floor 3 Walkthrough
| # | Floor 2 Walkthrough |
|---|---|
| 1 |  You will end up in a safe area again after getting out of Floor 2. You will reunite with the trio again and offer you the ones you didn't choose in floor 2. However, the risk factor you have to take will increase. |
| 2 |  Get all the other items in the area before going to the next area via the transmission. Don't forget to claim the ones on the right if you cleared Floor 2 with an S-rating! Get all the other items in the area before going to the next area via the transmission. Don't forget to claim the ones on the right if you cleared Floor 2 with an S-rating! |
| 3a | 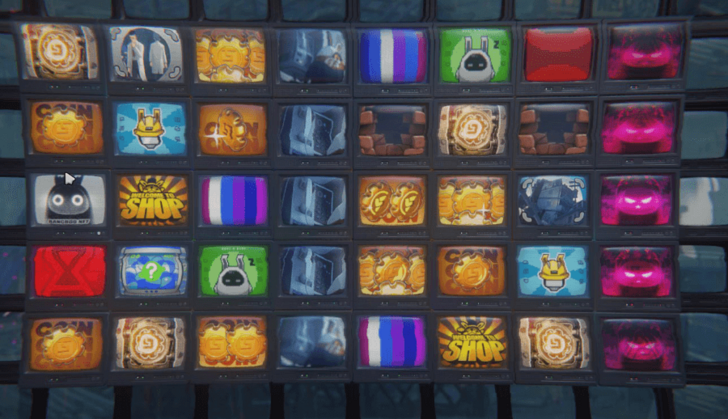 Same as Floor 2, the next area will be random but will be the similar with the ones on other zones or stages. Always take the path that is most beneficial for your squad to be strong enough to beat the final boss. |
| 3b | 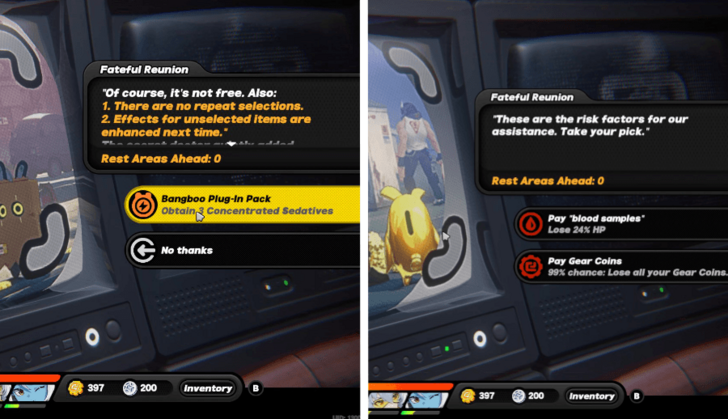 The next area will be another safe zone. You will meet the trio for the last time and offer you the last item that you didn't pick from the selection before. If you still have the "Can we just skip this part" option, it's best to use it now as the risk factor will be the highest here. |
| 4 | 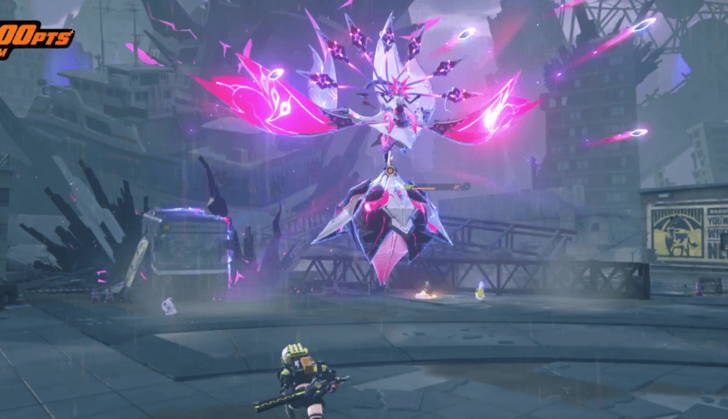 Head to the transmission and move towards the floor exit. Fight and defeat Nineveh and her minions to clear the stage and get its rewards! ▶ How to Beat Nineveh |
Blitz Mode Walkthrough
Wave 1 Battle Flow
| Encounter | Enemies |
|---|---|
| 1 |  Normal Enemy Mob Battle Normal Enemy Mob BattleResonia Selection x1 |
| 2 |  Elite Enemy Battle x1 Elite Enemy Battle x1Resonia Selection x2 |
| 3 |  Gatekeeper Battle Gatekeeper BattleBoss x1 + Elite Enemy x1 Resonia Selection x2 |
| 4 | Resonium Supply Selection (1 Catalyzed Resonia Set of a specific specialization) |
The first wave will start with a mob of random enemies. Quickly take them out, select your desired Resonia, then move out. The next battle will be against a singular Elite Enemy. Once defeated, select your Resonia again, then proceed to the next area.
The last area will be a Gatekeeper Battle. Defeating Gatekeeper Bosses will allow you to proceed to the next area. Take out any distractions by focusing on the Elite Enemy first, then go all-out on the boss!
Wave 2 Battle Flow
| Encounter | Enemies |
|---|---|
| 1 |  Elite Enemy Battle x1 Elite Enemy Battle x1Resonia Selection x1 |
| 2 |  Elite Enemy Battle x2 Elite Enemy Battle x2Resonia Selection x2 |
| 3 |  Gatekeeper Battle Gatekeeper BattleBoss x1 Resonia Selection x2 |
| 4 | Resonium Supply Selection (1 Catalyzed Resonia Set of a specific specialization) |
| 5 |
 Nineveh Nineveh
Final Boss Resonia Selection x1 |
The second wave will consist of one difficult battle after another, pitting you against Elite Enemies. Be sure to select your Resonia after each battle!
The Gatekeeper Boss may be an Expert Challenge boss or a Notorious Hunt boss, so be prepared for anything! Once all of them are done for, it's time to face Nineveh for one final battle.
Recommended Resonia
Get Freeze, Electric, or Ether Resonia
| Resonia | Effects |
|---|---|
|
|
Agent Ice DMG increases by 15% |
|
Upon triggering Shatter, the Agent inflicts additional Daze equal to 140% of Impact on the target if the target is not Stunned. |
|
Freezing an enemy increases the Agent's DEF by 5%, stacking up to 4 times. |
|
Launching an EX Special Attack grants the Agent 8 stacks of Ice Mark. |
|
When an Ultimate hits an enemy and deals Ice DMG, the Agent gains 36 stacks of Ice Mark. |
|
Freezing an enemy increases all squad members' CRIT DMG by 40% for 15s. |
|
Shatter DMG increases by 50%. When Shatter is triggered, hitting enemies increases the Agent's Ice Anomaly Buildup Rate by 20% for 5s. |
|
Triggering Shatter leaves an icy mist that lasts 10s. This effect can trigger once every 10s. Ice DMG against enemies caught in the mist deal 80% more CRIT DMG. |
|
Freeze lasts 2s longer. |
|
Freezing an enemy grants all squad members 12 stacks of Ice Mark. |
|
Triggering Ice Mark increases the Agent's Ice Anomaly Buildup Rate by 30%. |
|
Agents with Zap deal 25% more Electric DMG. |
|
Dealing Electric DMG grants all squad members 1 stacks of Zap. This effect can trigger once every 3s. |
|
Inflicting Shock on an enemy grants all squad members 10 stacks of Zap. |
|
Agent Electric DMG increases by 15%. |
|
Agents deal 15% more DMG to Shocked enemies. |
|
Dealing Electric DMG triggers Jolt, inflicting Electric DMG equal to 1,200% of ATK. |
|
Hitting an enemy with an EX Special Attack grants all squad members 6 stacks of Zap. |
|
Increases the stack limit of Zap from 20 to 30. Dealing Electric DMG grants all squad members 1 stack of Zap. This effect can trigger once every 1s. |
|
Inflicting Shock on an enemy generates 10 Energy for all squad members. This effect can trigger once every 15s. |
|
Shock lasts 3s longer. |
|
Agents generate 3% Decibels upon hitting a Shocked enemy. This effect can trigger once every 10s. |
|
All squad members' Electric DMG increases by 10%. |
|
All squad members' Ether DMG increases by 15%. |
|
All squad members' Electric DMG increases by 15%. |
|
All squad members' Ice DMG increases |
|
All squad members' Ether DMG increases by 15%. |
|
All squad members' Ice DMG increases by 15%. |
|
Each point of Anomaly Proficiency increases the Agent's Ether DMG by 0.2%, up to a maximum increase of 30%. |
|
Corruption DMG increases by 40% |
|
Agents deal 30% more DMG to Corrupted enemies. |
|
Inflicting Corruption on an enemy grants 1 stack of Activity to all squad members. Corrupted enemies have their Ether Res reduced by 20%. |
|
Dealing Ether DMG to an enemy increases Attribute Anomaly DMG 50% against the target for 10s. |
|
Increases the chance for [Ether] Resonia to appear. |
|
Agent Ether DMG increases by 15%. |
|
Agent Ether Anomaly Buildup Rate increases by 15%. |
|
Launching a Chain Attack increases all squad members' Anomaly Proficiency by 25 for 15s. |
|
Corrupted enemies have their ATK reduced by 15%. |
|
Dealing Ether DMG grants all squad members 1 stack of Activity. This effect can trigger once every 10s. |
|
Launching an EX Special Attack grants 1 stack of Activity to all squad members. |
|
Corruption lasts 2s longer. |
|
Each Standard Ether type Resonium owned increases Agent Ether Anomaly Buildup Rate by 4%, up to a maximum increase of 32%. |
Most Resonia That Will Appear is Random
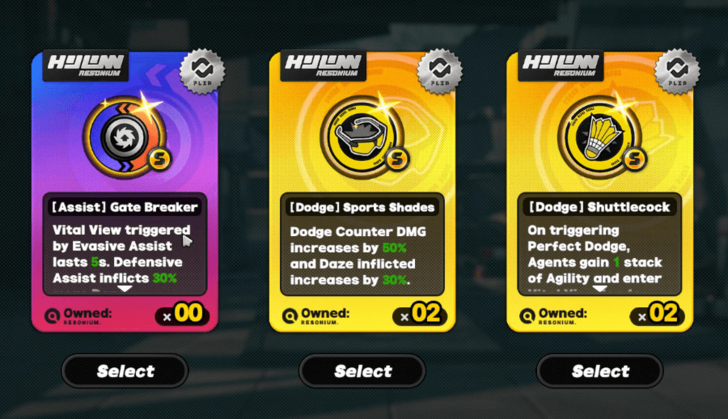
Most of the Resonia you will get are random unless they are indicated in the Shop or special event tiles. It means you won't have full control over which Resonia will appear, but you can always refresh it if you have unlocked Resonium Converters from the Combat Configuration!
Resonia in Blitz Mode
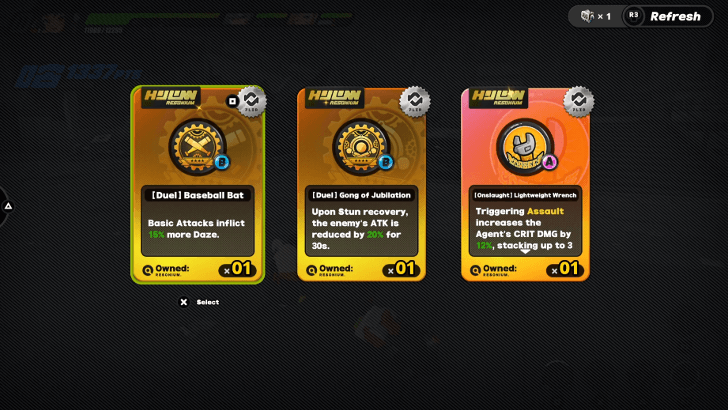
The Resonia in Blitz Mode are highly likely going to be aligned with the Agents you have selected. Though they may be random, the game will try to pair you up with your Agents' playstyles.
Should you have an Agent that excels in Dodge Counters, Dodge Resonia will be in the mix. If you have characters that rely on inflicting Assault, Onslaught Resonia will be offered to you.
Collect Inferno Reap Resonia Kit in Exploration Mode
When it comes to collecting Resonia for Inferno Reap, it's recommended that Proxies do so in Exploration Mode as opposed to Blitz Mode. The reason for this is that at most, you can only get 16-18 Resonia in the latter.
However, when exploring the Withering Garden manually, you will have access to multiple sources of Resonia, from Bangboo Merchants to event tiles. You may even keep Artifice Resonia in your kits, which can come in quite handy!
Withering Garden Rewards
First Clear Rewards
| First Clear Rewards |
|---|
|
|
The First Clear Rewards are the same for both Exploration Mode and Blitz Mode.
Regular Rewards
| Regular Rewards |
|---|
|
|
Ether Activity Exploration Mode Rewards
| Ether Activity 1 |
|
|---|---|
| Ether Activity 2 |
|
| Ether Activity 3 |
|
| Ether Activity 4 |
|
| Ether Activity 5 |
|
| Ether Activity 6 |
|
| Ether Activity 7 |
|
| Ether Activity 8 |
|
| Ether Activity 9 | |
| Ether Activity 10 | |
| Ether Activity 11 |
Ether Activity Blitz Mode Rewards
| Ether Activity 1 |
|
|---|---|
| Ether Activity 2 |
|
| Ether Activity 3 |
|
| Ether Activity 4 |
|
| Ether Activity 5 |
|
| Ether Activity 6 |
|
| Ether Activity 7 |
|
| Ether Activity 8 |
|
| Ether Activity 9 | |
| Ether Activity 10 | |
| Ether Activity 11 |
Zenless Zone Zero Related Guides

All Hollow Zero Game Modes
| Hollow Zero Modes | |
|---|---|
 Lost Void Lost Void |
 Withered Domain Withered Domain |
Lost Void Stages
| All Lost Void Stages | |
|---|---|
| Task Force Investigation | Perpetrator Battle |
| Shadow Operation | Battlefront Purge |
| Operation Matrix | - |
Withered Domain Stages
| All Withered Domain Stages | |
|---|---|
| Qualification Assessment | Old Capital Metro |
| Construction Ruins | Abandoned Skyscraper |
| Withering Garden | Inferno Reap |
Other Hollow Zero Guides
| Hollow Zero Upgrades and Mechanics | |
|---|---|
| Resonia | Corruption |
Comment
I just beat it that was intense but I cleared it with Jane btw. She carried me though delt most of the dmg and dodged most of the dmg. There no way my zhu yuan could carry this boss!
Author
Withering Garden Guide
improvement survey
03/2026
improving Game8's site?

Your answers will help us to improve our website.
Note: Please be sure not to enter any kind of personal information into your response.

We hope you continue to make use of Game8.
Rankings
Gaming News
Popular Games

Genshin Impact Walkthrough & Guides Wiki

Honkai: Star Rail Walkthrough & Guides Wiki

Umamusume: Pretty Derby Walkthrough & Guides Wiki

Pokemon Pokopia Walkthrough & Guides Wiki

Resident Evil Requiem (RE9) Walkthrough & Guides Wiki

Monster Hunter Wilds Walkthrough & Guides Wiki

Wuthering Waves Walkthrough & Guides Wiki

Arknights: Endfield Walkthrough & Guides Wiki

Pokemon FireRed and LeafGreen (FRLG) Walkthrough & Guides Wiki

Pokemon TCG Pocket (PTCGP) Strategies & Guides Wiki
Recommended Games

Diablo 4: Vessel of Hatred Walkthrough & Guides Wiki

Fire Emblem Heroes (FEH) Walkthrough & Guides Wiki

Yu-Gi-Oh! Master Duel Walkthrough & Guides Wiki

Super Smash Bros. Ultimate Walkthrough & Guides Wiki

Pokemon Brilliant Diamond and Shining Pearl (BDSP) Walkthrough & Guides Wiki

Elden Ring Shadow of the Erdtree Walkthrough & Guides Wiki

Monster Hunter World Walkthrough & Guides Wiki

The Legend of Zelda: Tears of the Kingdom Walkthrough & Guides Wiki

Persona 3 Reload Walkthrough & Guides Wiki

Cyberpunk 2077: Ultimate Edition Walkthrough & Guides Wiki
All rights reserved
Copyright © 2024 HoYoverse, COGNOSPHERE. All Rights Reserved.
The copyrights of videos of games used in our content and other intellectual property rights belong to the provider of the game.
The contents we provide on this site were created personally by members of the Game8 editorial department.
We refuse the right to reuse or repost content taken without our permission such as data or images to other sites.


![Everwind Review [Early Access] | The Shaky First Step to A Very Long Journey](https://img.game8.co/4440226/ab079b1153298a042633dd1ef51e878e.png/thumb)

![Monster Hunter Stories 3 Review [First Impressions] | Simply Rejuvenating](https://img.game8.co/4438641/2a31b7702bd70e78ec8efd24661dacda.jpeg/thumb)


I'm f2p and dont have good S rank agents, i beat this only using billy (worst agent according to this site, but my favorite one!), rina, and anby, and everyone at lv 50. Quite hard but doable, far from. And got S rank on first try. Perhaps you're just bad at this game? This thing is nowhere as hard as consort radahn pre nerf if you know who is this.