This survey will take about 1 minute.
Your answers will help us to improve our website.
Zenless Zone Zero (ZZZ)
Construction Ruins Guide
☆ New: Tier List Maker & Co-Op Board!
★ 2.7: Nangong Yu, Cissia, & 2.7 Livestream
☆ 2.6 Phase 1: Sunna & Yixuan
★ 2.6 Phase 2: Aria & Yuzuha
☆ Tier Lists: Agents | W-Engines | Bangboos | Teams
★ Redeem Codes for free Polychromes!
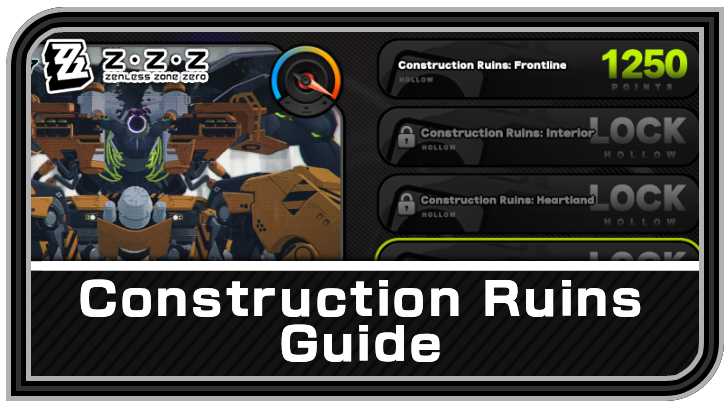
Construction Ruins is the third accessible zone in Hollow Zero. Learn how to unlock Construction Ruins, details for each stage, the best characters, and all its rewards!
| Hollow Zero Withered Domain Guides | ||
|---|---|---|
 Qualification Assessment Qualification Assessment |
 Old Capital Metro Old Capital Metro |
 Construction Ruins Construction Ruins |
 Abandoned Skyscraper Abandoned Skyscraper |
 Withering Garden Withering Garden |
 Inferno Reap Inferno Reap |
List of Contents
How to Unlock Construction Ruins
Finish Chapter 2, Old Capital Metro Edge, and Street Lost to Memory
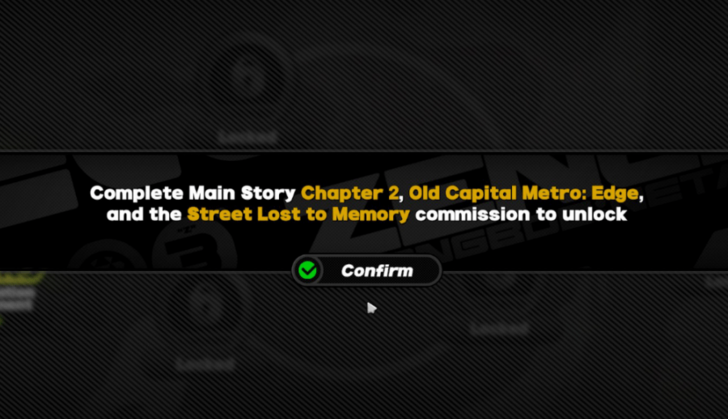
You can only unlock Construction Ruins after finishing Chapter 2, clearing Old Capital Metro: Edge, and completing Street Lost to Memory commission.
Talk to Ray at Scott Outpost after doing all of those to officially unlock the Construction Ruins.
Construction Ruins Best Characters
Hollow Zero Withered Domain Stage 3 Agents
| DPS | |
|---|---|
| Sub-DPS | |
| Stun | |
| Support |
These are the best Agents to use for the Construction Ruins stage in Withered Domain.
Construction Ruins Core Guide
Construction Ruins Core Enemies
| Enemies | Weakness | Resistance |
|---|---|---|
| None | ||
Construction Ruins Core Floor 1 Walkthrough
| # | Floor 1 Walkthrough |
|---|---|
| 1 | 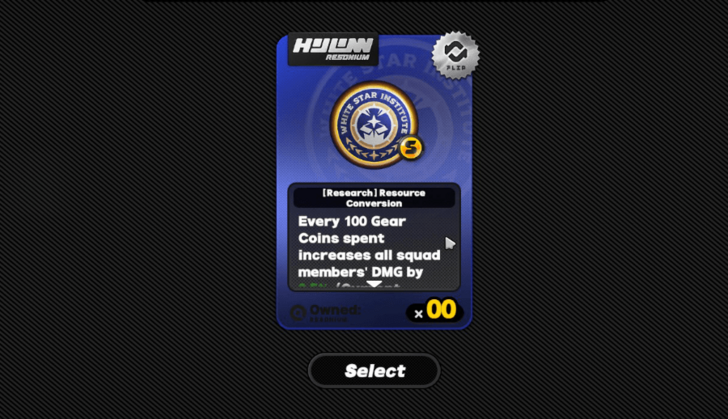 You will start this stage with a [Research] Resource Conversion Resonium which boosts your damage every time you spend 100 Gear Coins. It will make spending Gear Coins on your run more beneficial because of that! |
| 2 |  The Opportunist will appear after that, offering loaning services with interest. You can accept the offer to get more Gear Coins, increasing your spending power at the start. |
| 3a |  After talking to The Opportunist, you will spawn in an area that contains a five-row of tiles you can travel around with. However, moving to a different tile will cause the tiles opposite to your direction to disappear, limiting the playing area. This will be the pattern for Floor 2 and Floor 3 as well! |
| 3b | 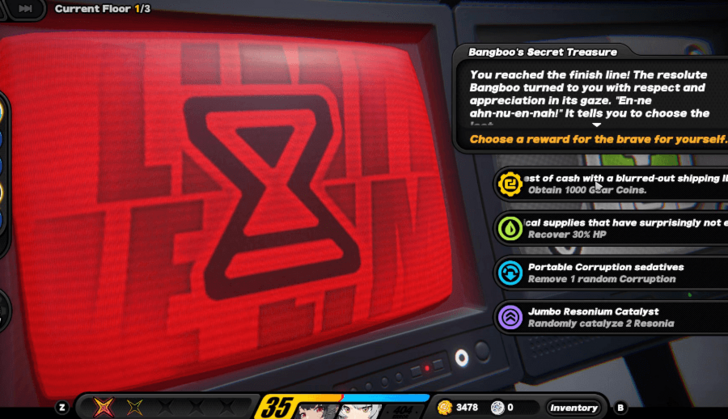 Each run will be different so try to path your way on the tiles with the most items or power-ups. Doing so will make it easier and faster for you to finish the stage. |
| 4 | 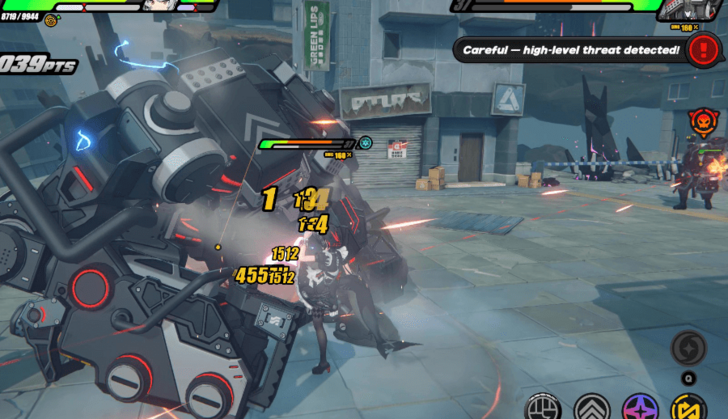 Keep moving to the right until you reach the exit. You will need to fight and defeat the Typhon Slugger and Assault Gunner to get to the next floor. |
Construction Ruins Core Floor 2 Walkthrough
| # | Floor 2 Walkthrough |
|---|---|
| 1 | 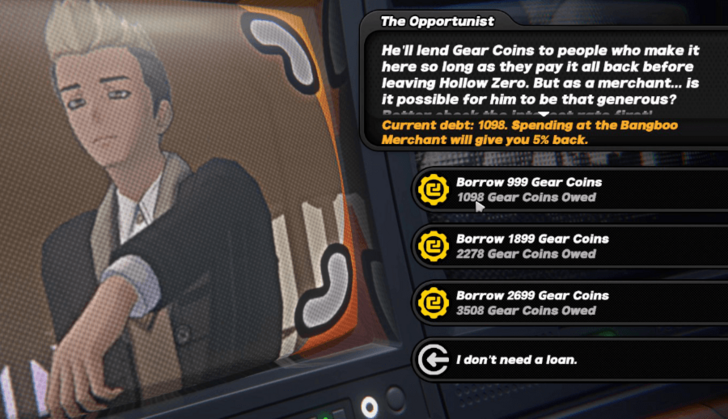 You will start Floor 2 in a safe area where you can meet The Opportunist again. You can borrow Gear Coins from him and get additional services like random resonium, heal, and reduce pressure. |
| 2 | 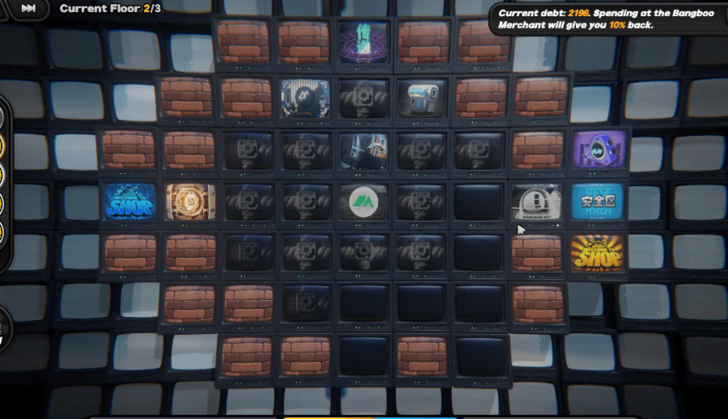 Explore the area after talking to The Opportunist and get all the rewards you can get, including the ones on the right if you get an S rating or grade from the previous floor! Head to the transmission after to proceed to the next area. |
| 3 | 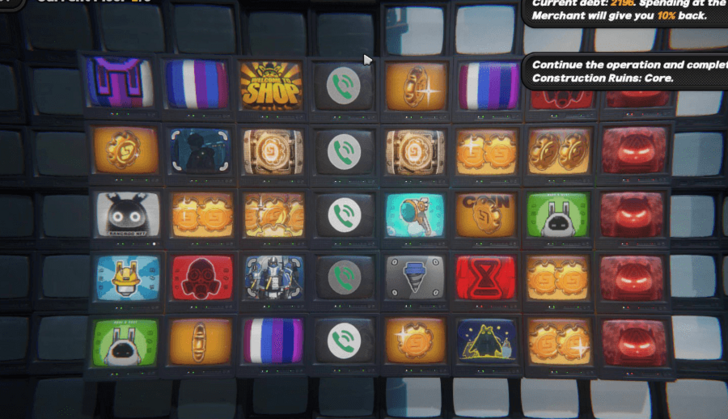 You will spawn in a similar area in Floor 1, where the tiles opposite to where you move will disappear. Scan the area and look for the best path to take to get more items. Keep moving until you reach the exit! |
| 4 |  You will need to defeat Friday - Energized at the exit to reach the final floor. |
Construction Ruins Core Floor 3 Walkthrough
| # | Floor 3 Walkthrough |
|---|---|
| 1 | 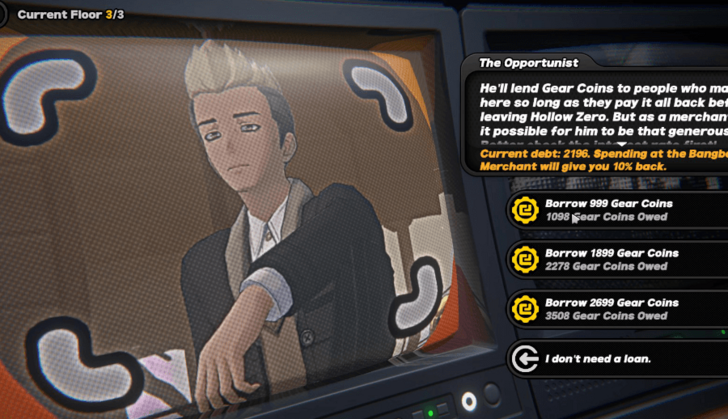 Similar to Floor 2, you will start in a safe area where you can talk to The Opportunist again to borrow Gear Coins and his other services. |
| 2 |  Get to all the tiles after talking to The Opportunist to get all the items and rewards before moving on to the final area. You can also get the rewards on the right side if you finish Floor 2 with an S rating. |
| 3a | 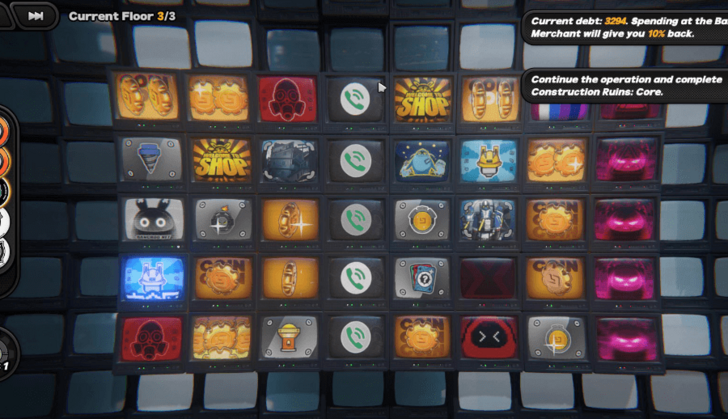 Head to the transmission to spawn in the final area. It will have the same mechanics as the first and second floor, so observe and try to move to the best path you can take for more rewards! |
| 3b | 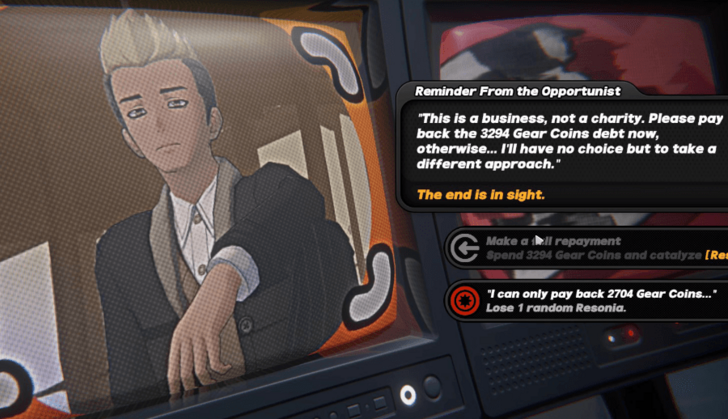 The Opportunist will be waiting at the end near the exit. It will be the time to pay your debt, or you will lose several Resonia depending on the value of your debt. |
| 4 | 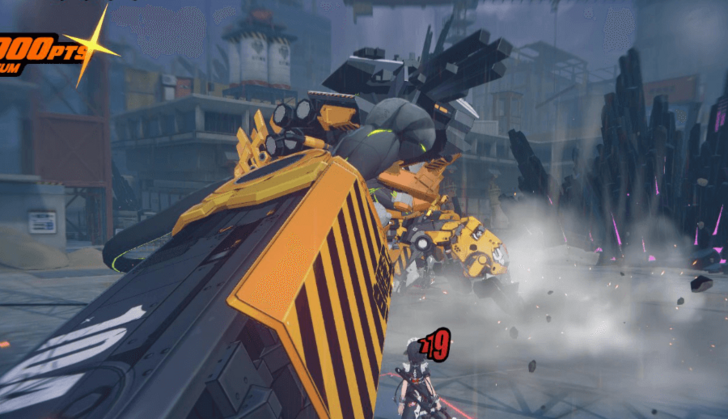 At the exit, fight and defeat the Unknown Corruption Complex to complete the stage and get its rewards! |
Construction Ruins Heartland Guide
Construction Ruins Heartland Enemies
| Enemies | Weakness | Resistance |
|---|---|---|
| None | ||
Construction Ruins Heartland Floor 1 Walkthrough
| # | Floor 1 Walkthrough |
|---|---|
| 1 |  You will start off with a [Research] Resource Conversion Resonium that will increase your party's damage depending on how many Gear Coins you spend. You will also get a random set of Resonium that you can pick from. |
| 2 |  After that, The Opportunist will show up and offer loaning services. You can borrow Gear Coins from him and get a free Resonium from him. You can also reject his offer if you want! |
| 3a | 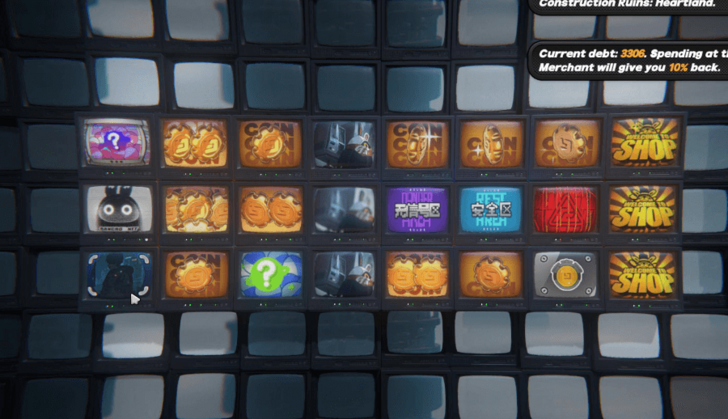 The first area will consist of tiles with three rows. Moving around will cause the opposite row or column, based on your direction, to be destroyed, giving you limited options on how to go around the area. |
| 3b | 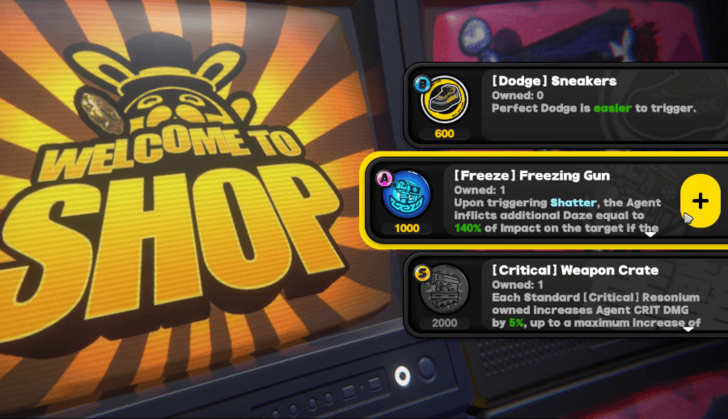 There will be tons of Event Tiles, Shops, and Gear Coins in the area, so be sure to path your way wisely to get all your desired power-ups or rewards! |
| 4 | 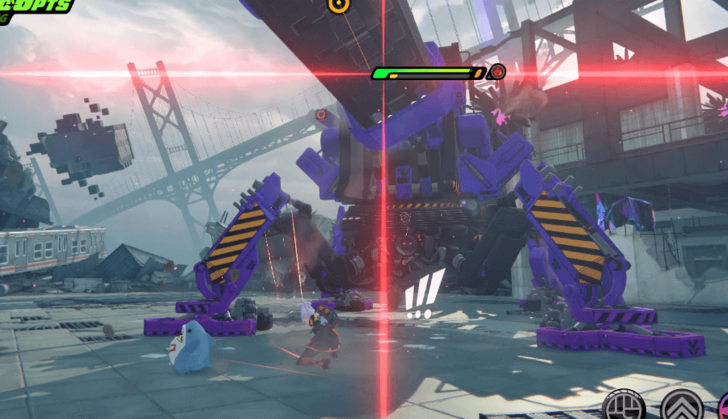 Move until you reach the end to the right to reach the exit. Beat Greta - Overclocked and proceed to the next floor. |
Construction Ruins Heartland Floor 2 Walkthrough
| # | Floor 2 Walkthrough |
|---|---|
| 1 | 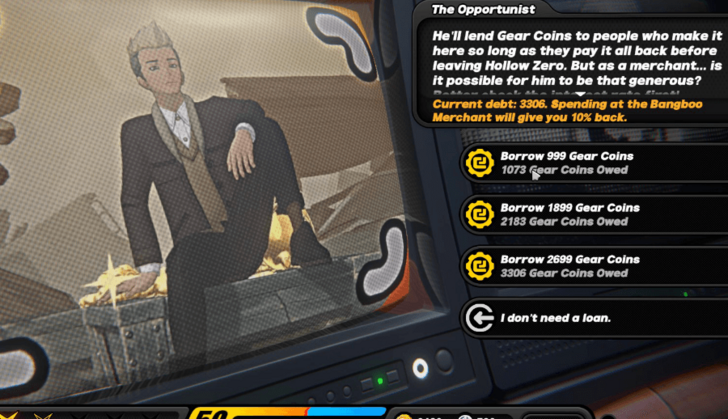 You will meet The Opportunist again and will ask if you want to borrow Gear Coins again. He will also offer a free service, which is either heal your squad or remove pressure, regardless of whether you borrow Gear Coins or not. |
| 2 | 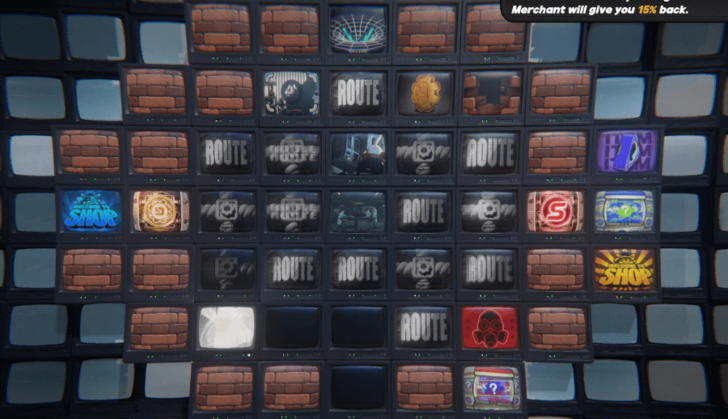 After talking to him, explore the surroundings and try to get as many items as you can to strengthen your squad. Don't forget to get the rewards on the right if you finish Floor 1 with an S rating! |
| 3a |  Head to the transmission to enter the next area. It will be similar to Floor 1's first area, where rows or columns disappear depending on how you move. The only thing changed is that there are now five rows you can work around with. |
| 3b | 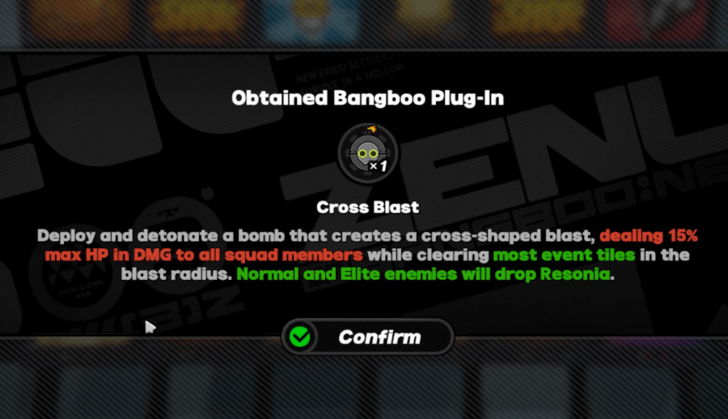 There will also be new Event Tiles, more Shops, vaults, more enemies, and Gear Coins. Work around those tiles carefully to get more items and rewards! |
| 4 | 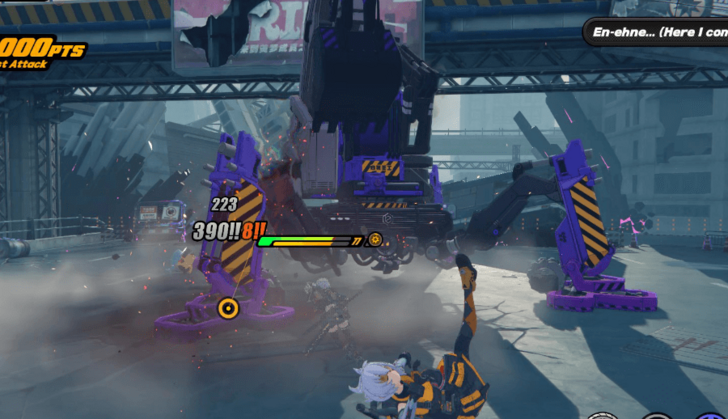 Defeat Hans - Overclocked once your reach the exit. It will be your ticket to the last floor. |
Construction Ruins Heartland Floor 3 Walkthrough
| # | Floor 3 Walkthrough |
|---|---|
| 1 | 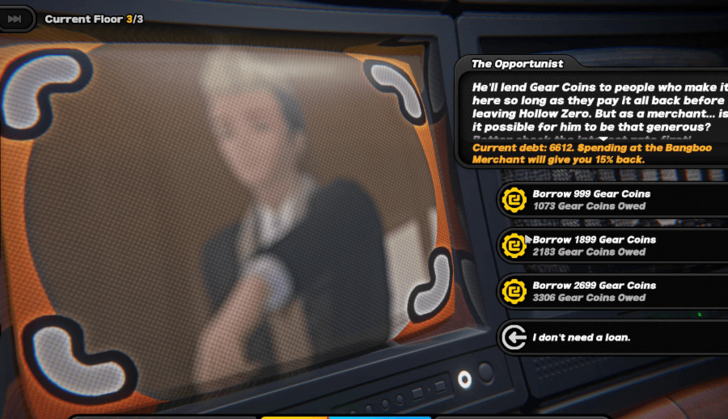 Same with Floor 2, you will meet The Opportunist at the start of Floor 3. He will offer the same thing as well, but it's best not to borrow Gear Coins at this point, as you might not be able to pay them back in time. |
| 2 | 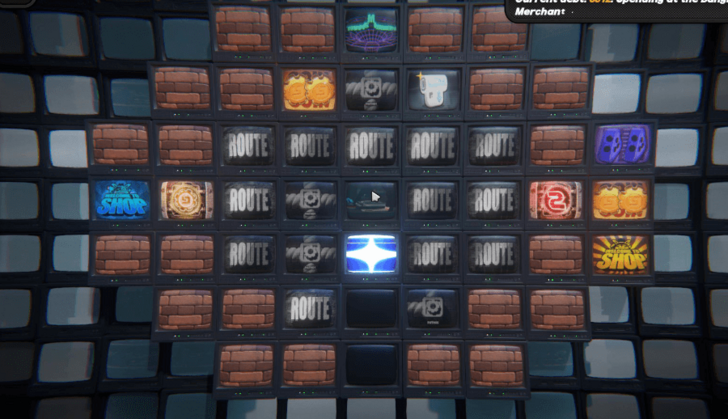 Collect all the rewards and items around the area before heading to the transmission and to the next area. Remember to claim the rewards on the right if you get an S rating in the previous floor! |
| 3a | 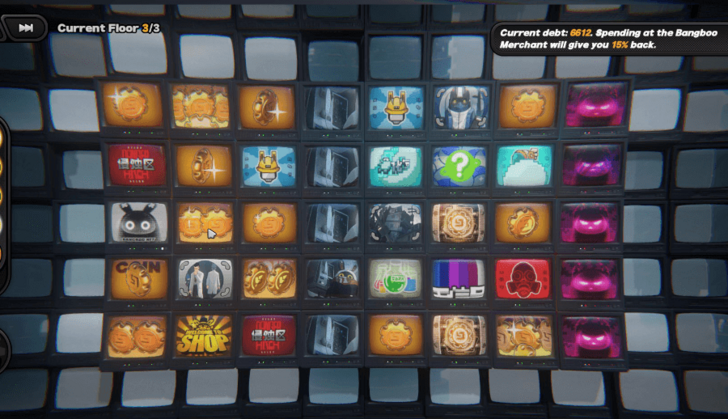 Similar to Floor 2, it will have a 5-row layout, but the tiles will be different. It will also have the same mechanic where the tiles will disappear depending on which direction you move, limiting your options. |
| 3b |  You will meet The Opportunist a tile before the floor exit. It will now be time to pay your debt, or you will lose several Resonium. |
| 4 |  After talking to him, head over to the exit and fight Unknown Corruption Complex. Defeat it to clear the stage! |
Construction Ruins Interior Guide
Construction Ruins Interior Enemies
| Enemies | Weakness | Resistance |
|---|---|---|
| None | ||
Construction Ruins Interior Floor 1 Walkthrough
| # | Floor 1 Walkthrough |
|---|---|
| 1 | You will get a [Research] Resource Conversion before starting the stage. It will increase your party's damage for every 100 Gear Coins you spend. You can also choose from a random set of Resonium after that. |
| 2a | 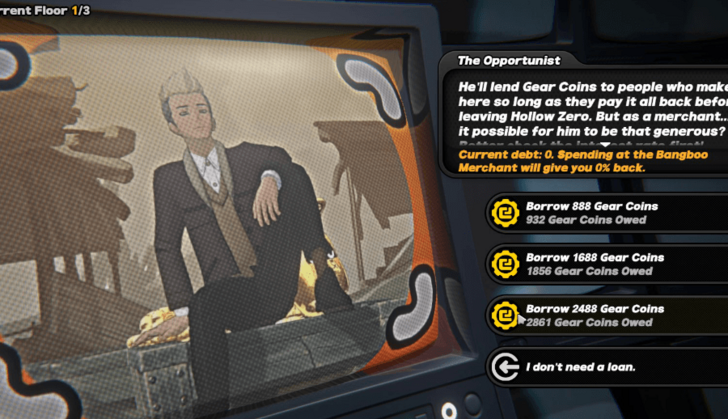 The Opportunist will appear after getting your free Resonium, offering loaning services. You can borrow Gear Coins for him or ignore his offer entirely. |
| 2b | Borrowing Gear Coins will increase your spending power in the early part of the stage. Just remember to pay it off at Floor 3 before the final exit, or you will lose several Resonium. |
| 3a | 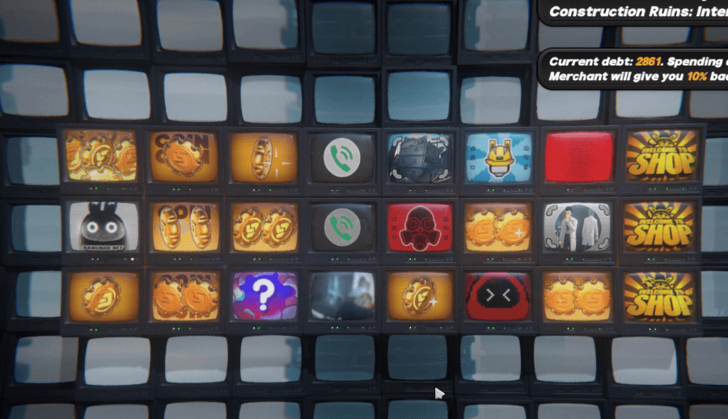 You will spawn after the event in an area with a three-row path. The tile rows or columns will disappear depending on how you move around. |
| 3b | Moving up or down will destroy the row opposite to your direction. Moving to the right will destroy the column on the left. This means you won't be able to go back once you've picked a direction, so path your way wisely! |
| 4 |  Move around the area until you reach the Shop at the end. Spend some Gear Coins or just save them for the next area to get value out of the Research Resonium. |
| 5 |  The same rule will apply to this newly unlocked area. However, you won't be able to avoid fighting enemies this time. |
| 6 |  Head to the exit at the end and beat the floor bosses, which are two Guardian MK II, to proceed to the next one. |
Construction Ruins Interior Floor 2 Walkthrough
| # | Floor 2 Walkthrough |
|---|---|
| 1 | 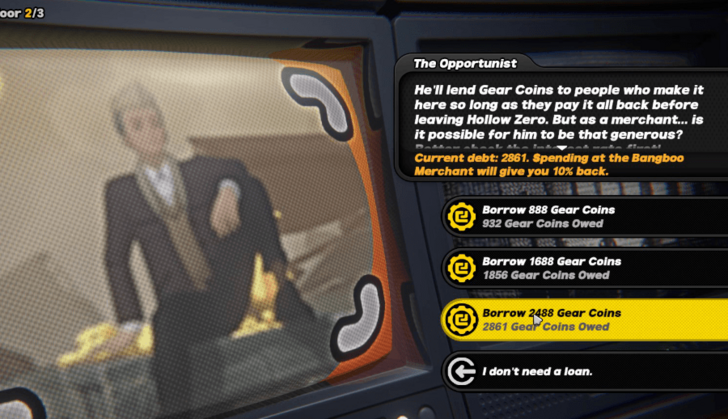 Talk to The Opportunist blocking the way to get more Gear Coins or ignore his offer and pass through. He will also offer other services this time at the cost of HP or Gear Coins. |
| 2 | 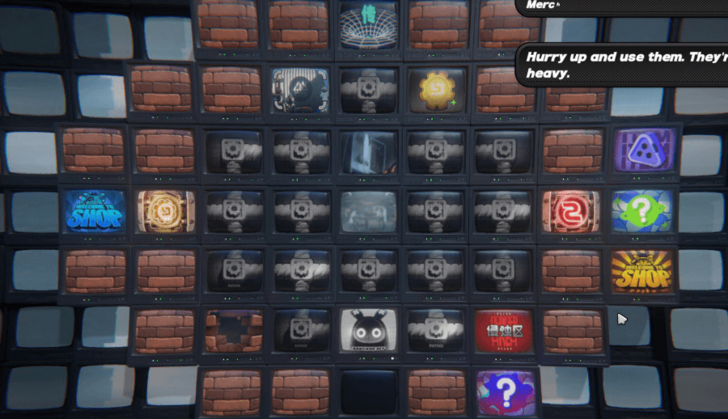 Explore the area and collect all the reward tiles before proceeding to the next area. You can claim the rewards on the right if you clear the first floor with an S grade. You can also destroy breakable walls for additional rewards, if there are any. |
| 3 | 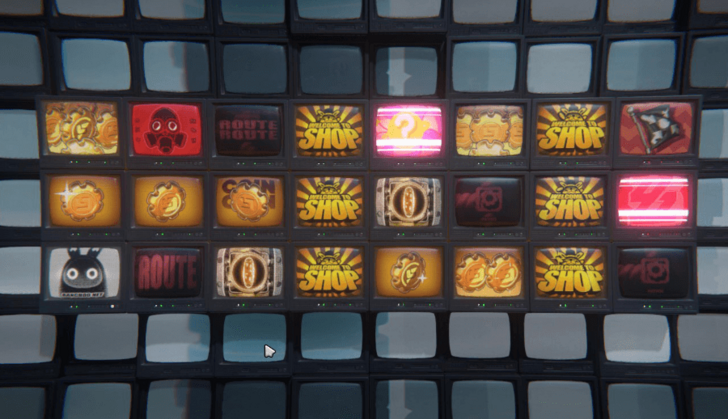 The next area will be the same as the ones on the first floor. The thing that is different this time is the vault, additional event tiles, and an enemy at the end of the first part instead of the Shop. |
| 4 |  Move through the tiles and collect all the things you deemed necessary until you reach the floor exit. Defeat Greta - Overclocked to proceed to the final floor. |
Construction Ruins Interior Floor 3 Walkthrough
| # | Floor 3 Walkthrough |
|---|---|
| 1 |  The start of Floor 3 is very similar to that of Floor 2. Talk to The Opportunist and explore the area to get rewards before heading to the final area. |
| 2 | 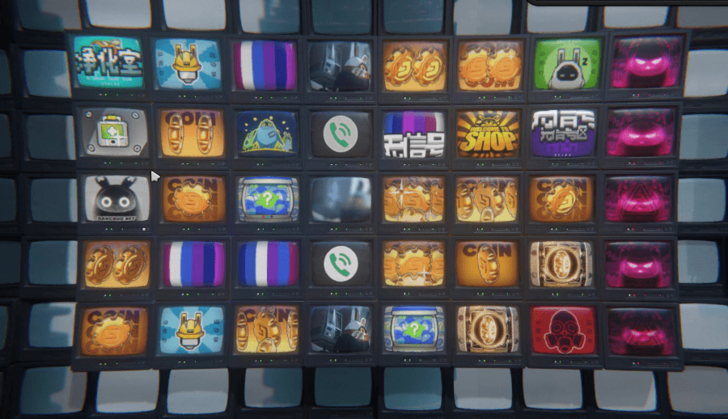 The final area of this floor is also similar to Floor 1 and 2. The area will change depending on how you move, but you will have more options on where to go than the previous ones, as there are now five rows. |
| 3 | 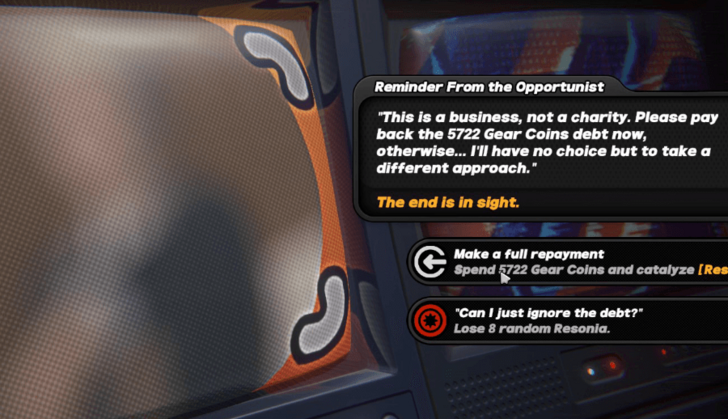 The Opportunist will be waiting next to the exit. You will need to pay your debt on this part, or else you will lose several Resonium. You can also spend more Gear Coins on him if you have some to spare, as you won't be able to use them anymore. |
| 4 |  You will face the Unknown Corruption Complex at the exit. Defeat it to complete the stage and obtain its rewards! |
Construction Ruins Frontline Guide
Construction Ruins Frontline Enemies
| Enemies | Weakness | Resistance |
|---|---|---|
| None |
Construction Ruins Frontline Floor 1 Walkthrough
| # | Floor 1 Walkthrough |
|---|---|
| 1 | 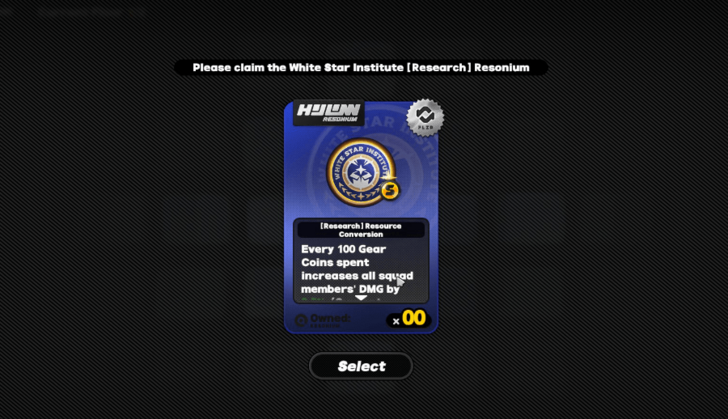 You will start the stage with a [Research] Resource Conversion and a random set of Resonium right off the bat. The Research Resonium will increase your damage by a certain percent for each 100 Gear Coins you spend. |
| 2a | 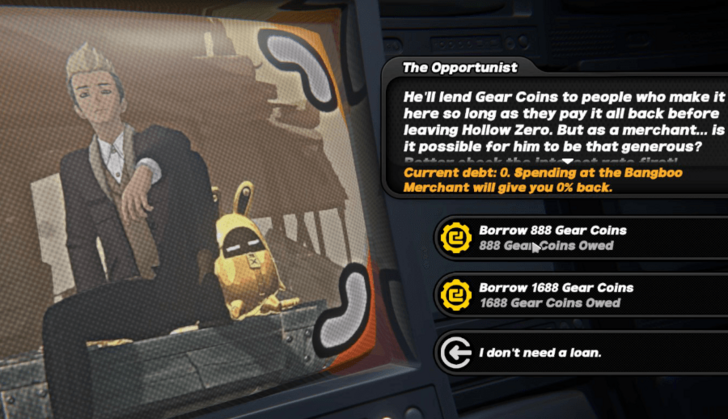 After getting the free rewards, you will meet The Opportunist. He will let you borrow Gear Coins that you will have to pay for later before fighting the final boss. You have the choice to ignore and reject his offer. |
| 2b | Borrowing Gear Coins from The Opportunist comes with positive and negative effects. You will get back some Gear Coins for buying in the shop and receive a free Resonium. If you're unable to pay that amount, you will lose a number of Resonium depending on your current debt. |
| 3 | 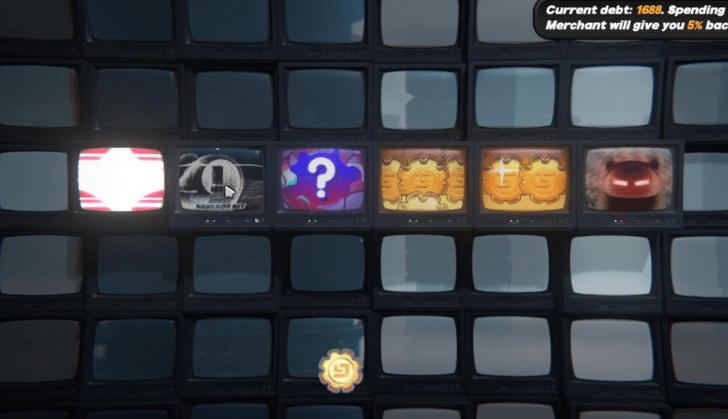 Follow the linear path to the right until you defeat the enemy at the end. You will receive Gear Coins, an Artifice Resonium (optional), and a character along the way. |
| 4 | 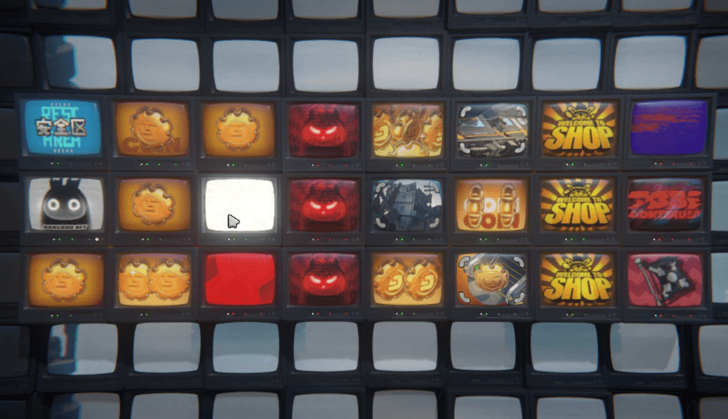 The next area will have 3 paths you can take to reach the exit. However, moving around the tile will make a path become inaccessible. |
| If you move a step to the right, the column you where standing before will be removed. If you move up or down, the previous row that you were standing on before will disappear. | |
| 5 | 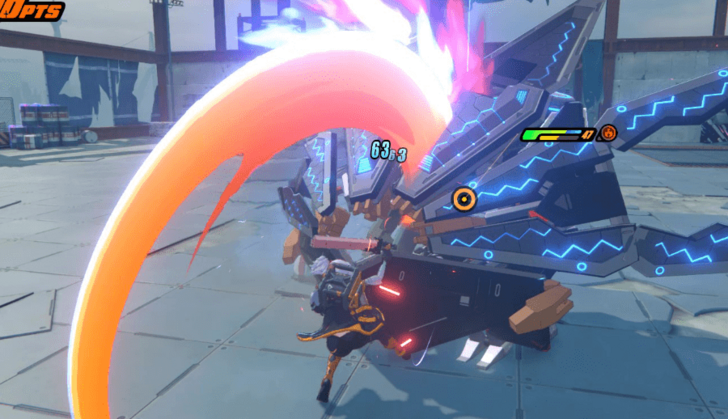 Fight the Guardian MK II at the exit to proceed to the next floor. |
Construction Ruins Frontline Floor 2 Walkthrough
| # | Floor 2 Walkthrough |
|---|---|
| 1 | 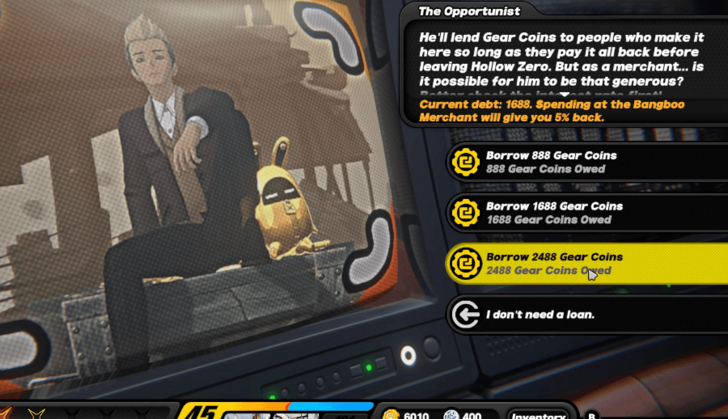 You will be blocked by The Opportunist at the start of Floor 2. You can borrow more Gear Coins, get additional resources, or ignore all his offers. |
| 2 | 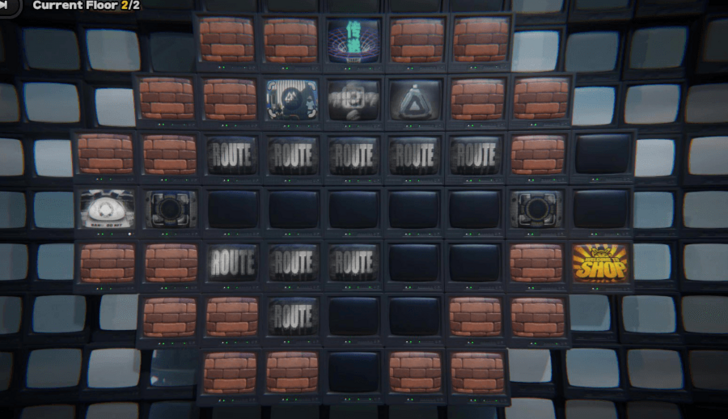 Collect all the rewards after talking to The Opportunist before proceeding to the last area using the transmission tile. Make sure to also claim the rewards on the right if you finish the first floor with an S grade. |
| 3a |  There will be three paths to choose from in the last area that similar to the disappearing tiles area in the first floor. After getting to the end, a similar area will spawn, but with five paths this time. |
| 3b | 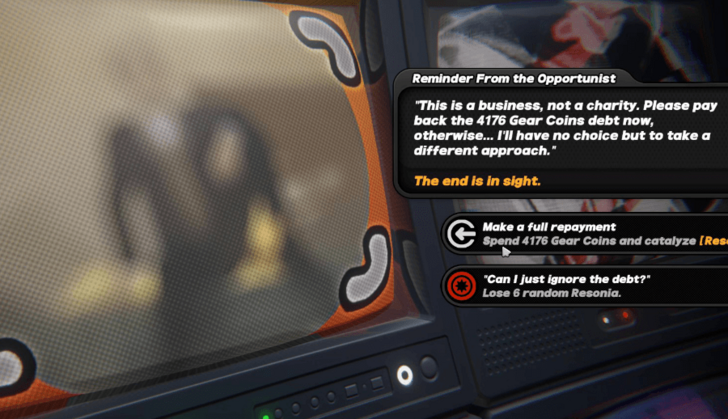 You will meet The Opportunist again before reaching the exit. You will have to pay him your debt, or he will take several Resonium from you. |
| 4 | 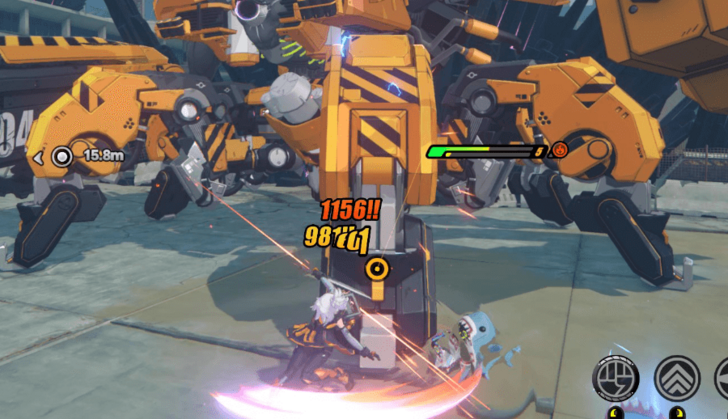 Defeat the Unknown Corruption Complex at the exit to complete the stage. |
Construction Ruins Recommended Resonia
Use Electric and Ether Resonia
The Electric and Ether Resonia are the best to use as their attributes are effective against most of the enemies in Construction Ruins. These Resonia will boost the Characters of the same attribute as well!
| Resonia | Effects |
|---|---|
|
|
Agents with Zap deal 25% more Electric DMG. |
|
Dealing Electric DMG grants all squad members 1 stacks of Zap. This effect can trigger once every 3s. |
|
Inflicting Shock on an enemy grants all squad members 10 stacks of Zap. |
|
Agent Electric DMG increases by 15%. |
|
Agents deal 15% more DMG to Shocked enemies. |
|
Dealing Electric DMG triggers Jolt, inflicting Electric DMG equal to 1,200% of ATK. |
|
Hitting an enemy with an EX Special Attack grants all squad members 6 stacks of Zap. |
|
Increases the stack limit of Zap from 20 to 30. Dealing Electric DMG grants all squad members 1 stack of Zap. This effect can trigger once every 1s. |
|
Inflicting Shock on an enemy generates 10 Energy for all squad members. This effect can trigger once every 15s. |
|
Shock lasts 3s longer. |
|
Agents generate 3% Decibels upon hitting a Shocked enemy. This effect can trigger once every 10s. |
|
All squad members' Electric DMG increases by 10%. |
|
All squad members' Ether DMG increases by 15%. |
|
All squad members' Electric DMG increases by 15%. |
|
All squad members' Ether DMG increases by 15%. |
|
Each point of Anomaly Proficiency increases the Agent's Ether DMG by 0.2%, up to a maximum increase of 30%. |
|
Corruption DMG increases by 40% |
|
Agents deal 30% more DMG to Corrupted enemies. |
|
Inflicting Corruption on an enemy grants 1 stack of Activity to all squad members. Corrupted enemies have their Ether Res reduced by 20%. |
|
Dealing Ether DMG to an enemy increases Attribute Anomaly DMG 50% against the target for 10s. |
|
Increases the chance for [Ether] Resonia to appear. |
|
Agent Ether DMG increases by 15%. |
|
Agent Ether Anomaly Buildup Rate increases by 15%. |
|
Launching a Chain Attack increases all squad members' Anomaly Proficiency by 25 for 15s. |
|
Corrupted enemies have their ATK reduced by 15%. |
|
Dealing Ether DMG grants all squad members 1 stack of Activity. This effect can trigger once every 10s. |
|
Launching an EX Special Attack grants 1 stack of Activity to all squad members. |
|
Corruption lasts 2s longer. |
|
Each Standard Ether type Resonium owned increases Agent Ether Anomaly Buildup Rate by 4%, up to a maximum increase of 32%. |
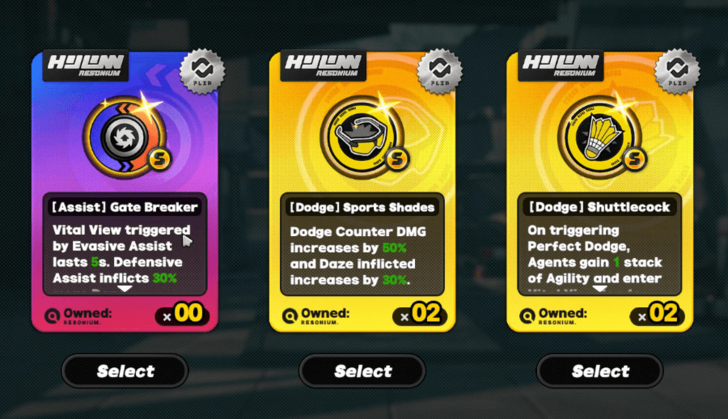
Consider Getting Dodge Resonia
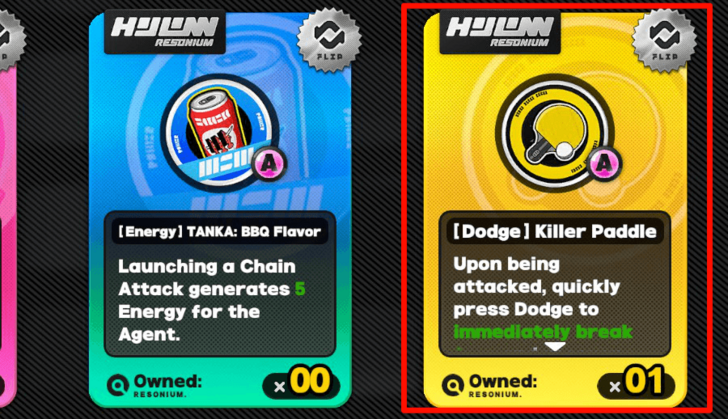
Most bosses, especially on Interior and higher stages, have attacks that cannot be parried (or perfectly assisted), so try to get Dodge Resonia to inflict more damage and interval time when dodging those attacks.
| Resonia | Effects |
|---|---|
|
|
Using Dodge increases the Agent's DEF by 20% for 5s. |
|
On triggering a Perfect Dodge, all squad members gain 1 stack of Agility, and DMG dealt is increased by 30 for 15s. |
|
On triggering Perfect Dodge, Agents gain 1 stack of Agility and enter Vital View for 4s This effect can trigger once every 10s. |
|
Dodge Counter DMG increases by 35% |
|
When in the Counter state, Anomaly Buildup Rate increases by 20% and CRIT DMG increases by 40%. |
|
Triggering a Dodge Counter generates 5 Energy for the Agent. |
|
Perfect Dodge is easier to trigger |
|
The post-Dodge Dash Attack is replaced by Dodge Counter. This effect can trigger once every 5s. Triggering this effect grants the Agent 1 stack of Agility. |
|
When entering Vital View by triggering Perfect Dodge, the post-Dodge Dash Attack is replaced by Dodge Counter that can be used repeatedly up to 4 times. |
|
Extends the duration of the Counter state by 5s. |
|
Upon being attacked, quickly press Dodge to immediately break free and recover 50% of the DMG taken as HP. This effect can trigger once every 6s. |
|
When in the Counter state, Agent EX Special Attacks and Dodge Counter Interrupt level is increased, and all Agents' DMG increases by 50%. |
|
Dodge Counter DMG increases by 50% and Daze inflicted increases by 30%. |
Most Resonia That Will Appear is Random
Most of the Resonia you will get are random unless they are indicated in the Shop or special event tiles. It means you won't have full control over which Resonia will appear, but you can always refresh it if you have unlocked Resonium Converters from the Combat Configuration!
Construction Ruins Rewards
First Clear Rewards
| Stage | Rewards |
|---|---|
| Frontline |
|
| Interior | |
| Heartland |
|
| Core |
|
Regular Rewards
| Stage | Rewards |
|---|---|
| Frontline |
|
| Interior |
|
| Heartland |
|
| Core |
|
Zenless Zone Zero Related Guides

All Hollow Zero Game Modes
| Hollow Zero Modes | |
|---|---|
 Lost Void Lost Void |
 Withered Domain Withered Domain |
Lost Void Stages
| All Lost Void Stages | |
|---|---|
| Task Force Investigation | Perpetrator Battle |
| Shadow Operation | Battlefront Purge |
| Operation Matrix | - |
Withered Domain Stages
| All Withered Domain Stages | |
|---|---|
| Qualification Assessment | Old Capital Metro |
| Construction Ruins | Abandoned Skyscraper |
| Withering Garden | Inferno Reap |
Other Hollow Zero Guides
| Hollow Zero Upgrades and Mechanics | |
|---|---|
| Resonia | Corruption |
Comment
Author

Construction Ruins Guide
Please participate in our site
improvement survey
03/2026
improvement survey
03/2026
Would you assist in
improving Game8's site?
improving Game8's site?

×
We are listening to our users' valuable opinions and discussing how to act on them.
The information collected through this survey will be used for the purpose of improving our services. In addition, the information will only be disclosed a part of a statistic in a format that will not allow identification of personal information.
Begin Survey
Not Now
×
Please rate each item regarding Game8.co's Advertisements.
Amount of Ads
Very Dissatisfied
Somewhat Dissatisfied
Fine
Somewhat Satisfied
Highly Satisfied
Placement of Ads
Timing of Ad Display
Ad Loading Speed
Safeness of Ads
Content of Ads
×
Please rate each item regarding Game8.co's Quality of Articles.
Amount of information
Very Dissatisfied
Somewhat Dissatisfied
Fine
Somewhat Satisfied
Highly Satisfied
Frequency of updates
Speed of new information
Accuracy of articles
Understandibility of articles
Readability of sentences
×
Please rate each item regarding Game8.co's Usability of the Site.
Ease of finding information
Very Dissatisfied
Somewhat Dissatisfied
Fine
Somewhat Satisfied
Highly Satisfied
Loading Speed
Use of Color
Font Size
Visibility of Images
Easy to Understand Layout
×
Please rate each item regarding Game8.co's Message Boards, Comments.
Ease of Writing
Very Dissatisfied
Somewhat Dissatisfied
Fine
Somewhat Satisfied
Highly Satisfied
Readability
Ease in Finding Information
Comment Quality
Comment Quantity
Admin Response
×
Please rate each item regarding Game8.co's Site's new design.
Please rate our site's new design
Very Dissatisfied
Somewhat Dissatisfied
Fine
Somewhat Satisfied
Highly Satisfied
Do you think that the website's design change makes the site easier to use?
Has the new design made it easier for you to find information on the site?
Has the new design improved the overall visual appeal of the site?
How would you rate your overall satisfaction with the new design of the site?
×
How likely are you to recommend Game8 to someone you know?
Very Unlikely
0
1
2
3
4
5
6
7
8
9
10
Very Likely
If you have other opinions regarding potential improvement to the website, please share them with us. We would appreciate your honest opinion.
Note: This is a free response section, so you can proceed without entering anything.
Note: Please be sure not to enter any kind of personal information into your response.
Note: Please be sure not to enter any kind of personal information into your response.
×
Thank You
×
Thank you for participating in our survey! Your answers will help us to improve the quality of our website and services.
We hope you continue to make use of Game8.
We hope you continue to make use of Game8.
Close
Rankings
Gaming News


![Everwind Review [Early Access] | The Shaky First Step to A Very Long Journey](https://img.game8.co/4440226/ab079b1153298a042633dd1ef51e878e.png/thumb)

![Monster Hunter Stories 3 Review [First Impressions] | Simply Rejuvenating](https://img.game8.co/4438641/2a31b7702bd70e78ec8efd24661dacda.jpeg/thumb)
Popular Games

Genshin Impact Walkthrough & Guides Wiki
Honkai: Star Rail Walkthrough & Guides Wiki
Umamusume: Pretty Derby Walkthrough & Guides Wiki
Pokemon Pokopia Walkthrough & Guides Wiki
Resident Evil Requiem (RE9) Walkthrough & Guides Wiki
Monster Hunter Wilds Walkthrough & Guides Wiki
Wuthering Waves Walkthrough & Guides Wiki
Arknights: Endfield Walkthrough & Guides Wiki
Pokemon FireRed and LeafGreen (FRLG) Walkthrough & Guides Wiki
Pokemon TCG Pocket (PTCGP) Strategies & Guides Wiki


Recommended Games
Diablo 4: Vessel of Hatred Walkthrough & Guides Wiki
Fire Emblem Heroes (FEH) Walkthrough & Guides Wiki
Yu-Gi-Oh! Master Duel Walkthrough & Guides Wiki
Super Smash Bros. Ultimate Walkthrough & Guides Wiki
Pokemon Brilliant Diamond and Shining Pearl (BDSP) Walkthrough & Guides Wiki
Elden Ring Shadow of the Erdtree Walkthrough & Guides Wiki
Monster Hunter World Walkthrough & Guides Wiki
The Legend of Zelda: Tears of the Kingdom Walkthrough & Guides Wiki
Persona 3 Reload Walkthrough & Guides Wiki
Cyberpunk 2077: Ultimate Edition Walkthrough & Guides Wiki


All rights reserved
Copyright © 2024 HoYoverse, COGNOSPHERE. All Rights Reserved.
The copyrights of videos of games used in our content and other intellectual property rights belong to the provider of the game.
The contents we provide on this site were created personally by members of the Game8 editorial department.
We refuse the right to reuse or repost content taken without our permission such as data or images to other sites.