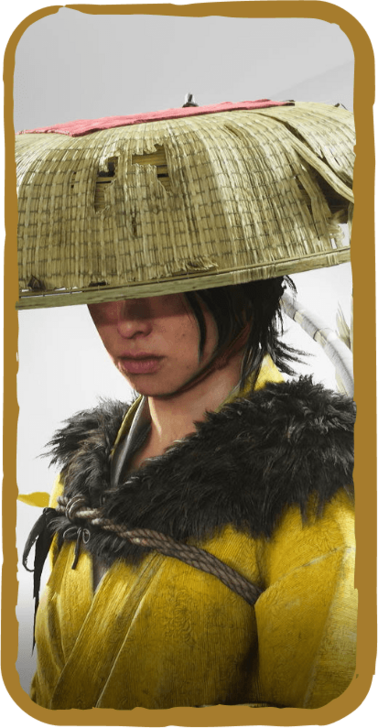
The Oni Quest Walkthrough
★ 11/24: 1.100.000 Patch Notes ▶︎ NG+
☆ Undying Armor | Spider Lily
┣ Jubei | Snow Drift | Takezo | Black Dye
┗ Reliquary | Fox Puzzles | Riddles | Kubo
★ Armor | Weapons | Charms | Best Armor
┗ Walkthrough | Quests | Platinum | Map
This is a walkthrough for The Oni's questline, one of Atsu's revenge targets in Ghost of Yotei. Learn more about The Oni's objectives, boss, its rewards, and how to unlock it here!
| ◄ Previous Quest | Next Quest ▶ |
|---|---|
| The Yotei Six | The Kitsune |
List of Contents
The Oni Walkthrough
- The Road to Ishikari Plain
- (Optional) Learn the Yari
- A Mad Pursuit
- Belly of the Beast
- A Fiery Consequence
- Twin Wolves, Twin Hearts
- The Tale of the Oni
Part 1: The Road Ishikari Plain
1. Find Ishikari Plain in Golden Foothills

Head to the Golden Foothills up north to reach the first gate leading to Ishikari Plain. Once you get there, talk to the guards and they will ask you for a travel permit.
2. Speak with the Beggar to Get Permit
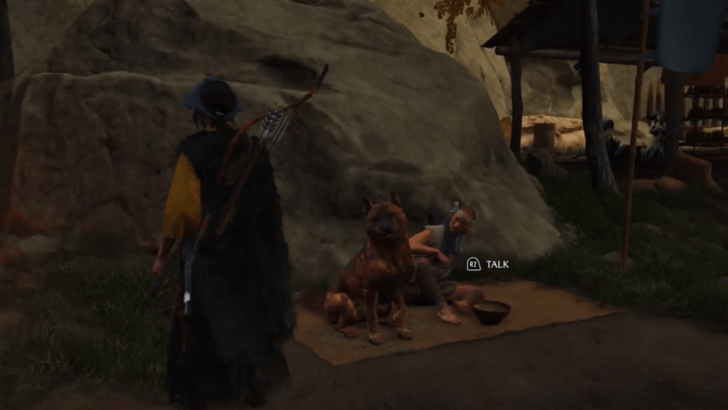
You can get the travel permit from the beggar near the gates. He will call you out after talking with the guards.
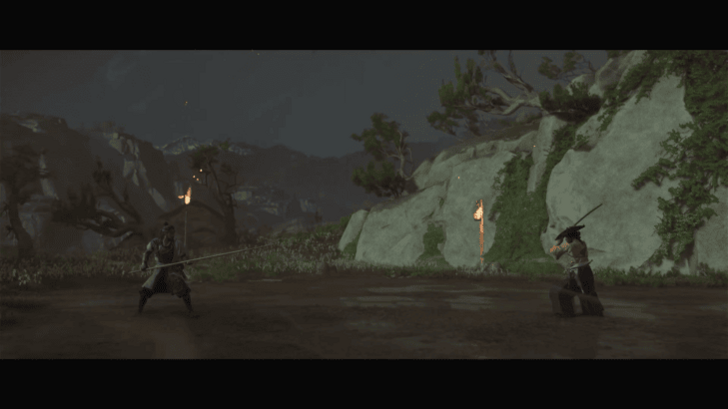
3. Defeat the Oni Raiders

Once your permit has been verified, they will open the gates but there will be several Oni Raiders trying to take you all out. Defend the gate and defeat all the Oni Raiders to progress.
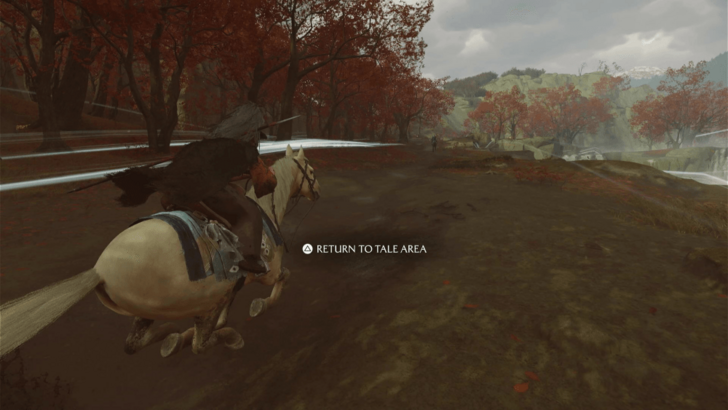
4. Ride Horse and Follow Lord Kitamori
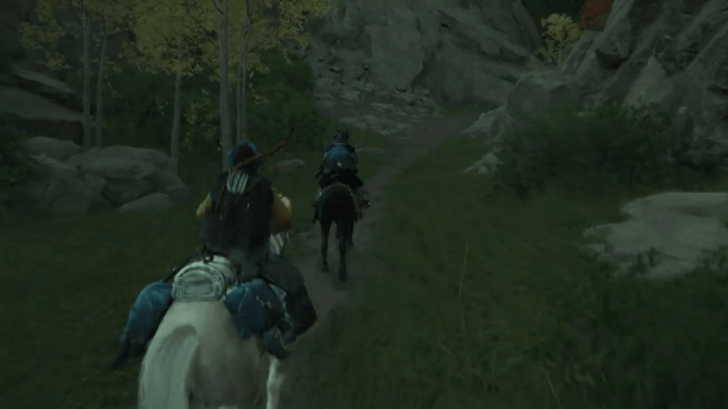
Ride your horse and follow Lord Kitamori after the cutscene. You can loot the corpses first before leaving to get extra Coins. You can also grab resources along the way.
5. Investigate the Matsumae Horses
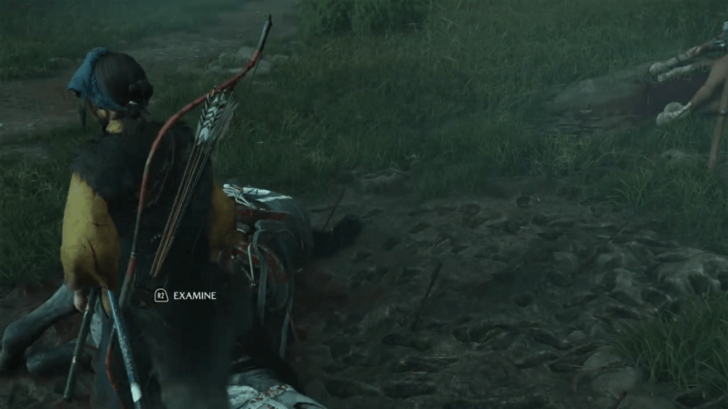
You will end up in a location where Matsumae Horses are killed. You will need to investigate the horses and find the missing Matsumae Samurai.
6. Find the Missing Matsumae Samurai

Follow the footprints and climb the cliff at the end. You will enter a cutscene once you get to the top where you can see the lost Matsume Samurai getting burned to death by the raiders.
7. Defeat the Oni Raiders
Follow Lord Kitamori and defeat all the raiders with him. Try to take out the archers first, as it will be hard to dodge their arrows if you are fighting 2-3 melee fighters at once.
A choice will appear after the fight, but it won't make any difference whichever you choose.
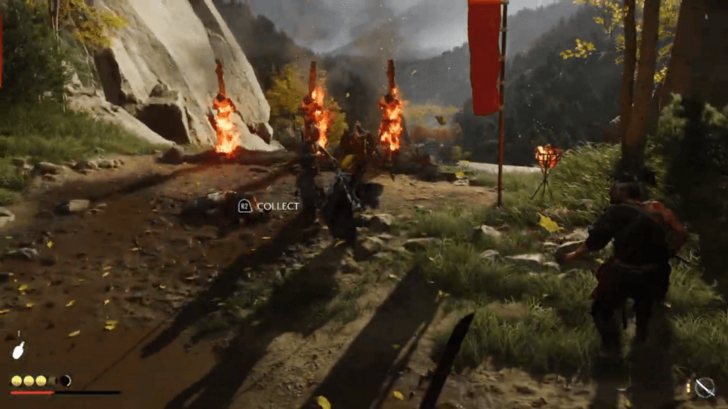
8. Camp at the Oni Raider Camp
| 8.1 | Find Food |
|---|---|
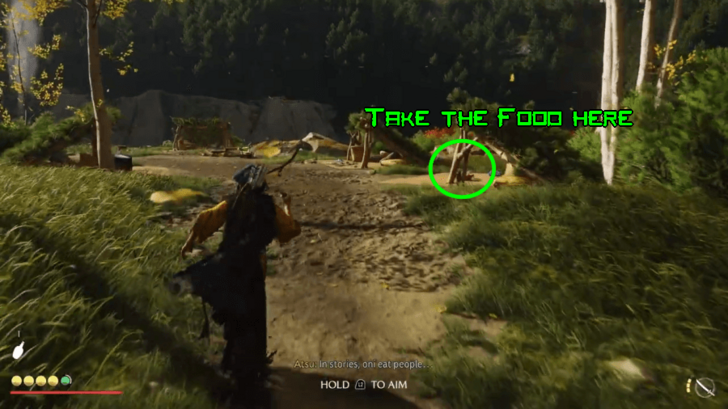 Search the Oni Raider Camp and look for food. You can find a red basket with two salmon on the tent to the right. |
|
| 8.2 | Build a Fire and Cook Fish |
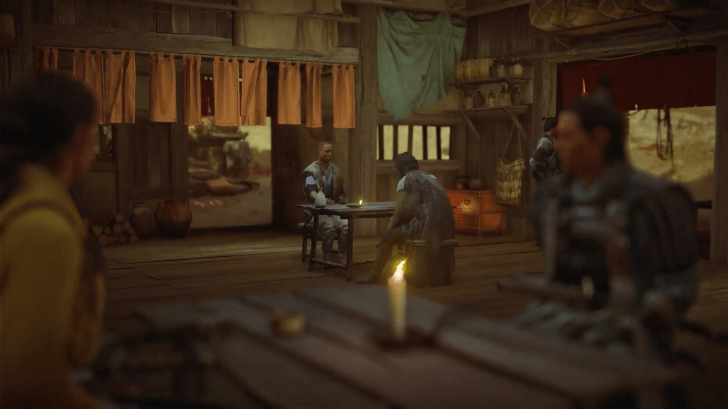
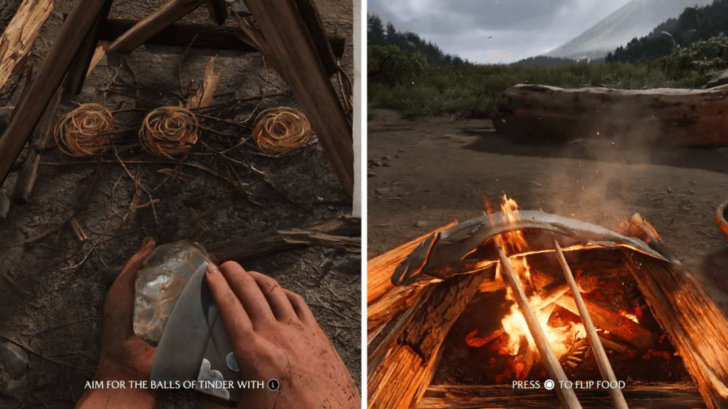 Head to the camp fire to build a fire and cook the fish. You will need to use the touchpad to light up the fire and cook. A cutscene will start playing and you will find that Lord Kitamori is your long lost brother, Jubei. |
We will now use Jubei instead of Lord Kitamori on the following steps.
9. Head for the Ishikari Plain
Leave the camp and ride the horse again and head for the Ishikari Plain. Another choice will appear as you talk with Jubei, but everything leads to not accepting Jubei's offer about joining the Matsumae Clan.
10. Defeat the Oni Raiders at the Gate
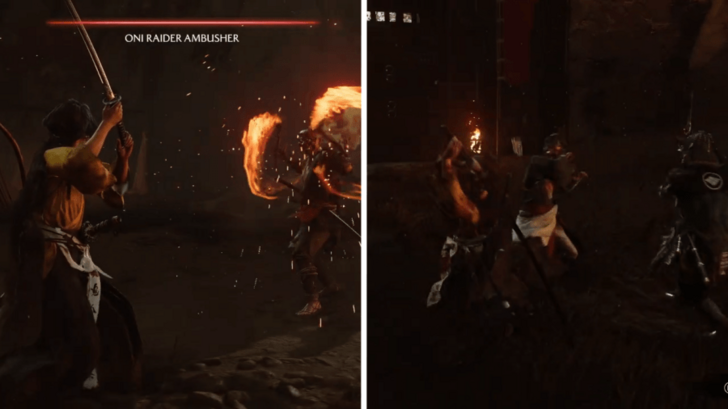
You and Jubei will be encounter several Oni Raiders at the gate. You will start a solo battle against the Oni Raider Ambusher after the cutscene, and it will become a free-for-all after winning the fight.
11. Go to the Matsumae Clan Camp
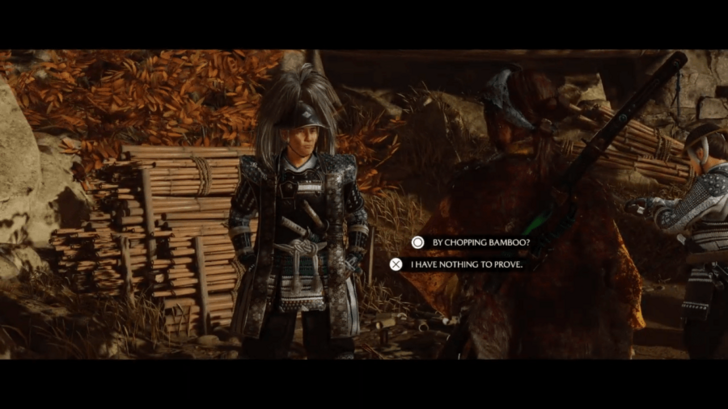
Head to the Matsumae Clan Camp after defeating all the Oni Raiders. Jubei will leave you for a bit to talk to Commander Wada. You can try talking or doing different activities at the camp, like bamboo cutting, before proceeding.
You will be able to get the Clan Matsumae Helmet and increase your Spirit when you do the bamboo cutting.
12. Talk to Jubei and Commander Wada
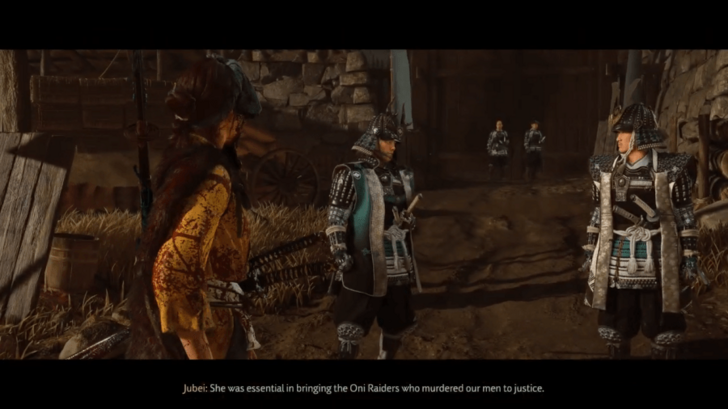
Talk to Jubei and Commander Wada after looking around at the camp. You won't be able to join them, as Commander Wada considers you as an outlaw.
Jubei will give you a clue on where to go next during the cutscene.
13. Use Spyglass to Survey Ishikari Plain
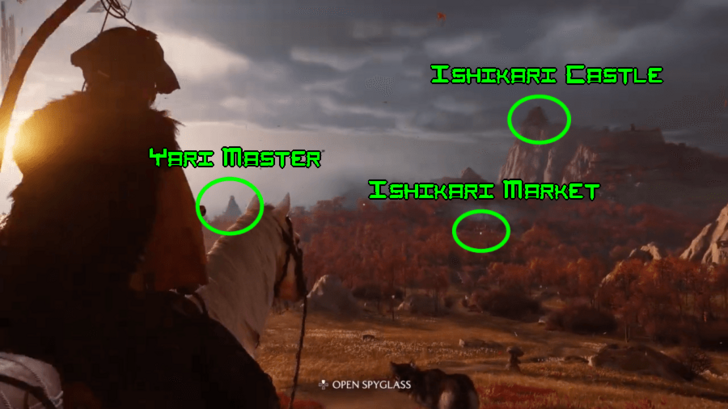
After leaving the camp, use the Spyglass to survey Ishikari Plain. Look towards northwest to find the market that Jubei mentioned. Look over the Ishikari Castle next just above the market.
You can then look over the west side and survey the island there to know where to find the Yari (Spear) master.
Optional: Learn and Get the Yari
You can try to learn the Yari first before continuing with the quest. This is not required, but it wouldn't hurt to have another weapon to your arsenal, especially the boss fight with The Oni himself.
Part 2: A Mad Pursuit
| Objectives |
|---|
|
1. Explore Ishikari Market 2. Take the Traitorous Raider Mad Goro Bounty 3. Finding Mad Goro |
2. Explore Ishikari Market
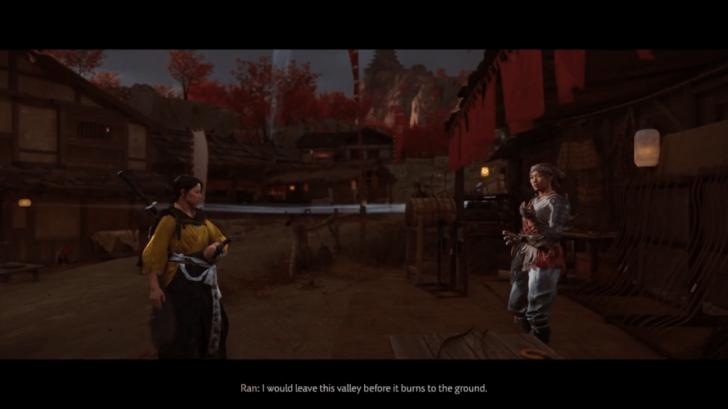
Head to the market and explore the area. Be careful when you reach the bridge, as there will be a group of ronin trying to rob you.
You can try selling, upgrading, or buying new gear at the market before proceeding with the quest. You can also get new side quests from the merchants and other NPCs here.
2. Take on the Traitorous Raider Mad Goro Bounty
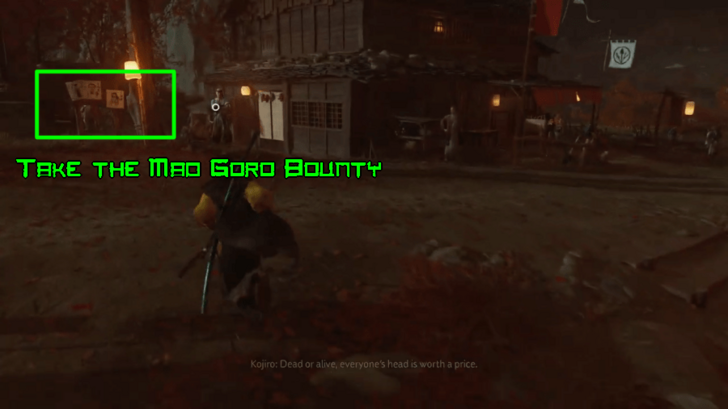
Examine the Bounty Board at the market and take the Traitorous Raider Mad Goro bounty. You will immediately get into a fight against the raiders after the cutscene.
This bounty is part of the quest and you have no choice but to take it to progress.
The Traitorous Raider, Mad Goro Bounty Guide and Rewards
3. Where to Find Mad Goro
| 3.1 | Talk to the Barman |
|---|---|
 You will have a dialogue choice when talking to the Barman, but anything you choose won't make a difference. Jubei will appear once you get inside the bar during a cutscene. |
|
| 3.2 | Eavesdrop Group of Men in the Bar |
 Eavesdrop the group of people to obtain information on Mad Goro. Start on the people on the right going to the left. Jubei will appear after eavesdropping the third group, but you will be able to continue after a few talks. |
|
| 3.3 | Defeat Enemies with Jubei |
 Leave the bar after getting information on Mad Goro. A group of raiders will come at you and Jubei, so defeat them and make your way out of the market. |
|
| 3.4 | Head to the Iwami Village |
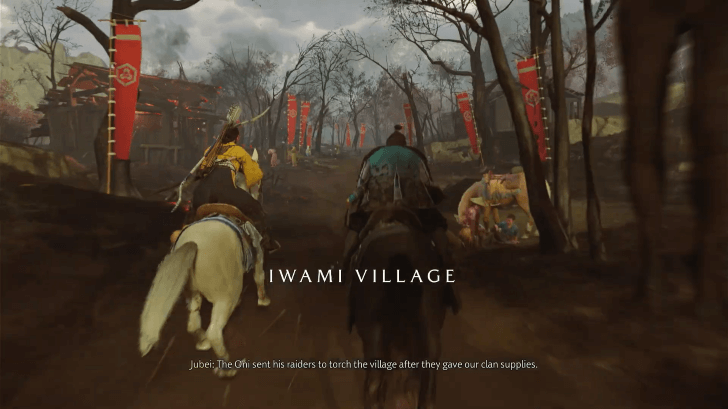 Follow the guiding wind to reach Iwami Village quickly. Talk to the villagers in the middle of the road once you get in the village and investigate the gunshot they mentioend after. |
|
| 3.5 | Investigate Mad Goro's Camp |
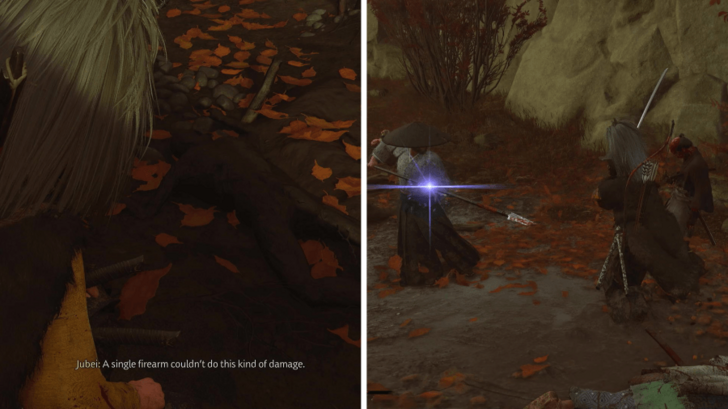 Investigate the location of the gunshot that the villagers have mentioned. It should lead you to the deserted Mad Goro's camp outside the village. After doing your investigation, a group of Ronin will appear and attack you. Defeat them after the dual Standoff with Jubei and proceed to the river. |
|
| 3.6 | Follow Jubei and Traverse the River |
 Follow the river until you see the Oni Raiders camp near the waterfall. Try not to veer off the river and follow Jubei, as you might lose him and take more time than usual to get to the camp. |
|
| 3.7 | Defeat the Oni Raiders |
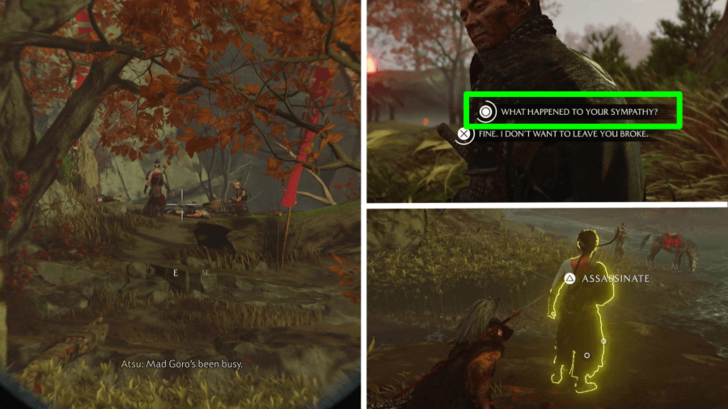 Survey the Oni Raider Camp and then take them all out. Before you can proceed, you will have a bet with Jubei and get coins for how many you can raiders you can kill without alerting them or getting caught. You can increase the coin reward from 10 coins to 15 coins if you choose the What Happened to Your Sympathy option. After defeating all raiders, survey the black smoke from the hill to see where Mad Goro is. Climb the hill and chase him after. |
|
| 3.8 | Chase Mad Goro |
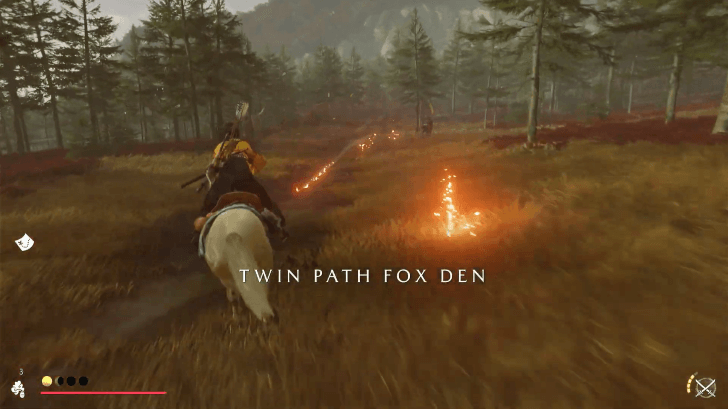 Ride your horse and chase after Mad Goro. Mad Goro will throw bombs and shoot you with the musket during the chase. Dodge and try to get close while Jubei distracts him. |
|
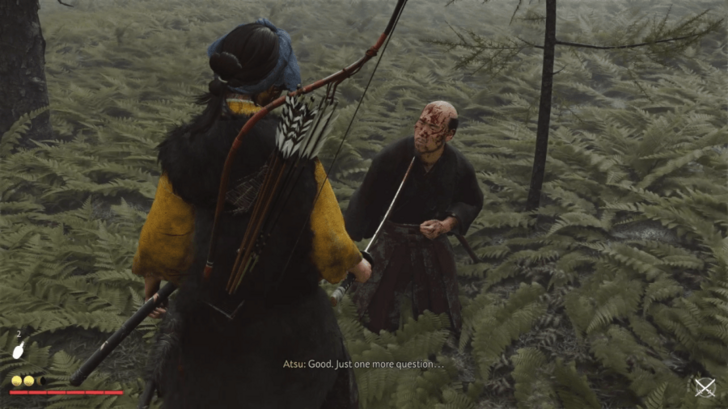
| 3.9 | Defeat Mad Goro |
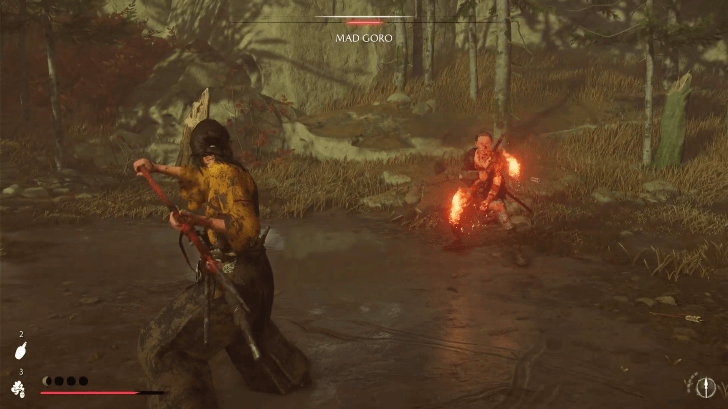 Mad Goro uses a burning stick, kusarigama and a katana against you. Beware of attacks from his burning stick or his kusarigama especially if it is lit on fire to avoid burning and taking too much damage. Once defeated, you will interrogate Mad Goro and complete the bounty and his side tale. |
Part 3: Belly of the Beast
1. Meet Jubei Near Ishikari Market
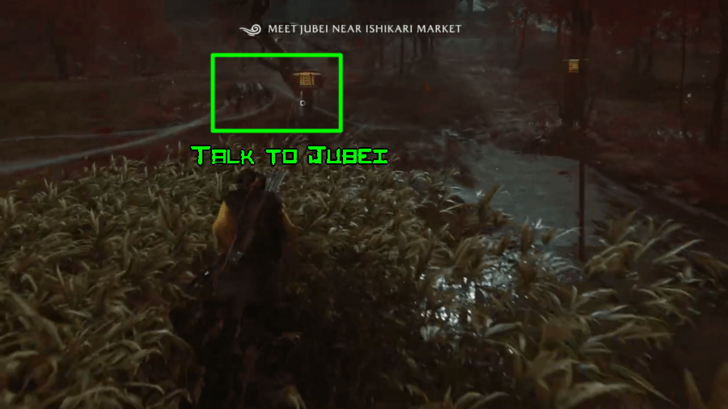
Talk to Jubei near the Cartographer in Ishikari Market to start a cutscene after capturing Mad Goro. Instead of using Mad Goro, you will use Jubei as the prisoner along with the musket to use a bait to get inside the castle.
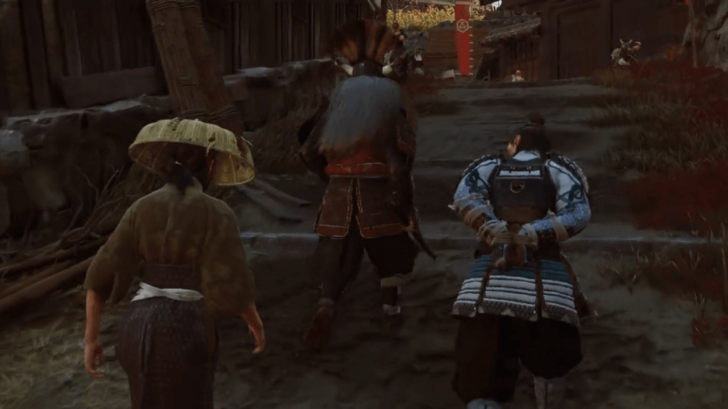
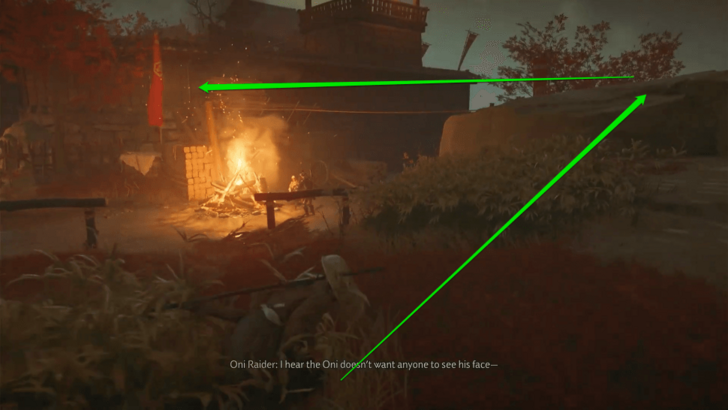
2. Infiltrate the Castle and Speak with The Oni

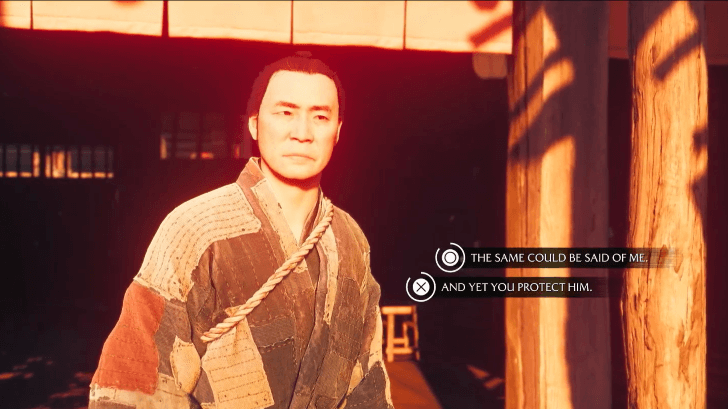
You will immediately start at the front of the castle after the cutscene. Present Jubei and the musket to the raider to get inside through the cutscene. You will also meet The Oni once you get inside.
3. Follow The Oni
Follow The Oni while talking to him. You will be presented with a dialogue option, but it won't affect the story in any way, so you can choose whatever you feel is right. Keep following The Oni until you reach the castle.
4. Examine the Scabbard
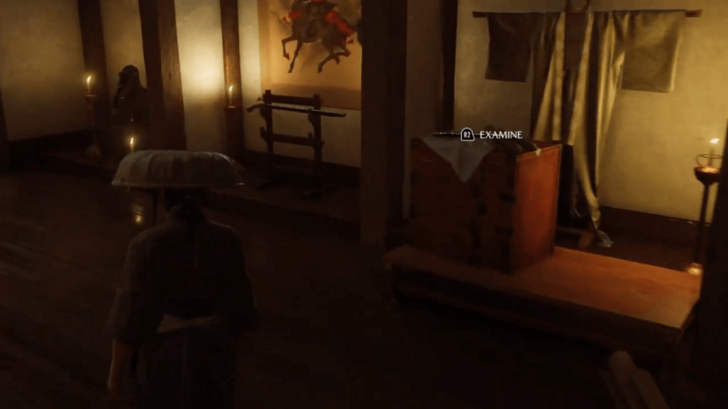
Examine The Oni's treasures in the castle. If you want to skip the other dialogues, you can simply examine the Scabbard (Saya) on the right and take it as your reward. The Oni will also give you coins during the cutscene.
5. Survey the Castle
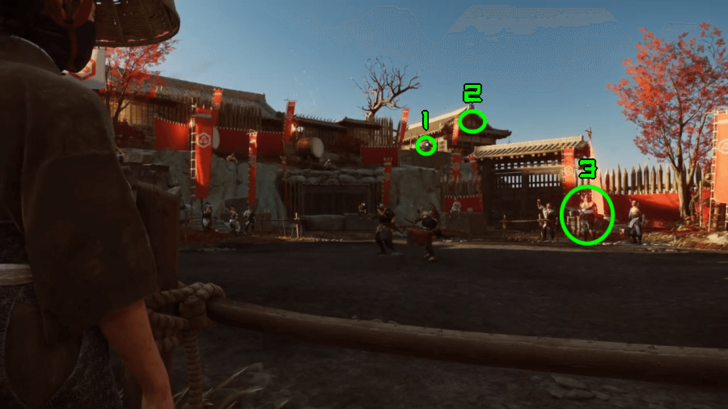
Survey the castle after talking to The Oni. Look at the house on the hill to see the prisoner who tried to escape. Look at the house behind her next, then check the Jailer (Kanta) watching in the arena after. You will be able to control Atsu after this.
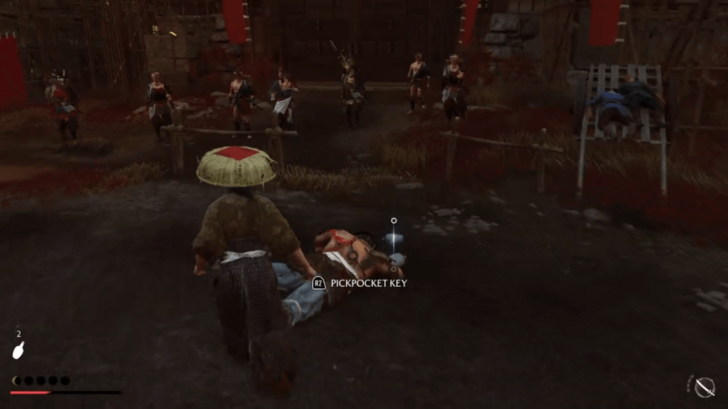
6. Steal the Keys

Go around the arena and get close to Kanta to try to take the keys. However, Kanta will notice her and will result on fighting him in the arena.
7. Defeat Kanta
Pick up a wooden sword (bokken) at the weapon rack near the torch to start the fight. Kanta will instantly charge at you at the start, so make sure to dodge to avoid it.
Kanta uses a Kanabo, a large, destructive, and heavy club. Most of his attacks are unblockable, so try to dodge and counterattack once he stops attacking to damge him. At 50% health, you will enter a Standoff-like state against Kanta, disarming him after striking. He would still fight without a weapon and they still pack a punch, so make sure to dodge whenever you can!
8. Help Kanta and Take the Keys
Take the keys while helping Kanta to get up. A cutscene will play and skip on night after the feast.
9. Retrieve Your Weapons
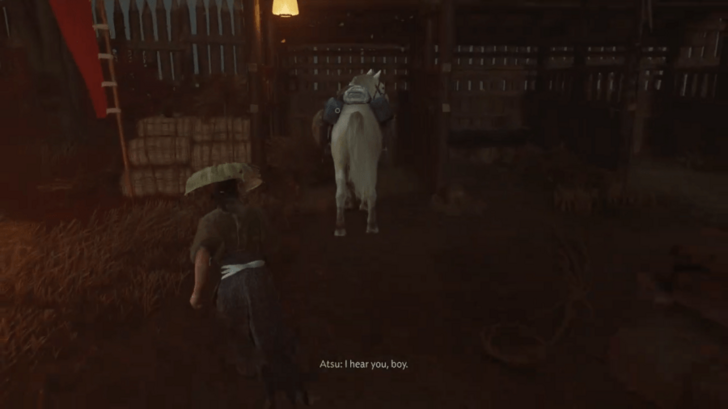
You will need to retrieve your weapons first before you can rescue Jubei. Head to the stables and take your weapons from your horse.
From this point forward, you will have to move carefully as the raiders will attack you if they see you with your weapons.
10. Free Jubei from the Cell
| 10.1 | Enter the Fortress through the Wall Crack |
|---|---|
 Crouch and move to the right side of the fortress wall after getting your weapon. Go to the rock and walk on the rope to avoid getting spotted. Enter through the crack on the wall after crossing the rope. |
|
| 10.2 | Climb the Tower and Walk on the Rope |
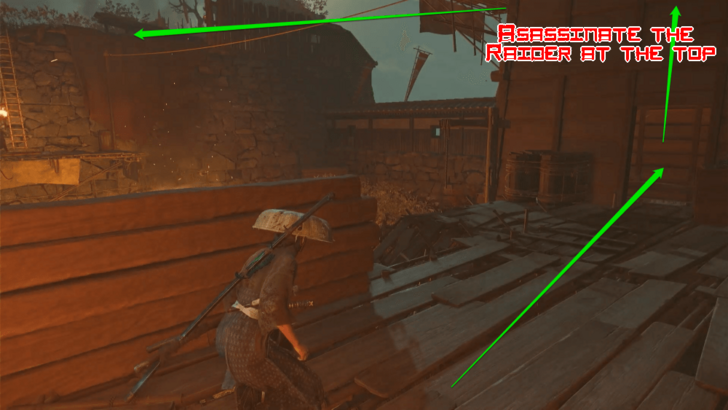 Climb the tower on the right and assassinate the raider at the top. Walk on the rope after and jump on the ledge. |
|
| 10.3 | Go to the Broken Wall on the Right |
 Go to the right side using the bushes while still crouching. Get behind the house and exit through the broken wall. |
|
| 10.4 | Climb Up and Go Around the Mine Entrance |
 Climb up after exiting through the broken wall. Keep hidden and go around in front of the mine entrance until you reach the Matsumae prisoner. Note that there are two enemies in front of the gate, near the Matsumae prisoner. |
|
| 10.4 | Climb Up and Unlock Jubei's Cell |
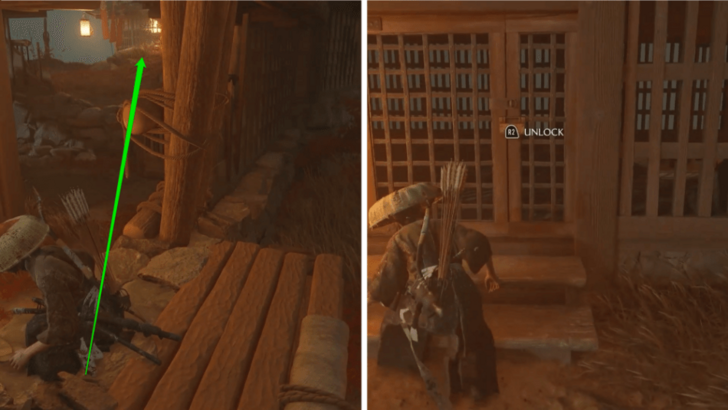 Climb the short cliff behind the Matsumae prisoner and turn right to see Jubei's cell. Unlock it, play through the cutscene, and break the back of the cell. |
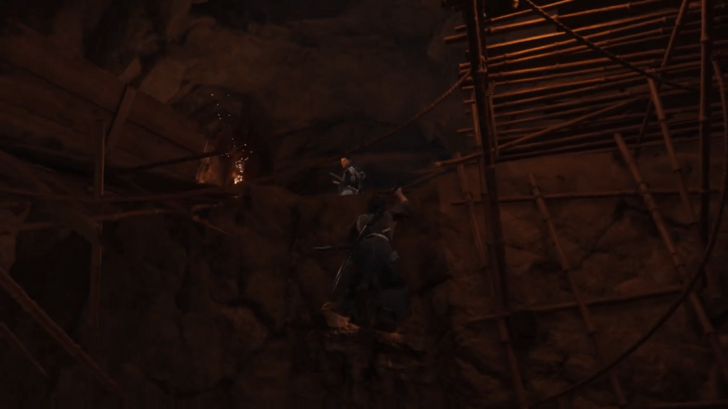
11. Climb the Cliffs to the Castle
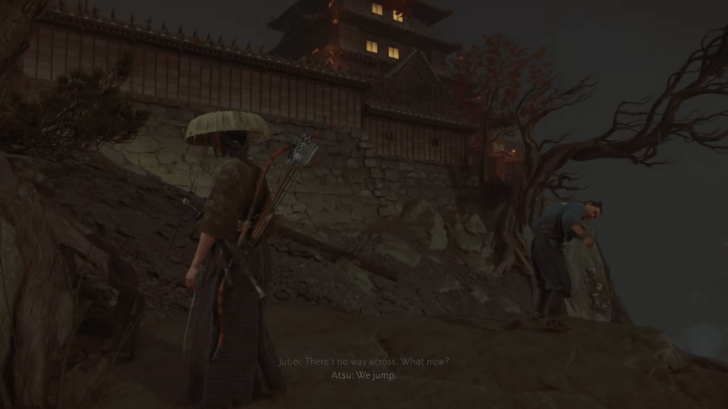
Break the bars of the cell behind to reach the cliffs that you can climb to reach the castle. You can simply follow Jubei as he will take the lead here.
He will stop on a part where you have to jump, and him taking the lead will stop here as well.
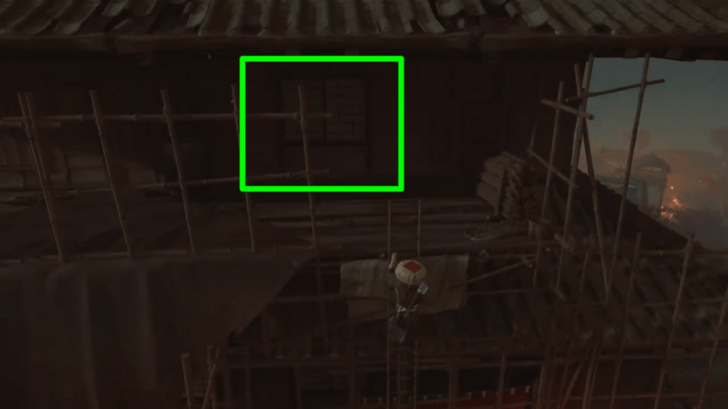
12. Continue Going to the Castle
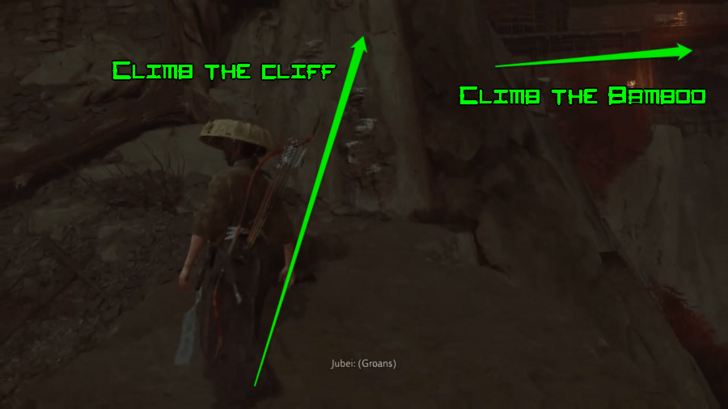
Climb on the cliff after jumping until you reach the back of the castle. After that, climb the bamboo walls with Jubei to get inside the castle.
13. Enter the Castle
The Oni will get a sniff of your plan and stop you when you enter the castle. The Oni will throw you out and send his men to come after you.
14. Escape the Castle
Follow Jubei and parkour around the castle to escape. Ride your horse and charge through the enemies to avoid getting stopped on the way. Note that it consumes a Spirit for each charge, so only use it whenever needed.
Part 4: A Fiery Consequence
1. Return to Matsumae Camp for Mad Goro
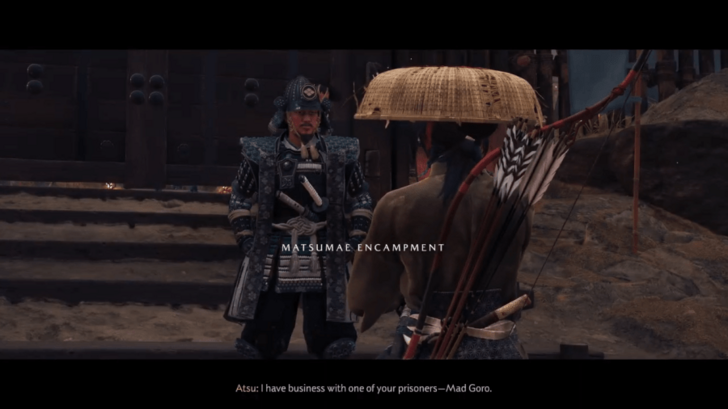
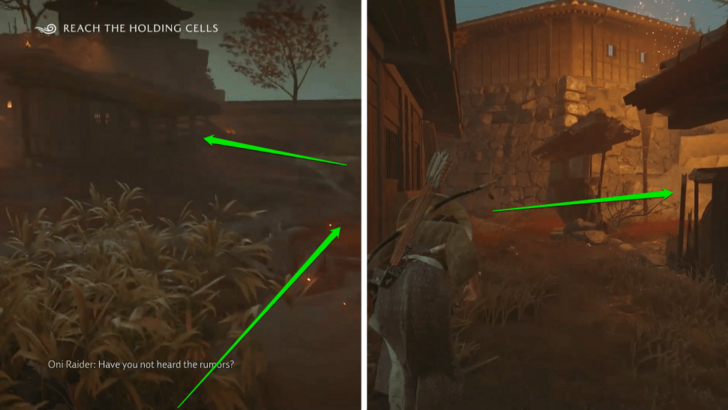
Fast travel to Matsumae Encampment and try to ask Mad Goro about the secret entrance. However, the Matsumae Samurai will stop you from entering and you'll have to find another way to get in.
2. Climb Up the Matsumae Camp
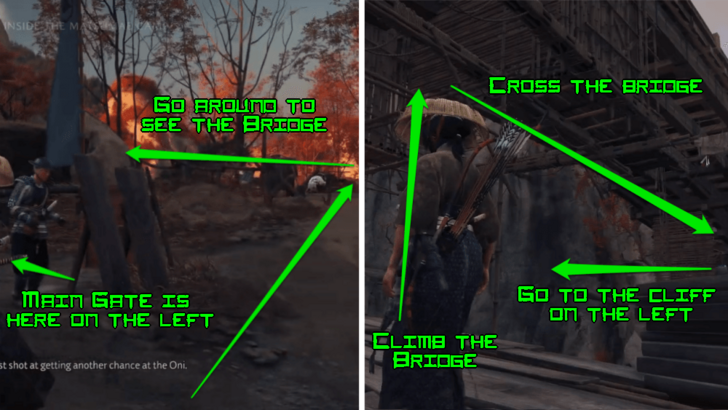
Go around the camp until you see the bridge. Climb the bridge from below and make your way to the other side until you see a scalable cliff. Climb the cliff to see the whole camp and plan your next move.
3. Use Spyglass to Find a Way Inside the Camp
Use the Spyglass to see a hidden entrance to the camp. Look to the right (northeast) while using the Spyglass to see an open wall that will lead you inside the camp.
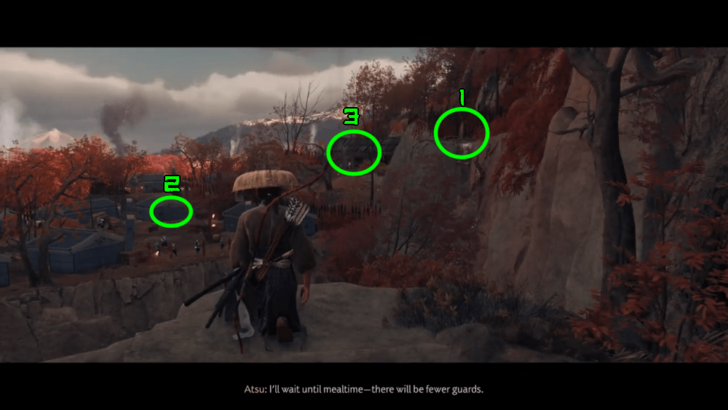
After that, look at the camp and look for Goro being taken back to his cell. You will need to scan the place where he will be taken, so you can take control of Atsu again.
4. Visit Mad Goro at the Camp
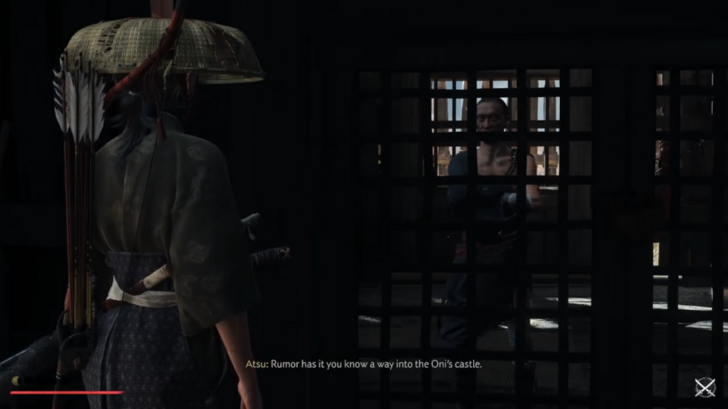
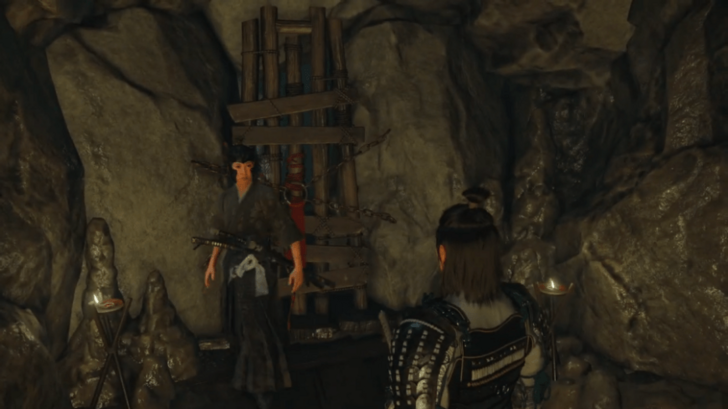
Climb the cliff and enter through the fence that you previously saw from the Spyglass. Walk towards Mad Goro's cell and talk to him.
5. Free Mad Goro
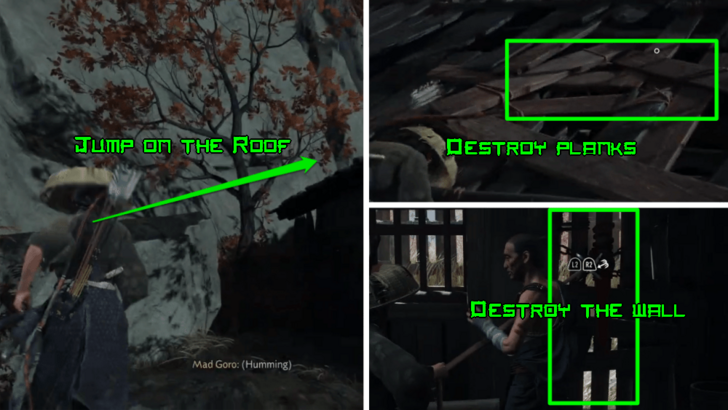
Go inside the cell by destroying the planks on the the roof. After that, go down and destroy the wall to free Mad Goro.
Jubei will meet you outside the cell after destroying the wall, resulting in a cutscene.
6. Follow Jubei
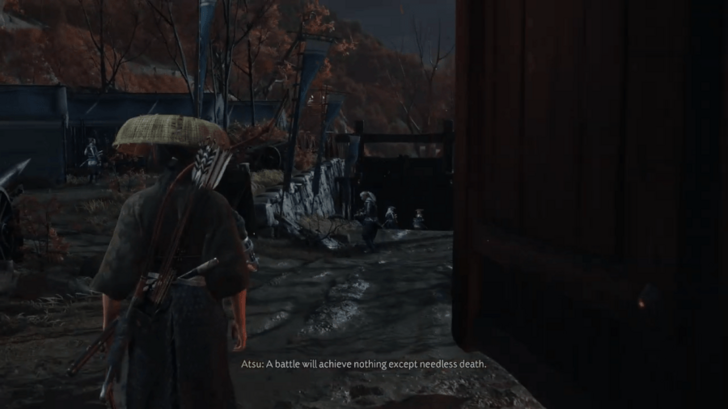
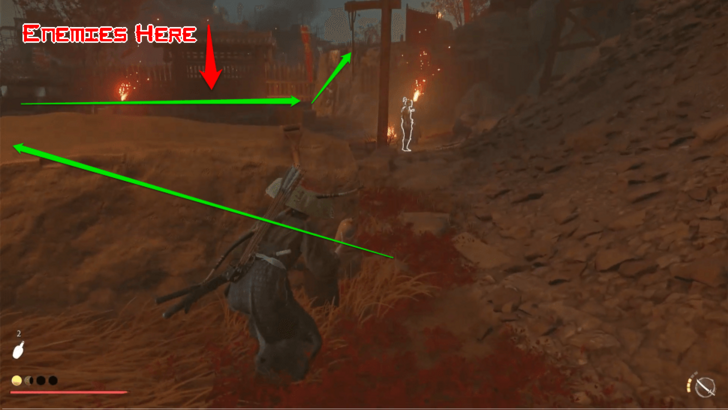
You will be forced to choose a dialogue option, but that won't make any difference to the story. Follow Jubei until you reach the middle of the camp and the Oni Raiders start attacking.
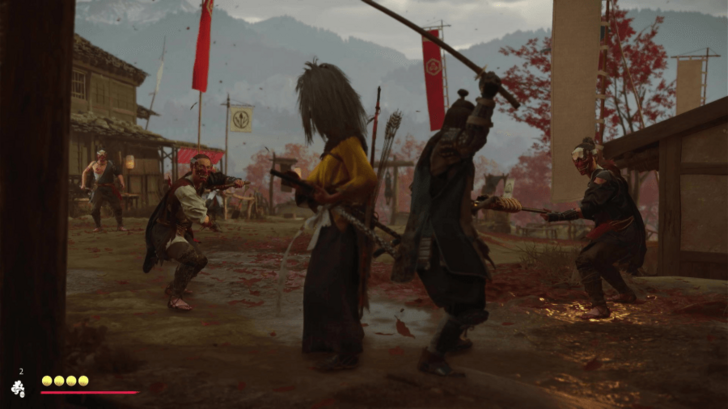
7. Defeat the Oni Raiders
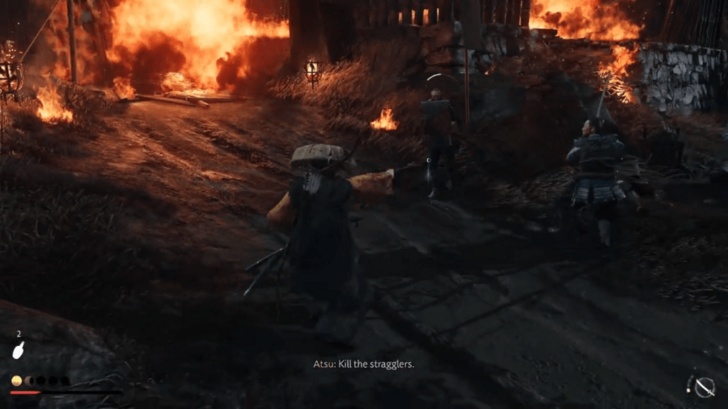
Defeat the Oni Raiders infiltrating the camp. There will be tons of enemies, so try to fight with the Matsumae to ensure you won't fight multiple enemies at once.
8. Secure the Bo-Hiya (Cannon)
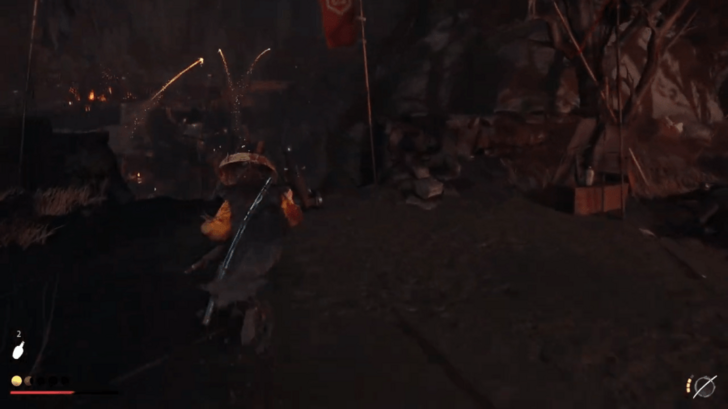
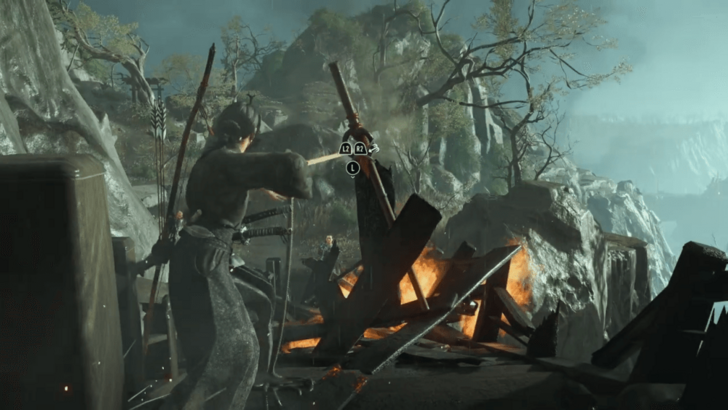
You will be fighting solo from this point forward. Defeat raiders as you make your way through their Bo-Hiya (cannon). You will need to defeat all the raiders there to enter a cutscene where you take control over the Bo-Hiya.
9. Destroy the Other Bo-Hiya
Use the Bo-Hiya to destroy the others and kill enemies below. You must destroy all the Bo-Hiya to progress.
10. Go to Jubei at the Bridge
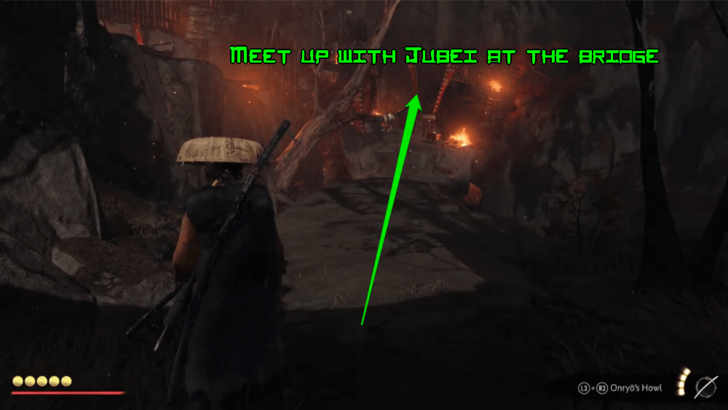
Make your way to Jubei on the bridge through the cliff. Defeat the raiders on the way until you reach Jubei on the bridge.
More enemies will come once you get reunited with Jubei. Kill them all to trigger the cutscene that will let you fall off the bridge with Jubei.
Part 5: Twin Wolves, Twin Hearts
| Objectives |
|---|
|
1. Meet Jubei at the Northern Matsumae Camp 2. Go to the Shrine with Jubei 3. Find a Way to the Shrine 4. Follow the Shrine Rules 5. Defeat the Ronin and Escape |
1. Meet Jubei at the Northern Matsumae Camp
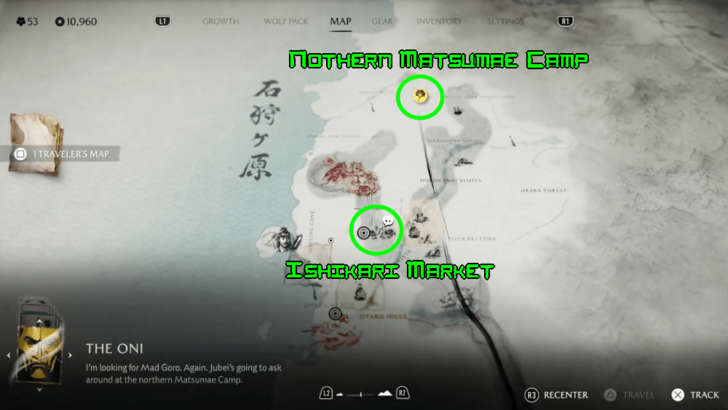
Travel north and go to the Northern Matsumae Camp to meet Jubei. You can find him talking to Commander Wada inside the camp.
2. Go to the Shrine with Jubei
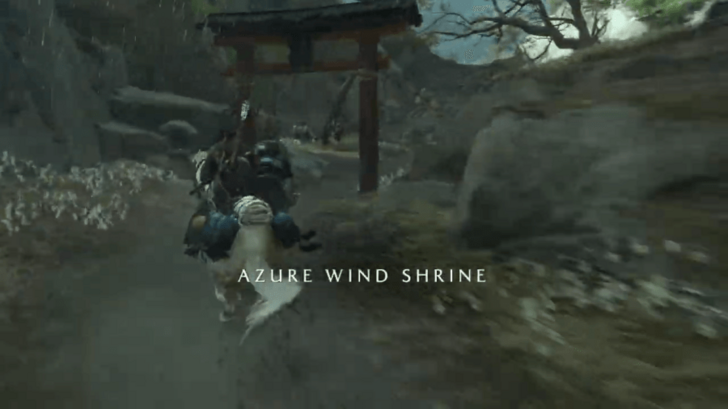
Follow Jubei and head for the Azure Wind Shrine to look for Mad Goro. You won't be able to reach the shrine using normal means, so you'll have to find another way around.
3. Find a Way to the Shrine
| 3.1 | Climb the Cliff on the Left |
|---|---|
 Go to the left side and climb the cliff with Jubei. Follow the path until you see the group of ronin in the area. |
|
| 3.2 | Kill the Group of Ronin |
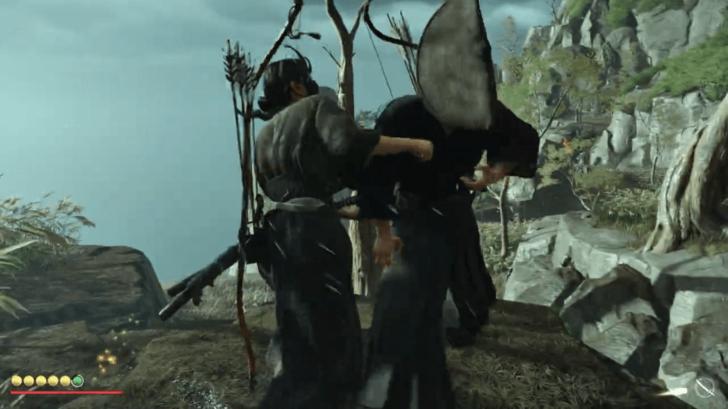 Kill the group of Ronin via assassination or head on fight. This should help you get to the next location without getting targeted from behind. |
|
| 3.3 | Get Across the Bridge |
 The bridge will be inaccessible due to the fire. Head to the left and go to the nearby cliff using the rope. After that, jump towards the cliff near the bridge and use the rope again to get across. |
|
| 3.4 | Clear the Debris on the Bridge |
 Clear the debris on the bridge using your rope to make it accessible. Wait for Jubei to cross and continue your way to the shrine. |
|
| 3.5 | Go Inside the Cave |
 Follow the path and head inside the cave. Destroy the wooden fence blocking the path to progress. Follow Jubei but you will end up on a different path once you cross the bridge. |
|
| 3.6 | Climb Around the Mountain |
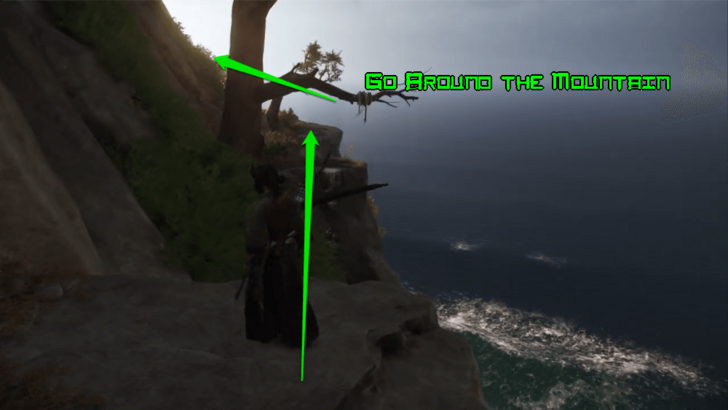 Exit the cave after falling off the bridge. Work your way around the mountain to meet Jubei. |
|
| 3.6 | Reach the Summit |
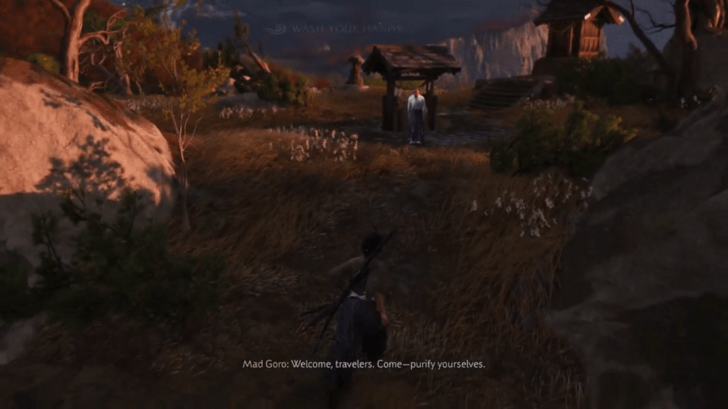 Continue climbing to the top to reach the summit where the shrine is located. You will see Mad Goro as soon as you reach the top. |
4. Follow the Shrine Rules

Although Atsu's raring to catch Mad Goro, you will have to follow the shrine rules first. Wash your hand and mouth, and then honor the shrine with Mad Goro and Jubei.
You will be able to get the Charm of Hachiman and the Oni's Flame afterward.
5. Defeat the Ronin and Escape
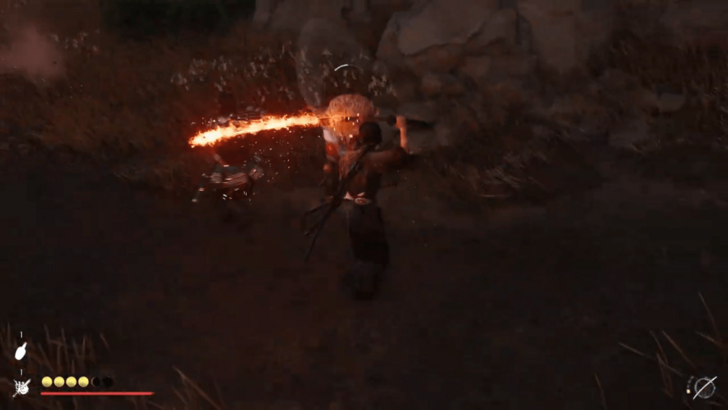
Defeat another group of ronin with Jubei and Mad Goro. You can test out the Oni's Flame to burn enemies as you slash them. You can always refill it through Mad Goro, so feel free to use it!
Escape the shrine after defeating them, but be careful as more will come. Follow your way back until you reach the cliff where you can see your horses.
Part 6: The Tale of the Oni
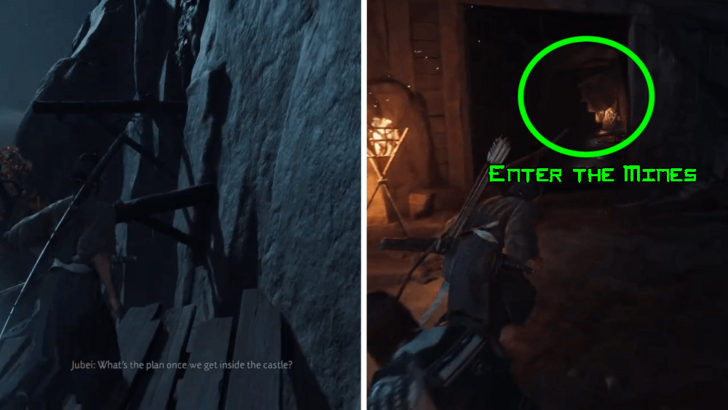
1. Meet Jubei on the Coast
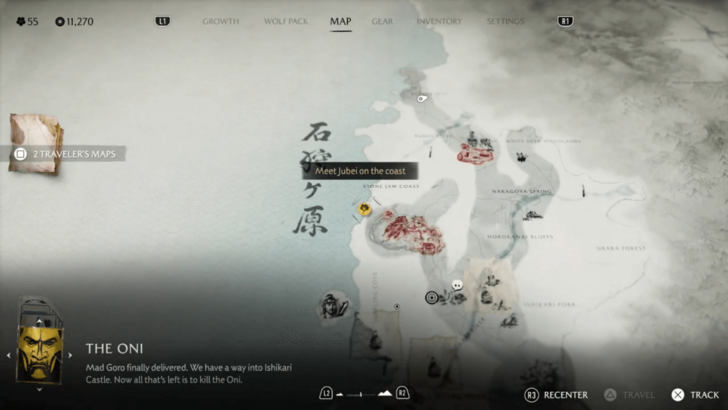
Head further north and meet Jubei on the coast. You will be able to go below the Ishikari Castle by the boat after the cutscene.
2. Follow Jubei Through the Mines
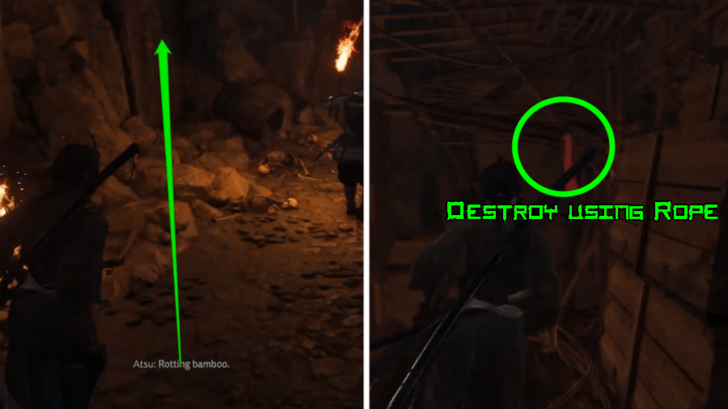
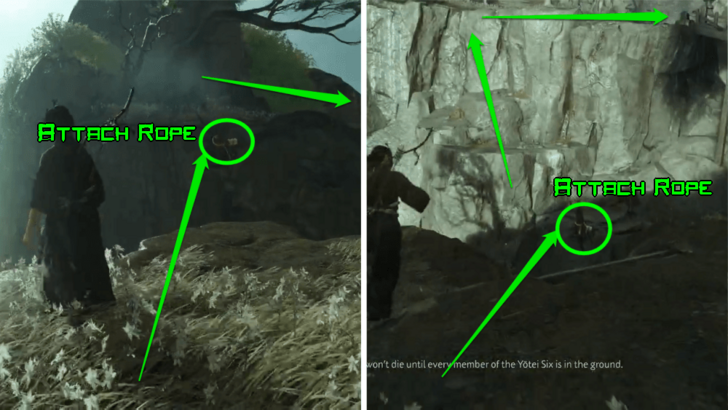
Follow Jubei until you reach the mines and the part where you can be boosted to the wall. Once you reach the top, look for the bamboo where you can attach your rope to destroy it. You will be able to grab Jubei from there.
3. Continue Following Jubei
Continue following Jubei through the mines until you reach the exit. You will be able to take the lead once you're outside.
4. Climb Up to Ishikari Castle
Continue your way up to the Ishikari Castle using the wooden platforms, logs, and scalable rocks. You will end up in another entrance leading inside the mines, but there will be tons of raiders this time.
5. Free the Prisoners
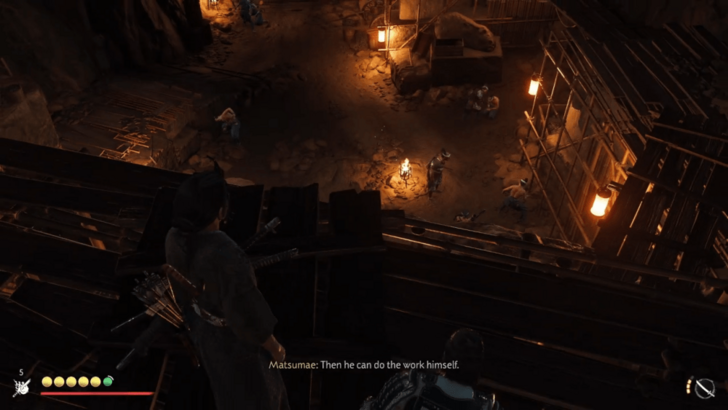
Once inside the mine, defeat all the raiders and free the prisoners. They will help you fighting the enemies in the next area.
6. Open the Gate and Free More Prisoners

Open the gate and defeat the rest of the guards to free up more prisoners. Continue doing this until you reach the castle.
You will have to fight more raiders here and battle Kanta one more time. His moveset will be the same and you will be able to use your weapons, so it shouldn't be difficult this time.
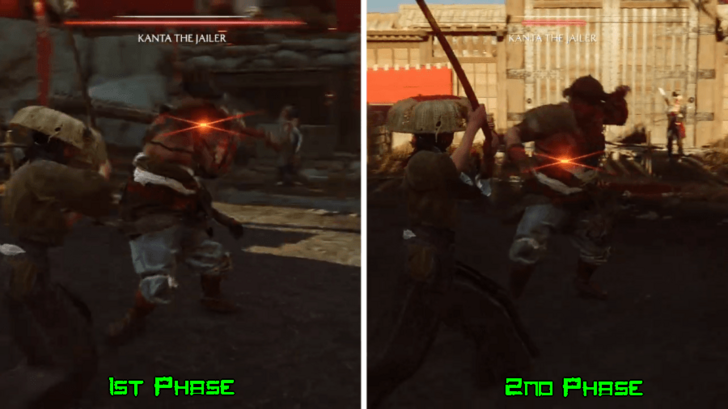
7. Defeat The Oni (1st Phase)
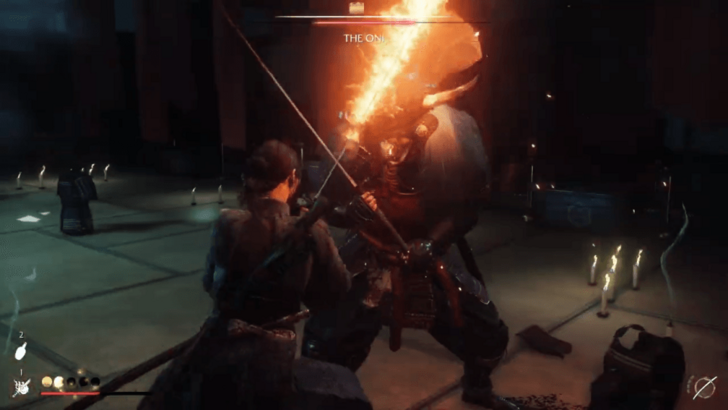
Enter the castle and defeat The Oni. The Oni uses an Odachi, which has a good range and a balanced mobility. Try to attack only when you get a chance or you might get damaged.
Most of his attacks can be parried, so try to block at the perfect time to stagger him and sneak some hits in. You can try to use the Oni's Flame for an extra damage. Rinse and repeat until you deplete his health!
8. Defeat The Oni (2nd Phase)
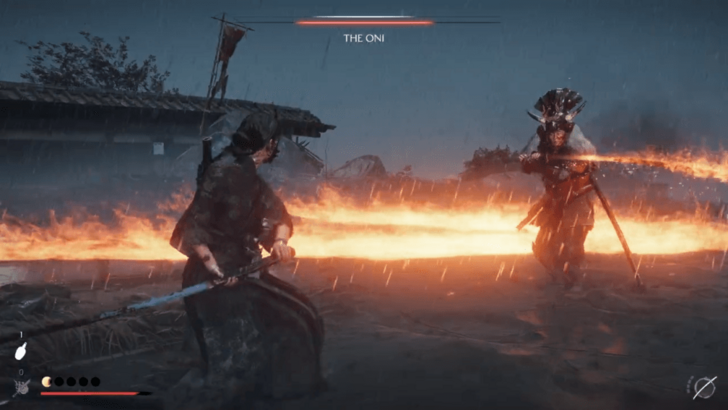
The Oni will use Oni's Flame and light up his Odachi in the second phase. He will be able to burn you if you get hit and leave the ground burning to damage you when you walk on it.
The fire will go out from his Odachi and on the ground from time to time. Use that chance to go on offensive and try to end the fight!
How to Unlock The Oni Questline
Interrogate a Ronin
You must interrogate a Ronin to unlock The Oni. You will need to choose The Oni topic to get the clue card and start the quest.
The Yotei Six Quest Walkthrough
The Oni Quest Rewards
- Clan Matsumae Helmet
- Mercenary Attire and Mask
- Charm of Hachiman
- The Oni's Flame
- The Onryo Armor and Wolf's Call Upgrades
- Trophies amd Achievements
Clan Matsumae Helmet
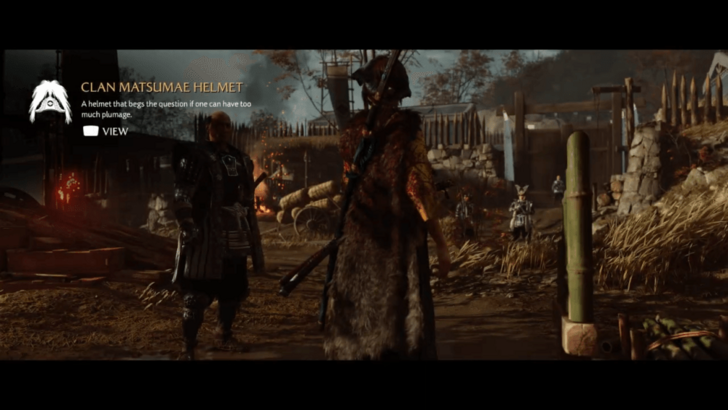
Complete the bamboo cutting in the Matsumae Clan Camp to get the Clan Matsumae Helmet. It will also increase your Spirit after the bamboo cutting.
How to Get Clan Matsumae Helmet
Mercenary Attire, Mercenary's Mask, and Old Straw Hat
 Mercenary Attire Mercenary Attire |
 Mercenary's Mask Mercenary's Mask |
 Old Straw Hat Old Straw Hat |
You can get the Mercenary Attire, Mercenary's Mask, and Old Straw Hat after making Jubei the prisoner for The Oni during the Belly of the Beast subquest.
Charm of Hachiman
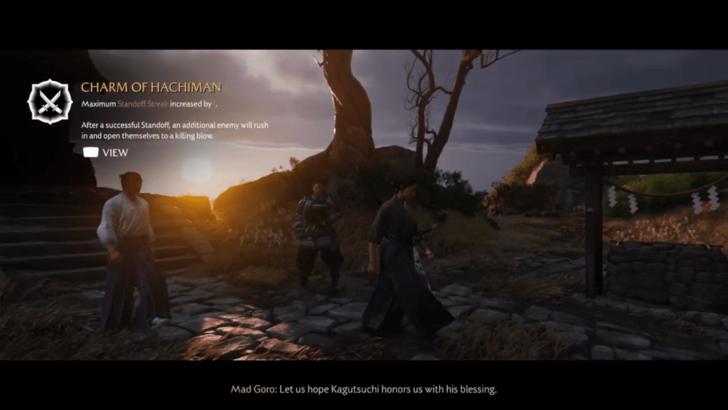
Honor the Azure Wind Shrine during the quest to get the Charm of Hachiman . It will be required to do and you won't be able to miss it.
Charm of Hachiman Effects and How to Get
The Oni's Flame
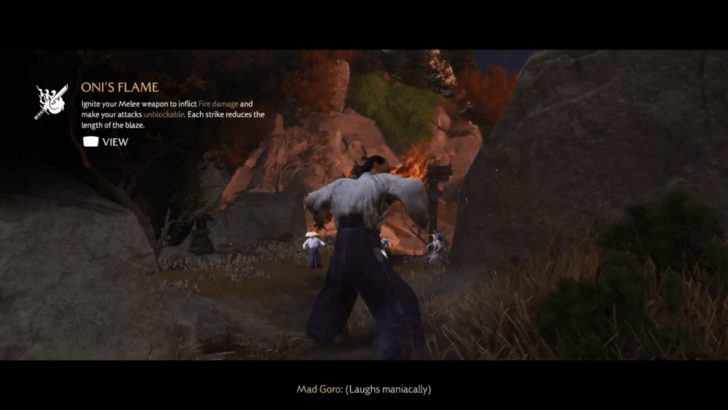
You will be able to get the Oni's Flame after obtaining the Charm of Hachiman . The Oni's Flame can make any of your sword burn and deal burning damage to enemies.
The Onryo Armor and Wolf's Call Upgrades
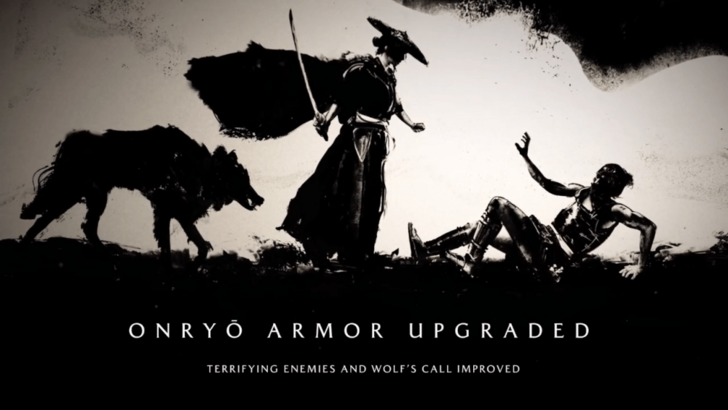
The Onryo Armor and the Wolf's Call will get an upgrade after defeating The Oni and completing the quest. It will automatically upgrade after watching the final cutscene of the quest.
Trophies and Achievements
| ✔️ | Trophy | Details |
|---|---|---|
|
|
Extinguish the fire of a cruel warlord. | |
|
|
Reunited with a ghost from the past. | |
|
|
Complete a successful Standoff or Assassination with a companion. |
Ghost of Yotei Related Guides

| Chapter | Quests |
|---|---|
| Prologue | ① The Snake |
| Chapter 1 | ② The Old Inn
③ The Way of Dual Katana ④ Saito ⑤ The Yotei Six ⑥ The Oni ⑦ The Kitsune ⑧ The Saito Brothers (Part 1) |
| Chapter 2 | ⑨ The Saito Brothers (Part 2) |
| Chapter 3 | ⑩ Call of the Hunt ⑪ The Final Hunt of the Onryo |
Comment
Author

The Oni Quest Walkthrough
Rankings
- We could not find the message board you were looking for.
Gaming News


![Monster Hunter Stories 3 Review [First Impressions] | Simply Rejuvenating](https://img.game8.co/4438641/2a31b7702bd70e78ec8efd24661dacda.jpeg/thumb)
Popular Games

Genshin Impact Walkthrough & Guides Wiki
Umamusume: Pretty Derby Walkthrough & Guides Wiki
Pokemon Pokopia Walkthrough & Guides Wiki
Honkai: Star Rail Walkthrough & Guides Wiki
Monster Hunter Stories 3: Twisted Reflection Walkthrough & Guides Wiki
Arknights: Endfield Walkthrough & Guides Wiki
Wuthering Waves Walkthrough & Guides Wiki
Zenless Zone Zero Walkthrough & Guides Wiki
Pokemon TCG Pocket (PTCGP) Strategies & Guides Wiki
Monster Hunter Wilds Walkthrough & Guides Wiki


Recommended Games
Diablo 4: Vessel of Hatred Walkthrough & Guides Wiki
Cyberpunk 2077: Ultimate Edition Walkthrough & Guides Wiki
Fire Emblem Heroes (FEH) Walkthrough & Guides Wiki
Yu-Gi-Oh! Master Duel Walkthrough & Guides Wiki
Super Smash Bros. Ultimate Walkthrough & Guides Wiki
Pokemon Brilliant Diamond and Shining Pearl (BDSP) Walkthrough & Guides Wiki
Elden Ring Shadow of the Erdtree Walkthrough & Guides Wiki
Monster Hunter World Walkthrough & Guides Wiki
The Legend of Zelda: Tears of the Kingdom Walkthrough & Guides Wiki
Persona 3 Reload Walkthrough & Guides Wiki


All rights reserved
©2025 Sony Interactive Entertainment LLC. Developed by Sucker Punch Productions.
The copyrights of videos of games used in our content and other intellectual property rights belong to the provider of the game.
The contents we provide on this site were created personally by members of the Game8 editorial department.
We refuse the right to reuse or repost content taken without our permission such as data or images to other sites.