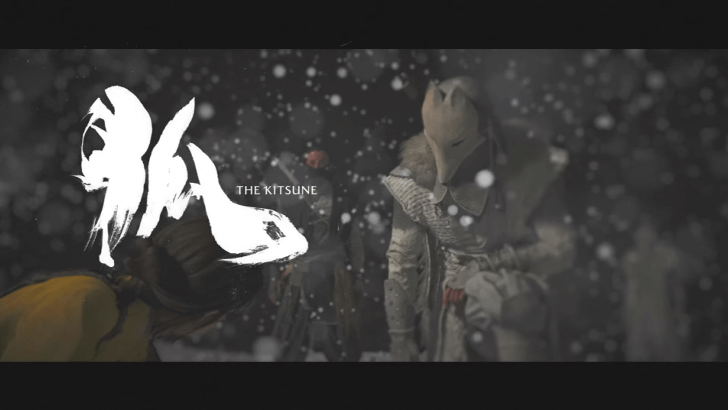
The Kitsune Walkthrough: How to Get Into the Building
★ 11/24: 1.100.000 Patch Notes ▶︎ NG+
☆ Undying Armor | Spider Lily
┣ Jubei | Snow Drift | Takezo | Black Dye
┗ Reliquary | Fox Puzzles | Riddles | Kubo
★ Armor | Weapons | Charms | Best Armor
┗ Walkthrough | Quests | Platinum | Map
Solve kitsune puzzles and get into buildings during The Kitsune tale in Ghost of Yotei. Check out the walkthrough on how to complete the Kitsune, its puzzles, solve how to get into the buildings, how to find the way into the forest, its quest rewards, and how to unlock it here!
| ◄ Previous Quest | Next Quest ▶ |
|---|---|
| The Oni | The Saito Brothers |
How to Get Into the Buildings and Forest
- Upper Level of the Nine Tails Training Grounds
- Black Dye House Puzzle
- Kitsune Puzzle Box Building
- Forest Kitsune Puzzle
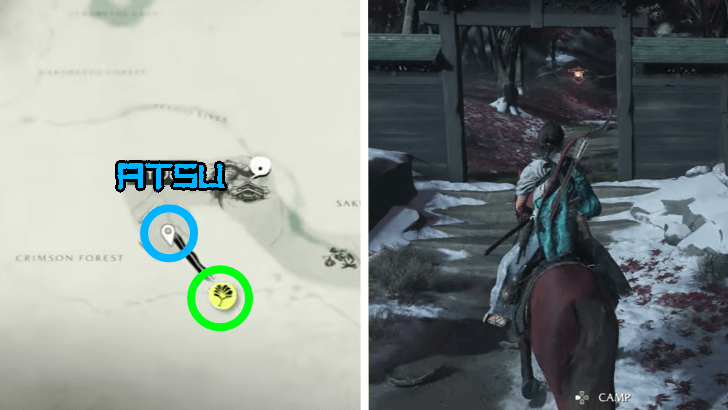
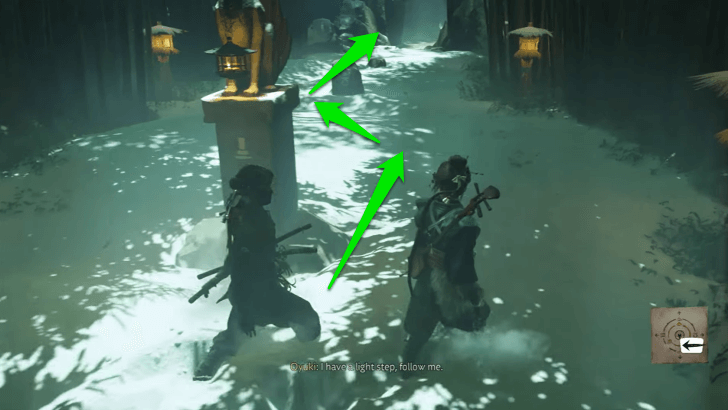
Upper Level of the Nine Tails Training Grounds
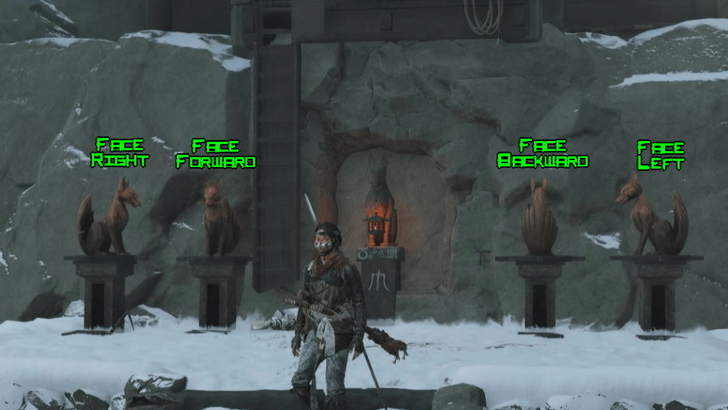
To get to the upper level of the Nine Tails Training Grouds, the leftmost statue should face right, the center-left one should face forward, the center-right one should face back and away from you, and the rightmost one should face left.
This is an objective in Part 2 of the Kitsune questline, Blood on the Snow, and is required to progress the story. This also leads to the acquisition of the NIne Tail Armor Set
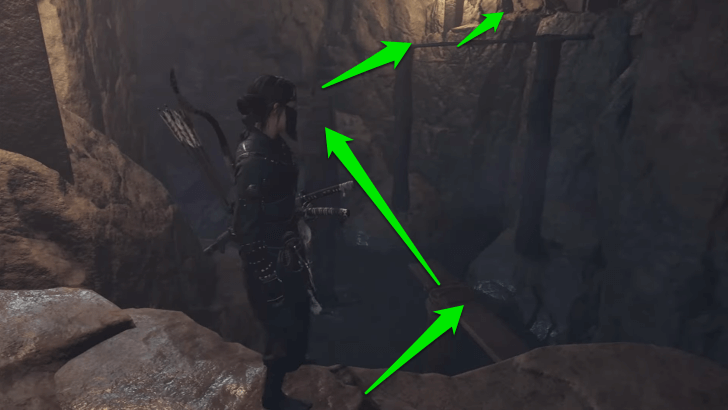
▼ How to Get to the Upper Level
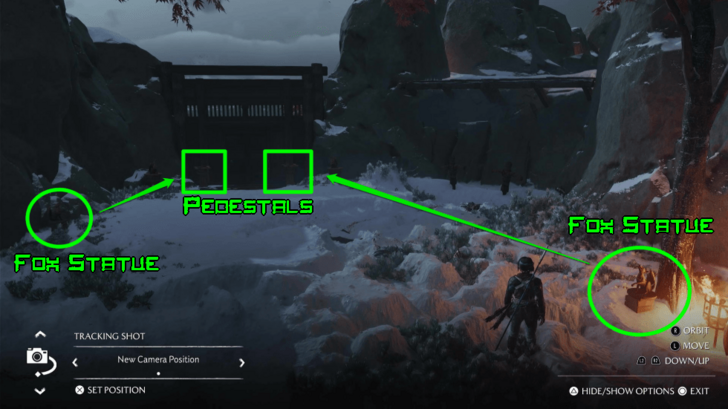
Black Dye House Kitsune Puzzle
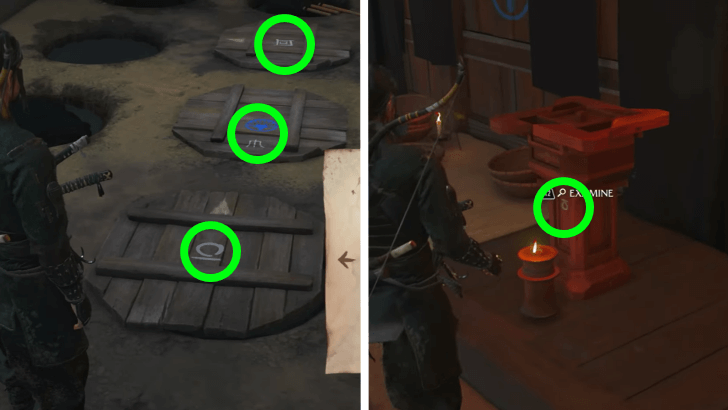
To get past the Black Dye House puzzle, pick up the kitsune statues to the left of the building and place them on the pedestals in the front. Rotate the left one to face left, then the right one to face right. This should unlock the lids for rotating.
As for the lids, it's the same thing: rotate the left lid to face left, then the right lid to face right. This should unlock the secret passage, which is an objective in the Way of the Shamisen subquest.
▼ How to Solve the Black Dye House Puzzle
Kitsune Puzzle Box Building

Only 3 clues are in the area, meaning that one of the 4 rotatable statues must not be moved. Keeping all of these in mind, the leftmost statue stays put, turn the center-left one should face right, the center-right one should face right, and the rightmost one should face left.
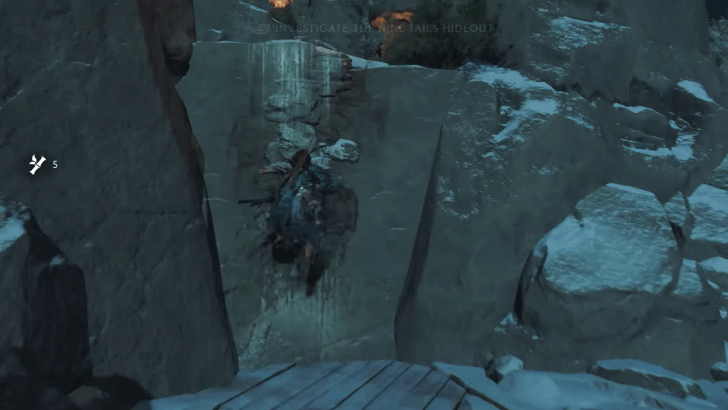
You'll encounter this puzzle in the Way of the Shamisen subquest, where you'll will need to get into the building where the puzzle box is kept in the Nine Tails hideout beneath the Black Dye House in order to progress the story.
▼ How to Solve the Nine Tails Hideout Puzzle
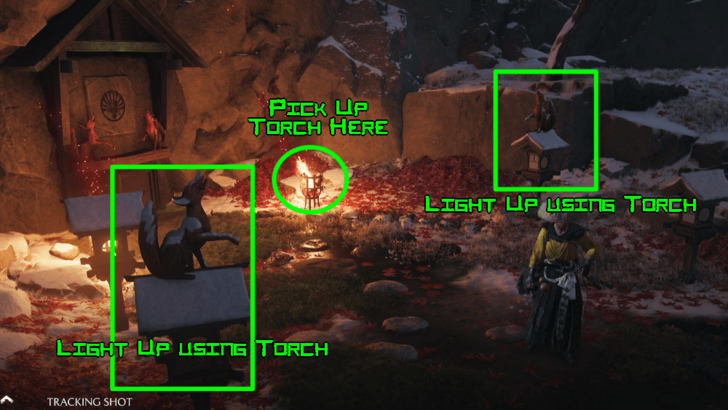
Forest Kitsune Puzzle
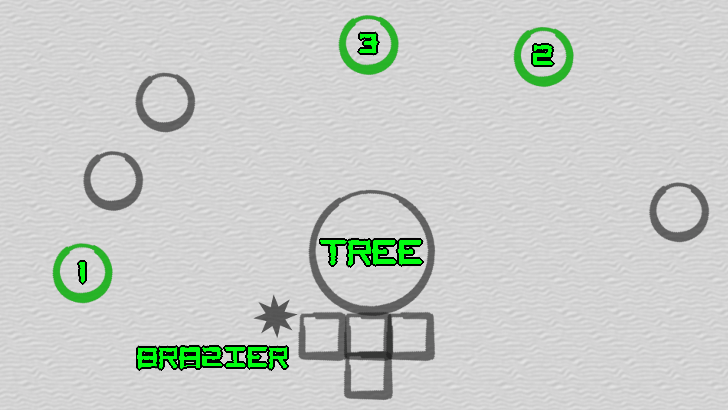
To get into the forest in the Poison and Lies subquest, pick up the torch and light the kitsune statue lanterns in accordance to the ones in front of the tree.
Light the completely crouched one directly left of the tree, then the rearing one a little to the northeast, then the other completely crouched fox directly north of the tree.
The Kitsune Walkthrough
- Spirits of Teshio Ridge
- Blood on the Snow
- The Way of the Shamisen
- Poison and Lies
- The Tale of the Kitsune
- The Kitsune's Fate
Part 1: Spirits of Teshio Ridge
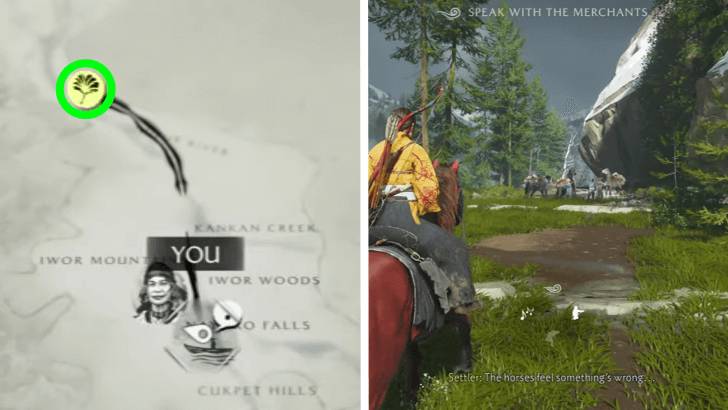
1. Go to the Central Ferry to Reach Nayoro Wilds
The Central Ferry is located hard northeast of the Old Inn and is quite a ways. Ride your horse and follow the Nupur River until you stumble upon some people around a campfire.
At the campfire, talk to huci, the ferrywoman, and ask to ride northward to Nayoro Wilds where the Kitsune was last seen.
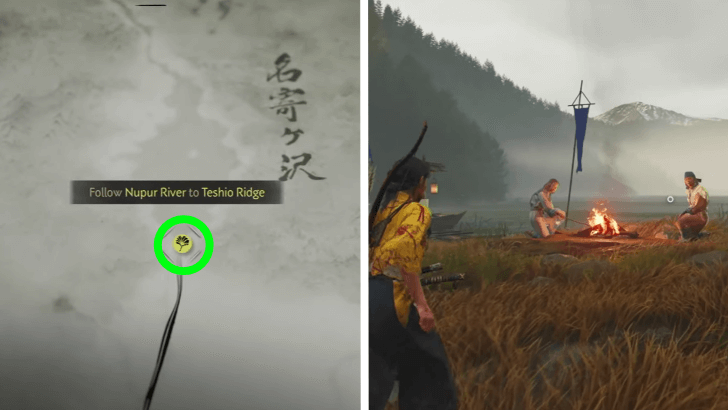
2. Follow the Nupur River to Teshio Ridge
Upon arriving at the North Ferry and unlocking some side quests like the Heart of an Ainu, mount your horse and ride northward to Teshio Ridge. You'll know you've reached your destination when you see a commotion ahead.
3. Speak to the Merchants and Kill the Ambushers
Dismount your horse and speak to the merchants to see what's going on. A cutscene in which they'll ask you to escort them up the mountain will play, and the quest will start.
Ride with the merchants and listen to their conversation about reaching the Red Crane Inn. Eventually, you will be ambushed in the snowstorm by shinobi in white, so take up your sword and defeat them.
4. Seek Shelter
After the cutscenes, you'll wake up to all the merchants killed and you being the sole survivor. Continue to trudge forward and into the cave ahead to seek shelter.
Start a fire inside the cave and a cutscene will play.
5. Travel to the Red Crane Inn for Leads on the Kitsune
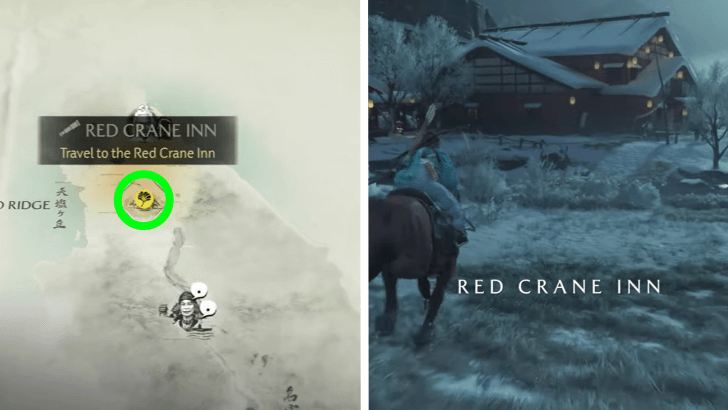
Once the storm clears up, mount your horse and ride to the Red Crane Inn. You can use the onsen they have prepared, but you need to go into the inn's main hall, which also happens to be filled Matsumae samurai.
Take a seat and eavesdrop on the samurai just up ahead. Approach them and offer to play zeni hajiki to glean more information on the Kitsune. They will instruct you to speak to their commander upstairs, but to no avail.
6. Beat Up the Samurai

Without any useful information, return downstairs for a cutscene involving Oyuki, the songstress. The samurai will get rowdy, so knock them all unconscious in a massive fistfight, then speak to Oyuki.
Part 2: Blood on the Snow
1. Meet Oyuki Outside of the Inn
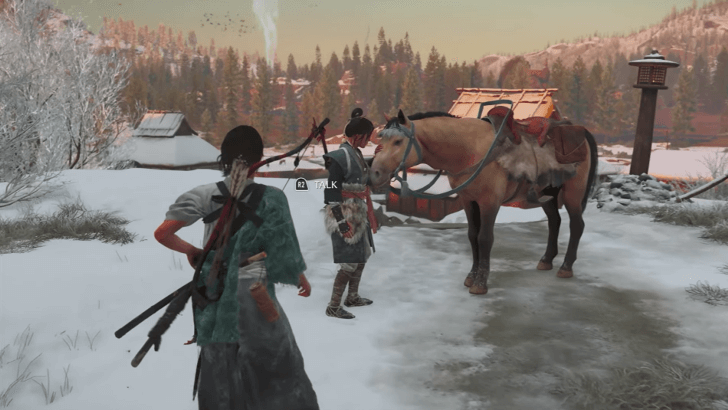
Exit the Red Crane Inn and speak to Oyuki outside, who will give you more clues about the Kitsune, the organization they run called the Nine Tails, and how they've been terrorizing the villages nearby.
When in observation mode, use the Right Analog Stick to look around. Observe the points of interests marked by a glowing white dot. Afterwards, Oyuki will ask you to ride with her, so agree to do so.
2. Use the Shrine to Lure Out the Nine Tails
Oyuki will lead you to a shrine dedicated to the Kitsune that many settlers leave coin offerings on in hopes that the masked figure would either leave them alone or protect them. Leave your own offerings and wait.
A cutscene will play where the Nine Tails shinobi will gather the offerings. Oyuki will suggest you follow them as they may lead to the Kitsune's hideout.
3. Follow and Defeat the Nine Tails
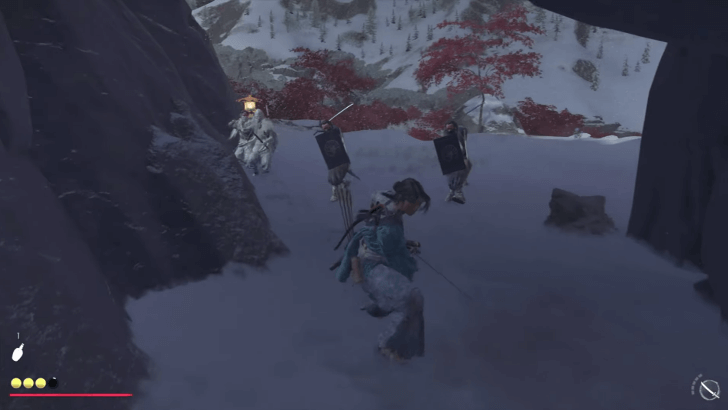
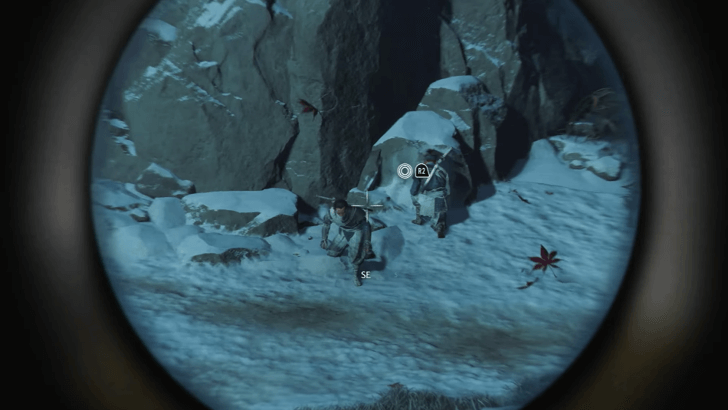
Follow the Nine Tails until you lose them but come across an actual fox. Follow the fox only to be led into an ambush. Defeat the Nine Tails and gather a map with a marked location.
4. Go to the Marked Location
The map acquired from the Nine Tails will point to a location directly southeast of your current position. Make your way there until you come across a wooden gate.
Go through it and follow the trail ahead until you reach a shrine with 4 lanterns in front of it.
5. Solve the Fox Lantern Puzzle
The fox lantern by the shrine is pretty easy. Simply grab the torch nearby and only light the lanterns with the foxes on top of them. Once complete, a crawlspace under the shrine will open, so go through it.
Brace yourself as a fight with the Nine Tails will ensue. Defeat them and press forward.
6. Solve the Next Kitsune Gate Puzzle
After the battle, examine the gate to find two empty pedestals, and beside them are fox statues with their heads looking up and a paw raised. Look around for the missing fox statues as they should just be nearby.
Facing the door, the fox with the left paw raised goes to the right side of the gate, while the one with the right paw raised goes to the left. Once Atsu confirms that it did something, open the door and proceed onward.
7. Pass Through the Training Grounds
| 7.1 | Climb the First Handholds |
|---|---|
 Move forward and climb the handholds that will be immediately to your right. |
|
| 7.2 | Grab the Chest and Climb the Handholds |
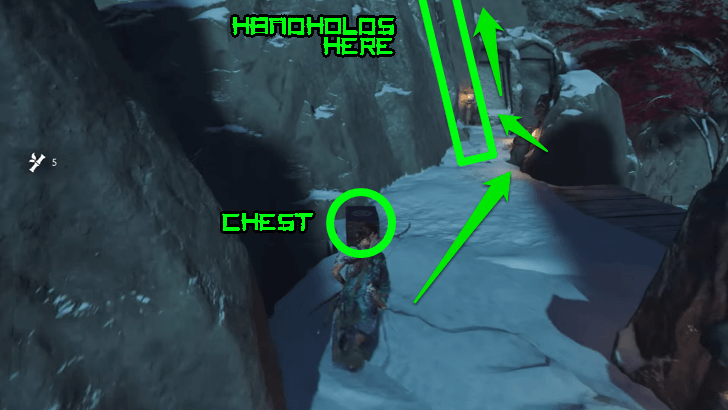 Open the chest in front of you, then proceed forward. Look to your left to spot the handholds, then climb them all the way to the top. |
|
| 7.3 | Jump Over the Gap and Cross the Slackline |
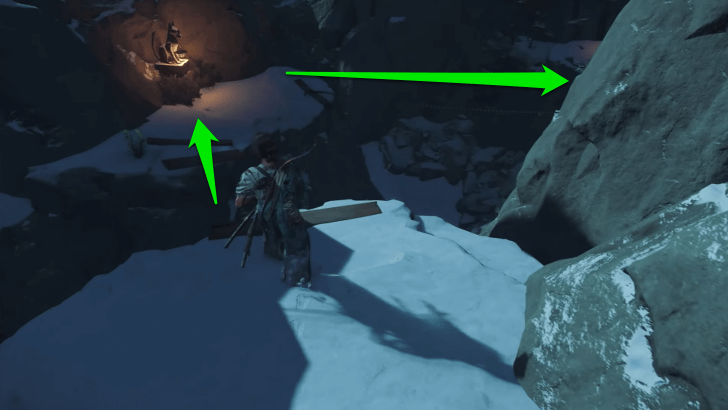 Move forward a bit and spot the kitsune lantern on the other side of the gap and a slackline next to it. Jump over the gap and cross the slackline, then jump to the beam areas by using the branch to get to the starting point. |
|
| 7.4 | Parkour Through the Beams |
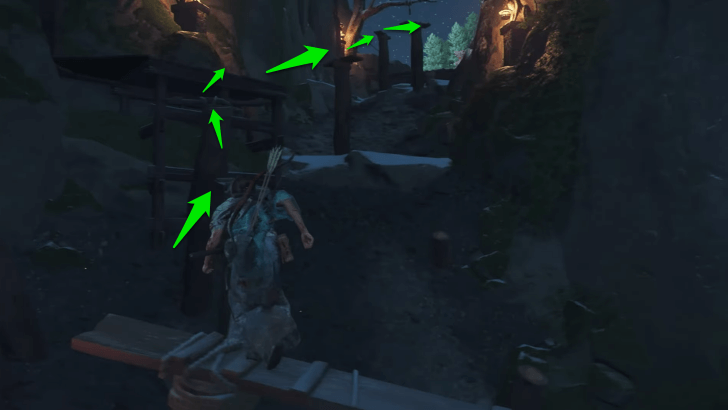 Follow the kitsune lanterns and make your way past the beams. You might need to climb some handholds and use your grapple for this. Once at the end, grapple onto the branch above and drop down onto the training grounds proper. |
|
| 7.5 | Enter the Dojo and Examine the Scroll |
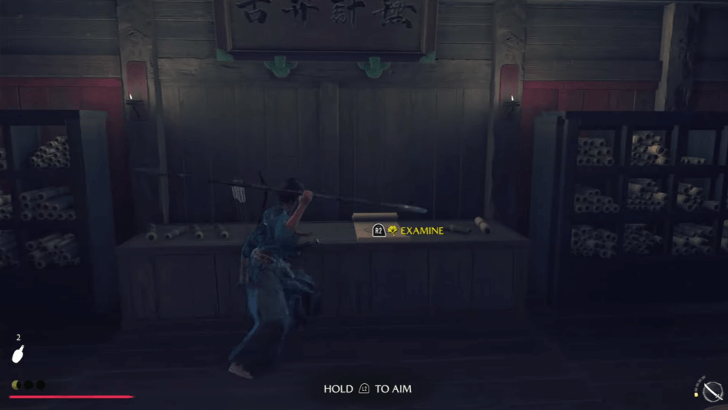 Enter the dojo and examine the scroll within. Brace yourself as the Nine Tails will spawn to try and stop you. |
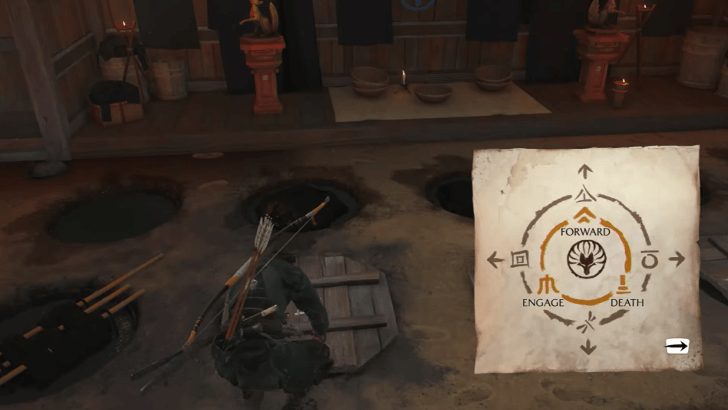
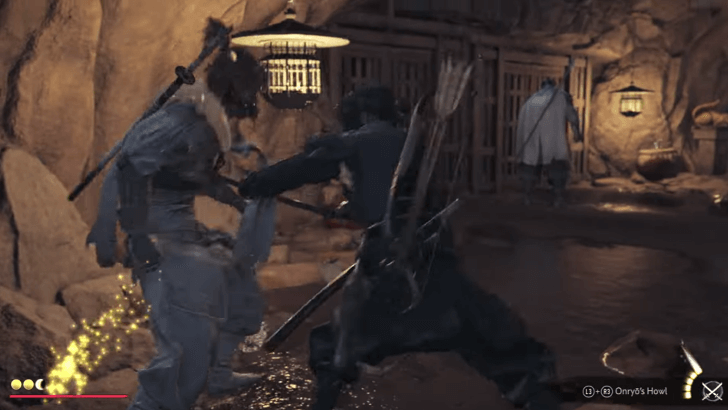
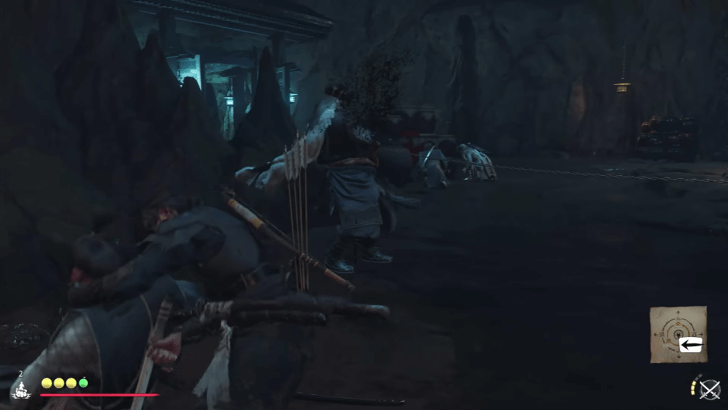
8. Defeat the Nine Tails and Copy the Cipher
 |
| Click here to open image in a new tab |
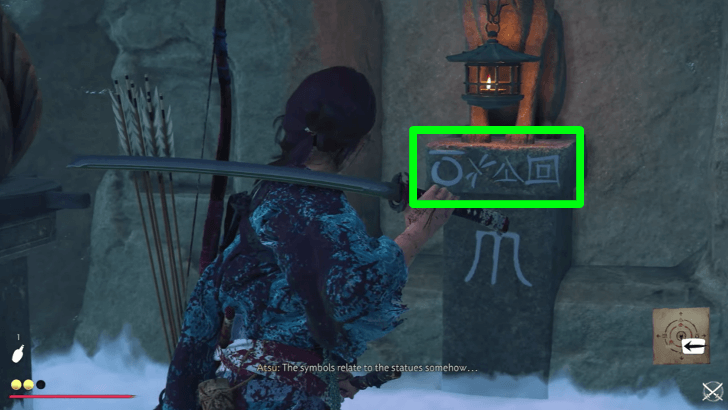
Defeat the waves of Nine Tails shinobi in your way. Afterwards, return to the scroll and copy the cipher for the symbols they use. Swipe on the touchpad as prompted to copy the symbols.
A good way to remember this cipher without looking is by acknowledging that it resembles the Playstation icons—Triangle for Up, X for Down, Square for Left, and Circle for Right. Avoid puzzle elements marked with the Death symbol.
You can click on the image above and use it as a reference, or swipe left on the touchpad at anytime to bring up the cipher in-game.
9. Use the Cipher to Exit the Dojo
Time to put the cipher to the test. Spot the door with the forward symbol below it, and see that it's framed by two kitsune statues. Pay attention to the symbols on the door frame behind them.
Interact with the left kitsune statue with the engage symbol behind it to unlock the door, then proceed. Defeat the Nine Tails shinobi that will try to stop you.
10. Find a Way to the Upper Building
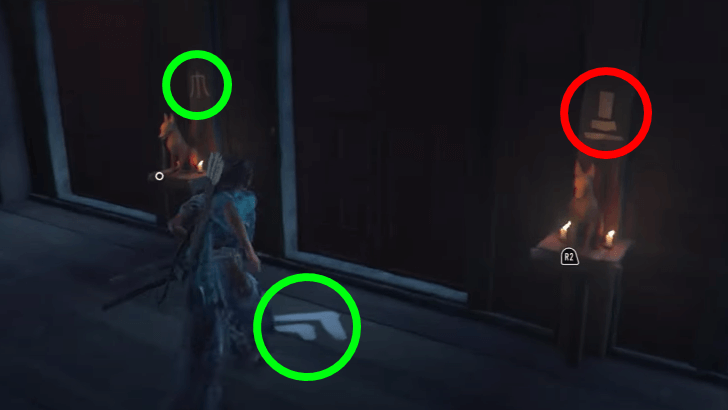
Now you must find a way to the upper building to continue onward. Spot the kitsune statues just below it and see if they can help.
| 10.1 | Examine the Central Statue |
|---|---|
 Approach the central kitsune to get some clues about how to solve this puzzle. Pay attention to the symbols at its base, then proceed to the surrounding kitsune statues. |
|
| 10.2 | Grab the Chest and Climb the Handholds |
Each kitsune statue apart from the central one has a symbol on its base and can be rotated to face a certain direction. • Rotate the leftmost one to face right. • Rotate the left one to face forward (down). • Rotate the right one to face backward (up). • Rotate the rightmost one to face left. |
11. Climb to the Upper Building and Acquire the Nine Tail Armor
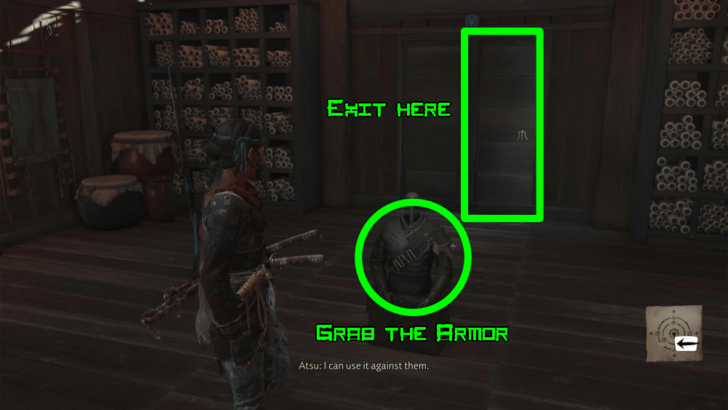
A ladder will descend from the upper building upon completing the kitsune statue puzzle. Climb it and proceed inside the upper building to find the Nine Tail Armor Set. Pick it up, put it on, and proceed forward.
Open the door with the engage symbol on it, then follow the trail all the way to the end to conclude this subquest and proceed to the next part.
Part 3: The Way of the Shamisen
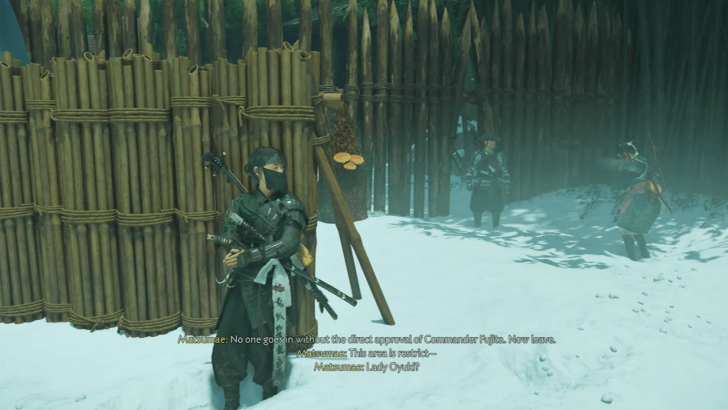
1. Return to Oyuki and Eavesdrop on Commander Fujita
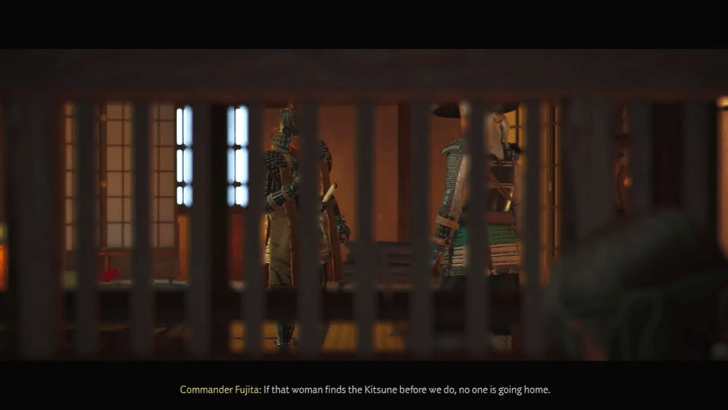
Travel back to the Red Crane Inn and return to Oyuki with new information about the Kitsune. In exchange, she'll present you with an opportunity to gather more.
Follow Oyuki upstairs and she'll lead you to a secret passageway where you can use to eavesdrop on Commander Fujita. You'll learn that the Matsumae samurai have an informant named Chosuke, and you should find him for more intel.
2. Enter the Room and Find Details About Chosuke
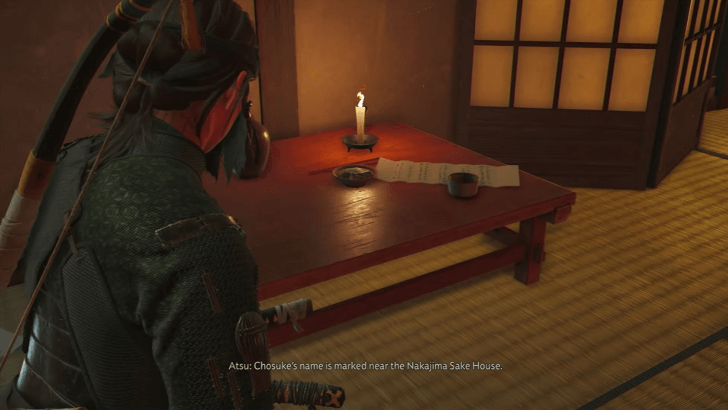
Oyuki will distract Commander Fujita, so you should go into the room and investigate. Examine the letter on the table to learn that Chosuke is at the Nakajima Sake House.
Another letter from mistresses on the bed, and the final note with Nine Tails symbols should be above the cabinet at the far side of the room. Leave the room with Oyuki and she'll tell you she has a plan to glean information from the sake house's proprietor.
3. Go to Nakajima Sake House and Get Intel on Chosuke

Mount your horse and ride with Oyuki to Nakajima Sake House. Along the way, she'll tell you of a plan to be disguised as waitresses to throw trackers off your scent and find Chosuke easier. Dismount your horse and you'll get changed immediately.
Enter the sake house and perform with Oyuki while eavesdropping on the patrons. You'll learn that Chosuke is well off at the moment, he's been here since morning, and that he's likely upstairs gambling.
4. Go Upstairs and Engage with Chosuke
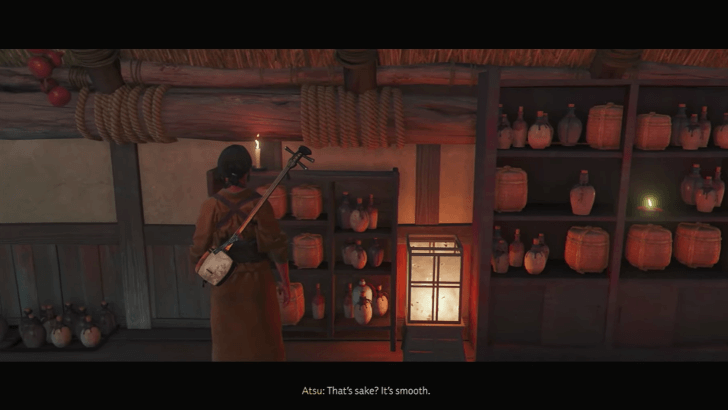
Follow Oyuki upstairs. Along the way, she'll give you an emetic that you must put into Chosuke's drink should he make an order. Climb up and spot Chosuke at the far corner of the room. Speak to him and he'll ask for a refined drink.
Go to the wine rack by the the wall opposite Chosuke's table. You can choose to taste the other drinks but ultimately, you'll settle for the smooth sake.
Put the emetic in and serve it to Chosuke. Follow him outside and he'll reveal to you that the symbol in the letters found in Commander Fujita's room came from a dye house near the river whose owner has been acting strange as of late.
5. Travel to the Black Dye House and Gain More Intel
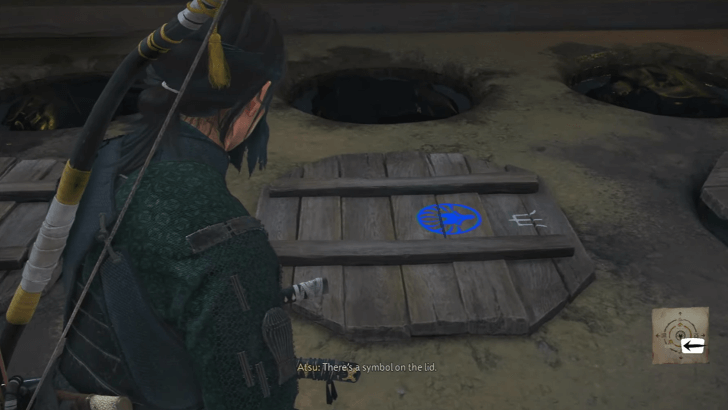
Oyuki knows where the dye house is so simply follow her to it. Enter the building on the right to find signs of a struggle and nothing else. Go to the dye storage and spot familiar symbols on the dye lids, kitsune statues, and pedestals with more symbols.
6. How to Solve the Black Dye House Kitsune Puzzle
| 6.1 | Put the Kitsune on Their Pedestals |
|---|---|
Simply pick up the kitsune statues and place the one facing left on the left pedestal with the left symbol, and the other one on the right with the right symbol to complete the puzzle. |
|
| 6.2 | Rotate the Lids |
 Next, rotate the lids in accordance to the symbols on them. Rotate the left one to face left, and the right one to face right. This should open the middle lid that leads to a hidden passage. |
7. Find and Rescue the Dye Master
Keep following the path ahead until you reach a chamber with Nine Tails shinobi and the dye master in a cage. Kill all the shinobi in the area, unlock the cage, and speak to the dye master.
She'll tell you that the other hostages are held deeper in the hideout, so set off and rescue them.
8. Find a Way Deeper into the Nine Tails Hideout
| 8.1 | Interact with the Fox Statue for a Slackline |
|---|---|
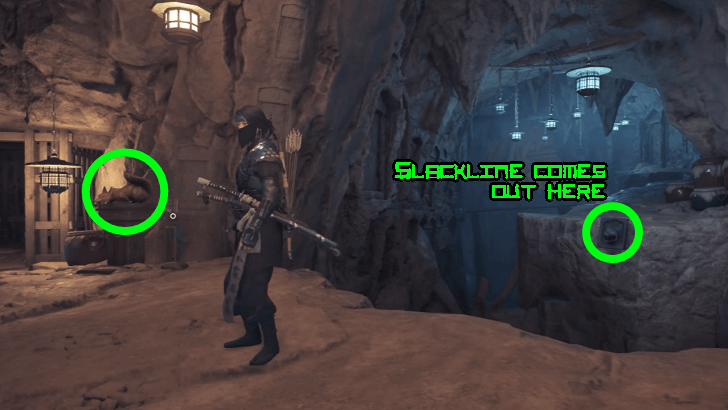 Interact with the fox statue by one of the cages to release a slackline to the other side, which you can use to cross. |
|
| 8.2 | Pass Through the Beams |
 Jump across the beams to the other side to proceed further. |
|
| 8.3 | Destroy the Barricade |
 Follow the path ahead and go through the crawlspace until you reach a wooden barricade. Use your grappling hook to pull it out of the way, then squeeze through the gap in the wall. |
|
| 8.4 | Grapple Across |
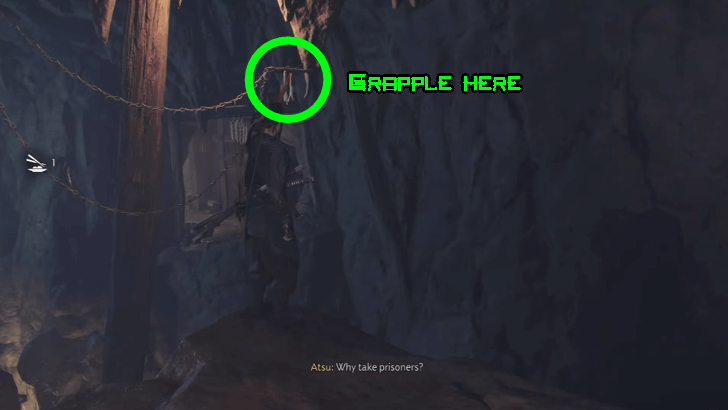 Look up to the ceiling ahead to spot a grapple point. Latch onto it and swing across. |
|
| 8.5 | Make Your Way Past More Beams |
 Jump across the final set of beams and you will be where the hostages are being kept. |
9. Defeat the Nine Tails and Rescue the Hostages
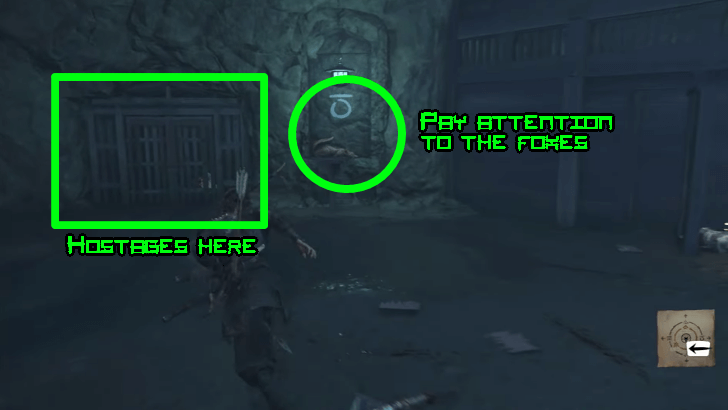
There will be two entrances you can take here—one through the door on the left and one through the open entrance to the right. Both will ultimately lead to the same area.
A wave of Nine Tails shinobi will be camped near each cage. Be sure to get rid of them before unlocking the said cages. You'll find that all the hostages are dead.
However, pay close attention to the fox statues near each cage and the symbols behind them.
10. Get Into the Building with the Puzzle Box
The gate to the next area is locked behind a puzzle involving kitsune statues in poses and different emotions: proud (standing), joyful (looking up), angry (crouched completely down), and scared (back arched).
Based on the clues given by the foxes near the cages, don't move the proud statue, turn the joyful statue to the right, turn the angry statue to the right, and turn the scared statue to the left.
11. Acquire the Kitsune's Puzzle Box and Leave
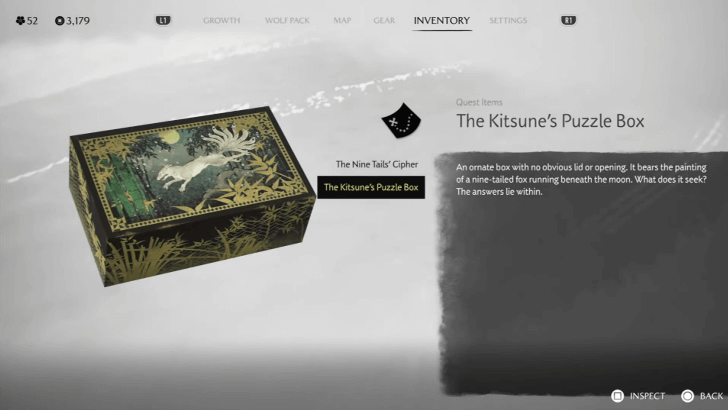
Enter the chamber beyond and a cutscene will play. You will then acquire the Kitsune's Puzzle Box, which will prompt you to return to Oyuki and the dye master with your findings.
A cutscene will play where Oyuki will help you solve the puzzle box, revealing a list of ingredients for a type of poison inside. This will conclude the subquest.
Part 4: Poison and Lies
1. Speak With Oyuki and Observe the Sentinel Camp
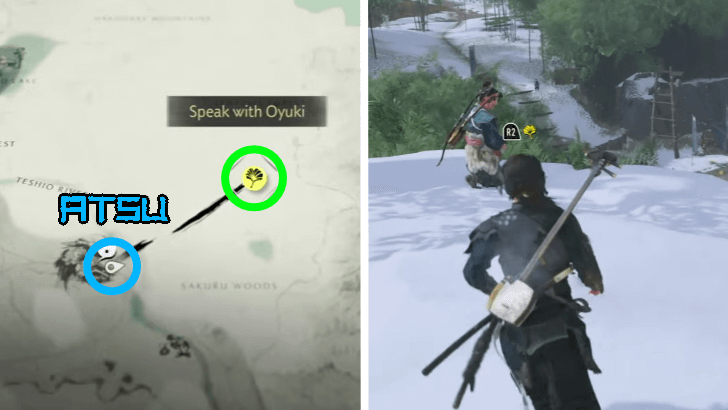
Find Oyuki directly northeast of your last position from the previous subquest. If you see a wooden gate crawling with soldiers, veer off-road to the right and climb up the hill that overlooks the compound. Oyuki will be there.
The Matsumae will be alerted on the Kitsune's presence thanks to Chosuke. Observe points of interest in the sentinel camp below to gather more clues, then spot your entrance to the Nine Tails harvest site at the far end of the compound.
2. Make Your Way Into the Harvest Site
You and Oyuki will then enter the compound. Lead her to the fence with the guard, then wait behind the bamboo walls until she convinces the guard to move.
Squeeze through the gap and Oyuki will follow shortly after. Follow the bamboo grove all the way to the end, but pay attention as the path will be littered with symbols from the cipher, as well as pit traps.
3. Find the Way Into the Forest
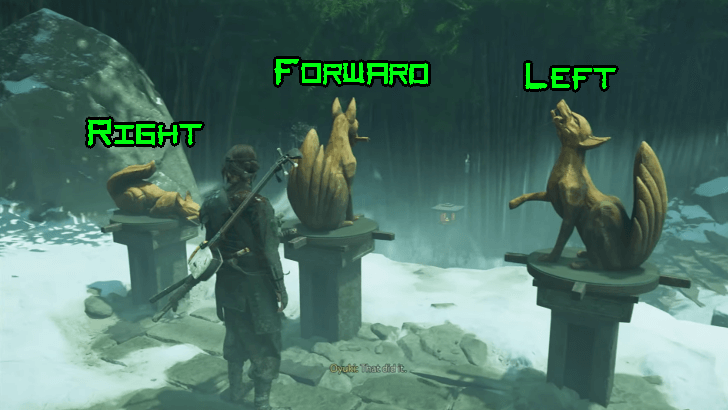
| 3.1 | Examine the Pedestals |
|---|---|
 You must find your way into the forest to progress. First, examine each fox on the pedestals and notice their poses: 2 completely crouched down foxes on either side of a howling one. |
|
| 3.2 | Light the Kitsune Lanterns |
Next is to grab the torch from the brazier nearby and light correct the lanterns with the kitsune on top of them posed accordingly. Use the photo above as a reference for which lanterns to light up. |
|
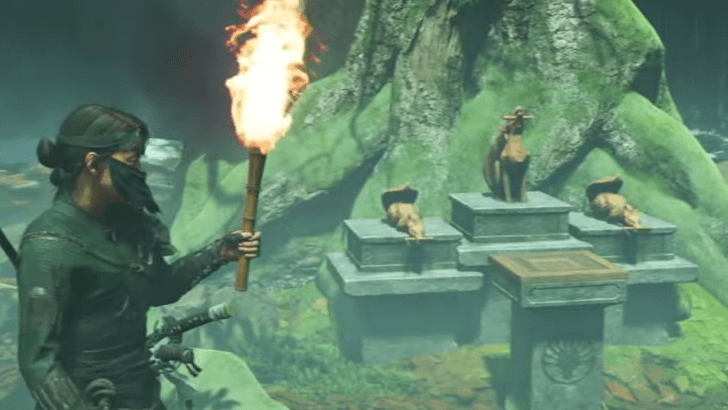
| 3.3 | Place the Puzzle Box on the Empty Pedestal |
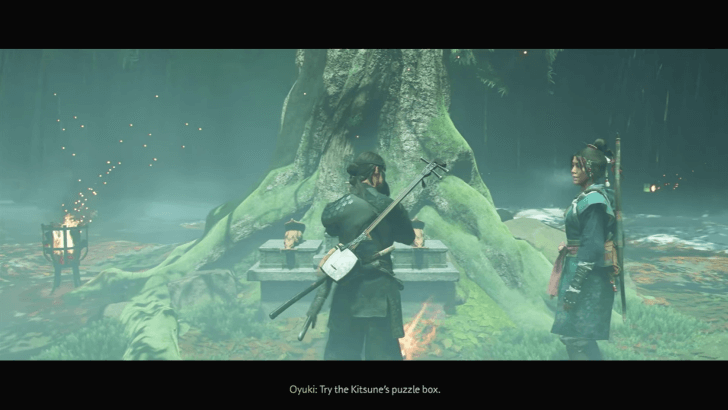 The final step to this puzzle is to put the puzzle box onto the empty pedestal in front of the three kitsune statues. Proceed into the forest afterwards. |
4. Solve the Second Kitsune Statue Puzzle
Proceed further inward and brace yourself for another ambush by the Nine Tails. Defeat them all and observe the surroundings. Three shrines with fox statues that correspond with the interactable ones will be present with symbols.
Use them as clues and rotate the fox statues accordingly. Then follow the path ahead.
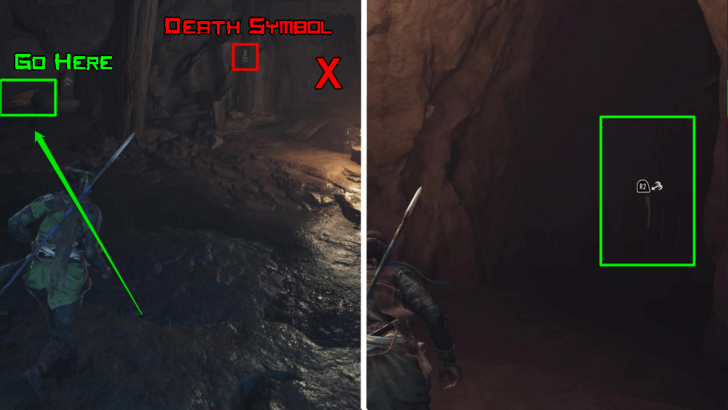
5. Get Past the Traps
Pay attention to the symbols on each rock and notice the death symbol with a directional symbol, telling you where the traps are.
Simply avoid going the indicated direction and follow Oyuki through the trap fields all the way to the other side. Squeeze under the crawlspace and follow the path ahead.
6. Open the Large Gate and Keep Pushing Forward
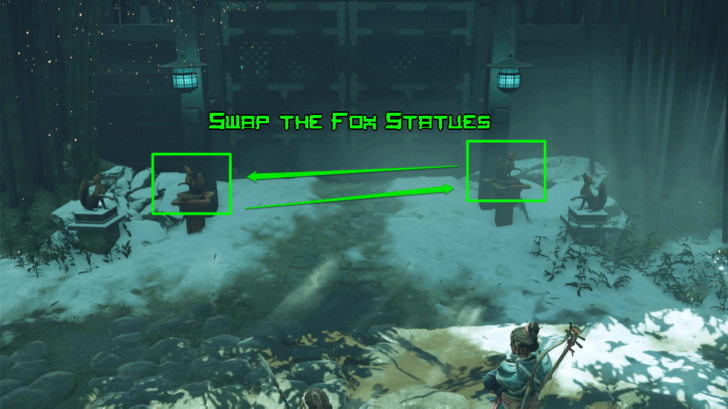
When you reach a large wooden gate framed by 4 fox statues, simply switch the places of the two inner foxes to unlock it, then proceed further inward with Oyuki.
Keep following the cave to the end, remove the wooden barricade, squeeze through, then keep pushing forward, defeating the ambushing Nine Tails shinobi along the way.
7. Get Past the Second Set of Traps
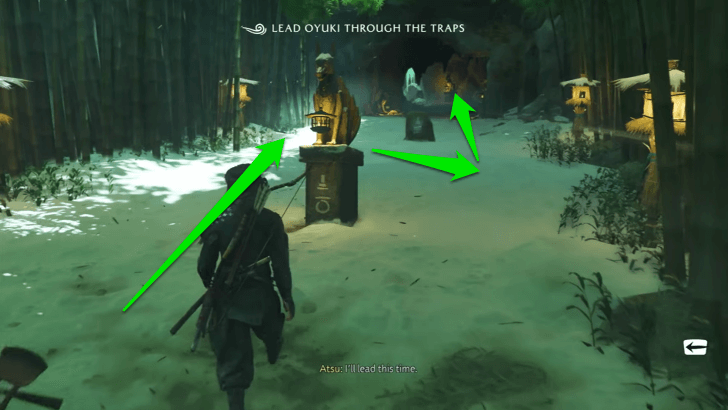
This time, it's your turn to lead Oyuki through the traps. Pay attention to the direction symbol on the base of the statues and avoid going there.
Go to the left of the statue, to the right of the rock, then straight to safety. Safely make your way to the other side and proceed further inward.
8. Find a Way Past the Gate
Cross the beams in the next area, then try to open the gate at the end only to find that it's locked. Look to the right of the gate to spot a cliff you can boost Oyuki up to, so approach it and do so.
You and Oyuki will arrive at the harvesting site proper. Use your spyglass to spot the Kitsune, but Commander Fujita will launch an all-out assault.
9. Make a Beeline for the Kitsune
The Kitsune will attempt to escape. Slide down immediately, ignore the ensuing battles, and head straight for the Kitsune. Observe your path as there will be turns that you may miss.
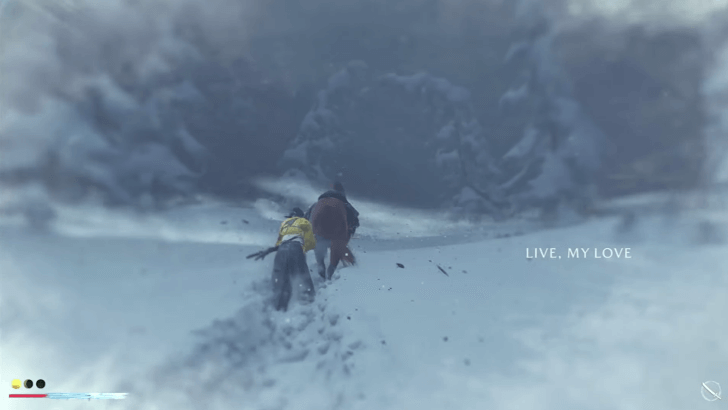
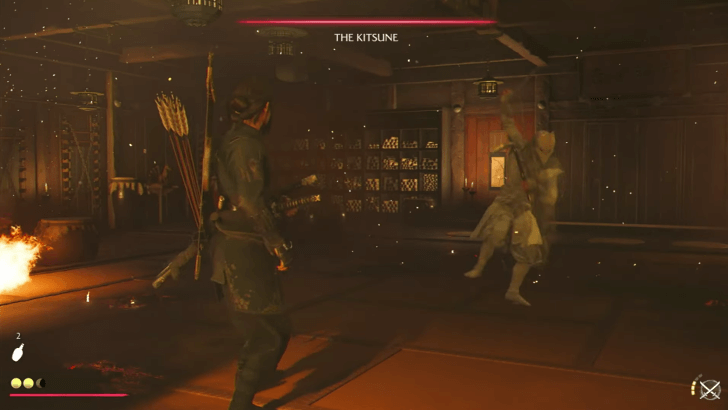
Once inside, attempt to face the Kitsune in a battle. However, this is not a winnable duel. Face him long enough until a cutscene ensues.
10. Push Through the Illusion
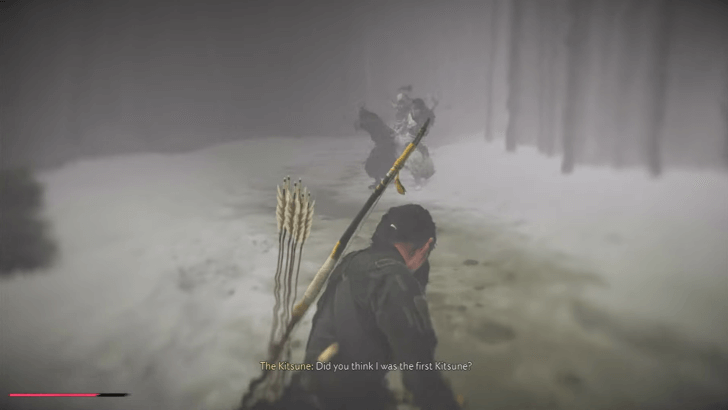
You will be infected with the Wolfsbane toxin by the Kitsune, which will send you in a daze and render you unable to fight. Follow Oyuki and listen to the revelations whispered to you by the Kitsune.
Keep moving forward until a the final set of cutscenes of the subquest play to conclude it.
Part 5: The Tale of the Kitsune
| Objectives |
|---|
|
1. Find Oyuki and Face Her in Battle 2. Learn the Listen Ability 3. Unlock the Smoke Bombs 4. Clear the Abandoned Village 5. Return to the Old Graveyard and Resist the Toxin |
1. Find Oyuki and Face Her in Battle
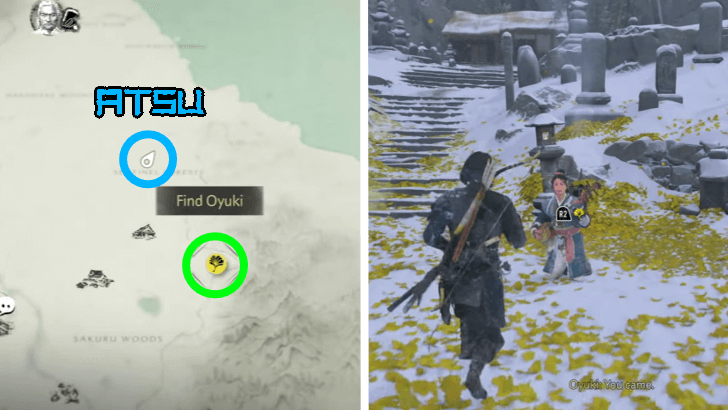
You can find Oyuki in the Old Graveyard southeast of your last position at the end of the previous subquest. She will be playing her shamisen in a clearing lined with graves. Speak to her and engage in a duel.
Reduce her health to 50% and a cutscene will play. Follow her to the hill by her hideout and she will reveal everything about her past, as well as more information about the Kitsune, how to resist the toxin, and mroe of Saito's weak spots.
2. Learn the Listen Ability
Oyuki will introduce you to the Listen ability, which allows Atsu to tell where enemies are, even through walls. Press R3 to listen to your surroundings and answer Oyuki's questions.
After you get the hang of it, use the Listen ability to try and find her. Once you hear her behind the rocks in the distance, approach her.
3. Unlock the Smoke Bombs
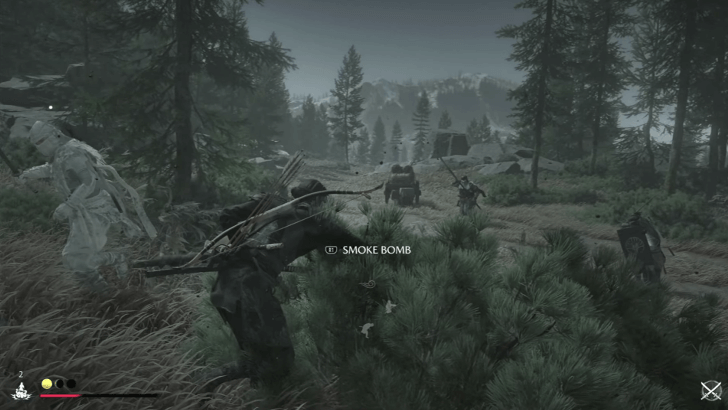
Follow Oyuki back to her hut and grab some incense, then follow her back out to the graveyard and tend to the graves. Do so, and she'll tell you the tale of her past as the Kitsune. Afterwards, ride with her, but you'll stop just short of an ambush.
Use the Hunter's Ear to ascertain the location of the ambushers. She'll then give you the smoke bombs, which will permanently unlock it in your inventory. After that, proceed to kill all the ambushers.
After defeating the ambushers, search their bodies to find out where they came from. Continue riding with Oyuki to the tannery.
4. Clear the Abandoned Village
With new a new tool and ability at your disposal, put them to the test by clearing out the abandoned village of Nine Tail shinobi. Most of them will be lurking in bushes, so do so in turn and use the cover of the fog to take them out one by one.
After doing so, Oyuki will ask you to set up camp by the firewood nearby. Cook some food, watch the cutscenes, then continue your journey with Oyuki in the morning.
5. Return to the Old Graveyard and Resist the Toxin
Return to the Old Graveyard with Oyuki and she'll ask you to light the braziers lining the clearing that are tainted with the Wolfsbane toxin. Do so so she can teach you how to resist it on your own.
You will then engage in a duel with Oyuki for the second time. Defeat her, and you will reconcile with her afterwards. In the morning, find Oyuki playing her shamisen in the clearing, and you'll seal your partnership with a song.
Part 6: The Kitsune's Fate
| Objectives |
|---|
|
1. Return to the Red Crane Inn and Investigate 2. Go to the Waterfall and Solve the Kitsune Brazier Puzzle 3. Assassinate the Nine Tails with Oyuki 4. Kill Dojun the Kitsune |
1. Return to the Red Crane Inn and Investigate

To begin your hunt for Dojun, the real Kitsune, return to the Red Crane Inn only to find it ransacked and destroyed with bodies hung everywhere. Speak to Oyuki who got there before you to find out what happened.
Afterwards, investigate the inn for clues on where Dojun might have headed. Use the Hunter's Ear ability to find the child Shunpei upstairs. Approach him and speak to him.
2. Go to the Waterfall and Solve the Kitsune Brazier Puzzle
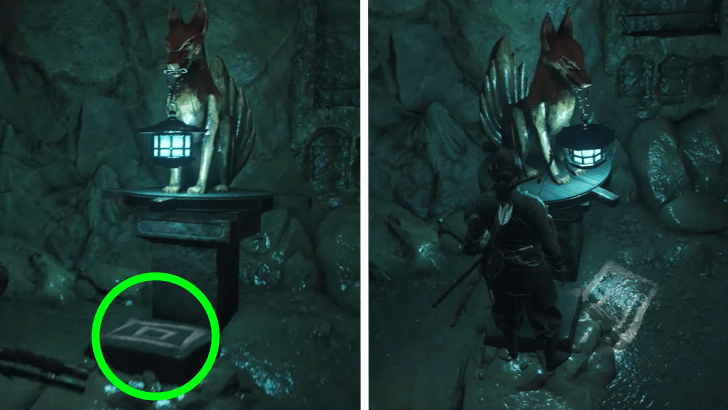
With clues about camellias, Oyuki will know where to go. Ride with her to a frozen waterfall in Teshio Ridge. Inside, you'll find a locked gate lined with blue braziers and kitsune statues with yellow braziers.
Light up the kitsune braziers and look below them to find symbols. Simply rotate them to the direction indicated, then proceed inward.
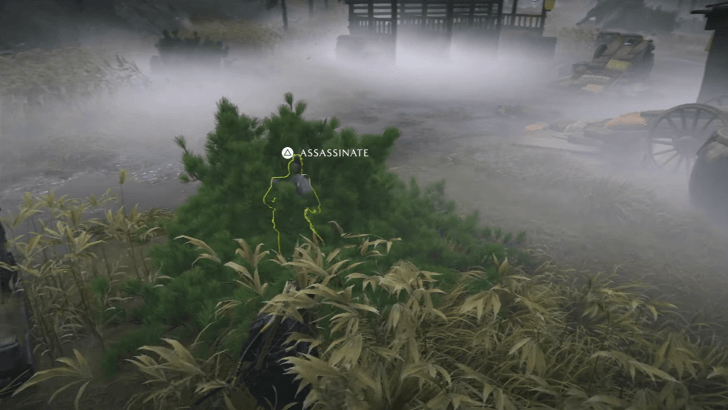
3. Assassinate the Nine Tails with Oyuki
Nine Tail shinobi will be stationed all over the clearing below. Assassinate all of them with Oyuki who will support you by killing her own share. Once that's done, investigate the displayed map with Oyuki.
Afterwards, go through the door, climb the wall, and follow a path to a wide open clearing where Nine Tails are waiting. Either use the Hunter's Ear to hunt the down silently or defeat them face to face in battle.
More Nine Tails will try to impede your progress so cut them all down. Once the Nine Tails are decimated, all that's left is to push forward and deal with Dojun himself.
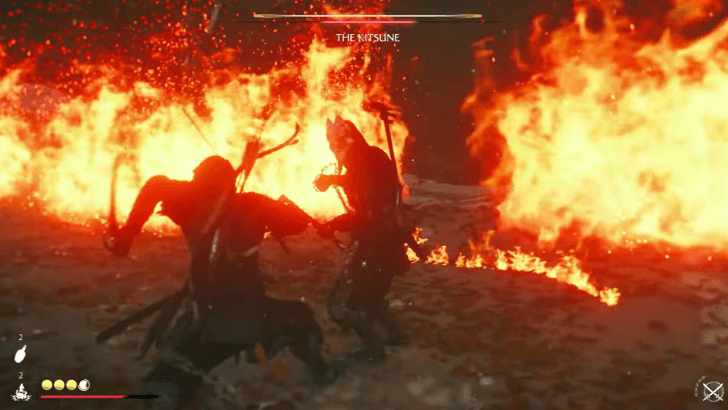
4. Kill Dojun the Kitsune
The Kitsune has a lot of tricks up his sleeve, such as disarming you, using smoke bombs to hide from view, and switching weapons to match your equipped gear.
Be careful and opt for defense rather than offense. Save up your sake for Spirit and your Spirit for emergency healing.
The Kitsune Quest Rewards
- Nine Tail Armor Set
- Onryo Armor Upgrade
- Hunter's Ear
- Smoke Bombs
- Kitsune's Mask and Shadow
- Trophies and Achievements
Nine Tail Armor Set
 Nine Tail Armor Nine Tail Armor |
 Nine Tail Acolyte Mask Nine Tail Acolyte Mask |
 Nine Tail Acolyte Headband Nine Tail Acolyte Headband |
During the quest, you can acquire the Nine Tail Armor Set within the Nine Tail Hideout. It is located in the upper building of the training grounds, and is specifically designed for stealth.
All Armor Sets Locations
Onryo Armor Upgrade

Defeating the Kitsune will upgrade your Onryo Armor, increasing your chances of terrifying enemies. Your Wolf's Call ability will also improve.
How to Upgrade the Onryo Armor
Hunter's Ear
The Hunter's Ear ability enables Atsu to perceive enemies even through walls and determine their position. Upon reaching Part 5 of the Kitsune questline, Oyuki will teach you how to use it, and it will be unlocked permanently.
Smoke Bombs
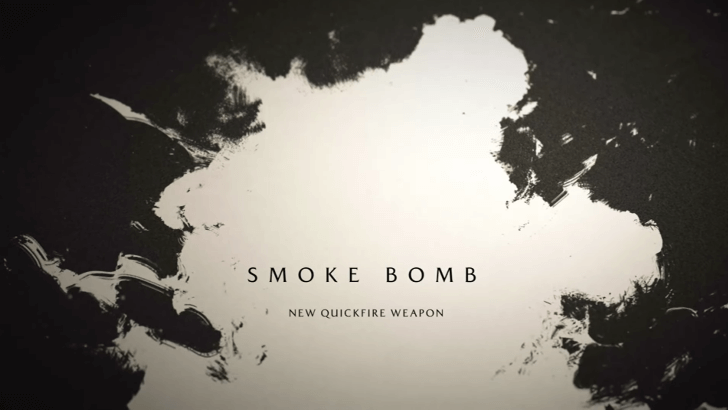
During Part 5 of the Kitsune questline, Oyuki will give you a Smoke Bomb, a Quickfire tool you can use to instantly conceal yourself, giving you a chance to hide. This will be permanently unlocked in your arsenal!
The Kitsune's Mask and Shadow
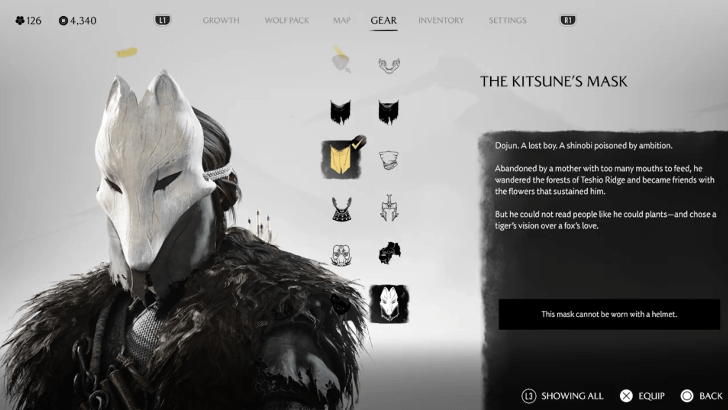
You will also acquire the Kitsune's mask as a vanity gear, as well as the Kitsune's Shadow dye to change your attire's overall color scheme.
Trophies and Achievements
| ✔️ | Trophy | Details |
|---|---|---|
|
|
Send Saito's spymaster back to the shadows. | |
|
|
Show mercy to the innkeeper's daughter. |
How to Unlock The Kitsune Questline
Interrogate Ronin During the Yotei Six Quest
After completing the Old Inn quest and receiving the clue cards about the Yotei Six from the Settler, you must defeat ronin groups and interrogate them to acquire leads about each member.
Ghost of Yotei Related Guides
| Chapter | Quests |
|---|---|
| Prologue | ① The Snake |
| Chapter 1 | ② The Old Inn
③ The Way of Dual Katana ④ Saito ⑤ The Yotei Six ⑥ The Oni ⑦ The Kitsune ⑧ The Saito Brothers (Part 1) |
| Chapter 2 | ⑨ The Saito Brothers (Part 2) |
| Chapter 3 | ⑩ Call of the Hunt ⑪ The Final Hunt of the Onryo |
Comment
Author

The Kitsune Walkthrough: How to Get Into the Building
Rankings
Gaming News


![Marathon Cryo Archive Map Teased as [REDACTED] on Selection Screen](https://img.game8.co/4442236/6357203e58172f6de57f1991e7c39b22.png/thumb)


Popular Games

Genshin Impact Walkthrough & Guides Wiki
Umamusume: Pretty Derby Walkthrough & Guides Wiki
Pokemon Pokopia Walkthrough & Guides Wiki
Honkai: Star Rail Walkthrough & Guides Wiki
Monster Hunter Stories 3: Twisted Reflection Walkthrough & Guides Wiki
Arknights: Endfield Walkthrough & Guides Wiki
Wuthering Waves Walkthrough & Guides Wiki
Zenless Zone Zero Walkthrough & Guides Wiki
Pokemon TCG Pocket (PTCGP) Strategies & Guides Wiki
Monster Hunter Wilds Walkthrough & Guides Wiki


Recommended Games
Diablo 4: Vessel of Hatred Walkthrough & Guides Wiki
Cyberpunk 2077: Ultimate Edition Walkthrough & Guides Wiki
Fire Emblem Heroes (FEH) Walkthrough & Guides Wiki
Yu-Gi-Oh! Master Duel Walkthrough & Guides Wiki
Super Smash Bros. Ultimate Walkthrough & Guides Wiki
Pokemon Brilliant Diamond and Shining Pearl (BDSP) Walkthrough & Guides Wiki
Elden Ring Shadow of the Erdtree Walkthrough & Guides Wiki
Monster Hunter World Walkthrough & Guides Wiki
The Legend of Zelda: Tears of the Kingdom Walkthrough & Guides Wiki
Persona 3 Reload Walkthrough & Guides Wiki


All rights reserved
©2025 Sony Interactive Entertainment LLC. Developed by Sucker Punch Productions.
The copyrights of videos of games used in our content and other intellectual property rights belong to the provider of the game.
The contents we provide on this site were created personally by members of the Game8 editorial department.
We refuse the right to reuse or repost content taken without our permission such as data or images to other sites.