This survey will take about 1 minute.
Your answers will help us to improve our website.
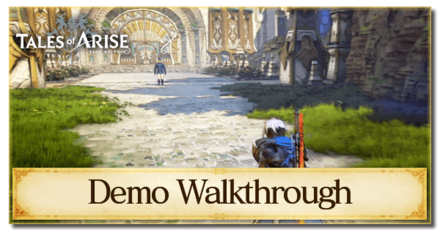
Tales of Arise
Demo Walkthrough and Maps
☆ Earn bonuses before you start the DLC.
★ Clear campaign & sub-quests | Get max lvl
☆ Learn all the ingredients in this new Gourmet Saga!
★ Get all Beyond the Dawn Trophies with these guides:
☆ Ryugola Weapons | All Portraits | Hero of the Summit
This is a walkthrough for the Tales of Arise Demo. Read on to learn the objectives, all item and chest locations, camp locations, enemies you can encounter, boss fights, and more!
List of Contents
Maps
Map Legend
| Mining Point | |
|---|---|
| Collection Point | |
| Chests | |
| Campfire | |
| General Store | |
| Zeugle (Boss Fight) |
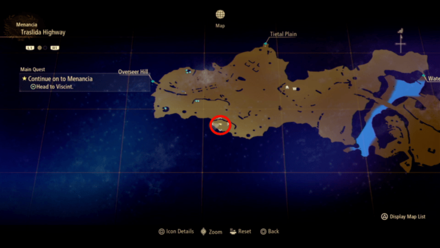
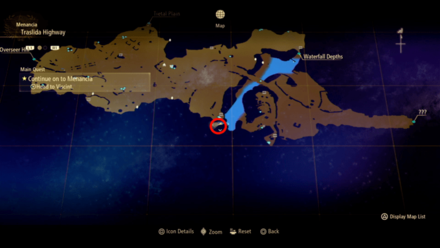
Elde Menancia
Overseer Hill
| Overseer Hill | 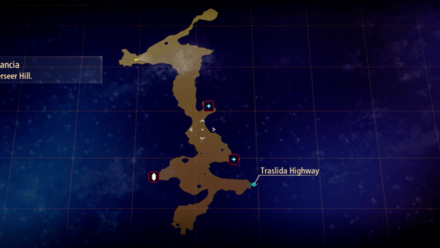 |
|---|
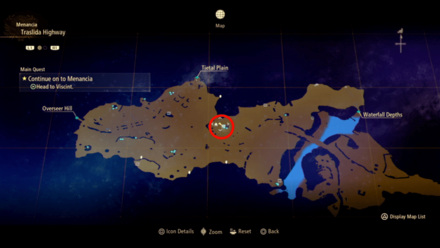
Traslida Highway
| Traslida Highway | 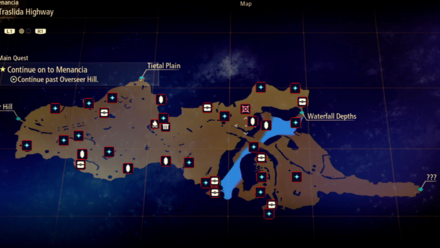 |
|---|---|
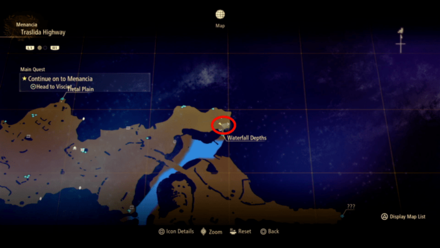
| Waterfall Depths | 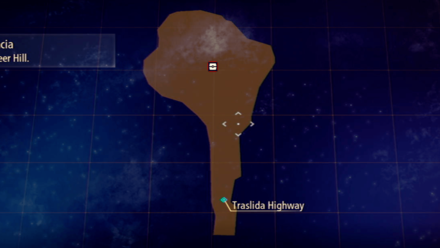 |
Tietal Plain
| Tietal Plain |  |
|---|
Demo Walkthrough
Objectives
| Objectives |
|---|
|
|
Overseer Hill
| Objectives | |
|---|---|
| 1 | After selecting your character, you will start off along a path leading down to a cliff. This area is known as Overseer Hill. |
| 2 | 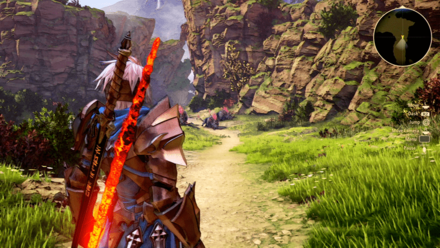 Follow the path to the right, where you'll encounter your first group of Zeugles and a battle tutorial. |
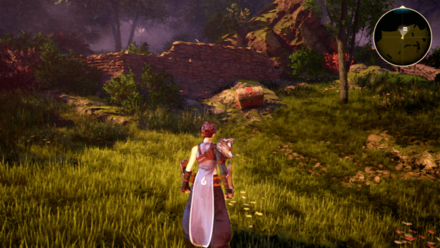
| 3 | Continue along the path where you'll encounter a group of Archer Hawks, then take the wooden bridge leading to Traslida Highway. Before you cross the bridge leading into Traslida Highway, you can explore this small area for items. Here you can find Tomatoes x3, Apple Gel x1, and a mining outcrop for materials you can use to Craft Accessories. |
Traslida Highway
| Objectives | |
|---|---|
| 4 | 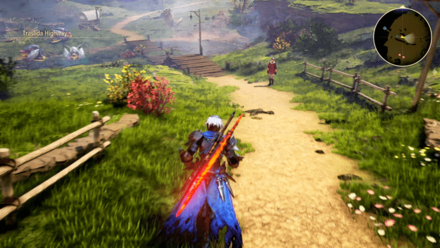 From where you appear once you cross the bridge, head down the path where a short conversation will trigger once you approach the man standing by the road. |
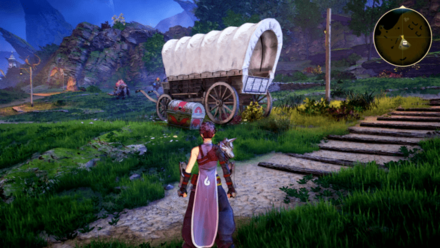
| 5 | Once the conversation is over, continue down the path until you see a small campfire before a tree. There will be a Shopkeeper nearby the campfire where you can Camp. It is highly recommended that you battle the monsters in this location for their item drops. Several Chests and materials can be found in small spaces leading up to the gates of Viscint.
|
| 6 | Follow the path all the way into a small village. You will see a man standing just outside of the gates of Viscint, where a short conversation will play once you approach him. |
| 7 | Head back towards the campfire you passed earlier, which will now be on the right side of the path. The gate to the Tietal Plain is along the right wall assuming you're returning from the gates of Viscint. If you haven't already, rest at the campfire before heading into Tietal Plain. |
Tietal Plain
| Objectives | |
|---|---|
| 8 |  Tietal Plain is a wide area with monsters scattered around. The primary goal in this area is to battle the large one in the middle called the Mantis. Once ready, head towards it to begin the battle. |
| 9 | Once the battle has ended you will reappear back in a conversation with the man in front of the gates to Viscint, ending the demo. |
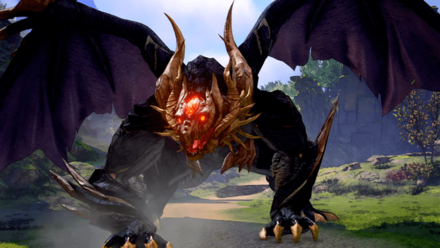
Boss Fights
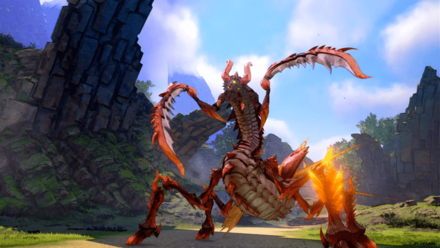
Mantis
 |
|
| Mantis | |
|---|---|
| Level | 26 |
| Max HP (Normal Difficulty) |
77,940 HP |
| Weak Spot | Front Left Leg |
| Location |  Tietal Plain |
After reaching the gates of Viscint, a man in front of the gates will tell you that they are locked and won't open until the Giant Zeugle terrorizing the town is put down. Head towards the Tietal Plain where the guard blocking your way will now have stepped aside to let you through.
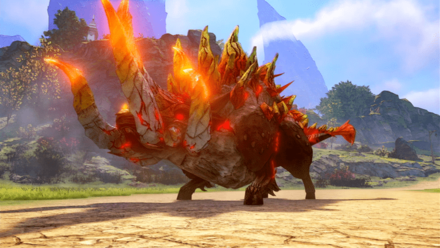
Optional Boss: Relentless Charger
 |
|
| Relentless Charger | |
|---|---|
| Level | 26 |
| Max HP (Normal Difficulty) |
77,090 HP |
| Weak Spot | Horns |
| Location | 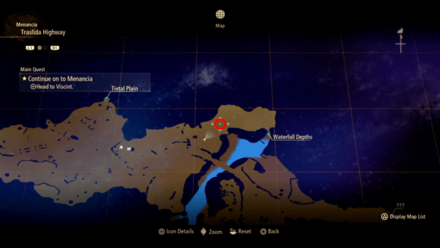 Traslida Highway |
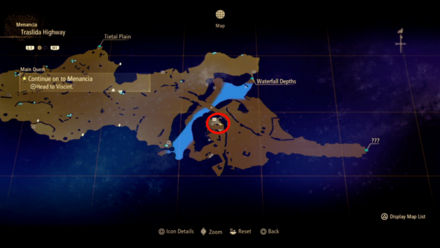
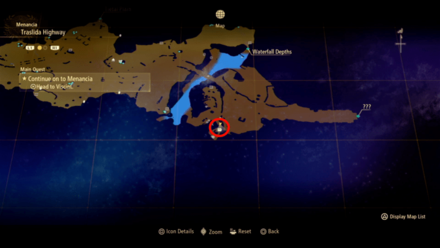
You can find the Relentless Charger at the northeastern portion of the map, before the bridge crossing into the Viscint.
The area it is in is close to where you can find Chest 5, at the ridge overlooking the town where you can drop off the waterfall to get to Waterfall Depths.
How to Beat Relentless Charger
Secret Boss: Mesmald
 |
|
| Mesmald | |
|---|---|
| Level | Level 28 |
| Max HP (Normal Difficulty) |
91,130 HP |
| Weak Spot | Head and Tail Tip |
| Location | 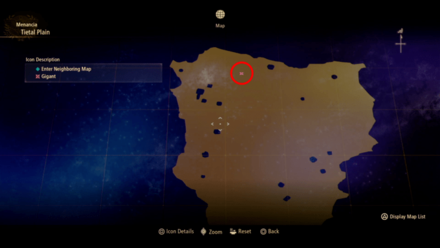 Tietal Plain |
Depending on whether you have defeated Mantis in under 5 minutes, a secret boss fight will immediately trigger – this will spawn Mesmald after finishing off Mantis without exiting battle.
Camp Locations
Traslida Highway Camp
| Map View | World View |
|---|---|
 |
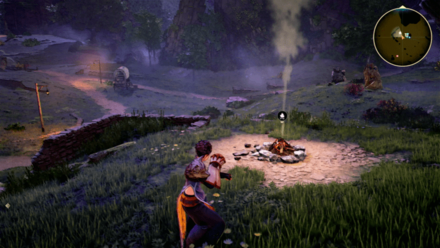 |
There is only one camp that can be found among the three areas in the demo. This can be located just in front of a tree near where the road splits off into Tietal Plain and into the area leading up to Viscint.
Chest Locations
Chest 1
| Map View | World View |
|---|---|
 |
 |
| Reward | |
| Solid Edge | |
Coming from the wooden bridge leading into the Traslida Highway, you can find this chest by sticking to the ridges on the right of the main road in Traslida Highway. The path to the chest is blocked by several Zeugle. This chest contains the Solid Edge, a weapon for Alphen.
Chest 2
| Map View | World View |
|---|---|
 |
 |
| Reward | |
| Innocent Lily | |
Coming from the wooden bridge leading into the Traslida Highway, this chest is located to the right of the main path just before the bridge leading to the gates of Viscint. The chest is guarded by several Apes and contains the Innocent Lily, a weapon for Shionne.
Chest 3
| Map View | World View |
|---|---|
 |
 |
| Reward | |
| Dawn Braces | |
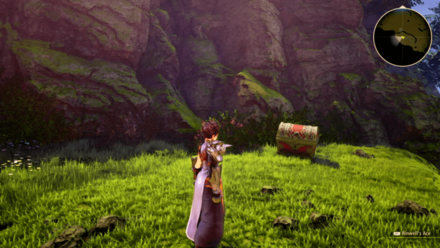
From the camp site by the tree, continue along the left wall and near some ruins, several Apes will be guarding this chest which contains the Dawn Braces, a weapon for Law.
Chest 4
| Map View | World View |
|---|---|
 |
 |
| Reward | |
| Protect Ring | |
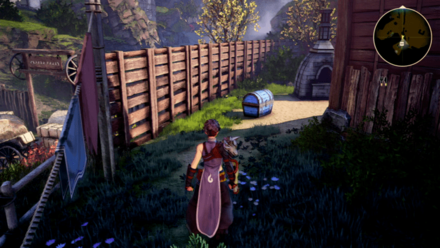
At the fork where the road splits off towards Tietal Plain and Viscint, you will find a wagon with a chest beside it.
Chest 5
| Map View | World View |
|---|---|
 |
 |
| Reward | |
| Silver Sword the Owl | |
From the camp site, continue along the left wall. Continue all the way to the back on the left side, past the optional boss Relentless Charger and behind a group of regular enemies you will find a chest containing Silver Sword the Owl, a weapon for Rinwell.
Note that you do not need to fight the enemies or optional boss to get this chest, but avoiding them both is difficult.
Chest 6
| Map View | World View |
|---|---|
 |
 |
| Reward | |
| Columna Latio | |
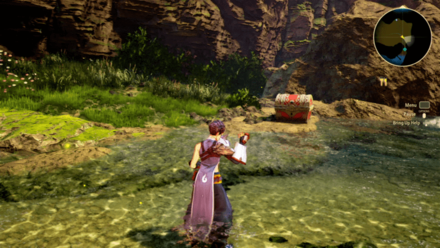
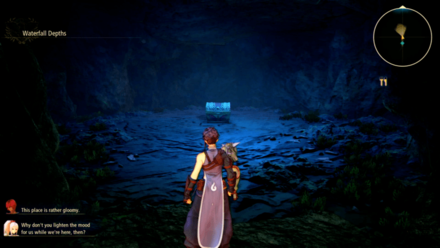
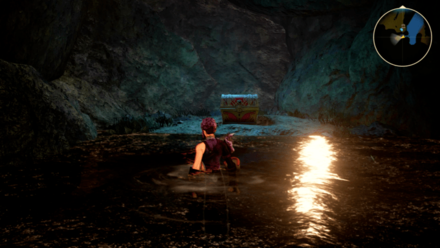
While standing on the bridge leading into Viscint, look left and you will see a waterfall. Jump into the water and swim your way over to it. Behind the waterfall is a small cave with a chest containing Columna Latio, a weapon for Dohalim. This area is called Waterfall Depths on the map.
You can also get to this chest quickly by dropping down into the water from the location of Chest 5 where you obtained the Silver Sword the Owl for Rinwell.
Chest 7
| Map View | World View |
|---|---|
 |
 |
| Reward | |
| Beef Stew Recipe | |
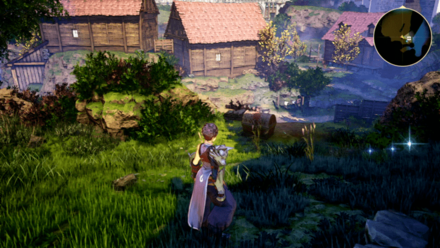
As you cross the bridge leading into Viscint, turn right. The chest is situated near the side of a house at the top of a ramp-like path.
Chest 8
| Map View | World View |
|---|---|
 |
 |
| Reward | |
| Vegetable Soup Recipe | |
From where you got the last chest, follow the line of houses to the end. The chest is hidden behind a house next to a well.
Chest 9
| Map View | World View |
|---|---|
 |
 |
| Reward | |
| Rock Wall | |
While standing on the bridge leading into Viscinct, look to the right and drop into the water. Swim along the right side, and there will be a small cave with a chest containing Rockwall, a weapon for Kisara.
You can also get to this chest quickly by dropping down from the location of Chest 2 where you obtained the Innocent Lily for Shionne.
Tales of Arise Related Guides

All Story Walkthroughs
| All Story Walkthroughs | |
|---|---|
| Tales of Arise Walkthrough | Beyond the Dawn DLC Walkthrough |
All Base Game Walkthroughs
| Chapters | |
|---|---|
 Calaglia Calaglia |
 Cyslodia Cyslodia |
 Elde Menancia Elde Menancia |
 Mahag Saar Mahag Saar |
 Ganath Haros Ganath Haros |
 The Wedge The Wedge |
 Berg Volcano Berg Volcano |
 Rena Rena |
Comment
Author
Demo Walkthrough and Maps
Please participate in our site
improvement survey
03/2026
improvement survey
03/2026
Would you assist in
improving Game8's site?
improving Game8's site?

×
We are listening to our users' valuable opinions and discussing how to act on them.
The information collected through this survey will be used for the purpose of improving our services. In addition, the information will only be disclosed a part of a statistic in a format that will not allow identification of personal information.
Begin Survey
Not Now
×
Please rate each item regarding Game8.co's Advertisements.
Amount of Ads
Very Dissatisfied
Somewhat Dissatisfied
Fine
Somewhat Satisfied
Highly Satisfied
Placement of Ads
Timing of Ad Display
Ad Loading Speed
Safeness of Ads
Content of Ads
×
Please rate each item regarding Game8.co's Quality of Articles.
Amount of information
Very Dissatisfied
Somewhat Dissatisfied
Fine
Somewhat Satisfied
Highly Satisfied
Frequency of updates
Speed of new information
Accuracy of articles
Understandibility of articles
Readability of sentences
×
Please rate each item regarding Game8.co's Usability of the Site.
Ease of finding information
Very Dissatisfied
Somewhat Dissatisfied
Fine
Somewhat Satisfied
Highly Satisfied
Loading Speed
Use of Color
Font Size
Visibility of Images
Easy to Understand Layout
×
Please rate each item regarding Game8.co's Message Boards, Comments.
Ease of Writing
Very Dissatisfied
Somewhat Dissatisfied
Fine
Somewhat Satisfied
Highly Satisfied
Readability
Ease in Finding Information
Comment Quality
Comment Quantity
Admin Response
×
Please rate each item regarding Game8.co's Site's new design.
Please rate our site's new design
Very Dissatisfied
Somewhat Dissatisfied
Fine
Somewhat Satisfied
Highly Satisfied
Do you think that the website's design change makes the site easier to use?
Has the new design made it easier for you to find information on the site?
Has the new design improved the overall visual appeal of the site?
How would you rate your overall satisfaction with the new design of the site?
×
How likely are you to recommend Game8 to someone you know?
Very Unlikely
0
1
2
3
4
5
6
7
8
9
10
Very Likely
If you have other opinions regarding potential improvement to the website, please share them with us. We would appreciate your honest opinion.
Note: This is a free response section, so you can proceed without entering anything.
Note: Please be sure not to enter any kind of personal information into your response.
Note: Please be sure not to enter any kind of personal information into your response.
×
Thank You
×
Thank you for participating in our survey! Your answers will help us to improve the quality of our website and services.
We hope you continue to make use of Game8.
We hope you continue to make use of Game8.
Close
Rankings
- We could not find the message board you were looking for.
Gaming News


![Everwind Review [Early Access] | The Shaky First Step to A Very Long Journey](https://img.game8.co/4440226/ab079b1153298a042633dd1ef51e878e.png/thumb)

![Monster Hunter Stories 3 Review [First Impressions] | Simply Rejuvenating](https://img.game8.co/4438641/2a31b7702bd70e78ec8efd24661dacda.jpeg/thumb)
Popular Games

Genshin Impact Walkthrough & Guides Wiki
Honkai: Star Rail Walkthrough & Guides Wiki
Umamusume: Pretty Derby Walkthrough & Guides Wiki
Pokemon Pokopia Walkthrough & Guides Wiki
Resident Evil Requiem (RE9) Walkthrough & Guides Wiki
Monster Hunter Wilds Walkthrough & Guides Wiki
Wuthering Waves Walkthrough & Guides Wiki
Arknights: Endfield Walkthrough & Guides Wiki
Pokemon FireRed and LeafGreen (FRLG) Walkthrough & Guides Wiki
Pokemon TCG Pocket (PTCGP) Strategies & Guides Wiki


Recommended Games
Diablo 4: Vessel of Hatred Walkthrough & Guides Wiki
Fire Emblem Heroes (FEH) Walkthrough & Guides Wiki
Yu-Gi-Oh! Master Duel Walkthrough & Guides Wiki
Super Smash Bros. Ultimate Walkthrough & Guides Wiki
Pokemon Brilliant Diamond and Shining Pearl (BDSP) Walkthrough & Guides Wiki
Elden Ring Shadow of the Erdtree Walkthrough & Guides Wiki
Monster Hunter World Walkthrough & Guides Wiki
The Legend of Zelda: Tears of the Kingdom Walkthrough & Guides Wiki
Persona 3 Reload Walkthrough & Guides Wiki
Cyberpunk 2077: Ultimate Edition Walkthrough & Guides Wiki


All rights reserved
© BANDAI NAMCO Entertainment America Inc. All third party content, brands, names, and logos are used under license and remain property of their respective owners. All rights reserved.
The copyrights of videos of games used in our content and other intellectual property rights belong to the provider of the game.
The contents we provide on this site were created personally by members of the Game8 editorial department.
We refuse the right to reuse or repost content taken without our permission such as data or images to other sites.