 Prologue
 Thwart Zorba’s Plan
 Apprehend the Real Kidnapper
 Infiltrate the Charadrius
 Obtain Drakodios
 Eliminate Virga Island’s Threat
 Prepare for the Final Battle
 Skybound Avatar Conquest
 Save the Country
This survey will take about 1 minute.
Your answers will help us to improve our website.
Metaphor: ReFantazio
Necromancer Takedown Walkthrough Guide
★ 100% Walkthrough Guide
☆ All 14 Follower Bond Guides
★ Dungeon Guides and Bosses
☆ Farming Guides: EXP, Money, MAG
★ Best Party, Tier Lists, and Builds
☆ New Game+ and How to Get All Endings
Necromancer Takedown is an Operation Quest in Metaphor: ReFantazio. Check out an overview of Necromancer Takedown and how to complete this Main Quest here!
| ◀︎ Previous Quest | Next Quest ▶︎ |
|---|---|
| Prologue | Thwart Zorba’s Plan |
List of Contents
Necromancer Takedown Overview
Quest Details, Deadline, and Rewards
| Necromancer Takedown | |||
|---|---|---|---|
| Louis's necromancer subordinate must be stopped! I need to discover Louis's whereabouts as well-who knows what could happen on the day of the prophesised calamity... | |||
| Type | Main Quest - Operation | ||
| Unlock | Complete the Prologue. | ||
| Start Date | 06/12 | Deadline | 06/21 |
| Rank | ◆◆◇◇◇◇◇◇◇◇ | ||
| Location | Grand Trad, Regalith Grand Cathedral | ||
Necromancer Takedown Walkthrough
| Jump to Section | |
|---|---|
| 1 | Mausoleum Catacombs |
| 2 | Prayer Chamber |
| 3 | Servant's Chamber |
| 4 | Altar Chamber |
| 5 | Reception Chamber |
| 6 | Royal Portrait Hall to Heavenly Staircase |
This is a pretty long dungeon so you can leave at any point to heal up and replenish supplies as you wish.
Mausoleum Catacombs
| Mausoleum Catacombs Guide | |
|---|---|
| 1 | Head back to the Catacombs Entrance and head back down again. Ignore the locked gates again since you still can't unlock them as of now. |
| 2 | 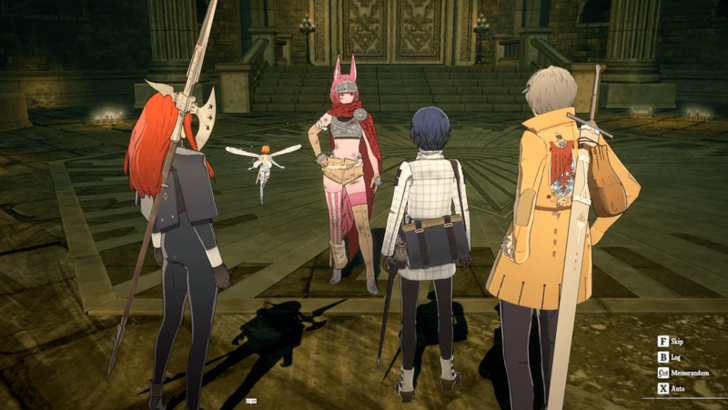 When you get back to where you fought Undead Grius, you'll encounter Catherina who will give you a side quest called A Friend in Need. Afterwards, head up the stairs to enter the cathedral. ▶ How to Complete A Friend in Need |
Prayer Chamber
| Prayer Chamber Guide | |
|---|---|
| 1 | Once you enter the cathedral, you can head straight ahead to get to the Magla Hollow safe room. However, you can also defeat enemies and pick up any item you find first. ▶ Regalith Grand Cathedral Dungeon Walkthrough |
| 2 | When you're ready, head up the stairs to start a cutscene with some guards talking about hostages you will need to save. The key that you'll need to rescue them is on a desk in an area directly down below. |
| 3 | 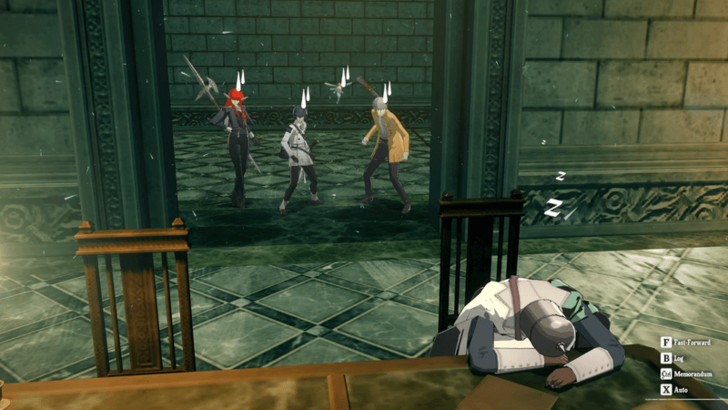 Make your way downstairs and head into the area on the right. A brief cutscene will then start with a sleeping guard. In the same room, there will be a green item on the table to the right so pick it up for the Chamber Side Room Key. |
| 4 | 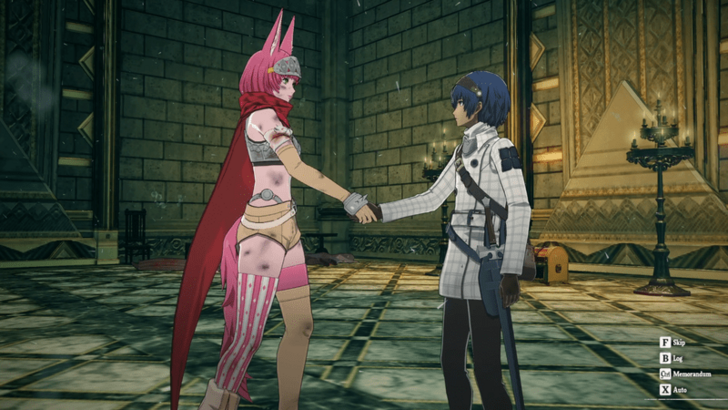 Go back up and unlock the door to rescue the people inside. You'll also find Cahterina's friend here which automatically completes her Side Quest. This also unlocks Catherina as a follower, as well as the Brawler Archetype! ▶ All Followers and How to Unlock Bonds |
| 5 | Open the chest and save if you wish, then head back down to defeat any enemies and pick up items in the large area opposite where you got the key. |
| 6 | When you're ready, approach the pack of white wolves in the center and defeat them to move on forward. Afterwards, head up the path to start another cutscene stating that you'll need to ascend to the floors above. |
Servant's Chamber
| Servant's Chamber Guide | |
|---|---|
| 1 | Once you reach the top and the cutscene ends, enter the Magla Hollow on the right to unlock a new safe room. When you're ready, head on forward. |
| 2 | Ignore the chest and the door on the right for now since they're locked. Go through the doorway to the left where you'll encounter a bunch of new undead enemies. It's recommended to bring a Healer and Mage in this area for multiple AoE Synthesis Skills, but it's also okay to bring only a Mage. ▶ All Archetypes and Jobs |
| 3 | 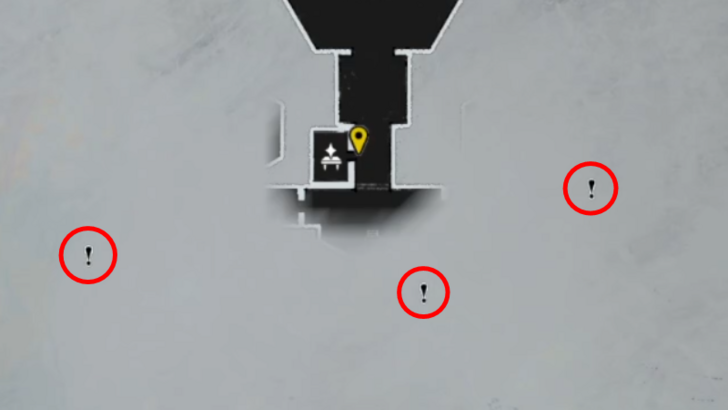 Explore any side areas for items, defeating enemies on the way, but the priority is to make your way to the Exclamation Marks in the area for important items. |
| 4 | 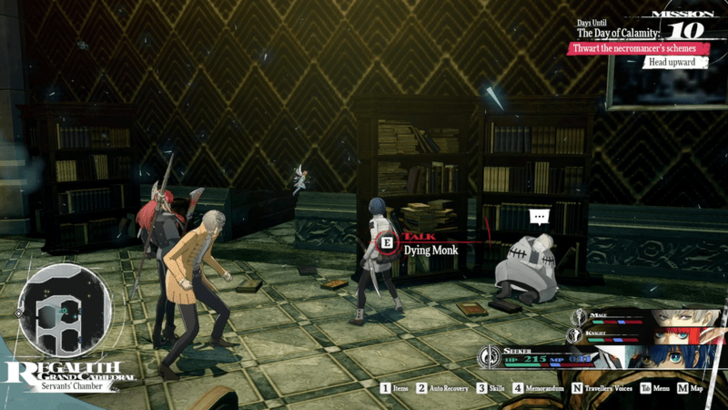 Follow the path on the left to get to the item behind the blocked-off door via the room behind it. This is the Guest Room Key that's needed to access the next room that has an exclamation mark. To get there, you'll need to crawl through a small tunnel behind some barrels to the left of the Dying Monk. |
| 5 | 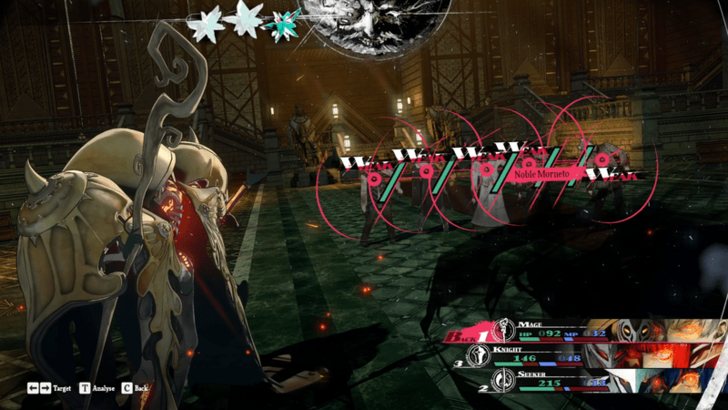 Head on back to the other path and head towards the next exclamation mark. Once you get there, prepare yourself as entering the room will start a battle against five Mornetos. Make sure you have AoE Fire or Light Synthesis Skills ready so that you can quickly take them down. ▶ Synthesis Skills Explained |
| 6 | After the battle, you'll talk to a Dying Monk who will give you the Treasure Chest Key for the chest earlier. Instead of heading back immediately, proceed to the next area first so you can also unlock the door that was locked. |
| 7 | 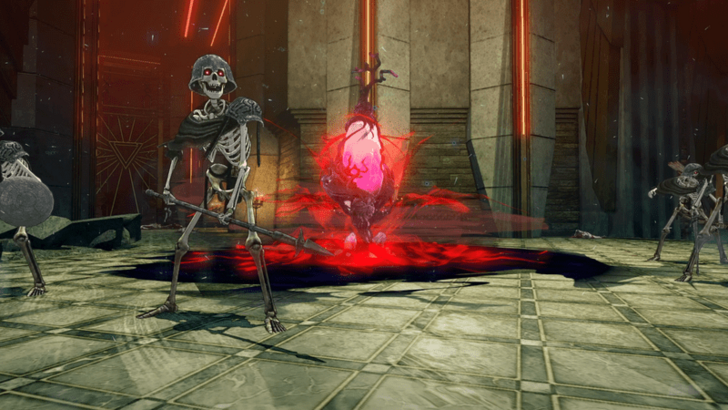 Proceed forward until you reach a Trance Crystal. This will infinitely spawn enemies which can be both a good and bad thing. On one hand, you have a way to farm enemies, but on the other, it can be annoying if you don't wish to farm them anymore. It's recommended to destroy this crystal since there will be another one later and it'll be safe to unlock the door to the right. |
| 8 | 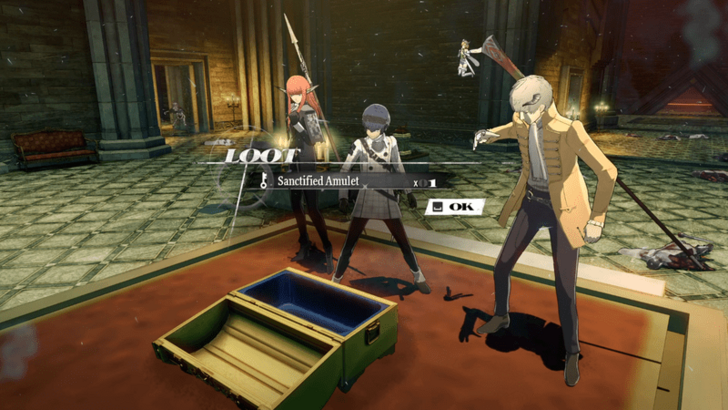 Head through and back to the initial area with the locked chest. After opening it, head back to the safe room if you wish and, when you're ready, continue following the path to the final exclamation mark. |
| 9 | Defeat more enemies and collect more items until you reach the end of this area. Head to the room to the left and talk to the Traumatised Soldier to get the Altar Chamber Key that's required to unlock the door opposite the room they're in. |
Altar Chamber
| Altar Chamber Guide | |
|---|---|
| 1 | Once you unlock the door and go through, there will be a Plateau Mirage on the right allowing you to save or leave the area if you wish. When you're ready, head on forward to the large storage area. |
| 2 | Defeat enemies and collect items on the way up until you reach another Plateau Mirage right in front of a door. Make a save here as you'll face a boss when you go through the doorway. It's recommended to bring a party consisting of a Brawler, Warrior, and Knight to enable the Brawler's Strike and Knight's Pierce Synthesis Skills. |
| 3 |  When you're ready, head on through to fight the Louisian Mage Captain and some Skeletons. Deal with the skeletons first with the Brawler's AoE Strike Skills so you can focus fire the soldier with your Knight's Pierce Skills. |
| * |  If you're playing the Demo, this is where the game will end. You'll need to load a previous save before the boss fight if you want to resume playing the Demo version of the game. ▶ Demo Release Guide and Length |
| 4 | After defeating the boss, head into the safe room on the left to save and unlock a new fast travel point. When you're ready, head forward to the next area. |
Reception Chamber
| Reception Chamber Guide | |
|---|---|
| 1 | 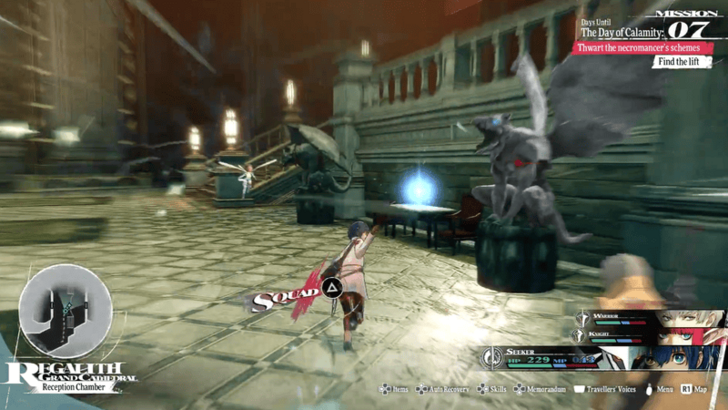 In this area, there are Gargoyles that disguise themselves as inanimate objects unless you approach them. Keep an eye out for any discoloured statues so that you don't get ambushed by one of these enemies. |
| 2 | 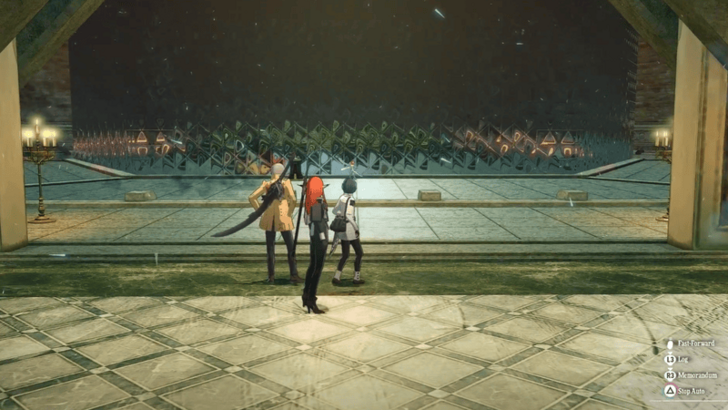 Going through this area, you'll come across a barrier that's blocking the way upwards. Ignore this for now and continue east and up the ladder until you reach another cutscene. |
| 3 | Explore the area, defeating enemies and collecting items as you wish, until you need to cross the arms of a giant statue. After crossing to the other side, head further down until you reach another Magla Hollow Safe Room. Make a save here as the next area has annoying Spekto enemies that like to disappear and ambush you. It's recommended to just initiate Squad Battle so you don't run the risk of getting ambushed. |
| 4 | 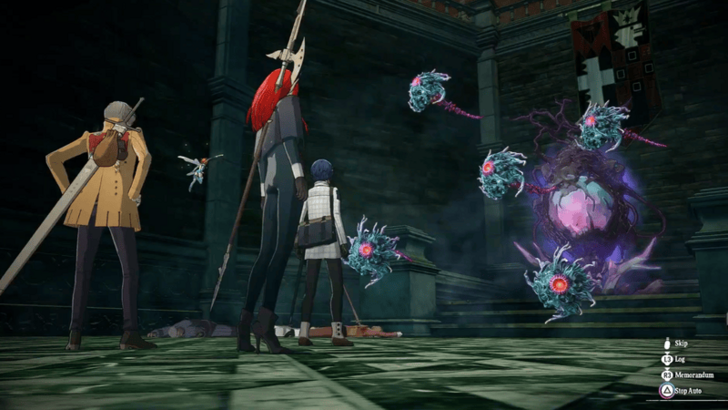 Once you're ready, head towards the room that's housing the crystal. You'll need to fight five Spektos once you go through the door so make sure to quickly kill them with AoE Fire and Light Skills before they summon more Spektos or Hex your team. |
| 5 | After they've been defeated, you'll destroy the crystal and dispel any barriers on this floor. Once the cutscene ends, you'll spawn right in front of the elevator. Make a save using the Plateau Mirage before heading to the elevator platform. |
| 6 | 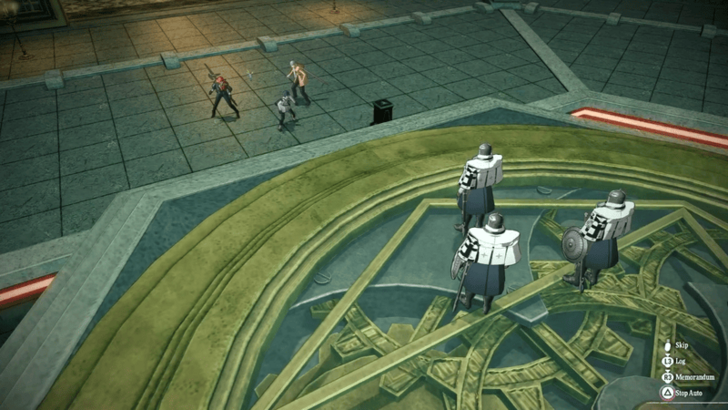 When you approach the elevator, a Louisian Mage Captain and two Louisian Sword Captains will come down to fight you. The Mage will have the same weaknesses and resistances as earlier while the Swordsmen will be weak to Ice. |
| 7 | After the fight, you'll finally be able to head up to the next area. Go back to Plateau to make a save, if you wish, before taking the elevator up. |
Royal Portrait Hall to Heavenly Staircase
| Royal Portrait Hall to Heavenly Staircase Guide | |
|---|---|
| 1 | The path forward is pretty straightforward so just continue until you reach a Magla Hollow. It's recommended to ignore the enemies here first since the two Homo Fulqulios here can be pretty tough if you're low on MP and resources. |
| 2 | Make a save as the next area has a lot of Louisian Captains. When you're ready, either defeat all the enemies or ignore them and head up the stairs to the next area. |
| 3 | Head down the hall until a cutscene starts. Once it ends, head outside and make your way up the Heavenly Staircase until you reach a Plateaur Mirage. Make another save as you're about to fight Zorba the Necromancer |
| 4 | 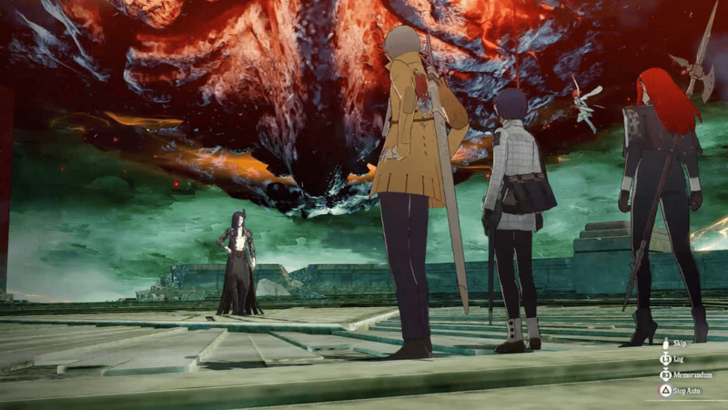 When you're ready, head through the door to face Zorba. Ideally, use AoE Light Skills to get rid of his Corpsethralls while also hitting him with an unresisted attack. Just make sure you avoid using Fire, Ice, Electric, and Wind since Zorba resists all of these attacks. ▶ How to Beat Zorba |
| 5 | Once he's been defeated, you'll have successfully completed this quest! However, the threat is not over as you'll now need to Thwart Zorba's Plan. |
Metaphor: ReFantazio Related Guides
List of All Main Quest Walkthroughs
All Main Quests
Author
Necromancer Takedown Walkthrough Guide
Please participate in our site
improvement survey
03/2026
improvement survey
03/2026
Would you assist in
improving Game8's site?
improving Game8's site?

×
We are listening to our users' valuable opinions and discussing how to act on them.
The information collected through this survey will be used for the purpose of improving our services. In addition, the information will only be disclosed a part of a statistic in a format that will not allow identification of personal information.
Begin Survey
Not Now
×
Please rate each item regarding Game8.co's Advertisements.
Amount of Ads
Very Dissatisfied
Somewhat Dissatisfied
Fine
Somewhat Satisfied
Highly Satisfied
Placement of Ads
Timing of Ad Display
Ad Loading Speed
Safeness of Ads
Content of Ads
×
Please rate each item regarding Game8.co's Quality of Articles.
Amount of information
Very Dissatisfied
Somewhat Dissatisfied
Fine
Somewhat Satisfied
Highly Satisfied
Frequency of updates
Speed of new information
Accuracy of articles
Understandibility of articles
Readability of sentences
×
Please rate each item regarding Game8.co's Usability of the Site.
Ease of finding information
Very Dissatisfied
Somewhat Dissatisfied
Fine
Somewhat Satisfied
Highly Satisfied
Loading Speed
Use of Color
Font Size
Visibility of Images
Easy to Understand Layout
×
Please rate each item regarding Game8.co's Message Boards, Comments.
Ease of Writing
Very Dissatisfied
Somewhat Dissatisfied
Fine
Somewhat Satisfied
Highly Satisfied
Readability
Ease in Finding Information
Comment Quality
Comment Quantity
Admin Response
×
Please rate each item regarding Game8.co's Site's new design.
Please rate our site's new design
Very Dissatisfied
Somewhat Dissatisfied
Fine
Somewhat Satisfied
Highly Satisfied
Do you think that the website's design change makes the site easier to use?
Has the new design made it easier for you to find information on the site?
Has the new design improved the overall visual appeal of the site?
How would you rate your overall satisfaction with the new design of the site?
×
How likely are you to recommend Game8 to someone you know?
Very Unlikely
0
1
2
3
4
5
6
7
8
9
10
Very Likely
If you have other opinions regarding potential improvement to the website, please share them with us. We would appreciate your honest opinion.
Note: This is a free response section, so you can proceed without entering anything.
Note: Please be sure not to enter any kind of personal information into your response.
Note: Please be sure not to enter any kind of personal information into your response.
×
Thank You
×
Thank you for participating in our survey! Your answers will help us to improve the quality of our website and services.
We hope you continue to make use of Game8.
We hope you continue to make use of Game8.
Close
Rankings
- We could not find the message board you were looking for.
Gaming News


![Everwind Review [Early Access] | The Shaky First Step to A Very Long Journey](https://img.game8.co/4440226/ab079b1153298a042633dd1ef51e878e.png/thumb)

![Monster Hunter Stories 3 Review [First Impressions] | Simply Rejuvenating](https://img.game8.co/4438641/2a31b7702bd70e78ec8efd24661dacda.jpeg/thumb)
Popular Games

Genshin Impact Walkthrough & Guides Wiki
Honkai: Star Rail Walkthrough & Guides Wiki
Umamusume: Pretty Derby Walkthrough & Guides Wiki
Pokemon Pokopia Walkthrough & Guides Wiki
Resident Evil Requiem (RE9) Walkthrough & Guides Wiki
Monster Hunter Wilds Walkthrough & Guides Wiki
Wuthering Waves Walkthrough & Guides Wiki
Arknights: Endfield Walkthrough & Guides Wiki
Pokemon FireRed and LeafGreen (FRLG) Walkthrough & Guides Wiki
Pokemon TCG Pocket (PTCGP) Strategies & Guides Wiki


Recommended Games
Diablo 4: Vessel of Hatred Walkthrough & Guides Wiki
Fire Emblem Heroes (FEH) Walkthrough & Guides Wiki
Yu-Gi-Oh! Master Duel Walkthrough & Guides Wiki
Super Smash Bros. Ultimate Walkthrough & Guides Wiki
Pokemon Brilliant Diamond and Shining Pearl (BDSP) Walkthrough & Guides Wiki
Elden Ring Shadow of the Erdtree Walkthrough & Guides Wiki
Monster Hunter World Walkthrough & Guides Wiki
The Legend of Zelda: Tears of the Kingdom Walkthrough & Guides Wiki
Persona 3 Reload Walkthrough & Guides Wiki
Cyberpunk 2077: Ultimate Edition Walkthrough & Guides Wiki


All rights reserved
©ATLUS. ©SEGA. All rights reserved.
The copyrights of videos of games used in our content and other intellectual property rights belong to the provider of the game.
The contents we provide on this site were created personally by members of the Game8 editorial department.
We refuse the right to reuse or repost content taken without our permission such as data or images to other sites.
For the mage with four skeletons boss fight the guide is incorrect, Brawler does not possess AoE Strike skills at this point in the game for first time players. It DOES however make it possible to use the pierce synthesize skills with knight. Some folks may just want to use two healers to spam Mahama and take Brawler to wail on the boss for an easier time.