This survey will take about 1 minute.
Your answers will help us to improve our website.
Zenless Zone Zero (ZZZ)
Simulated Battle Trial Last Stand Guide
☆ New: Tier List Maker & Co-Op Board!
★ 2.7: Nangong Yu, Cissia, & 2.7 Livestream
☆ 2.6 Phase 1: Sunna & Yixuan
★ 2.6 Phase 2: Aria & Yuzuha
☆ Tier Lists: Agents | W-Engines | Bangboos | Teams
★ Redeem Codes for free Polychromes!
Simulated Battle Trial Last Stand is a game mode in the Endless Tower introduced in Zenless Zone Zero (ZZZ) 1.5. See all the floor guides, how to play the Endless Tower Last Stand, and all the rewards here!
| Endless Tower Guides | |
|---|---|
 Simulated Battle Trial Simulated Battle Trial |
 The Last Stand The Last Stand |
List of Contents
How to Unlock Simulated Battle Trial
Complete The Midnight Pursuit
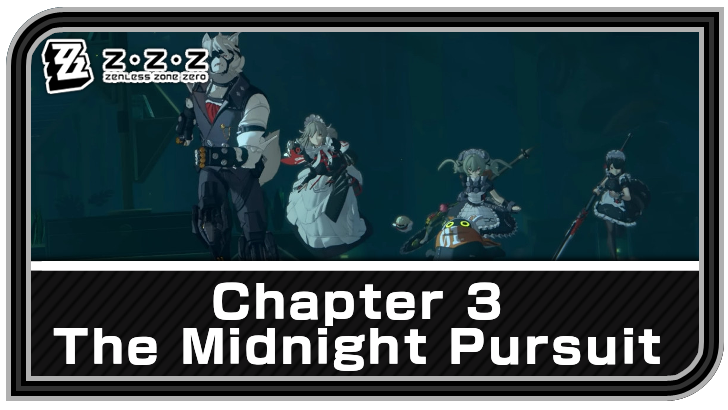
The Simulated Battle Trial, along with the Last Stand mode, can be unlocked after completing the The Midnight Pursuit Mission and reaching Inter-Knot Level 36.
Chapter 3: The Midnight Pursuit Guide
Simulated Battle Trial Last Stand Duration
Endless Tower Last Stand Event Duration
| Last Stand Countdown Duration |
|---|
| Finished |
Simulated Battle Trial Last Stand ended on July 16, 2025 at the very end of Version 2.0.
Endless Tower Last Stand Floors 1-5
Floors 1-5 Information
| Enemy Weaknesses | |
|---|---|
| Enemy Resistances | |
| Battle Environments | Elysium on Edge • When an Agent triggers a Dodge Counter, gain 1 Assist Point, but DMG taken increases by 15%. • After this floor is cleared, all Agents deployed in the next combat gain Doubled Decibels. |
| Fluid Soul • The Agent gains 1 extra dodge chance, but Assist Follow-Ups inflict 25% less Daze. • After this floor is cleared, the deployed Agents recover 40 Energy. |
|
| Unceasing Clash • When using an Ultimate, Agents gain 20 Energy. • After this floor is cleared, the deployed Agents recover 20% HP. |
Floors 1-5 Best Characters and Bangboo
Recommended Characters and Bangboo
| Best DPS | |
|---|---|
| Best Stun | |
| Best Support | |
| Best Bangboos | |
| Sample Teams |
|
Floors 1-5 Enemies
| Enemies | Weakness | Resistance | |
|---|---|---|---|
| 1 | None | ||
| 2 | None | ||
| 3 | None | ||
| 4 | None | ||
| 5 |
How to Beat Floors 1-5
Prioritize the Ranged Units in Floor 1
Floor 1 is pretty easy. The enemies will have relatively low HP and are easy to group, so long as you target the Greedy Rangers first. Do so and lure the melee units in the same spot to quickly clear this floor.
Use AoE Attacks in Floor 2
Floor 2 will feature nothing but Hoplitais, which are all melee units. They will constantly chase you around, so you won't have to worry about any stragglers straying too far. Use AoE attacks to quickly clear them out!
Use Dodge Counters and Perfect Assists in Floors 3 and 4
Floors 3 and 4 will feature Elite enemies. However, the Hatis and Frenzied Maniacs you will be up againts have long attack wind-ups, allowing you to see their attacks coming from miles away.
Use these opportunities to execute Dodge Counters and Perfect Assists to keep the tables turned in your favor. That way, you can minimize as much DMG as possible while dealing as much of your own DMG!
Rely on Perfect Assists and Anomalies Against Pompey
When dealing with Pompey's Notorious form, always make it a point that you inflict Attribute Anomalies and cause Disorder often to deal as much DMG as possible.
Additionally, you can use Perfect Assists to really throw him off-balance and minimize incoming DMG.
Endless Tower Last Stand Floors 6-10
Floors 6-10 Information
| Enemy Weaknesses | Floors 6-8: Floors 9-10: |
|---|---|
| Enemy Resistances | Floors 6-9: Floor 10: |
| Battle Environments | Cleaving the Way • Assist Follow-Ups inflict 150% more Daze, but when taking DMG, loses 5% Decibels.. • After this floor is cleared, the deployed Agents gain 1,000 Decibels. |
| Ravenous Gaze • When triggering Perfect Dodge, the Agent restores 5% HP, but DMG taken by the Agent increases by 15%. • After this floor is cleared, all Agents deployed in the next combat gain Doubled Decibels. |
|
| Beyond Decibels • All squad members' Decibel Generation Rate increases by 35%. • After this floor is cleared, all Agents deployed in the next combat gain Execution. |
Floors 6-10 Best Characters and Bangboo
Recommended Characters and Bangboo
| Best DPS | |
|---|---|
| Best Stun | |
| Best Support | |
| Best Bangboos | |
| Sample Teams |
|
Floors 6-10 Enemies
| Enemies | Weakness | Resistance | |
|---|---|---|---|
| 6 | |||
| 7 | |||
| 8 | |||
| 9 | |||
| 10 |
How to Beat Floors 6-10
Prioritize the Normal Enemies
Floors 6 and 7 will have you face a handful of normal enemies alongside a singular Doppelganger. Take them out first to prevent any distractions, then focus on the Doppelgangers.
Interrupt the Doppelgangers
Doppelgangers are susceptible to interruption. With the proper skills and Agents such as Burnice or proper tactics such as inflicting Anomalies, you will be able to interrupt their attacks effectively.
Do so to minimize incoming DMG while stacking up DMG of your own!
Inflict Shock on the Machines
Floors 9 and 10 will pit you against mechs—the Lumberjack and the Typhon Destroyer. To stop them in their tracks and interrupt their attacks, rely on the Shock Anomaly!
Endless Tower Last Stand Floors 11-15
Floors 11-15 Information
| Enemy Weaknesses | |
|---|---|
| Enemy Resistances | None |
| Battle Environments | Measured Pace • When triggering Dodge Counter, restores 1 Assist Point, but Dodge cooldown increases by 0.5s. • In combat, the final enemy gets Demonized. When the Boss's HP is lower than 30%, the Boss will be Demonized. • After this floor is cleared, the deployed Agents recover 20% HP. |
| Sharp Twirls • Enter Vital View when successfully triggering a Perfect Dodge, but Assist Follow-Ups inflict 25% less Daze. • In combat, the final enemy gets Demonized. When the Boss's HP is lower than 30%, the Boss will be Demonized. • After this floor is cleared, all Agents deployed in the next combat gain Dodge Up. |
|
| Lethal Move • Ultimate DMG increases by 30%. • In combat, the final enemy gets Demonized. When the Boss's HP is lower than 30%, the Boss will be Demonized. • After this floor is cleared, the deployed Agents gain 1000 Decibels. |
Floors 11-15 Best Characters and Bangboo
Recommended Characters and Bangboo
| Best DPS | |
|---|---|
| Best Stun | |
| Best Support | |
| Best Bangboos | |
| Sample Teams |
|
Floors 11-15 Enemies
| Enemies | Weakness | Resistance | |
|---|---|---|---|
| 11 | None | ||
| 12 | None | ||
| 13 | None | ||
| 14 | None | ||
| 15 | None |
How to Beat Floors 11-15
Use AoE Attacks on Enemy Waves
Floors 11 and 12 will have you fight large mobs of enemies, which will consist of both ranged and melee units. Most likely, the melee units will come first purely in one wave, and the ranged ones will come second.
Therefore, prioritizing ranged units won't be effective, as they will only spawn in the second wave. Instead, use AoE attacks to dispose of the melee wave quickly, then proceed to pick off the ranged wave one by one.
Rely on Dodge Counters and Perfect Assists Against Elites
Floors 13 and 14 will feature Thanatos and Metro Goblins by numbers. They are extremely dangerous and have high DMG output, so it would be wise to keep your vision wide to spot any incoming attacks.
Keep your eyes peeled for attack cues and dodge accordingly. The Thanatos enemies use a lot of ranged attacks that cannot be countered with a Perfect Assist, so be vigilant when they start using it!
Eliminate the Notorious Marionette's Clone
Unlike its original counterpart, the Notorious Marionette calls upon its Dance Partner—a phantom of itself—to assist with attacks. However, this phantom partner has very low HP and is very easy to kill.
Use AoE attacks to deal DMG to both the Marionette and its Partner, effectively eliminating the latter and weakening the former.
Endless Tower Last Stand Floors 16-20
Floors 16-20 Information
| Enemy Weaknesses | Floors 16-18: Floor 19: Floor 20: |
|---|---|
| Enemy Resistances | Floors 17-18: Floor 19: Floor 20: None |
| Battle Environments | Martyr's Gambit • Assist Follow-Ups inflict 150% more Daze, but DMG taken by the Agent increases by 15%. • In combat, the final enemy gets Demonized. When the Boss's HP is lower than 30%, the Boss will be Demonized. • All enemies gain Stat Enhancement Lv.1. • After this floor is cleared, enemies on the next floor gain an initial build-up of 30% Daze. |
| Fluid Soul • The Agent gains 1 extra dodge chance, but Assist Follow-Ups inflict 25% less Daze. • In combat, the final enemy gets Demonized. When the Boss's HP is lower than 30%, the Boss will be Demonized. • All enemies gain Stat Enhancement Lv.1. • After this floor is cleared, all Agents deployed in the next combat gain Execution. |
|
| Glazed Form • When triggering Ultimate, the Agent gains a shield equal to 15% of Max HP. • In combat, the final enemy gets Demonized. When the Boss's HP is lower than 30%, the Boss will be Demonized. • All enemies gain Stat Enhancement Lv.1. • After this floor is cleared, the deployed Agents recover 40 Energy. |
Floors 16-20 Best Characters and Bangboo
Recommended Characters and Bangboo
| Best DPS | |
|---|---|
| Best Stun | |
| Best Support | |
| Best Bangboos | |
| Sample Teams |
|
Floors 16-20 Enemies
| Enemies | Weakness | Resistance | |
|---|---|---|---|
| 16 | None | ||
| 17 | |||
| 18 | |||
| 19 | |||
| 20 | None |
How to Beat Floors 16-20
Rely on Dodge Counters and Perfect Assists In Floors 17 and 18
Floors 17 and 18 will pit you against Elites that are nimble and strong but have fairly predictable attack patterns. Always keep your eyes peeled for attack cues and execute Dodge Counters and Perfect Assists accordingly.
Interrupt the Doppegangers
As usual, when dealing with Doppelgangers, always keep in mind that they are susceptible to being interrupted. Always use skills that either launch them into the air or simply just stop their attacks midway.
Avoid the Notorious Dead End Butcher's Ether Explosions
Compared to its original counterpart, the Notorious Dead End Butcher is much more aggressive and unpredictable. It also likes to mix its attacks up by launching projectiles and then charging at you from a distance.
One of its most powerful attacks is the Ether explosions, which summons a ball of Ether at your character's position. The ball will follow your Agent around and then detonate after a few seconds. Be sure to watch out for this!
Endless Tower Last Stand Floors 21-25
Floors 21-25 Information
| Enemy Weaknesses | |
|---|---|
| Enemy Resistances | |
| Cleaving the Way | Cleaving the Way • Assist Follow-Ups inflict 150% more Daze, but when taking DMG, loses 5% Decibels. • In combat, the final enemy gets Demonized. When the Boss's HP is lower than 50%, the boss will be Demonized. • All enemies get Stat Enhancement Lv. 2. • After this floor is cleared, the deployed Agents gain 1,000 Decibels. |
| Charged Nerves • Enter Vital View when successfully triggering a Perfect Dodge, but all enemies gain Ambush. • In combat, the final enemy gets Demonized. When the Boss's HP is lower than 50%, the boss will be Demonized. • All enemies get Stat Enhancement Lv. 2. • After this floor is cleared, the deployed Agents recover 20% HP. |
|
| Shifting the Terra • Ultimate DMG increases by 30%. • In combat, the final enemy gets Demonized. When the Boss's HP is lower than 50%, the boss will be Demonized. • All enemies get Stat Enhancement Lv. 2. • After this floor is cleared, all Agents deployed in the next combat gain Doubled Decibels. |
Floors 21-25 Best Characters and Bangboo
| Best DPS | |
|---|---|
| Best Stun | |
| Best Support | |
| Best Bangboos | |
| Sample Teams |
|
Floors 21-25 Enemies
| Enemies | Weakness | Resistance | |
|---|---|---|---|
| 21 | None | ||
| 22 | |||
| 23 | |||
| 23 | |||
| 25 |
How to Beat Floors 21-25
Defeat Enemies One By One in Floors 22-24
You will fight three Elite enemies of the same name in Floors 22-24. It's best to focus on taking out one enemy at a time to make the fight a lot more manageable
Use Dodge Counters and Perfect Assists in Floor 25
Doppelganger - Jane is a very slick Elite enemy that will do some hit-and-run tactics. You will have to rely on Dodge Counters and Perfect Assists to safely chip down the Doppelganger's HP.
Endless Tower Last Stand Floors 26-30
Floors 26-30 Information
| Enemy Weaknesses | |
|---|---|
| Enemy Resistances | |
| Battle Environments | Double Edged • When triggering Dodge Counter, restores 1 Assist Point, but the deployment loses 10% HP. • All Enemies get Demonized when their HP is lower than 50%. • All enemies get Stat Enhancement Lv. 2. • After this floor is cleared, the deployed Agents recover 20% HP. |
| Ravenous Gaze • When triggering Perfect Dodge, the Agent restores 5% HP, but DMG taken by the Agent increases by 15%. • All Enemies get Demonized when their HP is lower than 50%. • All enemies get Stat Enhancement Lv. 2. • After this floor is cleared, the deployed Agents recover 40 Energy. |
|
| Anomaly Debate • Ultimates accumulate 60% more Anomaly Buildup. • All Enemies get Demonized when their HP is lower than 50%. • All enemies get Stat Enhancement Lv. 2. • After this floor is cleared, all Agents deployed in the next combat gain Doubled Decibels. |
Floors 26-30 Best Characters and Bangboo
Best Characters and Buffs
| Best DPS | |
|---|---|
| Best Stun | |
| Best Support | |
| Best Bangboos | |
| Sample Teams |
|
Floors 26-30 Enemies
| Enemies | Weakness | Resistance | |
|---|---|---|---|
| 26 | None | ||
| 27 | None | ||
| 28 | None | ||
| 29 | None | ||
| 30 |
How to Beat Floors 26-30
Defeat the Hitchspikers in Floor 26
The Hitchspikers will show up and infest in an Alpeca or Tyrfing. Defeated the infested enemies to remove the Hitchspiker and defeat them as soon as possible before they infest another enemy.
Focus on the Arlaunes in Floor 27
There will be two Arlaune enemies in Floor 27. Focus on either one of them since the Farbauti will always approach you and attack you at short range.
This will allow you to kill two enemies within one space.
Defeat Enemies One By One in Floors 28-24
You will fight three Elite enemies of the same name in Floors 22-24. It's best to focus on taking out one enemy at a time to make the fight a lot more manageable
Save Your Strongest Attacks in Phase 2 of Floor 30
When Bringer's HP is below 50%, try to save your strongest attacks on the next phase. This is because Bringer will charge up and then enter the Frenzied state.
Destroy the core immediately with your strongest attacks to cancel Bringer's Frenzied state.
Endless Tower Last Stand Floors 31-35
Floors 31-35 Information
| Enemy Weaknesses | |
|---|---|
| Enemy Resistances | |
| Battle Environments | Bewildering Blitz • Assist Follow-Ups accumulate 200% more Anomaly Buildup, but DMG taken by the Agent increases by 15%. • All Enemies get Demonized when their HP is lower than 50%. • All enemies get Stat Enhancement Lv. 3. • After this floor is cleared, the deployed Agents recover 40 Energy. |
| Zephyr Swordplay • Dodge Counter DMG increases by 180%, but triggering an Assist Follow-Up costs extra 1 Assist Point. • All Enemies get Demonized when their HP is lower than 50%. • All enemies get Stat Enhancement Lv. 3. • After this floor is cleared, the deployed Agents recover 20% HP. |
|
| Lethal Move • Ultimate DMG increases by 30%. • All Enemies get Demonized when their HP is lower than 50%. • All enemies get Stat Enhancement Lv. 3. • After this floor is cleared, the deployed Agents gain 1,000 Decibels. |
Floors 31-35 Best Characters and Bangboo
| Best DPS | |
|---|---|
| Best Stun | |
| Best Support | |
| Best Bangboos | |
| Sample Teams |
|
Floors 31-35 Enemies
| Enemies | Weakness | Resistance | |
|---|---|---|---|
| 31 | None | ||
| 32 | |||
| 33 | |||
| 34 | |||
| 35 | None |
How to Beat Floors 31-35
Attack the Legs for Floors 32-34
When fighting in Floors 32-34 against Greta, Hans, and Friday, respectively, attack only one specific leg to Impair them and build up a lot of Daze.
Attack the Legs Then the Body for Floor 35
While fighting against the Unknown Corruption Complex in Floor 35, focus all of your attacks on its legs to Impair them and build up Daze.
When the enemy is Stunned, focus all your attacks on the body to Impair them and deal a lot of DMG.
Endless Tower Last Stand Floors 36-40
Floors 36-40 Information
| Enemy Weaknesses | |
|---|---|
| Enemy Resistances | |
| Battle Environments | Cleaving the Way • Assist Follow-Ups inflict 150% more Daze, but when taking DMG, loses 5% Decibels. • In combat, the final enemy gets Demonized. When the Boss's HP is lower than 50%, the boss will be Demonized. • All enemies get Stat Enhancement Lv. 3. • After this floor is cleared, the deployed Agents gain 1,000 Decibels. |
| Sharp Twirls • Enter Vital View when successfully triggering a Perfect Dodge, but Assist Follow-Ups inflict 25% less Daze. • In combat, the final enemy gets Demonized. When the Boss's HP is lower than 50%, the boss will be Demonized. • All enemies get Stat Enhancement Lv. 3. • After this floor is cleared, all Agents deployed in the next combat gain Dodge Up. |
|
| Shifting the Terra • Ultimates inflict 30% more Daze. • In combat, the final enemy gets Demonized. When the Boss's HP is lower than 50%, the boss will be Demonized. • All enemies get Stat Enhancement Lv. 3. • After this floor is cleared, all Agents deployed in the next combat gain Combat Shield. |
Floors 36-40 Best Characters and Bangboo
| Best DPS | |
|---|---|
| Best Stun | |
| Best Support | |
| Best Bangboos | |
| Sample Teams |
|
Floors 36-40 Enemies
| Enemies | Weakness | Resistance | |
|---|---|---|---|
| 36 | |||
| 37 | |||
| 38 | |||
| 39 | |||
| 40 |
How to Beat Floors 36-40
Inflict Shock on Enemies
For all the last enemies of each Floor, we recommend inflicting Shock to briefly immobilize them. The Shielded Defender Omega, in particular, will have its shield removed after being Shocked.
Use Defensive Assists on the Missiles in Floor 39
The Terror Raptor can fire missiles in your direction. You can use a Defensive Assist to reflect the missiles back and paralyze the Terror Raptor.
Use Multiple Defensive Assists in Floor 40
When the Typhon Destroyer charges its mechanical arm, be prepared to use multiple Defensive Assists to Impair it.
Do note that most of the Typhon Destroyer's attacks can only be dodged, so use your Perfect Assist right away as soon as you see that yellow spark!
Endless Tower Last Stand Floors 41-45
Floors 41-45 Information
| Enemy Weaknesses | |
|---|---|
| Enemy Resistances | |
| Battle Environments | Measured Pace • When triggering a Dodge Counter, restores 1 Assist Point, but Dodge cooldown increases by 0.5s. • Upon entering combat, all enemies get Demonized • All enemies get Stat Enhancement Lv. 4. • After this floor is cleared, all Agents deployed in the next combat gain Double Decibels. |
| Martyr's Resolve • Hitting the enemy 5 times in total with Dodge Counter will end the enemy's Demonized but Agents take 15% increased DMG. • Upon entering combat, all enemies get Demonized • All enemies get Stat Enhancement Lv. 4. • After this floor is cleared, the deployed Agents recover 20% HP. |
|
| Anomaly Debate • Ultimates accumulate 60% more Anomaly Buildup. • Upon entering combat, all enemies get Demonized • All enemies get Stat Enhancement Lv. 4. • After this floor is cleared, the deployed Agents recover 40 Energy. |
Floors 41-45 Best Characters and Bangboo
| Best DPS | |
|---|---|
| Best Stun | |
| Best Support | |
| Best Bangboos | |
| Sample Teams |
|
Floors 41-45 Enemies
| Enemies | Weakness | Resistance | |
|---|---|---|---|
| 41 | None | ||
| 42 | None | ||
| 43 | None | ||
| 44 | None | ||
| 45 |
How to Beat Floors 41-45
Use Defensive Assists
Most enemies here, such as the Armored Hati, Thanatos, Farbauti, and Pompey, can be dealt with Defensive Assists since using it on them will apply a lot of Daze.
Avoid the Thracian's Blue Markings
When Thracian attacks, they can leave Blue Markings on the floor, which can take a huge chunk of your HP upon detonation. Do your best to avoid them by dodging or even dashing away from them.
Endless Tower Last Stand Floors 46-50
Floors 46-50 Information
| Enemy Weaknesses | |
|---|---|
| Enemy Resistances | |
| Battle Environments | Evil Eliminator • Hitting the enemy 3 times in total with Assist Follow-Up will end the enemy's Demonized, but loses 5% Decibels when taking DMG. • Upon entering combat, all enemies get Demonized • All enemies get Stat Enhancement Lv. 4. |
| Fluid Soul • When triggering Perfect Dodge, the Agent restores 5% HP, but Assist Follow-Ups inflict 25% less Daze. • Upon entering combat, all enemies get Demonized • All enemies get Stat Enhancement Lv. 4. |
|
| Beyond Decibels • All squad members' Decibel Generation Rate increases by 35%. • Upon entering combat, all enemies get Demonized • All enemies get Stat Enhancement Lv. 4. |
Floors 46-50 Best Characters and Bangboo
| Best DPS | |
|---|---|
| Best Stun | |
| Best Support | |
| Best Bangboos | |
| Sample Teams |
|
Floors 46-50 Enemies
| Enemies | Weakness | Resistance | |
|---|---|---|---|
| 46 | |||
| 47 | |||
| 48 | |||
| 49 | |||
| 50 |
How to Beat Floors 46-50
Use Attribute Anomalies in Floor 49
The Rampant Brute will power up and inflict Shock on himself. You can depower him by using Attribute Anomalies like Assault and Burning to trigger Disorder.
Save Your Strongest Attacks in Phase 2 of Floor 50
When Bringer's HP is below 50%, try to save your strongest attacks on the next phase. This is because Bringer will charge up and then enter the Frenzied state.
Destroy the core as soon as possible with your strongest attacks to cancel Bringer's Frenzied state.
How to Play Simulated Battle Trial Last Stand
Simulated Battle Trial Last Stand Guide
- Select Your Characters and Bangboos
- Select Your Battle Environment
- Clear the Floor to Move Up
- Challenge Endless Stages After Floor 25
Select Your Characters and Bangboos

Just like Simulated Battle Trial, Endless Tower Last Stand will have you select a fixed number of Agents and Bangboo to use throughout 10 Floors. Once selected, you may not switch them out, and their HP will not be restored.
Every 5 floors, a new slot for an additional characters wil be unlocked. Throughout your 10-floor run, you may only adjust your party based on the characters you have selected. Be sure to view each floor's enemies and plan prudently.
Select Your Battle Environment
A new feature in Endless Tower Last Stand is the Battle Enviroments, which you can swap out on each floor before the battle starts. These will provide buffs to your characters and give boons after every battle.
However, more often than not, these Battle Environments will also come with setbacks that will make the trials a bit more challenging than usual, such as restoring HP per Perfect Dodge, but increases the DMG your Agents take.
Clear the Floor to Move Up
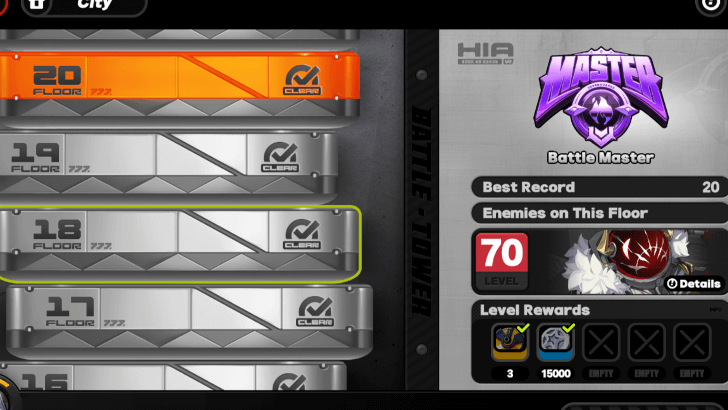
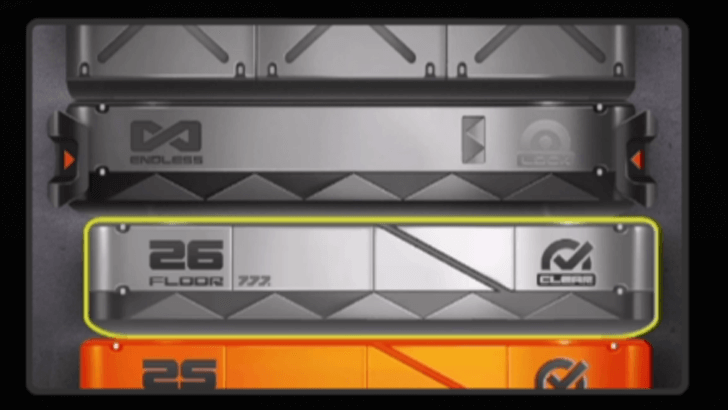
Just as it is in the normal mode of Simulated Battle Trial, Proxies will start from Floor 1 and move upwards after clearing a Floor. Clearing 10 floors will end a phase and save your progress.
Starting the next phase will allow you to reselect Agents and Bangboo. Your badge will change color and be displayed on your Personal Homepage for other Proxies to see!
Challenge Endless Stages After Floor 50
Finally, just like in the normal mode of Simulated Battle Trial, Proxies can challenge an endless number of stages after reaching the end of the tower.
However, instead of reaching 25 floors, the Last Stand's last stage before Endless Mode is Floor 50. Reaching Floor 100 will net you a Profile Title!
Simulated Battle Trial Rewards
Stage Rewards
| Floors | Rewards Per Floor |
|---|---|
| 1-5 | |
| 6-10 | |
| 11-15 | |
| 16-20 | |
| 21-25 | |
| 26-30 | |
| 31-35 | |
| 36-40 | |
| 41-45 | |
| 46-50 |
Milestone Rewards
| Objective | Rewards |
|---|---|
| Complete Battle Trial: The Last Stand Floor 5 | |
| Complete Battle Trial: The Last Stand Floor 10 | |
| Complete Battle Trial: The Last Stand Floor 15 | |
| Complete Battle Trial: The Last Stand Floor 20 | |
| Complete Battle Trial: The Last Stand Floor 30 | |
| Complete Battle Trial: The Last Stand Floor 40 | Title: Vanguard of the End |
| Complete Battle Trial: The Last Stand Floor 50 | Avatar: Endless Last Stand - Impasse |
| Complete Battle Trial: The Last Stand Floor 100 | Title: Banner of the End |
Clear Floor 50 to Unlock Floor -1
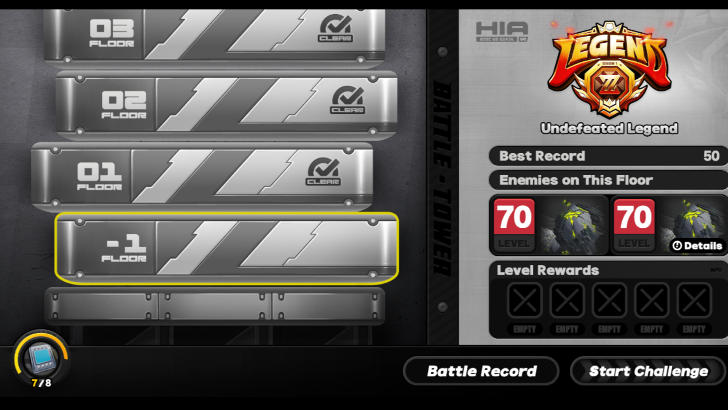
After clearing Floor 50, you can now access Floor -1 which can be found at the very bottom of the Tower. In this Floor, you have to fight two Dead End Butchers.
Clearing Floor -1 will reward you with an Achievement that has 5 Polychromes with it.
Simulated Battle Trial Last Stand Details
Endless Tower Last Stand Information
 |
|
| Duration | January 22 - July 16, 2025 |
|---|---|
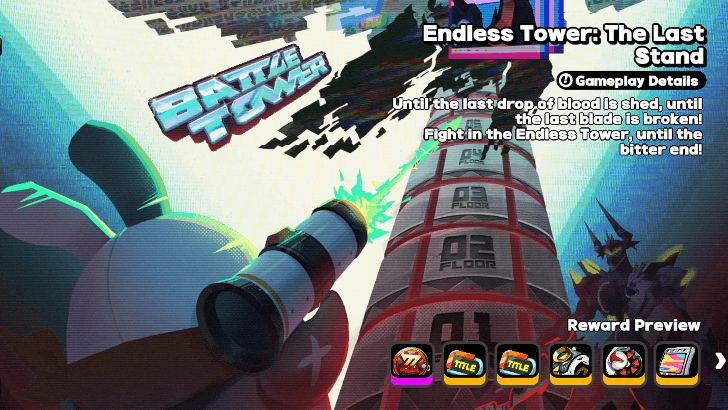
Battle Trial: The Last Stand, also known as Endless Tower: The Last Stand, is a limited time end game mode in the Simulated Battle Trial that features over 50 stages of enemies you must clear. You will get rewards for every five stages cleared.
Simulated Battle Trial Endless Tower Guide
Zenless Zone Zero Related Guides

All VR Device Challenges
| List of All VR Device Challenges | |
|---|---|
 Combat Simulation Combat Simulation |
 Expert Challenge Expert Challenge |
 VR Training VR Training |
 Simulated Battle Trial Simulated Battle Trial |
Comment
Author

Simulated Battle Trial Last Stand Guide
Please participate in our site
improvement survey
03/2026
improvement survey
03/2026
Would you assist in
improving Game8's site?
improving Game8's site?

×
We are listening to our users' valuable opinions and discussing how to act on them.
The information collected through this survey will be used for the purpose of improving our services. In addition, the information will only be disclosed a part of a statistic in a format that will not allow identification of personal information.
Begin Survey
Not Now
×
Please rate each item regarding Game8.co's Advertisements.
Amount of Ads
Very Dissatisfied
Somewhat Dissatisfied
Fine
Somewhat Satisfied
Highly Satisfied
Placement of Ads
Timing of Ad Display
Ad Loading Speed
Safeness of Ads
Content of Ads
×
Please rate each item regarding Game8.co's Quality of Articles.
Amount of information
Very Dissatisfied
Somewhat Dissatisfied
Fine
Somewhat Satisfied
Highly Satisfied
Frequency of updates
Speed of new information
Accuracy of articles
Understandibility of articles
Readability of sentences
×
Please rate each item regarding Game8.co's Usability of the Site.
Ease of finding information
Very Dissatisfied
Somewhat Dissatisfied
Fine
Somewhat Satisfied
Highly Satisfied
Loading Speed
Use of Color
Font Size
Visibility of Images
Easy to Understand Layout
×
Please rate each item regarding Game8.co's Message Boards, Comments.
Ease of Writing
Very Dissatisfied
Somewhat Dissatisfied
Fine
Somewhat Satisfied
Highly Satisfied
Readability
Ease in Finding Information
Comment Quality
Comment Quantity
Admin Response
×
Please rate each item regarding Game8.co's Site's new design.
Please rate our site's new design
Very Dissatisfied
Somewhat Dissatisfied
Fine
Somewhat Satisfied
Highly Satisfied
Do you think that the website's design change makes the site easier to use?
Has the new design made it easier for you to find information on the site?
Has the new design improved the overall visual appeal of the site?
How would you rate your overall satisfaction with the new design of the site?
×
How likely are you to recommend Game8 to someone you know?
Very Unlikely
0
1
2
3
4
5
6
7
8
9
10
Very Likely
If you have other opinions regarding potential improvement to the website, please share them with us. We would appreciate your honest opinion.
Note: This is a free response section, so you can proceed without entering anything.
Note: Please be sure not to enter any kind of personal information into your response.
Note: Please be sure not to enter any kind of personal information into your response.
×
Thank You
×
Thank you for participating in our survey! Your answers will help us to improve the quality of our website and services.
We hope you continue to make use of Game8.
We hope you continue to make use of Game8.
Close
Rankings
- We could not find the message board you were looking for.
Gaming News


![Everwind Review [Early Access] | The Shaky First Step to A Very Long Journey](https://img.game8.co/4440226/ab079b1153298a042633dd1ef51e878e.png/thumb)

![Monster Hunter Stories 3 Review [First Impressions] | Simply Rejuvenating](https://img.game8.co/4438641/2a31b7702bd70e78ec8efd24661dacda.jpeg/thumb)
Popular Games

Genshin Impact Walkthrough & Guides Wiki
Honkai: Star Rail Walkthrough & Guides Wiki
Umamusume: Pretty Derby Walkthrough & Guides Wiki
Pokemon Pokopia Walkthrough & Guides Wiki
Resident Evil Requiem (RE9) Walkthrough & Guides Wiki
Monster Hunter Wilds Walkthrough & Guides Wiki
Wuthering Waves Walkthrough & Guides Wiki
Arknights: Endfield Walkthrough & Guides Wiki
Pokemon FireRed and LeafGreen (FRLG) Walkthrough & Guides Wiki
Pokemon TCG Pocket (PTCGP) Strategies & Guides Wiki


Recommended Games
Diablo 4: Vessel of Hatred Walkthrough & Guides Wiki
Fire Emblem Heroes (FEH) Walkthrough & Guides Wiki
Yu-Gi-Oh! Master Duel Walkthrough & Guides Wiki
Super Smash Bros. Ultimate Walkthrough & Guides Wiki
Pokemon Brilliant Diamond and Shining Pearl (BDSP) Walkthrough & Guides Wiki
Elden Ring Shadow of the Erdtree Walkthrough & Guides Wiki
Monster Hunter World Walkthrough & Guides Wiki
The Legend of Zelda: Tears of the Kingdom Walkthrough & Guides Wiki
Persona 3 Reload Walkthrough & Guides Wiki
Cyberpunk 2077: Ultimate Edition Walkthrough & Guides Wiki


All rights reserved
Copyright © 2024 HoYoverse, COGNOSPHERE. All Rights Reserved.
The copyrights of videos of games used in our content and other intellectual property rights belong to the provider of the game.
The contents we provide on this site were created personally by members of the Game8 editorial department.
We refuse the right to reuse or repost content taken without our permission such as data or images to other sites.