Best Builds
As of December 2025, Game8 has ended coverage of Once Human. Thank you very much for your understanding and we hope you continue to enjoy Game8's guides.

Discover the best builds in Once Human! Read on to learn about the most effective builds, including the Shrapnel Build, Power Surge Build, Burn Build, Frost Vortex Build, Class Builds, PvP and PvE Builds!
List of Contents
Best Builds in Once Human
The Best Shrapnel Build
| Best Builds | |||
|---|---|---|---|
| Shrapnel | Power Surge | Burn | Frost Vortex |
| Sniper/Bull's Eye | Fast Gunner | Unstable Bomber | Bounce |
| Doombringer | Fabled Masamune | Corrosion | Critical Pulse |
| Slot | Item | Mod |
|---|---|---|
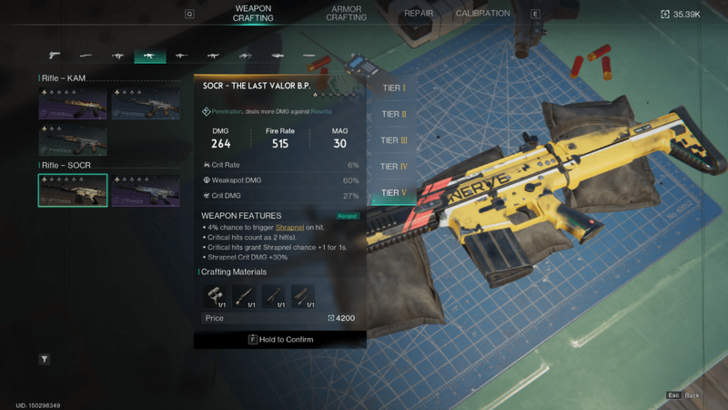
| Primary Weapon | SOCR - The Last Valor | Shatter Them All or Shrapnel Smash or Shrapnel Souvenir |
| Secondary Weapon | DE.50 - Wildfire or Recurve Crossbow | Vulnerability Amplifier |
| Melee | Long Axe | Portable Territory |
| Helmet | Beret or Gas-Tight Helmet | Momentum Up or Fateful Strike |
| Face | Lonewolf Mask | Targeted Strike or Shrapnel Carnage |
| Gloves | Lonewolf Gloves | Crit Amplifier or Crit Booster |
| Shoes | Bastille Shoes | Covered Advance or Slow and Steady |
| Top | Lonewolf Jacket | Healing Fortification |
| Bottoms | Lonewolf Pants | Bullet Siphon or Deadshot |
| Notes | ・For Cradle Overrides, equip Automatic Weapon Enhancement, Tactical Combo, Deadly Combo, and Tracking Bullet. ・Consume Canned Meat to increase character Shrapnel DMG by 20%. ・Use Lonewolf's Whisper for your Combat Deviant, as it provides damage and distracts enemies, making it easier for Covered Advance mod to be activated. |
|
The Best Power Surge Build
| Best Builds | |||
|---|---|---|---|
| Shrapnel | Power Surge | Burn | Frost Vortex |
| Sniper/Bull's Eye | Fast Gunner | Unstable Bomber | Bounce |
| Doombringer | Fabled Masamune | Corrosion | Critical Pulse |
| Slot | Item | Mod |
|---|---|---|
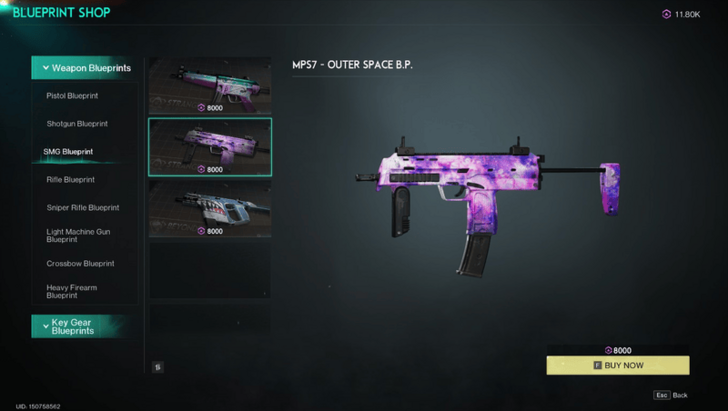
| Primary Weapon | MPS7 - Outer Space | Static Shock |
| Secondary Weapon | AWS.338 - Bullseye or Bingo | Vulnerability Amplifier |
| Melee | Stun Baton | Shock Diffusion |
| Helmet | Mayfly Goggles | Deviation Expert |
| Face | Shelterer Mask | Thunderclap |
| Gloves | Shelterer Gloves | Status Enhancement or Elemental Overload |
| Shoes | Shelterer Shoes | Covered Advance |
| Top | Shelterer Jacket | Flame Resonance or Rejuvenating |
| Bottoms | Bastille Pants | Precision Charge or Status Amplification |
| Notes | ・Additional Calibrations will increase the PSI Intensity so it increases thunderclap damage. ・For Cradle Overrides, use Automatic Weapon Enhancement, Transient Impact, Lone Walker, Deviation Master, First Round Blast, and Status Enhancement. ・Consume Whimsical Drink to increase Psi Intensity, Bone-In Deviated Sausage for Bosses, and Mixed Fried Hotdog for the your secondary's Bull's Eye |
|
The Best Burn Build
| Best Builds | |||
|---|---|---|---|
| Shrapnel | Power Surge | Burn | Frost Vortex |
| Sniper/Bull's Eye | Fast Gunner | Unstable Bomber | Bounce |
| Doombringer | Fabled Masamune | Corrosion | Critical Pulse |
| Slot | Item | Mod |
|---|---|---|
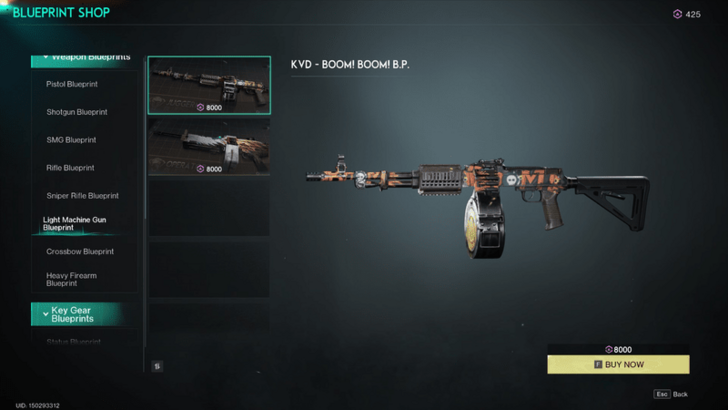
| Primary Weapon | KVD Boom! Boom! or KAM Crank | Embers or Flame Resonance or Burning Wrath |
| Secondary Weapon | Recurve Crossbow or DE.50 - Wildfire | Vulnerability Amplifier |
| Melee | Long Axe | Final Territory |
| Helmet | Bastille Hood or Shelterer Hat | Deviation Expert |
| Face | Shelterer Mask | Blaze Amplifier |
| Gloves | Grill Gloves | Status Enhancement |
| Shoes | Shelterer Shoes | Covered Advance |
| Top | Shelterer Jacket or Bastille Jacket | Flame Resonance (Tier 3) |
| Bottoms | Shelterer Pants | Status Amplification or Precision Charge |
| Notes | ・Use the Combat Deviant Pyro Dino to deal more Fire Damage. ・For Cradle Overrides, equip Automatic Weapon Enhancement, Lone Walker, Master Tactician, Sustained Supression, Deviation Master, Tactical Combo, and Head Agglutination. ・For food, consume Whimsical Drink to increase PSI intensity for your Burn effect. You may also consume Mixed Fried Hotdog for your secondary weapon's Bull's Eye. | |
The Best Frost Vortex Build
| Best Builds | |||
|---|---|---|---|
| Shrapnel | Power Surge | Burn | Frost Vortex |
| Sniper/Bull's Eye | Fast Gunner | Unstable Bomber | Bounce |
| Doombringer | Fabled Masamune | Corrosion | Critical Pulse |
| Slot | Item | Mod |
|---|---|---|
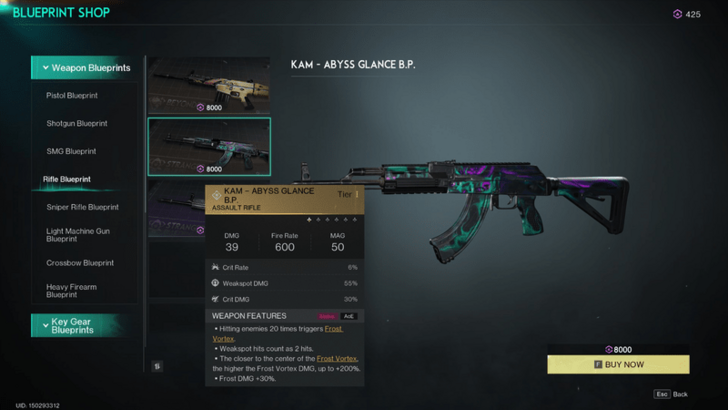
| Primary Weapon | KAM - Abyss Glance | Vortex Multiplier or Cryo Blast |
| Secondary Weapon | DE.50 - Wildfire | Vulnerability Amplifier |
| Melee | Frozen Northern Pike | Frosty Blessing |
| Helmet | Shelterer Hood | Deviation Expert |
| Face | Shelterer Mask | Lingering Frost |
| Gloves | Shelterer Gloves | Elemental Overload or Status Enhancement |
| Shoes | Bastille Shoes | Covered Advance |
| Top | Frost Tactical Vest | Flame Resonance |
| Bottoms | Shelterer Pants | Precision Charge |
| Notes | ・Use the Combat Deviant Polar Jelly. This critter is incredibly important for the Frost Vortex build. ・For Cradle Overrides, equip Status Enhancement, Lone Walker, Deviation Master, Sustained Suppression, Automatic Weapon Enhancement, and Tactical Combo. ・For food, consume Honey-Glazed Meat to increase Crit DMG affected by Frost Vortex and Mixed Fried Hotdog for your boost secondary's Bull's Eye effect. |
|
The Best Sniper Bull's Eye Build
| Best Builds | |||
|---|---|---|---|
| Shrapnel | Power Surge | Burn | Frost Vortex |
| Sniper/Bull's Eye | Fast Gunner | Unstable Bomber | Bounce |
| Doombringer | Fabled Masamune | Corrosion | Critical Pulse |
| Slot | Item | Mod |
|---|---|---|
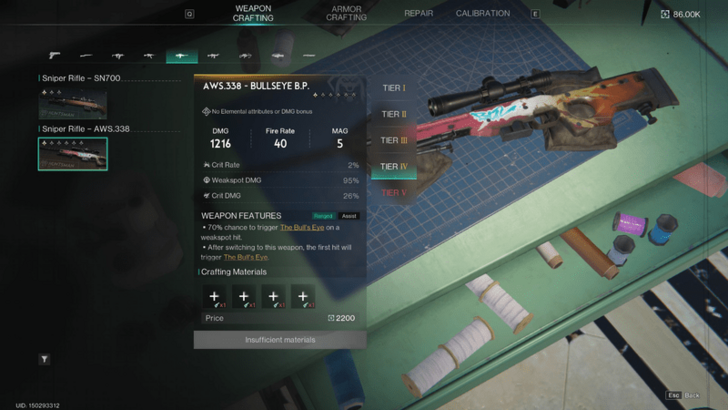
| Primary Weapon | AWS.338 - Bullseye | Vulnerability Amplifier |
| Secondary Weapon | DBSG - Doombringer | Vulnerability Amplifier |
| Melee | Long Axe | Durable Territory |
| Helmet | Bastille Hood | Precise Strike |
| Face | Bastille Mask or Renegade Mask | Most Wanted |
| Gloves | Renegade Gloves | Weakspot DMG Boost |
| Shoes | Seasoned Hunter Leather Boots | Covered Advance |
| Top | Renegade Jacket | Weakspot DMG Boost (Blue) |
| Bottoms | Bastille Pants | Three Strikes or Unstoppable |
| Notes | ・Consuming Mixed Fried Hot Dog enhances your damage by 20% against enemies affected by The Bull's Eye effect, and Assorted Canned Fruit for increased 25% Weakspot DMG if your Sanity is above 80%! ・For Cradle Overrides, equip Long Range Enhancement, Tactical Combo, Steady Hand, Bounty Bunter, Devatiation Master, and Lone Walker |
|
This build has been updated for Season 2!
The Bull's Eye Build (or the Sniper Build) is all about marking targets and making them super squishy with an 8% vulnerability boost for 12 seconds. Land a weakspot shot, and your enemies light up like a beacon, just begging for more punishment.
With the AWS.338 - Bullseye sniper rifle, you'll trigger Bull's Eye like a pro, turning every fight into a headshot-fueled highlight reel. It’s the perfect setup for anyone who wants to turn their enemies into target practice!
The Best Fast Gunner Build
| Best Builds | |||
|---|---|---|---|
| Shrapnel | Power Surge | Burn | Frost Vortex |
| Sniper/Bull's Eye | Fast Gunner | Unstable Bomber | Bounce |
| Doombringer | Fabled Masamune | Corrosion | Critical Pulse |
| Slot | Item | Mod |
|---|---|---|
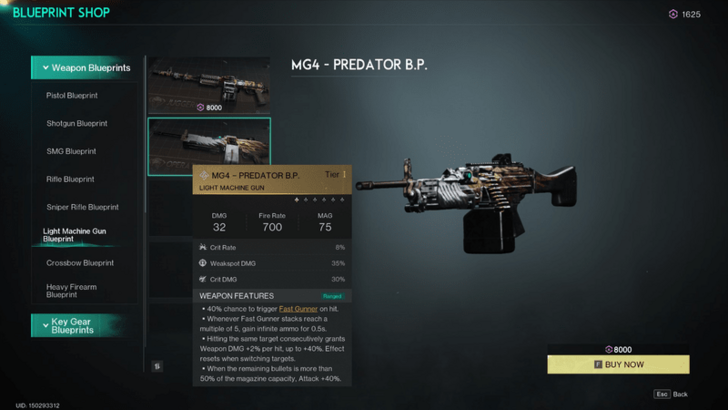
| Primary Weapon | MG4 - Predator | Precision Rush |
| Secondary Weapon | AWS.338 - Bullseye or Bingo | Vulnerability Amplifier |
| Melee | Stun Baton | Shock Diffusion |
| Helmet | Bastille Hood | Precise Strike |
| Face | Oasis Mask | Gunslinger |
| Gloves | Renegade Gloves or Bastille Gloves | Weakspot DMG Boost |
| Shoes | Lonewolf Shoes or Bastille Shoes | Covered Advance or Ruthless Reaper |
| Top | Renegade Jacket or Savior Jacket | Munitions Amplifier (Blue) |
| Bottoms | Renegade Pants or Savior Pants | Bullet Siphon or Unstoppable |
| Notes |
・For Cradle Overrides, use Automatic Weapon Enhancement for the LMG, Steady Hand, Tactical Combo, Deviation Master, Fast Pursuit, Long-Range Enhancement, Lone Walker. ・Get Lonewolf's Whisper for your main deviation! This loyal pup will not only protect you, but also increase your DMG. ・Consume Assorted Canned Fruit - Increases Weakspot DMG by 25% when Sanity if above 80%. |
|
This build has been updated for Season 2!
The Fast Gunner build lives up to its name—it's all about unleashing a rapid, relentless barrage of bullets. With each stack of Fast Gunner boosting your Fire Rate and Attack by 1% for 2 seconds (stacking up to 5 times), you're primed to shred through enemies.
Whether you're focusing on precision with weakspot hits or just laying down pure suppressive fire, this build is designed to make every shot count—and there will be a lot of them. It’s your go-to for raining bullets and quickly overwhelming foes!
Best Unstable Bomber Build
| Best Builds | |||
|---|---|---|---|
| Shrapnel | Power Surge | Burn | Frost Vortex |
| Sniper/Bull's Eye | Fast Gunner | Unstable Bomber | Bounce |
| Doombringer | Fabled Masamune | Corrosion | Critical Pulse |
| Slot | Item | Mod |
|---|---|---|
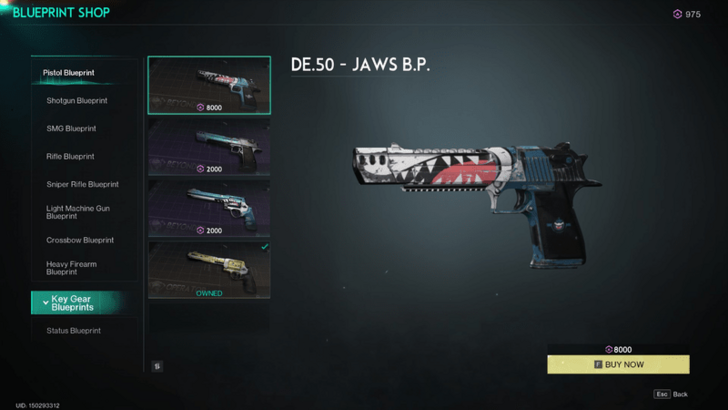
| Primary Weapon | DE.50 - Jaws | Bombardier Souvenir or Reckless Bomber |
| Secondary Weapon | AWS.338 - Bullseye | Vulnerability Amplifier |
| Melee | Long Axe or Stun Baton | Melee Amplifier |
| Helmet | Lonewolf Hood | Momentum Up or Deviation Expert |
| Face | Lonewolf Mask | Point Detonation |
| Gloves | Lonewolf Gloves or Bastille Gloves | Crit Amplifier or Crit Boost |
| Shoes | Bastille Shoes or Lonewolf Shoes | Slow and Steady |
| Top | Shaman Vulture Top | Rejuvenatiing or Resist Advantage |
| Bottoms | Lonewolf Pants | Deadshot |
| Notes |
・For Cradle Overrides, equip Automatic Weapon Enhancement, Tactical Combo, and First Round Blast. ・Use the Combat Deviants Lonewolf's Whisper or Butterfly's Emissary for additional damage. |
|
Best Bounce Build
| Best Builds | |||
|---|---|---|---|
| Shrapnel | Power Surge | Burn | Frost Vortex |
| Sniper/Bull's Eye | Fast Gunner | Unstable Bomber | Bounce |
| Doombringer | Fabled Masamune | Corrosion | Critical Pulse |
| Slot | Item | Mod |
|---|---|---|
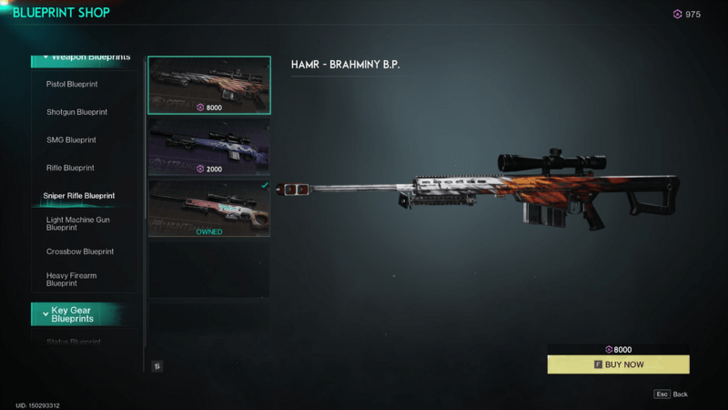
| Primary Weapon | HAMR - Brahminy | Targeted Bounce |
| Secondary Weapon | DE.50 Wildfire | Vulnerability Amplifier |
| Melee | Long Axe | Portable Territory |
| Helmet | Agent Helmet | Momentum Up or Precise Strike |
| Face | Agent Mask | Break Bounce or Precision Bounce |
| Gloves | Agent Gloves or Bastille Gloves | Weakspot DMG Boost |
| Shoes | Agent Shoes or Bastille Shoes | Covered Advance |
| Top | Bastille Jacket | Unstoppable or Weakspot DMG Boost |
| Bottoms | Hot Dog Shorts | Unstoppable / Weakspot DMG Boost |
| Notes | ・Cradle Overrides: Equip Long Range Enhancement, Tactical Combo, Deadly Combo and Bounce Rampage. ・Consume Assorted Canned Fruit to increase Weakspot DMG! |
|
Best Doombringer Build
| Best Builds | |||
|---|---|---|---|
| Shrapnel | Power Surge | Burn | Frost Vortex |
| Sniper/Bull's Eye | Fast Gunner | Unstable Bomber | Bounce |
| Doombringer | Fabled Masamune | Corrosion | Critical Pulse |
| Slot | Item | Mod |
|---|---|---|
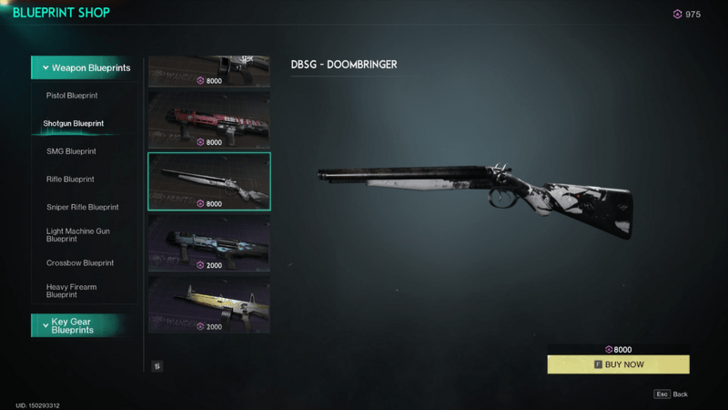
| Primary Weapon | DBSG - Doombringer | Vulnerability Amplifier |
| Secondary Weapon | AWS.338 - Bullseye or Bingo | Vulnerability Amplifier |
| Melee | Long Axe | Portable Territory |
| Helmet | Savior Hood or Lonewolf Hood | Lifeforce Boost or Precise Strike |
| Face | Savior Mask or Lonewolf Mask | Most Wanted or Targeted Strike |
| Gloves | Heavy Duty Clothing Gloves or Bastille Gloves | Crit Amplifier or Munitions Amplifier |
| Shoes | Seasoned Hunter Leather Boots or Earthly Boots | Covered Advance |
| Top | Savior Jacket or Lonewolf Jacket | Healing Fortification and Munitions Amplifier |
| Bottoms | Savior Pants or Lonewolf Pants | Unstoppable or Three Strikes |
| Notes | ・For Cradle Overrides, equip Handgun Enhancement, Long Range Enhancement, Agility, Rapid Aid, Tactical Combo, and Bounty Hunter. ・Use Lonewolf's Whisper for your Combat Deviant, as it provides damage and distracts enemies. ・Consume Stardust Raspberry Shaved Ice and Iced Tea when you can! |
|
Best Fabled Masamune Melee Build
| Best Builds | |||
|---|---|---|---|
| Shrapnel | Power Surge | Burn | Frost Vortex |
| Sniper/Bull's Eye | Fast Gunner | Unstable Bomber | Bounce |
| Doombringer | Fabled Masamune | Corrosion | Critical Pulse |
| Slot | Item | Mod |
|---|---|---|
| Primary Weapon | DBSG - Doombringer | Vulnerability Amplifier |
| Secondary Weapon | Recurve Crossbow | Vulnerability Amplifier |
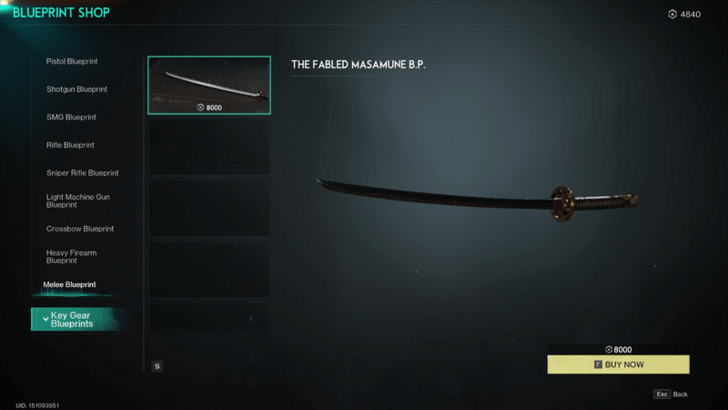
| Melee | Fabled Masamune | Melee Amplifier (Blue) |
| Helmet | Savior Hood | Fateful Strike |
| Face | Savior Mask | Lifeforce Boost |
| Gloves | Savior Gloves | Melee Amplifier (Gold) |
| Shoes | Savior Shoes | Covered Advance or Lifeforce Boost |
| Top | Blast Top | Healing Fortification or Resist Advantage or Enduring Shield |
| Bottoms | Blast Pants | Melee Momentum |
| Notes | ・For Cradle Overrides, equip Melee Enhancement, Rapid Aid, Tactical Combo, Bounty Hunter, Sprint, and Agility. ・Consume Canned Lunch Meat for HP Boost.and Stardust Mushroom Soup for Max Stamina +20% and increases Stamina Recover +30% . ・Use Zeno-Purfier for your Combat Deviant, as it allows you blink towards your enemy when you're wielding a melee weapon. |
|
Best Corrosion Build
| Best Builds | |||
|---|---|---|---|
| Shrapnel | Power Surge | Burn | Frost Vortex |
| Sniper/Bull's Eye | Fast Gunner | Unstable Bomber | Bounce |
| Doombringer | Fabled Masamune | Corrosion | Critical Pulse |

| Slot | Item | Mod |
|---|---|---|
| Primary Weapon | ACS12 - Corrosion | Shock Rampage |
| Secondary Weapon | Recurve Crossbow | Vulnerability Amplifier |
| Melee | Stun Baton | Shock Diffusion |
| Helmet | Gas Mask Hood | Deviation Expert |
| Face | Lonewolf Mask | First Electrocution |
| Gloves | Lonewolf Gloves | Crit Amplifier |
| Shoes | Lonewolf Shoes | Covered Advance |
| Top | Bastille Jacket | Rejuvenating |
| Bottoms | Lonewolf Pants | Deadshot |
| Notes | ・For Cradle Overrides, equip Handgun Enhancement, Tactical Combo, Transient Impact, Status Enhancement, and First Round Blast. ・Consume Whimsical Drink to increase Psi Intensity, Bone-In Deviated Sausage for Bosses. Other consumables to consider: Assorted Canned Fruit, Shattered Bread, Stargazy Pie, Raspberry Shaved Ice. ・For Deviations, Lonewolf’s Whisper is the best doggo! |
|
Best Critical Pulse Power Surge Build
| Best Builds | |||
|---|---|---|---|
| Shrapnel | Power Surge | Burn | Frost Vortex |
| Sniper/Bull's Eye | Fast Gunner | Unstable Bomber | Bounce |
| Doombringer | Fabled Masamune | Corrosion | Critical Pulse |
| Slot | Item | Mod |
|---|---|---|
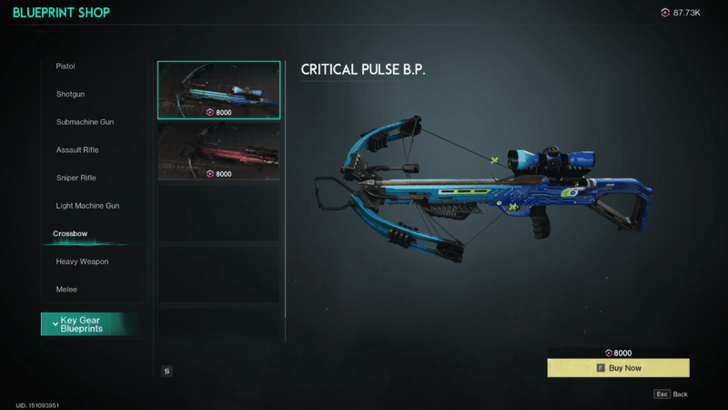
| Primary Weapon | Critical Pulse | Static Shock |
| Secondary Weapon | DE.50 Wildfire | Vulnerability Amplifier |
| Melee | Long Axe | Final Territory |
| Helmet | Shelterer Hood or Blackstone Helmet | Work of Proficiency |
| Face | Shelterer Mask or Blackstone Mask | Thunderclap |
| Gloves | Shelterer Gloves or Blackstone Gloves | Elemental Overload or Status Enhancement |
| Shoes | Renegade Shoes | Covered Advance |
| Top | Savior Jacket or Blackstone Tops | Flame Resonance |
| Bottoms | Overloaded Pants | Abnormal Increase |
| Notes | ・Use the Snowsprite Deviation to spawn more ice crystals! ・For Cradle Overrides, equip Anti-Phase, Resilience, Tactical Combo Status Enhancement, *Elemental Sense, Steady Hand, and Transient Impact**. ・For food, consume Honey-Glazed Meat to increase Crit DMG affected by Power Surge and Mixed Fried Hotdog for your boost secondary's Bull's Eye effect. |
|
Best Critical Pulse Power Surge Build
Class Best Builds
Chef Build

| Slot | Item | Mod |
|---|---|---|
| Primary Weapon | M416 - Silent Anabasis | Vortex Multiplier |
| Secondary Weapon | AWS.338 - Bullseye | Vulnerability Amplifier |
| Melee | Frozen Northern Pike | Frosty Blessing |
| Helmet | Shelterer Hood | Deviation Expert |
| Face | Shelterer Mask | Lingering Frost |
| Gloves | Snow Camo Gloves | Elemental Overload or Status Enhancement |
| Shoes | Shelterer Shoes | Covered Advance |
| Top | Savior Jacket | Flame Resonance (Talents) |
| Bottoms | Savior Pants | Bullet Siphon |
| Combat Deviation |
Can participate in combat to summon fragile frost crystals that explode upon being shattered, damaging enemies with a frost explosion and increasing the Frost DMG they receive. |
Best Food Combinations | Bone-In Deviated Sausage, Stardust Raspberry Shaved Ice, Surprise Spring Roll, Layered Galaxy, Canned Minty Meat, Whimsical Drink |
Beastmaster Build

| Slot | Item | Mod |
|---|---|---|
| Primary Weapon | KAM - Abyss Glance | Cryo Blast |
| Secondary Weapon | AWS.338 - Bullseye | Vulnerability Amplifier |
| Melee | Frozen Northern Pike | Frosty Blessing |
| Helmet | Treacherous Tides Helmet | Deviation Expert |
| Face | Treacherous Tides Mask | Frostwave Wither |
| Gloves | Savior Gloves | Elemental Overload or Status Enhancement |
| Shoes | Earthly Boots | Covered Advance |
| Top | Savior Jacket | Rejuvenating |
| Bottoms | Savior Pants | Elemental Resonance |
| Combat Deviation |
Recommended for bossing and Monoliths. Switch to Snowsprite for mobbing. |
|
Way of Winter Best Builds
| Way of Winter Best Builds | ||||
|---|---|---|---|---|
| Silent Anabasis Frost Vortex Build | Conflicting Memories Shrapnel Build | Pyroclasm Starter Burn Build | Autumn Equinox Fortress Warfare Build | Doombringer Fortress Warfare Build |
Silent Anabasis Frost Vortex Build

| Slot | Item | Mod |
|---|---|---|
| Primary Weapon | M416 - Silent Anabasis | Vortex Multiplier |
| Secondary Weapon | AWS.338 - Bullseye | Vulnerability Amplifier |
| Melee | Frozen Northern Pike or Torch | Frosty Blessing |
| Helmet | Shelterer Hood | Deviation Expert |
| Face | Shelterer Mask | Lingering Frost |
| Gloves | Snow Camo Gloves | Elemental Overload or Status Enhancement |
| Shoes | Shelterer Shoes | Covered Advance |
| Top | Savior Jacket | Flame Resonance |
| Bottoms | Savior Pants | Bullet Siphon |
| Notes | ・Use the Snowsprite Deviation to spawn more ice crystals! ・For Cradle Overrides, equip Status Enhancement, Deviation Master, Sustained Suppression and Bounty Hunter. If they're available in your scenario, also equip Frost Sense, Anti-Void, and Deviant Energy Defense. ・For food, consume Honey-Glazed Meat to increase Crit DMG affected by Frost Vortex and Mixed Fried Hotdog for your boost secondary's Bull's Eye effect. |
|
Silent Anabasis Frost Vortex Build (Way of Winter)
| Way of Winter Best Builds | ||||
|---|---|---|---|---|
| Silent Anabasis Frost Vortex Build | Conflicting Memories Shrapnel Build | Pyroclasm Starter Burn Build | Autumn Equinox Fortress Warfare Build | Doombringer Fortress Warfare Build |
Conflicting Memories Shrapnel Build
| Slot | Item | Mod |
|---|---|---|
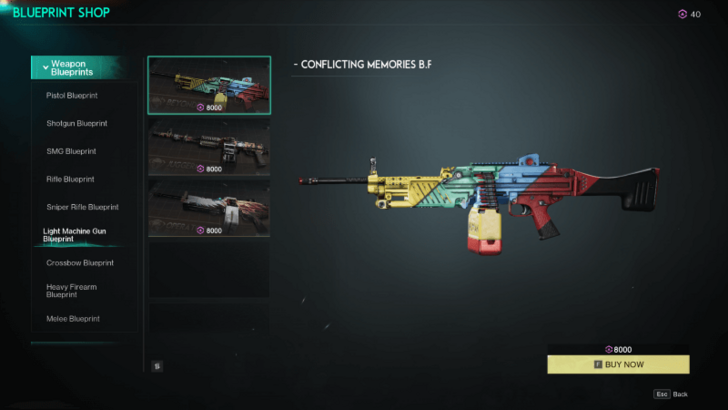
| Primary Weapon | MG4 - Conflicting Memories | Shrapnel Souvenir |
| Secondary Weapon | DE.50 - Wildfire | Vulnerability Amplifier |
| Melee | Long Axe | Portable Territory |
| Helmet | Beret or Gas-Tight Helmet | Mag Expansion |
| Face | Lonewolf Mask | Targeted Strike or Explosive Shrapnel |
| Gloves | Lonewolf Gloves | Crit Boost or Munitions Amplifier |
| Shoes | Lonewolf Shoes | Covered Advance |
| Top | Stormweaver Jacket | Quick Comeback |
| Bottoms | Stormweaver Pants | Bullet Siphon or Deadshot |
| Notes | ・For Cradle Overrides, equip Anti-Regen, Tactical Combo, Deadly Combo, Deviant Energy Defense, Deviation Master, Bounty Hunter, and Tracking Bullet. ・Consume Canned Meat to increase character Shrapnel DMG by 20%. ・Use Lonewolf's Whisper for your Combat Deviant, as it provides damage and distracts enemies, making it easier for Covered Advance mod to be activated. |
|
Conflicting Memories Shrapnel Build (Way of Winter)
| Way of Winter Best Builds | ||||
|---|---|---|---|---|
| Silent Anabasis Frost Vortex Build | Conflicting Memories Shrapnel Build | Pyroclasm Starter Burn Build | Autumn Equinox Fortress Warfare Build | Doombringer Fortress Warfare Build |
Pyroclasm Starter Burn Build
| Slot | Item | Mod |
|---|---|---|
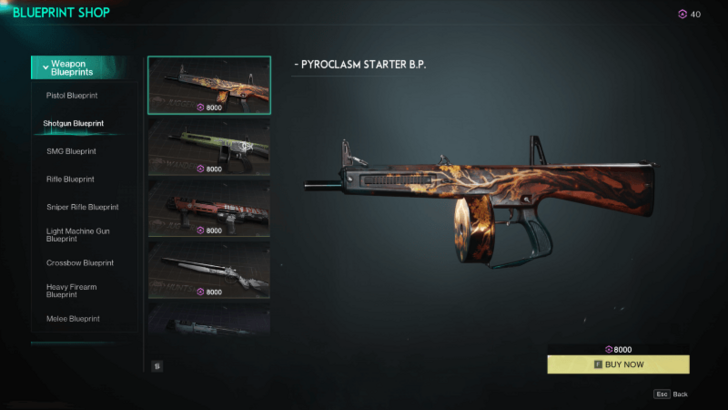
| Primary Weapon | ACS12 - Pyroclasm Starter | Burning Wrath |
| Secondary Weapon | DE.50 - Wildfire or AWS.338 - Bullseye | Vulnerability Amplifier |
| Melee | Torch | Burning Wrath |
| Helmet | Shelterer Hood | Deviation Expert |
| Face | Shelterer Mask | Blaze Amplifier |
| Gloves | Blackstone Gloves | Status Enhancement |
| Shoes | Fire Rune Boots | Covered Advance |
| Top | Shelterer Jacket | Flame Resonance - Blue |
| Bottoms | Blackstone Pants | Precision Charge |
| Notes | ・Use the Combat Deviation How to Get Invincible Sun to increase your Blaze DMG! ・For Cradle Overrides, equip Anti-Void, Status Enhancement, Sustained Supression, Heat Agglutination, Tactical Combo, Deviation Master, Bounty Hunter and Lonewalker/Side by Side. ・For food, consume Whimsical Drink and Flaming Egg Tart | |
Pyroclasm Starter Burn Build (Way of Winter)
| Way of Winter Best Builds | ||||
|---|---|---|---|---|
| Silent Anabasis Frost Vortex Build | Conflicting Memories Shrapnel Build | Pyroclasm Starter Burn Build | Autumn Equinox Fortress Warfare Build | Doombringer Fortress Warfare Build |
Autumn Equinox Fortress Warfare Build
| Slot | Item | Mod |
|---|---|---|
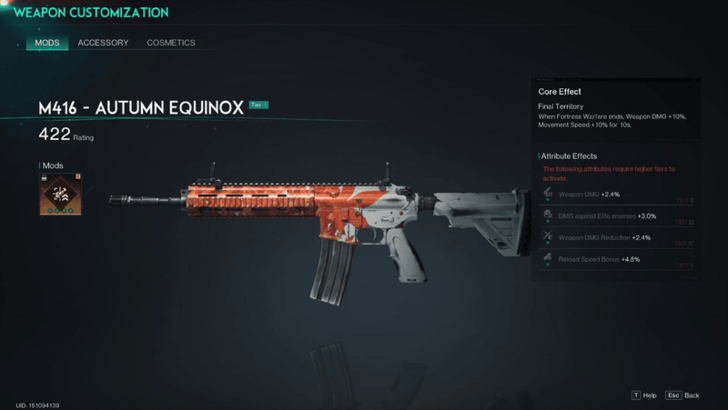
| Primary Weapon | M416 - Autumn Equinox | Final Territory |
| Secondary Weapon | AWS.338 - Bullseye | Vulnerability Amplifier |
| Melee | Long Axe | Frosty Blessing |
| Helmet | Bastille Hood | Momentum Up |
| Face | Lonewolf Mask | Unbreakable |
| Gloves | Lonewolf Gloves | Crit Boost |
| Shoes | Hard Tactical Boots | Covered Advance |
| Top | Lonewolf Jacket | Munitions Amplifier |
| Bottoms | Lonewolf Pants | Deadshot or Bullet Siphon |
| Notes | ・Use the Lonewolf's Whisper for your deviation! ・For Cradle Overrides, equip Anti-Void, Tactical Combo, Deviation Master, Steady Hand, Fortress Link, Bounty Hunter, Lone Walker/Side by Side and Anti-Phase! ・For food, consume Crumbly Bread, Bone-In Deviation Sausage, and Assorted Canned Fruit! |
|
Autumn Equinox Fortress Warfare Build (Way of Winter)
| Way of Winter Best Builds | ||||
|---|---|---|---|---|
| Silent Anabasis Frost Vortex Build | Conflicting Memories Shrapnel Build | Pyroclasm Starter Burn Build | Autumn Equinox Fortress Warfare Build | Doombringer Fortress Warfare Build |
Doombringer Fortress Warfare Build

| Slot | Item | Mod |
|---|---|---|
| Primary Weapon | DBSG - Doombringer | Vulnerability Amplifier |
| Secondary Weapon | S870 - Sandstorm | Durable Territory |
| Melee | Long Axe | Portable Territory |
| Helmet | Bastille Hood | Momentum Up |
| Face | Lonewolf Mask | Most Wanted |
| Gloves | Lonewolf Gloves | Crit Amplifier |
| Shoes | Tactical Combat Shoes | Covered Advance |
| Top | Lonewolf Jacket | Crit DMG Enhancement |
| Bottoms | Lonewolf Pants | Deadshot or Bullet Siphon |
| Notes | ・Use the Lonewolf's Whisper for your deviation! ・For Cradle Overrides, equip Anti-Void, Tactical Combo, Deviation Master, Steady Hand, Fortress Link, Bounty Hunter, Lone Walker/Side by Side and Deviant Energy Defense! ・For food, consume Ginger Drop to increase Fortress Warfare duration by 5 seocnds, Crumbly Bread, and Stardust Pumpkin Salad! |
|
Doombringer Fortress Warfare Build (Way of Winter)
Lunar Oracle Best Builds
Best Lunar Oracle Fortress Warfare Build
| Slot | Item | Mod |
|---|---|---|
| Primary Weapon | DB12 - Raining Cash | Portable Territory |
| Secondary Weapon | M416 - Autumn Equinox | Durable Territory |
| Melee | Long Axe | Portable Territory |
| Helmet | Treacherous Tides Helmet | First-Move Advantage |
| Face | Treacherous Tides Mask | Unbreakable |
| Gloves | Renegade Gloves | Munitions Amplifier |
| Shoes | Leather Boots | Enduring Shield |
| Top | Treacherous Tides Top | Three Strikes |
| Bottoms | Treacherous Tides Pants | Rush Hour |
| Notes | ・For Cradle Overrides, equip Resilience, Anti-Void, Heavy Strike, Tactical Combo, Steady Hand, Chaotic Thoughts, Deviant Energy Defense, and Tracking Bullet. ・Food items like Roulette Dumplings, Surprise Spring Rolls, and Unusual Braised Meat provide various buffs that help during the Lunar Oracle. ・Use Lonewolf's Whisper to help take the heat off you during Lunar Oracle! |
|
Lunar Oracle Fortress Warfare Build
Other Best Builds
| Other Best Builds | |
|---|---|
| Best PVP Build | Best PvE Build |
Best PvP Build
| Slot | Item | Mod |
|---|---|---|
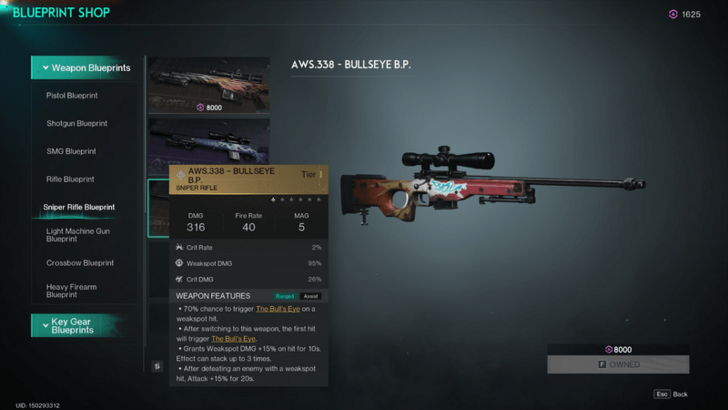
| Primary Weapon | AWS.338 - Bullseye or Bingo | Hunter's Perk |
| Secondary Weapon | DE.50 - Wildfire | Hunter's Perk |
| Melee | Stun Baton | Static Shock |
| Helmet | Savior Hood | Momentum Up |
| Face | Savior Mask | Most Wanted |
| Gloves | Savior Gloves | Munitions Amplifier |
| Shoes | Seasoned Hunter Leather Boots | Covered Advance |
| Top | Bastille Jacket | Rejuvenating |
| Bottoms | Savior Pants | Three Strikes |
| Notes | ・For Cradle Overrides, equip Long-Ranged Enhancement, Handgun Enhancement, Steady Hand, Sprint, Tactical Combo, Bounty Hunter, Advantage Barrier, and Sky Operation. ・Consuming Mixed Fried Hot Dog enhances your damage by 20% against enemies affected by The Bull's Eye effect, and Assorted Canned Fruit for increased 25% Weakspot DMG if your Sanity is above 80%! ・For Deviations, Mini Wonder is your personal bullet sponge. |
|
Best PvE Build

| Slot | Item | Mod |
|---|---|---|
| Primary Weapon | AWS.338 - Bullseye or Bingo | Vulnerability Amplifier |
| Secondary Weapon | DE.50 - Wildfire | Vulnerability Amplifier |
| Melee | Long Axe | Portable Territory |
| Helmet | Renegade Hood | Momentum Up |
| Face | Renegade Mask | Most Wanted |
| Gloves | Renegade Gloves | Munitions Amplifier |
| Shoes | Seasoned Hunter Leather Boots | Covered Advance |
| Top | Bastille Jacket | Munitions Amplifier (Blue) |
| Bottoms | Bastille Pants | Three Strikes |
| Notes | ・For Cradle Overrides, equip Long Range Enhancement, Handgun Enhancement, Bounty Hunter, Bounty Hunter, Tactical Combo, Advantage Barrier and Swift Recovery. ・Consuming Mixed Fried Hot Dog enhances your damage by 20% against enemies affected by The Bull's Eye effect, and Assorted Canned Fruit for increased 25% Weakspot DMG if your Sanity is above 80%! ・For Deviations, the Lonewolf's Whisper is your best pal! |
|
Once Human Related Guides

Author
Best Builds
Rankings
- We could not find the message board you were looking for.
Gaming News
Popular Games

Genshin Impact Walkthrough & Guides Wiki

Umamusume: Pretty Derby Walkthrough & Guides Wiki

Crimson Desert Walkthrough & Guides Wiki

Monster Hunter Stories 3: Twisted Reflection Walkthrough & Guides Wiki

Honkai: Star Rail Walkthrough & Guides Wiki

Pokemon Pokopia Walkthrough & Guides Wiki

The Seven Deadly Sins: Origin Walkthrough & Guides Wiki

Wuthering Waves Walkthrough & Guides Wiki

Zenless Zone Zero Walkthrough & Guides Wiki

Arknights: Endfield Walkthrough & Guides Wiki
Recommended Games

Fire Emblem Heroes (FEH) Walkthrough & Guides Wiki

Diablo 4: Vessel of Hatred Walkthrough & Guides Wiki

Cyberpunk 2077: Ultimate Edition Walkthrough & Guides Wiki

Yu-Gi-Oh! Master Duel Walkthrough & Guides Wiki

Super Smash Bros. Ultimate Walkthrough & Guides Wiki

Pokemon Brilliant Diamond and Shining Pearl (BDSP) Walkthrough & Guides Wiki

Elden Ring Shadow of the Erdtree Walkthrough & Guides Wiki

Monster Hunter World Walkthrough & Guides Wiki

The Legend of Zelda: Tears of the Kingdom Walkthrough & Guides Wiki

Persona 3 Reload Walkthrough & Guides Wiki
All rights reserved
Privacy Policy, Terms of Use 2024 NetEase, Inc.All Rights Reserved
The copyrights of videos of games used in our content and other intellectual property rights belong to the provider of the game.
The contents we provide on this site were created personally by members of the Game8 editorial department.
We refuse the right to reuse or repost content taken without our permission such as data or images to other sites.
 Tips and Tricks
 Best Builds
 Scenarios
 Visional Wheel
 Maps & Locations
 Weapons
 Deviants
 Armor
Armor Memetic Specializations
 Securement Silos
 Resources and Materials
 Mods
Mods Classes
 Side Quests
 News
News Bosses
 Base Building
 Memetics
 Message Boards
 RaidZone


![Death Stranding 2: On The Beach [PC] Review | A Port That Delivers](https://img.game8.co/4447392/15310a0c9aa1b6843bb713b2ea216930.jpeg/show)


