This survey will take about 1 minute.
Your answers will help us to improve our website.
Resident Evil Village (Resident Evil 8)
Shadows of Rose: House Walkthrough
☆ The Resident Evil Requiem wiki is now live!
★ Best Weapons List
★ List of Bosses and Optional Bosses
★ List of Treasures
Here is a guide to the House chapter of Resident Evil Village: Shadows of Rose. Read on for a walkthrough of the House, how to solve the doll puzzle, and how to beat Eveline!
| Previous | Current | Next |
|---|---|---|
| DLC: Castle | DLC: House | DLC: Deep Stratum |
House Walkthrough
| House Walkthrough |
|---|
| |
Hunting for Dolls
| Objectives | |
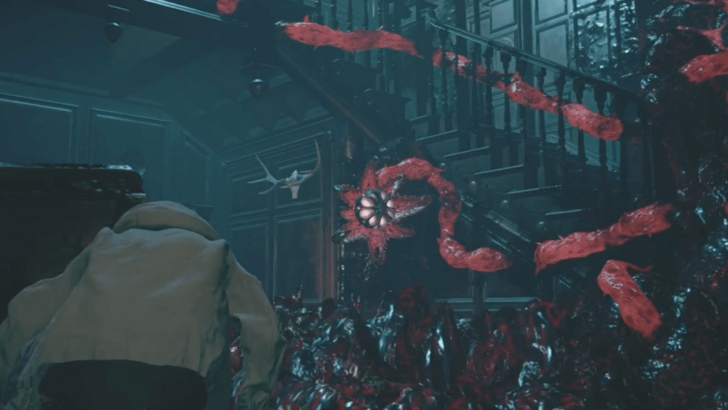
|---|---|
| 1 | 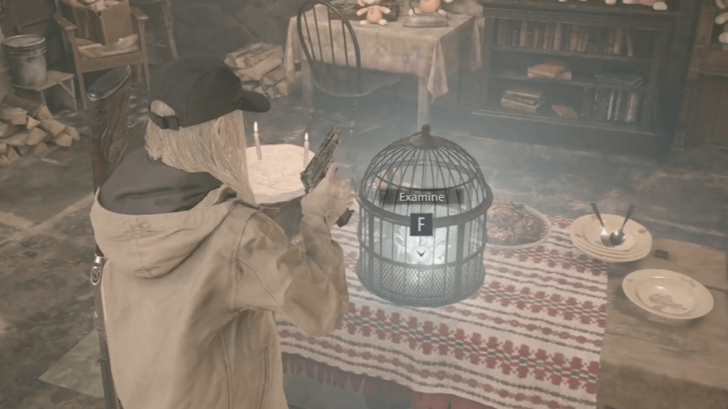 Entering the new stratum, walk along the path until you reach red double doors behind a grave. Go through them and ride up the elevator to enter the House. Once inside, keep going through until you reach the Workshop. Feel free to save beside the elevator. Examining the Purifying Crystal in the Workshop will make the room suddenly go dark and the surroundings will change. Your items and weapons will be gone too. |
| 2 | 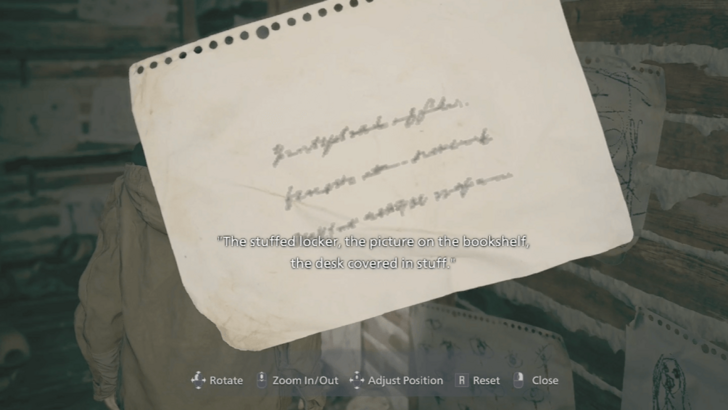 Head through the Medicine Room and out the hallway. You'll eventually reach the Study, where you have to open a cabinet with a combination lock. The numbers for the code can be found scattered around the room, with a hint to their order on the back of a drawing on the wall. To open the lock on the cabinet, enter the combination 024466. Opening the cabinet gets you Scissors. Make your way back to the Workshop and use the Scissors on the stuffed monkey to obtain the Relief of a Child. It will suddenly go dark and the surroundings will change again. |
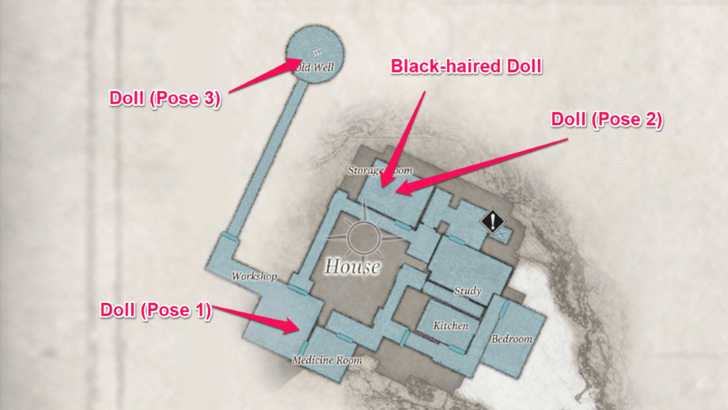
| 3 | 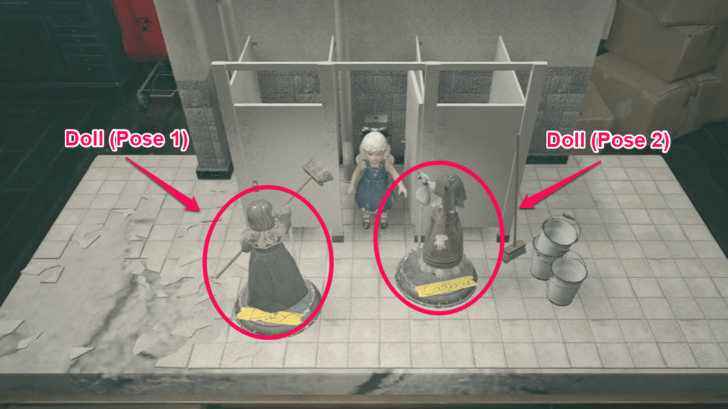 Your next objective is to find dolls and place them on three different displays. The first doll, Doll (Pose 1), is located on the table in the Workshop, next to the Medicine Room door. The second doll, Doll (Pose 2), is located on the display in the Storage Room. Take these two dolls and bring them to the display in the Medicine Room. Place Doll (Pose 1) on the left and Doll (Pose 2) on the right. Doing so rewards you with Jimmy's Room Key. ► Doll Puzzle Solution and Doll Locations |
| 4 | 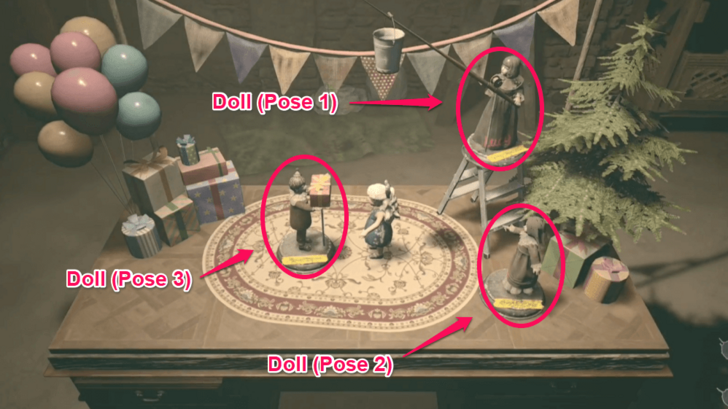 Take Jimmy's Room Key to the red isolated door labelled Jimmy's Room in the Workshop. Go down the well in Jimmy's Room to get Doll (Pose 3). Make your way back to the Storage Room and put the three dolls on the display. Doll (Pose 3) goes in the middle, Doll (Pose 1) goes on top of the ladder, and Doll (Pose 2) goes beside the ladder. Completing this display rewards you with the Black-haired Doll. ► Doll Puzzle Solution and Doll Locations |
| 5 | 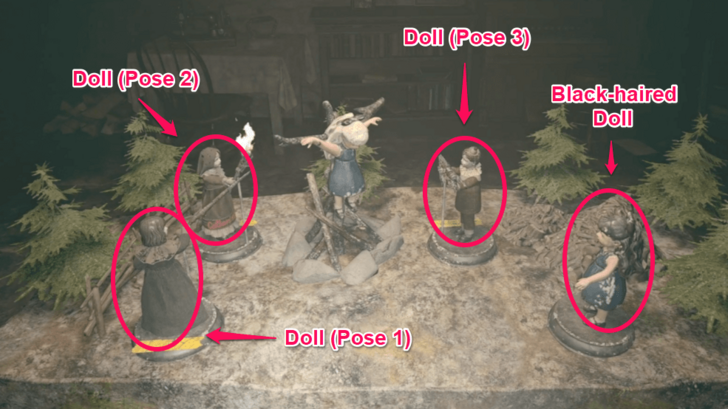 With all four dolls obtained, take them all back to the display in the Workshop. Be wary of the mannequin jumpscare through the Workshop doors. Place Doll (Pose 1) on the base labelled as Lucy, and place Doll (Pose 2) on the base beside it. Place Doll (Pose 3) on the base facing the blonde doll, and place the Black-haired Doll on the unlabelled base. ► Doll Puzzle Solution and Doll Locations |
| 6 | Completing the final display will reward you with the Breaker Box Key. A cutscene will play after you take the key. Go back to the breaker box beside the elevator and use the Breaker Box Key on it. Opening it, you find that the Fuse is missing. You need to go to the Bedroom to get the Fuse, but Mannequins will attempt to stop you. |
| 7 | 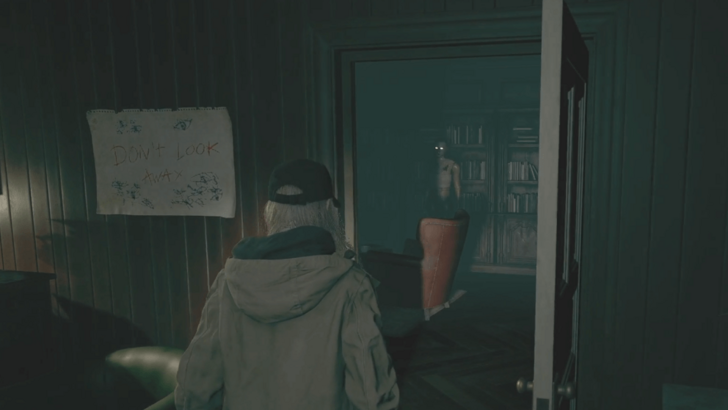 From the Study, you have to traverse through the Kitchen and to the Bedroom while dealing with a Mannequin. Looking at it will freeze it, while looking away will allow them to move toward you. Move backwards while keeping your eye on it and periodically check the map so you know where you're going. |
| 8 | 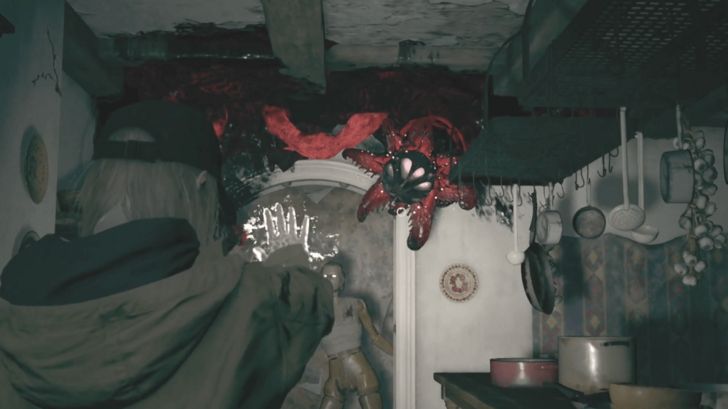 Reaching the Kitchen, a wall of mold blocks your way towards the Bedroom. Bait the Mannequin to be within the same field of view as the sclerotia core in the Kitchen so you can destroy it safely. Once destroyed, continue unto the Bedroom. You'll be safe in the Bedroom until you take the Fuse. |
| 9 |  Once you take the Fuse, the Mannequin will be able to get in the room and block your way out. Bait it towards the floor lamp in the far corner of the room by standing near it and looking away briefly. Once you've made a path for yourself, head out the Bedroom while keeping your eye on it. |
| 10 | Outside the Bedroom, you'll find another Mannequin waiting for you. If you've led the first Mannequin far enough into the Bedroom, you'll be able to run into the Kitchen and keep your eye on both Mannequins as you walk out. When you get out of the Kitchen and into the hallway, another Mannequin will greet you. Keep your eyes on all three of them as you make your way back into the Study. |
| 11 | In the Study, a fourth Mannequin blocks your way out. Lead the fourth one away from the door while doing your best to keep the other three at bay. Once the path is clear, maintain your vision on all four of them until you walk backward out of the Study. Once out, put the Fuse into the Breaker Box and enter the elevator Press the elevator button to enter a cutscene. |
Escaping the Dolls
| 12 | 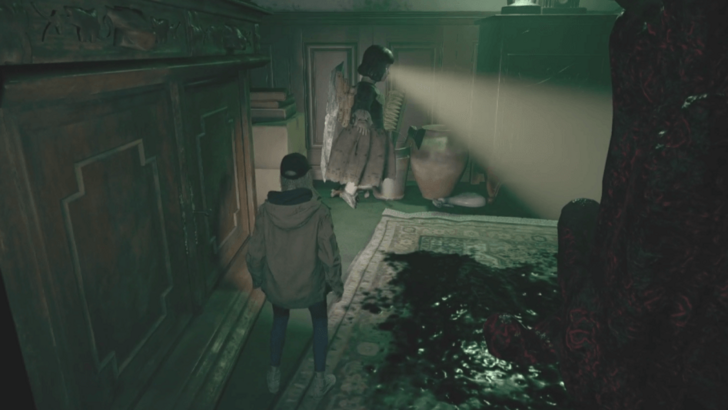 You've suddenly been shrunk and are being hunted by murderous dolls. Make your way through the giant house and stay out of the dolls' sight. When you're trailing behind them, make sure not to be too close as they can catch you despite not being in their sight When the way gets blocked, enter the Storage Room. |
| 13 | 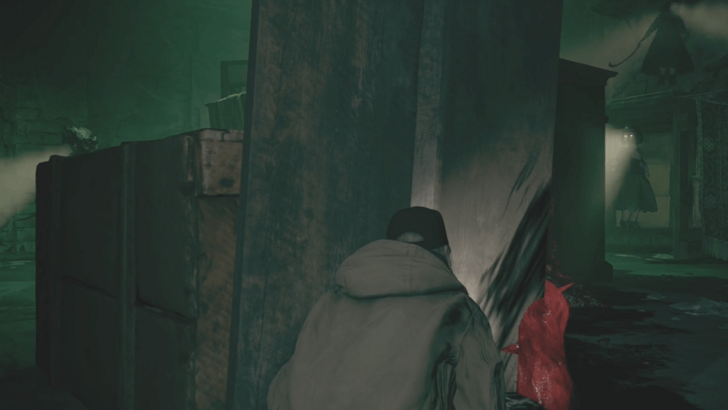 In the Storage Room, get up to the table by sticking to the left side. Destroy the sclerotia core on the table and carefully make your way out of the room. Destroy another core on the ceiling to distract the dolls and clear your path. Before destroying the next core, make sure to hide behind cover to avoid getting detected. |
| 14 | Entering the Workshop, go around the room in order to get under the desk in the middle. Be wary of the one doll that goes back and forth, and the two dolls that go around the desk in close succession. Sprint for cover whenever you get an opening. Once under the desk, destroy the sclerotia core directly across you. When the dolls pass and the coast is clear, destroy the core above the desk before proceeding to the Medicine Room. |
| 15 | 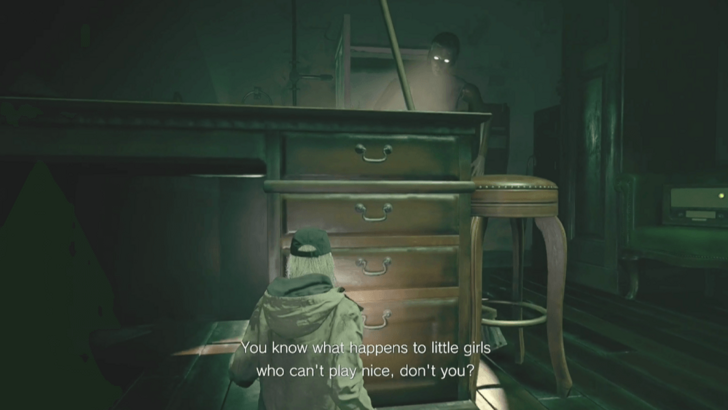 In the Medicine Room, go near the shaking door to bait the Mannequin out. Immediately hide under the desk and wait for the Mannequin to pass by before rushing out the door. Outside, you can find a Sprig of White Sage in a container. Using it allows you to stun dolls temporarily. Stun the stationary doll before proceeding. |
| 16 | Heading to the Kitchen, pick up the Sprig of White Sage and head to the serving cart without being noticed. Reaching that point will make a Mannequin spawn. Wait for the Mannequin to pass, stun the doll, and go to the other side of the table to destroy the sclerotia core. With the way clear, head to the Bedroom where a cutscene will play. |
| 17 | 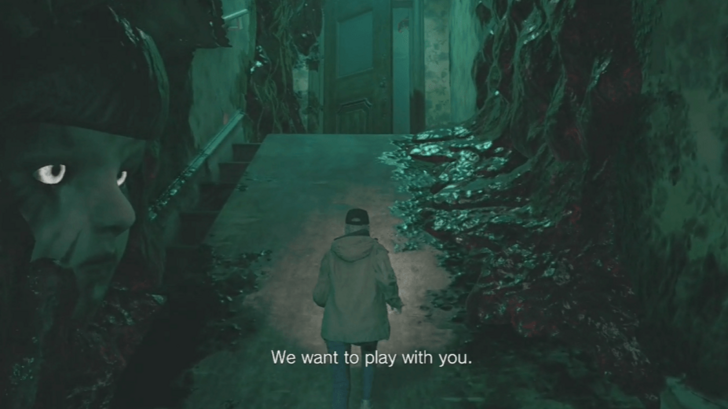 After the cutscene, you'll be chased by a Mannequin. Keep running and destroy the core that gets in your way. After reaching the Study, you'll be saved by Michael. Afterwards, Michael will send you to your old house for a memory trip. After interacting with all of Ethan's memories, head to his office on the second floor. Interact with the glowing picture frame of Rose and examine it to find the Drawer Key at the back of it. Open the drawer with it and examine the letter inside to trigger a cutscene. |
| 18 | After the cutscene, Eveline will attempt to drown you in mold. Keep moving through and destroy the sclerotia core that'll be in your way. Entering the Medicine Room, pick up the Bunch of White Sage on the table and wad through the mold as you make your way out of the Workshop. Out the Workshop, Eveline will send Mannequins your way. This time they won't stop when you look at them, so you have to use your powers to stun them. Rush to the elevator for another cutscene. |
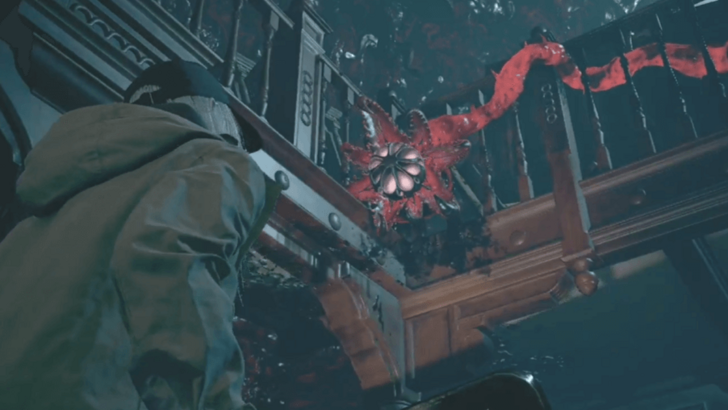
| 19 | 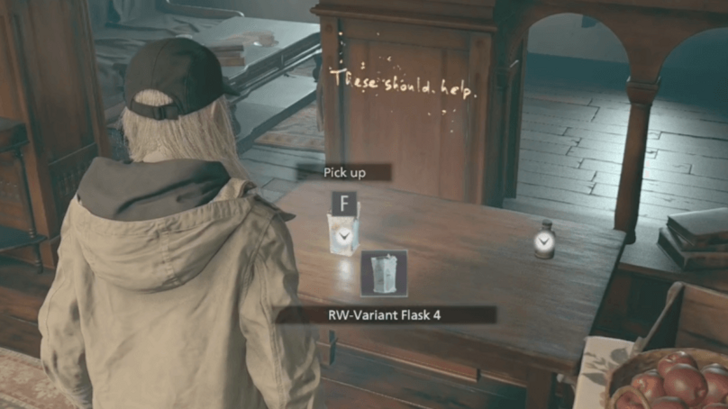 It's time to prepare for your fight with Eveline. Save your progress and collect the items in the Living Room, including RW-Variant Flask 4. This refills and increases your mutamycete power gauge. |
| 20 | 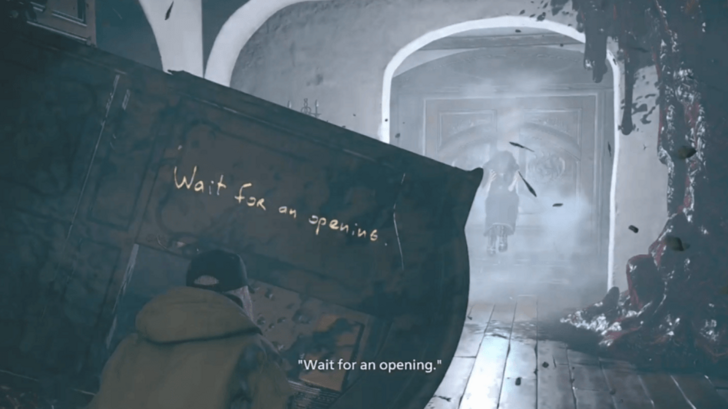 The fight starts once you enter the Foyer. Hide behind cover once you see Eveline charging her wind blasts. Only get up from cover and use your powers when she's visibly tired. Whenever she teleports, watch for her blue glow to keep track of her location. Once she's defeated, "Michael" will save you from an attack, pushing you into a Deeper Stratum. ► How to Beat Eveline |
How to Solve the Doll Puzzle
Doll Puzzle Solutions
| Order | Solutions |
|---|---|
| 1 | Solution for the Display in the Medicine Room |
| 2 | Solution for the Display in the Storage Room |
| 3 | Solution for the Display in the Workshop |
Doll Locations
| Order | Doll | Location |
|---|---|---|
| 1 |  |
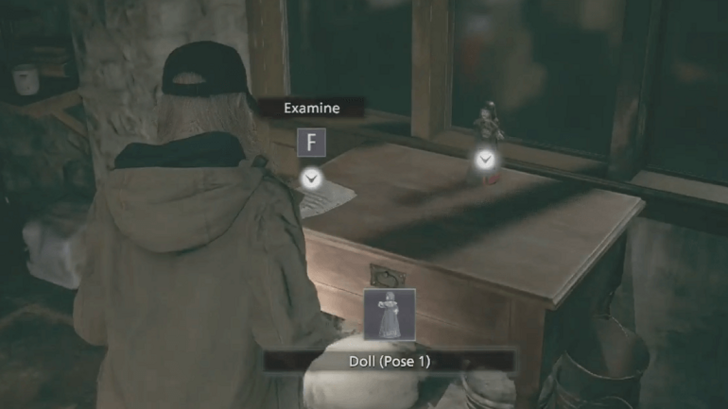 Found on the table in the Workshop, beside the door to the Medicine Room. |
| 2 |  |
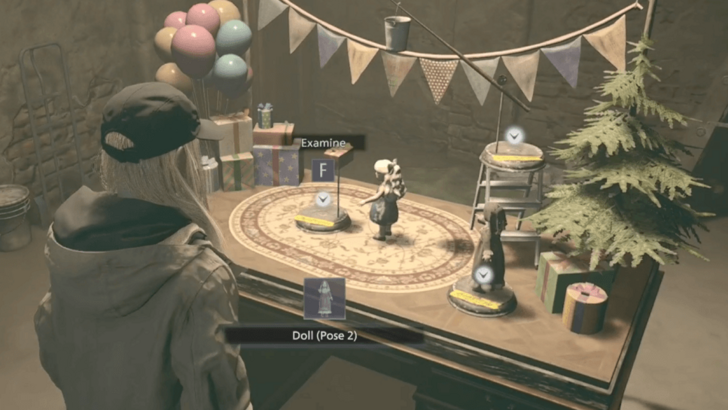 Found on the display in the Storage Room. |
| 3 |  |
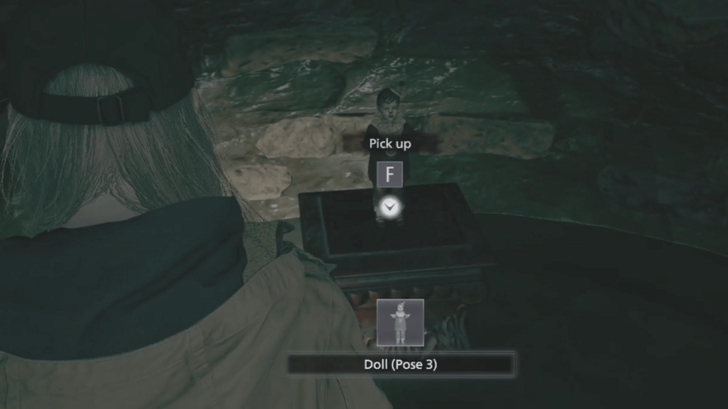 Found on the bottom of the well in Jimmy's Room. |
| 4 |  |
 Given as a reward for completing the display in the Storage Room. |
How to Beat Eveline
Take Cover From Her Wind Blasts
When you see Eveline charging up wind around her, immediately take cover behind the furniture to avoid getting damaged. She may do her wind blast attack more than once, so be vigilant.
Once she teleports, look for the blue glow to find her location quickly and take cover accordingly. Be careful not to step on any mold on the ground as well.
Use Your Powers When She's Tired

After an attack, you may see her motionless and slumped over. This is your chance to use your power against her. Just remember that Rose has to be standing up before she's able to use her power.
Destroy the Two Sclerotia Cores to Get Upstairs
 |
 |
After dealing enough damage, Eveline will teleport upstairs. The way up will be blocked by two sclerotia cores, so follow the bright red veins to find and destroy them. Do note as well that she can still damage you from the second floor. Watch out for her attacks as you make your way up.
Resident Evil Village Related Guides
Story Walkthroughs
| Story Guides | |
|---|---|
 Story and Plot Summary Story and Plot Summary |
 Megamycete Summary Megamycete Summary |
 Beginner's Guide Beginner's Guide |
|
| Main Story Walkthrough | |
 Prologue Prologue |
 Village Part 1 Village Part 1 |
 Mines Mines |
 Castle Dimitrescu Part 1 Castle Dimitrescu Part 1 |
 Castle Dimitrescu Part 2 Castle Dimitrescu Part 2 |
 Castle Dimitrescu Part 3 Castle Dimitrescu Part 3 |
 Castle Dimitrescu Part 4 Castle Dimitrescu Part 4 |
 Village Part 2 Village Part 2 |
 House Beneviento House Beneviento |
 Moreau's Reservoir Moreau's Reservoir |
 The Stronghold The Stronghold |
 Heisenberg's Factory Heisenberg's Factory |
 The Village Finale The Village Finale |
|
| Post Game Guides | |
| New Game Plus | Postgame Guide |
| DLC Walkthrough | |
 Castle Castle |
House |
 Deep Stratum Deep Stratum |
|
Demo Walkthroughs
| Demo Guides | ||
|---|---|---|
 Village Demo Village Demo |
 Castle Demo Castle Demo |
 Maiden Demo Maiden Demo |
Comment
Author

Shadows of Rose: House Walkthrough
Please participate in our site
improvement survey
03/2026
improvement survey
03/2026
Would you assist in
improving Game8's site?
improving Game8's site?

×
We are listening to our users' valuable opinions and discussing how to act on them.
The information collected through this survey will be used for the purpose of improving our services. In addition, the information will only be disclosed a part of a statistic in a format that will not allow identification of personal information.
Begin Survey
Not Now
×
Please rate each item regarding Game8.co's Advertisements.
Amount of Ads
Very Dissatisfied
Somewhat Dissatisfied
Fine
Somewhat Satisfied
Highly Satisfied
Placement of Ads
Timing of Ad Display
Ad Loading Speed
Safeness of Ads
Content of Ads
×
Please rate each item regarding Game8.co's Quality of Articles.
Amount of information
Very Dissatisfied
Somewhat Dissatisfied
Fine
Somewhat Satisfied
Highly Satisfied
Frequency of updates
Speed of new information
Accuracy of articles
Understandibility of articles
Readability of sentences
×
Please rate each item regarding Game8.co's Usability of the Site.
Ease of finding information
Very Dissatisfied
Somewhat Dissatisfied
Fine
Somewhat Satisfied
Highly Satisfied
Loading Speed
Use of Color
Font Size
Visibility of Images
Easy to Understand Layout
×
Please rate each item regarding Game8.co's Message Boards, Comments.
Ease of Writing
Very Dissatisfied
Somewhat Dissatisfied
Fine
Somewhat Satisfied
Highly Satisfied
Readability
Ease in Finding Information
Comment Quality
Comment Quantity
Admin Response
×
Please rate each item regarding Game8.co's Site's new design.
Please rate our site's new design
Very Dissatisfied
Somewhat Dissatisfied
Fine
Somewhat Satisfied
Highly Satisfied
Do you think that the website's design change makes the site easier to use?
Has the new design made it easier for you to find information on the site?
Has the new design improved the overall visual appeal of the site?
How would you rate your overall satisfaction with the new design of the site?
×
How likely are you to recommend Game8 to someone you know?
Very Unlikely
0
1
2
3
4
5
6
7
8
9
10
Very Likely
If you have other opinions regarding potential improvement to the website, please share them with us. We would appreciate your honest opinion.
Note: This is a free response section, so you can proceed without entering anything.
Note: Please be sure not to enter any kind of personal information into your response.
Note: Please be sure not to enter any kind of personal information into your response.
×
Thank You
×
Thank you for participating in our survey! Your answers will help us to improve the quality of our website and services.
We hope you continue to make use of Game8.
We hope you continue to make use of Game8.
Close
Rankings
- We could not find the message board you were looking for.
Gaming News


![Monster Hunter Stories 3 Review [First Impressions] | Simply Rejuvenating](https://img.game8.co/4438641/2a31b7702bd70e78ec8efd24661dacda.jpeg/thumb)

Popular Games

Genshin Impact Walkthrough & Guides Wiki
Honkai: Star Rail Walkthrough & Guides Wiki
Umamusume: Pretty Derby Walkthrough & Guides Wiki
Pokemon Pokopia Walkthrough & Guides Wiki
Resident Evil Requiem (RE9) Walkthrough & Guides Wiki
Monster Hunter Wilds Walkthrough & Guides Wiki
Wuthering Waves Walkthrough & Guides Wiki
Arknights: Endfield Walkthrough & Guides Wiki
Pokemon FireRed and LeafGreen (FRLG) Walkthrough & Guides Wiki
Pokemon TCG Pocket (PTCGP) Strategies & Guides Wiki


Recommended Games
Diablo 4: Vessel of Hatred Walkthrough & Guides Wiki
Fire Emblem Heroes (FEH) Walkthrough & Guides Wiki
Yu-Gi-Oh! Master Duel Walkthrough & Guides Wiki
Super Smash Bros. Ultimate Walkthrough & Guides Wiki
Pokemon Brilliant Diamond and Shining Pearl (BDSP) Walkthrough & Guides Wiki
Elden Ring Shadow of the Erdtree Walkthrough & Guides Wiki
Monster Hunter World Walkthrough & Guides Wiki
The Legend of Zelda: Tears of the Kingdom Walkthrough & Guides Wiki
Persona 3 Reload Walkthrough & Guides Wiki
Cyberpunk 2077: Ultimate Edition Walkthrough & Guides Wiki


All rights reserved
All trademarks referenced herein are the properties of their respective owners.
©CAPCOM CO., LTD. ALL RIGHTS RESERVED.
The copyrights of videos of games used in our content and other intellectual property rights belong to the provider of the game.
The contents we provide on this site were created personally by members of the Game8 editorial department.
We refuse the right to reuse or repost content taken without our permission such as data or images to other sites.