
This survey will take about 1 minute.
Your answers will help us to improve our website.
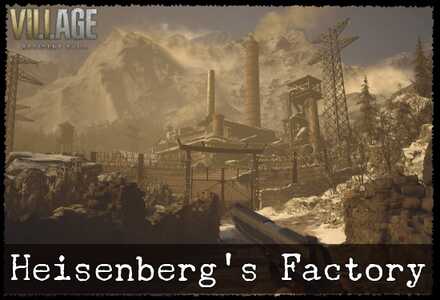
Resident Evil Village (Resident Evil 8)
Heisenberg's Factory Walkthrough and Maps
☆ The Resident Evil Requiem wiki is now live!
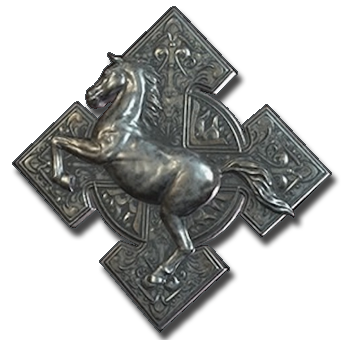
★ Best Weapons List
★ List of Bosses and Optional Bosses
★ List of Treasures
Here is the complete walkthrough for Heisenberg's Factory, an area located in Resident Evil Village. Game8 has you covered for everything you need to know about Heisenberg's Factory, including a guide on how to survive, weapon and item locations, treasure locations, enemies found in the area, and more!
| Previous | Current | Next |
|---|---|---|
| The Stronghold | Heisenberg's Factory | Finale |
List of Contents
Heisenberg's Factory Walkthrough
| Objectives | |
|---|---|
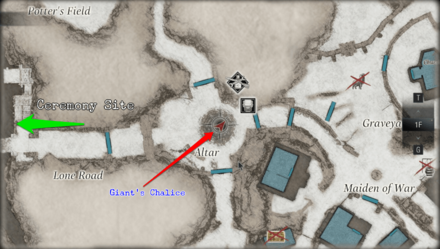
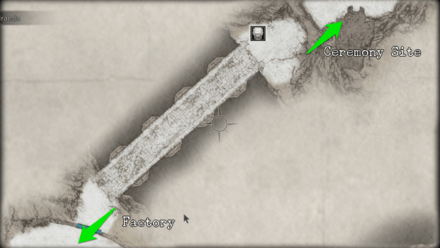
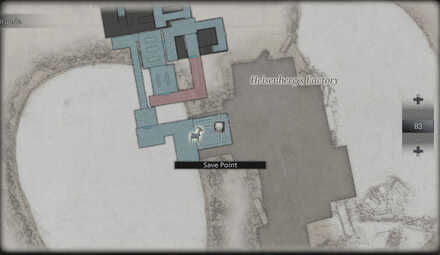
| 1 | 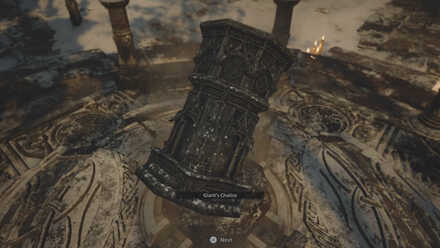 When you exit the Stronghold you will be near the Church. Head to the Altar and place the final flask to receive the Giant's Chalice. Head back to the Lone Road and place the Giant's Chalice on the Stone Dais to be taken down below the Ceremony Site. Entering the Factory is a point of no return, so make sure you've taken care of everything before continuing. |
| 2 | 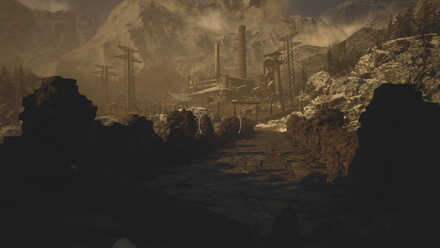
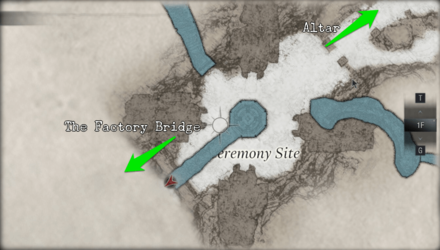
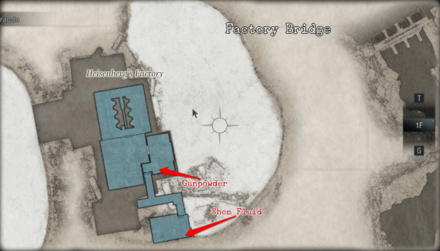
Cross the bridge and enter the Factory through the garage doors. Go through the door in the back and examine the cloth to trigger a cutscene. After the cutscene, sprint down the hall away from Sturm, going up the stairs and through the openings. When you reach a dead-end, turn right and slide down the chute to be taken to floor B4. |
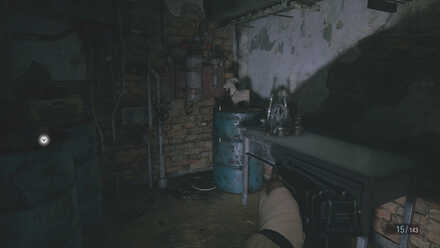
| 3 | Follow the path up, and some Haulers will attack you. Take them out to move on, going through the grate at the end of the room. Climb up the ladder when you exit the vent and you'll find the Duke on an elevator. Go through the large door and shoot the locks to let in some Haulers. |
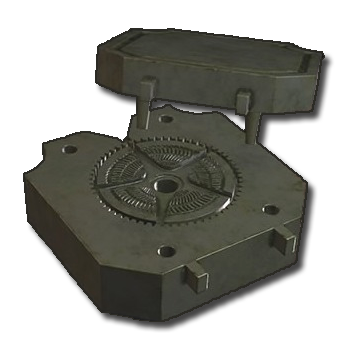
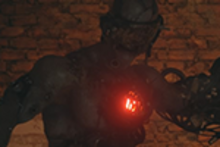
| 4 |  Go through the door and into the room with the lift. Then go through the door the Haulers came from to enter the Foundry. Go up the small flight of stairs into the next area through the open door. The next room will have a large chest with the Relief Mold. After picking it up, the previously inactive Soldat Eins will come to life. Keep some distance from its drill and shoot it in the chest to destroy its reactor to kill it quickly. |
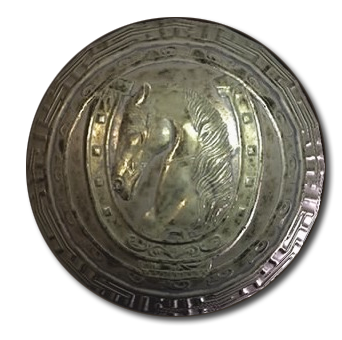
| 5 |  Return to the Foundry and insert the Relief Mold into the slot to create the Relief of a Horse. Take it and insert it into the wall to the right of the casting machine to unlock a hidden passage. Go down the path towards Heisenberg's Quarters but take the ladder down as we don't have the key yet. Enter the Engine Room and shoot the red orbs to stop the machinery. If you want to conserve ammo, you can time them and use the gears to hit the Haulers. |
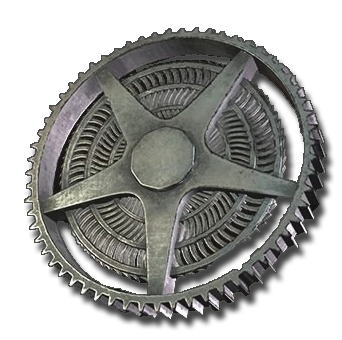
| 6 | When you reach the end, climb up the ladder and crawl through the grate. Head down the hallway to unlock the door leading back to the Foundry. In the next room is the Backup Generator that is missing a cog. Go up the stairs at the end of the room to another locked door. Shoot the top and bottom orbs to open it and go inside to find a Factory Map (Lower Levels) and a large chest with a Cog Mold. |
| 7 | Take the Cog Mold back to the Foundry, and another Soldat Eins will attack you. Create the Large Cog once you take care of the Soldat and insert it into the Backup Generator to turn on the power. The path you took will be blocked off with a new one opened up to its left. Get rid of the Soldats that attack you and keep moving. Go up the stairs and get rid of another Soldat, then unlock the door. |
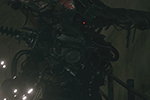
| 8 | 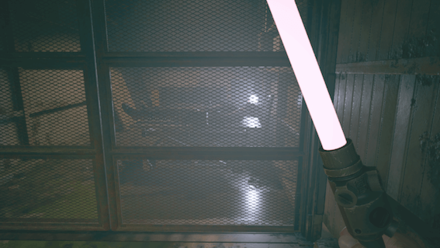 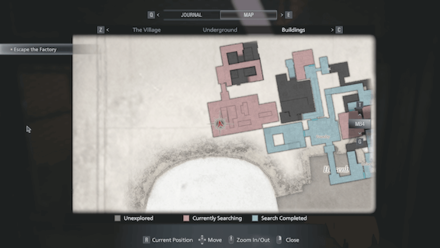 In the next room, kill the 3 Haulers. Go to the back where there is a small room. Shoot the inactive Soldat in the room, and it will break through the gate. Once it breaks the gate for you, kill it and pick up the 12000 Lei and some Magnum Ammo. Go upstairs to encounter a Soldat Zwei with two drill arms and a reactor on its back. Run around the other side to shoot at its back to take it down. Unlock the next door to return to the lift controls. With the electricity back on, return to the door to the Operating Room that needed power past the Foundry, left of the casting machine. Kill the Soldat that attacks, listen to the recording, pick up the M1851 Wolfsbane - Long Barrel, then go back to the room with the lowered platform. |
| 9 | Activate the controls to raise the platform and cross to the other side, then proceed to the next room to fight another Soldat Zwei. Unlock the door, and Sturm will come after you again. Run down the hall and through the door to escape, then pull the lever to bring the Duke's elevator to B3. |
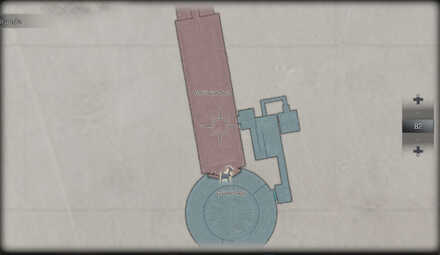
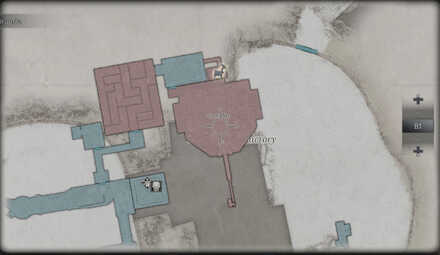
| 10 | 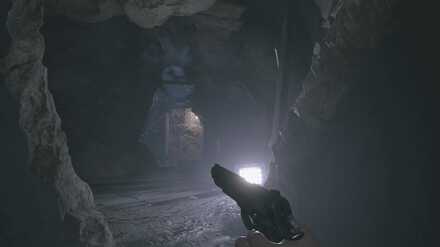 Take the nearby ladder and go up to MB3. Follow the path to some Moroaicas near a drill. Go through the small opening at the end of the cave. |
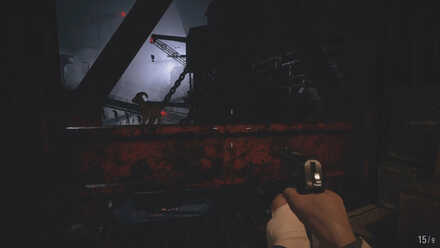
| 11 | 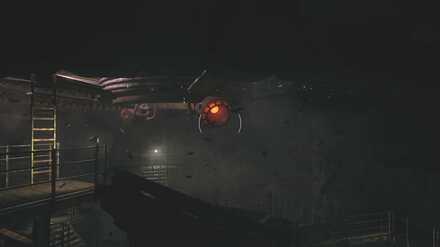 Drop down and turn around to find another breakable wall with some valuable crystals behind it. Turn back around and enter the Grinder Shaft. Go upstairs, and two Soldat Jets will attack you. Take them out the same way you did the others by shooting the reactor on their chest. To stop the grinder, shoot the three orbs surrounding it and one below it, just like the doors. Once it's stopped, climb up the ladder into the Giant Grinder. |
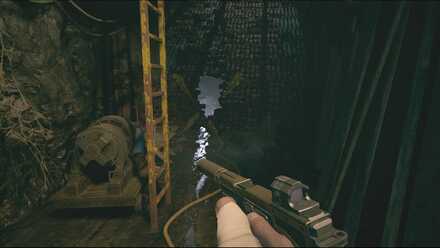
| 12 | 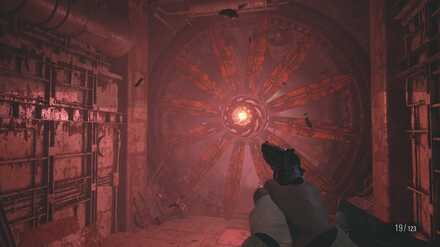 Go through the next door and up the stairs into a room with the Factory Map (Upper Levels). Push the cart out of the way to reveal a hole that can be crawled through into another room with a large chest containing the Ball Mold. Head upstairs into the Ventilation Duct. You will immediately be sucked in, so quickly shoot the orb on the fan to prevent yourself from getting torn to pieces. |
| 13 | Pass through where the fan was, and make your way down and around the shaft to the ladder. Climb it and open the small door at the top, then take the elevator up to B1. The next room will have a large chest with the Key Mold. Leave the room, climb the ladder, and pull the lever to bring the Duke's elevator up. Now that we have two molds, it's time to go back down to the Foundry on B4. The lights will be out again, and some Soldats will be roaming around. Be careful. |
| 14 | Back in the Foundry, use the Ball and Key Molds to create the Iron Horse Ball and Heisenberg's Key. When you return to the elevator, a Soldat Panzercompletely covered in armor will attack you. To expose its reactor, hit it with an Explosive Round or use a magnum to destroy its armor, then shoot its reactor to take it down. |
| 15 | Take the elevator back to B1 and unlock the door with Heisenberg's Key. |
| 16 | Sturm will charge at you and break through walls, so use this to your advantage. When Sturm gets stuck, run around to his other side and fire off some shots into his jet turbine. Your magnum will deal the most damage here, so rinse and repeat until it explodes and leaves you a Complex Mechanical Heart. Follow the path and exit out into the Cargo Bay. |
| 17 | 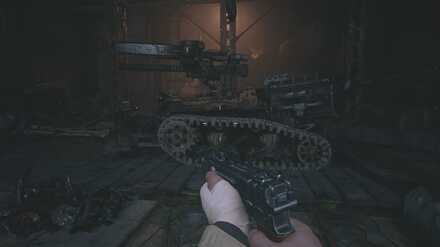 Drop down into the Cargo Bay, then go up the ladder and down to the end of the lift. You will be taken back to the entrance, attempt to go outside. After the scene, pull off the nearby grate and crawl through the hole into the Scrapheap.After the scene, get into the tank and hop on the elevator. Get ready for your fight with Heisenberg. |
| 18 | At the top of the elevator, blast the door off with the cannon and go outside. Aim for Heisenberg's orange weak spots with your Gatling gun and guard or shoot him with the cannon when he charges at you. Deal enough damage and Heisenberg will pick you up. Continue shooting him in the head to move on to phase 2. You will be on foot for phase 2, so you'll need to resort to your regular weapons. Aim for the head while avoiding his attacks, and he should go down quickly, giving you the Crystal Heisenberg. |
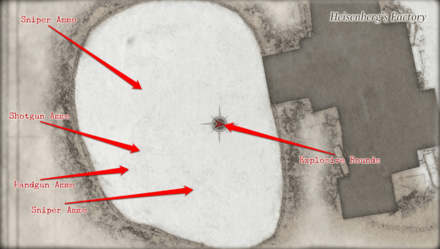
Watch Out for Soldats
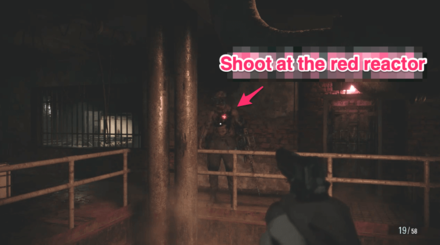
To get the Relief Mold, you'll have to pass by a seemingly inactive Soldat. Once you pick up the mold and head back, it will come to life. Shoot at the red reactor on its chest with your shotgun to take it down quickly.
Shoot the Fuses
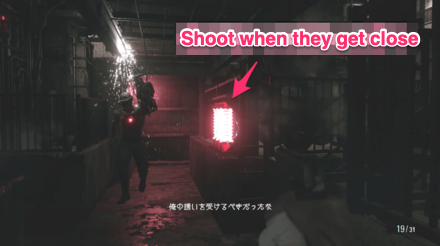
After turning on the electricity with the Backup Generator, more Soldats will come to life. Killing them all with your guns can go through a lot of ammo, so take advantage of your environment to conserve ammo. In some areas, you'll see red fuses lit up. If you shoot them, you can deal a lot of damage to any Soldats that get caught in the blast.
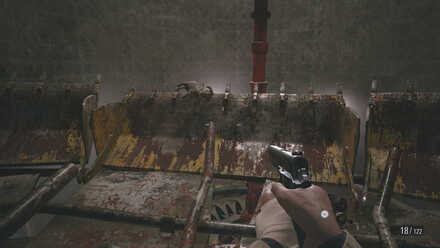
Look out for Breakable Walls
| World View | Map View |
|---|---|
 |
 |
 |
 |
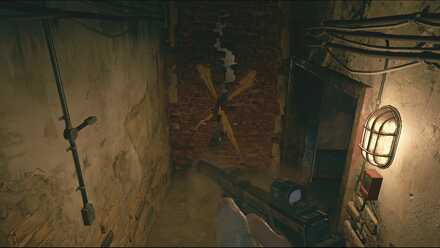
Some walls are marked with yellow paint, which means that these walls are breakable by using a Pipe Bomb. The one listed above contains the Mechanical Part (Cylinder), and the one below contains Large Crystals x2, Vivianite x1, and Yellow Quartz x1.
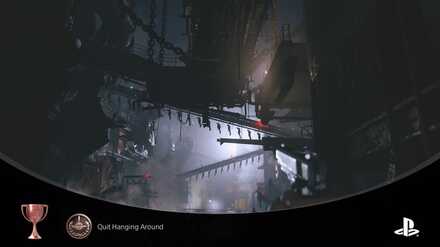
Shoot a Soldat Down for a Trophy
| World View | Map View |
|---|---|
 |
 |
On B3 if you look up you'll see Soldats being transported to different parts of the Factory above you. Line up a shot just right to knock one down to unlock the Quit Hanging Around trophy.
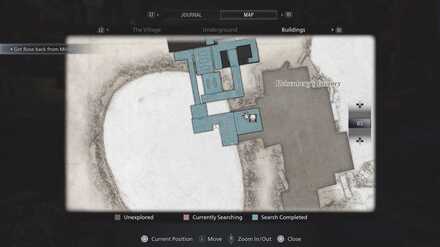
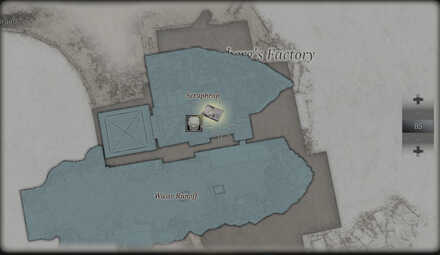
Heisenberg's Factory Maps and Item Locations
Heisenberg's Factory Maps and Treasure Locations
| Village | |
|---|---|
 Altar |
 Ceremony Site |
| Factory - 1F | |
 Factory - Bridge |
 Factory - 1F |
 Factory - Backyard |
|
| Factory - B4 | |
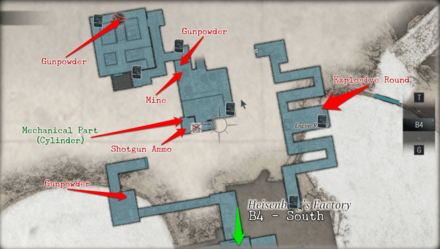
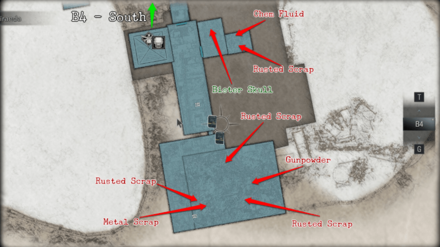 B4 - South |
 B4 - North |
 MB4 |
|
| Factory - B3 | |
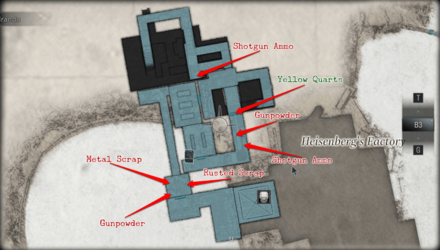 B3 |
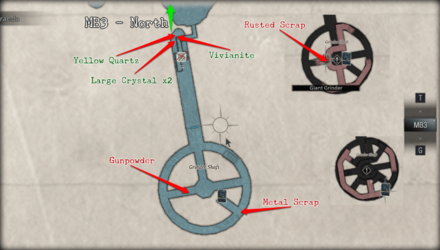
 MB3 - North |
 MB3 - South |
|
| Factory - B2 | |
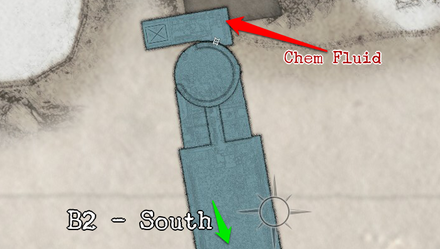
 B2 - South |
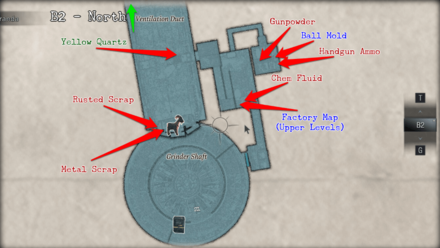
 B2 - North |
| Factory - B1 | |
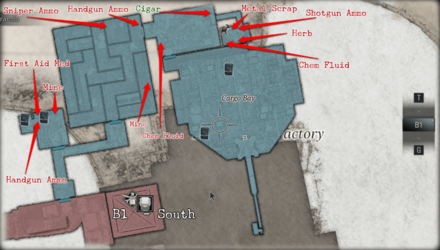
 B1 - South |
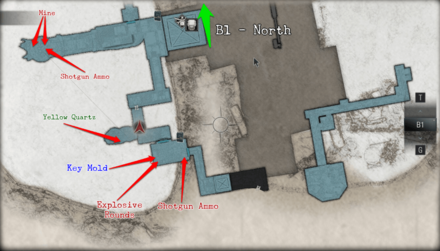
 B1 North |
| Factory - B5 | |
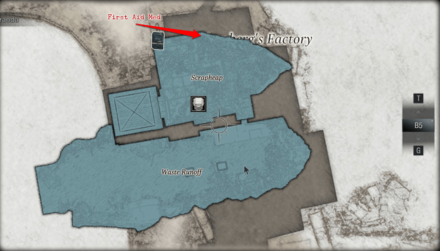 B5 |
|
Map Key
| Key | |
|---|---|
| Blue | Key Item |
| Green | Valuable |
| Purple | Weapon/Attachment |
| Red | Items |
| Breakable | |
| Goat | |
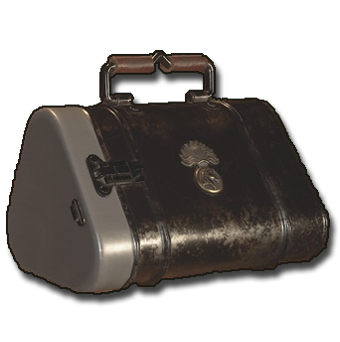
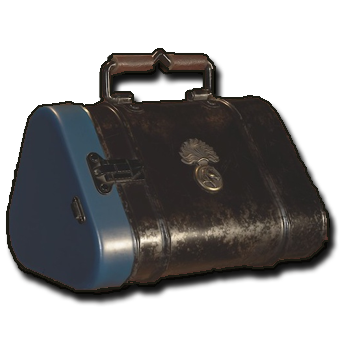
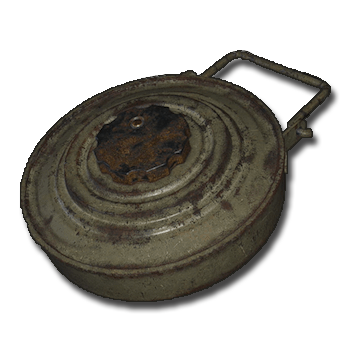
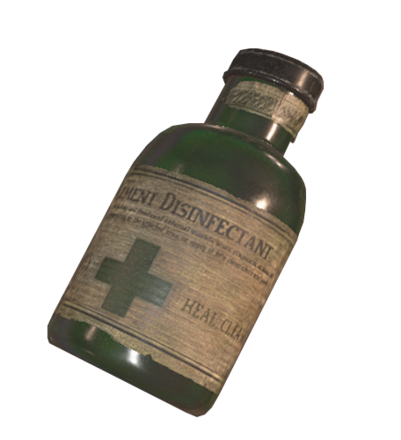
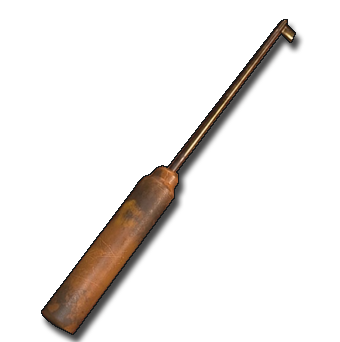
List of Items
| Key Items | |
|---|---|
 Giant's Chalice Giant's Chalice |
|
 Relief of a Horse Relief of a Horse |
 Relief Mold Relief Mold |
 Large Cog Large Cog |
 Cog Mold Cog Mold |
 Iron Horse Ball Iron Horse Ball |
 Ball Mold Ball Mold |
 Heisenberg's Key Heisenberg's Key |
 Key Mold Key Mold |
| Treasure and Valuables | |
 Crystal Fragment Crystal Fragment |
 Yellow Quartz Yellow Quartz |
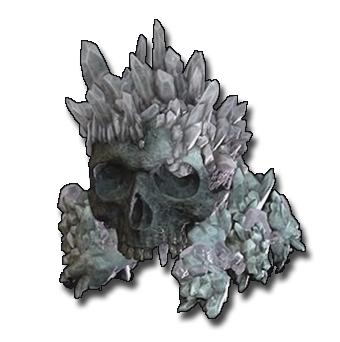 Polycrystal Skull Polycrystal Skull |
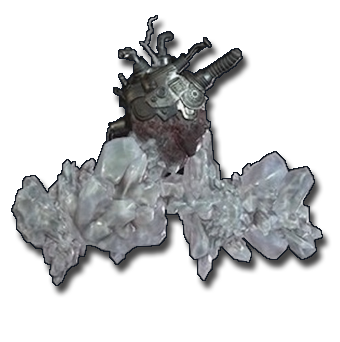 Crystal Mechanical Heart Crystal Mechanical Heart |
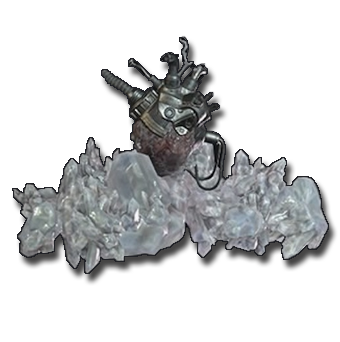 Large Crystal Mechanical Heart Large Crystal Mechanical Heart |
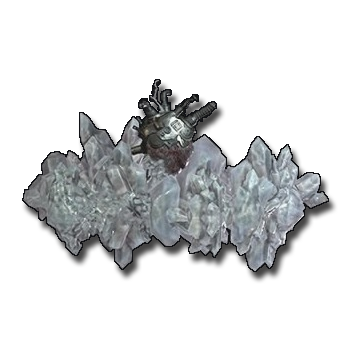 Perfect Crystal Mechanical Heart Perfect Crystal Mechanical Heart |
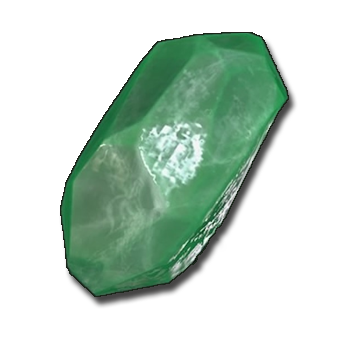
 Large Crystal Large Crystal |
 Vivianite Vivianite |
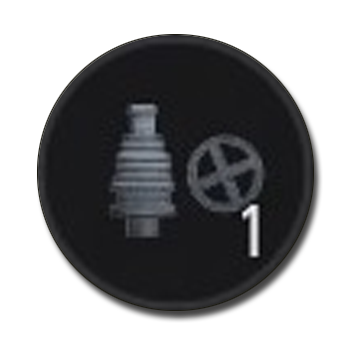
 Mechanical Part (Cylinder) Mechanical Part (Cylinder) |
 Mechanical Part (Shaft) Mechanical Part (Shaft) |
 Cigar Cigar |
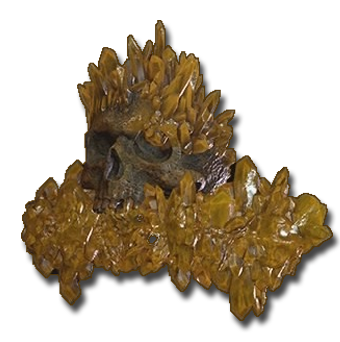 Bister Skull Bister Skull |
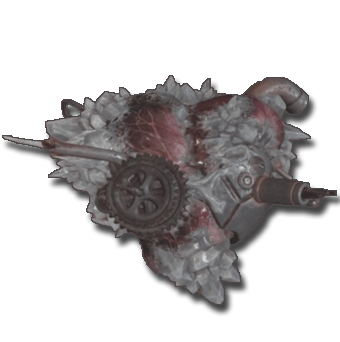 Complex Mechanical Heart Complex Mechanical Heart |
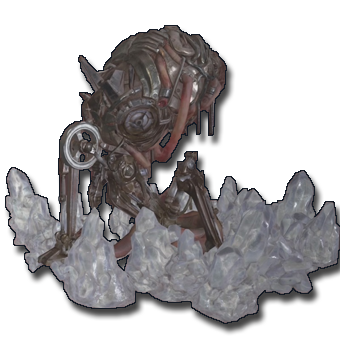 Crystal Heisenberg Crystal Heisenberg |
| Weapons & Attachments | |
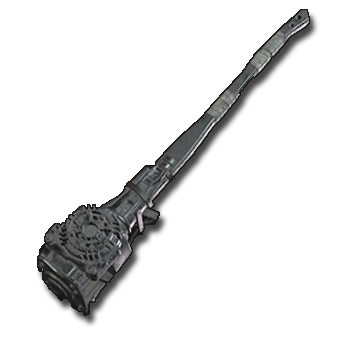
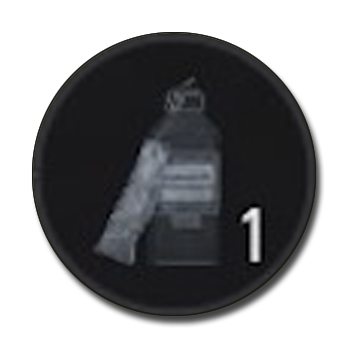
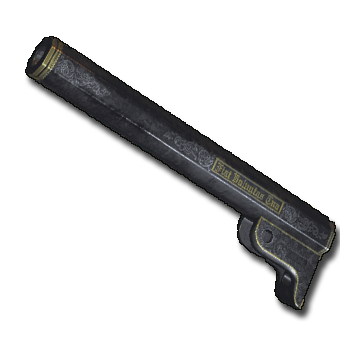 M1851 Wolfsbane - Long Barrel M1851 Wolfsbane - Long Barrel |
|
| Crafting Materials | |
 Rusted Scrap Rusted Scrap |
 Gunpowder Gunpowder |
 Herb Herb |
 Chem Fluid Chem Fluid |
 Metal Scrap Metal Scrap |
|
| Ammo | |
 Handgun Ammo Handgun Ammo |
 Shotgun Ammo Shotgun Ammo |
 Sniper Rifle Ammo Sniper Rifle Ammo |
 Magnum Ammo Magnum Ammo |
 Explosive Rounds Explosive Rounds |
 Flashbang Flashbang |
| Explosives | |
 Mine Mine |
 Pipe Bomb Pipe Bomb |
| Recovery Item | |
 First Aid Med First Aid Med |
|
| Other | |
 Lockpick Lockpick |
|
Heisenberg's Hammer
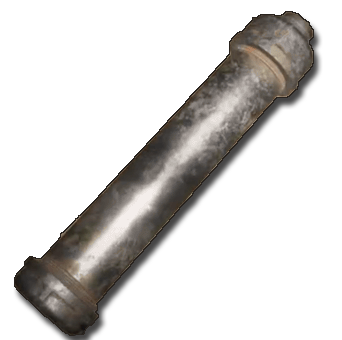
Treasure Components
| Treasures to Combine | Combined Treasure |
|---|---|
| Mechanical Part (Cylinder) (7000 Lei) Mechanical Part (Shaft) (4000 Lei) |
 Heisenberg's Hammer Heisenberg's Hammer(45000 Lei) |
Treasure Locations
| Mechanical Part (Cylinder) | |
|---|---|
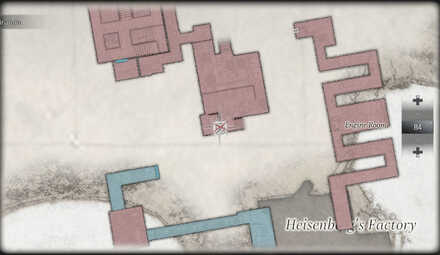
| Inside B4 of Heisenberg's Factory, there is a breakable wall, indicated with yellow paint. Destroy the wall with a Pipe Bomb, then check the room to find the Mechanical Part (Cylinder) | 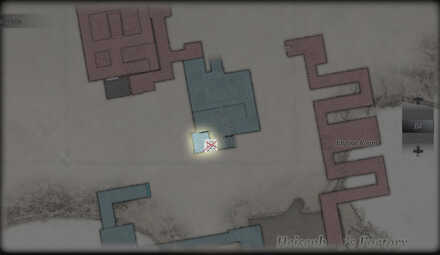 |
| Mechanical Part (Shaft) | |
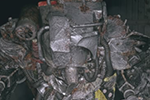
| Using Heisenberg's Key, go to MB4 of his factory to unlock his quarters. Inside you will find the Mechanical Part (Shaft). | 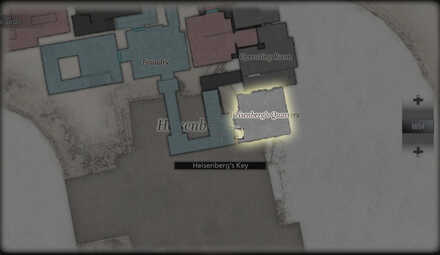 |
List of All Combinable Treasure
Goat of Warding Locations
Goat 17
| World View | Map View |
|---|---|
 |
 |
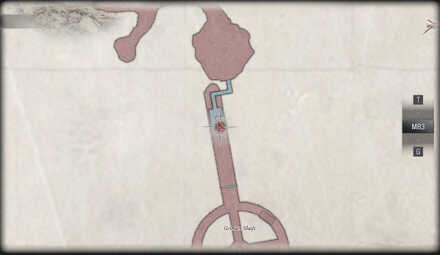
After shooting the giant fan that almost sucked you in, go to the other side of that area. The seventeenth Goat of Warding is on top of the ledge.
Goat 18
| World View | Map View |
|---|---|
 |
 |
While riding the elevator in Heisenberg's factory from B1 to B3, pay close attention to the door frame where you entered. The eighteenth Goat of Warding is on one of the railings outside the elevator. It only shows up for a split second, so it might take you a few tries to hit it.
Goat 19
| World View | Map View |
|---|---|
 |
 |
Before going to the Cargo Bay, examine the Control Room. Crawl through the hole in the wall. The nineteenth Goat of Warding is on top of the table in the adjacent room.
List of All Goats of Warding and Where to Find Them
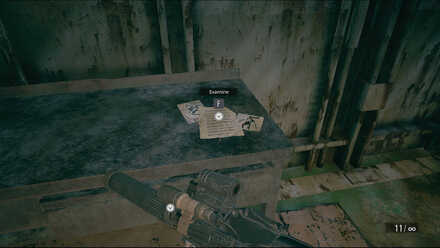
File Locations
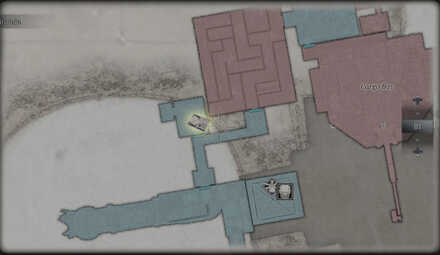
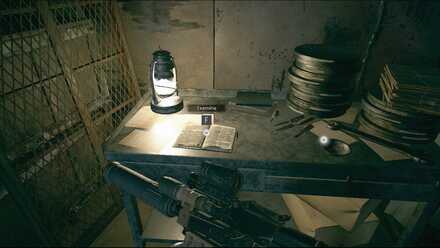
Development Note 1
| World View | Map View |
|---|---|
 |
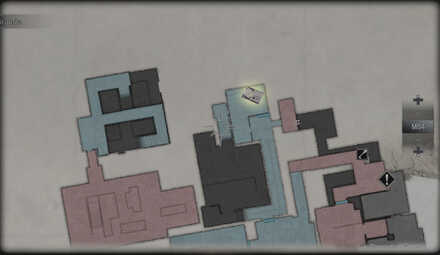 |
As you climb the stairs from B4 to MB4, the small room you enter is where you will find the file on the table.
Development Note 2
| World View | Map View |
|---|---|
 |
 |
After climbing the giant grinder, the room at the end of the stairs has a table on your left. The file is on that table.
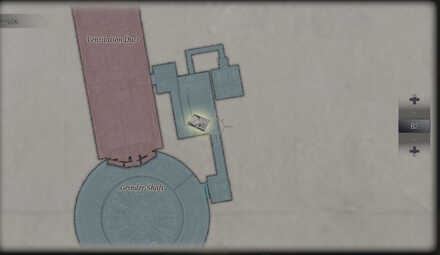
Sturm
| World View | Map View |
|---|---|
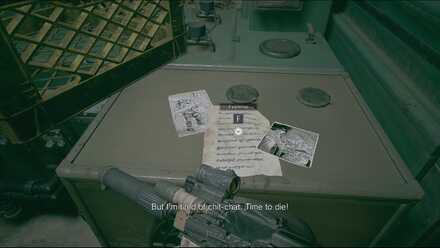 |
 |
After opening the door with Heisenberg's key, the room ahead will contain some supplies and a note. This file is in a room just before you face Sturm.
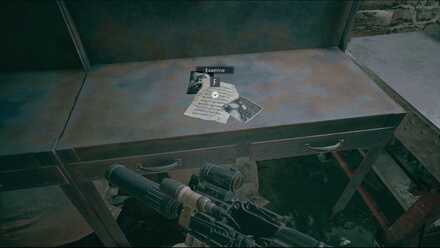
Heisenberg's Diary
| World View | Map View |
|---|---|
 |
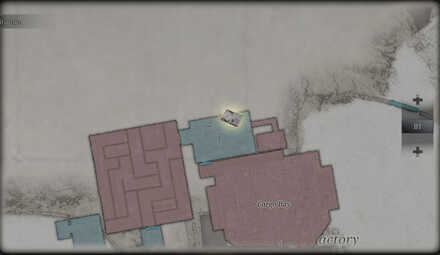 |
Before going to the Cargo Bay, examine the Control Room. Crawl through the hole in the wall. The file is on top of the table in the adjacent room.
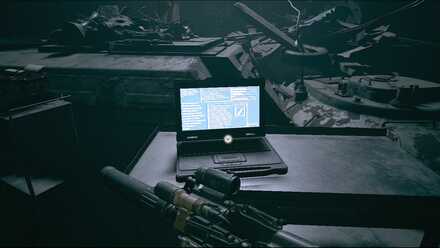
Chris' Computer
| World View | Map View |
|---|---|
 |
 |
After your cutscene with Chris Redfield, you will see a table with a computer. Just before you fight Heisenberg, examine the computer.
List of All Files and Where to Find Them
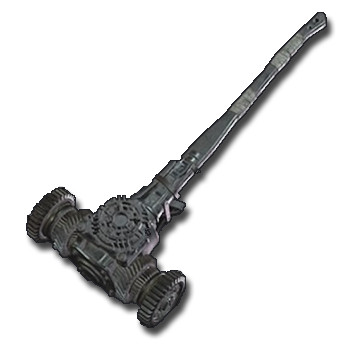
Enemies Encountered in Heisenberg's Factory
Regular Enemies
 Hauler |
 Soldat Eins |
 Soldat Zwei |
|||
 Soldat Jet |
 Soldat Panzer |
||||
List of All Enemies and Monsters
Sturm

Sturm attacks by charging straight at you breaking walls, and getting stuck on them. As soon as Sturm gets stuck, use your hardest-hitting weapon to shoot the jet turbine on its back. Deal enough damage and Sturm will burst into flames, spewing fire through the room. Avoid the fire and continue to shoot Sturm in his weak point. Do this a few times, and Sturm will go down.
Heisenberg
Phase 1

You will be in the tank for this portion, so start firing at the orange spots on Heisenberg with your cannon or Gatling gun. When Heisenberg charges, you can knock him back with the cannon. If it's reloading, then guard to prevent taking as much damage. After you've hit him enough, he'll knock you out of the vehicle and enter phase 2.
Phase 2

Without the tank, you will have to resort to your weapons. Avoid Heisenberg's attacks and shoot him in the face with everything you've got. Either the magnum or shotgun is particularly helpful here due to their high attack power. When you've dealt enough damage, a scene will start, and Heisenberg will go down.
Resident Evil Village Related Guides
Story Walkthroughs
| Story Guides | |
|---|---|
 Story and Plot Summary Story and Plot Summary |
 Megamycete Summary Megamycete Summary |
 Beginner's Guide Beginner's Guide |
|
| Main Story Walkthrough | |
 Prologue Prologue |
 Village Part 1 Village Part 1 |
 Mines Mines |
 Castle Dimitrescu Part 1 Castle Dimitrescu Part 1 |
 Castle Dimitrescu Part 2 Castle Dimitrescu Part 2 |
 Castle Dimitrescu Part 3 Castle Dimitrescu Part 3 |
 Castle Dimitrescu Part 4 Castle Dimitrescu Part 4 |
 Village Part 2 Village Part 2 |
 House Beneviento House Beneviento |
 Moreau's Reservoir Moreau's Reservoir |
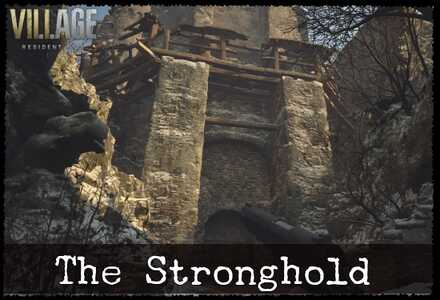 The Stronghold The Stronghold |
Heisenberg's Factory |
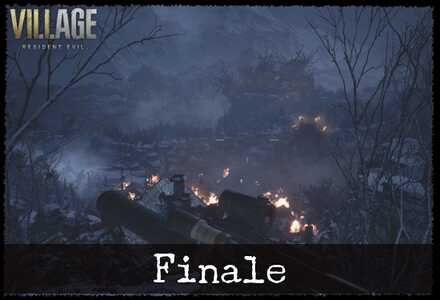 The Village Finale The Village Finale |
|
| Post Game Guides | |
| New Game Plus | Postgame Guide |
| DLC Walkthrough | |
 Castle Castle |
 House House |
 Deep Stratum Deep Stratum |
|
Demo Walkthroughs
| Demo Guides | ||
|---|---|---|
 Village Demo Village Demo |
 Castle Demo Castle Demo |
 Maiden Demo Maiden Demo |
Comment
1  Anonymous almost 5 years
this is the worst freaking guide there is lmao.
Author

Heisenberg's Factory Walkthrough and Maps
Please participate in our site
improvement survey
03/2026
improvement survey
03/2026
Would you assist in
improving Game8's site?
improving Game8's site?

×
We are listening to our users' valuable opinions and discussing how to act on them.
The information collected through this survey will be used for the purpose of improving our services. In addition, the information will only be disclosed a part of a statistic in a format that will not allow identification of personal information.
Begin Survey
Not Now
×
Please rate each item regarding Game8.co's Advertisements.
Amount of Ads
Very Dissatisfied
Somewhat Dissatisfied
Fine
Somewhat Satisfied
Highly Satisfied
Placement of Ads
Timing of Ad Display
Ad Loading Speed
Safeness of Ads
Content of Ads
×
Please rate each item regarding Game8.co's Quality of Articles.
Amount of information
Very Dissatisfied
Somewhat Dissatisfied
Fine
Somewhat Satisfied
Highly Satisfied
Frequency of updates
Speed of new information
Accuracy of articles
Understandibility of articles
Readability of sentences
×
Please rate each item regarding Game8.co's Usability of the Site.
Ease of finding information
Very Dissatisfied
Somewhat Dissatisfied
Fine
Somewhat Satisfied
Highly Satisfied
Loading Speed
Use of Color
Font Size
Visibility of Images
Easy to Understand Layout
×
Please rate each item regarding Game8.co's Message Boards, Comments.
Ease of Writing
Very Dissatisfied
Somewhat Dissatisfied
Fine
Somewhat Satisfied
Highly Satisfied
Readability
Ease in Finding Information
Comment Quality
Comment Quantity
Admin Response
×
Please rate each item regarding Game8.co's Site's new design.
Please rate our site's new design
Very Dissatisfied
Somewhat Dissatisfied
Fine
Somewhat Satisfied
Highly Satisfied
Do you think that the website's design change makes the site easier to use?
Has the new design made it easier for you to find information on the site?
Has the new design improved the overall visual appeal of the site?
How would you rate your overall satisfaction with the new design of the site?
×
How likely are you to recommend Game8 to someone you know?
Very Unlikely
0
1
2
3
4
5
6
7
8
9
10
Very Likely
If you have other opinions regarding potential improvement to the website, please share them with us. We would appreciate your honest opinion.
Note: This is a free response section, so you can proceed without entering anything.
Note: Please be sure not to enter any kind of personal information into your response.
Note: Please be sure not to enter any kind of personal information into your response.
×
Thank You
×
Thank you for participating in our survey! Your answers will help us to improve the quality of our website and services.
We hope you continue to make use of Game8.
We hope you continue to make use of Game8.
Close
Rankings
- We could not find the message board you were looking for.
Gaming News


![Monster Hunter Stories 3 Review [First Impressions] | Simply Rejuvenating](https://img.game8.co/4438641/2a31b7702bd70e78ec8efd24661dacda.jpeg/thumb)
Popular Games

Genshin Impact Walkthrough & Guides Wiki
Honkai: Star Rail Walkthrough & Guides Wiki
Umamusume: Pretty Derby Walkthrough & Guides Wiki
Pokemon Pokopia Walkthrough & Guides Wiki
Resident Evil Requiem (RE9) Walkthrough & Guides Wiki
Monster Hunter Wilds Walkthrough & Guides Wiki
Wuthering Waves Walkthrough & Guides Wiki
Arknights: Endfield Walkthrough & Guides Wiki
Pokemon FireRed and LeafGreen (FRLG) Walkthrough & Guides Wiki
Pokemon TCG Pocket (PTCGP) Strategies & Guides Wiki


Recommended Games
Diablo 4: Vessel of Hatred Walkthrough & Guides Wiki
Cyberpunk 2077: Ultimate Edition Walkthrough & Guides Wiki
Fire Emblem Heroes (FEH) Walkthrough & Guides Wiki
Yu-Gi-Oh! Master Duel Walkthrough & Guides Wiki
Super Smash Bros. Ultimate Walkthrough & Guides Wiki
Pokemon Brilliant Diamond and Shining Pearl (BDSP) Walkthrough & Guides Wiki
Elden Ring Shadow of the Erdtree Walkthrough & Guides Wiki
Monster Hunter World Walkthrough & Guides Wiki
The Legend of Zelda: Tears of the Kingdom Walkthrough & Guides Wiki
Persona 3 Reload Walkthrough & Guides Wiki


All rights reserved
All trademarks referenced herein are the properties of their respective owners.
©CAPCOM CO., LTD. ALL RIGHTS RESERVED.
The copyrights of videos of games used in our content and other intellectual property rights belong to the provider of the game.
The contents we provide on this site were created personally by members of the Game8 editorial department.
We refuse the right to reuse or repost content taken without our permission such as data or images to other sites.
good guide thx