Shadows of Rose: Castle Walkthrough
☆ The Resident Evil Requiem wiki is now live!
★ Best Weapons List
★ List of Bosses and Optional Bosses
★ List of Treasures
Here is a guide to the Castle chapter of Resident Evil Village: Shadows of Rose DLC. Read on for a walkthrough of the Castle, how to solve Masked Duke's dungeon puzzle, how to beat the Executioner boss fight, and more!
| Previous | Current | Next |
|---|---|---|
| Finale | DLC: Castle | DLC: House |
List of Contents
Castle Walkthrough
| Castle Walkthrough |
|---|
| |
Entering the Castle
| Objectives | |
|---|---|
| 1 | 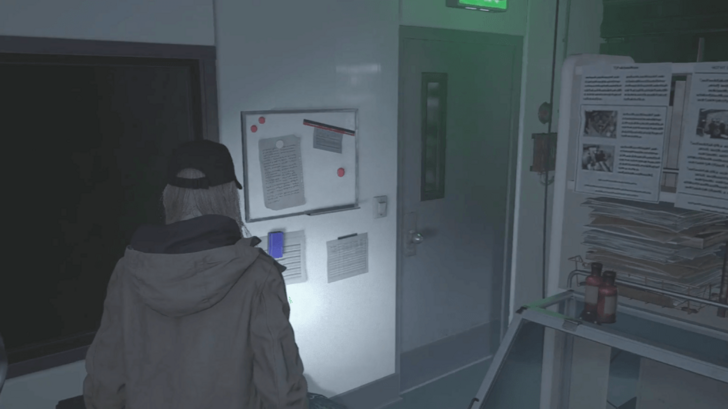 Once you enter into the consciousness of the Megamycete, feel free to read the file next to the door before exiting the Laboratory. |
| 2 | 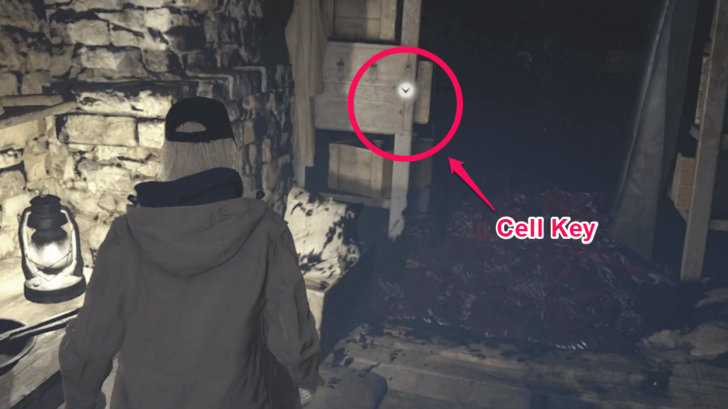 Walk through the hallway until you reach a locked door. Continue on your path to find the key for it. You'll eventually reach the Treatment Room, where you'll find the Cell Key. After a cutscene, go back to the locked door. |
| 3 | Unlock the door and enter the cell to trigger a cutscene with a clone of Rose. Follow her back into the Treatment Room where you'll help her lift a body bag, revealing a crawlspace. Crawl through it to enter the Cells, where multiple clones of Rose are kept locked away. To open the way out the Cells, you need to find the Switch Handle. Go to the path to the left of the gate and continue through the path. Be wary of a jumpscare that will happen when you enter the room at the end of the path. Pick up the Switch Handle in the same room. Unlock the door in the room and make your way back to the Cells. |
| 4 | Once back in the Cells, a cutscene will play, revealing a new enemy called the Face Eater. Quickly put the Switch Handle into the switch and avoid the Face Eater. The gate will open slow, so just keep moving around the room to avoid getting attacked. Once the gate opens, run through the path while avoiding the mass of Face Eaters. At the end of the chase, you'll end up in the Parlor after being saved by an entity named Michael. You can save your progress on the typewriter in the Parlor. |
| 5 | Exit the Parlor and into the Main Hall. After the cutscene, run away while avoiding the mold and Face Eaters. You'll end up outside near the entrance of the castle before your way gets blocked. Go back inside to trigger a cutscene where Michael gives you a LEMI handgun. Shoot the Face Eater that comes to attack you. |
Getting the Bronze Mask
| 6 | 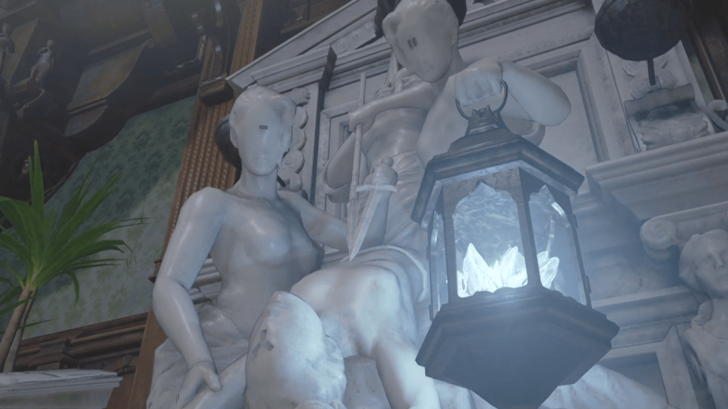 Your next objective is to find the three masks to get the Purifying Crystal in the Main Hall, starting with the Bronze Mask. Feel free to save in the Main Hall as well. Head to the Kitchen to get the Bolt Cutters. Use the Bolt Cutters on the chained door in the Dining Room to access the Courtyard. Feel free to talk to Michael every time you see him in the Dining Room as well as he can give you items. |
| 7 | Head to the center of the Courtyard where the Bronze Mask is. You cannot get it yet, so you'll be led to the door to its left. Entering through and heading up the stairs, go through the Library and Waiting Room to reach the Atelier. In the Atelier, go up the stairs and push down the ladder to cross the mold safely. |
| 8 | Climb up the ladder to the Attic and enter the Workshop to find the RW-Variant Flask 1. After a cutscene, Rose will now have the ability to destroy sclerotia cores. Feel free to save in the Workshop too. With Rose's new ability, head back to the Courtyard while destroying the cores in your way. Sclerotia cores have a bright red vein that points out their location. |
| 9 | 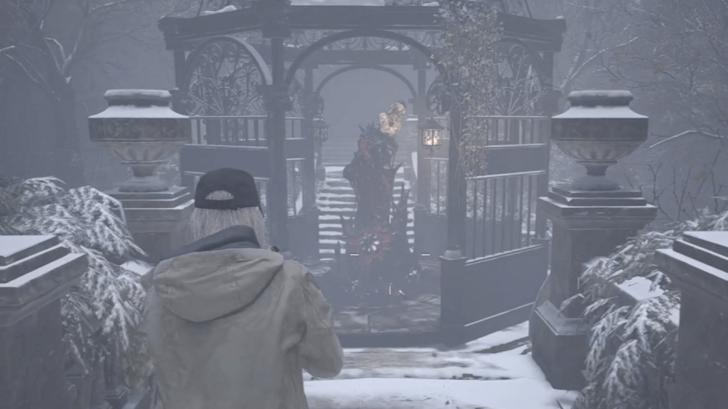 Destroy the core holding the Bronze Mask to obtain it. Head back to the Main Hall and mount the Bronze Mask unto the leftmost statue. |
Getting the Silver Mask
| 10 | 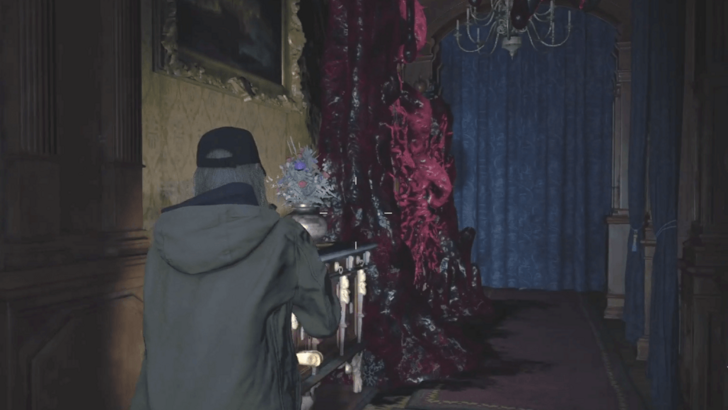 To obtain the Silver Mask, head up to the second floor and head to the right side of the loft. Get ready for a brief chase while going to the Drawing Room. From the Drawing Room, you can enter the Armory, where you'll obtain RW-Variant Flask 2. With it, Rose can now temporarily stun enemies. Utilize this ability to stun the two Face Eaters in the Dressing Room to obtain the Monocular Key. Carefully escape the Face Eaters on your way out. |
| 11 | With the Monocular Key on your person, you can first head down to the Salon to open the case and get the Compensator for your LEMI handgun. Next, go to the Courtyard and open the double doors marked with one eye. Go through the "Gallery of Despair" and head to the Hall of Ablution. Push the statues in this order: Hanged Corpse → Stabbed Corpse → Drowned Corpse → Arrow-Pierced Corpse. ► How to Solve Hall of Ablution Statue Puzzle |
| 12 | 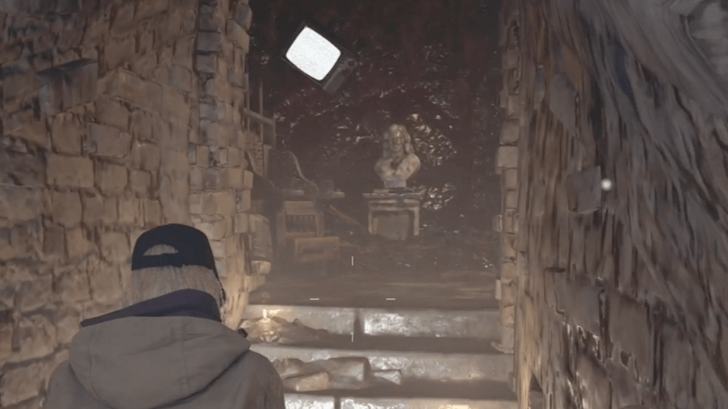 Head down the newly-opened staircase and into the Basement. Sneak past the Executioner and Face Eater to obtain the Silver Mask. The Executioner and a wave of Face Eaters will start to chase you, so carefully escape the Basement. Stun them if necessary. |
| 13 | Once out of the Basement and Hall of Ablution, you'll pass through the Guest Room. Obtain the Snake Painting from the guest bathroom before making your way back to the Main Hall. Be careful as the Executioner and some Face Eaters now roam the Courtyard. In the Main Hall, mount the Silver Mask unto the rightmost statue. |
Getting the Gold Mask
| 14 | 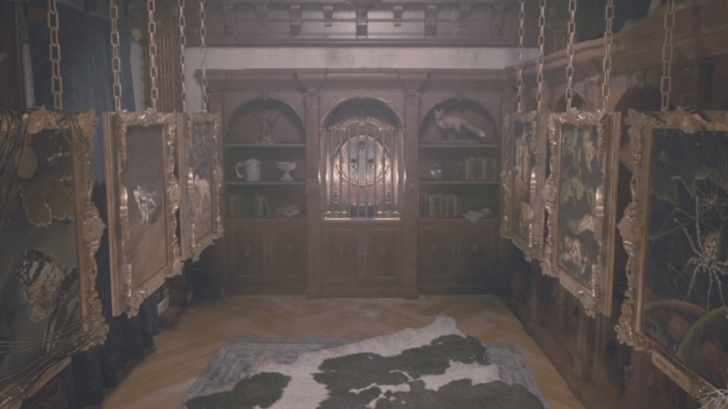 To obtain the Gold Mask, head up to Gallery on the second floor. You have to solve the Predation Gallery puzzle in order to continue. Take off all paintings that can be taken off and arrange the paintings in this order: Sheep → Wolves Frog → Snake Butterfly → Spider |
| 15 | After obtaining the Triocular Key from the painting puzzle, head to the Dining Room and use the key there to obtain the M1897 shotgun. Afterwards, head back to the Courtyard and enter the door on the left. Open the locked door with three eyes to enter the Opera Hall. There you will find the Gold Mask, but a mass of mold is surrounding it. |
| 16 | 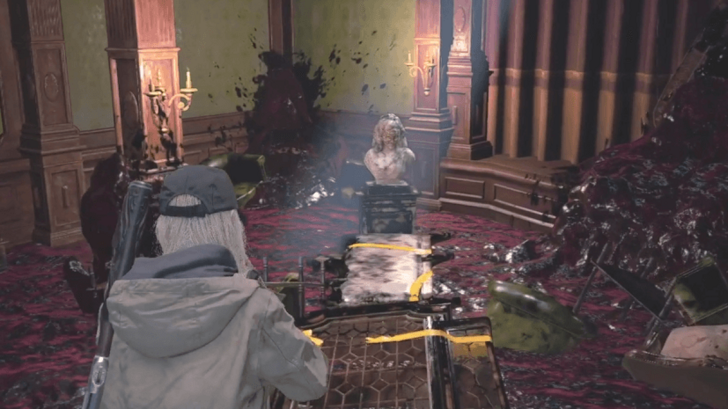 To get to it, you have to destroy three sclerotia cores. The first one is located on the pillar to the right of the mask. The second one is located above the fireplace near the mask. And the last one is on the second floor. Be careful as Face Eaters will spawn once you destroy the first core. With a newly-made bridge, cross it to obtain the Gold Mask. A cutscene will trigger after. |
| 17 | 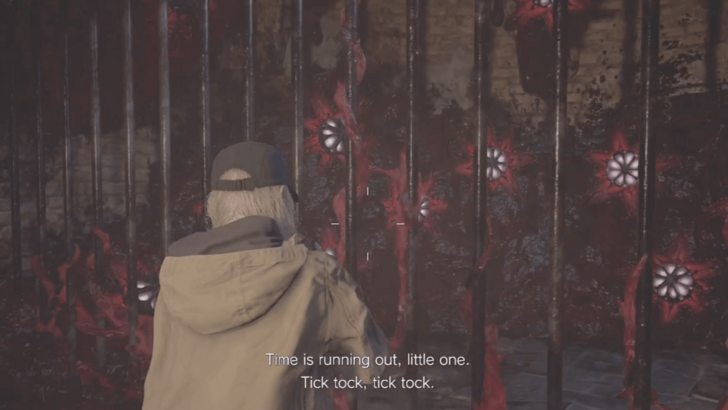 Once you wake up, you'll be stuck in a dungeon cell, forced to guess three correct sclerotia cores from a mass of fake ones within two and a half minutes. With Michael's help, destroy the three correct cores to escape the dungeon cell. ► How to Solve Masked Duke's Dungeon Puzzle |
| 18 | Make your way out the Dungeon and back to the Main Hall. Mount the Gold Mask unto the bottommost statue to obtain the "Purifying Crystal". A cutscene will play, then you'll be transported to a boss fight with the Executioner. |
| 19 | 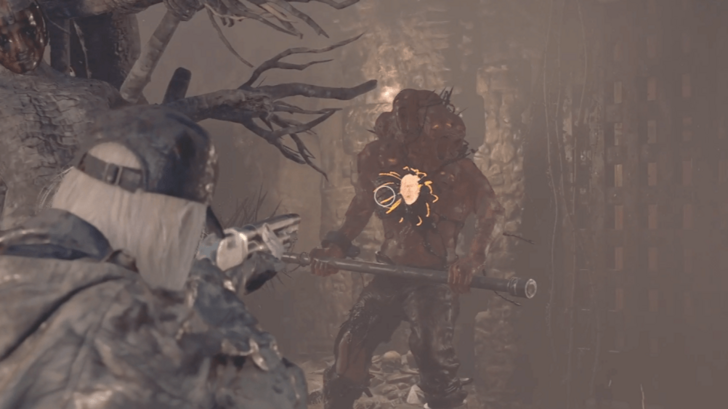 To defeat the Executioner, you have to target your hits at the orange core on its body. It will first be it on its chest, then it will move to its right leg, then to its back. Keep moving and time your attacks to avoid getting damaged. You'll have to face some Face Eaters at the same time as well. Mid-fight, Michael will give you RW-Variant Flask 3, which gives you the ability to stun the Executioner. Stun it to get damage windows. ► How to Beat Executioner Boss Fight |
| 20 | Once you defeat the executioner, you'll be forced to escape the Castle stratum and enter the House stratum. |
How to Solve Masked Duke's Dungeon Puzzle
Follow Michael's Directions
| Order | Sclerotia Core | Hints |
|---|---|---|
| 1 | 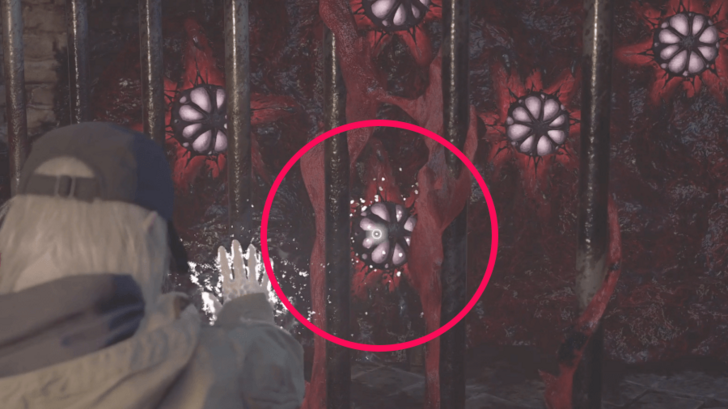 Third to the left, bottom-most row |
"Lower than barrel" |
| 2 | 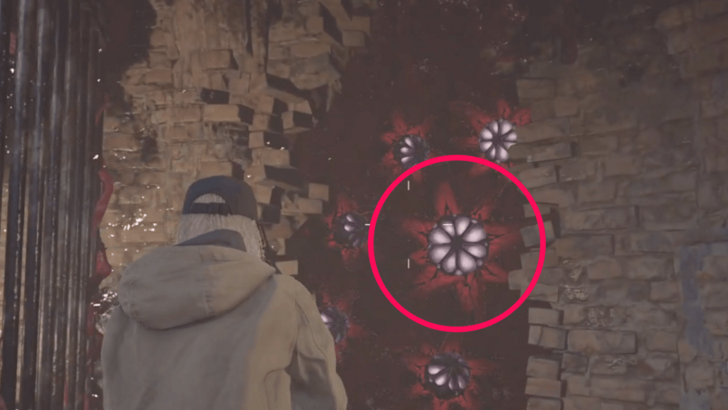 Biggest core found in the middle of broken wall within the cell |
"Broken wall", "Deep shadow", "Big core" |
| 3 | 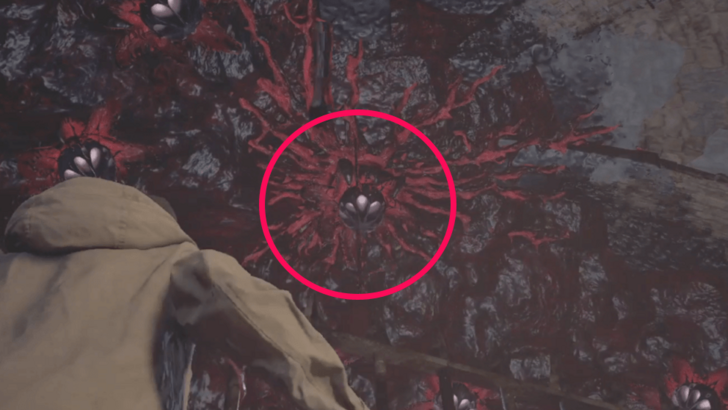 Middle of the ceiling |
"Up", "Center" |
After obtaining the Gold Mask, you are sent to a dungeon cell by Masked Duke. Not only are you trapped, but the room is getting filled with mold. You can only escape by destroying the three correct Sclerotia Cores in a sea of duplicates within two and a half minutes.
Thankfully, Michael is there to guide you to the correct cores. The first one he points to is the core third to the left on the bottom-most row. The next one is the biggest core in the middle of the broken wall that Michael reveals. Be careful as a Face Eater shows up once you try to destroy the second core. The last one is on the very middle of the ceiling above you.
How to Solve Hall of Ablution Statue Puzzle
Push Statues in Order Based on the Hints on the Plaque
| Order | Statue | Hint |
|---|---|---|
| 1 | 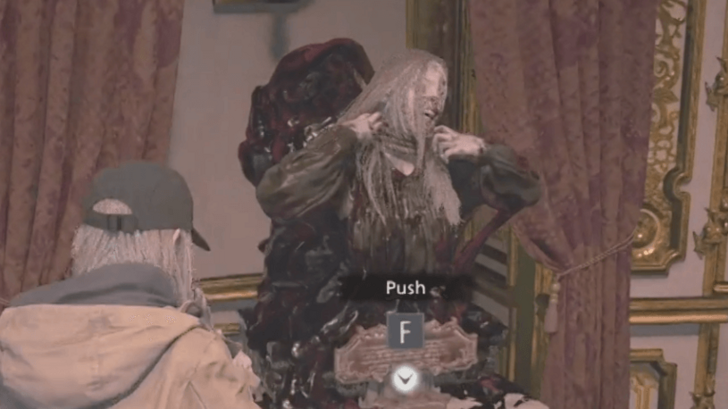 Hanged Corpse |
"They hanged me long ago-" |
| 2 | 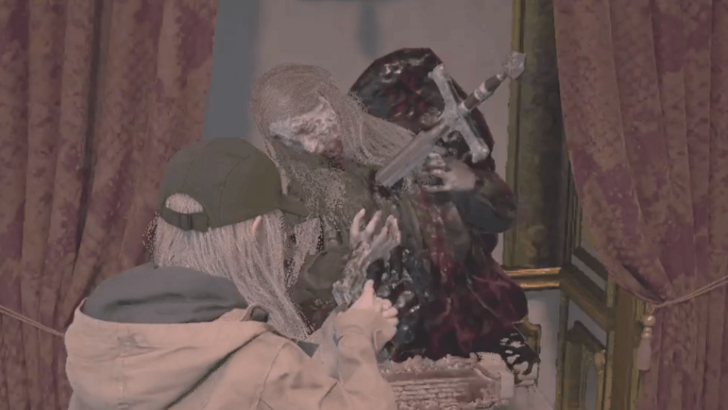 Stabbed Corpse |
"-not last nor first, the sharpened blade did ring." |
| 3 | 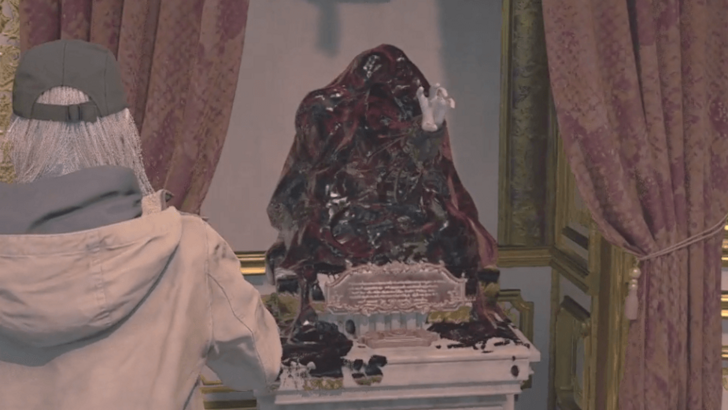 Drowned Corpse |
"Although I have just drowned," |
| 4 | 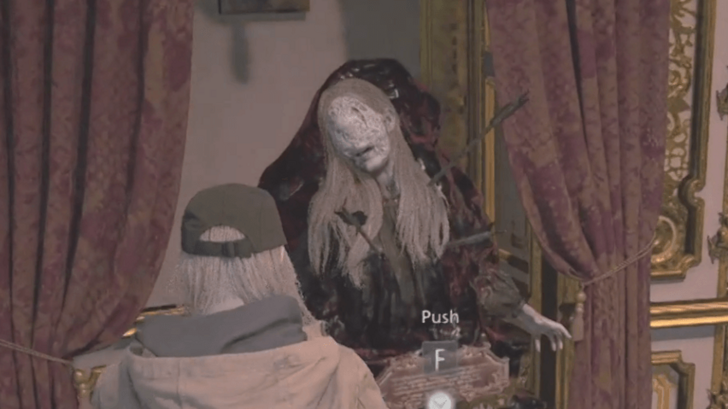 Arrow-Pierced Corpse |
"-the arrows' bite doth sting." |
In the Hall of Ablution, you must push the statues in the correct order so that the staircase will open. The plaque in the middle wall of the room gives us hints for the puzzle.
You must push the statues by order of recency, starting with what happened first. The first one to push is the Hanged Corpse, then the Stabbed Corpse, then the Drowned Corpse, and lastly, the Arrow-Pierced Corpse.
How to Beat Executioner
Phase 1: Shoot the Core
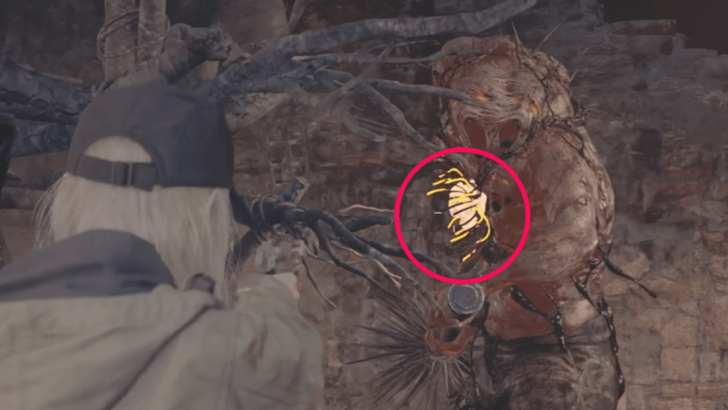
In the first phase of the fight, aim for the bright orange core on Executioner's chest. It only does two attacks in this phase, which is swinging its weapon at you and trying to grab you. You get a damage window when it swings down its weapon. Keep moving around the area to avoid getting hit and collect the items situated on the walls.
Phase 2: Wait Until It's Tired
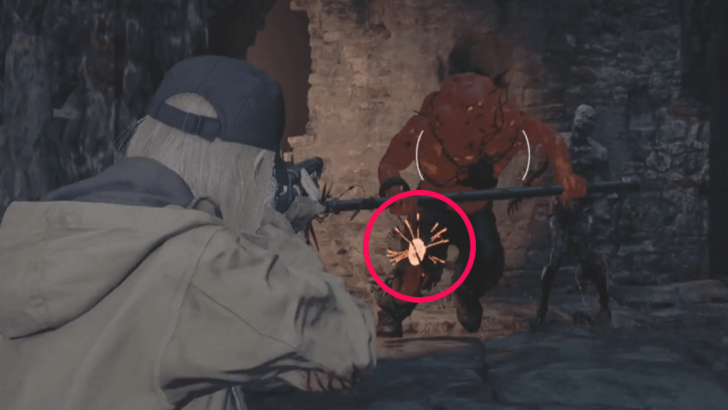
When you've done enough damage, another area opens up and you have to also deal with Face Eaters along with the Executioner. This time, it can start charging at you and swing its weapon wildly. Shoot at the core on its right leg whenever it gets tired after its wild weapon-swinging.
During this phase, Michael will give you RW-Variant Flask 3, which gives Rose the ability to temporarily stun the Executioner. Destroy the sclerotia core near where you got the flask to open up the other area for the last phase of the fight.
Phase 3: Stun It
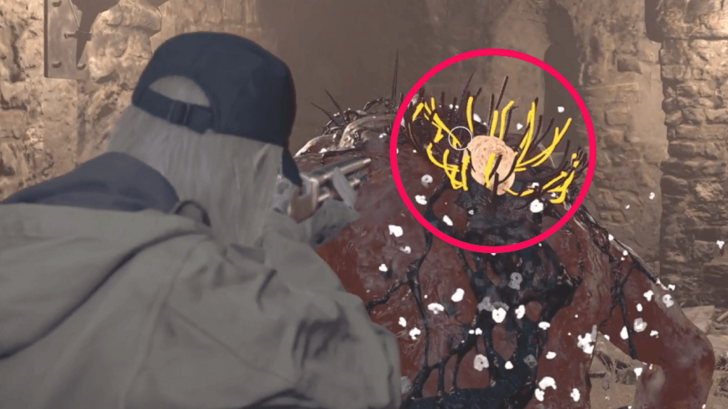
In the last phase, Executioner will now have the ability to teleport and rise from beneath you. Once you see it disappear into the floor, keep running to avoid getting hit by its surprise attack. You can shoot the core on its back whenever you stun it with Rose's newfound power or whenever it gets stuck after swinging its weapon down.
Resident Evil Village Related Guides
Story Walkthroughs
| Story Guides | |
|---|---|
 Story and Plot Summary Story and Plot Summary |
 Megamycete Summary Megamycete Summary |
 Beginner's Guide Beginner's Guide |
|
| Main Story Walkthrough | |
 Prologue Prologue |
 Village Part 1 Village Part 1 |
 Mines Mines |
 Castle Dimitrescu Part 1 Castle Dimitrescu Part 1 |
 Castle Dimitrescu Part 2 Castle Dimitrescu Part 2 |
 Castle Dimitrescu Part 3 Castle Dimitrescu Part 3 |
 Castle Dimitrescu Part 4 Castle Dimitrescu Part 4 |
 Village Part 2 Village Part 2 |
 House Beneviento House Beneviento |
 Moreau's Reservoir Moreau's Reservoir |
 The Stronghold The Stronghold |
 Heisenberg's Factory Heisenberg's Factory |
 The Village Finale The Village Finale |
|
| Post Game Guides | |
| New Game Plus | Postgame Guide |
| DLC Walkthrough | |
 Castle Castle |
 House House |
 Deep Stratum Deep Stratum |
|
Demo Walkthroughs
| Demo Guides | ||
|---|---|---|
 Village Demo Village Demo |
 Castle Demo Castle Demo |
 Maiden Demo Maiden Demo |
Comment
Author
Shadows of Rose: Castle Walkthrough
improvement survey
03/2026
improving Game8's site?

Your answers will help us to improve our website.
Note: Please be sure not to enter any kind of personal information into your response.

We hope you continue to make use of Game8.
Rankings
- We could not find the message board you were looking for.
Gaming News
Popular Games

Genshin Impact Walkthrough & Guides Wiki

Honkai: Star Rail Walkthrough & Guides Wiki

Umamusume: Pretty Derby Walkthrough & Guides Wiki

Pokemon Pokopia Walkthrough & Guides Wiki

Resident Evil Requiem (RE9) Walkthrough & Guides Wiki

Monster Hunter Wilds Walkthrough & Guides Wiki

Wuthering Waves Walkthrough & Guides Wiki

Arknights: Endfield Walkthrough & Guides Wiki

Pokemon FireRed and LeafGreen (FRLG) Walkthrough & Guides Wiki

Pokemon TCG Pocket (PTCGP) Strategies & Guides Wiki
Recommended Games

Diablo 4: Vessel of Hatred Walkthrough & Guides Wiki

Fire Emblem Heroes (FEH) Walkthrough & Guides Wiki

Yu-Gi-Oh! Master Duel Walkthrough & Guides Wiki

Super Smash Bros. Ultimate Walkthrough & Guides Wiki

Pokemon Brilliant Diamond and Shining Pearl (BDSP) Walkthrough & Guides Wiki

Elden Ring Shadow of the Erdtree Walkthrough & Guides Wiki

Monster Hunter World Walkthrough & Guides Wiki

The Legend of Zelda: Tears of the Kingdom Walkthrough & Guides Wiki

Persona 3 Reload Walkthrough & Guides Wiki

Cyberpunk 2077: Ultimate Edition Walkthrough & Guides Wiki
All rights reserved
All trademarks referenced herein are the properties of their respective owners.
©CAPCOM CO., LTD. ALL RIGHTS RESERVED.
The copyrights of videos of games used in our content and other intellectual property rights belong to the provider of the game.
The contents we provide on this site were created personally by members of the Game8 editorial department.
We refuse the right to reuse or repost content taken without our permission such as data or images to other sites.





![Monster Hunter Stories 3 Review [First Impressions] | Simply Rejuvenating](https://img.game8.co/4438641/2a31b7702bd70e78ec8efd24661dacda.jpeg/thumb)


