

This survey will take about 1 minute.
Your answers will help us to improve our website.
Zenless Zone Zero (ZZZ)
Trigger TV Schedule - Zero Point Calibration Guide
☆ New: Tier List Maker & Co-Op Board!
★ 2.7: Nangong Yu, Cissia, & 2.7 Livestream
☆ 2.6 Phase 1: Sunna & Yixuan
★ 2.6 Phase 2: Aria & Yuzuha
☆ Tier Lists: Agents | W-Engines | Bangboos | Teams
★ Redeem Codes for free Polychromes!
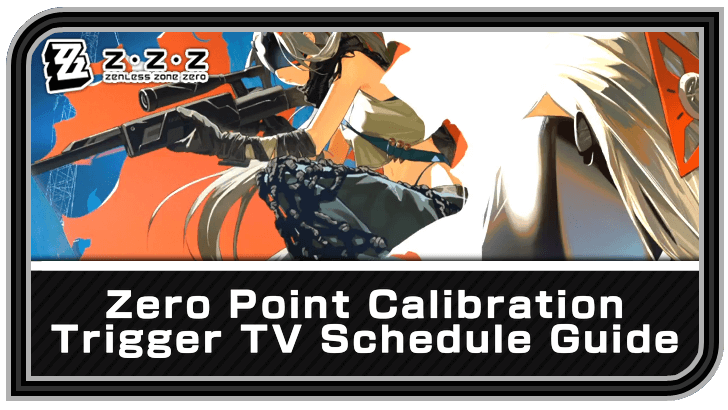
Zero Point Calibration is Trigger's TV Schedule in Zenless Zone Zero (ZZZ). See all the Zero Point Calibration Guides for each stage, how to play the Trigger TV Schedule, and all the rewards here!
List of Contents
Trigger TV Schedule Information
Zero Point Calibration Event Details
 |
|
| Event Start | April 2, 2022 |
|---|---|
| Event End | April 21, 2025 |
| How to Unlock | Reach Inter-Knot Lv. 15+ Complete Soldier 11 Agent Story |
| Rewards |
|
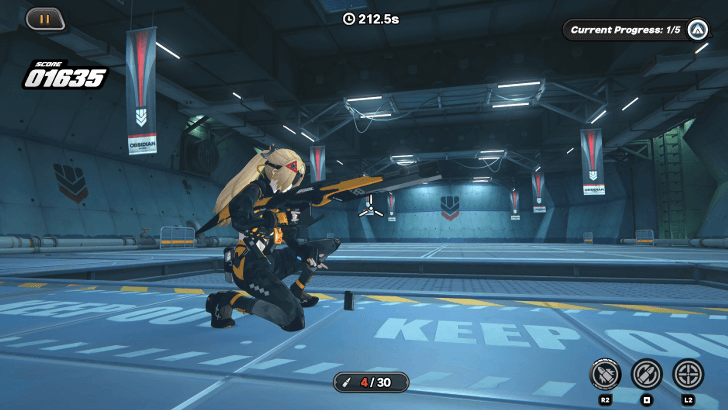
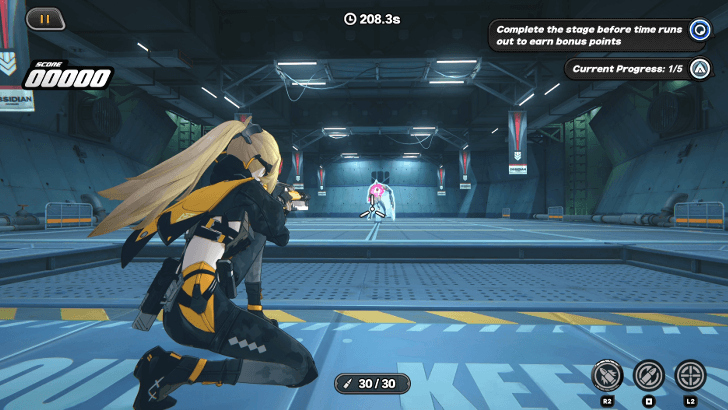
Zero Point Calibration is Trigger's TV Schedule Event that takes place in the Defense Force's shooting range. Trigger will stay in one spot, and you simply need to shoot the targets to score as many points as possible!
How to Unlock Zero Point Calibration Trigger
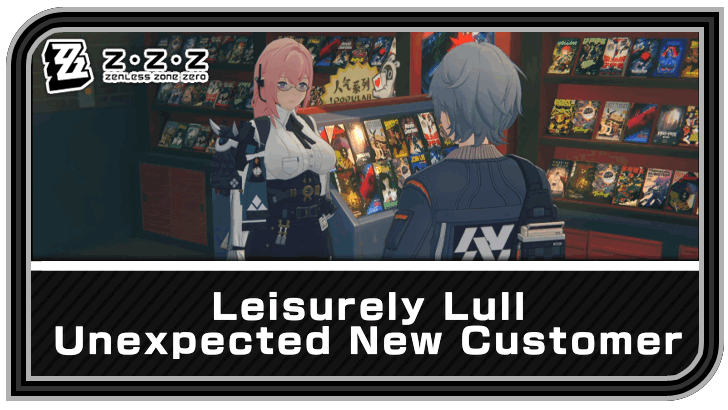
Zero Point Calibration can be unlocked after Proxies complete Soldier 11's Agent Story, Mole in the Hole, and the Leisurely Lull - Unexpected New Customer commission.
Unexpected New Customer Quest Guide
Zero Point Calibration Stages and Schedule
All Flowers of Asphodel Event Stages
| Unlock | Flowers of Asphodel Stages |
|---|---|
| April 2 | Bated Breath |
| Enemy Radar | |
| April 3 | Breaking Force |
| Stillness Triumphs | |
| April 4 | Shatter to Conquer |
Click on the links to jump to a guide!
Bated Breath Guide
| Training Objectives |
|
|---|---|
| Assessment Objectives |
|
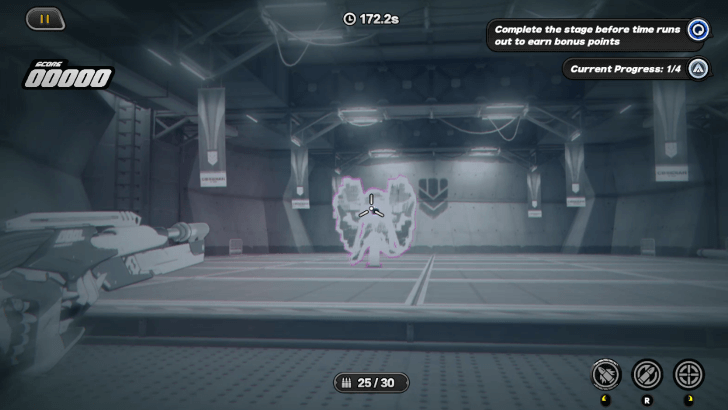
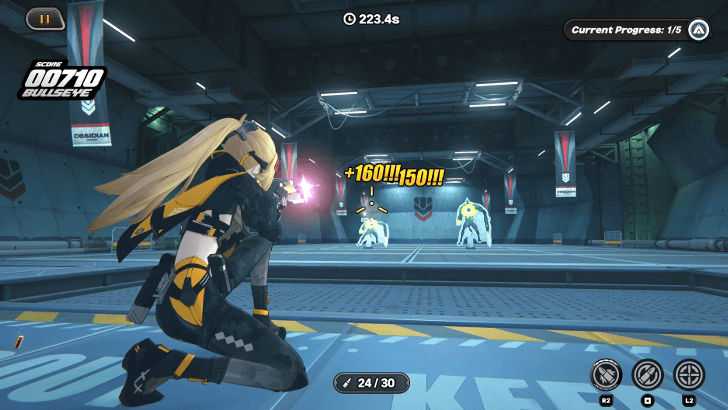
Shoot Ether Cores
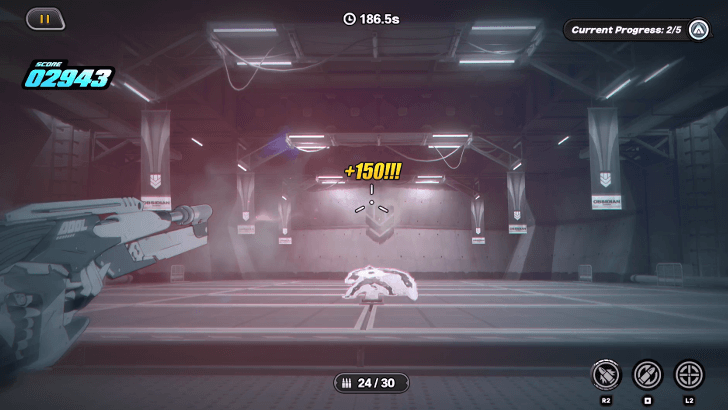
When you see the Ethereal targets come up, notice their Ether cores at their heads. Shooting these down, essentially getting a headshot, will result in a much higher score than simply shooting the target anywhere.
Additionally, shooting the Ether cores will instantly bring the target down.
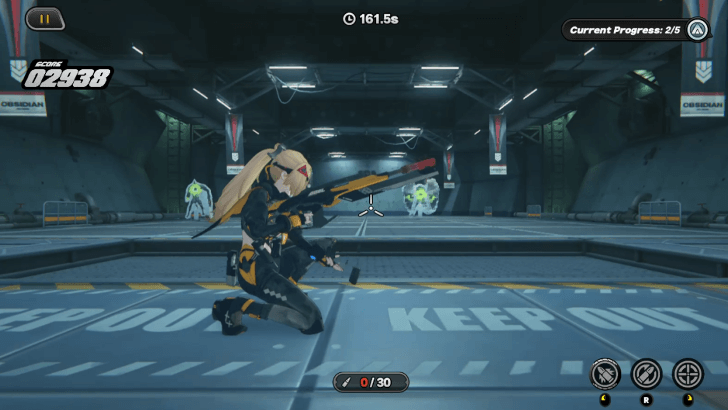
Reload After Every Wave
After taking down an entire wave of targets, it's best to reload your rifle even when you still have bullets to prepare for the next one.
This will result in continuous firing without needing to reload in the middle of a wave, leading to getting a high score faster!
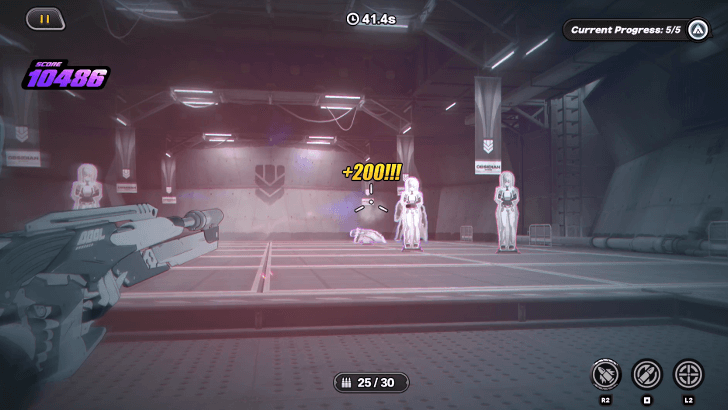
Use Rapid Fire on Golden Bangboos
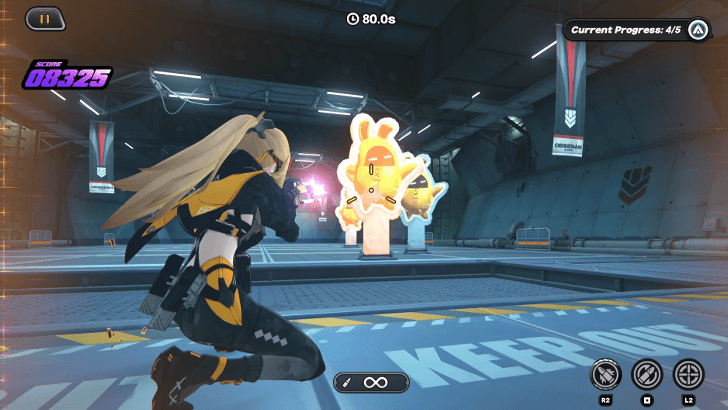
Once the Golden Bangboos appear and Focused Fire occurs, wail on the Golden Bangboos by using Rapid Fire on them! They will only require one shot each, no matter what shot you use, so you might as well go all out!
Only use single or aimed shots when the targets are too far away. Otherwise, just keep firing to really bump up your score!
Enemy Radar Guide
| Training Objectives |
|
|---|---|
| Assessment Objectives |
|
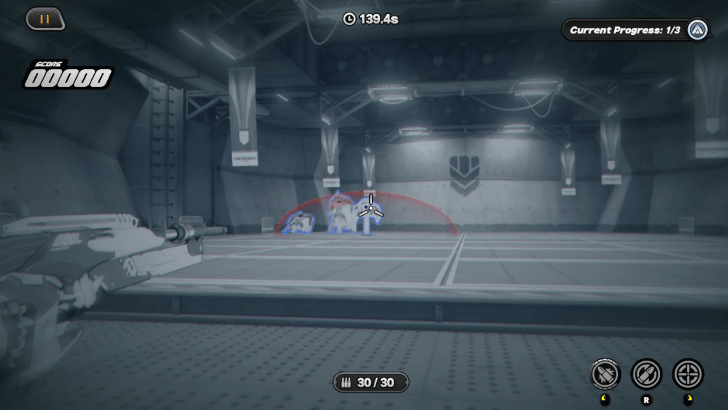
Avoid the Civilians
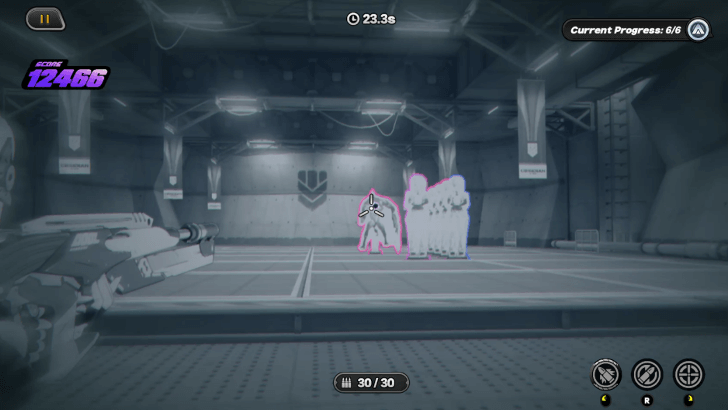
In Enemy Radar, Civilian targets will be introduced for the first time. Hitting these targets will result in a 100-point deduction.
Civilians can also be taken down by piercing rounds if they are directly behind an enemy target. Be very careful with your shots so as to not hit any of the civilians and to prevent lowering your score!
Red Tyrfings are Durable but Give More Points
Target the Red Tyrfings as much as you can to score higher points. Do take note, however, that they are more durable than regular targets, so you may need to use two single shots or a single aimed shot!
Breaking Force Guide
| Training Objectives |
|
|---|---|
| Assessment Objectives |
|
Wait for the Shields to Open
This time, we have Hoplitais joining the mix of Ethereal targets. The trick to dealing with them is by waiting for their shields to open up, revealing their Ether cores. Once you see those, be prepared to shoot!
Stillness Triumphs Guide
| Training Objectives |
|
|---|---|
| Assessment Objectives |
|
Take Advantage of the Blastcrawlers
Blastcrawlers are introduced in this stage, and shooting one will cause it to “explode”, taking other targets down with it. If any targets are moving or the Blastcrawler is moving on its own, it would be wise to time your shots correctly.
Just remember to watch out for when these Blastcrawlers are near civilians. If you see them moving towards some, take them out before they get there!
Shatter to Conquer Guide
| Training Objectives |
|
|---|---|
| Assessment Objectives |
|
Use Aimed Shots to Bypass Barriers
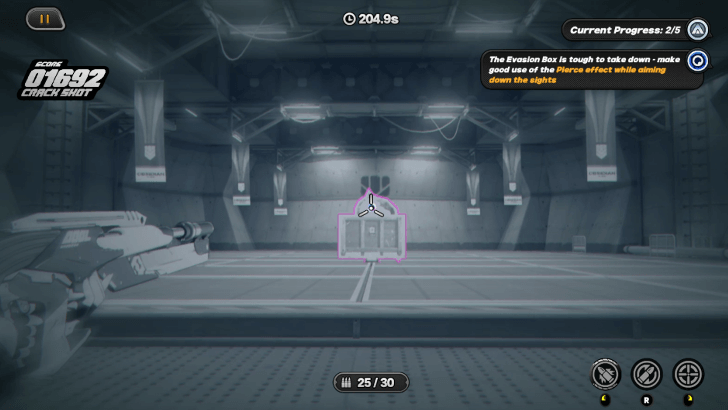
Enemy targets in Shatter to Conquer will occassionally hide behind barriers. Their Ether cores will still be exposed, so be sure to use aimed shots at them to take them down easily.
Alternatively, while these barriers are resistant to single shots and rapid fire shots, they can be broken by using the aimed shots' piercing effect. Since aimed shots take up more bullets, be sure to reload often!
How to Play Zero Point Calibration
Zero Point Calibration Mechanics
Single Shot
| Single Shot | |
|---|---|
 |
|
PS5 |
PC |
Trigger's most basic shot will expend 1 bullet. A single shot has moderate firepower and can take down a target in one shot if it is hit in its Ether core. Otherwise, targets may take two to three single shots.
Single shots are useful against targets in close quarters or moderate distances. After a single shot is used, Proxies will have to wait until Trigger's rifle muzzle flashes blue before firing the next shot.
Rapid Fire
| Rapid Fire | |
|---|---|
 |
|
Hold PS5 |
Hold PC |
Rapid Fire mode enables Trigger's rifle to enter a fully-automatic mode to shoot bullets at an increased firing rate. Each shot still costs 1 bullet, and the shots are weaker, but one would not need to worry about aiming too hard.
Rapid Fire mode is useful when dealing with a large amount of targets at close to medium range. However, it is highly ineffective against long-range targets. Rapid Fire is enabled by holding down the Fire button.
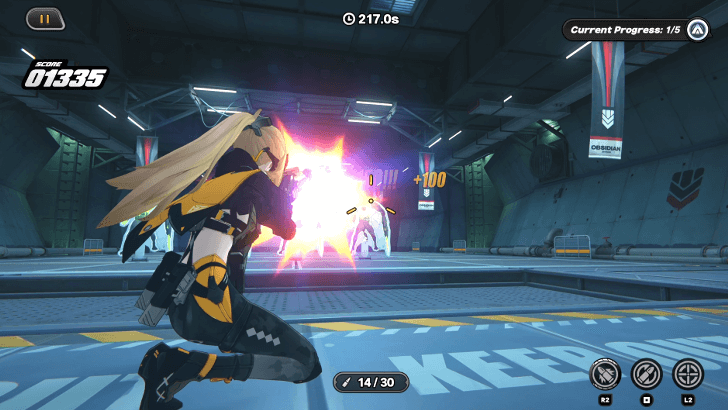
Aimed Shot
| Aimed Shot | |
|---|---|
 |
|
Hold PS5 |
Hold PC |
Aimed shots will have Trigger use her scope to zoom in on targets. Additionally, her bullets gain a piercing effect that allows her shots to take down multiple targets if they are in a single-file line!
Aimed shots cost 5 bullets, but they can take out almost any normal target with one shot. Rapid Fire cannot be enabled while aiming. Aimed shots are exceptional when it comes to taking out distant targets!
Reload
| Reload | |
|---|---|
 |
|
PS5 |
PC |
Trigger's rifle can hold up to 30 rounds. Proxies can manually reload the rifle or expend all its bullets to have Trigger automatically reload.
Do take note that Trigger has a reloading animation. Timing your reloads right is one of the keys to scoring big, so be sure to keep an eye out for opportunities where you can reload, such as after each wave is cleared!
Focus Fire
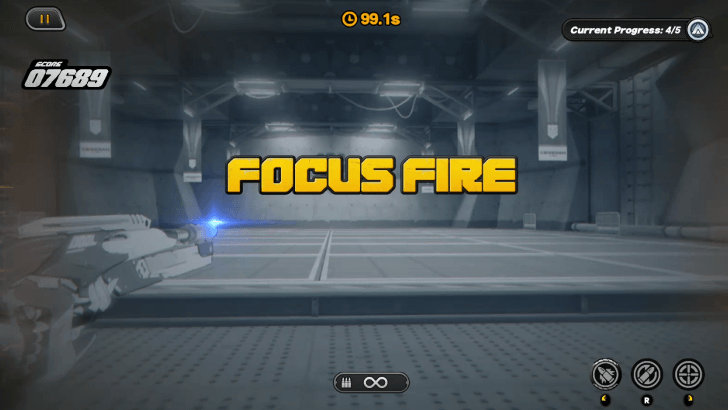
Focus Fire occurs when Golden Bangboo targets appear. During Focus Fire, Trigger will have unlimited bullets, allowing you to wail on the targets to your heart's content!
Focus Fire ends once the Golden Bangboo targets have been cleared out or have all left the field.
Zero Point Calibration Rewards
Trigger TV Schedule Rewards
| Objective | Rewards |
|---|---|
| Complete Agent Story "Out of Sight" | |
| Complete "Bated Breath" on "Training!" diffculty with a rating of B | |
| Complete "Bated Breath" on "Assessment!" diffculty with a rating of B | |
| Complete "Enemy Radar" on "Training!" diffculty with a rating of B | |
| Complete "Enemy Radar" on "Assessment!" diffculty with a rating of B | |
| Complete "Breaking Force" on "Training!" diffculty with a rating of B | |
| Complete "Breaking Force" on "Assessment!" diffculty with a rating of B | |
| Complete "Stillness Triumphs" on "Training!" diffculty with a rating of B | |
| Complete "Stillness Triumphs" on "Assessment!" diffculty with a rating of B | |
| Complete "Shatter to Conquer" on "Training!" diffculty with a rating of B | |
| Complete "Shatter to Conquer" on "Assessment!" diffculty with a rating of B |
We'll update this section with the total rewards soon!
Zenless Zone Zero Related Guides
Recent TV Schedule Stages
| Event | Event Duration |
|---|---|
 The Inverted Night Lantern The Inverted Night Lantern |
10/15/2025 - 11/24/2025 |
Previous TV Schedule Events
| Event | Event Duration |
|---|---|
 Floral Voyage Into the Unknown Floral Voyage Into the Unknown |
09/04/2025 - 10/13/2025 |
 Tiger's Billowing Roar Tiger's Billowing Roar |
06/25/2025 - 07/16/2025 |
 Silver Soldier Song Silver Soldier Song |
03/12/2025 - 04/21/2025 |
| Zero Point Calibration |
04/02/2025 - 04/21/2025 |
 Harmonic Pact Harmonic Pact |
01/22/2025 - 03/10/2025 |
 The Troubles of Ellen the Shark The Troubles of Ellen the Shark |
01/22/2025 - 03/10/2025 |
 Windchaser Harumasa Windchaser Harumasa |
12/30/2024 - 01/20/2025 |
 The Champion The Champion |
11/27/2024 - 12/16/2024 |
 Moonlight Traces Moonlight Traces |
11/06/2024 - 12/16/2024 |
Other Events
Comment
Author

Trigger TV Schedule - Zero Point Calibration Guide
Please participate in our site
improvement survey
03/2026
improvement survey
03/2026
Would you assist in
improving Game8's site?
improving Game8's site?

×
We are listening to our users' valuable opinions and discussing how to act on them.
The information collected through this survey will be used for the purpose of improving our services. In addition, the information will only be disclosed a part of a statistic in a format that will not allow identification of personal information.
Begin Survey
Not Now
×
Please rate each item regarding Game8.co's Advertisements.
Amount of Ads
Very Dissatisfied
Somewhat Dissatisfied
Fine
Somewhat Satisfied
Highly Satisfied
Placement of Ads
Timing of Ad Display
Ad Loading Speed
Safeness of Ads
Content of Ads
×
Please rate each item regarding Game8.co's Quality of Articles.
Amount of information
Very Dissatisfied
Somewhat Dissatisfied
Fine
Somewhat Satisfied
Highly Satisfied
Frequency of updates
Speed of new information
Accuracy of articles
Understandibility of articles
Readability of sentences
×
Please rate each item regarding Game8.co's Usability of the Site.
Ease of finding information
Very Dissatisfied
Somewhat Dissatisfied
Fine
Somewhat Satisfied
Highly Satisfied
Loading Speed
Use of Color
Font Size
Visibility of Images
Easy to Understand Layout
×
Please rate each item regarding Game8.co's Message Boards, Comments.
Ease of Writing
Very Dissatisfied
Somewhat Dissatisfied
Fine
Somewhat Satisfied
Highly Satisfied
Readability
Ease in Finding Information
Comment Quality
Comment Quantity
Admin Response
×
Please rate each item regarding Game8.co's Site's new design.
Please rate our site's new design
Very Dissatisfied
Somewhat Dissatisfied
Fine
Somewhat Satisfied
Highly Satisfied
Do you think that the website's design change makes the site easier to use?
Has the new design made it easier for you to find information on the site?
Has the new design improved the overall visual appeal of the site?
How would you rate your overall satisfaction with the new design of the site?
×
How likely are you to recommend Game8 to someone you know?
Very Unlikely
0
1
2
3
4
5
6
7
8
9
10
Very Likely
If you have other opinions regarding potential improvement to the website, please share them with us. We would appreciate your honest opinion.
Note: This is a free response section, so you can proceed without entering anything.
Note: Please be sure not to enter any kind of personal information into your response.
Note: Please be sure not to enter any kind of personal information into your response.
×
Thank You
×
Thank you for participating in our survey! Your answers will help us to improve the quality of our website and services.
We hope you continue to make use of Game8.
We hope you continue to make use of Game8.
Close
Rankings
- We could not find the message board you were looking for.
Gaming News


![Monster Hunter Stories 3 Review [First Impressions] | Simply Rejuvenating](https://img.game8.co/4438641/2a31b7702bd70e78ec8efd24661dacda.jpeg/thumb)

Popular Games

Genshin Impact Walkthrough & Guides Wiki
Honkai: Star Rail Walkthrough & Guides Wiki
Umamusume: Pretty Derby Walkthrough & Guides Wiki
Pokemon Pokopia Walkthrough & Guides Wiki
Resident Evil Requiem (RE9) Walkthrough & Guides Wiki
Monster Hunter Wilds Walkthrough & Guides Wiki
Wuthering Waves Walkthrough & Guides Wiki
Arknights: Endfield Walkthrough & Guides Wiki
Pokemon FireRed and LeafGreen (FRLG) Walkthrough & Guides Wiki
Pokemon TCG Pocket (PTCGP) Strategies & Guides Wiki


Recommended Games
Diablo 4: Vessel of Hatred Walkthrough & Guides Wiki
Fire Emblem Heroes (FEH) Walkthrough & Guides Wiki
Yu-Gi-Oh! Master Duel Walkthrough & Guides Wiki
Super Smash Bros. Ultimate Walkthrough & Guides Wiki
Pokemon Brilliant Diamond and Shining Pearl (BDSP) Walkthrough & Guides Wiki
Elden Ring Shadow of the Erdtree Walkthrough & Guides Wiki
Monster Hunter World Walkthrough & Guides Wiki
The Legend of Zelda: Tears of the Kingdom Walkthrough & Guides Wiki
Persona 3 Reload Walkthrough & Guides Wiki
Cyberpunk 2077: Ultimate Edition Walkthrough & Guides Wiki


All rights reserved
Copyright © 2024 HoYoverse, COGNOSPHERE. All Rights Reserved.
The copyrights of videos of games used in our content and other intellectual property rights belong to the provider of the game.
The contents we provide on this site were created personally by members of the Game8 editorial department.
We refuse the right to reuse or repost content taken without our permission such as data or images to other sites.