Fifth Kalpa Walkthrough and Item Locations
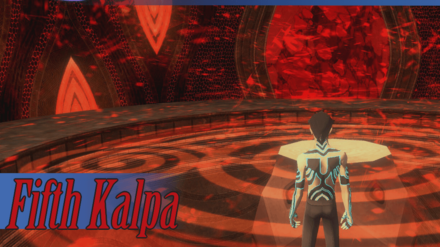
This is a walkthrough for the Fifth Kalpa in Shin Megami Tensei III HD Remaster (SMT Nocturne) for the Nintendo Switch, PS4, and Steam. Here you'll find a guide on how to complete this area, general tips, and a list of items that can be found.
| Previous | Next |
|---|---|
| Fourth Kalpa Walkthrough | - |
How to Unlock Fifth Kalpa
DLC Only Content
You will only be able to access this content if you are playing the Chronicle or Maniax version of the game.
Accessible after defeating Beelzebub and Obtaining the Star Key
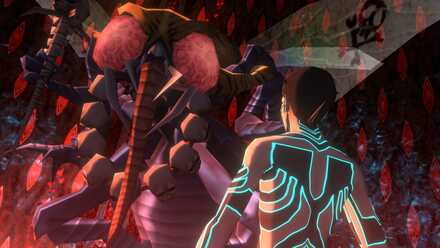
Only after defeating Beelzebub in the Fourth Kalpa will players be able to retrieve the Star Key. This key is the only way to unlock the path to the Fifth Kalpa dungeon in the Labyrinth of Amala.
Fifth Kalpa Walkthrough
Labyrinth of Amala Entrance & Fourth Kalpa
| 1 | 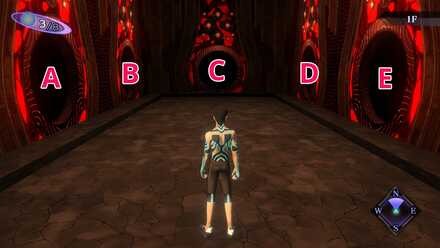 For players who have unlocked the 5th path (Path E), use that instead and skip to the Fifth Kalpa section of this walkthrough. |
|---|---|
| 2 | Upon landing, enter the North door. |
| 3 | Go through this room's door and run straight, entering the other door directly in front of you (northern door). |
| 4 | Follow the corridor until you come to an intersection. Turn right and go into the door in front of you. |
| 5 | Once in the new room, take a right and keep going straight. Ignore the doors to your left and enter the South door at the end of the hallway. |
| 6 | Take the ladder down to the 12 Meters of Eternity corridor in the B1 level. |
| 7 | Enter the warp point at any of the following Kagutsuchi Phases: 1, 3, 5, or 7. This will bring players to the Road To Hell area of the Kalpa. |
| 8 | Upon arrival in the Road To Hell area, run straight down the hallway and into the opposite warp point. |
| 9 | Now, players will have reached the end of the 12 Meters of Eternity corridor. Use the ladder to go down to the B2 level. |
| 10 | Follow along the corridor, ignoring the doors to your left. When you reach the intersection with a transparent wall in front of you, turn right and head into the Fifth Kalpa doorway. |
| 11 | Run past the peephole and, using the path inside the room behind it, jump down to the Fifth Kalpa entrance. Prepare for another falling mini-game. This time, obstacles and coins can come from behind you so take care not to take too much damage. |
Fifth Kalpa
To get to B6 of this kalpa, players will need demons that have at least 25 stats points in Magic and Agility (Dante will not be an option). We recommend getting the Uber Pixie behind the Strength door.
| Objectives | |
|---|---|
| 1 | From the arrival area, follow the hallway down until you reach a ladder. Use it to descend to the B1 level. |
| 2 | The ladder takes you to the center of the B1 level. Exit through the door in front of you. |
| 3 | You will exit into the B1 central lobby while facing south. Enter the western door of this lobby. |
| 4 | After entering, go straight until you reach a T-intersection. Some walls in this area are illusions. Just keep heading straight until you come to the intersection. |
| 5 | At the intersection, take the south path, walking through the illusory wall, and entering the one-way door on the other side. |
| 6 | From here (facing south), take a left turn to get to another T-intersection. Go left and then right to get to the ladder leading down to B2. Use it to go down. |
| 7 | Upon landing, take the first and only right. Go to the end of this hallway to find a switch to your right. |
| 8 | 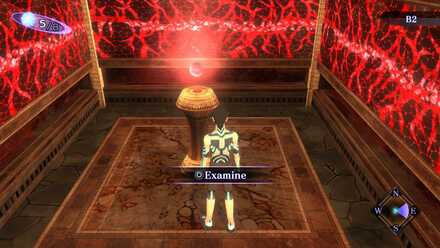 Activate the switch to open the locked door. |
| 9 | Go through the locked door, following the hallway until you come to a ladder. Use it to descend to the B3 level. |
| 10 | Upon landing, head out through the door in front of you. Face right and you should see a door right next to where you exited. Go through it and the door behind it. |
| 11 | After exiting the second door, take two lefts until you see another door. Go through it and use the ladder to go down to the B4 level. |
| 12 | In the B4 level, exit through the door in front of you. This brings you to the main area with brand new stat doors. Warning: These stat doors will test for your demons' stats. If an offered demon is found lacking, they will be killed and the player will be sent back to the beginning door of the B4 level. |
| 13 | Immediately turn right as soon as you exit and head for the first start door. You can test out the Strength door first to get the Uber Pixie, provided you still have her or the demon you fused her with. You'd need to offer a demon with at least 25 Str and then offer Pixie / Fused Demon to the South door. |
| 14 | 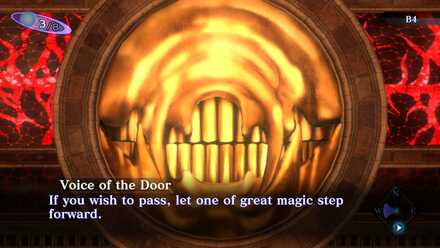 Offer a demon with a high Magic stat. The Magic stat should be at least 25. |
| 15 | Once you pass this first test, go straight along the hallway and take the second left. |
| 16 | 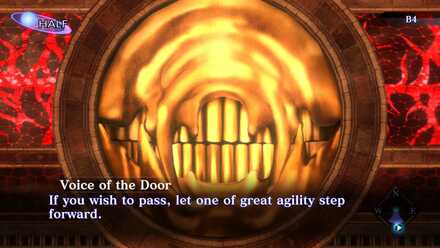 You should see a new stat door to your right as soon as you turn the corner. Go to it and offer a demon with a high Agility stat. The Agility stat should be at least 25. |
| 17 | Once past this door, take a right turn and use the one-way door in front of you. |
| 18 | Take another right and use the one-way door you see around the bend. |
| 19 | From here, take a left and head through the next one-way door. |
| 20 | Turn left upon exit, then keep running straight (past 2 one-way doors) until you reach the end of the corridor. |
| 21 | Facing south, turn left and head through the one-way door there. |
| 22 | Follow the hallway until you reach a door to your right. Enter through it. The room on the other side should have a demon between two doors. |
| 23 | Enter the door to your right (facing south), and use the ladder behind it to descend to the lower level. |
| 24 | Upon landing, the door directly in front of you will open to the boss fight with Metatron. Prepare for this boss fight before entering the door as a cutscene will start once you enter, just like with the Beelzebub fight. |
| 25 | 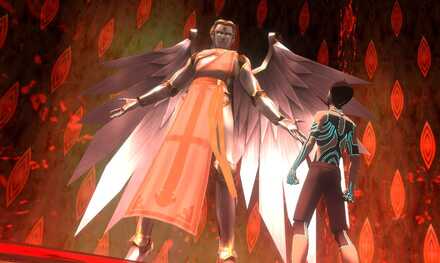 Beat him in order to access the Lift of the Abyss. |
| 26 | After beating Metatron, run past where he was and go into the opposite door from where you entered. Use the ladder on the other side of the door to descend to the B6 level. |
| 27 | Upon landing, keep going straight. Pass through the red water and enter the door on the other end of the hallway. The red water is safe. It does not do floor damage. |
| 28 | Keep heading straight until you reach another T-intersection. Take the left turn and follow the corridor until you reach a door. Enter this door. |
| 29 | 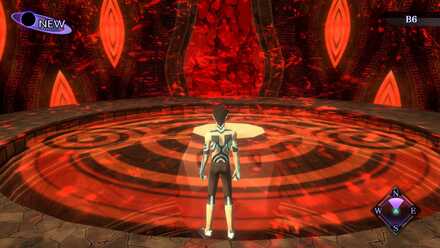 Ride the Lift of the Abyss down and meet Lucifer to unlock the True Demon ending. |
Minimum Stat Requirements
There are doors with stat requirements your demons have to successfully qualify for to complete this dungeon. Below, you'll find the minimum stat requirements needed of your demons so they can be offered.
| Stat Door | Minimum Stat Requirement |
|---|---|
| Magic | 25 Mag |
| Agility | 20 Agi |
| Strength | 25 Str |
| Luck | 20 Luc |
| Vitality | 25 Vit |
Fifth Kalpa Bosses
Metatron Boss Fight
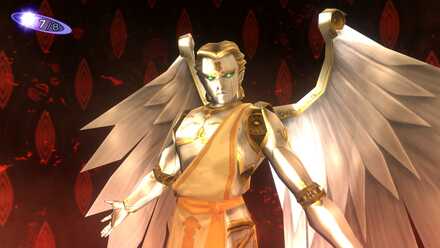
Defeating Metatron is needed to clear this Kalpa Dungeon. Unlike Beelzebub, Metatron makes use of different, hard-hitting Almighty spells like Fire of Sinai and Megidolaon.
When planning to fight him, make sure to equip the Demi-fiend with a Null for Light, while bringing along a demon or two that has strong healing spells.
Fifth Kalpa Maps
| 1F | 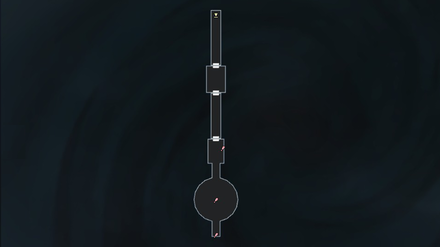 |
|---|---|
| B1 | 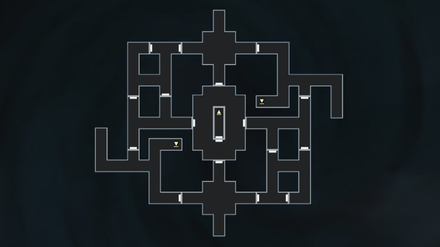 |
| B2 | 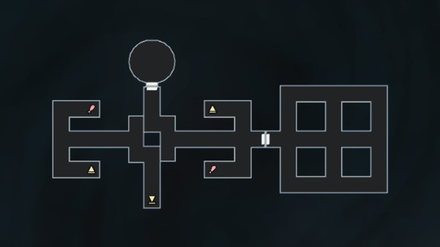 |
| B3 | 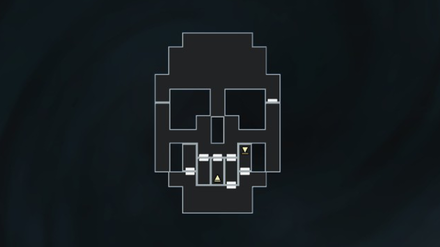 |
| B4 | 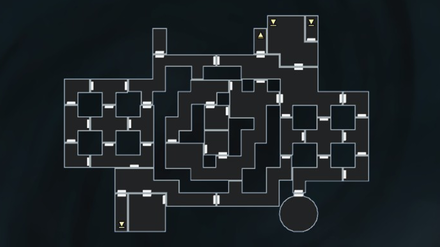 |
| B5 | 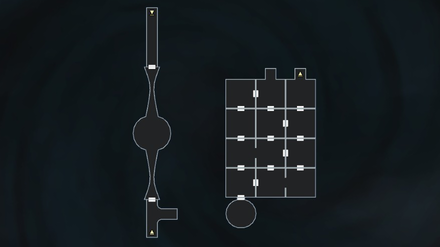 |
| B6 | 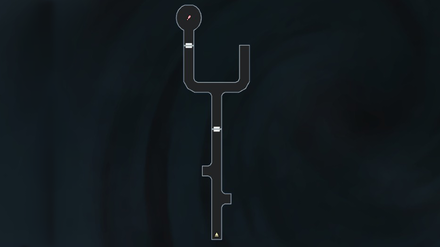 |
Fifth Kalpa NPCs
B1
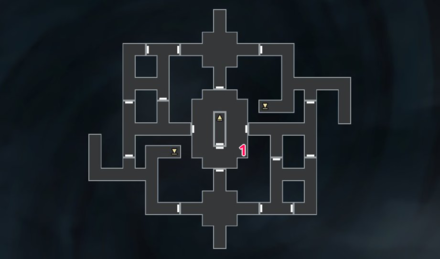
| NPC | |
|---|---|
| 1 | Yomotsu-Shikome |
Yomotsu-Shikome
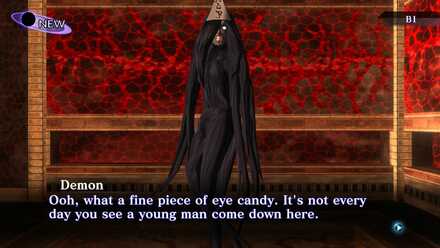
Tell this Yomotsu-Shikome that she does not look like a hag. In return, she will fully heal the player. Do note that this interaction can only be used once.
B3
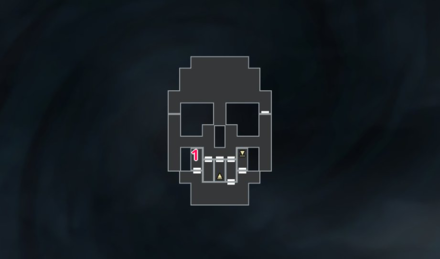
| NPC | |
|---|---|
| 1 | Shady Surgeon |
Shady Surgeon
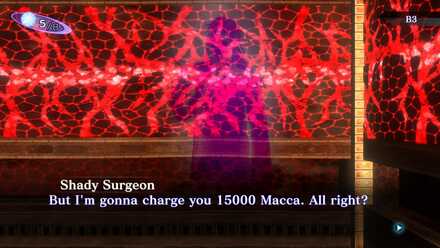
The Shady Surgeon in the Hell's Hall level of the Fourth Kalpa dungeon will charge Macca to heal players. For a full heal, he asks for 15,000 Macca.
He can be viable for healing weakened demons in one go since the floor below can potentially kill the demons you have in your roster.
B4
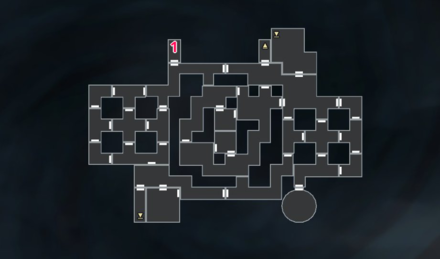
| NPC | |
|---|---|
| 1 | Souls Offering Rest |
Souls Offering Rest
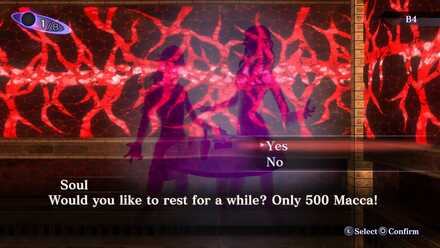
These souls will offer players a chance to rest and heal up, for a fee of 500 Macca. Accepting will teleport players back to the entrance with a significant amount of their Macca missing.
B5
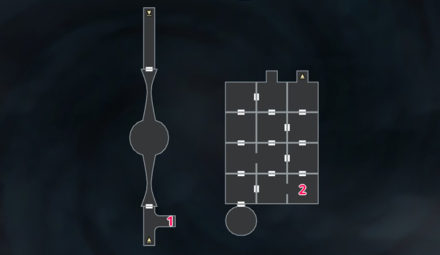
| NPC | |
|---|---|
| 1 | Souls Offering Rest |
| 2 | Shady Broker |
Souls Offering Rest
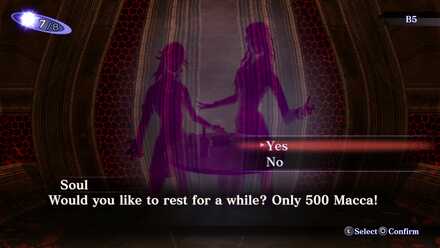
These souls will offer players a chance to rest and heal up, for a fee of 500 Macca. Accepting will teleport players back to the entrance with a significant amount of their Macca missing.
These souls can be used to quickly exit the dungeon, provided that the player does not want to meet up with Lucifer. However, do remember that they take a lot of Macca for their services.
Fifth Kalpa Obtainable Items
B1
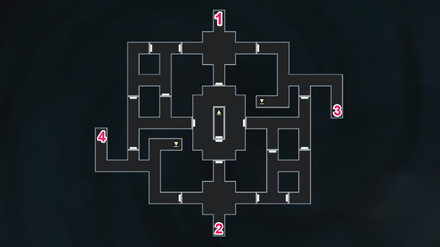
| Obtained from | Items | |
|---|---|---|
| 1 | Mystical Chest | Balm of Rising x 1 |
| 2 | Mystical Chest | Magic Mirror x 1 |
| 3 | Cache Cube | Bead x 1 |
| 4 | Cache Cube | Chakra Drop x 1 |
B2
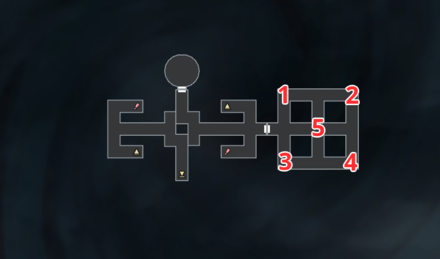
| Obtained from | Items | |
|---|---|---|
| 1 | Mystical Chest | Jade x 4 |
| 2 | Cache Cube | 150,000 Macca |
| 3 | Mystical Chest | Lucky Ticket x 25 |
| 4 | Mystical Chest | Magic Incense x 3 |
| 5 | Cache Cube | Deathstone x 3 |
B4
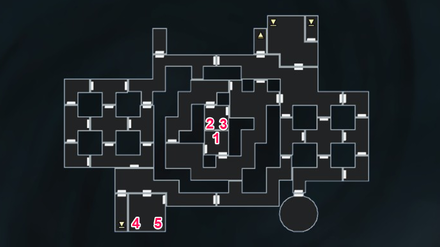
| Obtained from | Items | |
|---|---|---|
| 1 | Cache Cube | Bead x 1 |
| 2 | Mystical Chest Need Black Frost in your party |
Bead of Life x 5 |
| 3 | Mystical Chest Need Black Frost in your party |
Great Chakra x 5 |
| 4 | Mystical Chest Need Beelzebub in your party |
Balm of Rising x 10 |
| 5 | Mystical Chest Need Beelzebub in your party |
Soma x 10 |
Fifth Kalpa General Tips
How to Get Uber Pixie
Behind the Strength Door at B4 of Fifth Kalpa
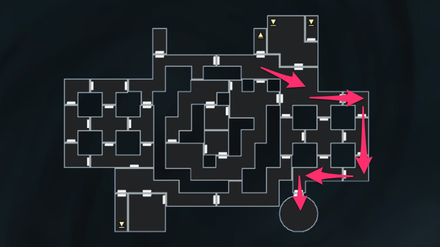
Go through the Strength door that requires at least 25 Str and then head over to the Burial Chamber for the first time and sacrifice your Pixie to the door.
If you've kept your first Pixie, an evolution of her, or a Fused demon that used her as material, then you can offer that to a door in the B4 level to get the upgraded Pixie.
Uber Pixie Stats
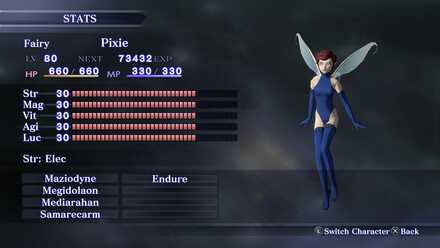
For players having a tough time getting through the different demon stat doors, the alternative is getting the upgraded, level 80 Pixie.
How to Get Special Girimekhala
Shady Broker in B5 Accessible via the Demon Brimming with Light Door
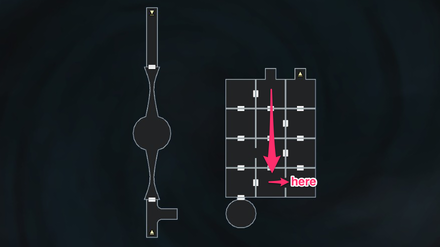
Offer Metatron to the Demon Brimming with Light Door. You'll get to open only three doors in this area.
Go straight through the three South doors, then left to the open space and speak to the blue soul.
Girimekhala Stats
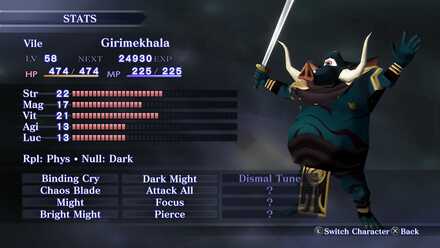
The Shady Broker in the B5 level of the Fifth Kalpa dungeon will sell a special Girimekhala to players for 200,000 Macca.
This Girimekhala is a Physical attacking/tanking demon that is useful in the active party as well as in Fusion (for inheriting the rare skill, Pierce).
| Special Girimekhala Skills | |
|---|---|
| Binding Cry | Chaos Blade |
| Might | Bright Might |
| Dark Might | Attack All |
| Focus | Pierce |
How to Access Demon Brimming with Light Door
Offer Metatron
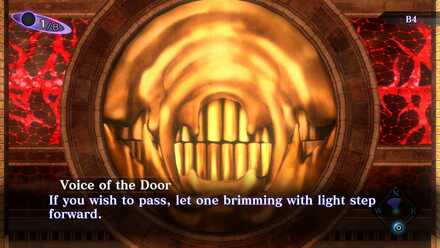
The demon who is brimming with Light is Metatron. Offer Metatron to the door and explore the labyrinth beneath.
How to Access Demon Who Embodies Chaos Door
Offer Beelzebub
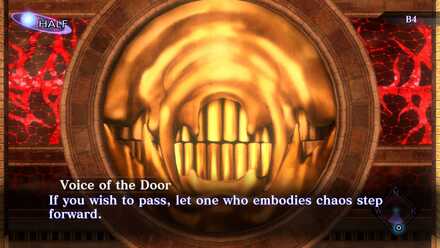
The demon who embodies Chaos is Beelzebub. Offer Beelzebub to the door to access the Mystical Chests inside.
How to Access Demon Whose Soul is Black Door
Offer Black Frost
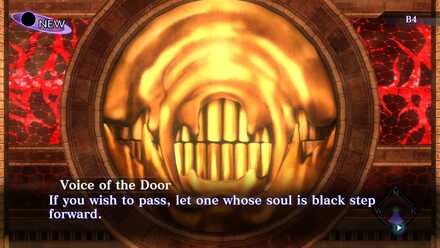
The demon whose soul is black is Black Frost. Offer Black Frost to access the two Mystical Chests inside.
Prepare a Diverse Roster of Magic and Physical
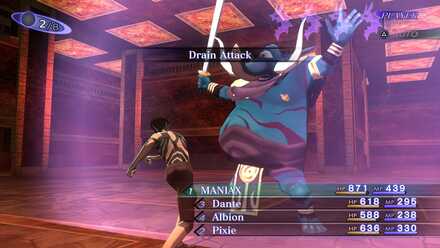
In this dungeon, players will encounter demons that are immune to or will absorb Physical damage.
To avoid taking too much damage and wasting your Press Turns by passing, make sure your roster has decent damage spread between Physical and Magical.
Shin Megami Tensei 3: Nocturne Related Links

Story Walkthrough Guides
Endings Guide: How to Get All Endings
Labyrinth of Amala Guides
 First Kalpa Area First Kalpa AreaRecommended level: 20 |
 Second Kalpa Area Second Kalpa AreaRecommended level: 35 |
 Third Kalpa Area Third Kalpa AreaRecommended level: 50 |
 Fourth Kalpa Area Fourth Kalpa Area Recommended level: 65 |
 Fifth Kalpa Area Fifth Kalpa AreaRecommended level: 75 |
DLC Dungeon Guides
 Where the Demi-Fiend was Born Where the Demi-Fiend was Born |
 Center of the Conception Center of the Conception |
Comment
Doesn’t say anything about the Raidou mahjong tile portion. Picking the left gets you 100k and picking right gets you 1 Macca.
Author
Fifth Kalpa Walkthrough and Item Locations
improvement survey
03/2026
improving Game8's site?

Your answers will help us to improve our website.
Note: Please be sure not to enter any kind of personal information into your response.

We hope you continue to make use of Game8.
Rankings
- We could not find the message board you were looking for.
Gaming News
Popular Games

Genshin Impact Walkthrough & Guides Wiki

Honkai: Star Rail Walkthrough & Guides Wiki

Umamusume: Pretty Derby Walkthrough & Guides Wiki

Pokemon Pokopia Walkthrough & Guides Wiki

Resident Evil Requiem (RE9) Walkthrough & Guides Wiki

Monster Hunter Wilds Walkthrough & Guides Wiki

Wuthering Waves Walkthrough & Guides Wiki

Arknights: Endfield Walkthrough & Guides Wiki

Pokemon FireRed and LeafGreen (FRLG) Walkthrough & Guides Wiki

Pokemon TCG Pocket (PTCGP) Strategies & Guides Wiki
Recommended Games

Diablo 4: Vessel of Hatred Walkthrough & Guides Wiki

Cyberpunk 2077: Ultimate Edition Walkthrough & Guides Wiki

Fire Emblem Heroes (FEH) Walkthrough & Guides Wiki

Yu-Gi-Oh! Master Duel Walkthrough & Guides Wiki

Super Smash Bros. Ultimate Walkthrough & Guides Wiki

Pokemon Brilliant Diamond and Shining Pearl (BDSP) Walkthrough & Guides Wiki

Elden Ring Shadow of the Erdtree Walkthrough & Guides Wiki

Monster Hunter World Walkthrough & Guides Wiki

The Legend of Zelda: Tears of the Kingdom Walkthrough & Guides Wiki

Persona 3 Reload Walkthrough & Guides Wiki
All rights reserved
©ATLUS. ©SEGA. All rights reserved. ATLUS is registered in the U.S. Patent and Trademark Office. ATLUS, the ATLUS logo, SHIN MEGAMI TENSEI, SHIN MEGAMI TENSEI NOCTURNE and SMT are either registered trademarks or trademarks of ATLUS Co., Ltd. or its affiliates.
©CAPCOM CO., LTD. All rights reserved.
The copyrights of videos of games used in our content and other intellectual property rights belong to the provider of the game.
The contents we provide on this site were created personally by members of the Game8 editorial department.
We refuse the right to reuse or repost content taken without our permission such as data or images to other sites.
 Shinjuku Hospital Walkthrough
 Yoyogi Park and Shibuya Walkthrough
 Amala Network 1 Walkthrough
 Ginza and the Great Underpass Walkthrough
 Ikebukuro Walkthrough
 Assembly of Nihilo Walkthrough
 Kabukicho Walkthrough
 Asakusa and Obelisk Walkthrough
 Amala Network 2 Walkthrough
 Yoyogi Park 2 Walkthrough
 Amala Temple Walkthrough
 Mifunashiro and Yurakucho Walkthrough
 Diet Building Walkthrough
 Bandou Shrine Walkthrough
 Tower of Kagutsuchi Walkthrough




![Monster Hunter Stories 3 Review [First Impressions] | Simply Rejuvenating](https://img.game8.co/4438641/2a31b7702bd70e78ec8efd24661dacda.jpeg/thumb)


the stats door dose not work properly for no reason they won`t accept certain demons