Endings Guide: How to Get All Endings

This is a guide to getting all endings in Shin Megami Tensei III HD Remaster (SMT Nocturne) releasing for the Switch, Steam, and PS4. Here you'll find out about the methods of unlocking every story endings.
List of Contents
Spoiler Notes
This is a summary list of how to get all endings in the game. As such, it contains end-game content decisions and will include some heavy spoilers. For new players, it is suggested to turn back now!
How to Get True Demon Ending
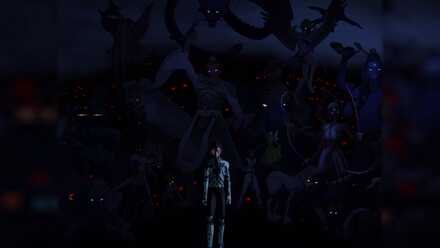
In the True Demon Ending, the Protagonist will be able to recreate a new world and stop the cycle of the apocalypse. Players can unlock this ending by completing the Amala Labyrinth before reaching the Tower of Kagutsuchi.
| Objectives | |
|---|---|
| ✔️ | Acquire all Menorah. |
| ✔️ | Complete the Amala Labyrinth before reaching Tower of Kagutsuchi. |
| ✔️ | Flagging or not flagging any Reason is not of essence. |
| ✔️ | Defeat Ahriman, Noah, Thor, Baal, and Kagutsuchi in Tower of Kagutsuchi. |
| ✔️ | Defeat Lucifer in Tower of Kagutsuchi. |
Obtain Menorahs from Fiend Bosses
To acquire all Menorah in the game, you have to defeat the fiend bosses who hold the menorah. You'll need a total of 11 Menorah to access all the Kalpas in the Amala Labyrinth.
List of Fiend Bosses and Locations
Complete the Amala Labyrinth Before Reaching Tower of Kagutsuchi
You'd need to complete all five Kalpas of Amala Labyrinth to get the True Demon Ending. Make sure to complete the labyrinth before you reach Tower of Kagutsuchi.
Flagging or Not Flagging Any Reason Is Not Important
As long as you have completed the Amala Labyrinth, flagging or not flagging any Reason does not prevent you from getting the True Demon Ending.
Defeat All the Bosses in Tower of Kagutsuchi
You must defeat Ahriman, Noah, Thor, Baal, Kagutsuchi, and Lucifer in Tower of Kagutsuchi to finally get the True Demon Ending.
How to Get Demon Ending (Neutral Ending)
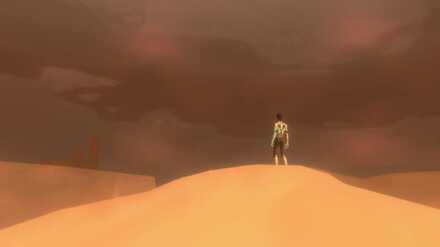
In the Demon Ending (Neutral Ending), there is no new world forged. The Vortex world will be stuck in a post-apocalyptic state, housing demons, until the next Conception.
| Objectives | |
|---|---|
| ✔️ | Do not complete the Amala Labyrinth. |
| ✔️ | Do not align with any ally and reject all Reasons. |
| ✔️ | Respond Cowardly to Aradia's questions in Yoyogi Park. |
| ✔️ | Confront Kagutuschi in Tower of Kagutsuchi. |
Respond Cowardly to Aradia's Questions in Yoyogi Park
You must answer cowardly to both of Aradia's questions at the end of Yoyogi Park to unlock the neutral ending.
Answer '...I’m terrified' to Neutral Flag 2 / 2 Question
Do you fear the suffering and humiliation?...I’m terrified.
(Neutral Flag 1 / 2)
Answer '...I’m terrified' to Neutral Flag 1 / 2 Question
Do you fear the deceit, the torment?...I’m terrified.
(Neutral Flag 2 / 2)
How to Get Freedom Ending
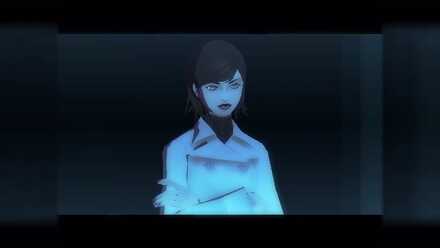
The Freedom Ending is tied to the teacher, Yuko Takao. The world is reverted to its state before the Conception.
| Objectives | |
|---|---|
| ✔️ | Do not complete the Amala Labyrinth. |
| ✔️ | Do not align with any ally and reject all Reasons, or alternatively, Align yourself with at least two allies and Reasons. |
| ✔️ | Respond Courageously to Aradia's questions in Yoyogi Park. |
| ✔️ | Defy Hikawa in Diet Building. |
| ✔️ | Defeat the Final Boss. |
Respond Courageously to Aradia's Questions in Yoyogi Park
You must answer courageously to both of Aradia's questions at the end of Yoyogi Park to unlock the Freedom Ending.
Answer 'I can take it' to Freedom Flag 1 / 3 Question
Do you fear the suffering and humiliation?
I can take it. (Freedom Flag 1 / 3)
Answer 'I can take it' to Freedom Flag 2 / 3 Question
Do you fear the deceit, the torment?
I can take it. (Freedom Flag 2 / 3)
Defy Hikawa in the Diet Building
Answer 'Can't do that' to Freedom Flag 3 / 3 Question
Now, I’d appreciate it if you’d stand aside and cease with the interruptions.
Can’t do that. (Freedom Flag 3 / 3)
How to Get Reason of Musubi Ending
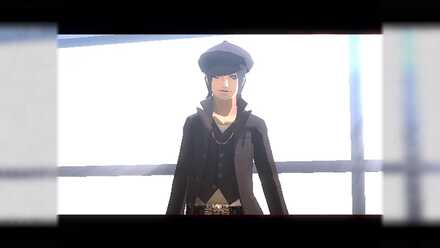
Reason of Musubi is tied with Isamu and is built on the principle of the individual as standing on their own. It is a world of isolation where everyone is independent and separates themselves from others.
| Objectives | |
|---|---|
| ✔️ | Do not complete the Amala Labyrinth. |
| ✔️ | Talk to Isamu and agree with Isamu's first Musubi flag question during your second run in Amala Network. |
| ✔️ | Agree with Isamu in Amala Temple. |
| ✔️ | Defeat Ahriman and Baal in Tower of Kagutsuchi. |
| ✔️ | Defeat the Final Boss. |
Agree with Isamu in Amala Network for Musubi Flag 1 / 2
Wouldn’t it be nice to have a world to yourself?
I can relate. (Musubi Flag 1 / 2)
Agree with Isamu in Amala Temple for Musubi Flag 2 / 2
Will you do it, for the sake of Musubi?
All right. (Musubi Flag 2 / 2)
How to Get Reason of Shijima Ending
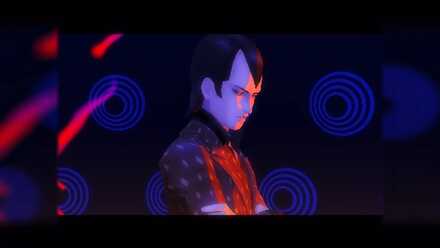
The Reason Shijima is tied with Hikawa and is the opposite of Musubi. It is a world where Individualism is looked down on, and the world should be in perfect harmony.
| Objectives | |
|---|---|
| ✔️ | Do not complete the Amala Labyrinth. |
| ✔️ | Agree with Hikawa at Mantra HQ. |
| ✔️ | Do not stop Hikawa in Diet Building. |
| ✔️ | Defeat Noah and Baal in Tower of Kagutsuchi. |
| ✔️ | Defeat the Final Boss. |
Agree with Hikawa at Mantra HQ
Do you not agree that the world should be ruled by serenity?
Actually, I do. (Shijima 1 / 2)
Do not stop Hikawa in Diet Building
Now, I’d appreciate it if you’d stand aside and cease with the interruptions.
Fine by me. (Shijima 2 / 2)
How to Get Reason of Yosuga Ending
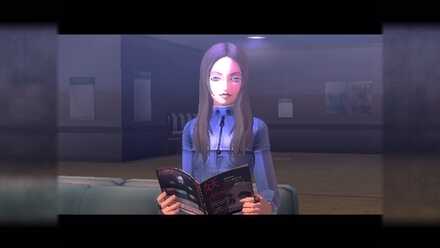
Reason of Yosuga is tied with Chiaki and is based on 'The Strongest Rule' principle. Power is the only thing important in this world.
| Objectives | |
|---|---|
| ✔️ | Do not complete the Amala Labyrinth. |
| ✔️ | Do not flag Shijima and Musubi. |
| ✔️ | Agree with Chiaki in Mantra HQ for Yosuga Flag 1 / 2. |
| ✔️ | Agree with Chiaki in Mifunashiro for Yosuga Flag 2 / 2. |
| ✔️ | Defeat Futomimi in Mifunashiro. |
| ✔️ | Complete Tower of Kagutsuchi. |
Agree with Chiaki in Mantra HQ
You know what I’m saying, don’t you?
Yeah, I get it. (Yosuga Flag 1 / 2)
Agree with Chiaki in Mifunashiro
I know you understand what I mean.
I see your point. (Yosuga Flag 2 / 2)
Shin Megami Tensei 3: Nocturne Related Guides

Story Walkthrough Guides
Endings Guide: How to Get All Endings
Labyrinth of Amala Guides
 First Kalpa Area First Kalpa AreaRecommended level: 20 |
 Second Kalpa Area Second Kalpa AreaRecommended level: 35 |
 Third Kalpa Area Third Kalpa AreaRecommended level: 50 |
 Fourth Kalpa Area Fourth Kalpa Area Recommended level: 65 |
 Fifth Kalpa Area Fifth Kalpa AreaRecommended level: 75 |
DLC Dungeon Guides
 Where the Demi-Fiend was Born Where the Demi-Fiend was Born |
 Center of the Conception Center of the Conception |
Author
Endings Guide: How to Get All Endings
improvement survey
03/2026
improving Game8's site?

Your answers will help us to improve our website.
Note: Please be sure not to enter any kind of personal information into your response.

We hope you continue to make use of Game8.
Rankings
- We could not find the message board you were looking for.
Gaming News
Popular Games

Genshin Impact Walkthrough & Guides Wiki

Honkai: Star Rail Walkthrough & Guides Wiki

Umamusume: Pretty Derby Walkthrough & Guides Wiki

Pokemon Pokopia Walkthrough & Guides Wiki

Resident Evil Requiem (RE9) Walkthrough & Guides Wiki

Monster Hunter Wilds Walkthrough & Guides Wiki

Wuthering Waves Walkthrough & Guides Wiki

Arknights: Endfield Walkthrough & Guides Wiki

Pokemon FireRed and LeafGreen (FRLG) Walkthrough & Guides Wiki

Pokemon TCG Pocket (PTCGP) Strategies & Guides Wiki
Recommended Games

Diablo 4: Vessel of Hatred Walkthrough & Guides Wiki

Cyberpunk 2077: Ultimate Edition Walkthrough & Guides Wiki

Fire Emblem Heroes (FEH) Walkthrough & Guides Wiki

Yu-Gi-Oh! Master Duel Walkthrough & Guides Wiki

Super Smash Bros. Ultimate Walkthrough & Guides Wiki

Pokemon Brilliant Diamond and Shining Pearl (BDSP) Walkthrough & Guides Wiki

Elden Ring Shadow of the Erdtree Walkthrough & Guides Wiki

Monster Hunter World Walkthrough & Guides Wiki

The Legend of Zelda: Tears of the Kingdom Walkthrough & Guides Wiki

Persona 3 Reload Walkthrough & Guides Wiki
All rights reserved
©ATLUS. ©SEGA. All rights reserved. ATLUS is registered in the U.S. Patent and Trademark Office. ATLUS, the ATLUS logo, SHIN MEGAMI TENSEI, SHIN MEGAMI TENSEI NOCTURNE and SMT are either registered trademarks or trademarks of ATLUS Co., Ltd. or its affiliates.
©CAPCOM CO., LTD. All rights reserved.
The copyrights of videos of games used in our content and other intellectual property rights belong to the provider of the game.
The contents we provide on this site were created personally by members of the Game8 editorial department.
We refuse the right to reuse or repost content taken without our permission such as data or images to other sites.
 Shinjuku Hospital Walkthrough
 Yoyogi Park and Shibuya Walkthrough
 Amala Network 1 Walkthrough
 Ginza and the Great Underpass Walkthrough
 Ikebukuro Walkthrough
 Assembly of Nihilo Walkthrough
 Kabukicho Walkthrough
 Asakusa and Obelisk Walkthrough
 Amala Network 2 Walkthrough
 Yoyogi Park 2 Walkthrough
 Amala Temple Walkthrough
 Mifunashiro and Yurakucho Walkthrough
 Diet Building Walkthrough
 Bandou Shrine Walkthrough
 Tower of Kagutsuchi Walkthrough




![Monster Hunter Stories 3 Review [First Impressions] | Simply Rejuvenating](https://img.game8.co/4438641/2a31b7702bd70e78ec8efd24661dacda.jpeg/thumb)


