 Shinjuku Hospital Walkthrough
 Yoyogi Park and Shibuya Walkthrough
 Amala Network 1 Walkthrough
 Ginza and the Great Underpass Walkthrough
 Ikebukuro Walkthrough
 Assembly of Nihilo Walkthrough
 Kabukicho Walkthrough
 Asakusa and Obelisk Walkthrough
 Amala Network 2 Walkthrough
 Yoyogi Park 2 Walkthrough
 Amala Temple Walkthrough
 Mifunashiro and Yurakucho Walkthrough
 Diet Building Walkthrough
 Bandou Shrine Walkthrough
 Tower of Kagutsuchi Walkthrough
This survey will take about 1 minute.
Your answers will help us to improve our website.
Shin Megami Tensei 3: Nocturne (SMT Nocturne)
Ginza Walkthrough, Boss Battles, and Item Locations
This is a story walkthrough for Ginza in Shin Megami Tensei III: Nocturne (HD Remastered) for the Nintendo Switch, PS4, and Steam. Here you'll find a guide on how to complete this area, story section, boss strategies, general tips, and a list of items that can be found.
| Previous | Next |
|---|---|
| Amala Network 1 | Ikebukuro |
List of Contents
Ginza Story Walkthrough
Ginza Mall
| Objectives | |
|---|---|
| 1 | After using the Amala Link, you'll be transported to Ginza Mall B1. There is a Fountain of Life at the Northeast door. |
| 2 | From the terminal, go through the North door then head Northeast to Nyx's Lounge. You can find Rag's Jewelry (door with Yellow symbol) and a Cathedral of Shadows (door with Purple symbol). |
| 3 | 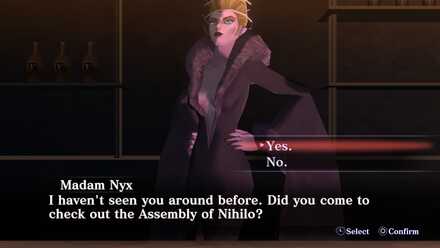 Speak with Madam Nyx and say you are looking for the Assembly of Nihilo. |
| 4 | Leave Nyx's Lounge then head West. Then turn left at the end of the hall to a South door. |
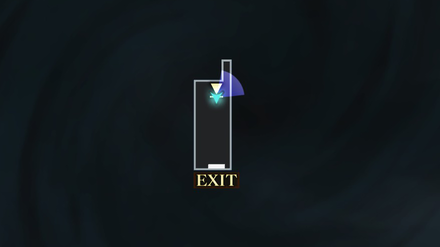
| 5 | Go up the stairs then exit the area. |
| 6 | You will be taken to the World Map. Go Southwest then stop at the middle of the intersection. Take the bottom left road until you reach Assembly of Nihilo. |
| 7 | Return to Madam Nyx after talking to Berith at the Assembly of Nihilo. |
| 8 | You will then be instructed to look for Gozu-Tennoh in Ikebukuro. |
| 9 | Head back out to the World Map and cross the bridges. Go Southeast and enter Harumi Warehouse. |
| 10 | Continue forward and enter the garage door. There are items nearby that you can pick up. |
| 11 | Push South, then take a right to access an S-Terminal (garage door with Orange symbol). We advise you to save your game at this point. |
| 12 | 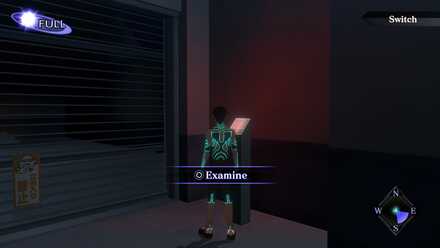 Exit S-Terminal, head East, and then examine the Switch. Continue and then descend down the ladder. |
Great Underpass of Ginza
| Objectives | |
|---|---|
| 13 | 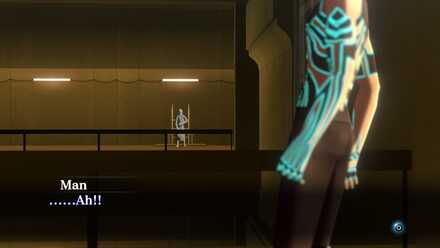 From B1, keep pushing West until you go through two doors, and then a cutscene will ensue. |
| 14 | Continue West, turn right, and then descend the Northeast ladder (to where the Man was in the cutscene). |
| 15 | Go forward and take the farthest door. Follow the path in the new room and go through the door. |
| 16 | 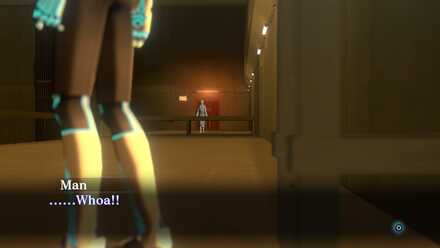 You will reach another platform. Go through the West door. Continue forward and another cutscene plays. |
| 17 | Press forward then turn right to the Northwest. Keep pushing forward and enter the West door. |
| 18 | Another cutscene with a group of Manikins. There's a Terminal through the first North door. Across on the other platform, a Junk Shop at the South door. |
| 19 | Cross to the Southwest platform, and then climb up the ladder to the Southeast. |
| 20 | From B1 platform, go Northeast to the other side, and continue forward. Descend the ladder you locate. |
| 21 | Back on the B2 platform, go West and then enter through the Northwest door. |
| 22 |  Another cutscene with a Collector Manikin. |
| 23 | Exit the room and go back up the ladder. From B1 platform, go Northeast to the other side, and continue forward until you reach the farthest West door. Enter then talk to the Manikin Gatekeeper. |
| 24 | 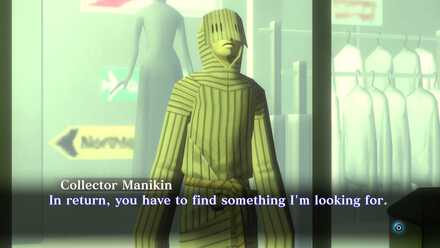 After being denied access, go back to the Collector Manikin and accept their Request in exchange for help. |
| 25 | Head back over to Ginza (a city crowded with people), return to Nyx's Lounge. You can use the Terminal found in Step 18. |
Collector Manikin's Request
| Objectives | |
|---|---|
| 26 | Exit the Terminal. Go through the North door, and then exit Ginza. |
| 27 | 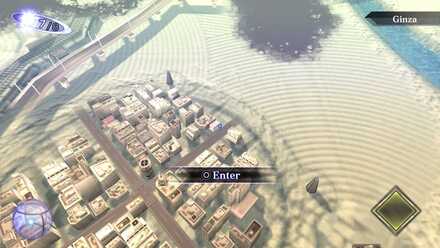 On the World Map, go to the upper-right road and enter the building. |
| 28 | Follow the path go through the door. There are items you can pick up in this room. Prepare for the boss fight that's about to ensue after you leave the room! |
| 29 | Leave the room after gathering Items. |
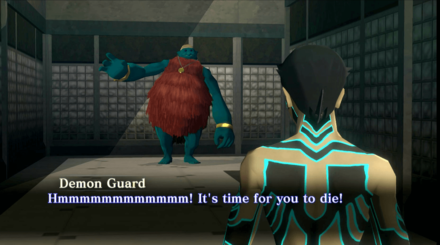
| Boss Fight | 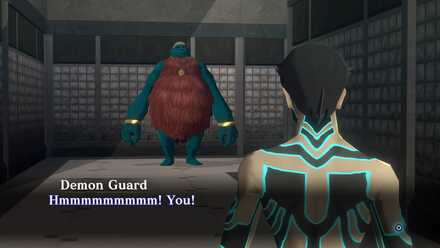 Boss Battle: Troll |
| 31 | After the boss fight, you may go back to the Great Underpass of Ginza. |
Great Underpass of Ginza - Part 2
| Objectives | |
|---|---|
| 32 | 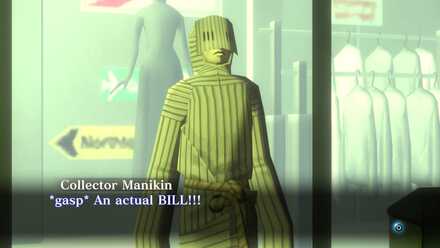 Go back to the Collector Manikin and speak with him. They will hand you a letter that can help you get through the Guard Manikin. |
| 33 | 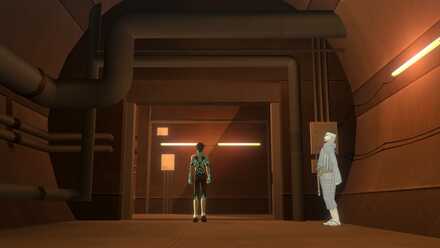 Give the letter to the Guard Manikin and pass through. |
| 35 | Make your way to the West door and prepare for an upcoming Boss Fight. |
| Boss Fight | 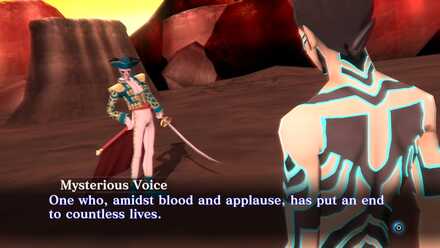 Boss Battle: Matador |
| 37 | 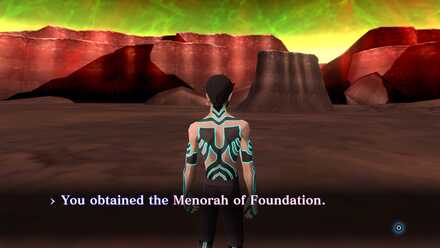 After defeating Matador, you will obtain the Menorah of Foundation. |
Labyrinth of Amala Will Be Unlocked
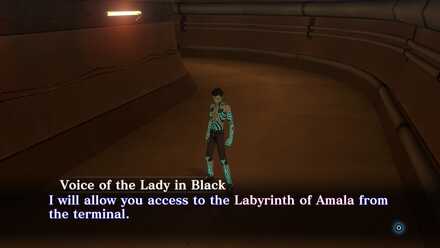
Lady in Black will now grant you access to the Labyrinth of Amala after defeating Matador, seeing as you now hold Menorah of Foundation, proving your worth and strength.
Great Underpass of Ginza A
| Objectives | |
|---|---|
| 38 | Start towards West and enter the West door. |
| 39 | Follow the path, turn left going South and then enter the West door. An S-Terminal can be found inside the West door before the ladder. |
| 40 | Descend the ladder, move down the stairs and head Northwest. Go up to the further platform to the Northwest and climb up the ladder. |
| 41 | Follow the path and descend the ladder to your left. |
| 42 | On B2, follow the pathway and climb the ladder. |
Great Underpass of Ginza B
| Objectives | |
|---|---|
| 43 | Enter the West door and then climb down the nearest ladder (Northwest ladder). |
| 44 | Get down the platform, to the water, then go straight ahead to the right-side stairs. Climb up the ladder. |
| 45 | Pace a little to the West and descend the North ladder. |
| 46 | Get down the platform, to the water, then go straight ahead again to the right-side stairs. Open the Northwest door. There is an S-Terminal located at the left-side stairs. |
| 47 | Climb the ladder and go through the door at the top. |
| 48 | On B1, enter the door to your right. Push forward and enter the door.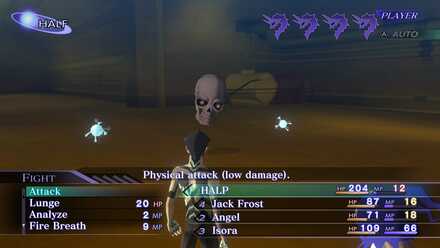 You might engage in a demon battle. You might engage in a demon battle. |
| 49 | Keep right in the cylindrical hallway and climb the ladder.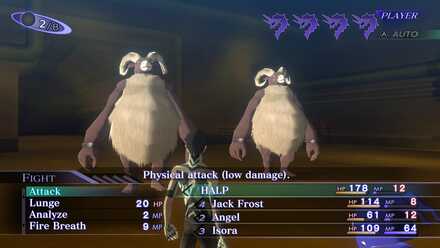 You might engage in a demon battle. You might engage in a demon battle. |
| 50 | 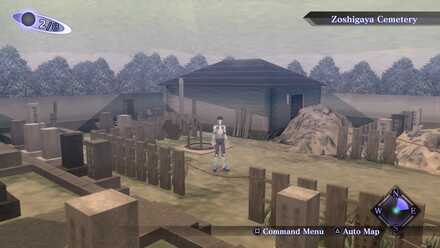 You will reach Zoshigaya Cemetery. Continue forward and exit the area. |
| 51 | On the World Map, come up from the cemetery and head North. Enter the building to proceed with the story. |
Ginza Boss Fights
Troll
This Troll isn't letting you escape with all of Loki's treasures. Time to play Mind games with this Troll.
| List of Boss Weaknesses | ||
|---|---|---|
| Mind |
While Mind skills do not necessarily inflict damage, exploiting Troll's weakness towards it will offer you more turns.
Matador

Matador challenges you to a duel to determine who is truly worthy of the Menorah. Use every skill at your disposal to get through this very tough boss.
| List of Boss Weaknesses | ||
|---|---|---|
| None, but Phys attacks can go a long way in damaging Matador. |
Matador gets two turns, and more often than not, he will always buff himself before striking. Buff your party by increasing your defense and offense.
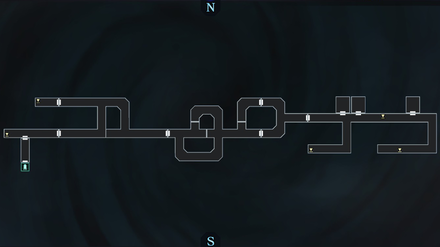
Ginza Maps
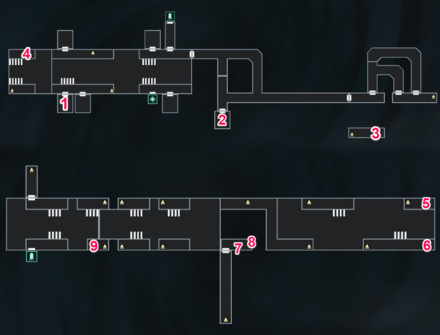
Ginza
| B1 | 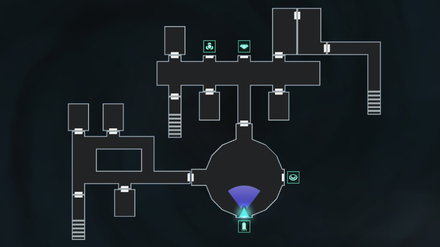 |
|---|---|
| 1F |  |
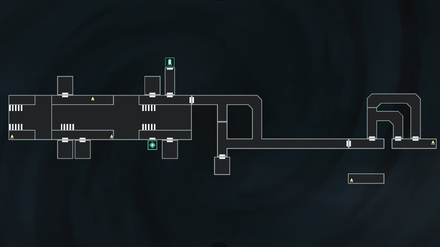
Harumi Warehouse
| 1F |
|---|
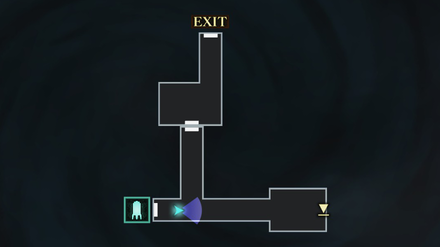 |
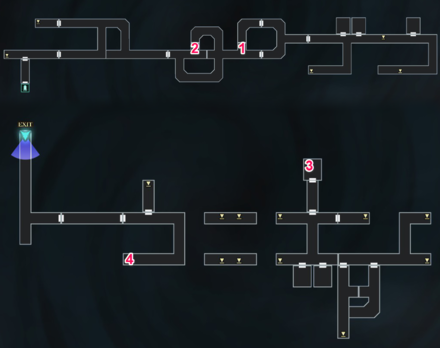
Great Underpass of Ginza
| B1 |
|---|
 |
 |
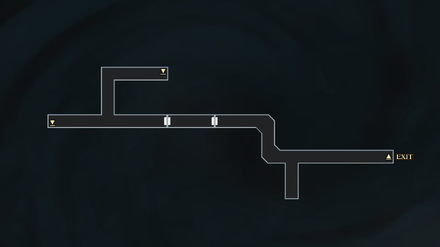
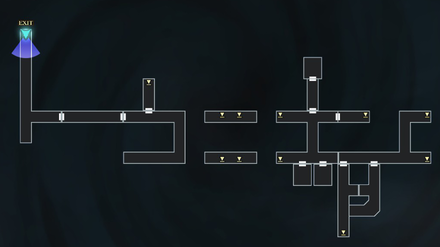 |
| B2 |
 |
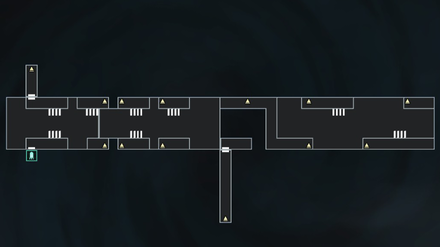 |
Zoshigaya Cemetery
| Zoshigaya Cemetery |
|---|
 |
Ginza Obtainable Magatamas
Ankh
Ankh can be purchased at the Junk Shop in the Great Underpass of Ginza.
Hifumi
Hifumi can be purchased at the Junk Shop in the Great Underpass of Ginza.
Kamudo
Kamudo can be purchased at the Junk Shop in the Great Underpass of Ginza.
Ginza Obtainable Items
World Map
| Obtained from | Items | |
|---|---|---|
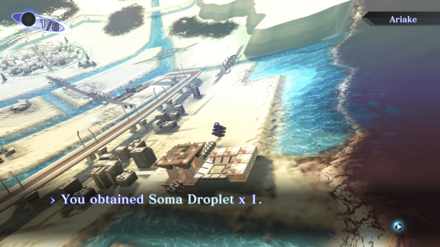
| 1 | Ariake East of Ginza |
Soma Droplet x 1 |
Ginza: B1
| Obtained from | Items | |
|---|---|---|
| 1 | Cache Cube | Repulse Bell x 1 |
| 2 | Cache Cube | 1000 Yen Bill x 1 |
| 3 | Mystical Chest | Sapphire x 1 |
| 4 | Mystical Chest | Pearl x 1 |
| 5 | Mystical Chest | Emerald x 1 |
Harumi Warehouse: 1F
| Obtained from | Items | |
|---|---|---|
| 1 | Cache Cube | Muscle Drink x 1 |
| 2 | Cache Cube | Makajam Rock x 1 |
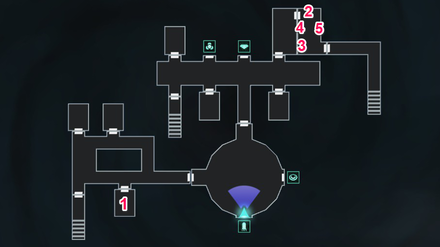
Great Underpass of Ginza: B2
| Obtained from | Items | |
|---|---|---|
| 1 | Cache Cube | Poison Arrow x 1 |
| 2 | Cache Cube | Mahama Rock x 2 |
| 3 | Cache Cube | Maragi Rock x 2 |
| 4 | Mystical Chest | Bead Chain x 1 |
| 5 | Mystical Chest | Bead Chain x 1 |
| 6 | Cache Cube | Life Stone x 2 |
| 7 | Cache Cube | It's a trap! Your party takes damage. |
| 8 | Mystical Chest | Amethyst x 1 |
| 9 | Mystical Chest | Diamond x 1 |
Great Underpass of Ginza: B1
| Obtained from | Items | |
|---|---|---|
| 1 | Cache Cube | Medicine x 2 |
| 2 | Cache Cube | Smoke Ball x 1 |
| 3 | Cache Cube | Medicine x 2 |
| 4 | Cache Cube | Soma Droplet x 1 |
Ginza General Tips
Level Up Demi-Fiend to At Least Lvl18 Before Facing Matador
Matador is your toughest fight so far at this point in the game, so make Demi-Fiend and your demons stronger. You can level grind in the Ginza Underpass tunnels.
Prioritize Buying Hifumi and Kamudo Magatama
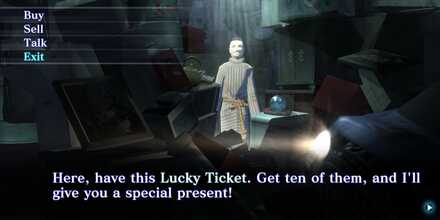
You can purchase both of these Magatama from the Manikin’s shop.
Shin Megami Tensei 3: Nocturne Related Links

Story Walkthrough Guides
Endings Guide: How to Get All Endings
Labyrinth of Amala Guides
 First Kalpa Area First Kalpa AreaRecommended level: 20 |
 Second Kalpa Area Second Kalpa AreaRecommended level: 35 |
 Third Kalpa Area Third Kalpa AreaRecommended level: 50 |
 Fourth Kalpa Area Fourth Kalpa Area Recommended level: 65 |
 Fifth Kalpa Area Fifth Kalpa AreaRecommended level: 75 |
DLC Dungeon Guides
 Where the Demi-Fiend was Born Where the Demi-Fiend was Born |
 Center of the Conception Center of the Conception |
Author
Ginza Walkthrough, Boss Battles, and Item Locations
Please participate in our site
improvement survey
03/2026
improvement survey
03/2026
Would you assist in
improving Game8's site?
improving Game8's site?

×
We are listening to our users' valuable opinions and discussing how to act on them.
The information collected through this survey will be used for the purpose of improving our services. In addition, the information will only be disclosed a part of a statistic in a format that will not allow identification of personal information.
Begin Survey
Not Now
×
Please rate each item regarding Game8.co's Advertisements.
Amount of Ads
Very Dissatisfied
Somewhat Dissatisfied
Fine
Somewhat Satisfied
Highly Satisfied
Placement of Ads
Timing of Ad Display
Ad Loading Speed
Safeness of Ads
Content of Ads
×
Please rate each item regarding Game8.co's Quality of Articles.
Amount of information
Very Dissatisfied
Somewhat Dissatisfied
Fine
Somewhat Satisfied
Highly Satisfied
Frequency of updates
Speed of new information
Accuracy of articles
Understandibility of articles
Readability of sentences
×
Please rate each item regarding Game8.co's Usability of the Site.
Ease of finding information
Very Dissatisfied
Somewhat Dissatisfied
Fine
Somewhat Satisfied
Highly Satisfied
Loading Speed
Use of Color
Font Size
Visibility of Images
Easy to Understand Layout
×
Please rate each item regarding Game8.co's Message Boards, Comments.
Ease of Writing
Very Dissatisfied
Somewhat Dissatisfied
Fine
Somewhat Satisfied
Highly Satisfied
Readability
Ease in Finding Information
Comment Quality
Comment Quantity
Admin Response
×
Please rate each item regarding Game8.co's Site's new design.
Please rate our site's new design
Very Dissatisfied
Somewhat Dissatisfied
Fine
Somewhat Satisfied
Highly Satisfied
Do you think that the website's design change makes the site easier to use?
Has the new design made it easier for you to find information on the site?
Has the new design improved the overall visual appeal of the site?
How would you rate your overall satisfaction with the new design of the site?
×
How likely are you to recommend Game8 to someone you know?
Very Unlikely
0
1
2
3
4
5
6
7
8
9
10
Very Likely
If you have other opinions regarding potential improvement to the website, please share them with us. We would appreciate your honest opinion.
Note: This is a free response section, so you can proceed without entering anything.
Note: Please be sure not to enter any kind of personal information into your response.
Note: Please be sure not to enter any kind of personal information into your response.
×
Thank You
×
Thank you for participating in our survey! Your answers will help us to improve the quality of our website and services.
We hope you continue to make use of Game8.
We hope you continue to make use of Game8.
Close
Rankings
- We could not find the message board you were looking for.
Gaming News


![Monster Hunter Stories 3 Review [First Impressions] | Simply Rejuvenating](https://img.game8.co/4438641/2a31b7702bd70e78ec8efd24661dacda.jpeg/thumb)
Popular Games

Genshin Impact Walkthrough & Guides Wiki
Honkai: Star Rail Walkthrough & Guides Wiki
Umamusume: Pretty Derby Walkthrough & Guides Wiki
Pokemon Pokopia Walkthrough & Guides Wiki
Resident Evil Requiem (RE9) Walkthrough & Guides Wiki
Monster Hunter Wilds Walkthrough & Guides Wiki
Wuthering Waves Walkthrough & Guides Wiki
Arknights: Endfield Walkthrough & Guides Wiki
Pokemon FireRed and LeafGreen (FRLG) Walkthrough & Guides Wiki
Pokemon TCG Pocket (PTCGP) Strategies & Guides Wiki


Recommended Games
Diablo 4: Vessel of Hatred Walkthrough & Guides Wiki
Cyberpunk 2077: Ultimate Edition Walkthrough & Guides Wiki
Fire Emblem Heroes (FEH) Walkthrough & Guides Wiki
Yu-Gi-Oh! Master Duel Walkthrough & Guides Wiki
Super Smash Bros. Ultimate Walkthrough & Guides Wiki
Pokemon Brilliant Diamond and Shining Pearl (BDSP) Walkthrough & Guides Wiki
Elden Ring Shadow of the Erdtree Walkthrough & Guides Wiki
Monster Hunter World Walkthrough & Guides Wiki
The Legend of Zelda: Tears of the Kingdom Walkthrough & Guides Wiki
Persona 3 Reload Walkthrough & Guides Wiki


All rights reserved
©ATLUS. ©SEGA. All rights reserved. ATLUS is registered in the U.S. Patent and Trademark Office. ATLUS, the ATLUS logo, SHIN MEGAMI TENSEI, SHIN MEGAMI TENSEI NOCTURNE and SMT are either registered trademarks or trademarks of ATLUS Co., Ltd. or its affiliates.
©CAPCOM CO., LTD. All rights reserved.
The copyrights of videos of games used in our content and other intellectual property rights belong to the provider of the game.
The contents we provide on this site were created personally by members of the Game8 editorial department.
We refuse the right to reuse or repost content taken without our permission such as data or images to other sites.