Ikebukuro and Mantra HQ Walkthrough, Boss Battles, and Item Locations

This is a story walkthrough for Ikebukuro in Shin Megami Tensei III HD Remaster (SMT Nocturne) for the Nintendo Switch, PS4, and Steam. Here you'll find a guide on how to complete this area, story section, boss strategies, general tips, and a list of items that can be found.
| Previous | Next |
|---|---|
| Ginza and the Great Underpass | Assembly of Nihilo |
List of Contents
Ikebukuro Story Walkthrough
Ikebukuro Mall
| Objectives | |
|---|---|
| 1 | At West Hall 1F, you may choose to ignore the Oni demon and go on straight ahead, or talk to it now IF you want to fight. Fighting Oni is completely optional. |
| 2 | Walk down the stairs and enter through the door. Cathedral of Shadows can be found on the 2nd East door. Junk Shop can be located on the 3rd East door. Fountain of Life can be found on the 1st west door. Terminal can be found on the 2nd West door. |
| 3 | Go through the first East door, and then climb the stairs. At the top, enter the North door to access Mantra's Headquarters. We recommend saving the game before proceeding with this step. |
Mantra Headquarters - Part 1
| Objectives | |
|---|---|
| 4 | 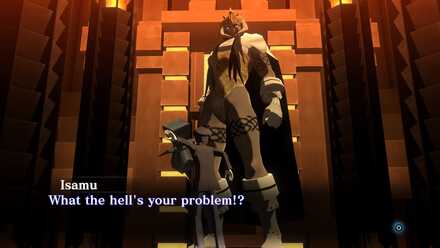 Upon entering, a cutscene will play, and you will then be locked away by Thor. |
| 5 | 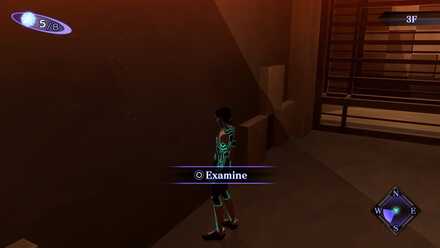 Examine both the left-side and right-side walls. After doing that, the Demon Guard will permit you to get out. |
| 6 | After being let out, turn right, then left, and enter the West door. |
| 7 | After the cutscene, a boss fight will ensue. You have the option to prepare for this fight, Orthrus will let you decide if you are ready or not. We suggest equipping Shiranui Magatama for this fight. |
| Boss Fight | 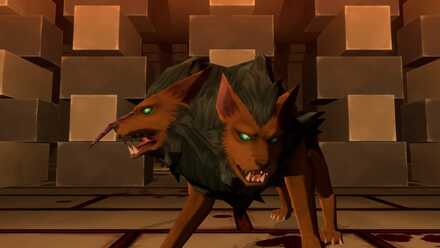 Boss Battle: Orthrus |
| 9 | Immediately after the fight with Orthrus, you will face Yaksini. You have the option to prepare for this fight, Yaksini will let you decide if you are ready or not. We suggest equipping Hifumi Magatama for this fight. |
| Boss Fight | 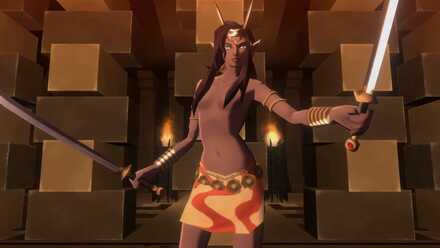 Boss Battle: Yaksini |
| 11 | Immediately after the fight with Yaksini, you will face Thor. You have the option to prepare for this fight, Thor will let you decide if you are ready or not. We suggest equipping Kamudo Magatama for this fight. |
| Boss Fight | 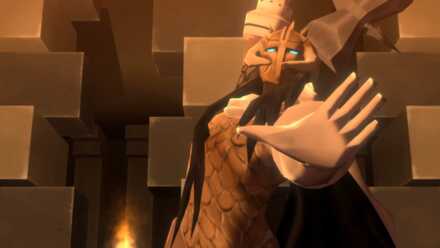 Boss Battle: Thor |
| 13 | After the battle, Thor will allow you to go see Gozu-Tennoh. Shortly after, you will be taken back to Ikebukuro Mall. |
Obtain Narukami Magatama After the Battle with Thor
Thor will become impressed that you beat him, and will impart with you Narukami Magatama as a reward.
Mantra Headquarters - Part 2
| Objectives | |
|---|---|
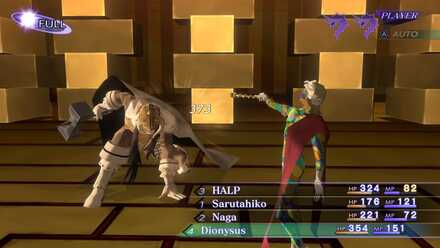
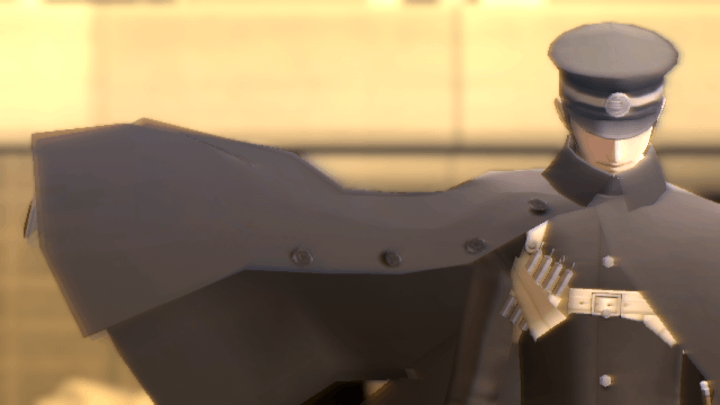
| 14 | You will have to return to Mantra Headquarters, but prepare for a Boss Fight with either Raidou or Dante. We recommend you save the game and level grind up to at least Lvl.23. Likewise, we suggest equipping Kamudo Magatama. |
| Boss Fight | 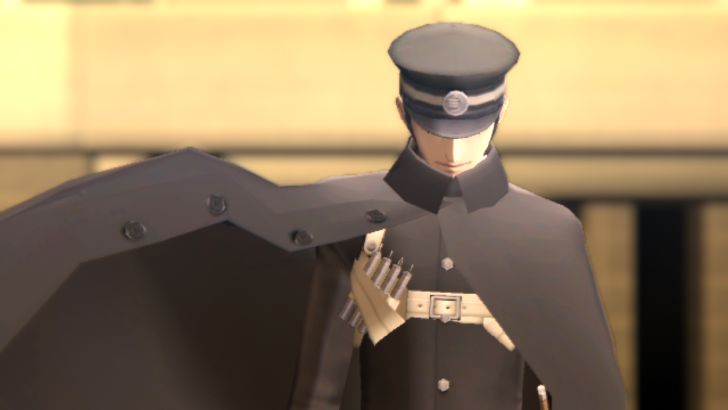 Boss Battle: Raidou (Chronicles Pack) |
| Boss Fight | 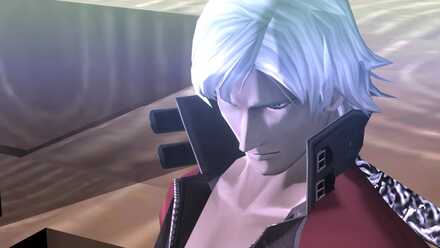 Boss Battle: Dante (Maniax Pack) |
| 16 | After the fight, enter Mantra Headquarters again. |
| 17 | Continue forward and enter the door. In the next room, there is an S-Terminal located at the Northwest door behind the Oni. |
| 18 | Enter the first East door. In the new hallway, turn left and head for the North door. |
| 19 | Go up the flight of stairs to reach 2F. |
| 20 | Follow the path and enter the West door. |
| 21 | Go straight and enter the West door. An elevator will be on the other side of the room. |
| 22 | Enter the elevator and go up to 3F. |
| 23 | On 3F, go to the East door. |
| 24 | Turn right to the Arena Platform, continue forward, and then turn right and enter the West door. There is an Oni demon that can point you to where Gozu-Tennoh is. |
| 25 | Continue and get on the elevator. Go up to 60F. |
| 26 | Take the closest set of stairs and go up to proceed to 64F. |
| 27 |  Go through the door located on 64F. Head straight and enter Gozu-Tennoh's Chamber. A cutscene will play. |
| 28 | Gozu-Tennoh will reward you a gift. He will also ask a question and your response will influence Reason alignment and affect the ending you get. "I am at your service." (Yosuga) "I decline." (Shijima) "Let me think about it." (Musubi) |
| 29 | After this exchange, go back to Ikebukuro Mall to use the Amala Link to transport to Ginza and fulfill Gozu-Tennoh's command. |
| 30 | Head to Assembly of Nihilo to proceed with the story. |
Response to Gozu-Tennoh Will Affect Reason
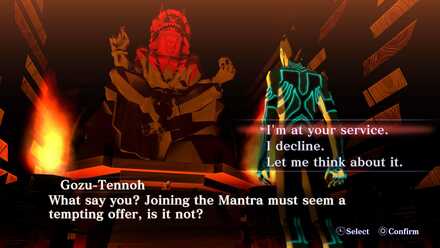
Your response to Gozu-Tennoh when he offers you to join the Mantra will point to your Reason alignment so far in the game, and this will affect the ending you get.
| Response | Reason |
|---|---|
| "I'm at your service." | Yosuga |
| "I decline." | Shijima |
| "Let me think about it." | Musubi |
Endings Guide: How to Get All Endings
Gozu-Tennoh Will Grant Two New Slots In Your Party
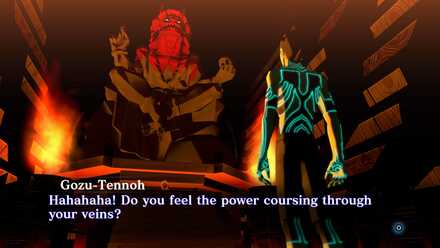
As a reward from Gozu-Tennoh, he will grant you a power that will free up two new vacant slots for putting demons in your party.
Face Raidou in the Chronicles Pack DLC
Raidou will be your opponent in the boss fight if you are playing the base game. He will introduce himself as someone who is tasked to hunt down a Fiend.
Face Dante in the Maniax Pack DLC
In place of Raidou, Dante will be your opponent in the boss fight if you are playing Maniax Pack DLC. He will play a similar role and will introduce himself as someone who is tasked to hunt down a Fiend.
Ikebukuro Boss Fights
Orthrus
First off in the tournament is Orthrus. Exploit his weakness and you'll get through just fine.
| List of Boss Weaknesses | ||
|---|---|---|
| Ice |
Orthrus is weak towards Ice and will be highly susceptible to Ice attacks. Exploit this weakness as much as you can, bring along demons that have Ice skills.
Yaksini
Yaksini is a bit tougher than Orthrus but electrify her with Zio attacks to quickly end the battle.
| List of Boss Weaknesses | ||
|---|---|---|
| Elec |
Yaksini is weak towards Elec and will be highly susceptible to Elec attacks. Exploit this weakness as much as you can, bring along demons that have Elec skill.
Thor
Thor finally deigns to challenge you. Thor packs a wallop, so be ready with your healing spells.
| List of Boss Weaknesses | ||
|---|---|---|
| None, but Phys Attacks can go a long way. |
Thor has no Elemental Weakness, however, utilizing Phys Attacks and Magic Attacks except for Force, Light, Nerve, and Mind, are effective in inflicting damage on Thor.
Raidou / Dante
Raidou or Dante will face you in battle before you can return to Mantra HQ. Be ready to defend against their Physical attacks.
| List of Boss Weaknesses | ||
|---|---|---|
| None, but using both Phys and Magic skills can go a long way. |
Neither Raidou nor Dante will have weaknesses, however you can still utilize both Phys and Magic attacks to inflict damage onto them.
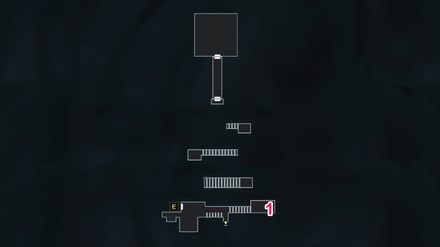
Ikebukuro Maps
Ikebukuro
| B2 | 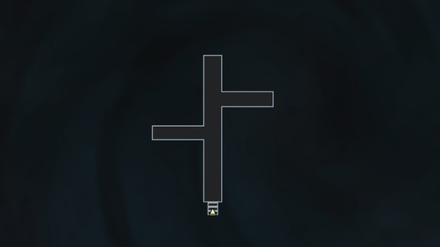 |
|---|---|
| B1 | 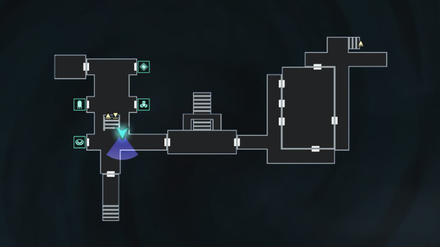 |
| 1F | 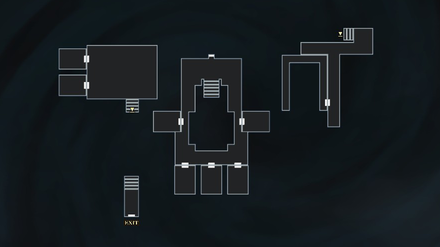 |
Mantra Headquarters
| B1 | 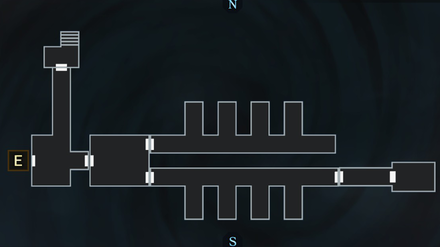 |
|---|---|
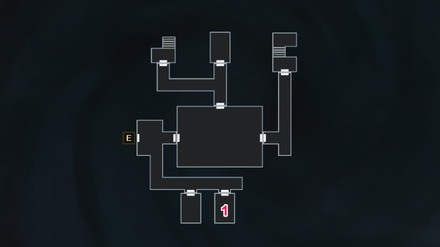
| 1F | 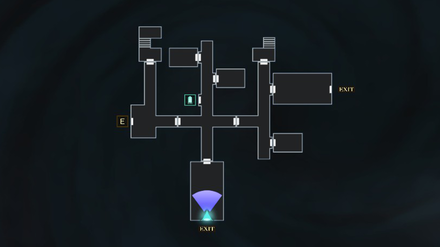 |
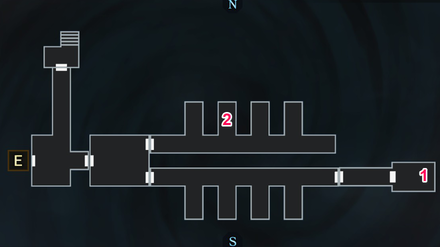
| 2F | 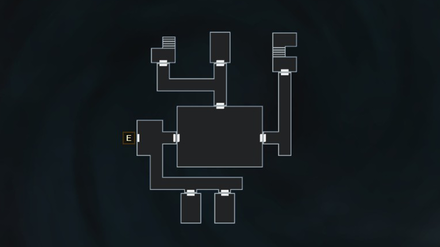 |
| 3F | 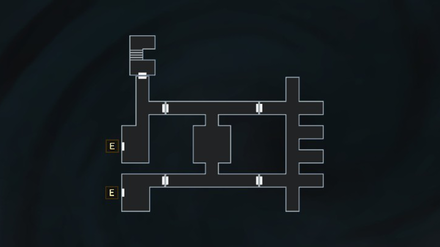 |
| 60F - 64F | 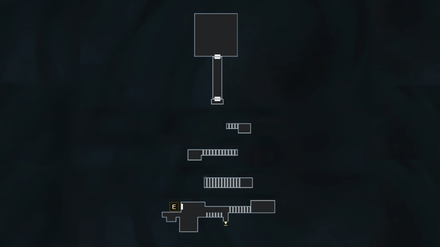 |
Ikebukuro Obtainable Magatamas
Narukami
Narukami is rewarded to you after defeating Thor.
Gaea
Gaea can be accessed through the locked door near the jail cells in Mantra Headquarters (B1). It's behind a locked door that needs a specific amount of base STR to open!
Ikebukuro Obtainable Items
Ikebukuro: B2
| Obtained from | Items | |
|---|---|---|
| 1 | Cache Cube | Bead x 1 |
Ikebukuro: B1
| Obtained from | Items | |
|---|---|---|
| 1 | Cache Cube | Repulse Bell x 1 |
Ikebukuro: 1F
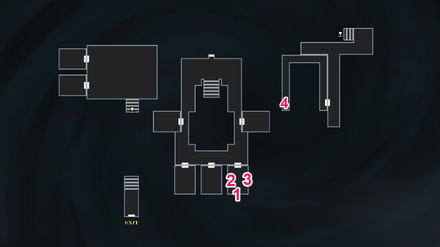
| Obtained from | Items | |
|---|---|---|
| 1 | Cache Cube | It's a trap! Your party takes damage. |
| 2 | Cache Cube | Bead x 2 |
| 3 | Mystical Chest | Strength Incense x 1 |
| 4 | Mystical Chest | Chakra Pot x 1 |
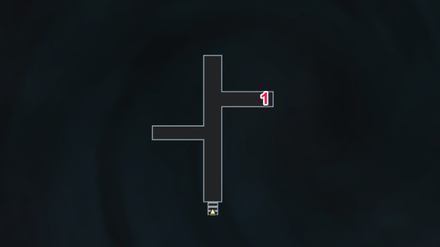
Mantra Headquarters: B1
| Obtained from | Items | |
|---|---|---|
| 1 | Cache Cube Door can only be opened with 24 base Str. |
Gaea Magatama |
| 2 | Mystical Chest Accessible after a certain point in the story |
Bead of Life |
Mantra Headquarters: 1F

| Obtained from | Items | |
|---|---|---|
| 1 | Cache Cube | Mamudo Rock x 1 |
Mantra Headquarters: 2F
| Obtained from | Items | |
|---|---|---|
| 1 | Cache Cube | Attract Pipe x 1 |
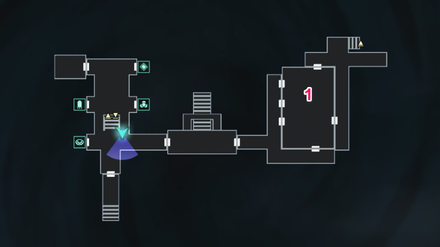
Mantra Headquarters: 3F
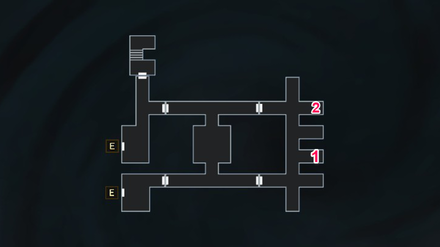
| Obtained from | Items | |
|---|---|---|
| 1 | Cache Cube | Bead x 1 |
| 2 | Mystical Chest Accessible after a certain point in the story |
Strength Incense x 1 |
Mantra Headquarters: 60F - 64F
| Obtained from | Items | |
|---|---|---|
| 1 | Cache Cube | 3000 Macca |
Ikebukuro General Tips
Prepare for the Boss Fights
There will be several Boss Fights that will ensue in this area. Be sure you're prepared.
Check out our guides to know different bosses' strengths and weaknesses, how to beat them, which Magatama to equip, and more.
Level Up to At Least Lvl.22
Keep strengthening Demi-Fiend and your demons in order to last longer in this area. You can expect your stats to be exhausted in this area as many boss fights will ensue.
Leveling Guide: Best Leveling Areas
Obtain Kamudo Magatama Beforehand
Kamudo Magatama will be vital in the boss battles against Thor and Raidou/Dante. This magatama will boost your HP and Str, making you last longer and inflict more damage.
Obtain Hifumi Magatama Beforehand
Hifumi Magatama will be vital in the boss battle against Yaksini. This magatama will protect you from its Force attacks, nulling the attacks, making Yaksini lose its turns.
Obtain Shiranui Magatama Beforehand
Shiranui Magatama will be vital in the boss battle against Orthrus. This magatama will protect you from its Fire attacks, nulling the attacks, making Orthrus lose its turns.
Shin Megami Tensei 3: Nocturne Related Links

Story Walkthrough Guides
 Shinjuku Hospital Walkthrough
 Yoyogi Park and Shibuya Walkthrough
 Amala Network 1 Walkthrough
 Ginza and the Great Underpass Walkthrough
 Ikebukuro Walkthrough
 Assembly of Nihilo Walkthrough
 Kabukicho Walkthrough
 Asakusa and Obelisk Walkthrough
 Amala Network 2 Walkthrough
 Yoyogi Park 2 Walkthrough
 Amala Temple Walkthrough
 Mifunashiro and Yurakucho Walkthrough
 Diet Building Walkthrough
 Bandou Shrine Walkthrough
 Tower of Kagutsuchi Walkthrough
Endings Guide: How to Get All Endings
Labyrinth of Amala Guides
 First Kalpa Area First Kalpa AreaRecommended level: 20 |
 Second Kalpa Area Second Kalpa AreaRecommended level: 35 |
 Third Kalpa Area Third Kalpa AreaRecommended level: 50 |
 Fourth Kalpa Area Fourth Kalpa Area Recommended level: 65 |
 Fifth Kalpa Area Fifth Kalpa AreaRecommended level: 75 |
DLC Dungeon Guides
 Where the Demi-Fiend was Born Where the Demi-Fiend was Born |
 Center of the Conception Center of the Conception |
Author
Ikebukuro and Mantra HQ Walkthrough, Boss Battles, and Item Locations
Rankings
- We could not find the message board you were looking for.
Gaming News


![Monster Hunter Stories 3 Review [First Impressions] | Simply Rejuvenating](https://img.game8.co/4438641/2a31b7702bd70e78ec8efd24661dacda.jpeg/thumb)
Popular Games

Genshin Impact Walkthrough & Guides Wiki
Honkai: Star Rail Walkthrough & Guides Wiki
Umamusume: Pretty Derby Walkthrough & Guides Wiki
Pokemon Pokopia Walkthrough & Guides Wiki
Resident Evil Requiem (RE9) Walkthrough & Guides Wiki
Monster Hunter Wilds Walkthrough & Guides Wiki
Wuthering Waves Walkthrough & Guides Wiki
Arknights: Endfield Walkthrough & Guides Wiki
Pokemon FireRed and LeafGreen (FRLG) Walkthrough & Guides Wiki
Pokemon TCG Pocket (PTCGP) Strategies & Guides Wiki


Recommended Games
Diablo 4: Vessel of Hatred Walkthrough & Guides Wiki
Cyberpunk 2077: Ultimate Edition Walkthrough & Guides Wiki
Fire Emblem Heroes (FEH) Walkthrough & Guides Wiki
Yu-Gi-Oh! Master Duel Walkthrough & Guides Wiki
Super Smash Bros. Ultimate Walkthrough & Guides Wiki
Pokemon Brilliant Diamond and Shining Pearl (BDSP) Walkthrough & Guides Wiki
Elden Ring Shadow of the Erdtree Walkthrough & Guides Wiki
Monster Hunter World Walkthrough & Guides Wiki
The Legend of Zelda: Tears of the Kingdom Walkthrough & Guides Wiki
Persona 3 Reload Walkthrough & Guides Wiki


All rights reserved
©ATLUS. ©SEGA. All rights reserved. ATLUS is registered in the U.S. Patent and Trademark Office. ATLUS, the ATLUS logo, SHIN MEGAMI TENSEI, SHIN MEGAMI TENSEI NOCTURNE and SMT are either registered trademarks or trademarks of ATLUS Co., Ltd. or its affiliates.
©CAPCOM CO., LTD. All rights reserved.
The copyrights of videos of games used in our content and other intellectual property rights belong to the provider of the game.
The contents we provide on this site were created personally by members of the Game8 editorial department.
We refuse the right to reuse or repost content taken without our permission such as data or images to other sites.