Yoyogi Park 2 Walkthrough, Boss Battles, and Item Locations
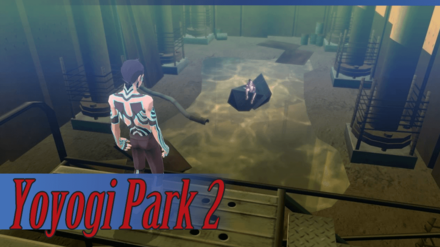
This is a story walkthrough for Yoyogi Park 2 in Shin Megami Tensei III HD Remaster (SMT Nocturne) for the Nintendo Switch, PS4, and Steam. Here you'll find a guide on how to complete this area, story section, boss strategies, general tips, and a list of items that can be found.
| Previous | Next |
|---|---|
| Amala Network 2 | Amala Temple |
Yoyogi Park 2 Story Walkthrough
Asakusa Tunnel
We recommend buying Light Balls or learning Lightoma for this area.
| Objectives | |
|---|---|
| 1 | On the Overworld, head down South and cross the bridge. Keep going South and enter Yushima Station to gain access to Asakusa Tunnel. |
| 2 | Turn left and go through the ticketing barrier gates. Climb down the stairs to get to the platform. |
| 3 | Take the left-side stairs and continue forward. Go through the middle hole and descend the ladder to B3. |
| 4 | 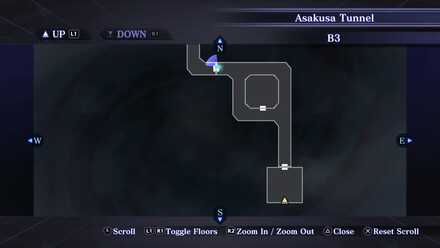 Go through the door and then turn left. Follow the corridor and go through the door. |
| 5 | Follow the corridor, go through the door, and climb up the ladder to B2. Go through the door and follow the corridor. |
| 6 | Turn right going West and climb up the platform. Climb up the stairs to Gaienmae Station. |
| 7 | Go through the ticketing barrier and climb up to exit the area. |
| 8 | On the Overworld, head West and traverse Jingumae-Harajuku, go through the road tunnel to get to Yoyogi Park. |
Yoyogi Park
| Objectives | |
|---|---|
| 9 | From the starting point, turn left going South and go through the West door, and then go through the South door. A cutscene with Yuko will play. An S-Terminal can be located in the North wing of the park. |
| 10 | Your response to Yuko will influence your Reason. "Consider it done." (No Effect) "Not happening." (Shijima) "Let me think." (Musubi) |
| 11 | After obtaining the Yoyogi Park Key, head through the East door to go back to East Plaza. Head towards the door next to the Troll demon and use the key. |
| 12 | Climb the stairs and go through the door. A short cutscene will play. Take the left path and continue moving forward until another short cutscene plays. |
| 13 | 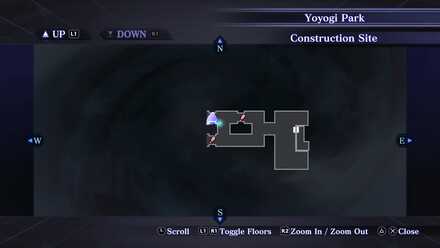 Once you get transported back to the starting point, take the left-side path again but immediate turn right between the two stacks of boulders. |
| 14 | 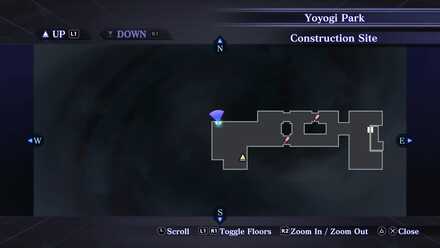 Continue forward going West until you reach the North door, and then enter it. |
| 15 | 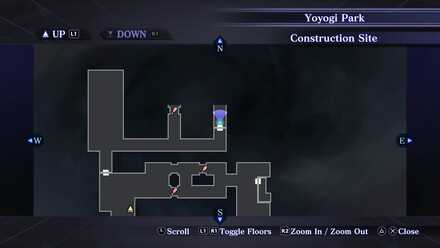 Turn right and take the farthest path and go through the door. Take the right-most path and continue forward. |
| 16 | Follow the path and go through the door. Move forward and enter the North door. Continue forward again and go through the North door. |
| 17 | Again, continue forward and go through the North door. Go through the middle path and then turn left and go through the West door. |
| 18 | Take the left-side path, and then immediately turn right between two boulders and go through the door. A cutscene with Oberon will play. |
| 19 | Take the right-side path and go through the door. Continue forward and turn left and go through the South door. An S-Terminal is located at the North door. |
| 20 | Move forward and trigger a High Pixie cross-formation. |
| 21 | Go through the right-side West door and trigger an X-formation. Follow the path and go through the farthest door. |
| 22 | Pace forward and turn left at the next intersection. Continue moving forward to trigger a cross-formation. Go through the door. |
| 23 | Follow the path and go through the door. Go through another door. A cutscene with Oberon and Troll will play. |
| 24 | Continue forward, turn left, and go through the 2nd North door. Go through another door, keep going straight and go through another door. |
| 25 | Turn left and then turn right and go through the North door. Pace forward and go through another North door. |
| 26 | 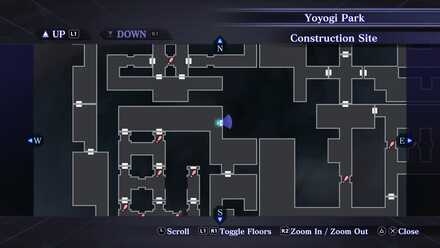 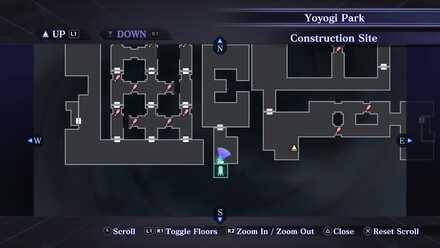 |
| Boss Fight | 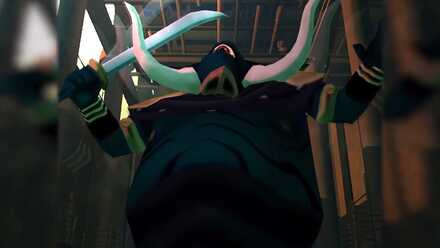 Boss Battle: Girimekhala |
| Boss Fight | 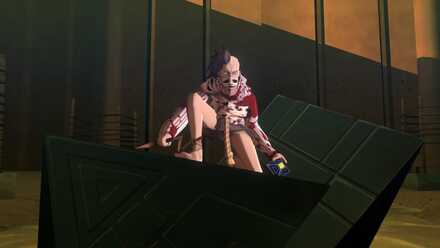 Boss Battle: Sakahagi |
| 29 | Obtain the Yahiro no Himorogi after defeating Girimekhala and Sakahagi. |
| 30 | Start pacing towards the S-Terminal, a cutscene will play shortly. Continue and use the S-Terminal to go back to the Terminal in Yoyogi Park East Plaza. |
| 31 | Head back to Yukiko to hand over the Yahiro no Himorogi. A cutscene will play. |
| 32 | Your response will affect the ending of the game. Do you fear the suffering and humiliation? "...I’m terrified." (Neutral Flag 1 / 2) "I can take it." (Freedom Flag 1 / 3) Do you fear the deceit, the torment? "...I’m terrified." (Neutral Flag 2 / 2) "I can take it." (Freedom Flag 2 / 3) |
| 33 | 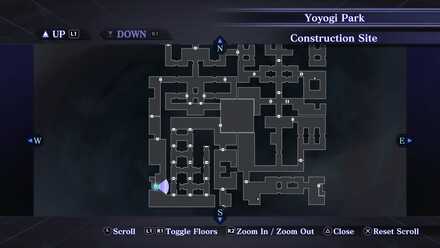 After the cutscene, go back to the Construction Site and head to this room located in the Southwest to access the West Plaza. |
| 34 | 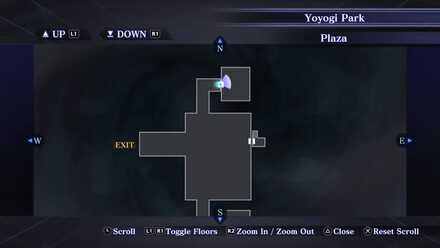 From the starting point, take the right-side path and enter the East door in the North wing of the plaza. Prepare for a boss fight against Mother Harlot before proceeding. |
| Boss Fight |  Boss Battle: Mother Harlot |
| 36 | Obtain the Menorah of Beauty after defeating Mother Harlot. |
| 37 | Fast-travel to Asakusa and watch the cutscene with Hijiri to proceed with the story. |
Your Response to Aradia in Yoyogi Park Will Affect the Ending of the Game
| Response | Effect |
|---|---|
| "...I’m terrified." | (Neutral Flag 1 / 2) |
| "I can take it." | (Freedom Flag 1 / 3) |
| Response | Effect |
|---|---|
| "...I’m terrified." | (Neutral Flag 2 / 2) |
| "I can take it." | (Freedom Flag 2 / 3) |
Obtain the Menorah of Beauty After Defeating Mother Harlot.
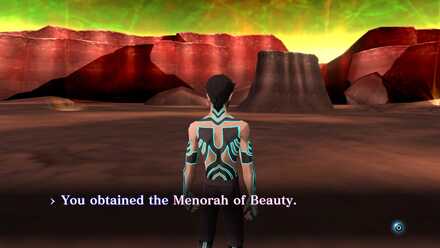
You will obtain the Menorah of Beauty after defeating Mother Harlot in the West Plaza of Yoyogi Park.
Yoyogi Park 2 Boss Fights
Girimekhala
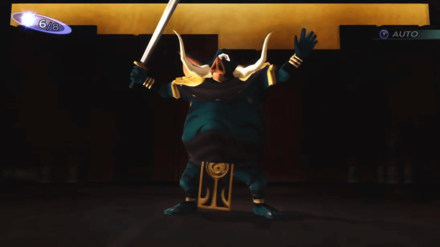
Looking into Girimekhala's evil eye is said to bring misfortune. Physical attacks don't work on him.
| Weaknesses | ||
|---|---|---|
| None, but Magic Attacks can go a long way. |
Girimekhala does not have any elemental weakness, however, using Magic attacks is useful for dealing damage.
Sakahagi
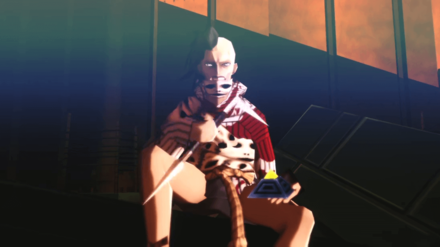
You've finally caught up to the Manikin-killing Sakahagi. This battle will be quick.
| Weaknesses | ||
|---|---|---|
| None, but Phys and Magic attacks can go a long way. |
Sakahagi does not have any elemental weakness, however, using both Phys and Magic attacks is useful for dealing damage.
Mother Harlot
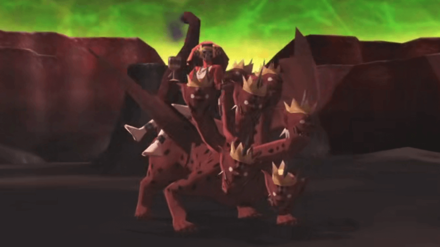
Mother Harlot is the subjugator of the Beast that rules all men. She reflects physical attacks, so be prepared.
| Weaknesses | ||
|---|---|---|
| None, but Magic Attacks can go a long way. |
Mother Harlot does not have any elemental weakness, however, using Magic attacks is useful for dealing damage.
Yoyogi Park 2 Maps
Asakusa Tunnel
| B3 | 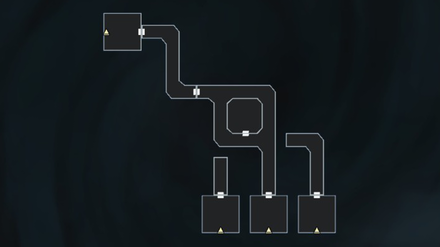 |
|---|---|
| B2 | 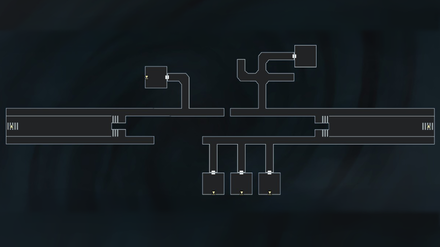 |
| Station | 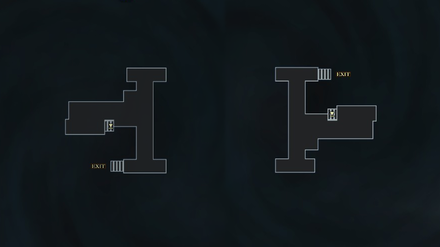 |
Yoyogi Park
| Construction Site | 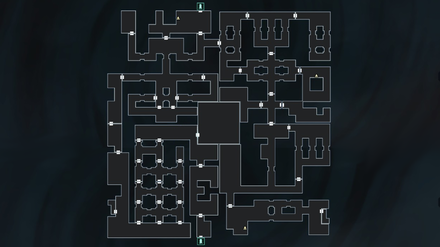 |
|---|---|
| Plazas | 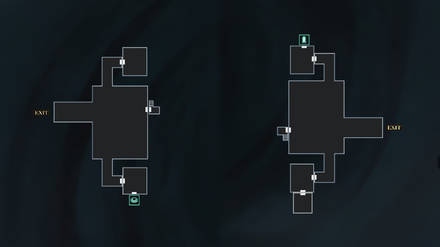 |
| Platforms | 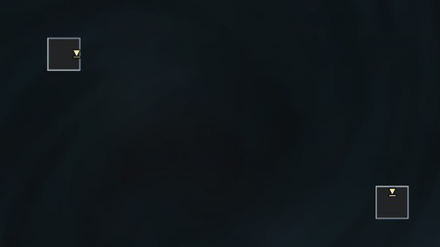 |
Yoyogi Park 2 Obtainable Items
World Map
| Obtained from | Items | |
|---|---|---|
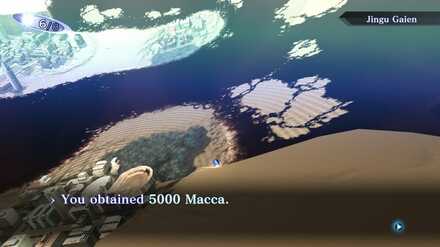
| 1 | Jingu Gaien Right after exiting Asakusa Tunnel |
5000 Macca |
Asakusa Tunnel: Station
| Obtained from | Items | |
|---|---|---|
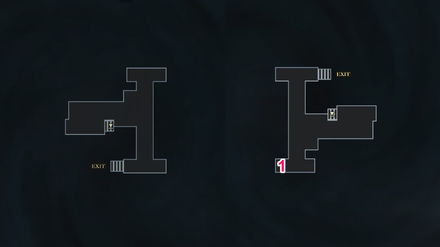
| 1 | Cache Cube | Repulse Bell x 1 |
Asakusa Tunnel: B2
| Obtained from | Items | |
|---|---|---|
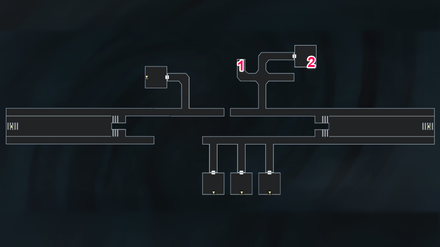
| 1 | Cache Cube | Medicine x 2 |
| 2 | Cache Cube | 8000 Macca |
Asakusa Tunnel: B3
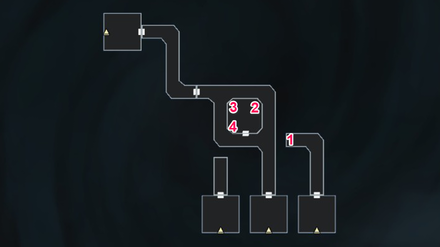
| Obtained from | Items | |
|---|---|---|
| 1 | Mystical Chest | Bead Chain |
| 2 | Cache Cube | It's a trap! Ambushed by 3 Titans. |
| 3 | Cache Cube | Soma Droplet x 1 |
| 4 | Cache Cube | It's a trap! Your party gets inflicted with silence. |
Yoyogi Park: Plazas
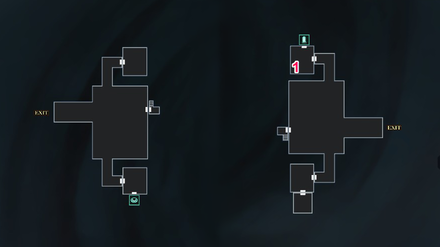
| Obtained from | Items | |
|---|---|---|
| 1 | Cache Cube | Life Stone x 3 |
Yoyogi Park: Construction Site
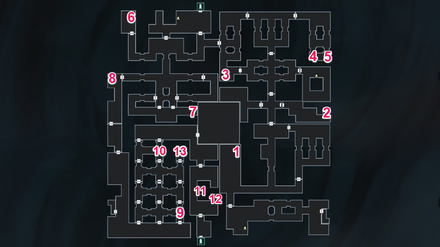
| Obtained from | Items | |
|---|---|---|
| 1 | Cache Cube | Life Stone x 2 |
| 2 | Mystical Chest | Balm of Rising x 1 |
| 3 | Mystical Chest | Luck Incense x 1 |
| 4 | Cache Cube | Chakra Drop x 1 |
| 5 | Mystical Chest | Sapphire x 1 |
| 6 | Mystical Chest | Bead Chain x 1 |
| 7 | Cache Cube | Sacred Water x 1 |
| 8 | Cache Cube | Medicine x 3 |
| 9 | Cache Cube Trigger the pixies above Item #10 to teleport to this Cache Cube |
Life Stone x 2 |
| 10 | Cache Cube | Chakra Drop x 1 |
| 11 | Cache Cube | Bead x 1 |
| 12 | Cache Cube | Revival Bead x 1 |
| 13 | Mystical Chest Trigger the pixies on the left side to teleport near this Mystical Chest |
Bead of Life x 1 |
Yoyogi Park 2 General Tips
Raise Demi-Fiend's Magic Stat
Two out of three of the bosses you fight in this area can only be beaten by using Magic attacks, so we highly recommend raising Demi-Fiend's Magic stat to increase your attack's damage output.
Look at The Maze Formation from Platforms
You can pinpoint which paths are going to be blocked by High Pixies by looking at them up from the platforms on the construction site.
Shin Megami Tensei 3: Nocturne Related Links

Story Walkthrough Guides
Endings Guide: How to Get All Endings
Labyrinth of Amala Guides
 First Kalpa Area First Kalpa AreaRecommended level: 20 |
 Second Kalpa Area Second Kalpa AreaRecommended level: 35 |
 Third Kalpa Area Third Kalpa AreaRecommended level: 50 |
 Fourth Kalpa Area Fourth Kalpa Area Recommended level: 65 |
 Fifth Kalpa Area Fifth Kalpa AreaRecommended level: 75 |
DLC Dungeon Guides
 Where the Demi-Fiend was Born Where the Demi-Fiend was Born |
 Center of the Conception Center of the Conception |
Author
Yoyogi Park 2 Walkthrough, Boss Battles, and Item Locations
improvement survey
03/2026
improving Game8's site?

Your answers will help us to improve our website.
Note: Please be sure not to enter any kind of personal information into your response.

We hope you continue to make use of Game8.
Rankings
- We could not find the message board you were looking for.
Gaming News
Popular Games

Genshin Impact Walkthrough & Guides Wiki

Honkai: Star Rail Walkthrough & Guides Wiki

Umamusume: Pretty Derby Walkthrough & Guides Wiki

Pokemon Pokopia Walkthrough & Guides Wiki

Resident Evil Requiem (RE9) Walkthrough & Guides Wiki

Monster Hunter Wilds Walkthrough & Guides Wiki

Wuthering Waves Walkthrough & Guides Wiki

Arknights: Endfield Walkthrough & Guides Wiki

Pokemon FireRed and LeafGreen (FRLG) Walkthrough & Guides Wiki

Pokemon TCG Pocket (PTCGP) Strategies & Guides Wiki
Recommended Games

Diablo 4: Vessel of Hatred Walkthrough & Guides Wiki

Cyberpunk 2077: Ultimate Edition Walkthrough & Guides Wiki

Fire Emblem Heroes (FEH) Walkthrough & Guides Wiki

Yu-Gi-Oh! Master Duel Walkthrough & Guides Wiki

Super Smash Bros. Ultimate Walkthrough & Guides Wiki

Pokemon Brilliant Diamond and Shining Pearl (BDSP) Walkthrough & Guides Wiki

Elden Ring Shadow of the Erdtree Walkthrough & Guides Wiki

Monster Hunter World Walkthrough & Guides Wiki

The Legend of Zelda: Tears of the Kingdom Walkthrough & Guides Wiki

Persona 3 Reload Walkthrough & Guides Wiki
All rights reserved
©ATLUS. ©SEGA. All rights reserved. ATLUS is registered in the U.S. Patent and Trademark Office. ATLUS, the ATLUS logo, SHIN MEGAMI TENSEI, SHIN MEGAMI TENSEI NOCTURNE and SMT are either registered trademarks or trademarks of ATLUS Co., Ltd. or its affiliates.
©CAPCOM CO., LTD. All rights reserved.
The copyrights of videos of games used in our content and other intellectual property rights belong to the provider of the game.
The contents we provide on this site were created personally by members of the Game8 editorial department.
We refuse the right to reuse or repost content taken without our permission such as data or images to other sites.
 Shinjuku Hospital Walkthrough
 Yoyogi Park and Shibuya Walkthrough
 Amala Network 1 Walkthrough
 Ginza and the Great Underpass Walkthrough
 Ikebukuro Walkthrough
 Assembly of Nihilo Walkthrough
 Kabukicho Walkthrough
 Asakusa and Obelisk Walkthrough
 Amala Network 2 Walkthrough
 Yoyogi Park 2 Walkthrough
 Amala Temple Walkthrough
 Mifunashiro and Yurakucho Walkthrough
 Diet Building Walkthrough
 Bandou Shrine Walkthrough
 Tower of Kagutsuchi Walkthrough


![Monster Hunter Stories 3 Review [First Impressions] | Simply Rejuvenating](https://img.game8.co/4438641/2a31b7702bd70e78ec8efd24661dacda.jpeg/thumb)


i have gotten more lost and wasted more time thanks to this guide more than i would figuring it out by my own