Mifunashiro & Yurakucho Walkthrough, Boss Battles, and Item Locations
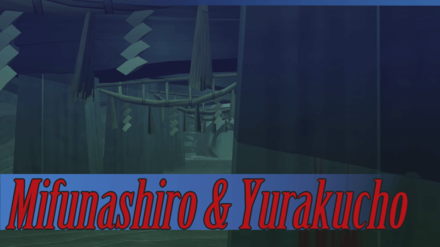
This is a story walkthrough for Mifunashiro & Yurakucho in Shin Megami Tensei III HD Remaster (SMT Nocturne) for the Nintendo Switch, PS4, and Steam. Here you'll find a guide on how to complete this area, story section, boss strategies, general tips, and a list of items that can be found.
| Previous | Next |
|---|---|
| Amala Temple | Diet Building |
Mifunashiro & Yurakucho Story Walkthrough
Mifunashiro
| Objectives | |
|---|---|
| 1 | 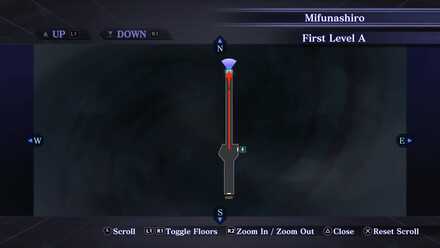 On the First Stratum, start by heading North and go through the North door. |
| 2 | 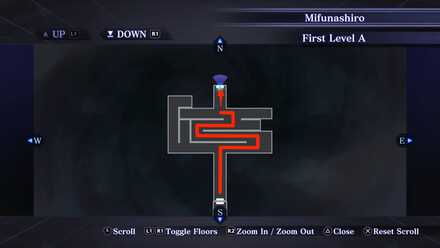 Take the right-side path and go down the slope then enter the North door. |
| 3 | Continue forward and descend the ladder. Go around and enter the South door past the demon guard. |
| 4 | Continue forward and then turn right going West and go down the slope. Turn right going North and make your way to North door and enter it. Descend the ladder to the Third Stratum, and then enter the door. |
| 5 | Follow the path of the slope going down. A cutscene will play as you reach a tunneling area. Your response to the question does not affect the ending of the game. |
| 6 | Continue on the path and turn right to the downward slope. Continue forward and enter the Mirror Chamber's door. Examine the mirror on the floor and step into the light. Prepare for a boss fight before proceeding. |
| 7 | A cutscene will play. Your response to Chiaki will affect the ending of the game. Likewise, your response also affects the boss you'll fight in this dungeon. "I see your point." (Yosuga Flag 2 / 2). You will fight Futomimi. "You’re misguided." (Reject). You will fight Gabriel, Raphael, and Uriel. |
| Boss Fight |  Boss Battle (Not Aligned with Yosuga): Gabriel, Raphael, and Uriel |
| Boss Fight |  Boss Battle (Aligned with Yosuga): Futomimi |
| 10 | Exit the room, then make your way to an S-Terminal and fast-travel to Ginza. |
| 11 | Exit Ginza to go on the Overworld. Make your way Southeast and cross the bridges. Follow the long highway. Head Northwest past the radio tower, and then head all the way North to Yurakucho station. |
Yurakucho Station & Yurakucho Tunnel
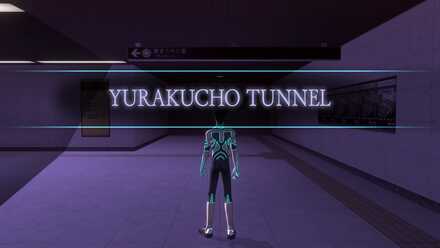
We recommend using Light Balls or Lightoma in this area.
| Objectives | |
|---|---|
| 12 | Turn left to get to the ticketing barrier gates. A boss fight with Trumpeter will be triggered near the barrier gate if you have previously defeated all the other Menorah Bosses in the game. |
| Boss Fight | 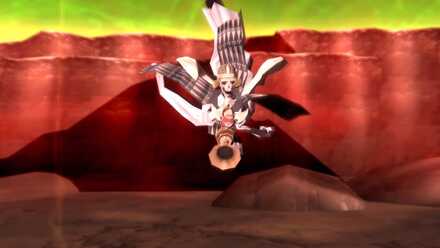 Boss Battle: Trumpeter |
| 14 | Obtain the Menorah of Glory after defeating Trumpeter. |
| 15 | Go through the ticketing barrier gates and descend the stairs to get to the platform. Take the left-side stairs and continue forward. Enter the South hole to your left. |
| 16 | Continue forward and enter the South door. Move forward until you slide down to B3. |
| 17 | Turn left going East, follow the path and enter the North door. Descend the ladder in the room to get to B4 and go through the door. |
| 18 | 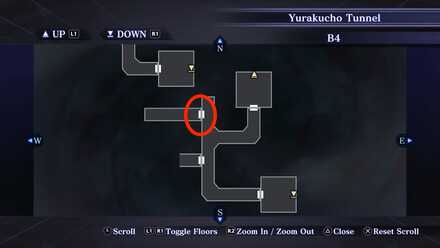 Take the right-side door and move forward until you slide down to B5. |
| 19 | 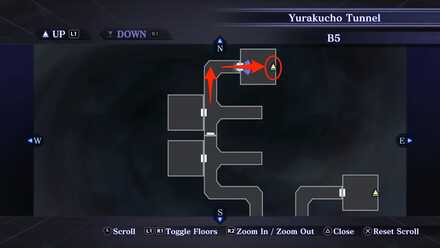 Turn right and enter the East door and then climb the ladder to B4. |
| 20 | Go through the door. Follow the path and enter the North door. An S-Terminal is located at the West door. |
| 21 | 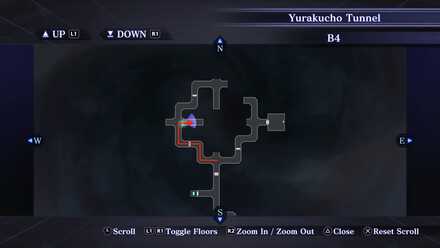 Take the left-side path going West, follow the path and go through the door. Continue forward and turn right going East and slide down to B5. |
| 22 | 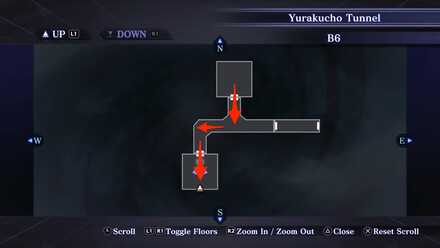 Continue forward and get warped down to B6. Turn around and go through the West door. Continue forward, turn left and go through the door. Climb the ladder. |
| 23 | 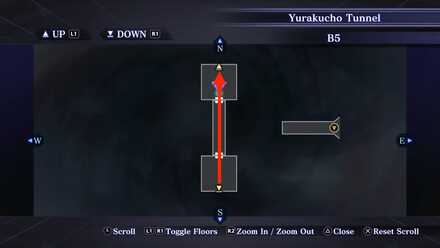 Continue forward, entering two North doors. Climb the ladder. |
| 24 | 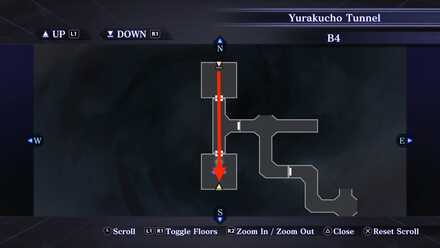 Continue forward, entering two South doors. Climb the ladder. |
| 25 | Go through the door, follow the path, and then enter the West door. |
| 26 | Take the right-side path and enter the North door. An S-Terminal is located at the South door. |
| 27 | Climb the ladder to B2 and go through the door. Continue forward to exit the tunnel. Turn right going West and then head to the stairs to climb up the platform. Climb the stairs at the other end of the platform to get to Kasumigaseki Station. |
| 28 | Go through the ticketing barrier gates, turn right, and climb the stairs to exit the area. |
| 29 | On the Overworld, make your way up North. Turn left and enter the Diet Building to proceed with the story. |
Your Response to Chiaki Will Affect the Ending of the Game
Your response to Chiaki will affect the ending of the game. Likewise, your response also affects the boss you'll fight in Mifunashiro.
| Response | Effect | Boss |
|---|---|---|
| "I see your point." | Yosuga Flag 2 / 2 | Futomimi |
| "You’re misguided." | Reject Yosuga | Gabriel, Raphael, and Uriel |
Obtain the Menorah of Glory After Defeating Trumpeter
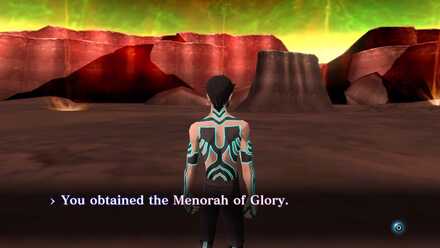
You will obtain the Menorah of Glory after defeating Trumpeter in Yurakucho Station.
Mifunashiro & Yurakucho Boss Fights
Futomimi
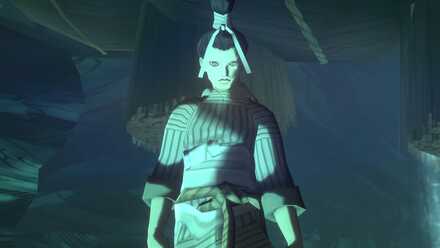
You will face Futomimi if you have accepted Yosuga Flag 2 / 2 during the conversation with Chiaki.
| Weaknesses | ||
|---|---|---|
| None, but Magic attacks can go a long way. |
Futomimi does not have any elemental weakness, however, using Magic attacks is useful for dealing damage.
Gabriel, Raphael, and Uriel
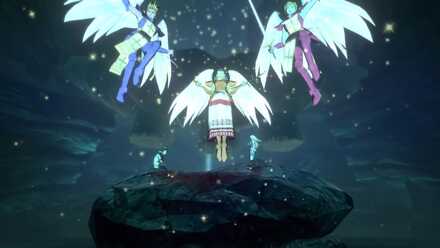
You will face Gabriel, Raphael, and Uriel if you have rejected Yosuga during the conversation with Chiaki.
| Weaknesses | ||
|---|---|---|
| None, but Phys attacks can go a long way |
Gabriel, Raphael, and Uriel do not have any elemental weakness, however, using Phys attacks is useful for dealing damage.
How to Beat Gabriel, Raphael, and Uriel
Trumpeter

Trumpeter is the final holder of the Menorahs among the Fiend Bosses. You will face Trumpeter in Yurakucho Station.
| Weaknesses | ||
|---|---|---|
| None, but both Phys and Magic attacks can go a long way |
Trumpeter does not have any elemental weakness, however, using both Phys and Magic attacks is useful for dealing damage.
Mifunashiro & Yurakucho Maps
Mifunashiro
| 1st Level A | 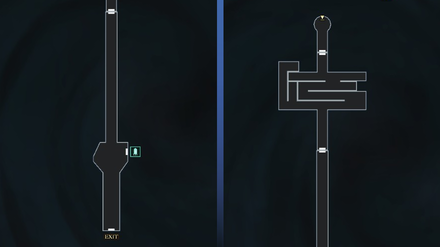 |
|---|---|
| 1st Level B |  |
| 2nd Level A | 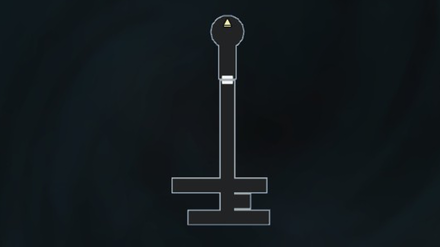 |
| 2nd Level B | 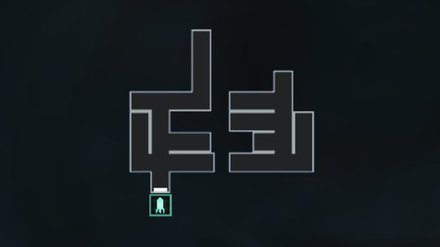 |
| 2nd Level C | 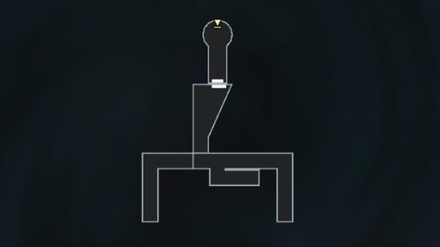 |
| 2nd Level D | 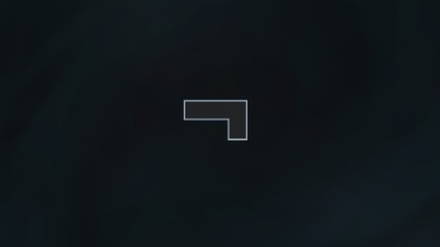 |
| 3rd Level A | 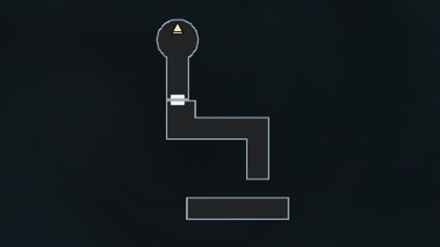 |
| 3rd Level B | 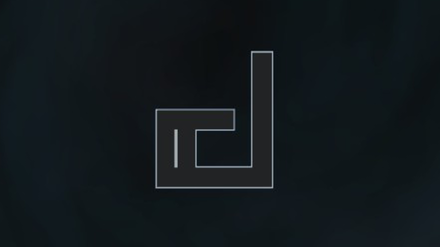 |
| 3rd Level C | 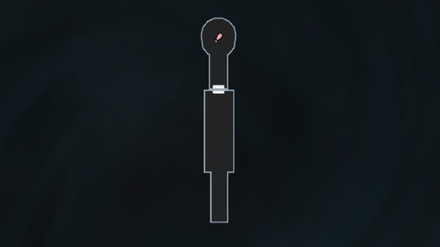 |
Yurakucho Tunnel
| Station | 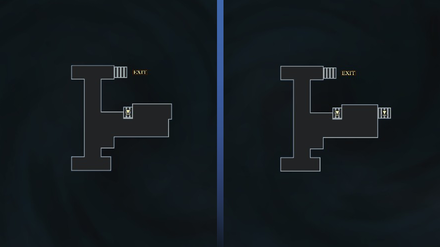 |
|---|---|
| B2 Entrance | 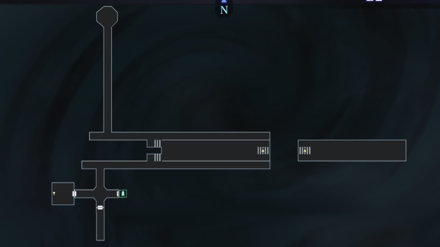 |
| B2 Exit | 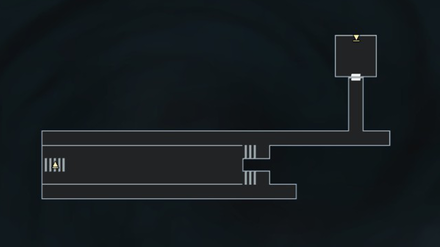 |
| B3 | 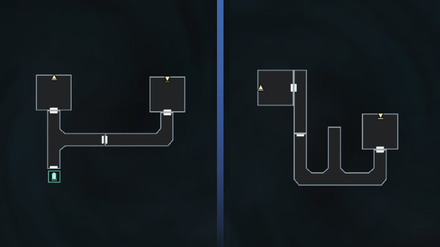 |
| B4 | 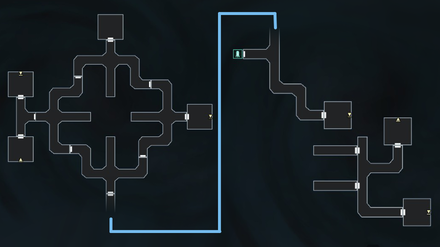 |
| B5 | 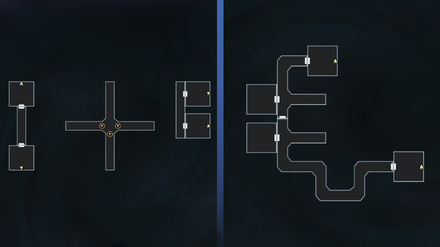 |
| B6 | 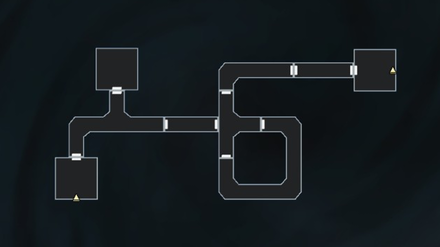 |
Mifunashiro & Yurakucho Obtainable Items
World Map
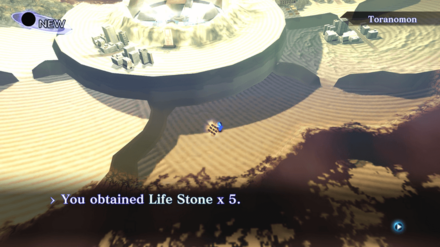
| Obtained from | Items | |
|---|---|---|
| 1 | Cache Cube Head southeast immediately after exiting Yurakucho Tunnel. |
Life Stone x 5 |
Mifunashiro: 1st Level B
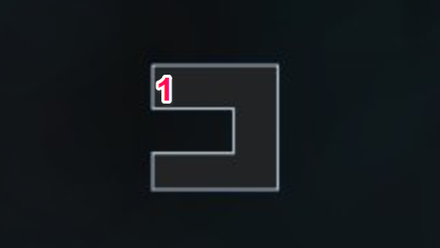
| Obtained from | Items | |
|---|---|---|
| 1 | Cache Cube | Magic Mirror x 1 |
Mifunashiro: 3rd Level A
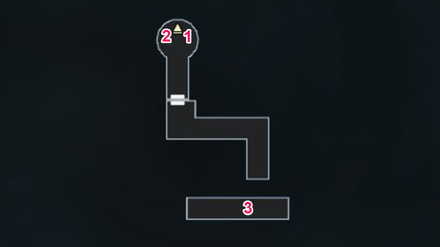
| Obtained from | Items | |
|---|---|---|
| 1 | Cache Cube | Life Stone x 2 |
| 2 | Mystical Chest | Diamond x 1 |
| 3 | Body of Manikin | Medicine x 1 |
Yurakucho Tunnel: Station
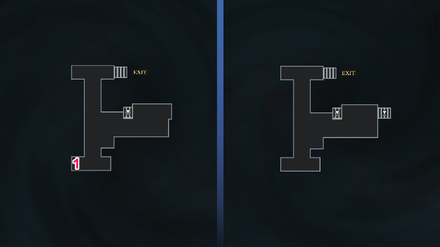
| Obtained from | Items | |
|---|---|---|
| 1 | Mystical Chest | Vitality Incense x 1 |
Yurakucho Tunnel: B2
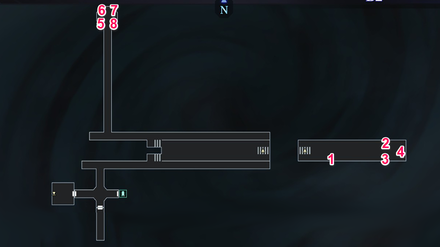
| Obtained from | Items | |
|---|---|---|
| 1 | Cache Cube | Muscle Drink x 1 |
| 2 | Cache Cube | Medicine x 1 |
| 3 | Cache Cube | Bead x 1 |
| 4 | Cache Cube | It's a trap! Ambushed by 4 Loas. |
| 5 | Cache Cube | Kimon Stone x 1 |
| 6 | Cache Cube | 10000 Macca |
| 7 | Mystical Chest | Sapphire x 1 |
| 8 | Mystical Chest | Great Chakra x 1 |
Yurakucho Tunnel: B3
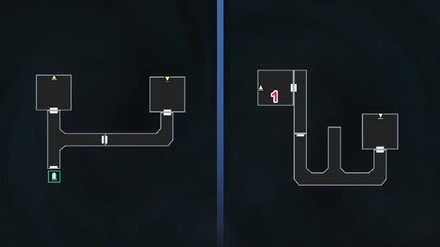
| Obtained from | Items | |
|---|---|---|
| 1 | Cache Cube | Life Stone x 2 |
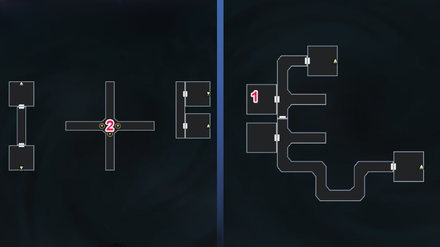
Yurakucho Tunnel: B5
| Obtained from | Items | |
|---|---|---|
| 1 | Cache Cube | Bead x 1 |
| 2 | Mystical Chest | Bead of Life x 1 |
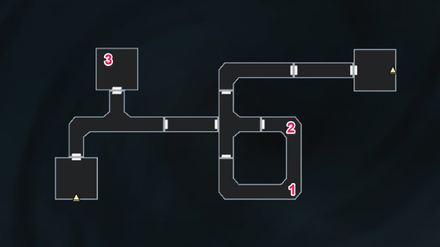
Yurakucho Tunnel: B6
| Obtained from | Items | |
|---|---|---|
| 1 | Cache Cube | It's a trap! Ambushed by 2 Loa and 1 Cerberus. |
| 2 | Cache Cube | Soma Droplet x 1 |
| 3 | Mystical Chest | Pearl x 1 |
Mifunashiro & Yurakucho General Tips
Level Up to at Least Lvl.75
We recommend leveling up to at least Lvl.75 to become effective against the bosses in this area.
Get Light Balls or Learn Lightoma for Yurakucho Tunnels
We recommend using Light Balls or Lightoma in Yurakucho Tunnels as this dungeon will be shrouded in darkness.
Shin Megami Tensei 3: Nocturne Related Links

Story Walkthrough Guides
Endings Guide: How to Get All Endings
Labyrinth of Amala Guides
 First Kalpa Area First Kalpa AreaRecommended level: 20 |
 Second Kalpa Area Second Kalpa AreaRecommended level: 35 |
 Third Kalpa Area Third Kalpa AreaRecommended level: 50 |
 Fourth Kalpa Area Fourth Kalpa Area Recommended level: 65 |
 Fifth Kalpa Area Fifth Kalpa AreaRecommended level: 75 |
DLC Dungeon Guides
 Where the Demi-Fiend was Born Where the Demi-Fiend was Born |
 Center of the Conception Center of the Conception |
Comment
I got a life stone from one of the chests in the room stige dug up not a great chakra
Author
Mifunashiro & Yurakucho Walkthrough, Boss Battles, and Item Locations
improvement survey
03/2026
improving Game8's site?

Your answers will help us to improve our website.
Note: Please be sure not to enter any kind of personal information into your response.

We hope you continue to make use of Game8.
Rankings
- We could not find the message board you were looking for.
Gaming News
Popular Games

Genshin Impact Walkthrough & Guides Wiki

Honkai: Star Rail Walkthrough & Guides Wiki

Umamusume: Pretty Derby Walkthrough & Guides Wiki

Pokemon Pokopia Walkthrough & Guides Wiki

Resident Evil Requiem (RE9) Walkthrough & Guides Wiki

Monster Hunter Wilds Walkthrough & Guides Wiki

Wuthering Waves Walkthrough & Guides Wiki

Arknights: Endfield Walkthrough & Guides Wiki

Pokemon FireRed and LeafGreen (FRLG) Walkthrough & Guides Wiki

Pokemon TCG Pocket (PTCGP) Strategies & Guides Wiki
Recommended Games

Diablo 4: Vessel of Hatred Walkthrough & Guides Wiki

Cyberpunk 2077: Ultimate Edition Walkthrough & Guides Wiki

Fire Emblem Heroes (FEH) Walkthrough & Guides Wiki

Yu-Gi-Oh! Master Duel Walkthrough & Guides Wiki

Super Smash Bros. Ultimate Walkthrough & Guides Wiki

Pokemon Brilliant Diamond and Shining Pearl (BDSP) Walkthrough & Guides Wiki

Elden Ring Shadow of the Erdtree Walkthrough & Guides Wiki

Monster Hunter World Walkthrough & Guides Wiki

The Legend of Zelda: Tears of the Kingdom Walkthrough & Guides Wiki

Persona 3 Reload Walkthrough & Guides Wiki
All rights reserved
©ATLUS. ©SEGA. All rights reserved. ATLUS is registered in the U.S. Patent and Trademark Office. ATLUS, the ATLUS logo, SHIN MEGAMI TENSEI, SHIN MEGAMI TENSEI NOCTURNE and SMT are either registered trademarks or trademarks of ATLUS Co., Ltd. or its affiliates.
©CAPCOM CO., LTD. All rights reserved.
The copyrights of videos of games used in our content and other intellectual property rights belong to the provider of the game.
The contents we provide on this site were created personally by members of the Game8 editorial department.
We refuse the right to reuse or repost content taken without our permission such as data or images to other sites.
 Shinjuku Hospital Walkthrough
 Yoyogi Park and Shibuya Walkthrough
 Amala Network 1 Walkthrough
 Ginza and the Great Underpass Walkthrough
 Ikebukuro Walkthrough
 Assembly of Nihilo Walkthrough
 Kabukicho Walkthrough
 Asakusa and Obelisk Walkthrough
 Amala Network 2 Walkthrough
 Yoyogi Park 2 Walkthrough
 Amala Temple Walkthrough
 Mifunashiro and Yurakucho Walkthrough
 Diet Building Walkthrough
 Bandou Shrine Walkthrough
 Tower of Kagutsuchi Walkthrough




![Monster Hunter Stories 3 Review [First Impressions] | Simply Rejuvenating](https://img.game8.co/4438641/2a31b7702bd70e78ec8efd24661dacda.jpeg/thumb)


You need to open those chests when the kagetsuchi is at Full, otherwise you will always get a life stone.