 Shinjuku Hospital Walkthrough
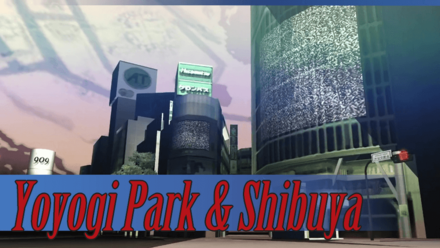
 Yoyogi Park and Shibuya Walkthrough
 Amala Network 1 Walkthrough
 Ginza and the Great Underpass Walkthrough
 Ikebukuro Walkthrough
 Assembly of Nihilo Walkthrough
 Kabukicho Walkthrough
 Asakusa and Obelisk Walkthrough
 Amala Network 2 Walkthrough
 Yoyogi Park 2 Walkthrough
 Amala Temple Walkthrough
 Mifunashiro and Yurakucho Walkthrough
 Diet Building Walkthrough
 Bandou Shrine Walkthrough
 Tower of Kagutsuchi Walkthrough
This survey will take about 1 minute.
Your answers will help us to improve our website.
Shin Megami Tensei 3: Nocturne (SMT Nocturne)
Yoyogi Park and Shibuya Walkthrough, Boss Battles, and Item Locations
This is a story walkthrough for Yoyogi Park and Shibuya in Shin Megami Tensei III HD Remaster (SMT Nocturne) for the Nintendo Switch, PS4, and Steam. Here you'll find a guide on how to complete this area, story section, boss strategies, general tips, and a list of items that can be found.
| Previous | Next |
|---|---|
| Prologue and Shinjuku Hospital | Amala Network (1st Entry) |
List of Contents
Yoyogi Park and Shibuya Story Walkthrough
Yoyogi Park
| Objectives | ||
|---|---|---|
| 1 | On the overworld map, go Southwest until you reach Yoyogi and enter the foremost structure to get into Yoyogi Park. | |
| 2 | A cutscene will then appear and you have to decide whether to keep or release Pixie. While keeping her will have its benefits, releasing her on the other hand will grant you the Ankh Magatama. | |
| 3 | After entering via the West Plaza, talk to the red demon to your East and talk about the Lady of the Fount. | |
| 4 | Head East and enter the room with a Green symbol plastered on it to find Lady of the Fount. | |
| Friendly NPC | 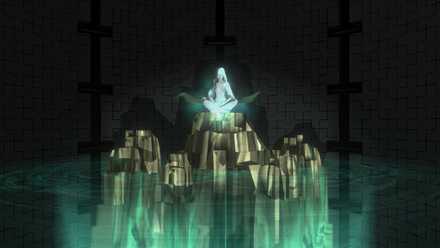 Lady of the Fount |
|
Cutscene with Pixie
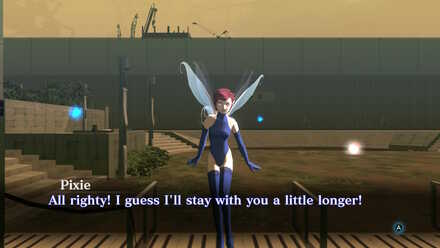
The moment you step on Yoyogi Park, a cutscene will play wherein you have to choose to keep or release Pixie. Pixie can be highly valuable as you explore the Amala Labyrinth, or you can release Pixie in exchange for an Ankh Magatama.
Shibuya
| Objectives | |
|---|---|
| 1 | Exit Yoyogi Park and return to the World map. Head south and Enter Shibuya. |
| 2 | Enter the nearby Underground Mall Access. Several facilities will be available in the Underground Mall. Fountain of Life (door with Green symbol) Terminal (door with Red symbol) Cathedral of Shadows (door with Purple symbol) Junk Shop (door with Pink symbol) |
| 3 | Leave the Underground Mall and head back up to Hachiko Intersection. You can purchase the Iyomante and Shiranui Magatama at the Junk Shop. Remember to save your game in the Terminal before leaving! |
| 4 | Continue East and enter the other Underground Mall. |
| 5 | Turn on the first right and continue heading North and enter the farthest door to the East. Upon entering, you will see a Datsue-Ba. Approach the Datsue-Ba then head North, then enter through the East most door. |
| Boss Fight | 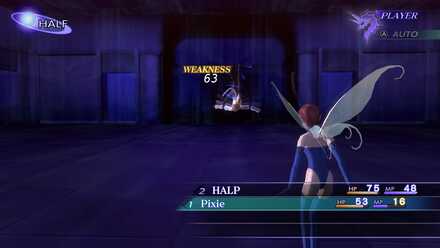 Boss Battle: Nekomata |
| 7 | Exit through the previous silver door in front of the Datsue-Ba to proceed with the story. Before you leave the room, you can open the cache cube. |
Pixie Will Ask to Evolve
As the battle ends, something will happen to Pixie's body. Choosing 'Yes' will evolve her, otherwise you can keep Pixie as its base form.
Shibuya - Phase 2
| Objectives | |
|---|---|
| 1 | After exiting the door, head West then keep heading Southwest until you reach a flight of stairs. |
| 2 | From the stairs, turn right and keep heading West till you reach the door leading to Club Inferno. |
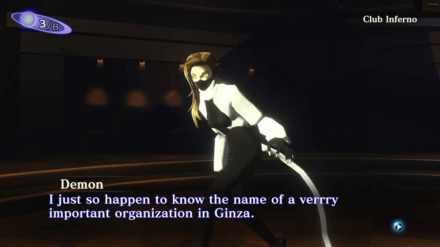
| 3 |  Continue East and enter the other Underground Mall. Keep going straight to enter Club Inferno and a cutscene with Chiaki will appear. |
| Boss Fight |  Boss Battle: Nekomata |
| 4 | Exit the area to and go back up Hachiko Intersection to leave the area. There's a Setanta in the middle of the Intersection to interact with. Save your game in the Underground Mall Terminal before leaving the area!. |
Head to the Underground Mall Terminal to talk to Hijiri
Apart from saving the game, head back to the Terminal and talk to Hijiri. Hijiri will offer the Demi-Fiend some form of alliance.
Yoyogi Park and Shibuya Boss Fights
Nekomata
This Nekomata will give you some info in exchange for a little favor~ Give her an Electrifying performance!
| List of Boss Weaknesses | ||
|---|---|---|
| Elec |
Nekomata will gain the upperhand in the battle, so make a sound decision between healing up who got hit in your party first or attack first then hope for another turn after exploiting her Elec weakness.
Mara
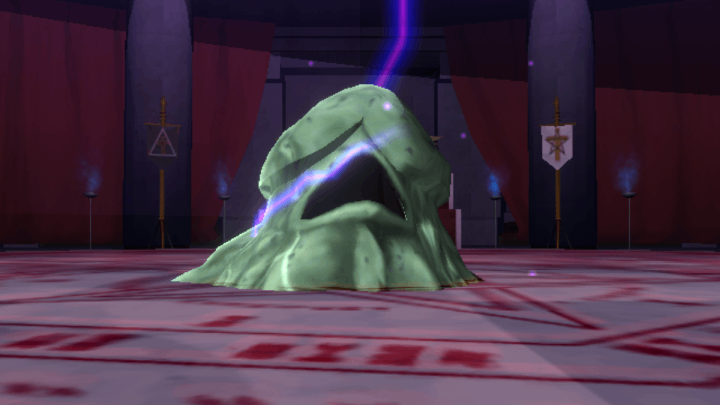
After you finish the Obelisk section, you can return to Shibuya and enter the secret door in Hachiko Intersection during a Full Kagutsuchi phase and battle Mara!
| Weaknesses | ||
|---|---|---|
| None, but Phys attacks are effective in dealing damage. |
Mara does not have any weaknesses and resists Magic damage, so focus on dealing damage using Physical attacks instead.
Yoyogi Park and Shibuya Maps
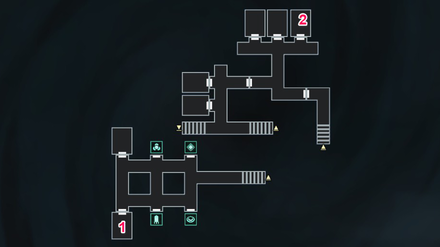
Yoyogi Park
| Plaza | 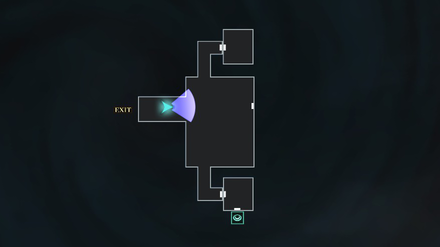 |
|---|
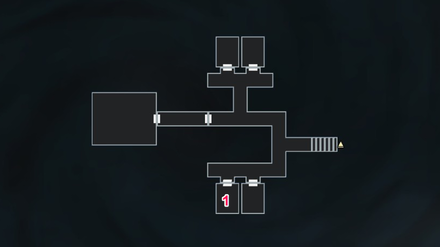
Shibuya
| Hachiko Intersection | 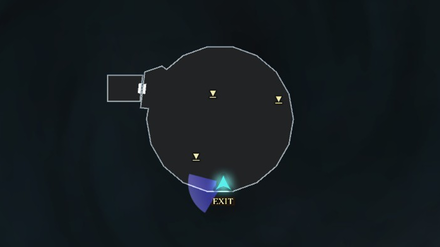 |
|---|---|
| B1 | 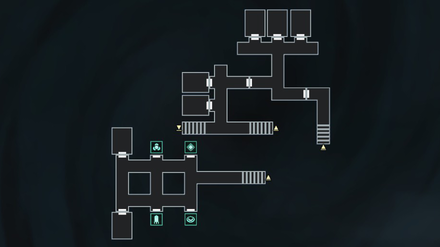 |
| B2 | 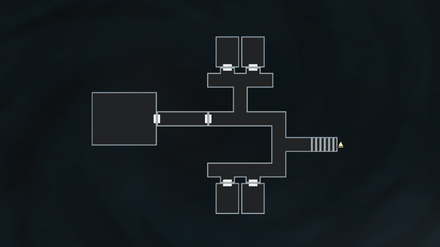 |
Yoyogi Park and Shibuya Obtainable Magatamas
Iyomante
Iyomante can be bought in the Junk Shop in Shibuya, where Hee-Ho is first met.
Shiranui
Shiranui can be bought in the Junk Shop in Shibuya, where Hee-Ho is first met.
Muspell
Muspell can be acquired through a hidden room with a hidden boss battle against Mara!
Yoyogi Park and Shibuya Obtainable Items
Yoyogi Park: Plaza
| Obtained from | Items | |
|---|---|---|
| 1 | Cache Cube | Chakra Drop x 1 |
| 2 | Cache Cube | Life Stone x 2 |
| 3 | Cache Cube | Dis-Poison x 1 |
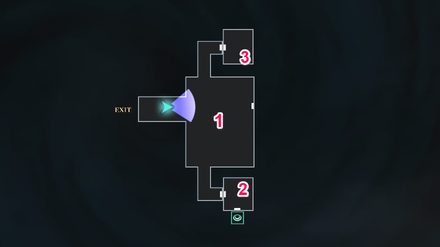
Shibuya: Hachiko Intersection
| Obtained from | Items | |
|---|---|---|
| 1 | Mystical Chest | Amethyst x 1 |
| 2 | Boss Fight After completing the Obelisk storyline, come back to Shibuya and enter the back door during Full Kagutsuchi. |
Muspell Magatama |
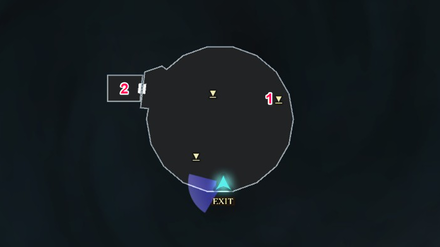
Shibuya: B1
| Obtained from | Items | |
|---|---|---|
| 1 | Mystical Chest | Agate x 1 |
| 2 | Cache Cube | Dis-Charm x 2 |
Shibuya: B2
| Obtained from | Items | |
|---|---|---|
| 1 | Cache Cube | 1000 Macca |
Yoyogi Park and Shibuya General Tips
| List of Enemy Weaknesses | ||
|---|---|---|
| Fire, Elec, Light |
The demons you'll face here generally have Fire, Elec, and Light weaknesses. Summon your demons that have those skills to secure a victory easier.
Heal, Revive, or Remove Curse at the Fountain of Life
The Lady of the Fount is kind enough to offer these services, so if you need to heal up, had a demon flown away you need to revive, or simply want to remove a curse before moving on with the story, go unlock the Fountain of Life located in Yoyogi Park
Buy Magatama from Jack Frost at the Junk Shop
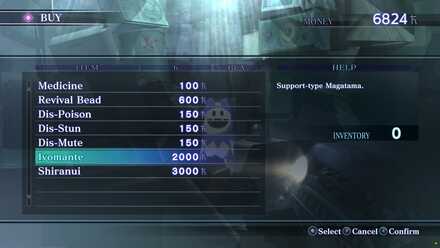
The Shiranui and Iyomante Magatama are purchasable at the Junk Shop. We recommend getting the Shiranui to get a Magic Fire build, and level it up to get Fire Breath, as you grind in the dungeons in this area.
Shin Megami Tensei 3: Nocturne Related Links

Story Walkthrough Guides
Endings Guide: How to Get All Endings
Labyrinth of Amala Guides
 First Kalpa Area First Kalpa AreaRecommended level: 20 |
 Second Kalpa Area Second Kalpa AreaRecommended level: 35 |
 Third Kalpa Area Third Kalpa AreaRecommended level: 50 |
 Fourth Kalpa Area Fourth Kalpa Area Recommended level: 65 |
 Fifth Kalpa Area Fifth Kalpa AreaRecommended level: 75 |
DLC Dungeon Guides
 Where the Demi-Fiend was Born Where the Demi-Fiend was Born |
 Center of the Conception Center of the Conception |
Author
Yoyogi Park and Shibuya Walkthrough, Boss Battles, and Item Locations
Please participate in our site
improvement survey
03/2026
improvement survey
03/2026
Would you assist in
improving Game8's site?
improving Game8's site?

×
We are listening to our users' valuable opinions and discussing how to act on them.
The information collected through this survey will be used for the purpose of improving our services. In addition, the information will only be disclosed a part of a statistic in a format that will not allow identification of personal information.
Begin Survey
Not Now
×
Please rate each item regarding Game8.co's Advertisements.
Amount of Ads
Very Dissatisfied
Somewhat Dissatisfied
Fine
Somewhat Satisfied
Highly Satisfied
Placement of Ads
Timing of Ad Display
Ad Loading Speed
Safeness of Ads
Content of Ads
×
Please rate each item regarding Game8.co's Quality of Articles.
Amount of information
Very Dissatisfied
Somewhat Dissatisfied
Fine
Somewhat Satisfied
Highly Satisfied
Frequency of updates
Speed of new information
Accuracy of articles
Understandibility of articles
Readability of sentences
×
Please rate each item regarding Game8.co's Usability of the Site.
Ease of finding information
Very Dissatisfied
Somewhat Dissatisfied
Fine
Somewhat Satisfied
Highly Satisfied
Loading Speed
Use of Color
Font Size
Visibility of Images
Easy to Understand Layout
×
Please rate each item regarding Game8.co's Message Boards, Comments.
Ease of Writing
Very Dissatisfied
Somewhat Dissatisfied
Fine
Somewhat Satisfied
Highly Satisfied
Readability
Ease in Finding Information
Comment Quality
Comment Quantity
Admin Response
×
Please rate each item regarding Game8.co's Site's new design.
Please rate our site's new design
Very Dissatisfied
Somewhat Dissatisfied
Fine
Somewhat Satisfied
Highly Satisfied
Do you think that the website's design change makes the site easier to use?
Has the new design made it easier for you to find information on the site?
Has the new design improved the overall visual appeal of the site?
How would you rate your overall satisfaction with the new design of the site?
×
How likely are you to recommend Game8 to someone you know?
Very Unlikely
0
1
2
3
4
5
6
7
8
9
10
Very Likely
If you have other opinions regarding potential improvement to the website, please share them with us. We would appreciate your honest opinion.
Note: This is a free response section, so you can proceed without entering anything.
Note: Please be sure not to enter any kind of personal information into your response.
Note: Please be sure not to enter any kind of personal information into your response.
×
Thank You
×
Thank you for participating in our survey! Your answers will help us to improve the quality of our website and services.
We hope you continue to make use of Game8.
We hope you continue to make use of Game8.
Close
Rankings
- We could not find the message board you were looking for.
Gaming News


![Monster Hunter Stories 3 Review [First Impressions] | Simply Rejuvenating](https://img.game8.co/4438641/2a31b7702bd70e78ec8efd24661dacda.jpeg/thumb)
Popular Games

Genshin Impact Walkthrough & Guides Wiki
Honkai: Star Rail Walkthrough & Guides Wiki
Umamusume: Pretty Derby Walkthrough & Guides Wiki
Pokemon Pokopia Walkthrough & Guides Wiki
Resident Evil Requiem (RE9) Walkthrough & Guides Wiki
Monster Hunter Wilds Walkthrough & Guides Wiki
Wuthering Waves Walkthrough & Guides Wiki
Arknights: Endfield Walkthrough & Guides Wiki
Pokemon FireRed and LeafGreen (FRLG) Walkthrough & Guides Wiki
Pokemon TCG Pocket (PTCGP) Strategies & Guides Wiki


Recommended Games
Diablo 4: Vessel of Hatred Walkthrough & Guides Wiki
Cyberpunk 2077: Ultimate Edition Walkthrough & Guides Wiki
Fire Emblem Heroes (FEH) Walkthrough & Guides Wiki
Yu-Gi-Oh! Master Duel Walkthrough & Guides Wiki
Super Smash Bros. Ultimate Walkthrough & Guides Wiki
Pokemon Brilliant Diamond and Shining Pearl (BDSP) Walkthrough & Guides Wiki
Elden Ring Shadow of the Erdtree Walkthrough & Guides Wiki
Monster Hunter World Walkthrough & Guides Wiki
The Legend of Zelda: Tears of the Kingdom Walkthrough & Guides Wiki
Persona 3 Reload Walkthrough & Guides Wiki


All rights reserved
©ATLUS. ©SEGA. All rights reserved. ATLUS is registered in the U.S. Patent and Trademark Office. ATLUS, the ATLUS logo, SHIN MEGAMI TENSEI, SHIN MEGAMI TENSEI NOCTURNE and SMT are either registered trademarks or trademarks of ATLUS Co., Ltd. or its affiliates.
©CAPCOM CO., LTD. All rights reserved.
The copyrights of videos of games used in our content and other intellectual property rights belong to the provider of the game.
The contents we provide on this site were created personally by members of the Game8 editorial department.
We refuse the right to reuse or repost content taken without our permission such as data or images to other sites.