Fourth Kalpa Walkthrough and Item Locations
This is a walkthrough for the Fourth Kalpa in Shin Megami Tensei III HD Remaster (SMT Nocturne) for the Nintendo Switch, PS4, and Steam. Here you'll find a guide on how to complete this area, general tips, and a list of items that can be found.
| Previous | Next |
|---|---|
| Third Kalpa Walkthrough | Fifth Kalpa Walkthrough |
List of Contents
How to Unlock Fourth Kalpa
DLC Only Content
You will only be able to access this content if you are playing the Chronicle or Maniax version of the game.
Accessible after defeating Dante, Pale Rider, Mother Harlot, and Trumpeter
Only after defeating Dante in the Third Kalpa, Pale Rider in Asakusa, Mother Harlot in Yoyogi park, and Trumpeter in Yurakucho Station will you be able to access the Fourth Kalpa in the Labyrinth of Amala.
| Boss Fight Guides | ||
|---|---|---|
 Dante(2nd Encounter) Dante(2nd Encounter) |
 Pale Rider Pale Rider |
|
 Mother Harlot Mother Harlot |
 Trumpeter Trumpeter |
|
Fourth Kalpa Walkthrough
Labyrinth of Amala Entrance & Third Kalpa
| Objectives | |
|---|---|
| 1 | Use the Amala Link to warp into the entrance of the Labyrinth of Amala. |
| 2 | 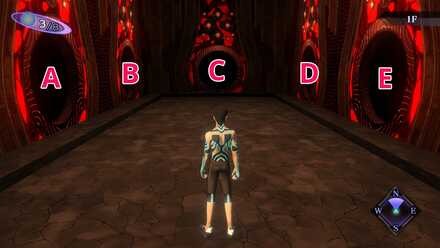 Use the middle path (path C) to descend. |
| 3 | 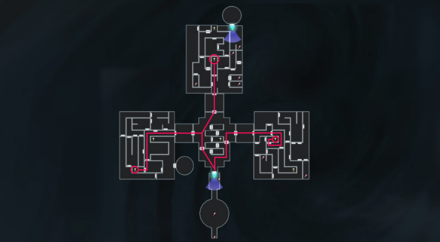 Descend to B1 from any of the three provided paths on the map. |
| 4 | 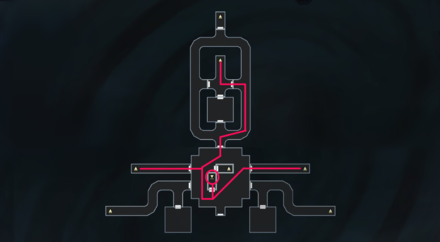 Use the following routes to find the path leading to B2 level from either the Strength, Magic, or Luck sections. |
| 5 | 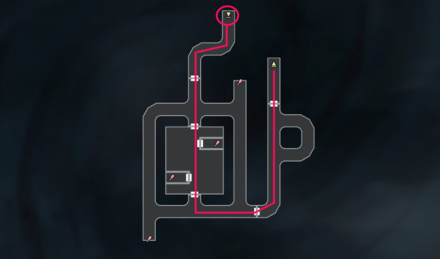 If players have beaten Black Frost in Kabukicho Prison prior to this, he will appear in the center room of the B2 level and join the player's party, forcibly. |
| 6 | Head straight, enter the door, then enter the door directly in front of you as you exit. This takes you to a room with a ladder leading down to the B4 level. |
| 7 | 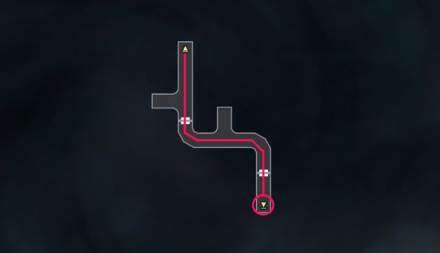 Follow the winding hallway all the way to the end. You should end up in the room where you originally fought Dante and you'll find the ladder leading to B5 level. |
| 8 | Run past the peephole and jump down the hole to the Fourth Kalpa entrance. |
| 9 | 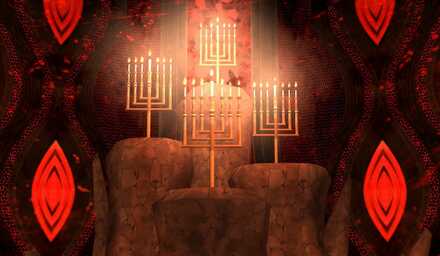 After landing, proceed to the Hall of Candles and light the 4 Menorahs in your possession. |
| 10 | The door to the Fourth Kalpa should now be open. |
Fourth Kalpa
| Objectives | |
|---|---|
| 1 | Upon entering, you will find yourself inside a cursed corridor. Keep heading straight, entering the north door. Warning: Float Balls do not work in these types of corridors. All players can do is tank the damage until you exit through the north door. |
| 2 | After entering the north door, proceed down the hallway. |
| 3 | 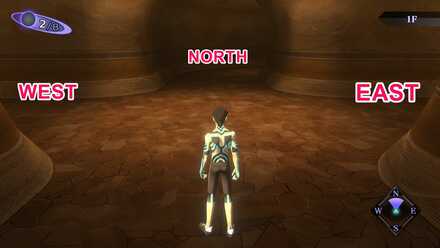 Once you reach the intersection, take the eastern path. |
| 4 |  Follow the hallway and use Door C. Use the ladder inside to descend to the B1 level. |
| 5 | In the B1 level, you will face a hallway with a warp point. It teleports you to different locations based on the phase of the Kagutsuchi. |
| 6 | When the phase indicated is New, enter the warp point. |
Fourth Kalpa: Hell's Hall
| Objectives | |
|---|---|
| 1 | The door in front of you will lead to a large area comprised of only cursed corridors. Enter it. |
| 2 | After entering, head straight and take the second right. You cannot use the map in this area. Make sure to take the second right. |
| 3 | After taking the second right, you should see a Mothman standing around. This means you're on the right track. |
| 4 | 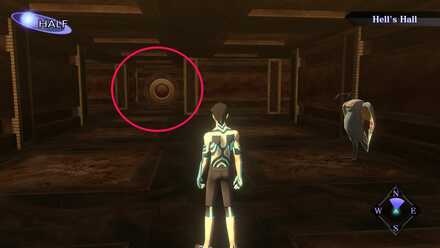 In the room with the Mothman, head North. |
| 5 | The northern door will soon be visible. Head straight until you get a prompt to open a door. Do so. |
| 6 | 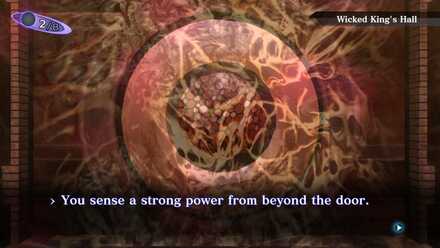 Before entering, recover all your lost HP and MP to prepare for a boss fight. |
| 7 | 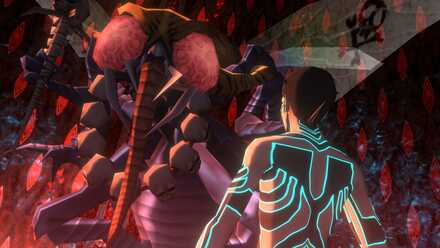 Boss Fight: Beelzebub |
| 8 | After beating Beelzebub, the curse of the corridors will be lifted. You can now return the way you came in. Note: There is a loot room at the opposite end of the room from where you entered. |
| 9 | 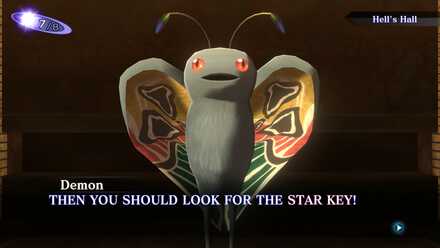 Once you exit, head back to the room/area with the Mothman. Speak to him and he'll tell you about the Star Key. This item is needed to descend further into the Amala Labyrinth. |
| 10 | After speaking to him, orient yourself to the south with the Mothman next to you, on your left. |
| 11 | Head south until a door comes up to your left. Enter that door. |
| 12 | Use the warp point to get to the end of the original warp corridor in the B1 level. |
| 13 | Don't go down the ladder. Instead, use the warp point behind you to return to the entrance of the Fourth Kalpa. |
| 14 | 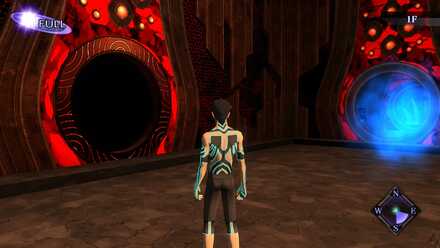 Return to the entrance of the Labyrinth of Amala using the hole next to the entrance and the soul. |
Second Kalpa
| Objectives | |
|---|---|
| 1 |  From the Labyrinth of Amala Entrance, use the 2nd path to the left (path B). |
| 2 | From the 1F level, go down the hallway and use the drop-down pit to get to the B1 level. |
| 3 | 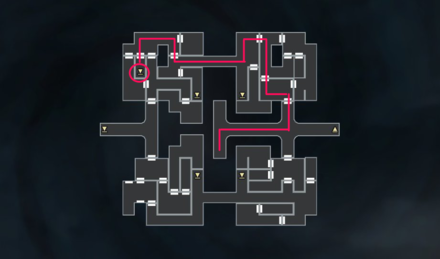 Follow this path to get to the ladder that takes you to the B2 Cursed Corridor area. |
| 4 | 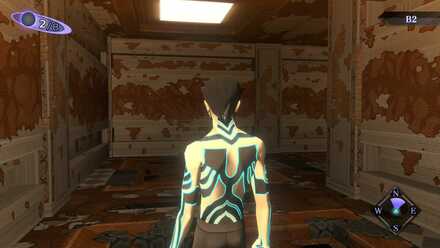 Follow it until you reach the ladder at the center. Follow it until you reach the ladder at the center.The curse has been removed by defeating Beelzebub. |
| 5 | Use the ladder to descend down to the room with the Efreet demon. |
| 6 | 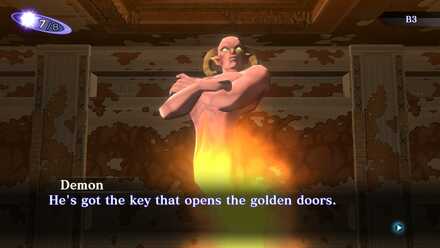 Talk to him and he'll tell you the Star Key is with his drinking buddy up in Tokyo. |
| 7 | Exit the cursed corridor area and ascend back to the B1 level. |
| 8 | 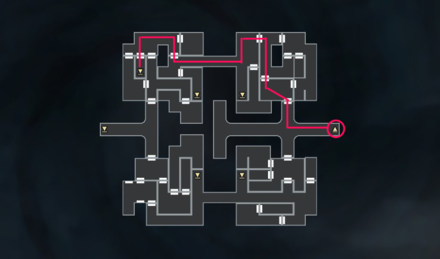 Follow this path to the ladder leading you up to the entrance of the Second Kalpa. |
| 9 | 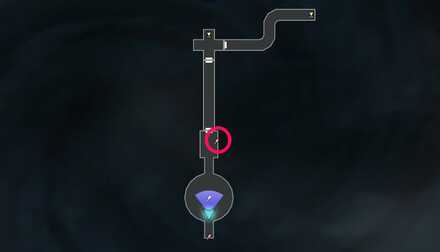 Follow the path that returns you to the entrance of the Labyrinth. |
Finding the Star Key
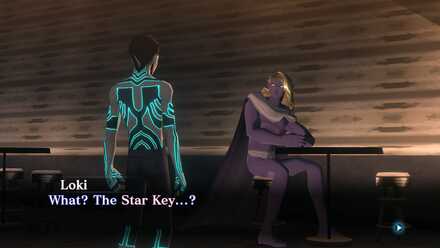
The Efreet's drinking buddy is Loki in Ginza! Head to Nyx's lounge to find that the Star Key is no longer in his possession!
After talking to Loki, head to Asakusa then proceed to the B1 level then head straight to the Junkshop.
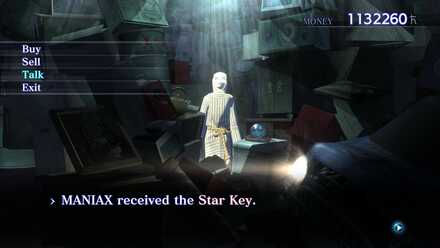
Choose the Talk command to have the Collector Manikin give you the Star Key. After obtaining it, return to the third Kalpa.
Third Kalpa
| Objectives | |
|---|---|
| 1 |  From the Labyrinth of Amala entrance, jump down the central path (path C). |
| 2 |  After landing, follow any of the paths indicated to get to the B1 level from the Strength, Luck, or Magic sections then descend to B1 level. |
| 3 | 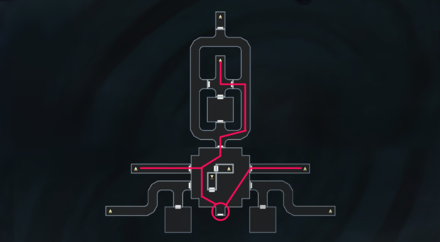 Follow the indicated paths to get to the central area of the B1 level. |
| 4 | 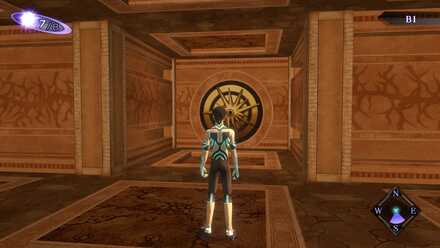 With the Star Key, you can now open the locked gold door on this level. |
| 5 | Open the locked door then jump down the hole to proceed to fourth Kalpa. |
| 6 | 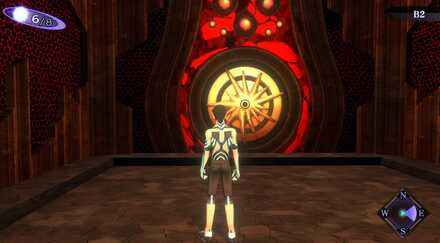 Upon landing, a new locked gold door will await you. Open it with the Star Key. |
| 7 | 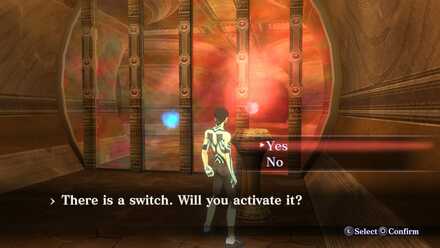 Activate the switch on the other end. This will open the door to the Fifth Kalpa. |
| 8 | Head back the way you came. |
| 9 | 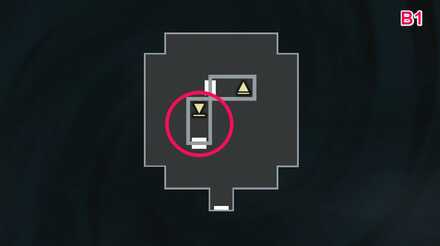 Once back in the B1 level of the Third Kalpa, use this ladder to get to the B2 level. |
| 10 |  Follow this route to get to the ladder that takes you to the B3 level. |
| 11 | After reaching B3, keep heading straight, past two doors then you'll arrive at the ladder taking you to the B4 level. |
| 12 | Follow the snaking hallway a second time and descend to the B5 level. |
| 13 | Run past the peephole and jump down the hole to the Fourth Kalpa entrance. |
Fourth Kalpa to Fifth Kalpa Entrance
| Objectives | |
|---|---|
| 1 | Head through the north door again. |
| 2 | Once through, go down the hallway and take the first right at the intersection. |
| 3 | 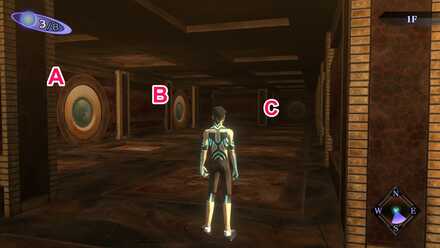 Follow the hallway and use Door C to get to the ladder. |
| 4 | Use the ladder to descend to the B1 level. |
| 5 | Wait for a New Kagutsuchi again. Once it's New, use the warp point. |
| 6 | You should now be back in Hell's Hall. Enter the door in front of you. Players will still be unable to use the map in these special areas. |
| 7 | This time, take the first right. There should be a door at the end of the hallway if you used the correct right turn. |
| 8 | Head to the door and enter it. |
| 9 | Use the warp point inside. This takes you to the end of the original warp corridor in the B1 level. |
| 10 | Use the ladder to descend to the B2 level. |
| 11 | 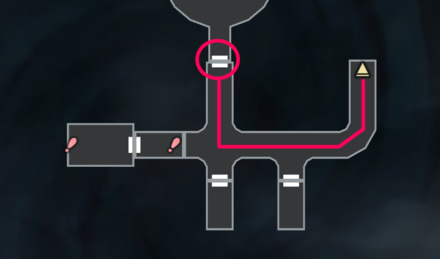 Follow this path to get to the Fifth Kalpa entrance. It should be open now. |
| 12 | Head inside and peer through the peephole. The lady-in-black will ask you a question. If you answer yes, she will open the door leading to the Fifth Kalpa. |
Fourth Kalpa Boss Fights
Beelzebub Boss Fight

Many sections will be cursed while Beelzebub has not yet been defeated. Make sure to prioritize defeating Beelzebub to fully unlock the fourth Kalpa area.
Fourth Kalpa Maps
| 1F | 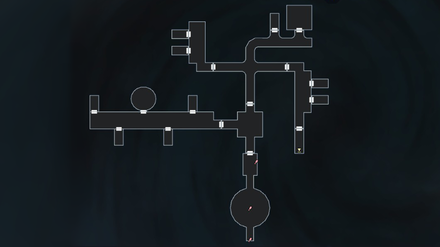 |
|---|---|
| B1 | 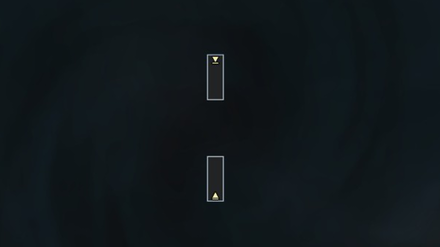 |
| B1: Road to Hell | 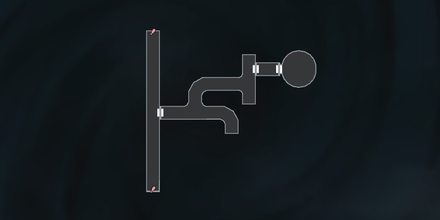 |
| B1: Hell's Vault | 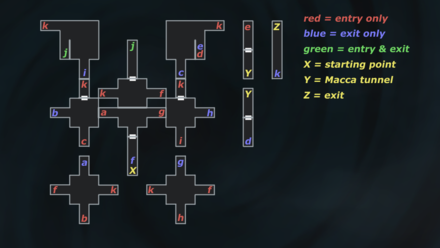 |
| B1: Hell's Maze | 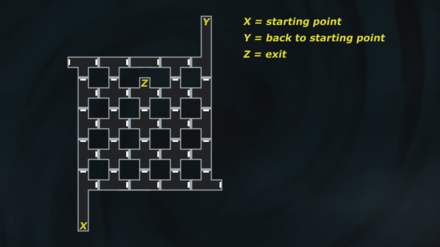 |
| B1: Hell's Hall | 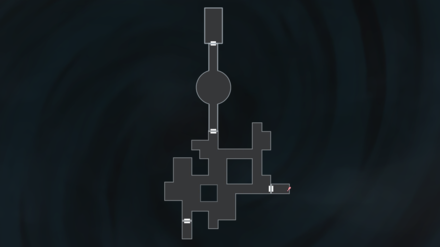 |
| B2 | 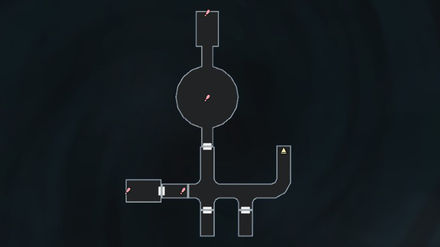 |
Fourth Kalpa NPCs
1F
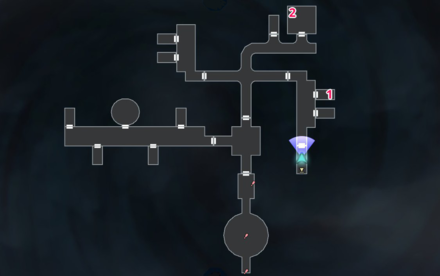
| NPC | |
|---|---|
| 1 | Shady Surgeon |
| 2 | Shady Broker |
Shady Surgeon
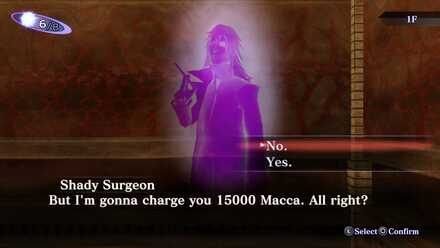
The Shady Surgeon in the 1F level of the Fourth Kalpa dungeon will charge Macca to heal players. For a full heal, he asks for 15,000 Macca.
Shady Broker
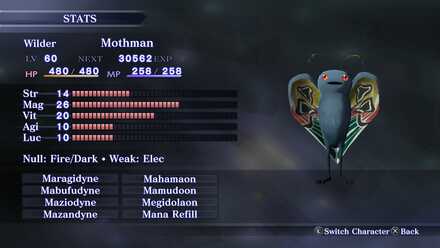
The Shady Broker in the 1F level of the Fourth Kalpa dungeon will sell a special Mothman to players for 50,000 Macca.
This Mothman is a multi-target, offensive spellcaster, seeing as it has all the multi-target spells of every element including Light, Dark, and Almighty.
| Special Mothman Skills | |
|---|---|
| Maragidyne | Mabufudyne |
| Maziodyne | Mazandyne |
| Mahamaon | Mamudoon |
| Megidolaon | Mana Refill |
Hell's Hall
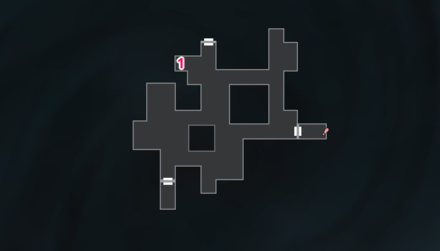
| NPC | |
|---|---|
| 1 | Shady Surgeon |
Shady Surgeon
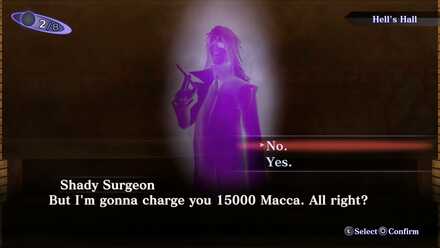
The Shady Surgeon in the Hell's Hall level of the Fourth Kalpa dungeon will charge Macca to heal players. For a full heal, he asks for 15,000 Macca.
Although this NPC can heal players, he will not be practical to use for the Beelzebub boss fight. This is due to his distance from the boss door and the cursed nature of the area.
B2
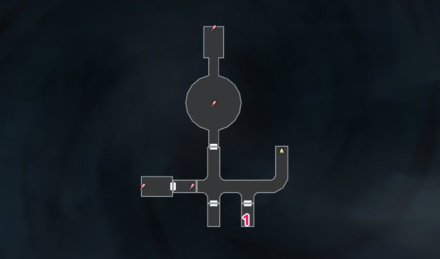
| NPC | |
|---|---|
| 1 | Souls Offering Rest |
Souls Offering Rest
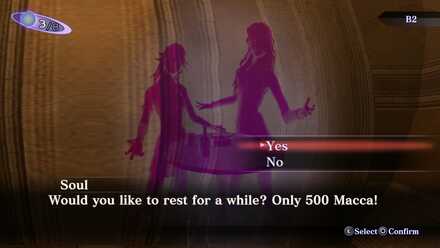
These two souls will offer to heal the player in exchange for Macca. Accepting will teleport players back to the start of the dungeon with a significant amount of their Macca, missing.
Fourth Kalpa Obtainable Items
1F
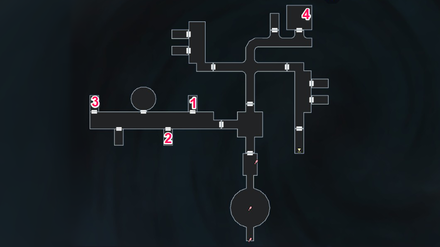
| Obtained from | Items | |
|---|---|---|
| 1 | Cache Cube | 25000 Macca |
| 2 | Cache Cube | 25000 Macca |
| 3 | Cache Cube | Deathstone x 1 |
| 4 | Mystical Chest | Soma x 1 |
B1: The Road to Hell
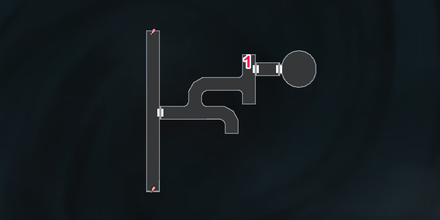
| Obtained from | Items | |
|---|---|---|
| 1 | Cache Cube | Deathstone x 1 |
B1: Hell's Vault
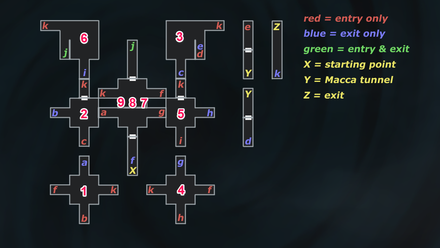
| Obtained from | Items | |
|---|---|---|
| 1 | Mystical Chest | Bead of Life x 1 |
| 2 | Mystical Chest | Great Chakra x 1 |
| 3 | Mystical Chest | Bead Chain x 1 |
| 4 | Mystical Chest | Attack Mirror x 1 |
| 5 | Mystical Chest | Attack Mirror x 1 |
| 6 | Cache Cube | Deathstone x 1 |
| 7 | Mystical Chest | Smoke Ball x 5 |
| 8 | Cache Cube | Deathstone x 1 |
| 9 | Cache Cube | 100001 Macca |
B1: Hell's Hall
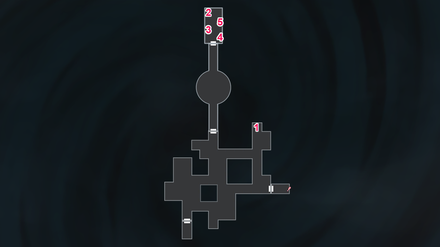
| Obtained from | Items | |
|---|---|---|
| 1 | Cache Cube | Deathstone x 1 |
| 2 | Mystical Chest | Magic Incense x 1 |
| 3 | Mystical Chest | Strength Incense x 1 |
| 4 | Mystical Chest | Diamond x 3 |
| 5 | Cache Cube | 66666 Macca |
B2
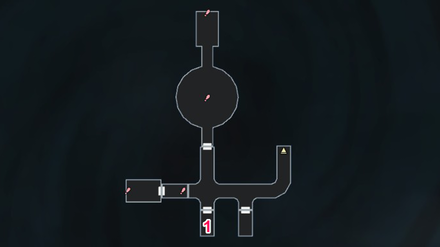
| Obtained from | Items | |
|---|---|---|
| 1 | Cache Cube | Tetraja Rock x 1 |
Fourth Kalpa General Tips
Equip your team with Null Death
Beelzebub will use a special attack called Death Flies. This skill kills anyone without Dark immunity, including the Demi-fiend.
Equip Magatama that has Null Dark. Also, bring demons with immunities to dark. Check out our Magatama list to know which ones have this resistance.
Float Balls do not Negate Cursed Corridor Damage
The type of floor damage Cursed Corridors inflict cannot be prevented using float balls.
Instead, bring lots of HP Recvovery items and demons with appropriate healing spells like Mediarama and Diarama
Use Estoma Excessively
Estoma reduces the encounter rate until a new Kagutsuchi. Bring a demon with this skill and use it excessively especially when traversing cursed sections of the Kalpa.
High level demons roam these cursed halls, it would be unwise to combat them at any condition other than full.
Shin Megami Tensei 3: Nocturne Related Links

Story Walkthrough Guides
Endings Guide: How to Get All Endings
Labyrinth of Amala Guides
 First Kalpa Area First Kalpa AreaRecommended level: 20 |
 Second Kalpa Area Second Kalpa AreaRecommended level: 35 |
 Third Kalpa Area Third Kalpa AreaRecommended level: 50 |
 Fourth Kalpa Area Fourth Kalpa Area Recommended level: 65 |
 Fifth Kalpa Area Fifth Kalpa AreaRecommended level: 75 |
DLC Dungeon Guides
 Where the Demi-Fiend was Born Where the Demi-Fiend was Born |
 Center of the Conception Center of the Conception |
Comment
Hands down the Best Guide i can find about 4th Kalpa ever. Even Gamefaqs does not give a clear detail about what to do or which way to choose. Whoever you are that write this guide, may God bless you as save us hours of this maze
Author
Fourth Kalpa Walkthrough and Item Locations
improvement survey
03/2026
improving Game8's site?

Your answers will help us to improve our website.
Note: Please be sure not to enter any kind of personal information into your response.

We hope you continue to make use of Game8.
Rankings
- We could not find the message board you were looking for.
Gaming News
Popular Games

Genshin Impact Walkthrough & Guides Wiki

Honkai: Star Rail Walkthrough & Guides Wiki

Umamusume: Pretty Derby Walkthrough & Guides Wiki

Pokemon Pokopia Walkthrough & Guides Wiki

Resident Evil Requiem (RE9) Walkthrough & Guides Wiki

Monster Hunter Wilds Walkthrough & Guides Wiki

Wuthering Waves Walkthrough & Guides Wiki

Arknights: Endfield Walkthrough & Guides Wiki

Pokemon FireRed and LeafGreen (FRLG) Walkthrough & Guides Wiki

Pokemon TCG Pocket (PTCGP) Strategies & Guides Wiki
Recommended Games

Diablo 4: Vessel of Hatred Walkthrough & Guides Wiki

Cyberpunk 2077: Ultimate Edition Walkthrough & Guides Wiki

Fire Emblem Heroes (FEH) Walkthrough & Guides Wiki

Yu-Gi-Oh! Master Duel Walkthrough & Guides Wiki

Super Smash Bros. Ultimate Walkthrough & Guides Wiki

Pokemon Brilliant Diamond and Shining Pearl (BDSP) Walkthrough & Guides Wiki

Elden Ring Shadow of the Erdtree Walkthrough & Guides Wiki

Monster Hunter World Walkthrough & Guides Wiki

The Legend of Zelda: Tears of the Kingdom Walkthrough & Guides Wiki

Persona 3 Reload Walkthrough & Guides Wiki
All rights reserved
©ATLUS. ©SEGA. All rights reserved. ATLUS is registered in the U.S. Patent and Trademark Office. ATLUS, the ATLUS logo, SHIN MEGAMI TENSEI, SHIN MEGAMI TENSEI NOCTURNE and SMT are either registered trademarks or trademarks of ATLUS Co., Ltd. or its affiliates.
©CAPCOM CO., LTD. All rights reserved.
The copyrights of videos of games used in our content and other intellectual property rights belong to the provider of the game.
The contents we provide on this site were created personally by members of the Game8 editorial department.
We refuse the right to reuse or repost content taken without our permission such as data or images to other sites.
 Shinjuku Hospital Walkthrough
 Yoyogi Park and Shibuya Walkthrough
 Amala Network 1 Walkthrough
 Ginza and the Great Underpass Walkthrough
 Ikebukuro Walkthrough
 Assembly of Nihilo Walkthrough
 Kabukicho Walkthrough
 Asakusa and Obelisk Walkthrough
 Amala Network 2 Walkthrough
 Yoyogi Park 2 Walkthrough
 Amala Temple Walkthrough
 Mifunashiro and Yurakucho Walkthrough
 Diet Building Walkthrough
 Bandou Shrine Walkthrough
 Tower of Kagutsuchi Walkthrough




![Monster Hunter Stories 3 Review [First Impressions] | Simply Rejuvenating](https://img.game8.co/4438641/2a31b7702bd70e78ec8efd24661dacda.jpeg/thumb)


Yes and No. Dante is from the Maniax DLC (costs 10 bucks) and Raidou is from the Chronicles DLC (free). On PC, you need to download the free Chronicles DLC in order to unlock Raidou, the Fiends and the Labyrinth of Amala. On PS4, the Chronicle DLC is already "installed", so no extra DLC is needed to get this content. On both systems however, you need to select Chronicles when playing a New Game, otherwise you get the Normal version, which is without Raidou, the Fiends and the Labyrinth.