Amala Network (1st Entry) Walkthrough, Boss Battles, and Item Locations
This is a story walkthrough for Amala Network in Shin Megami Tensei III HD Remaster (SMT Nocturne) for the Nintendo Switch, PS4, and Steam. Here you'll find a guide on how to complete this area, story section, boss strategies, general tips, and a list of items that can be found.
| Previous | Next |
|---|---|
| Yoyogi Park and Shibuya | Ginza and the Great Underpass |
List of Contents
Amala Network Story Walkthrough
Amala Network B3
| Objectives | |
|---|---|
| 1 | 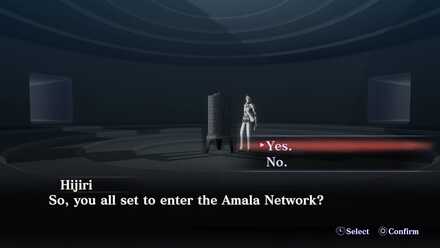 The Amala Network will become available after speaking to Hijiri at the Terminal. |
| 2 | Starting at B3, head North until you reach the door, then Head West when you reach the hallway. |
| 3 | When you reach the new hallway, head North to the right-side hallway. |
| 4 | 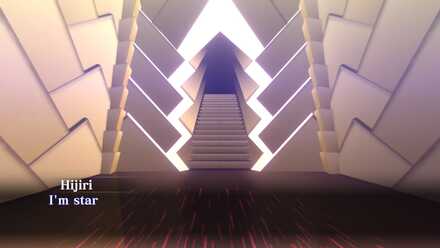 Keep heading North until a cutscene with Hijiri ensues. A stairway will then appear. |
Amala Network B2
| 5 | 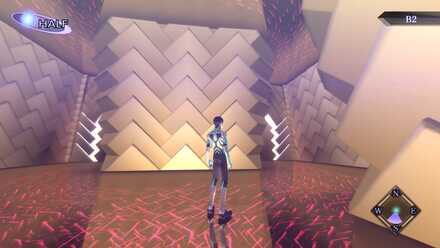 Go up the stairs to reach B2. Keep going Southeast then take the right-side path and enter the door. |
|---|---|
| 6 | Continue South until a dialogue from Hijiri appears. Reroute East and go through the door. |
| 7 | Turn right then keep going Southeast. Go through the farthest door in the hallway (East). Heading towards East until Healing Room (North) will open the door to a Heal spot. Heading towards East until Hall of Records will open the door to a Save Terminal. |
| 8 | Go through the left-side hallway. |
| 9 | Upon entering the new hallway, go through the left-side hallway again. |
| 10 | To the left! Head to the left-side hallway upon entering the new hallway. |
| 11 | 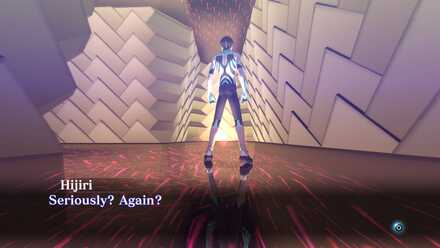 Keep pushing forward until you reach Anomaly. You'll start to hear Hijiri again. |
| 12 | Stairs will appear at a previous area near the Healing Room. Start by hugging the right wall and keep turning right until you reach the room that leads to the Healing Room. |
| 13 | 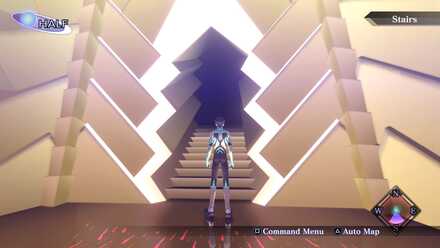 In front of the Healing Room door, turn left and exit the area through the door, then head south and the new staircase will be there.. Go up to reach B1. |
Amala Network B1
| Objectives | |
|---|---|
| 16 | Starting at B1, keep going South.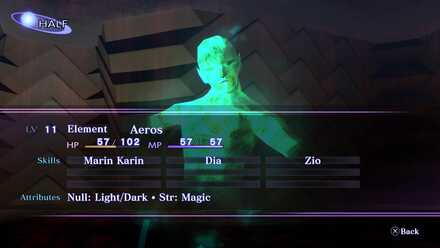 You might encounter a demon fight. You might encounter a demon fight. |
| 17 | Continue Southeast until you reach a door (East door). |
| 18 | After entering the door, head Northeast to the left-side hallway.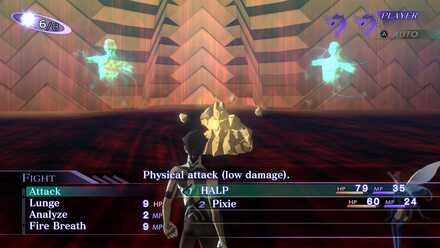 You might encounter a demon fight. You might encounter a demon fight. |
| 19 | Go East towards the right-side hallway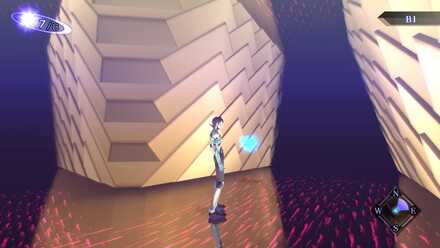 You can interact with the Soul. You can interact with the Soul. |
| 20 | Once you reach the new hallway split into four, just stick East pushing forward. |
| 21 | Keep going East again, pushing forward, until you go through a new hallway. |
| 22 | 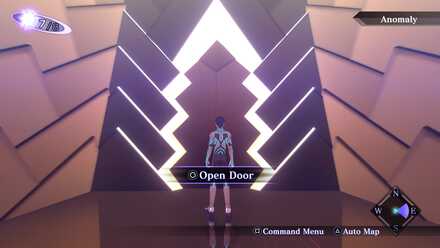 Keep going forward and you'll reach Anomaly. You'll be able to hear Hijiri again. |
| 23 | Push forward away from the Anomaly until you reach the middle of the four-split hallway. Then proceed to the South hallway. |
| 24 | Go east then push through the left-side hallway. |
| 25 | 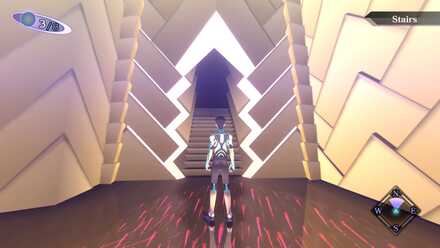 Keep going forward until you reach the stairs! |
Amala Network 1F
| Objectives | |
|---|---|
| 26 | Starting at 1F, head Northwest then go through the West hallway. You can speak to a Soul. |
| 27 | Keep pushing forward to the West. |
| 28 | Upon entering another four-split hallway, go to the middle then turn left and head towards the South hallway. |
| 29 | Keep pushing forward until you reach the stairs.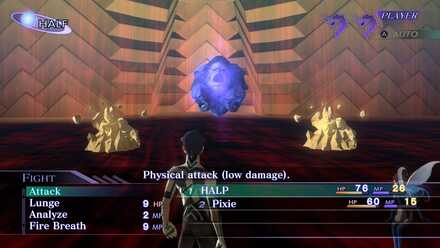 You might engage in a demon fight. You might engage in a demon fight. |
Amala Network B1 - Part 2
| Objectives | |
|---|---|
| 30 | You'll reach a new area of B1 and notice a bunch of Cache Cubes and Chest scattered around. Turn left at the end of the hall towards the North hallway.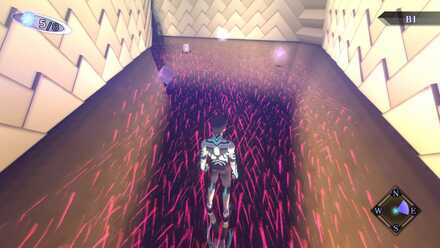 The furthest Cache Cube is a trap and your party will take damage. The furthest Cache Cube is a trap and your party will take damage. |
| 31 | Go East towards the East hallway.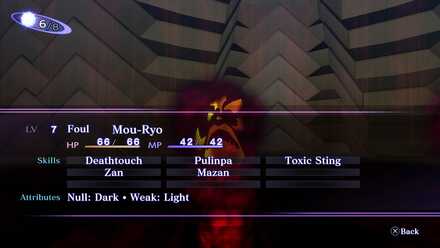 You might engage in a demon fight. You might engage in a demon fight. |
| 32 | Press forward until you reach the stairs then go back up to 1F. |
Amala Network 1F - Part 2
| Objectives | |
|---|---|
| 33 | Starting at 1F, turn right at the end of the hallway towards the East hallway. |
| 34 | Take the right-side path of the new hallway, head West until you reach the South door. You'll find a Save Terminal at the East door Hall of Records. You'll find a healing room at the South door near Hall of Records. |
| 35 | You'll reach another Anomaly and hear Hijiri again. |
| Boss Fight | 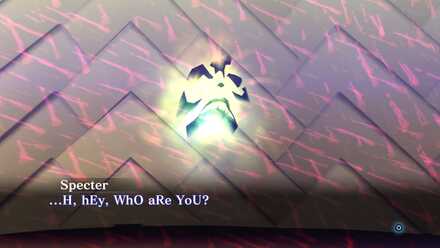 Boss Battle: Specter |
| 37 | Hijiri will open a door that should let you reach the next area safely. |
| 38 | Head towards the light (in the South)! Exit the area to proceed with the story. There is a Save Terminal at the East door. There is a Healing Room at the South door near Hall of Records. |
Amala Network 1F - Part 3
| Objectives | |
|---|---|
| 39 | 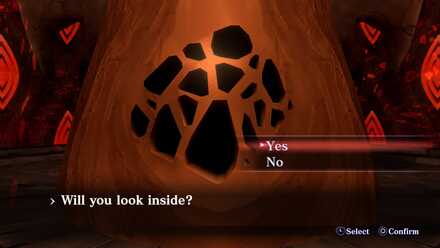 You will be transported to an unknown location. Examine the structure in the middle and look inside the peephole. |
| 40 | 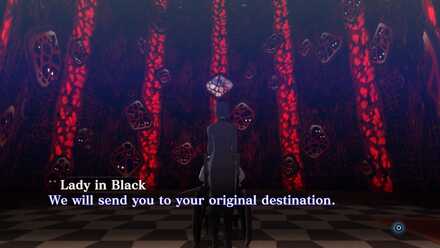 During the cutscene, Lady in Black will decide to "take you back to your original destination". After that, you will be transported to a Terminal. |
The Amala Link Will Be Unlocked
The Terminal Link enables you to fast-travel to your desired destination. This will be unlocked once you get transported to a Terminal after the cutscene.
At this point, you will now be able to access the optional dungeons of Where the Demi-Fiend was Born and Center of the Conception if you have the Mercy and Expectation Map Pack DLC.
Amala Network Boss Fights
Specter
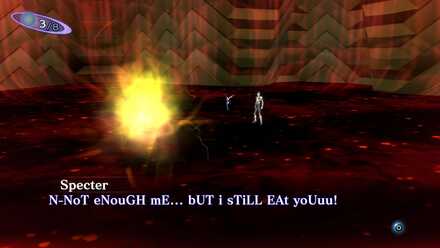
Specter wants all the Magatsuhi for itself. Focus on area of effect attacks to wipe out the army of Specters quickly before they can overwhelm you.
| List of Boss Weaknesses | ||
|---|---|---|
| None, but you can take advantage of its Fire attacks by arming yourself with Shiranui. |
This battle is generally divided into two phases. Phase 1 will be against a group of Specters. At the enemy's third turn, it will activate Foul Union, ushering the battle to Phase 2, which is against a unified Specter.
Amala Network Maps
| B3 | 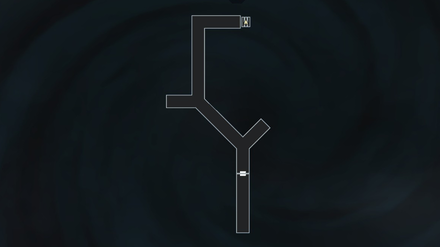 |
|---|---|
| B2 | 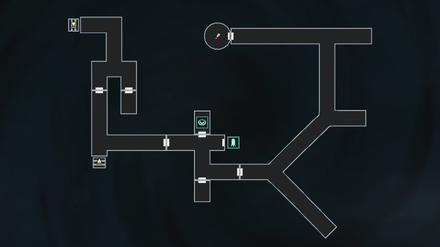 |
| B1 | 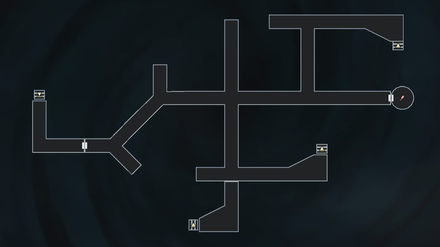 |
| 1F | 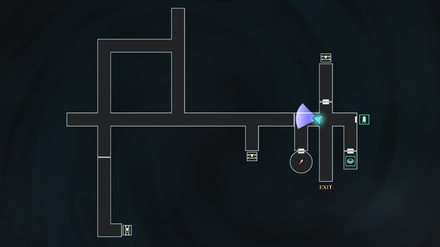 |
Amala Network Obtainable Items
B3
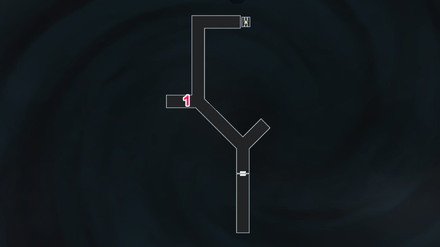
| Obtained from | Items | |
|---|---|---|
| 1 | Cache Cube | Dis-Stone x 1 |
B2
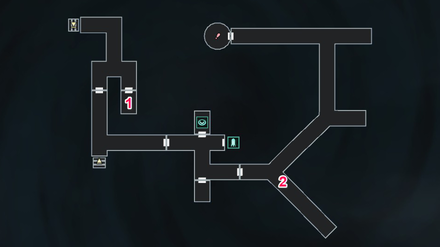
| Obtained from | Items | |
|---|---|---|
| 1 | Cache Cube | Bead x 1 |
| 2 | Cache Cube | Life Stone x 2 |
B1
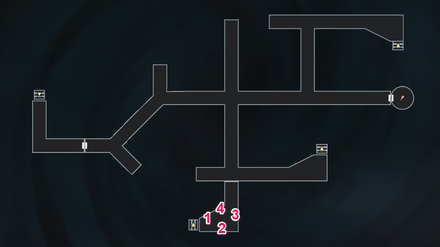
| Obtained from | Items | |
|---|---|---|
| 1 | Cache Cube | Mazan Rock x 1 |
| 2 | Cache Cube | Chakra Drop x 1 |
| 3 | Cache Cube | It's a trap! Your party takes damage. |
| 4 | Mystical Chest | Life Stone x 1 or Bead Chain x 1 |
Amala Network General Tips
| List of Enemy Weaknesses | ||
|---|---|---|
| Force, Light |
Enemies in this dungeon will generally be weak to Force and Light attacks.
Bring Demons that Have AOE, Force, and Light Skills
The weaknesses of the enemies in this dungeon are varied but in general they are weak to Force and Light. It is also highly recommended to bring demons that have wide area-of-effect attacks as the group of enemies mostly come in threes.
Equip Shiranui Magatama Before the Boss Fight
The Amala Network Boss, Specter, will rely mostly on Fire and Phys attacks. Take advantage of this by equipping Shiranui that will make Demi-Fiend block Fire attacks.
Save Game and Heal Whenever Possible!
Check out the indicated Save Terminals and Healing Rooms hidden behind the doors in this dungeon. Always keep this in mind before proceeding to the next area.
Shin Megami Tensei 3: Nocturne Related Links

Story Walkthrough Guides
Endings Guide: How to Get All Endings
Labyrinth of Amala Guides
 First Kalpa Area First Kalpa AreaRecommended level: 20 |
 Second Kalpa Area Second Kalpa AreaRecommended level: 35 |
 Third Kalpa Area Third Kalpa AreaRecommended level: 50 |
 Fourth Kalpa Area Fourth Kalpa Area Recommended level: 65 |
 Fifth Kalpa Area Fifth Kalpa AreaRecommended level: 75 |
DLC Dungeon Guides
 Where the Demi-Fiend was Born Where the Demi-Fiend was Born |
 Center of the Conception Center of the Conception |
Author
Amala Network (1st Entry) Walkthrough, Boss Battles, and Item Locations
improvement survey
03/2026
improving Game8's site?

Your answers will help us to improve our website.
Note: Please be sure not to enter any kind of personal information into your response.

We hope you continue to make use of Game8.
Rankings
- We could not find the message board you were looking for.
Gaming News
Popular Games

Genshin Impact Walkthrough & Guides Wiki

Honkai: Star Rail Walkthrough & Guides Wiki

Umamusume: Pretty Derby Walkthrough & Guides Wiki

Pokemon Pokopia Walkthrough & Guides Wiki

Resident Evil Requiem (RE9) Walkthrough & Guides Wiki

Monster Hunter Wilds Walkthrough & Guides Wiki

Wuthering Waves Walkthrough & Guides Wiki

Arknights: Endfield Walkthrough & Guides Wiki

Pokemon FireRed and LeafGreen (FRLG) Walkthrough & Guides Wiki

Pokemon TCG Pocket (PTCGP) Strategies & Guides Wiki
Recommended Games

Diablo 4: Vessel of Hatred Walkthrough & Guides Wiki

Cyberpunk 2077: Ultimate Edition Walkthrough & Guides Wiki

Fire Emblem Heroes (FEH) Walkthrough & Guides Wiki

Yu-Gi-Oh! Master Duel Walkthrough & Guides Wiki

Super Smash Bros. Ultimate Walkthrough & Guides Wiki

Pokemon Brilliant Diamond and Shining Pearl (BDSP) Walkthrough & Guides Wiki

Elden Ring Shadow of the Erdtree Walkthrough & Guides Wiki

Monster Hunter World Walkthrough & Guides Wiki

The Legend of Zelda: Tears of the Kingdom Walkthrough & Guides Wiki

Persona 3 Reload Walkthrough & Guides Wiki
All rights reserved
©ATLUS. ©SEGA. All rights reserved. ATLUS is registered in the U.S. Patent and Trademark Office. ATLUS, the ATLUS logo, SHIN MEGAMI TENSEI, SHIN MEGAMI TENSEI NOCTURNE and SMT are either registered trademarks or trademarks of ATLUS Co., Ltd. or its affiliates.
©CAPCOM CO., LTD. All rights reserved.
The copyrights of videos of games used in our content and other intellectual property rights belong to the provider of the game.
The contents we provide on this site were created personally by members of the Game8 editorial department.
We refuse the right to reuse or repost content taken without our permission such as data or images to other sites.
 Shinjuku Hospital Walkthrough
 Yoyogi Park and Shibuya Walkthrough
 Amala Network 1 Walkthrough
 Ginza and the Great Underpass Walkthrough
 Ikebukuro Walkthrough
 Assembly of Nihilo Walkthrough
 Kabukicho Walkthrough
 Asakusa and Obelisk Walkthrough
 Amala Network 2 Walkthrough
 Yoyogi Park 2 Walkthrough
 Amala Temple Walkthrough
 Mifunashiro and Yurakucho Walkthrough
 Diet Building Walkthrough
 Bandou Shrine Walkthrough
 Tower of Kagutsuchi Walkthrough




![Monster Hunter Stories 3 Review [First Impressions] | Simply Rejuvenating](https://img.game8.co/4438641/2a31b7702bd70e78ec8efd24661dacda.jpeg/thumb)


