Diet Building Walkthrough, Boss Battles, and Item Locations

This is a story walkthrough for Diet Building in Shin Megami Tensei III HD Remaster (SMT Nocturne) for the Nintendo Switch, PS4, and Steam. Here you'll find a guide on how to complete this area, story section, boss strategies, general tips, and a list of items that can be found.
| Previous | Next |
|---|---|
| Mifunashiro & Yurakucho | Tower of Kagutsuchi |
Diet Building Story Walkthrough
Diet Building
| Objectives | |
|---|---|
| 1 | As you enter Diet Building, walk forward and a dialogue will play. An S-Terminal is located up ahead at the 2F North door. |
| 2 | Turn left heading to the West wing of the building. A short monologue will play before you can get to the door. Prepare for a fight against Surt before proceeding with this step. |
| Boss Fight |  Boss Battle: Surt |
| 4 | 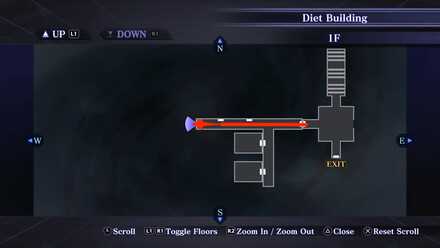 Enter the West door after defeating Surt. Continue forward to the other end of the hall and enter the West door. |
| 5 | Climb up the flight of stairs and enter the door. Turn left going North and enter the door. |
| 6 | 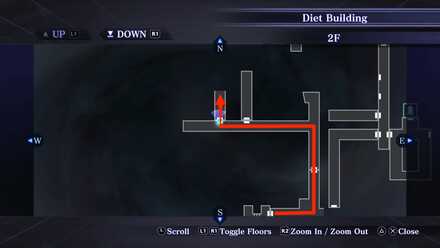 Take the first left turn and enter the farthest North door. |
| 7 | Continue forward to the other end of the hall and enter the farthest East door. |
| 8 | Turn left and go through the North door. Turn right going East, then turn right and enter the nearby East door. |
| 9 | 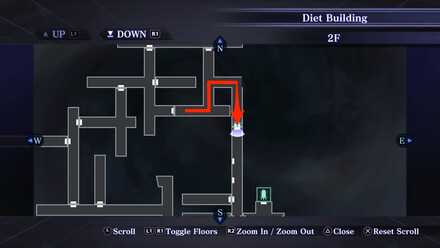 Turn left, turn right, and turn right again and enter the South door. |
| 10 | 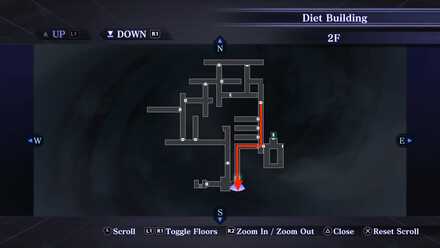 Go to the other end of the hall and enter the West door. Continue forward, turn left and enter the South door at the end of the hall. Prepare for a fight against Mada before proceeding. |
| Boss Fight |  Boss Battle: Mada |
| 12 | Go through the East door ahead after the battle. Turn left, follow the path, then enter the East door. A short cutscene will play. |
| 13 | Move forward and get teleported to East Wing 1F. Pace forward. A very short monologue will appear. Turn right and enter the East door at the end of the hall. |
| 14 | 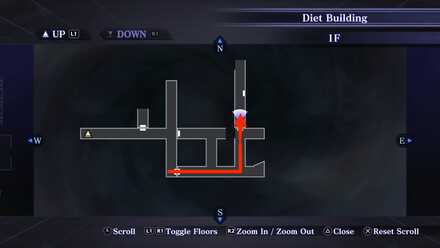 Continue forward and take the second left turn and enter the North door. |
| 15 | 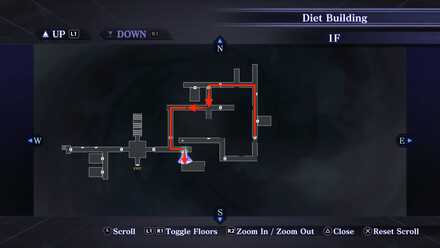 Continue forward and turn left at the farthest West corridor. Continue forward and enter the West door up ahead. Enter the first left-side South door. Continue forward, a short monologue will appear, and then turn right going West and enter the door. Pace forward, take the first left turn and enter the South door. |
| 16 | Turn left and enter the South door. Prepare for a fight against Mot before proceeding. A door leading to the Central Tower is located at the West corridor. You can save the game using the S-Terminal located at Central Tower. |
| 17 | To locate Mot, find the statue with the reflection only showing the podium and no figure. |
| Boss Fight | 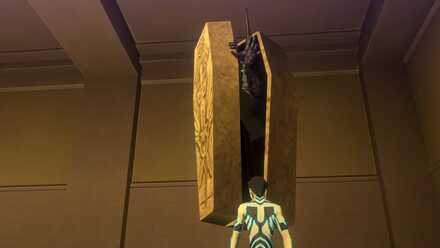 Boss Battle: Mot |
| 19 | Continue forward and enter the East door. Continue forward again and enter the door. Climb up the stairs to get to 2F. |
| 20 | Turn right and enter the first West door. Proceed along the Conference Hall until a cutscene plays. Prepare for a fight against Mithra before proceeding. Your response to Mithra's questions will not affect the ending of the game. |
| Boss Fight |  Boss Battle: Mitra |
| 22 | Climb up the platform and stairs and enter the door. Turn left going South and follow the corridor. Enter the West door. |
| 23 | Turn left, follow the corridor, and then use the elevator to go to 6F. |
| 24 | Enter the door ahead. A cutscene will play. Your response to Hikawa will affect the ending of the game and determine if you will face Samael. Choosing to stop Hikawa will trigger the boss fight. "Fine by me." (Shijima Flag 2 /2) "Can’t do that." (Freedom Flag 3 / 3) + Fight Samael |
| Boss Fight |  Boss Battle: Samael |
| 26 | Fast travel to Amala Temple to proceed with the story. |
Your Response to Hikawa Will Affect the Ending of the Game
Your response to Hikawa during the cutscene in Diet Building 6F will affect the ending of the game.
| Response | Effect |
|---|---|
| Fine by me. | Shijima Flag 2 /2 |
| Can’t do that. | Freedom Flag 3 / 3 |
Diet Building Boss Fights
Surt
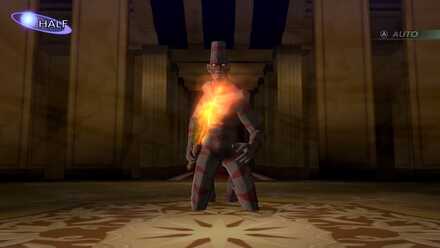
Surt is the first boss fight in this area. It will happen immediately in Central Tower.
| Weaknesses | ||
|---|---|---|
| None, but Magic attacks can go a long way |
Surt does not have any elemental weakness, however, using Magic attacks is useful for dealing damage.
Mada
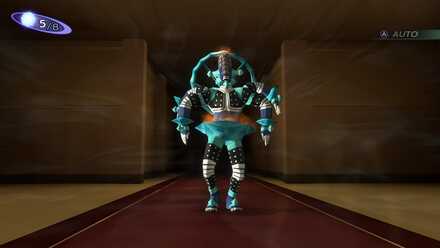
After going through the tricks and mazes in the hallways spells more trouble as you face Mada next.
| Weaknesses | ||
|---|---|---|
| None, but Magic attacks can go a long way |
Mada does not have any elemental weakness, however, using Magic attacks is useful for dealing damage.
Mot

A tricky boss to reach and locate. Find the statue with the reflection only showing the podium and no figure to find Mot.
| Weaknesses | ||
|---|---|---|
| Elec |
Mot is weak towards Elec. We recommend using Elec attacks as much as you can to deal damage and secure more turns for your party.
Mithra
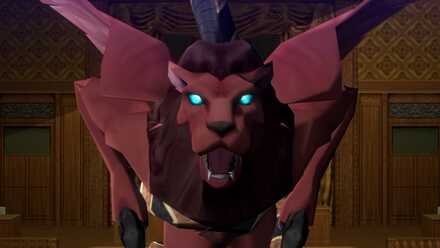
The last of the bosses in the area to attempt stopping you from getting to Hikawa. Mithra uses both Light and Dark instakill attacks.
| Weaknesses | ||
|---|---|---|
| None, but Phys and Magic attacks can go a long way |
Mithra does not have any elemental weakness, however, using Phys and Magic attacks is useful for dealing damage.
Samael
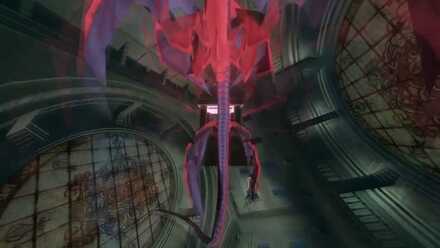
Samael is Hikawa's most faithful servant. This story boss fight can be triggered by rejecting Hikawa in Diet Building 6F.
| Weaknesses | ||
|---|---|---|
| None, but Magic attacks can go a long way |
Samael does not have any elemental weakness, however, using Magic attacks is useful for dealing damage.
Diet Building Maps
| 1F | 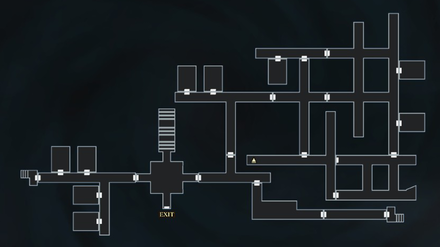 |
|---|---|
| 2F | 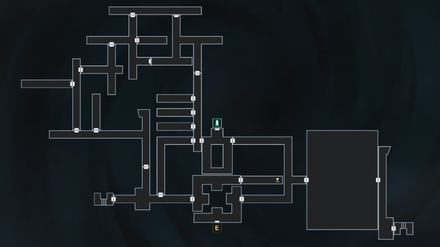 |
| 6F | 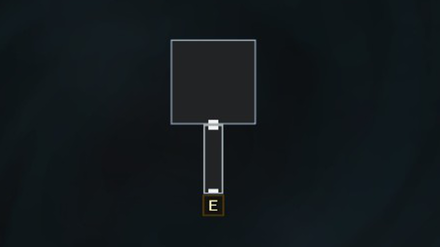 |
Diet Building Obtainable Items
1F
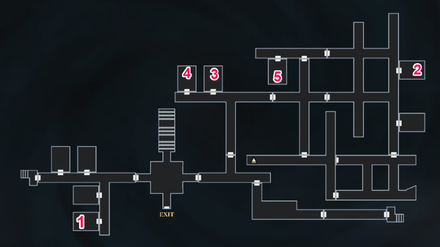
Note: Items 3 and 4 can only be accessed after defeating Mot.
| Obtained from | Items | |
|---|---|---|
| 1 | Cache Cube | Smoke Ball x 1 |
| 2 | Cache Cube | Megido Rock x 1 |
| 3 | Mystical Chest | Balm of Rising x 1 |
| 4 | Mystical Chest | Bead Chain x 1 |
| 5 | Cache Cube | Bead x 1 |
2F
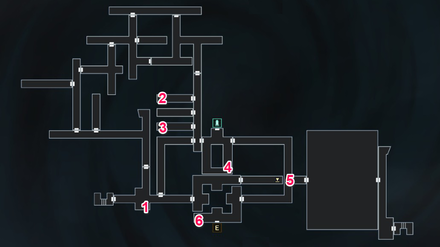
| Obtained from | Items | |
|---|---|---|
| 1 | Cache Cube | It's empty. |
| 2 | Cache Cube | 3000 Macca |
| 3 | Cache Cube | It's a trap! Your party gets inflicted with Mute. |
| 4 | Cache Cube | Life Stone x 3 |
| 5 | Mystical Chest | Magic Incense x 1 |
| 6 | Cache Cube | Soma Droplet x 1 |
Diet Building General Tips
Painted Walls Look Like An Oil Painting
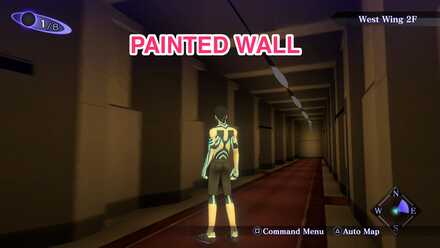
Apart from looking like an oil painting, painted walls in this dungeon will also have the following descriptions:
| Dim, almost non-luminous, lightbulbs |
| Oval light casted in the middle of the corridor |
| General area appears to be dimmer |
| Less spaces in between wall columns |
| Appears distorted if you play with the camera angles |
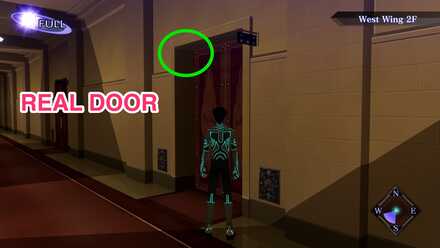
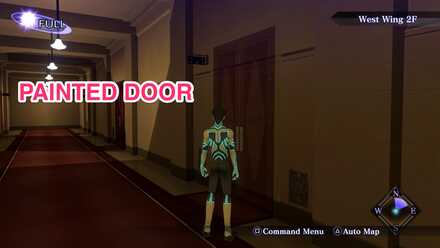
Look for a Deep Door Frame to Tell Real Doors and Painted Ones Apart
Real doors in this dungeon will have a deep door frame. Angle the camera to inspect if a door has a deep door frame to figure out if it's real or an illusion.
| Real Door | Painted Door |
|---|---|
 |
 |
Shin Megami Tensei 3: Nocturne Related Links

Story Walkthrough Guides
Endings Guide: How to Get All Endings
Labyrinth of Amala Guides
 First Kalpa Area First Kalpa AreaRecommended level: 20 |
 Second Kalpa Area Second Kalpa AreaRecommended level: 35 |
 Third Kalpa Area Third Kalpa AreaRecommended level: 50 |
 Fourth Kalpa Area Fourth Kalpa Area Recommended level: 65 |
 Fifth Kalpa Area Fifth Kalpa AreaRecommended level: 75 |
DLC Dungeon Guides
 Where the Demi-Fiend was Born Where the Demi-Fiend was Born |
 Center of the Conception Center of the Conception |
Author
Diet Building Walkthrough, Boss Battles, and Item Locations
improvement survey
03/2026
improving Game8's site?

Your answers will help us to improve our website.
Note: Please be sure not to enter any kind of personal information into your response.

We hope you continue to make use of Game8.
Rankings
- We could not find the message board you were looking for.
Gaming News
Popular Games

Genshin Impact Walkthrough & Guides Wiki

Honkai: Star Rail Walkthrough & Guides Wiki

Umamusume: Pretty Derby Walkthrough & Guides Wiki

Pokemon Pokopia Walkthrough & Guides Wiki

Resident Evil Requiem (RE9) Walkthrough & Guides Wiki

Monster Hunter Wilds Walkthrough & Guides Wiki

Wuthering Waves Walkthrough & Guides Wiki

Arknights: Endfield Walkthrough & Guides Wiki

Pokemon FireRed and LeafGreen (FRLG) Walkthrough & Guides Wiki

Pokemon TCG Pocket (PTCGP) Strategies & Guides Wiki
Recommended Games

Diablo 4: Vessel of Hatred Walkthrough & Guides Wiki

Cyberpunk 2077: Ultimate Edition Walkthrough & Guides Wiki

Fire Emblem Heroes (FEH) Walkthrough & Guides Wiki

Yu-Gi-Oh! Master Duel Walkthrough & Guides Wiki

Super Smash Bros. Ultimate Walkthrough & Guides Wiki

Pokemon Brilliant Diamond and Shining Pearl (BDSP) Walkthrough & Guides Wiki

Elden Ring Shadow of the Erdtree Walkthrough & Guides Wiki

Monster Hunter World Walkthrough & Guides Wiki

The Legend of Zelda: Tears of the Kingdom Walkthrough & Guides Wiki

Persona 3 Reload Walkthrough & Guides Wiki
All rights reserved
©ATLUS. ©SEGA. All rights reserved. ATLUS is registered in the U.S. Patent and Trademark Office. ATLUS, the ATLUS logo, SHIN MEGAMI TENSEI, SHIN MEGAMI TENSEI NOCTURNE and SMT are either registered trademarks or trademarks of ATLUS Co., Ltd. or its affiliates.
©CAPCOM CO., LTD. All rights reserved.
The copyrights of videos of games used in our content and other intellectual property rights belong to the provider of the game.
The contents we provide on this site were created personally by members of the Game8 editorial department.
We refuse the right to reuse or repost content taken without our permission such as data or images to other sites.
 Shinjuku Hospital Walkthrough
 Yoyogi Park and Shibuya Walkthrough
 Amala Network 1 Walkthrough
 Ginza and the Great Underpass Walkthrough
 Ikebukuro Walkthrough
 Assembly of Nihilo Walkthrough
 Kabukicho Walkthrough
 Asakusa and Obelisk Walkthrough
 Amala Network 2 Walkthrough
 Yoyogi Park 2 Walkthrough
 Amala Temple Walkthrough
 Mifunashiro and Yurakucho Walkthrough
 Diet Building Walkthrough
 Bandou Shrine Walkthrough
 Tower of Kagutsuchi Walkthrough




![Monster Hunter Stories 3 Review [First Impressions] | Simply Rejuvenating](https://img.game8.co/4438641/2a31b7702bd70e78ec8efd24661dacda.jpeg/thumb)


