Yale and Oliver Best Build and Demon Wedges
★ Tier Lists: Characters | Weapons | Demon Wedges
★ Builds: Kezhou | Fushu | Fina | Lynn | Psyche
★ Version 1.2 Summary | Characters: Zhiliu | Yuming
┗ Mechanics: Mount | Gifting | Reputation | Accessory Customization
★ How to Get Characters | Mystic Maze | Redeem Codes
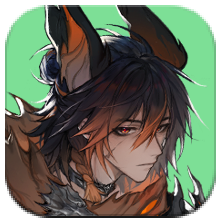
Yale and Oliver is a playable Pyro character in Duet Night Abyss (DNA). See the best Yale and Oliver build, Yale and Oliver best teams, weapons, Demon Wedges, skill priority, kit details, voice actors, and how to get Yale and Oliver here!
List of Contents
Yale and Oliver Character Overview
Yale and Oliver Information
 Yale and Oliver Yale and Oliver
|
||||||||
| Element |
 Pyro Pyro
|
|||||||
|---|---|---|---|---|---|---|---|---|
| Role | DPS / Skill DMG | |||||||
| Ranged Weapon |
 Shotgun Shotgun
|
|||||||
| Melee Weapon |
 Sword Sword
|
|||||||
Yale and Oliver Rankings
| Active Character | Companion Partner |
|---|---|
|
|
|
How Would You Rate Yale and Oliver?
Yale and Oliver Stats
| Lv. 1 | Lv. 80 | |
|---|---|---|
| ATK | 21 | 395.39 |
| HP | 96 | 1,205.01 |
| Shield | 96 | 1,205.01 |
| DEF | 288 | 288 |
| Max Sanity | 180 | 180 |
| Skill DMG | 100% | 120% |
| Skill Range | 100% | 100% |
| Skill Duration | 100% | 100% |
| Skill Efficiency | 100% | 0% |
| Morale | 0% | 0% |
| Malaise | 0% | 0% |
Stat calculations does not include the Stat Bonuses from upgrading Yale and Oliver's Skills.
How Strong Are Yale and Oliver?
| Strengths | |||
|---|---|---|---|
|
• Tot Poppers can deal an explosive amount of damage. • Can avoid melee attacks since they float in the air. • Can deal more damage the farther they are from the target. • Great character regardless of Intron Level. |
|||
| Weaknesses | |||
|
• Can struggle against mobile enemies due to slow attacks. • Unusual playstyle may be hard to pull off. |
Yale and Oliver are a powerful DPS unit that specializes in using Tot Poppers to deal ranged damage from above. Their kit can obliterate both mobs of enemies and powerful bosses.
Yale and Oliver Build Guide
Yale and Oliver DPS Build
| Best Melee Weapon | |
|---|---|
| Best Ranged Weapon | |
| Demon Wedge Character |
1: Devouring Wildfire (Gold)
Devouring Wildfire (Gold) Skill DMG+30%. When a Pyro character deals damage, gains 1 stack that increases ATK by 1.0% for 15.0s, up to 120 stacks. 2: Inferno • Wildfire (Gold)
Inferno • Wildfire (Gold) Pyro ATK+18%, Skill DMG+18%, Skill Range+18% 3: Prime • Morale (Gold)
Prime • Morale (Gold) ATK+84%, HP+84%, DEF+84%, Morale+18%. 4: Blaze • Inspo (Gold)
Blaze • Inspo (Gold) ATK+48%, Skill Efficiency+12%. Once upgraded to +5, this Demon Wedge can be equipped in multiples. 5: Blaze • Inspo (Gold)
Blaze • Inspo (Gold) ATK+48%, Skill Efficiency+12%. Once upgraded to +5, this Demon Wedge can be equipped in multiples. 6: Blaze • Inspo (Gold)
Blaze • Inspo (Gold) ATK+48%, Skill Efficiency+12%. Once upgraded to +5, this Demon Wedge can be equipped in multiples. 7: Blaze • Inspo (Gold)
Blaze • Inspo (Gold) ATK+48%, Skill Efficiency+12%. Once upgraded to +5, this Demon Wedge can be equipped in multiples. 8: Blaze • Inspo (Gold)
Blaze • Inspo (Gold) ATK+48%, Skill Efficiency+12%. Once upgraded to +5, this Demon Wedge can be equipped in multiples. Core: Blastwave
Blastwave Upon landing from a height, deals Smash Damage equal to 128.0% of ATK to nearby enemies. Increases the character's max Tolerance by 2.5 times the Demon Wedge's required Tolerance. |
Yale and Oliver's Tot Poppers deal a lot of Skill DMG, so focus on collecting those stats. Skill Efficiency is also very important since Yale and Oliver's playstyle consumes so much Sanity.
Pyro ATK is essential to increase Fire DMG dealt by Yale and Oliver.
Yale and Oliver Best Demon Wedge Loadout
Recommended Setup for Yale and Oliver DPS Build
| Slot 1 | Slot 3 | Core | Slot 4 | Slot 2 |
|---|---|---|---|---|
|
|
|
|
|
|
| Slot 5 | Slot 7 | Slot 8 | Slot 6 | |
|
|
|
|
|
|
| Tolerance: 115 / 100 | ||||
Blastwave +5 increases the character's max Tolerance.
Blaze • Inspo can be equipped multiple times if you have them upgraded to +5. You can also replace them with situational Wedges under the Sphinx set, such as Duel for better performance against bosses.
Track Adjustments for Demon Wedge Slots
| Slot 1 | Slot 3 | Core | Slot 4 | Slot 2 |
|---|---|---|---|---|
|
|
|
✖︎ |
|
|
| Slot 5 | Slot 7 | Slot 8 | Slot 6 | |
|
|
✖︎ | ✖︎ |
|
|
| Track-Shift Module Required: 6 | ||||
There is no need to adjust a slot if it has an ✖︎!
Yale and Oliver Best Weapons
Best Yale and Oliver Melee Weapons
| # | Melee Weapon | Skill (Max) |
|---|---|---|
| 1 |
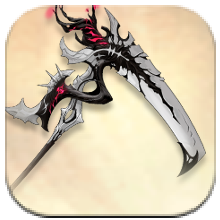 Wanewraith Wanewraith
|
Skill Damage +48% |
Wanewraith is the best weapon for Yale and Oliver simply for the Skill Intensity, which is where most of his DPS comes from.
Best Yale and Oliver Ranged Weapons
| # | Ranged Weapon | Skill (Max) |
|---|---|---|
| 1 |
 Excresduo Excresduo
|
Skill Damage +48% |
Just like their Melee Weapon, Excresduo is Yale and Oliver's best Ranged Weapon for the Skill Intensity buff.
Yale and Oliver Best Teams
Yale and Oliver Hypercarry Team
| Yale and Oliver Hypercarry Team | ||
|---|---|---|
|
DPS (Active Unit) |
Support |
Support |
| Geniemon |
•
Alternatives •
|
|
Yale and Oliver's best team comp consists of both Fushu and Tabethe to amplify their Skill DMG and increase the damage their bombs deal. On top of these said buffs, Tabethe provides crowd control while Fushu grants healing and Sanity restoration.
Yale and Oliver Skill Priority
| Skill | Priority | Explanation |
|---|---|---|
| Tot Popper | ★★★★★ | Most of Yale and Oliver's damage will come form their Skills. Tot Popper in particular is the source of most of his damage. |
| Nightmare's Grasp | ★★★★☆ | Upgrading Nightmare's Grasp will improve the Movement Speed debuff towards enemies and increase the damage dealt by the detonated Tot Poppers. |
| The Rules of Bomb | ★★★★☆ | This increases the landing damage of the Tot Poppers. |
Yale and Oliver DMG Skills
| Skill Effects |
|---|
|
Tot Popper
Drops a bomb named [Tot Popper], assuming the form of either [Tot Popper: Yale's Make] or [Tot Popper: Oliver's Make]. Upon landing, the bomb explodes after 2s, dealing Pyro Damage to enemies within a cross-shaped area and detonating any other [Tot Poppers] within range. A maximum of 10 [Tot Poppers] can exist at the same time. |
|
Tot Popper: Yale's Make: When dealing damage, causes greater Stance reduction to the target(s). The greater the difference between Yale and Oliver's Skill Range and the Skill Damage provided by equipped Demon Wedges, the higher the chance of deploying [Tot Popper: Yale's Make]. If the difference is no less than 50%, it's guaranteed to be a [Tot Popper: Yale's Make]. |
|
Tot Popper: Oliver's Make: Deals higher damage. The greater the difference between Yale and Oliver's Skill Damage and the Skill Range provided by equipped Demon Wedges, the higher the chance of deploying [Tot Popper: Oliver's Make]. If the difference is no less than 50%, it's guaranteed to be a [Tot Popper: Oliver's Make]. |
Yale and Oliver DMG Skills
| Skill Effects |
|---|
|
Nightmare's Grasp
Generates [Nightmare Lab] around Yale and Oliver. Using the skill again can close [Nightmare Lab] in advance. |
|
Nightmare Lab: When in the area of [Nightmare Lab]: The Movement Speed of enemies within range is decreased. The detonation timers of [Tot Poppers] on the ground are paused, and they won't be detonated by other [Tot Poppers]. When [Nightmare Lab] closes: Detonates all [Tot Poppers] within range and the lab explodes to deal Pyro Damage to the enemies within range. For each [Tot Popper] detonated, increases the explosion damage of [Nightmare Lab] and restores Sanity for Yale and Oliver. |
Yale and Oliver Passive Skills
| Skill Effects |
|---|
|
The Rules of Bomb
When a Tot Popper is deployed, if it's no less than 2 metres above the ground, it deals Pyro Damage to nearby enemies upon landing. |
|
Bombing Memories
Each time a Tot Popper is deployed, Yale and Oliver gains 1 stack of Bombing Frenzy, up to 3 stacks. [Bombing Frenzy]: Increases Skill Efficiency. |
|
Aetherflame
[Available only when deployed as a Combat Partner] Increases ATK for self and Pyro allies. |
Yale and Oliver Intron Levels
Recommended Intron Levels
| Why We Recommend It | |
|---|---|
| I1 | ★★★★☆ - Great Yale and Oliver can restore Sanity through Tot Popper detonation. This is great since Yale and Oliver use their Skills to deal damage. |
| I2 | ★★★☆☆ - Good Nightmare Lab's Movement Speed debuff becomes enhanced, which results in better crowd-control. |
| I4 | ★★★★☆ - Great Tot Poppers deployed during Nightmare Lab have a chance to deploy an extra Tot Popper, increasing Yale and Oliver's overall damage. |
| I6 | ★★★★★ - Amazing! Yale and Oliver can combine both Tot Popper types and can deal significantly higher damage and Stance reduction. |
Intron 3 and 5 are just stat boosts. So, they are not included in the table above!
All Intron Level Effects
| Intron Effect | |
|---|---|
| I1 | If a Tot Popper is detonated by a different type of Tot Popper, restores 1 point of Sanity for Yale and Oliver; if detonated by the same type, restores 2. |
| I2 | The Movement Speed decrease effect inflicted on enemies in Nightmare Lab is increased to 60.0%. |
| I3 | Tot Popper Level +2; The Rules of Bomb Level +1. |
| I4 | When deploying a Tot Popper in Nightmare Lab, there's a 45.0% chance to deploy 1 additional Tot Popper. |
| I5 | Nightmare's Grasp Level +2; The Rules of Bomb Level +1. |
| I6 | When Yale and Oliver is applied with Bombing Frenzy, each deployed Tot Popper combines the features of both types, dealing higher damage and posing greater Stance reduction. |
How to Play Yale and Oliver
- Drop Bombs on Top of Enemies
- Install Ten Tot Poppers at Once with Ultimate
- Provide an ATK Boost to Pyro Allies
Drop Bombs on Top of Enemies
Use Yale and Oliver's Tot Popper skill to drop bombs. Yale and Oliver will be floating during this skill's duration, and bombs dropped two meters above the ground will deal extra damage to enemies below.
Tot Poppers have two variations, Yale's Make and Oliver's Make. They have different effects and are randomly generated, but can be controlled based on the Demon Wedges equipped.
Break Stance or Deal Damage with Different Bombs
| Tot Popper: Yale's Make | If you have more Skill Range than Skill DMG, these bombs are more likely to be deployed. Having at least a 50% stat difference guarantees this effect. |
|---|---|
| Tot Popper: Oliver's Make | If you have more Skill DMG than Skill Range, these bombs are more likely to be deployed. Having at least a 50% stat difference guarantees this effect. |
Tot Poppers are randomly deployed by Yale and Oliver. You can guarantee the chances of generating a specific type by prioritizing either Skill DMG or Skill Range, and making sure the chosen stat is 50% higher than the other. It is generally better to build Skill DMG, though Skill Range can be great for facing bosses.
At I6, you can find any balance between Skill DMG and Skill Range given how this character drops both types of bombs regardless of the stat ratios.
Install Ten Tot Poppers at Once with Ultimate
Yale and Oliver's Ultimate, Nightmare's Grasp, allows him to cast a Nightmare Lab domain that slows enemies down while stopping Tot Poppers from exploding. You can use this before activating Tot Popper to stack up to ten bombs that can explode all at once.
Provide an ATK Boost to Pyro Allies
Yale and Oliver provides an ATK Boost to all his Pyro allies when he is a Combat Partner. Activate this skill to receive the buff.
How to Get Yale and Oliver
Get Through the Secret Letter System
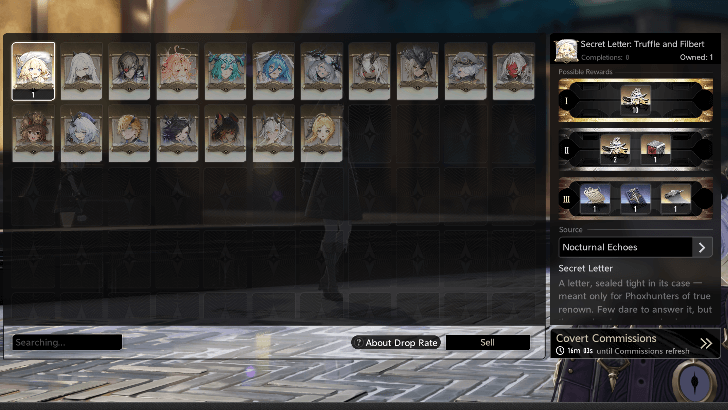
Most of the characters in Duet Night Abyss can be obtained through the Secret Letter system. Using 10 Secret Letter Clues, you can buy the Secret Letter of Yale and Oliver, which can be opened after completing a Covert Commission stage.
After opening a Secret Letter, it has a chance to drop a Thought. You then need 30 pieces of a Thought to unlock Yale and Oliver. Do note that Secret Letters are not guaranteed to drop a Thought!
Use Phoxene Plumule to Buy Thoughts
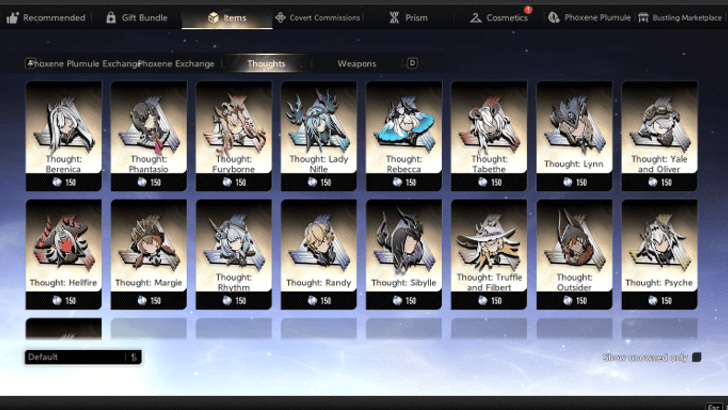
If you go to the Shop via the pause menu, you can buy a character's Thought for 150 Phoxene Plumule, which is the game's premium currency and can be bought using real money.
Yale and Oliver Upgrade Materials
Ascension Materials Per Rank
| Lv.20 ➔ 30 |
|
|---|---|
| Lv.30 ➔ 40 |
|
| Lv.40 ➔ 50 |
|
| Lv.50 ➔ 60 |
|
| Lv.60 ➔ 70 |
|
| Lv.70 ➔ 80 |
|
Ascension Guide: How to Ascend
Total Skill Upgrade Materials
| Coin |
|
|---|---|
| Drop Materials |
|
| Capture Materials |
|
| Defence Materials |
|
| Boss Material | |
| Twilight Tread |
Yale and Oliver Skins and Cosmetics
All Yale and Oliver Skins
| There are currently no skins available for this character. |
All Yale and Oliver Accessories
| There are currently no accessories available for this character. |
Yale and Oliver Voice Actor and Lore
All Voice Actors and Basic Info
| Birthplace | Hyperborean Empire |
|---|---|
| Birthday | December 21st |
| Affiliation | Unaffiliated |
| Voice Actors | Claire Morgan (EN) Mutsumi Tamura (田村睦心) (JP) Pei Yang (弭洋) (CN) Lee Eun-jo (이은조) (KR) |
| Traits | Tamer Impression: Wisdom Astute Mind |
List of EN and JP Voice Actors
Duet Night Abyss Related Guides
Character Guides
 All Best Builds All Best Builds |
 Character Tier List Character Tier List |
 All Free Characters All Free Characters |
 All Voice Actors All Voice Actors |
 All Support Characters All Support Characters |
 All Healers All Healers |
Characters By Gender
| Characters By Gender | |
|---|---|
 Female Female |
 Male Male |
Characters By Element
| Characters By Element | ||
|---|---|---|
 Hydro Hydro |
Pyro |
 Anemo Anemo |
 Electro Electro |
 Lumino Lumino |
 Umbro Umbro |
Characters By Birthplace
| Characters By Birthplace | ||
|---|---|---|
 Hyperborean Empire Hyperborean Empire |
 The Elysian Church The Elysian Church |
 Republic of Luca Republic of Luca |
 Huaxu Huaxu |
||
All Playable Characters
| Playable Characters | ||
|---|---|---|
 Randy Randy
|
 Rhythm Rhythm
|
 Daphne Daphne
|
 Outsider Outsider
|
Yale and Oliver
|
 Hellfire Hellfire
|
 Margie Margie
|
 Phantasio Phantasio
|
 Berenica Berenica
|
 Tabethe Tabethe
|
 Sibylle Sibylle
|
 Lynn Lynn
|
 Rebecca Rebecca
|
 Kezhou Kezhou
|
 Truffle and Filbert Truffle and Filbert
|
 Psyche Psyche
|
 Zhiliu Zhiliu
|
 Fushu Fushu
|
 Lisbell Lisbell
|
 Lady Nifle Lady Nifle
|
 Yuming Yuming
|
 Fina Fina
|
 Phoxhunter Phoxhunter
|
|
Upcoming Characters
| Upcoming Characters | ||
|---|---|---|
 Camilla Camilla
|
 Su Yi Su Yi
|
 Hilda Hilda
|
Comment
small confusing detail. Yale's bombs are the ones that deal stance/shield damage (blue ones) and deal less damage. You get these by having more Skill DMG than Skill Range. Oliver's bombs are the ones that deal a lot of damage (red ones). You only get his bombs if you have a max of 50% less Skill Range than Skill DMG. Meaning if you wanna deal high damage, his Range must be high and vice versa. Would recommend only one Skill DMG weapon and the other one either ATK% or Skill Range, until Intron 6.
Author

Yale and Oliver Best Build and Demon Wedges
Rankings
- We could not find the message board you were looking for.
Gaming News


![Forza Horizon 6 Review [Preview] | Beautiful Roads With a Whole Lot of Oversteer](https://img.game8.co/4460981/a7254c24945c43fbdf6ad9bea52b5ce9.png/thumb)
Popular Games

Genshin Impact Walkthrough & Guides Wiki
Crimson Desert Walkthrough & Guides Wiki
Umamusume: Pretty Derby Walkthrough & Guides Wiki
Honkai: Star Rail Walkthrough & Guides Wiki
Monster Hunter Stories 3: Twisted Reflection Walkthrough & Guides Wiki
Wuthering Waves Walkthrough & Guides Wiki
The Seven Deadly Sins: Origin Walkthrough & Guides Wiki
Pokemon TCG Pocket (PTCGP) Strategies & Guides Wiki
Pokemon Pokopia Walkthrough & Guides Wiki
Zenless Zone Zero Walkthrough & Guides Wiki


Recommended Games
Monster Hunter World Walkthrough & Guides Wiki
Fire Emblem Heroes (FEH) Walkthrough & Guides Wiki
Pokemon Brilliant Diamond and Shining Pearl (BDSP) Walkthrough & Guides Wiki
Super Smash Bros. Ultimate Walkthrough & Guides Wiki
Diablo 4: Vessel of Hatred Walkthrough & Guides Wiki
Cyberpunk 2077: Ultimate Edition Walkthrough & Guides Wiki
Yu-Gi-Oh! Master Duel Walkthrough & Guides Wiki
Elden Ring Shadow of the Erdtree Walkthrough & Guides Wiki
The Legend of Zelda: Tears of the Kingdom Walkthrough & Guides Wiki
Persona 3 Reload Walkthrough & Guides Wiki


All rights reserved
Game Copyright©Pan Studio All Rights Reserved.
The content we provide on this site were created personally by members of the Game8 editorial department.
We refuse the right to reuse or repost content taken without our permission such as data or images to other sites.
©Pan Studio (Provider)
yall STILL don't have team recommendations for him?? if it was a tig ol bitty waifu you would..