Looming Winter Story Walkthrough and Guide
★ Tier Lists: Characters | Weapons | Demon Wedges
★ Builds: Kezhou | Fushu | Fina | Lynn | Psyche
★ Version 1.2 Summary | Characters: Zhiliu | Yuming
┗ Mechanics: Mount | Gifting | Reputation | Accessory Customization
★ How to Get Characters | Mystic Maze | Redeem Codes
Here you'll find a walkthrough for the main quest Looming Winter in Duet Night Abyss (DNA). Read on to learn how to complete Looming Winter, quest rewards and objectives, dialogue impressions, and more information!
| ◄ Previous Quest | Next Quest ▶ |
|---|---|
| Time of Innocence | The Scarlet Land |
Looming Winter Story Walkthrough
| Looming Winter Objectives |
|---|
|
1. Speak with Lynn 2. Find Clive 3. Look for Rhythm 4. Head to Mist Aken 5. Speak with Clive Again 6. Head to the Sewers 7. Head to the Designated Area 8. Drain the Wastewater 9. Investigate the Designated Area 10. Repair the Comms Terminal 11. Take Down the Perpetrator 12. Review Clues and Continue the Investigation 13. Head to the Fischers' Secret Base 14. Talk to Rhythm 15. Confront the Perpetrator |
Speak with Lynn
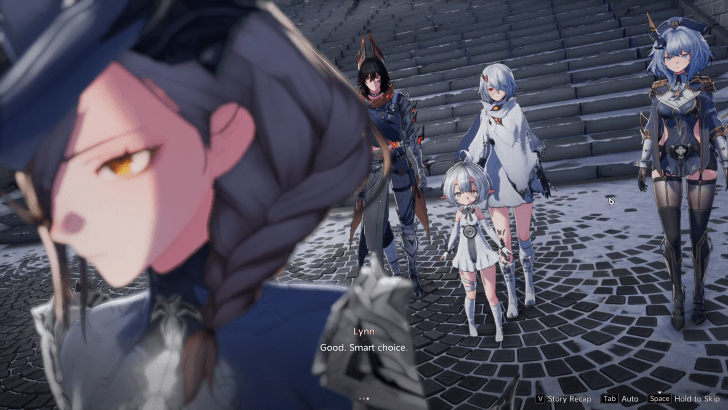
Go to Lynn in front of the Security Bureau, and talk to her to start a brief cutscene.
Lynn will assign you a list of tasks to carry out. She will also order you to talk to Clive, a high-ranking officer of the 13th Legion.
Find Clive
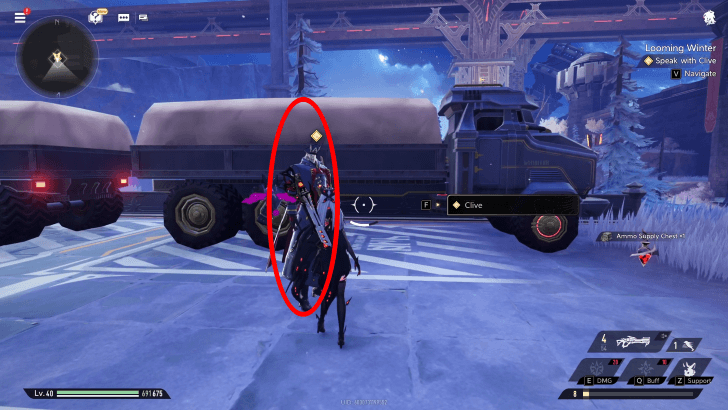
Exit the city gates and turn to your left where you can find parked trucks and stacked crates. You'll find Clive with another Legion soldier.
Repel the Snow Wolves
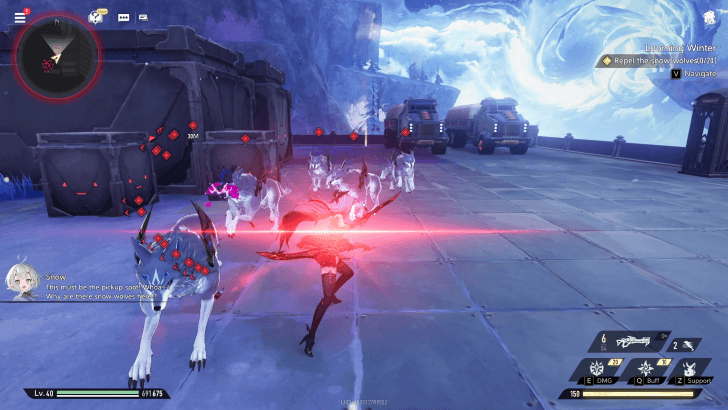
Snow Wolves will ambush you before you can approach Clive. Defeat 20 Snow Wolves before you can talk to Clive.
Talk to Clive
Once all of the wolves have been defeated, you can now talk to Clive, who will issue you the full list of tasks that you, Rhythm, Outsider, and Snow must complete to assist with the investigation.
Rhythm will set off for a while to complete her own tasks.
Rhythm Full Dialogue
| Prompt 1 | ||
|---|---|---|
| This occurred as a result of my negligence, and I'm willing to accept the consequences. But please, allow me to assist in the investigation and make amends. | ||
| Response | Impression | Points |
| It's not your fault. Don't take the blame for others. | Morality | +3 |
| (Stay silent.) | (No Impression Stat Gained) | N/A |
Look for Rhythm
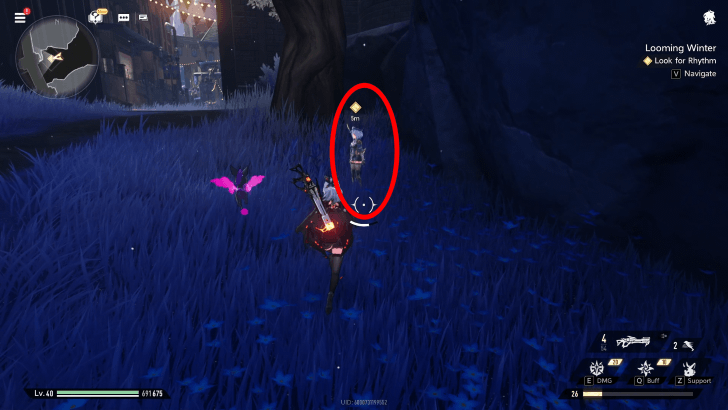
Meet back up with Rhythm. You can find her at the northern exit of Icelake, near the pond.
Gather 3 Fish
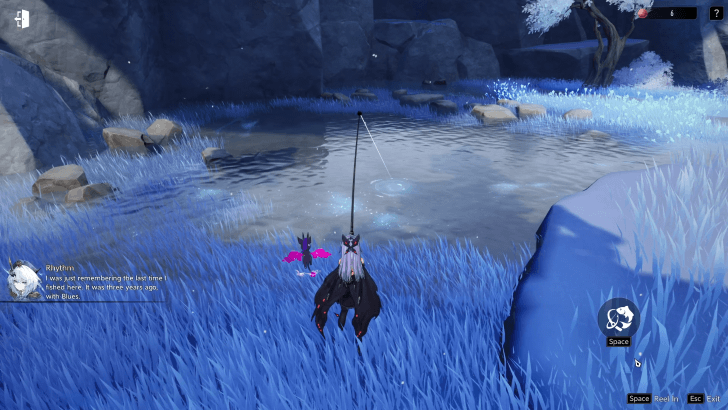
During a short cutscene, Rhythm will tell you that she has been gathering essential goods for residents of Mist Aken. The group will volunteer to help Rhythm catch and distribute food. Afterwards, go to the nearby pond and catch 3 fish of any kind.
| Angler Shop Location |
|---|
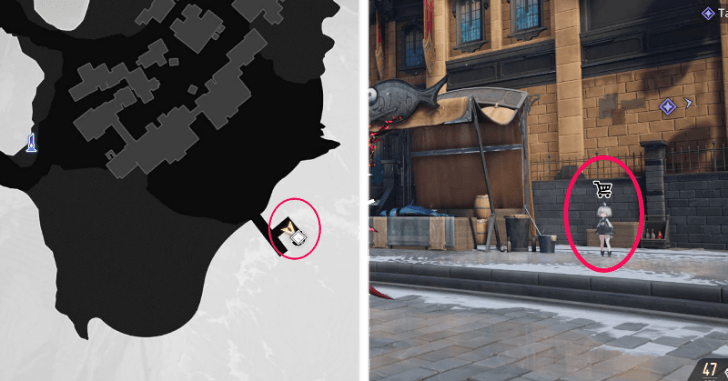 |
If you're out of bait, you can purchase some from the Angler Shop. The shop can be found in Icelake Suburban Square.
Outsider Full Dialogue
| Prompt 1 | ||
|---|---|---|
| Wow, you sure don't know how to take it easy, do you? I know, I know, save the "It's my duty" speech this time. | ||
| Response | Impression | Points |
| Let us help you. | Morality | +3 |
| I'm running low on supplies too. Can you get me some Phoxenes? | Chaos | +3 |
Head to Mist Aken
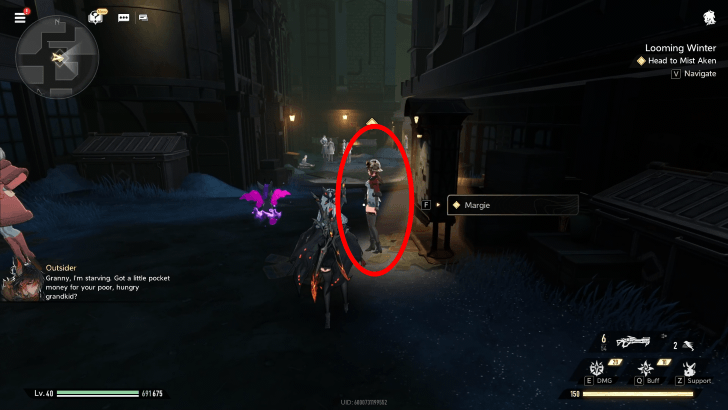
Find Margie in Mist Aken to hand over the food. She can be found standing in front of the notice board near the entrance behind The Asphodel.
Speak with Clive Again
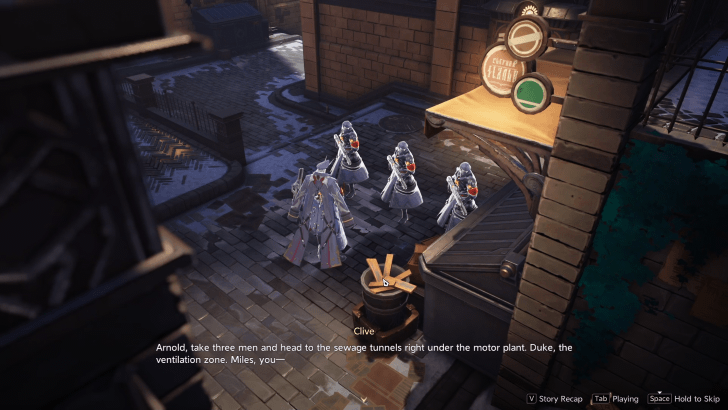
Your conversation with Margie will be cut short when Rhythm receives information that the 13th Legion will soon enter the sewers.
Follow the quest marker near the site of the incident where the Perpetrator first attacked the Phoxhunter. Clive can be seen talking to a group of soldiers.
Speak with Clive again to report for duty. He will order Rhythm and your group to head to the sewers.
Head to the Sewers
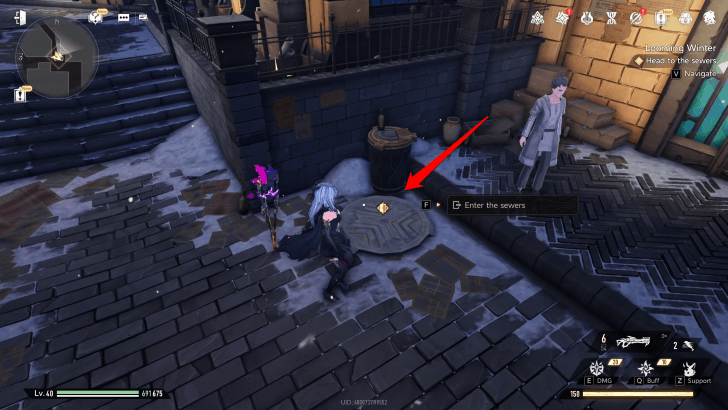
Go to the sewers. You can use the manhole entrance in the area to as the best entry point.
Head to the Designated Area
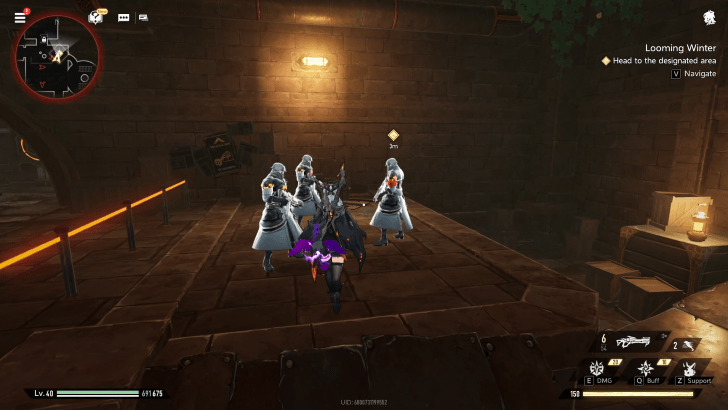
Follow the quest marker through a short tunnel to meet up with the other soldiers from Lynn's unit. Talk to them to receive your orders.
Follow the quest marker again to a flooded area.
Drain the Wastewater
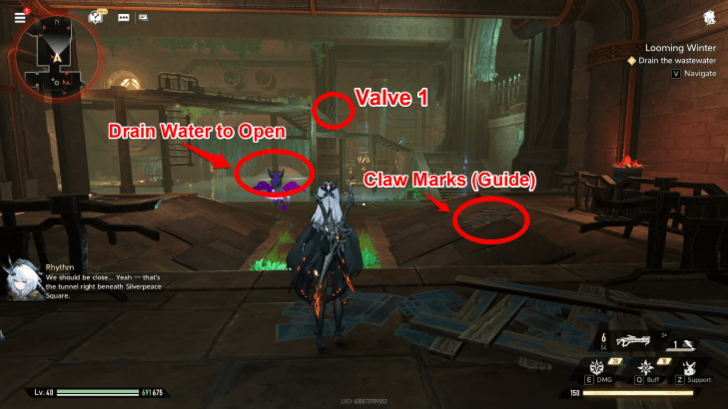
As with the previous subquests, you will have to drain the wastewater from the chamber.
If you ever find yourself lost during the rest of this quest, the giant blue clawmarks that can be found in your surroundings can serve as helpful markers.
Turn the First Valve
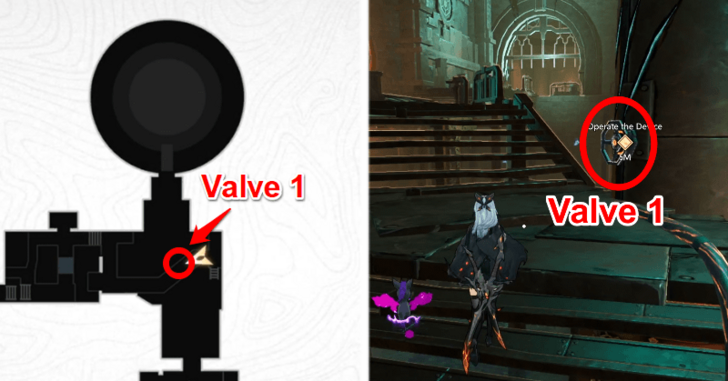
Go up the stairs toward the first valve. Interact with the device and solve a drag puzzle to turn on the valve.
Repel the Filthoids
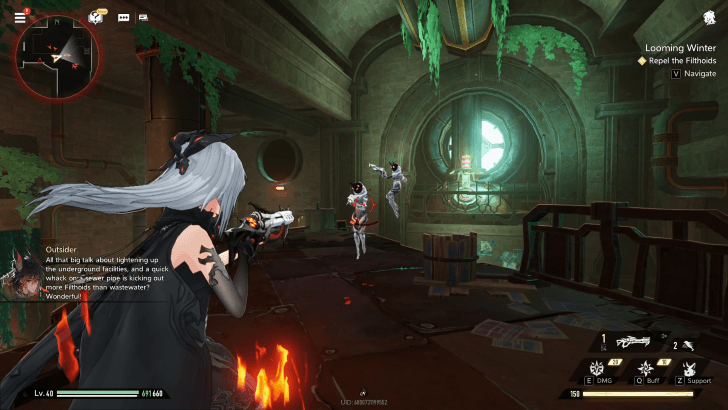
Opening the first valve will attract a large wave of Filthoids. You must clear the area of enemies before moving on to the second valve.
Turn the Second Valve
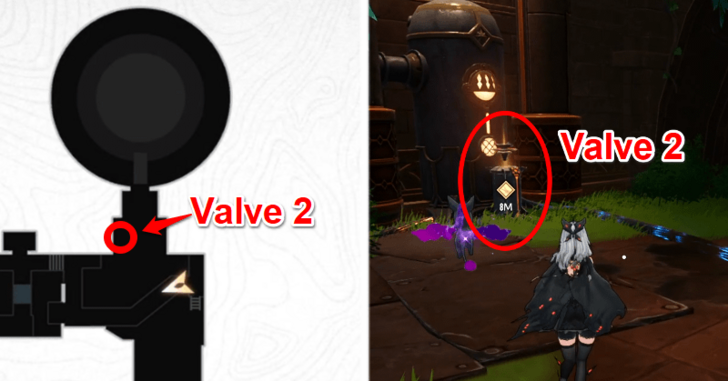
Go to the other end of the chamber to the locked gate.
Approach the large mechanism with the electrical cords attached to it. Simply interact with the mechanism to unlock the gate.
Investigate the Designated Area
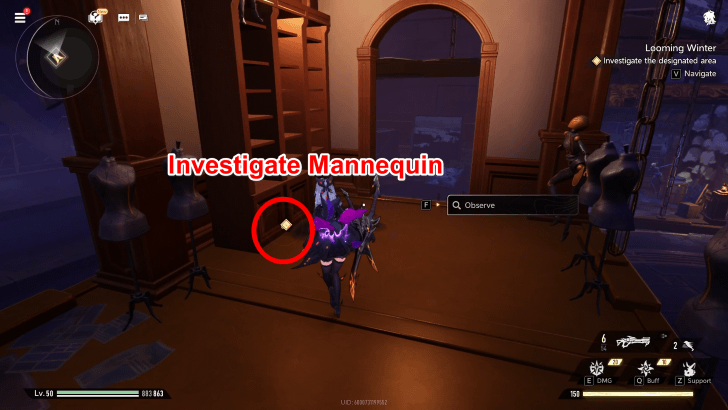
The gate next to the valve will open, leading to a large open chamber designed like a stage. Follow the quest marker and jump up some of the boxes to reach a floating platform. Begin investigating the area from there.
Observe the mannequin to move on. 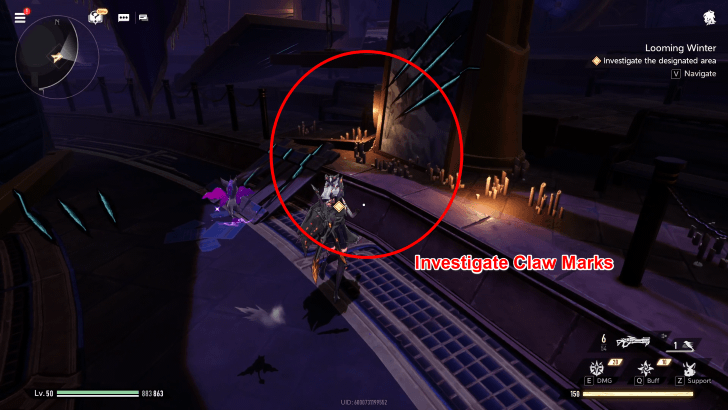
Then, follow the quest marker again to another area to investigate multiple blue claw marks left behind by the monster.
Turn the First Wheel
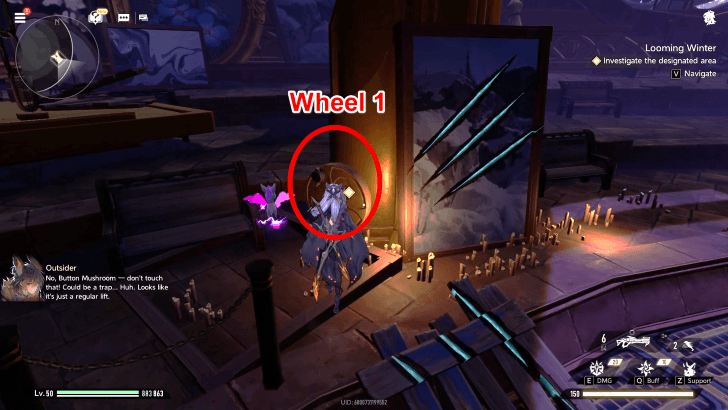
The marker will lead you to the wheel attached to the pipe. Simply hold to turn it and bring down another floating platform.
Turn the Second Wheel
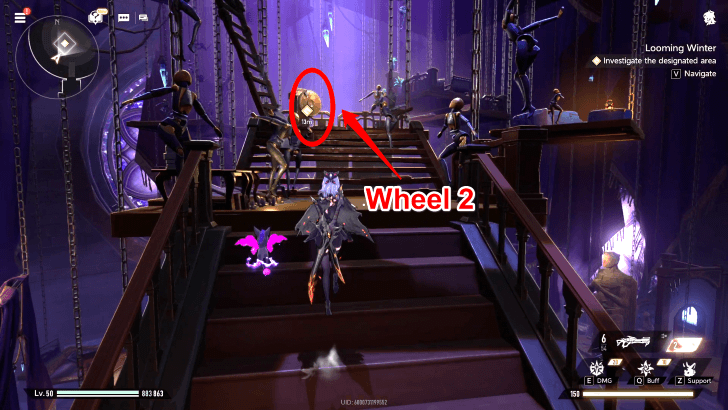
Jump onto the platform until you reach the quest marker. Investigate the curtain. The Phoxhunter will notice that the fabric matches the fabric of the stage curtain found at the crime scene.
Head further up the platforms to another wheel. Turn it to create a path forward and move higher up the chamber.
Turn the Third Wheel
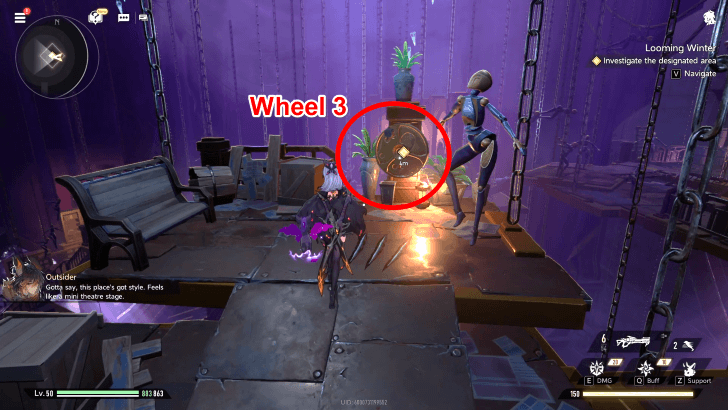
The path will bring you to another wheel. Doing this will clear the entire area of floating platforms and curtains.
Repair the Comms Terminal
During the cutscene, Rhythm's communication device will malfunction.
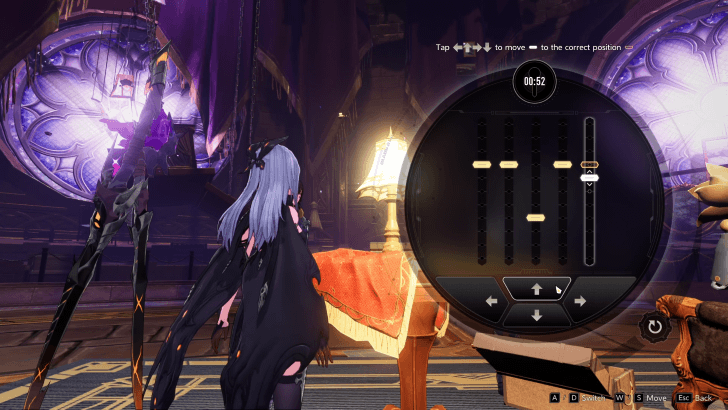
Interact with the terminal to start fixing it. This will bring you to a new type of puzzle. To solve it, move each white bar to the orange outline.
Successfully repairing the terminal will reveal that the rest of the squad has been warning Rhythm that the monster is nearby. However, it will be too late by then.
Take Down the Perpetrator
| Subject 47 Boss Information | |
|---|---|
 |
|
| Level | 45 |
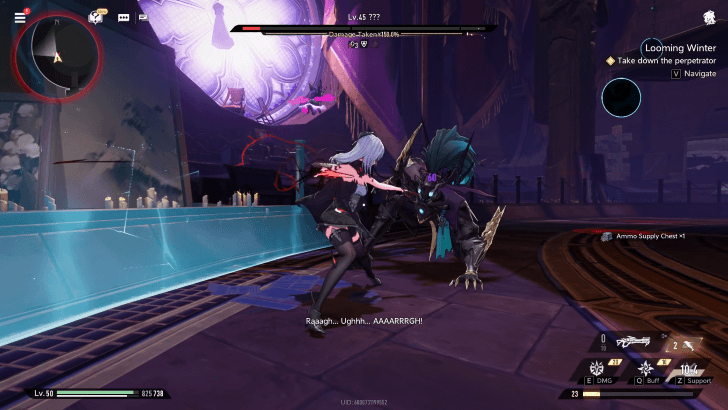
What follows is a difficult fight against the Perpetrator, which will later be revealed as Subject 47. The first phase of the battle will be familiar: the Perpetrator will attack you at close range and dash away frequently.
As you move on to the next phase, however, the Perpetrator will begin to use powerful attacks that can cover the entire arena.
Energy orbs will also begin to fall from above. You will have to dodge them while continuously breaking down its Stance bar.
Review Clues and Continue the Investigation
Successfully defeating the Perpetrator will take you to a long cutscene and back to Icelake. When you're free to move, the Phoxhunter will declare that they need to figure out the identity of the Perpetrator and their whereabouts.
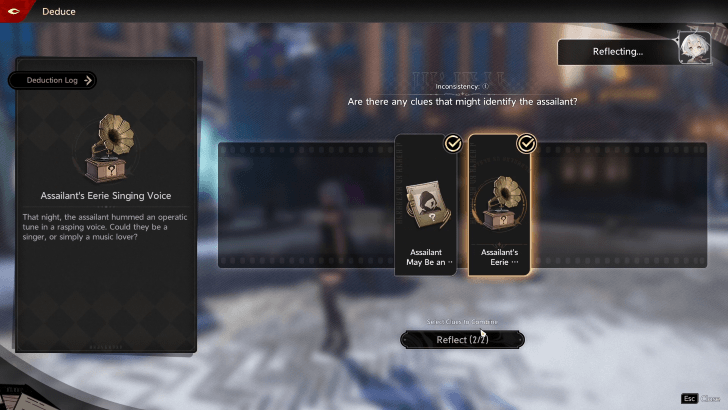
Start deducing the identity of the Perpetrator by combining the following clues you collected previously:
- Assailant May Be an Opera Enthusiast
- Assailant's Eerie Singing Voice
Combining these two clues will result in a new one: Operatic Melody Heard during the Attack.
Submit the clue to inform your companions of your suspect: an opera enthusiast. Rhythm will invite you to the secret base so you can figure out which aria the perpetrator was singing.
Rhythm Full Dialogue
| Prompt 1 | ||
|---|---|---|
| ... | ||
| Response | Impression | Points |
| It's tough, isn't it? Protecting the people and following orders are both your duties. | Morality | +3 |
| Just follow your heart. | Empathy | +3 |
| They summon us when it suits them and kick us out when they're done. I'm so fed up with this arrogant 13th Legion. | Chaos | +3 |
| Prompt 2 | ||
| Sorry for unloading all these old memories on you ... I should get going while there's still daylight. | ||
| Response | Impression | Points |
| We'll go with you. I want to help you fix your regrets. | Empathy | +3 |
| Just you and us? | Benefit | +3 |
Head to the Fischers' Secret Base
Go back to the Fischers' Secret Base to start listening to tapes. Approach the radio and interact with it to switch tapes. Doing this will start a series of 3 puzzles that are overall easy to solve.
Listen to the First Tape
The first puzzle resembles the first puzzle you solved to fix the comms terminal. Move each bar to the orange outline to solve the puzzle.
The song the Phoxhunter hears will sound similar to the aria they heard, but the tone is different. Switch to the next tape to listen to another song.
Listen to the Second Tape
Interact with the radio again to start another puzzle. The second puzzle will require you to follow a specific symmetrical pattern. It has fewer bars than the previous one, making for a quick solve.
The second tape will also turn out to be the wrong piece.
Listen to the Third Tape
The third puzzle is tricky compared to the other two, because two bars will move simultaneously. The key here is to focus on moving the first or left bar to its designated notch (orange outline) until you reach the end.
You don't need to worry about doing anything complicated; the last two bars will require the same number of movements to reach their respective notches.
Solving this puzzle will allow you to listen to the final tune, which turns out to be a dead end.
Talk to Rhythm
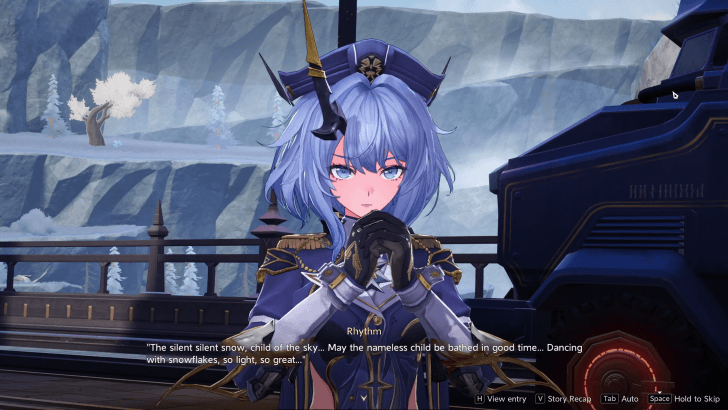
You, Outsider and Snow head out to meet up with Rhythm. You'll find her by one of the abandoned cars in the lot. Talk to her to start a cutscene.
Rhythm will begin singing a song that sparks the Phoxhunter's memory. They identify it as the exact same song they heard on the night of the attack—Requiem for the Nameless, from the opera Children From the Snowfield.
Just as the group begins to hatch a plan to draw out the Perpetrator with the song, it will appear before them.
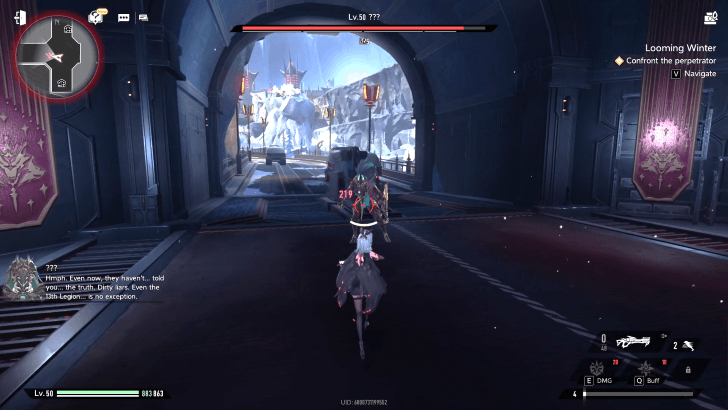
Confront the Perpetrator
| Subject 47 Boss Information | |
|---|---|
 |
|
| Level | 50 |
Confronting the Perpetrator (Subject 47) will start a very short battle that is less intense than the previous one. Keep attacking the Perpetrator until shortly after Outsider tells you to take it down.
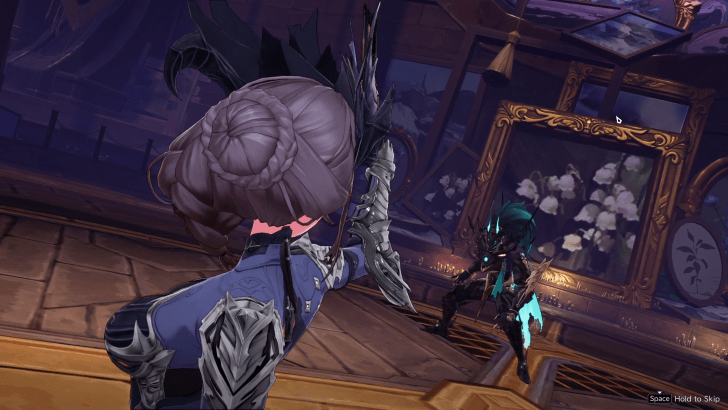
The Perpetrator will stop attacking, immediately ending the fight and initiating a cutscene in which the Perpetrator reveals his identity as Rhythm's brother, Blues Fischer.
Looming Winter will end when Blues begins to tell the story of his life as a Laurelled Charon.
Looming Winter Bosses
Subject 47
The Perpetrator, also known as Subject 47, is a difficult story boss who moves swiftly and balances close combat, leap attacks, and bullet hell-style moves.
Looming Winter Rewards
| Obtainable Rewards |
|
|
|
|---|---|---|
Looming Winter Previous and Next Quests
| ◄ Previous Quest | Next Quest ▶ |
|---|---|
| Time of Innocence | The Scarlet Land |
Duet Night Abyss Related Guides

All Quest Types
| All Quest Types | |
|---|---|
| Main Quests | Side Quests |
| Special Side Quests | Dynamic Quests |
| Event Quests | |
All Main Quests
 Prologue
 Chapter 1: Noctoyager Act 1
 Chapter 2: Twilight Act 1
 Chapter 3: Noctoyager Act 2
 Chapter 4: Journey Across the Lands
Comment
Author

Looming Winter Story Walkthrough and Guide
Rankings
Gaming News


![Forza Horizon 6 Review [Preview] | Beautiful Roads With a Whole Lot of Oversteer](https://img.game8.co/4460981/a7254c24945c43fbdf6ad9bea52b5ce9.png/thumb)
Popular Games

Genshin Impact Walkthrough & Guides Wiki
Crimson Desert Walkthrough & Guides Wiki
Umamusume: Pretty Derby Walkthrough & Guides Wiki
Honkai: Star Rail Walkthrough & Guides Wiki
Monster Hunter Stories 3: Twisted Reflection Walkthrough & Guides Wiki
Wuthering Waves Walkthrough & Guides Wiki
The Seven Deadly Sins: Origin Walkthrough & Guides Wiki
Pokemon TCG Pocket (PTCGP) Strategies & Guides Wiki
Pokemon Pokopia Walkthrough & Guides Wiki
Zenless Zone Zero Walkthrough & Guides Wiki


Recommended Games
Monster Hunter World Walkthrough & Guides Wiki
Fire Emblem Heroes (FEH) Walkthrough & Guides Wiki
Pokemon Brilliant Diamond and Shining Pearl (BDSP) Walkthrough & Guides Wiki
Super Smash Bros. Ultimate Walkthrough & Guides Wiki
Diablo 4: Vessel of Hatred Walkthrough & Guides Wiki
Cyberpunk 2077: Ultimate Edition Walkthrough & Guides Wiki
Yu-Gi-Oh! Master Duel Walkthrough & Guides Wiki
Elden Ring Shadow of the Erdtree Walkthrough & Guides Wiki
The Legend of Zelda: Tears of the Kingdom Walkthrough & Guides Wiki
Persona 3 Reload Walkthrough & Guides Wiki


All rights reserved
Game Copyright©Pan Studio All Rights Reserved.
The content we provide on this site were created personally by members of the Game8 editorial department.
We refuse the right to reuse or repost content taken without our permission such as data or images to other sites.
©Pan Studio (Provider)