Great Chaos of Mechapuppets Event Guide
★ Tier Lists: Characters | Weapons | Demon Wedges
★ Builds: Kezhou | Fushu | Fina | Lynn | Psyche
★ Version 1.2 Summary | Characters: Zhiliu | Yuming
┗ Mechanics: Mount | Gifting | Reputation | Accessory Customization
★ How to Get Characters | Mystic Maze | Redeem Codes
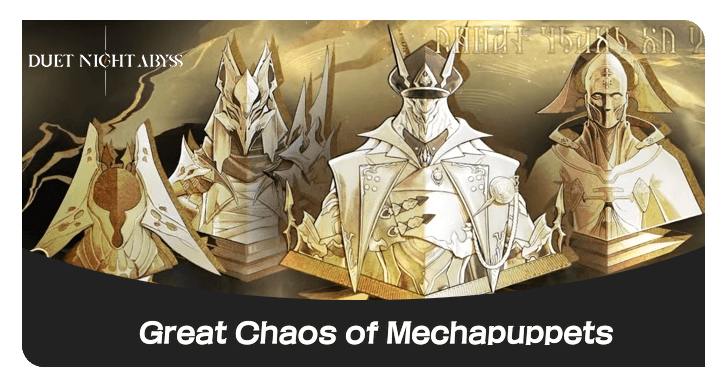
Great Chaos of Mechapuppets is a limited-time event auto-battler strategy mini game in Duet Night Abyss (DNA). See a guide on Great Chaos of Mechapuppets, how to unlock and play it, a list of all runes and mechapuppets, its rewards, and tips for each stage.
List of Contents
How to Unlock Great Chaos of Mechapuppets
Complete the Lost and Found Main Quest
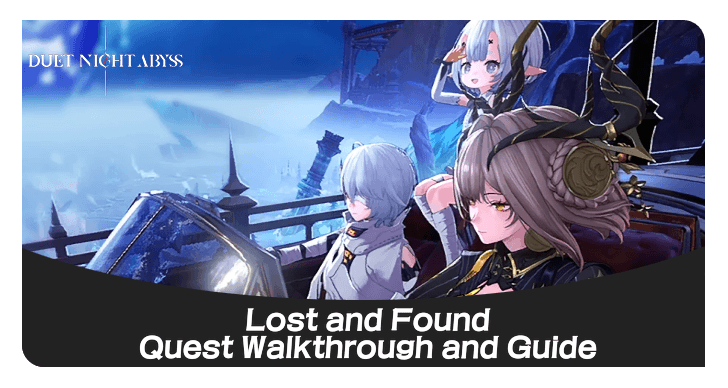
To unlock this event, players must first complete Lost and Found main quest.
Lost and Found Quest Walkthrough and Guide
How to Play Great Chaos of Mechapuppets
| How to Play Great Chaos of Mechapuppets |
|---|
|
|
Head to Events
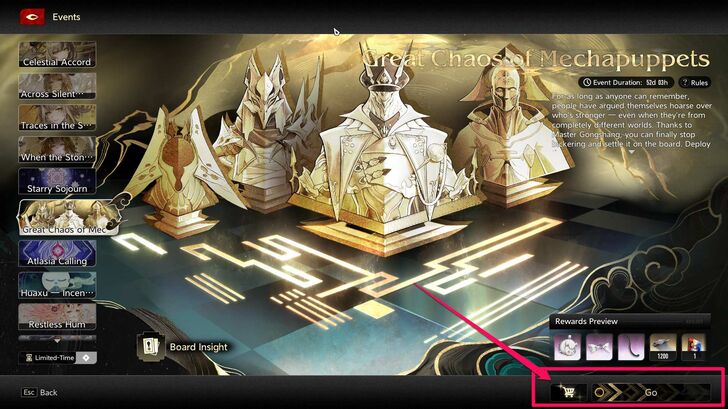
To access Great Chaos of Mechapuppets, open the main menu and navigate to the Events tab.
From there, select the Great Chaos of Mechapuppets event page and press Go to enter the mode.
Select a Game Mode
Great Chaos of Mechapuppets features two playable game modes: Master Gongshang’s Board and Endless Mode.
You may freely choose between these modes and begin a match.
Master Gongshang's Board
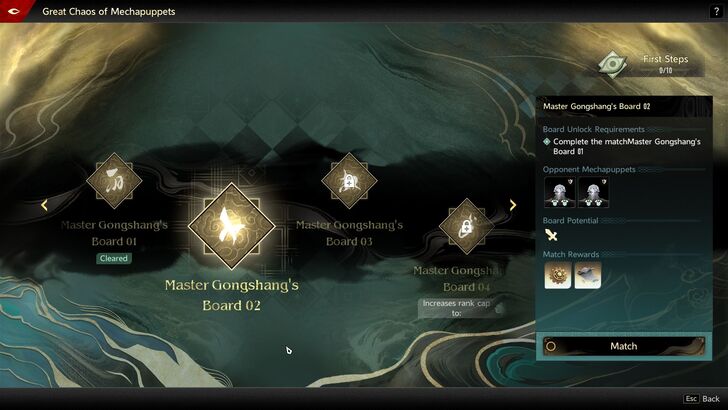
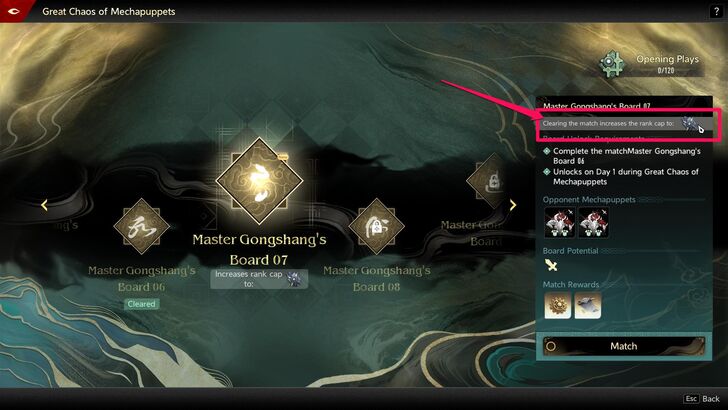
The first mode is Master Gongshang's Board.
Clearing a board unlocks new Mechapuppets and Runes through the Board Insights system. Completing specific boards also increases your Rank Cap and grants additional rewards.
Endless Game
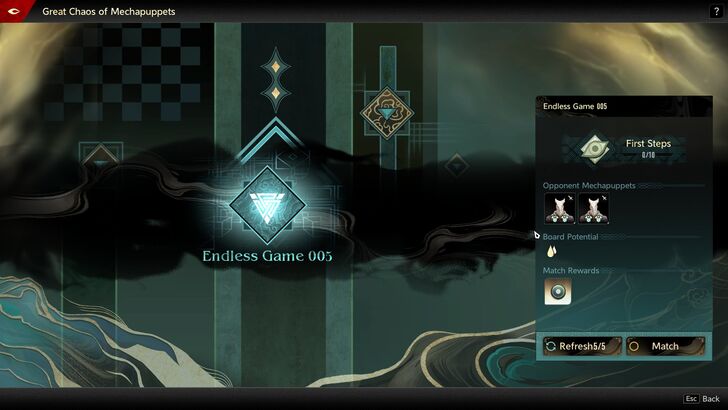
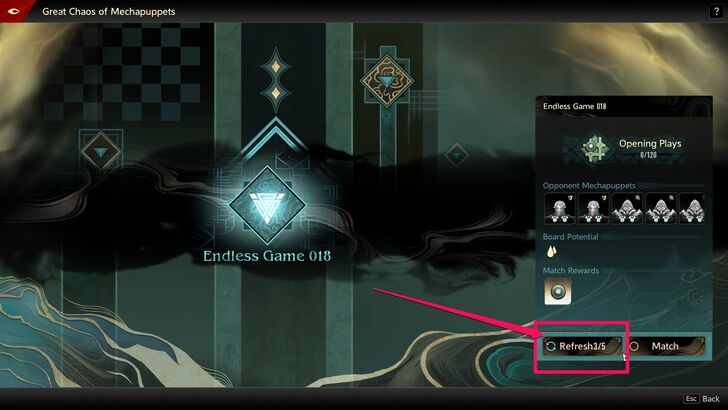
The second mode is Endless Games.
Clear Endless Games to earn Match Points. Accumulating Match Points increases your Rank.
Each Rank Up grants rewards via Board Insights and unlocks more challenging Endless Games with greater clearance rewards.
Endless Games can be refreshed up to 5 times per day.
Prepare Your Mechapuppets
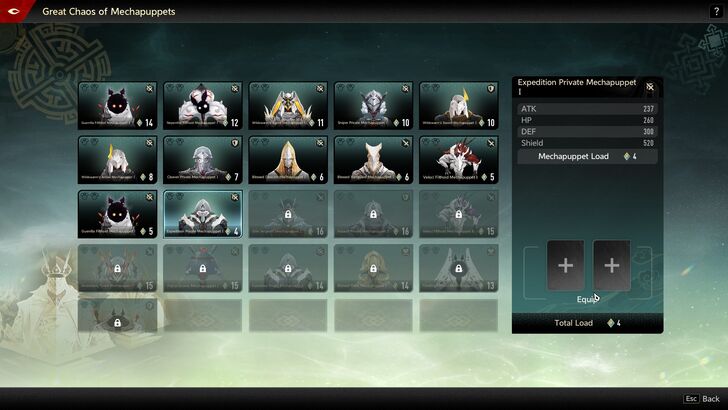
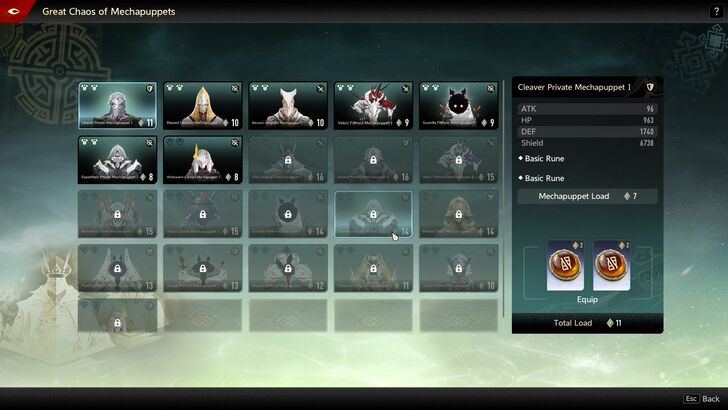
From the main menu, select Mechapuppet Overview to view all owned Mechapuppets and manage their loadouts.
In this menu, players can equip or unequip Runes to customize stats and optimize performance for specific strategies.
Always make sure to prepare and review Mechapuppet loadouts before starting a match.
Deploy Mechapuppets on Board
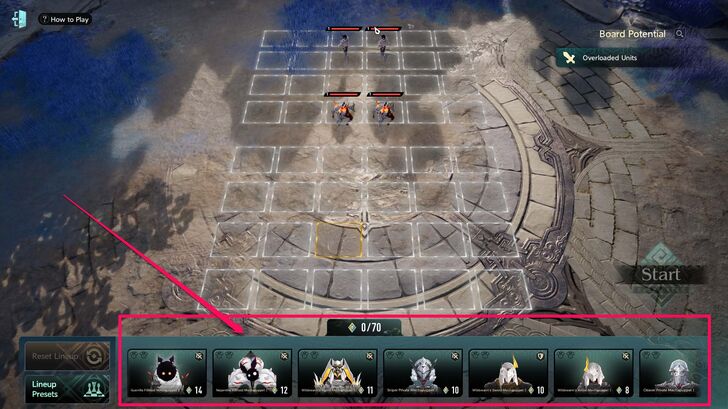
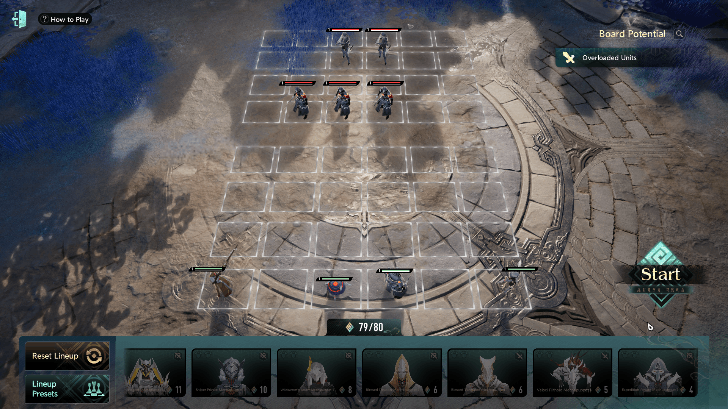
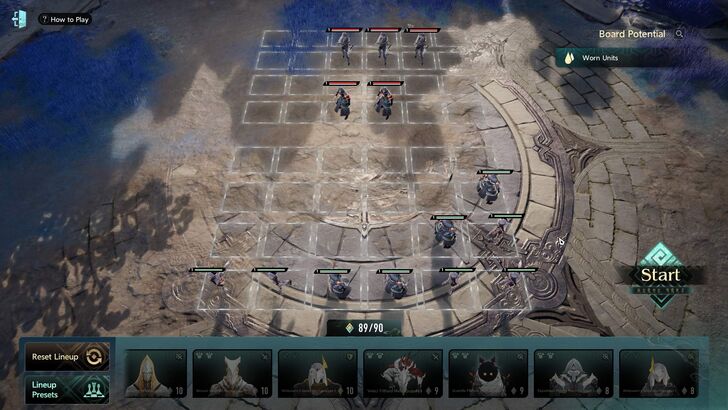
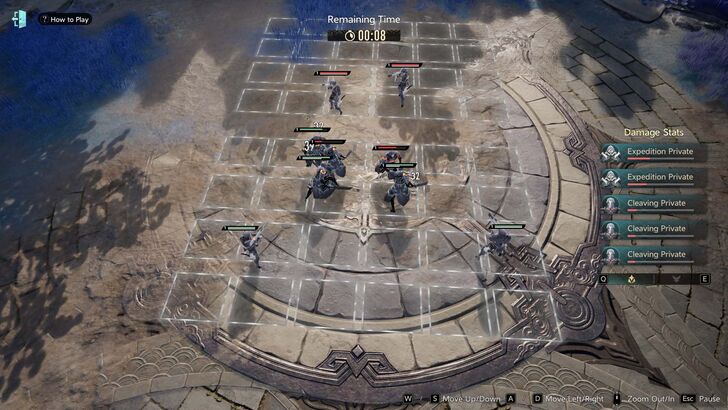
At the start of each match, players must prepare their board by placing the desired Mechapuppets onto the field.
The board interface displays the deployment cost of each Mechapuppet, as well as the total capacity available for the match. Players should optimize their lineup by balancing cost efficiency, team synergy, and overall strategy.
Lineups can be adjusted freely before the match begins. Players may reset their entire formation if needed or utilize preset configurations for faster setup. Up to three lineup presets can be saved for quick selection.
Press Start
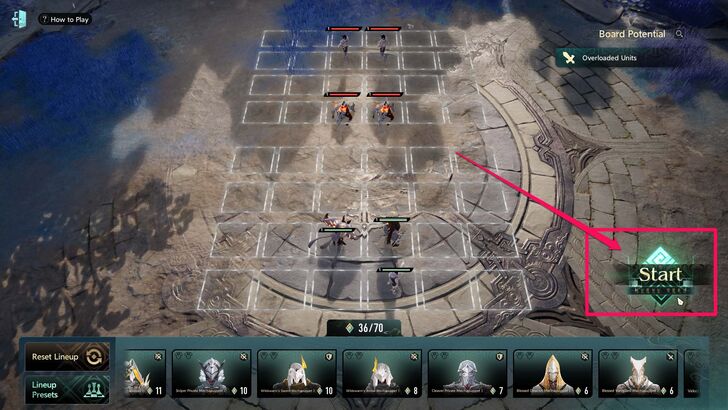
Once preparations are complete, press Start to begin the match. Combat proceeds in Auto Battle mode.
During Auto Battle, players may freely move and zoom the camera to observe the battlefield from different angles. The match can also be paused, restarted, or quit at any time through the in-game controls.
How to Win All Master Gongshang's Board Stages
| Jump to a stage! | ||||
|---|---|---|---|---|
| 01 | 02 | 03 | 04 | 05 |
| 06 | 07 | 08 | 09 | 10 |
| 11 | 12 | 13 | 14 | 15 |
| 16 | 17 | 18 | 19 | 20 |
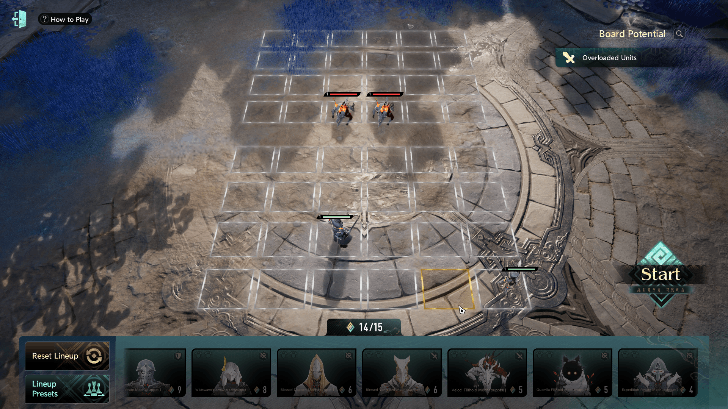
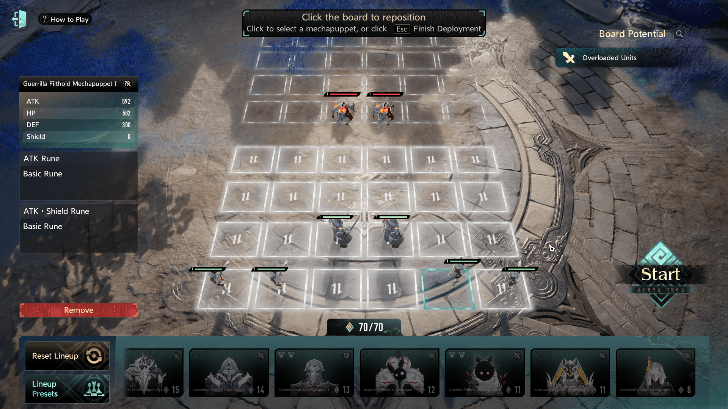
Master Gongshang's Board 01
| Board Lineup | |
|---|---|
 |
|
| Enemies | Runes |
| Veloci Filthoid Mechapuppet I x2 | Shield Rune x2 |
| Recommended Lineup | Runes |
| Cleaver Private Mechappupet I x1 | Shield Rune x1 |
| Guerrilla Filthoid Mechappupet I x1 | - |
Place your Cleaver Private Mechapuppet I in the middle of the board, three squares away from the enemy but still within their line of sight.
Then, position your Guerrilla Filthoid Mechapuppet I at the edge of the board. This setup ensures that enemies focus only on your tank.
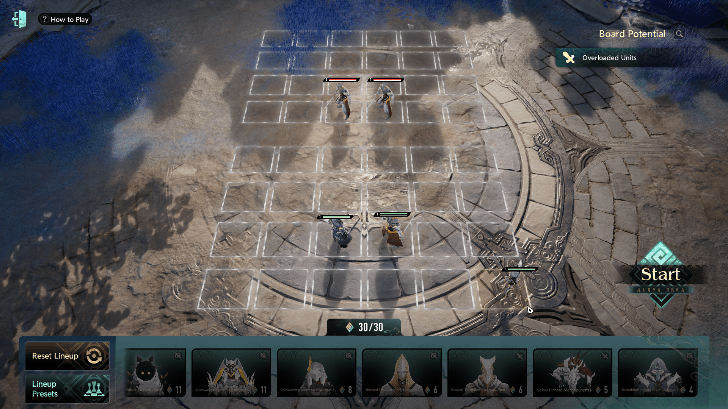
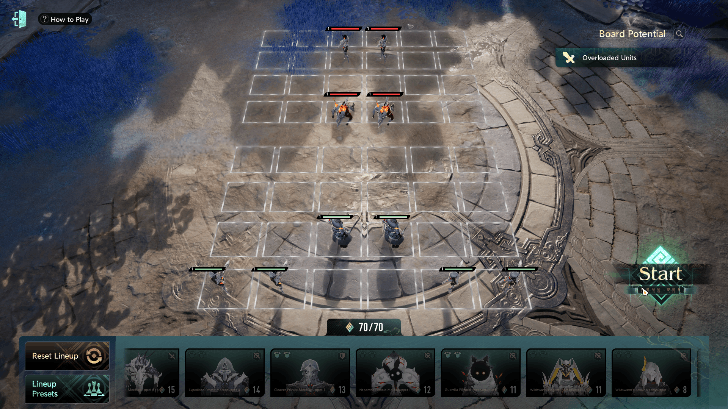
Master Gongshang's Board 02
| Board Lineup | |
|---|---|
 |
|
| Enemies | Runes |
| Cleaver Private Mechappupet x2 | ATK Rune x2 |
| Recommended Lineup | Runes |
| Cleaver Private Mechappupet I x1 | Shield Rune x1 |
| Guerrilla Filthoid Mechappupet I x1 | ATK Rune x1 |
Position your mechapuppets similar to Board 1, and place the second Guerrilla Filthoid Mechapuppet I on the opposite edge of the board. This ensures they don’t get targeted first.
Master Gongshang's Board 03
| Board Lineup | |
|---|---|
 |
|
| Enemies | Runes |
| Blessed Vanguard Mechapuppet I x2 | HP Rune x1 ATK - HP Rune x1 |
| Recommended Lineup | Runes |
| Cleaver Private Mechappupet I x1 | Shield Rune x1 Shield - HP Rune x1 |
| Blessed Vanguard Mechapuppet x1 | - |
| Guerrilla Filthoid Mechappupet I x1 | ATK Rune x1 ATK Shield Rune x1 |
Summon one Cleaver Private Mechapuppet I and one Blessed Vanguard Mechapuppet I next to each other within the enemy’s line of sight. Position them in the enemy’s placement, but on the 4th row of your board.
Finally, summon one Guerrilla Filthoid Mechapuppet I at the edge of the board so it remains outside the enemy’s line of sight.
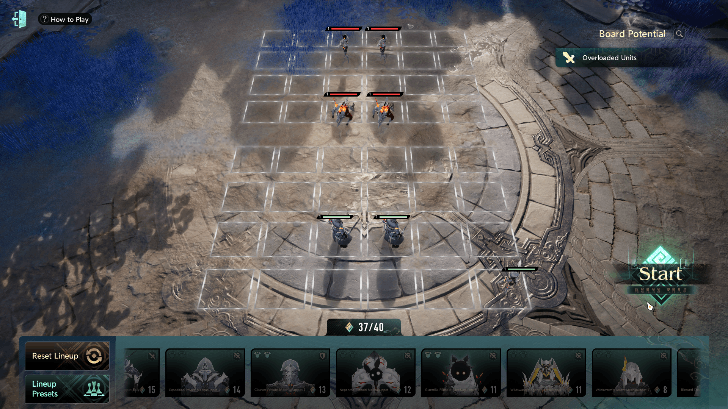
Master Gongshang's Board 04
| Board Lineup | |
|---|---|
 |
|
| Enemies | Runes |
| Veloci Filthoid Mechapuppet I x2 | Shield Rune x2 ATK Shield Rune x2 |
| Guerrilla Filthoid Mechappupet I x2 | Shield Rune x2 HP - Def Rune x2 |
| Recommended Lineup | Runes |
| Cleaver Private Mechappupet I x2 | Shield Rune x1 Shield - HP Rune x1 |
| Guerrilla Filthoid Mechappupet I x1 | ATK Rune x1 ATK Shield Rune x1 |
Copy the set-up and board placement of Board 03 except replace Blessed Vanguard Mechapuppet with another Cleaver Private Mechappupet I.
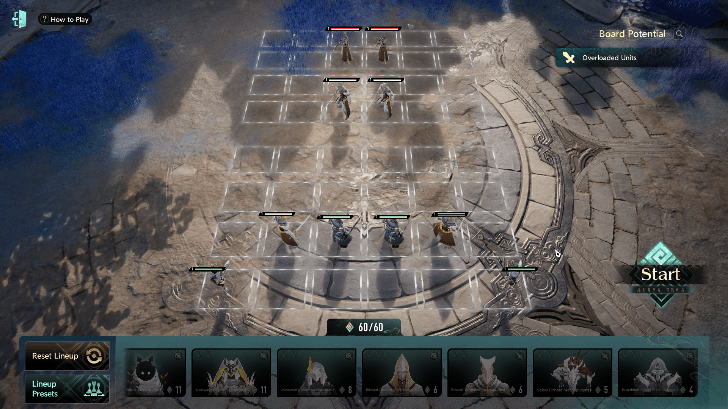
Master Gongshang's Board 05
| Board Lineup | |
|---|---|
 |
|
| Enemies | Runes |
| Cleaver Private Mechappupet I x2 | ATK Rune x2 |
| Expedition Private Mechapuppet I x2 | Shield Rune x2 HP - Def Rune x2 |
| Recommended Lineup | Runes |
| Cleaver Private Mechappupet I x2 | Shield Rune x1 Shield - HP Rune x1 |
| Guerrilla Filthoid Mechappupet I x2 | ATK Rune x2 ATK Shield Rune x2 |
Copy the setup and board placement from Board 04, but add another Guerrilla Filthoid Mechapuppet I and place it on the opposite end of the board.
Master Gongshang's Board 06
| Board Lineup | |
|---|---|
 |
|
| Enemies | Runes |
| Blessed Vanguard Mechapuppet I x2 | HP Rune x2 ATK - HP Rune x2 |
| Blessed Deacon Mechapuppet I x2 | Shield Rune x2 HP - Def Rune x2 |
| Recommended Lineup | Runes |
| Cleaver Private Mechappupet I x2 | Shield Rune x1 Shield - HP Rune x1 |
| Blessed Vanguard Mechapuppet x2 | - |
| Guerrilla Filthoid Mechappupet I x2 | ATK Rune x2 ATK Shield Rune x2 |
Copy the setup and board placement from Board 06, then add two Blessed Vanguard Mechapuppet I and place one on each side of your Cleaver Private Mechapuppet I.
This setup helps protect your Guerrilla Filthoid Mechapuppet I while also providing a bit more frontline damage.
Master Gongshang's Board 07
| Board Lineup | |
|---|---|
 |
|
| Enemies | Runes |
| Veloci Filthoid Mechapuppet I x2 | ATK - HP Rune x2 ATK - Shield Rune x2 |
| Recommended Lineup | Runes |
| Cleaver Private Mechappupet I x2 | Shield Rune x1 Shield - HP Rune x1 |
| Guerrilla Filthoid Mechappupet I x4 | ATK Rune x4 ATK Shield Rune x4 |
You can follow the same board placement as Board 05, but you can also add two additional Guerrilla Filthoid Mechapuppet I, placing one next to each existing Guerrilla Filthoid Mechapuppet I. This will help clear the board faster.
Master Gongshang's Board 08
| Board Lineup | |
|---|---|
 |
|
| Enemies | Runes |
| Veloci Filthoid Mechapuppet I x2 | ATK - HP Rune x2 ATK - Shield Rune x2 |
| Guerrilla Filthoid Mechappupet I x2 | Shield Rune x2 HP - Def Rune x2 |
| Recommended Lineup | Runes |
| Cleaver Private Mechappupet I x2 | Shield Rune x2 Shield - HP Rune x2 |
| Guerrilla Filthoid Mechappupet I x4 | ATK Rune x4 ATK Shield Rune x4 |
Board 08 has a 70-rune limit, so follow the same strategy as Board 07.
Master Gongshang's Board 09
| Board Lineup | |
|---|---|
 |
|
| Enemies | Runes |
| Cleaver Private Mechappupet x2 | Shield Rune x2 Shield - HP Rune x2 |
| Expedition Private Mechapuppet I x2 | Shield Rune x2 HP - Def Rune x2 |
| Recommended Lineup | Runes |
| Expedition Private Mechapuppet II x2 | - |
| Guerrilla Filthoid Mechappupet I x3 | ATK Rune x3 ATK Shield Rune x3 |
Place the two Expedition Private Mechapuppet II in the same column as the enemies, and keep the three Guerrilla Filthoid Mechapuppet I at the far end of the board.
The Expedition Private Mechapuppet II has an AoE attack that will deal significant damage, while the Guerrilla Filthoid Mechapuppet I finish off the remaining HP.
Master Gongshang's Board 10
| Board Lineup | |
|---|---|
 |
|
| Enemies | Runes |
| Blessed Vanguard Mechapuppet I x2 | Shield Rune x2 Shield - HP Rune x2 |
| Blessed Deacon Mechapuppet I x2 | Shield Rune x2 HP - Def Rune x2 |
| Recommended Lineup | Runes |
| Expedition Private Mechapuppet II x2 | - |
| Guerrilla Filthoid Mechappupet I x3 | ATK Rune x3 ATK Shield Rune x3 |
Follow the same strategy and board placement as Board 09 to clear this stage.
Master Gongshang's Board 11
| Board Lineup | |
|---|---|
 |
|
| Enemies | Runes |
| Cleaver Private Mechappupet I x2 | ATK - HP Rune x2 ATK - Shield Rune x2 |
| Expedition Private Mechapuppet I x2 | ATK Rune x2 HP - Def Rune x2 |
| Recommended Lineup | Runes |
| Cleaver Private Mechappupet I x1 | ATK Rune x2 |
| Wildswarm’s Arrow Mechapuppet I x1 | - |
| Guerrilla Filthoid Mechappupet I x1 | ATK Rune x1 ATK Shield Rune x1 |
Summon one Blessed Priest Mechapuppet I and position it alongside one Cleaver Private Mechapuppet I in the enemy frontline.
Next, summon one Wildswarm’s Arrow Mechapuppet I and place it at the far right end of the board. Then, summon one Guerrilla Filthoid Mechapuppet I and position it at the far left end of the board.
Master Gongshang's Board 12
| Board Lineup | |
|---|---|
 |
|
| Enemies | Runes |
| Veloci Filthoid Mechapuppet I x3 | Shield Rune x2 ATK - Shield Rune x2 |
| Guerrilla Filthoid Mechappupet I x2 | Shield Rune x2 HP - Def Rune x2 |
| Recommended Lineup | Runes |
| Cleaver Private Mechappupet I x1 | Shield Rune x1 Shield - HP Rune x1 |
| Benevolent Tyrant Mechapuppet I x1 | Bloodbath Rune x1 HP–DEF Rune x1 |
| Guerrilla Filthoid Mechappupet I x1 | ATK Rune x1 ATK Shield Rune x1 |
| Expedition Private Mechapuppet I x1 | - |
Summon one Benevolent Tyrant Mechapuppet I and position it alongside one Cleaver Private Mechapuppet I in either the 4th or 5th row of your board.
For your damage dealers, summon one Guerrilla Filthoid Mechapuppet I and one Expedition Private Mechapuppet I, placing them at opposite ends of the board to maximize coverage while keeping them safe.
This setup allows your damage dealers to target both the front-row and back-row enemies effectively.
Master Gongshang's Board 13
| Board Lineup | |
|---|---|
 |
|
| Enemies | Runes |
| Cleaver Private Mechappupet x3 | ATK - HP Rune x3 ATK - Shield Rune x3 |
| Expedition Private Mechapuppet I x2 | ATK Rune x2 HP - Def Rune x2 |
| Recommended Lineup | Runes |
| Cleaver Private Mechappupet I x1 | Shield Rune x1 Shield - HP Rune x1 |
| Patrol Drone Mechapuppet I | Vengeance Rune x1 ATK-DEF Rune x1 |
| Guerrilla Filthoid Mechappupet I x1 | ATK Rune x1 ATK Shield Rune x1 |
| Expedition Private Mechapuppet I x1 | - |
Summon one Patrol Drone Mechapuppet I and summon a Cleaver Private Mechapuppet I next to each other in front of enemy sight. For damage, summon 1 Blessed Deacon Mechapuppet and 1 Guerrilla Filthoid Mechapuppet I at the opposite end of the boards.
Master Gongshang's Board 14
| Board Lineup | |
|---|---|
 |
|
| Enemies | Runes |
| Blessed Vanguard Mechapuppet I x3 | HP Rune x2 ATK - HP Rune x2 |
| Blessed Deacon Mechapuppet I | Shield Rune x2 HP - Def Rune x2 |
| Recommended Lineup | Runes |
| Cleaver Private Mechappupet I x1 | Shield Rune x1 Shield - HP Rune x1 |
| Elite Sergeant Mechapuppet I x1 | Corrosion Rune x1 |
| Guerrilla Filthoid Mechappupet I x1 | ATK Rune x1 ATK Shield Rune x1 |
| Sniper Private Mechapuppet i x1 | - |
After clearing Board 13, you will unlock Elite Sergeant Mechapuppet I, one of the best mechapuppets alongside Cleaver Private Mechapuppet I and Guerrilla Filthoid Mechapuppet I.
Summon Elite Sergeant Mechapuppet I, and next to it, place a Cleaver Private Mechapuppet I to serve as your front-row tank.
For your damage dealers, summon one Sniper Private Mechapuppet and one Guerrilla Filthoid Mechapuppet I at the opposite end of the board.
Master Gongshang's Board 15
| Board Lineup | |
|---|---|
 |
|
| Enemies | Runes |
| Blessed Vanguard Mechapuppet I x3 | HP Rune x2 ATK - HP Rune x2 |
| Blessed Deacon Mechapuppet I | Shield Rune x2 HP - Def Rune x2 |
| Recommended Lineup | Runes |
| Cleaver Private Mechappupet I x1 | Shield Rune x1 Shield - HP Rune x1 |
| Elite Sergeant Mechapuppet I x1 | Glimmer Rune x1 |
| Guerrilla Filthoid Mechappupet I x2 | ATK Rune x2 ATK Shield Rune x2 |
| Sniper Private Mechapuppet I x1 | - |
| Blessed Deacon Mechapuppet I x1 | - |
With a rune limit of 100, you can summon additional damage dealers. We recommend summoning Elite Sergeant Mechapuppet I and placing a Cleaver Private Mechapuppet I next to it to serve as tanks in the enemy’s line of sight.
For your main damage output, summon one Guerrilla Filthoid Mechapuppet I, along with one Sniper Private Mechapuppet and one Blessed Deacon Mechapuppet I, positioning them at the back of the board with two mechapuppets at each end.
Master Gongshang's Board 16
| Board Lineup | |
|---|---|
 |
|
| Enemies | Runes |
| Wildswarm's Sword Mechapuppet I x2 | Shield Rune x2 Rune - Enrage x2 |
| Wildswarm's Arrow Mechapuppet I x2 | ATK Rune x2 Rune - Collapse x2 |
| Recommended Lineup | Runes |
| Cleaver Private Mechappupet I x1 | Shield Rune x1 Shield - HP Rune x1 |
| Elite Sergeant Mechapuppet I x1 | Glimmer Rune x1 |
| Guerrilla Filthoid Mechappupet I x5 | ATK Rune x5 ATK Shield Rune x5 |
| Blessed Deacon Mechapuppet I x1 | - |
With a rune limit of 120, similar to Board 15, summon Elite Sergeant Mechapuppet I and place a Cleaver Private Mechapuppet I next to it to serve as your front-row tank.
Then summon five Guerrilla Filthoid Mechapuppet I and one Blessed Deacon Mechapuppet I, placing them below the Elite Sergeant Mechapuppet I, next to the Guerrilla Filthoid Mechapuppet I for optimal damage and protection.
Master Gongshang's Board 17
| Board Lineup | |
|---|---|
 |
|
| Enemies | Runes |
| Blessed Vanguard Mechapuppet I x2 | Shield Rune x2 ATK - Shield Rune x2 |
| Wildswarm's Agent Mechapuppet I x2 | Rune - Break x2 Rune - Break x2 |
| Recommended Lineup | Runes |
| Cleaver Private Mechappupet I x1 | Shield Rune x1 Shield - HP Rune x1 |
| Elite Sergeant Mechapuppet I x1 | Glimmer Rune x1 |
| Guerrilla Filthoid Mechappupet I x5 | ATK Rune x5 ATK Shield Rune x5 |
| Blessed Deacon Mechapuppet I x1 | - |
For Board 17, just follow the same strategy as Board 16 to take out enemies quickly.
Master Gongshang's Board 18
| Board Lineup | |
|---|---|
 |
|
| Enemies | Runes |
| Savage Filthoid Mechapuppet I x2 | Rune Tempering x2 Rune Benevolence x2 |
| Guerrilla Filthoid Mechapuppet I x2 | ATK Rune x2 ATK - Def Rune x2 |
| Recommended Lineup | Runes |
| Wildswarm’s Sword Mechapuppet I x2 | Shield Rune x3 Shield - HP Rune x3 |
| Guerrilla Filthoid Mechappupet II x4 | ATK Rune x4 ATK Shield Rune x4 |
| Wildswarm Arrow Mechapuppet I x1 | - |
Board 18 is arguably the hardest board in the game due to the two Savage Filthoid Mechapuppet I. These enemies are extremely difficult to kill because of their runes.
Not only are these mechapuppets very durable, but they also heal during the fight, so you’ll need to adjust your strategy. Additionally, they have an ability where they jump to a certain area of the board and deal massive AoE damage. They don’t use it often, but be careful.
We recommend summoning two Wildswarm’s Sword Mechapuppet I with the runes mentioned above. Place them in front of the Savage Filthoid Mechapuppet I to make them the primary target. They will act as both defense and damage dealers.
Next, summon at least four Guerrilla Filthoid Mechapuppet II, spacing them out as shown in the reference image so they avoid the AoE attacks. Position the two Savage Filthoid Mechapuppet I in the top-right to handle enemies at the back. Finally, place one Wildswarm Arrow Mechapuppet I at the back of the line to provide extra damage output.
Master Gongshang's Board 19
| Board Lineup | |
|---|---|
 |
|
| Enemies | Runes |
| Veloci Filthoid Mechapuppet I x2 | Rune Tempering x2 Rune Benevolence x2 |
| Savage Filthoid Mechapuppet I x1 | Rune: Frenzy x1 Rune: Riptide x1 |
| Floating Filthoid Mechapuppet x1 | Rune: Restoration x1 Rune: Inspiration x1 |
| Recommended Lineup | Runes |
| Wildswarm’s Sword Mechapuppet I x3 | Shield Rune x3 Shield - HP Rune x3 |
| Guerrilla Filthoid Mechappupet II x4 | ATK Rune x4 ATK Shield Rune x4 |
| Wildswarm Arrow Mechapuppet I x1 | - |
Board 19 is easier than Board 18. Simply summon 3 Wildswarm’s Sword Mechapuppet I in the enemy’s line of sight, and then place 3 Guerrilla Filthoid Mechapuppet II at the far end of the board, similar to the reference image.
Master Gongshang's Board 20
| Board Lineup | |
|---|---|
 |
|
| Enemies | Runes |
| Veloci Filthoid Mechapuppet I x3 | ATK - DEF Rune x2 ATK - HP Rune x2 |
| Nepenthe Filthoid Mechapuppet I x2 | ATK Rune x2 Rune: Break x2 |
| Recommended Lineup | Runes |
| Wildswarm’s Sword Mechapuppet I x3 | Shield Rune x3 Shield - HP Rune x3 |
| Guerrilla Filthoid Mechappupet II x4 | ATK Rune x4 ATK Shield Rune x4 |
| Guerrilla Filthoid Mechappupet I x1 | ATK Rune x1 ATK Shield Rune x1 |
Board 20 is quite easy as well. Summon 3 Wildswarm’s Sword Mechapuppet I in the enemy’s line of sight to take damage as front-line tanks, 3 Guerrilla Filthoid Mechapuppet II at the back end of the board, and 1 Guerrilla Filthoid Mechapuppet I for extra damage, which can be positioned anywhere in the back.
Great Chaos of Mechapuppets Tips
| Great Chaos of Mechapuppets Tips |
|---|
|
|
Complete Board Insight
Completing Board Insight tasks unlocks more powerful Mechapuppets and Runes, helping players clear increasingly difficult boards.
Equip Runes to Mechapuppets
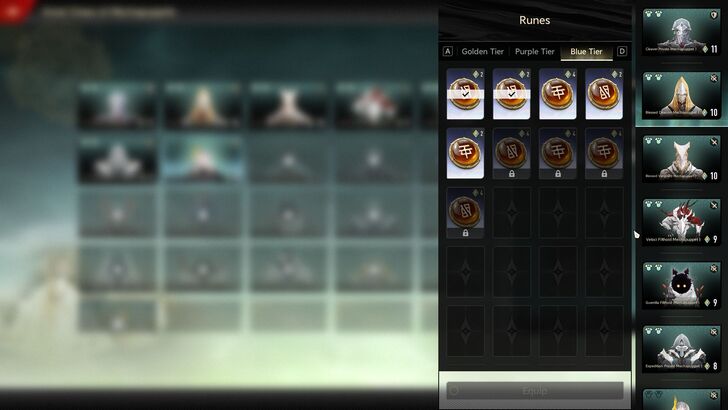
Phoxhunters can equip Runes to their Mechapuppets to enhance overall match performance. Players can also review detailed Mechapuppet data to better understand their strengths, weaknesses, and core attributes.
Understanding a unit’s strengths and shortcomings allows you to equip Runes that either reinforce its advantages or compensate for its weaknesses.
Keep in mind that equipping more Runes increases the Mechapuppet’s Load cost, making it more expensive to deploy. Striking a balance between power and cost is key—experiment with different Rune combinations to find a setup that best fits your strategy and playstyle.
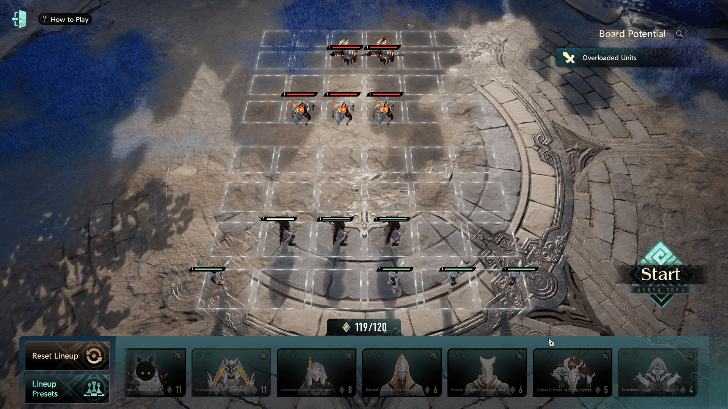
Try Out Different Mechapuppets
Mechapuppets each have their own playstyles, cores, strengths, and weaknesses. Because of this, it is highly recommended to experiment with different team compositions, Rune setups, and synergies to find what works best for each stage.
For better team balance, consider pairing Cleaver Private with a long-range unit such as Guerrilla Filthoid. While Cleaver Private absorbs incoming damage on the frontline, the ranged unit can safely deal sustained damage from the backline.
Review Enemy Loadout Before Match Starts

Before starting a match, players can preview the enemies loadout by clicking on their icons. This allows you to view their equipped Runes and unit setups, providing valuable information for planning your strategy.
By analyzing the enemy’s build, you can adjust your own Mechapuppet lineup and Rune configuration accordingly to better counter their strengths and exploit their weaknesses.
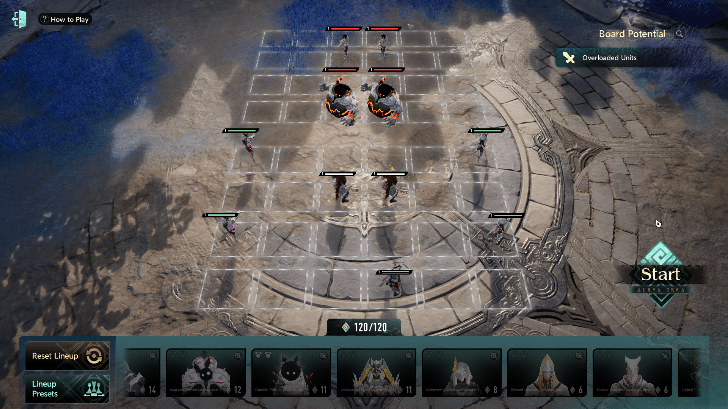
Strategically Position Your Mechapuppets
Before starting a match, you can observe enemy positioning and formations before deploying their own Mechapuppets. Each battle may also feature unique Board Potential effects that influence the flow of combat, requiring players to adapt their strategy accordingly.
Positioning plays a crucial role in battle. Enemies typically target units that are closest to them or directly in front of their position. As a result, careful placement of your Mechapuppets can significantly impact survivability and damage output.
Adjust your formation based on enemy composition to maximize efficiency and battlefield control.
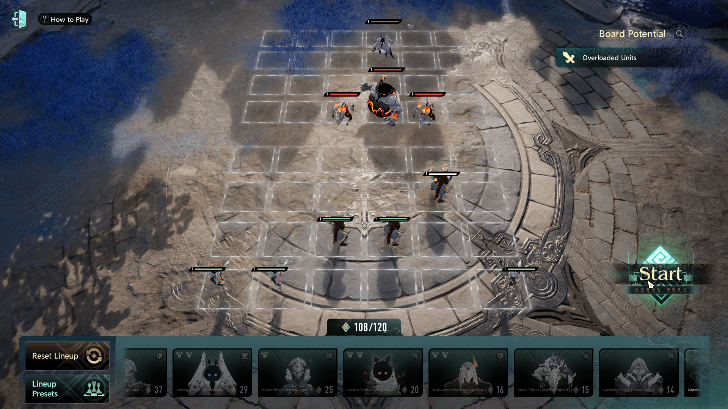
Protect Your Carries
Position Tank-type Mechapuppets within the enemy’s line of sight to ensure they draw incoming attacks. Their higher durability allows them to absorb damage more effectively and protect the team.
Place Damage-dealing Mechapuppets behind Tanks or outside the enemy’s direct line of sight. Proper positioning minimizes unnecessary damage taken and maximizes overall team survivability and damage output.
How to Increase Great Chaos of Mechapuppets Rank
| How to Increase Great Chaos of Mechapuppets Rank |
|---|
|
|
Grind Endless Mode
The most efficient way to increase Rank is by consistently playing Endless Mode. Endless Mode matches always grant Match Points, which directly contribute to Rank progression.
Increasing Rank unlocks additional Mechapuppets, expands available Board Insight objectives, and provides access to stronger Runes, along with various resource rewards.
Players who are struggling with Master Gongshang’s Board are advised to farm Match Points in Endless Mode. Ranking up grants upgrades and unlocks that can significantly improve progression.
Refresh Matches if You're Stuck
Players can refresh their list of available opponents up to five times per day in Endless Mode. This feature is especially useful when facing particularly difficult matchups or when the current team composition is at a disadvantage.
Refreshing will generate a new set of opponents, allowing players to seek more favorable encounters.
Increase Rank Cap in Master Gongshang's Board
| Ranks |
|---|
| ・Measured Moves
・Opening Plays ・Midgame Clash ・Inspired Plays ・Relentless Advance ・Masterful Control ・Beyond the Board ・Grand Master |
There are currently 8 Ranks in Great Chaos of Mechapuppets.
While Endless Mode is the primary method for earning Match Points and increasing Rank, players will eventually reach a Rank Cap. At this point, further Rank progression is locked until specific requirements are completed.
To raise the Rank Cap, players must challenge Master Gongshang’s Board and clear stages marked with the “Increase Rank Cap” condition. Completing these objectives unlocks the next Rank tier, allowing continued rank progression through Endless Mode.
List of All Mechapuppets
All Unlockabnle Mechapuppets
| Mechapuppet | Stats | Load Cost |
|---|---|---|
| Cleaver Private Mechapuppet I | ・ATK 96
・HP 963 ・DEF 1200 ・SHIELD 4813 |
7 Total Load |
| Wildswarm's Agent Mechapuppet I | ・ATK 922
・HP 49 ・DEF 300 ・SHIELD 1867 |
11 Total Load |
| Sniper Private Mechapuppet I | ・ATK 3434
・HP 460 ・DEF 300 ・SHIELD 919 |
10 Total Load |
| Blessed Deacon Mechapuppet I | ・ATK 979
・HP 33 ・DEF 300 ・SHIELD 1238 |
6 Total Load |
| Blessed Vanguard Mechapuppet I | ・ATK 354
・HP 59 ・DEF 600 ・SHIELD 3381 |
6 Total Load |
| Wildswarm's Sword Mechapuppet I | ・ATK 138
・HP 123 ・DEF 1200 ・SHIELD 11680 |
10 Total Load |
| Veloci Filthoid Mechapuppet I | ・ATK 184
・HP 1372 ・DEF 870 ・SHIELD 0 |
5 Total Load |
| Guerrilla Filthoid Mechapuppet I | ・ATK 370
・HP 582 ・DEF 300 ・SHIELD 0 |
5 Total Load |
| Expedition Private Mechapuppet I | ・ATK 237
・HP 260 ・DEF 300 ・SHIELD 520 |
4 Total Load |
| Wildswarm's Arrow Mechapuppet I | ・ATK 435
・HP 39 ・DEF 300 ・SHIELD 1498 |
8 Total Load |
| Elite Sergeant Mechapuppet I | ・ATK 728
・HP 647 ・DEF 300 ・SHIELD 1293 |
16 Total Load |
| Assault Private Mechapuppet I | ・ATK 241
・HP 1720 ・DEF 1200 ・SHIELD 8601 |
16 Total Load |
| Veloci Filthoid Mechapuppet I | ・ATK 407
・HP 2239 ・DEF 600 ・SHIELD 8601 |
15 Total Load |
| Benevolent Tyrant Mechapuppet I | ・ATK 579
・HP 1119 ・DEF 600 ・SHIELD 3358 |
15 Total Load |
| Patrol Drone Mechapuppet I | ・ATK 345
・HP 616 ・DEF 300 ・SHIELD 1232 |
15 Total Load |
| Expedition Private Mechapuppet II | ・ATK 418
・HP 586 ・DEF 300 ・SHIELD 1171 |
14 Total Load |
| Blessed Priest Mechapuppet I | ・ATK 820
・HP 59 ・DEF 300 ・SHIELD 2225 |
14 Total Load |
| Floating Filthoid Mechapuppet I | ・ATK 630
・HP 1109 ・DEF 300 ・SHIELD 0 |
13 Total Load |
| Savage Filthoid Mechapuppet I | ・ATK 130
・HP 2951 ・DEF 1200 ・SHIELD 0 |
13 Total Load |
| Guerrilla Filthoid Mechapuppet II | ・ATK 889
・HP 1171 ・DEF 300 ・SHIELD 0 |
14 Total Load |
| Nepenthe Filthoid Mechapuppet I | ・ATK 387
・HP 1046 ・DEF 300 ・SHIELD 0 |
12 Total Load |
List of Mechapuppet Runes
All Runes Available
| Rune | Stats | Buff Effects |
|---|---|---|
| Cleaver Private Mechapuppet I | ATK 100%
HP 100% DEF 100% SHIELD 100% |
Gain Primander Abilitiy - Bloodbath |
| Rune: Tempering | ATK
HP DEF 90.0% SHIELD |
When taking damage, gains +25.0% DEF for 10s, stacking up to 3 times. |
| Rune: Enrage | ATK
HP DEF SHIELD 90.0% |
When taking damage,gains +25.0% DEF for 10s, stacking up to 3 times. |
| Rune: Penetration | ATK 55.0%
HP DEF SHIELD |
When dealing damage to a shielded target, damage dealt is increased by 100%. |
| Rune: Collapse | ATK 45.0%
HP DEF SHIELD |
When dealing damage, reduces the target's DEF by 20.0% for 10s, stacking up to 3 times.. |
| Rune: Break | ATK 30.0%
HP DEF SHIELD |
Gains +#2 DEF for every 20% HP lost. |
| HP . DEF Rune | ATK 30.0%
HP DEF SHIELD |
- |
| ATK . DEF Rune | ATK 30.0%
HP DEF 45.0% SHIELD |
- |
| ATK . HP Rune | ATK 30.0%
HP 30.0% DEF SHIELD |
- |
| Shield . HP Rune | ATK
HP 65.0% DEF SHIELD 60.0% |
- |
| HP Rune | ATK
HP 30.0% DEF SHIELD |
- |
| DEF Rune | ATK
HP DEF 45.0% SHIELD |
- |
| ATK Rune | ATK 30.0%
HP DEF SHIELD |
- |
| Shield Rune | ATK
HP DEF SHIELD 40.0% |
- |
| Rune: Blast | ATK 100%
HP 100% DEF 100% SHIELD 100% |
Gain Primander Abilitiy - Blast |
| Rune: Corrosion | ATK 50.0%
HP 50.0% DEF 50.0% SHIELD 50.0% |
Gain Primander Abilitiy - Corrosion |
| Rune: Thunderbolt | ATK 100%
HP 100% DEF 100% SHIELD 100% |
Gain Primander Abilitiy - Thunderbolt |
| Rune: Decay | ATK 100%
HP 100% DEF 100% SHIELD 100% |
Gain Primander Abilitiy - Decay |
| Rune: Wither | ATK 100%
HP 100% DEF 100% SHIELD 100% |
Gain Primander Abilitiy - Wither |
| Rune: Vengeance | ATK 150.0%
HP DEF SHIELD |
Gain Primander Abilitiy - Vengeance |
| Rune: Sacrifice | ATK 150.0%
HP DEF SHIELD |
Gain Primander Abilitiy - Sacrifice |
| Rune: Benevolence | ATK
HP 90.0% DEF SHIELD |
When HP falls below 25.0%, restores 7.5% Max HP per second for 10s. |
| Rune: Last Stand | ATK
HP 90.0% DEF SHIELD |
Gains +15.0% ATK for every 20% HP lost. |
| Rune: Tenacity | ATK
HP 90.0% DEF SHIELD |
Gains +4 DEF for every 20% HP lost. |
| Rune: Fatality | ATK 50.0%
HP DEF SHIELD |
When dealing damage to an unshielded target, damage dealt is increased by 100%. |
| Rune: Frenzy | ATK
HP DEF 30.0% SHIELD |
When taking damage, gains +20.0% ATK and +20.0% DEF for 10s, stacking up to 3 times. |
| Rune: Riptide | ATK 20.0%
HP DEF SHIELD |
When dealing damage, gains +20.0% ATK and +20.0% DEF for 10s, stacking up to 3 times. |
| Rune: Restoration | ATK 45.0%
HP DEF SHIELD |
When healing an ally, Increases the ally's DEF by 45.0% for 10s. |
| Rune: Inspiration | ATK 45.0%
HP DEF SHIELD |
When healing an ally, gains +35.0% ATK for 10s. |
| Rune: Resonance | ATK 45.0%
HP DEF SHIELD |
When healing an ally, gains +45.0% ATK for 10s. |
Great Chaos of Mechapuppets Rewards
Master Gongshang's Gifts
| Price | Item |
|---|---|
| 200 Cog | Demon King Hat Piece |
| 200 Cog | Bowknot: Opaque White |
| 200 Cog | Snap Kitty Waistpiece: Leaden Grey |
| 5 Cog | Silkrain: Glit |
| 5 Cog | Silkrain: Apricot |
| 5 Cog | Silkrain: Azure |
| 5 Cog | Blazing Heartbeat: Glit |
| 5 Cog | Blazing Heartbeat: Azure |
| 5 Cog | Blazing Heartbeat: White Sakura |
| 150 Cog | Twilight Tread |
| 100 Cog | Track-Shift Module |
| 75 Cog | Weapon Track-Shift Module |
| 40 Cog | Iridescent Dye |
| 20 Cog | Luno Memento x20 |
| 10 Cog | Coin x50000 |
| 10 Cog | Combat Melody IV x2 |
| 10 Cog | Weapon Manual IV x2 |
| 10 Cog | Carmine Globule x800 |
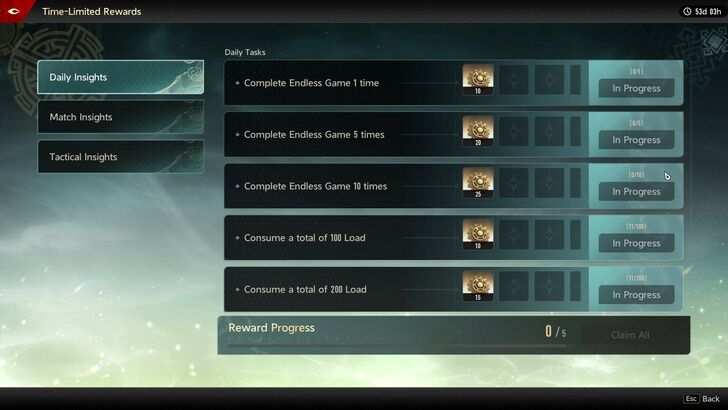
Cogs are the special currency in Great Chaos of Mechapuppets which players can get by completing objectives and in Board Insights.
Great Chaos of Mechapuppets Event Info
Schedule
| Event Start | February 10, 2026 |
|---|---|
| Event End | April 6, 2026 |
Great Chaos of Mechapuppets will run from February 10, 2026 to April 6, 2026, 17:00 (server time).
Duet Night Abyss Related Guides

All Current Events
| Event | Schedule & Summary |
|---|---|
 Moments in Frame Moments in Frame |
Duration: April 7, 2026 – April 21, 2026 Take photos of moments in Phoxhunter's life and receive rewards. |
 Traces in the Sand Traces in the Sand |
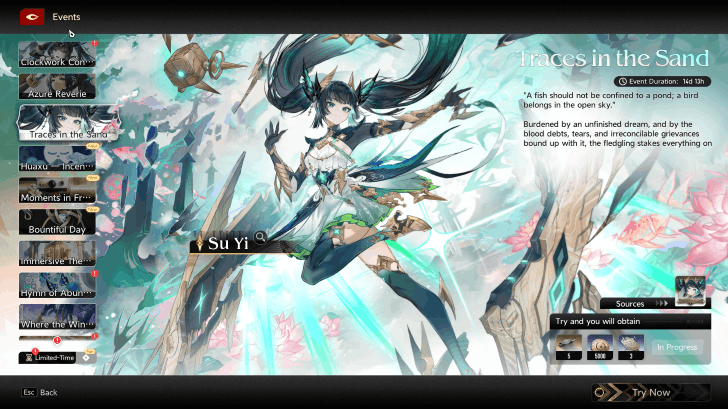
Duration: April 7, 2026 – June 1, 2026 Test out the latest DNA character, Su Yi! |
 Azure Reverie Azure Reverie |
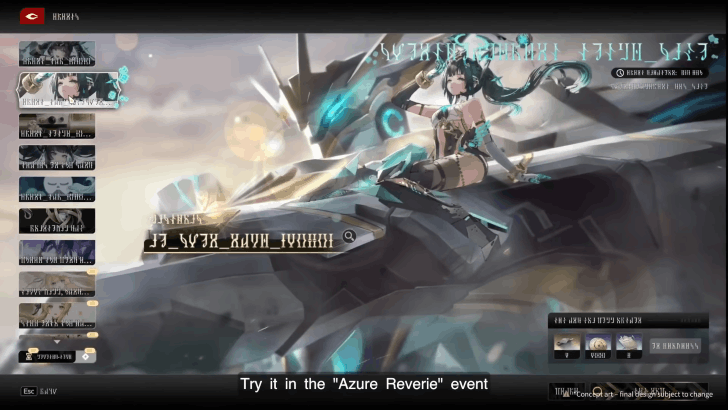
Duration: April 7, 2026 – May 5, 2026 Test out Su Yi's exclusive skin, Volant Viridity! |
 Clockwork Constellations Clockwork Constellations |
Duration: April 7, 2026 – May 5, 2026 Watch the latest Huaxu trailer to earn rewards! |
 Huaxu - Incense and Marvels II Huaxu - Incense and Marvels II |
Duration: April 7, 2026 – June 1, 2026 Watch the latest Huaxu trailer to earn rewards! |
 Where the Wind Rises Where the Wind Rises |
Duration: April 6, 2026 – May 27, 2026 Watch the latest Huaxu trailer to earn rewards! |
 Wish Amidst Myriad Turns Wish Amidst Myriad Turns |
Duration: April 6, 2026 – April 13, 2026 Transform into objects using the Wonder Box and take pictures for other players to guess where you are. |
 A Night of Endless Wonders A Night of Endless Wonders |
Duration: March 27, 2026 – April 14, 2026 Transform into objects using the Wonder Box and take pictures for other players to guess where you are. |
All Old Events
 When Dreams Gild the Night Guide
 Global Milestone Rewards
 DNArt UGC Event
 Friendly Games
 Leap! Helix Leap!
 Ode to the Bloom
 List of Web Events
 Stranger From Afar
 Message of the Nightingale
 Bountiful Day
 Official Reddit Giveaway
 Under the Apricot Petals
 Gleam of Flowing Waters
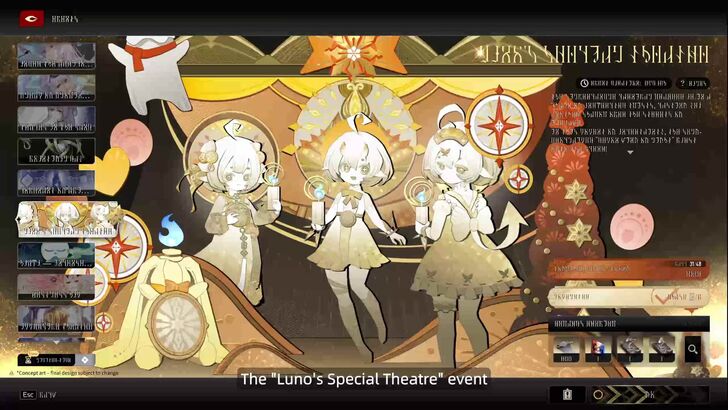 Luno's Special Theatre
 Amazon Gift Card Giveaway
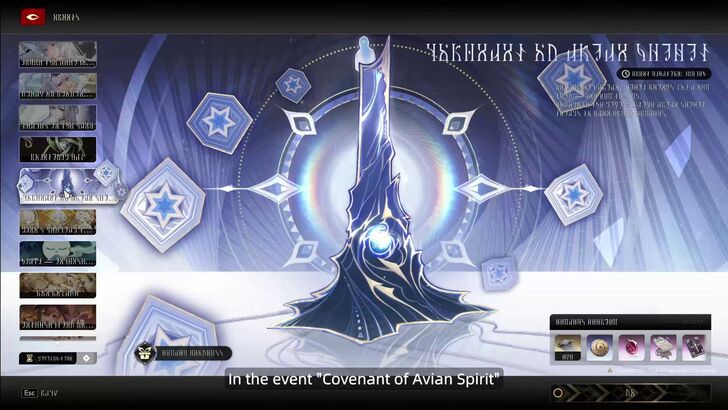 Covenant of Avian Spirit
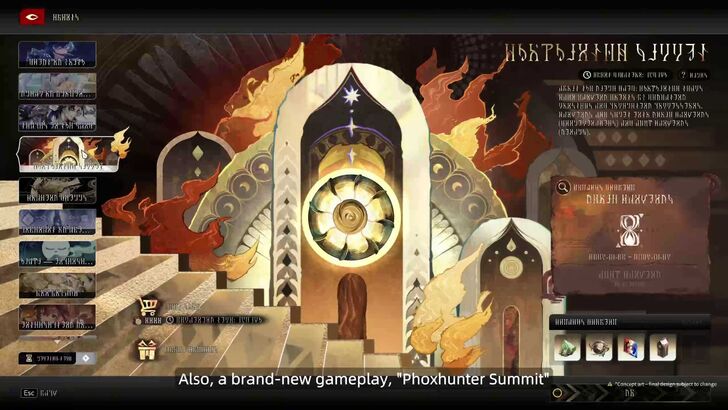 Phoxhunter Summit
 The Wind Awakening Fan Creations Contest
 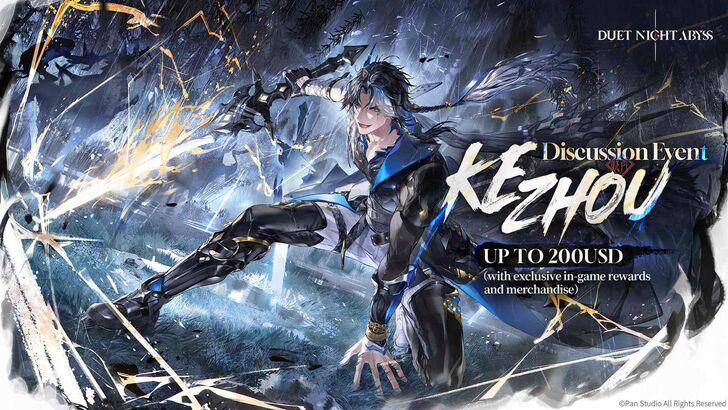 Kezhou Reddit Giveaway
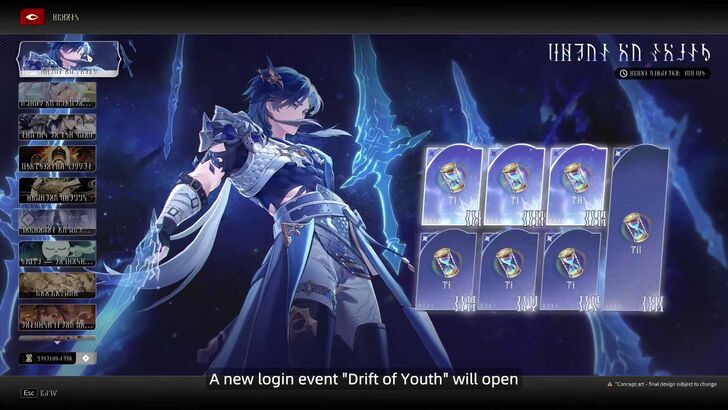 Drift of Youth
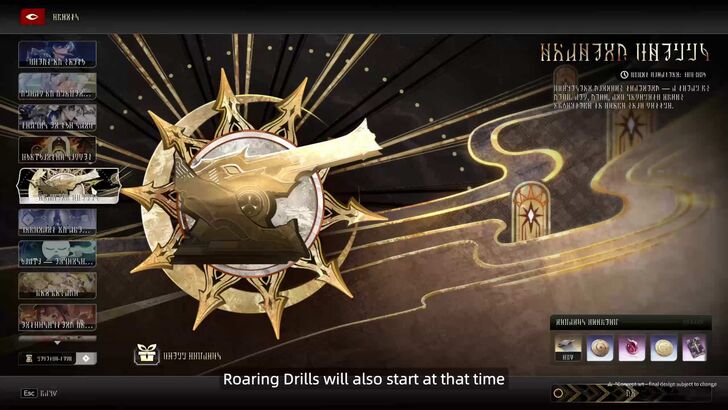 Roaring Drills
 When the Stone Falls Event Guide
 Zhiliu X Giveaway Event Guide
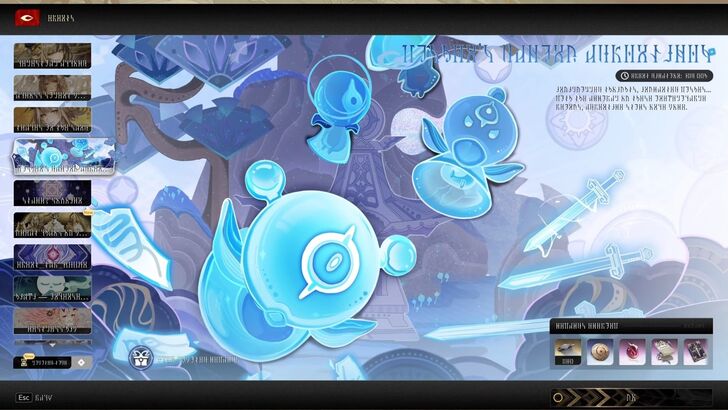 Wishen's Daring Adventures
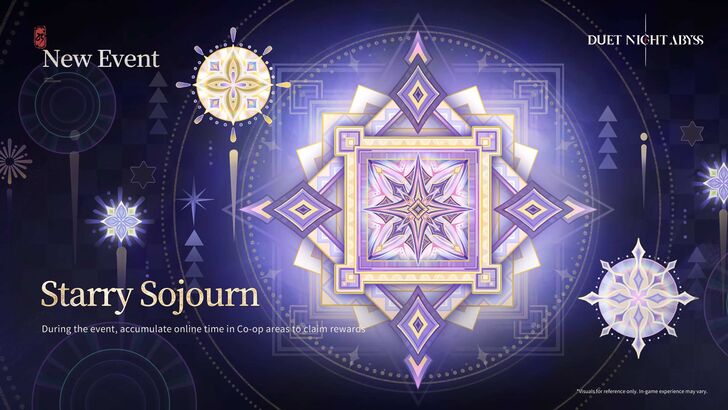 Starry Sojourn
 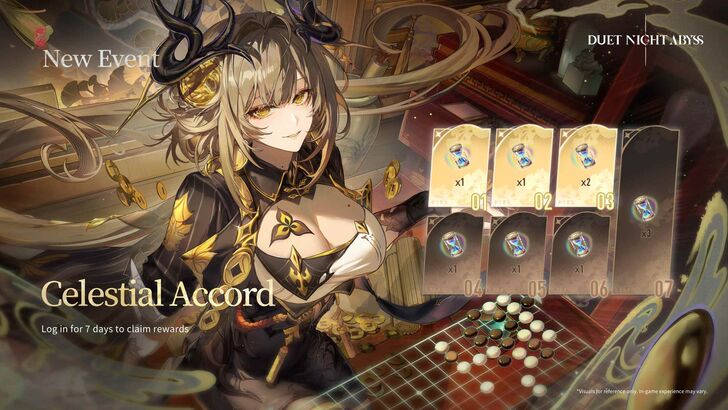 Celestial Accord
 Yuming X Giveaway
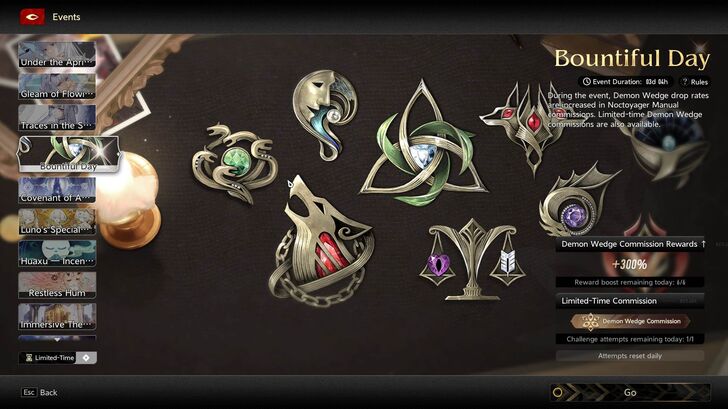 Bountiful Day
 Across Silent Mountains, Along Flowing Rivers
 Atlasia Calling
 Wish for Tranquil Peace
 Huaxu - Incense and Marvel
 Great Chaos of Mechapuppets
Author

Great Chaos of Mechapuppets Event Guide
Rankings
- We could not find the message board you were looking for.
Gaming News


![Forza Horizon 6 Review [Preview] | Beautiful Roads With a Whole Lot of Oversteer](https://img.game8.co/4460981/a7254c24945c43fbdf6ad9bea52b5ce9.png/thumb)
Popular Games

Genshin Impact Walkthrough & Guides Wiki
Crimson Desert Walkthrough & Guides Wiki
Umamusume: Pretty Derby Walkthrough & Guides Wiki
Honkai: Star Rail Walkthrough & Guides Wiki
Monster Hunter Stories 3: Twisted Reflection Walkthrough & Guides Wiki
Wuthering Waves Walkthrough & Guides Wiki
The Seven Deadly Sins: Origin Walkthrough & Guides Wiki
Pokemon TCG Pocket (PTCGP) Strategies & Guides Wiki
Pokemon Pokopia Walkthrough & Guides Wiki
Zenless Zone Zero Walkthrough & Guides Wiki


Recommended Games
Monster Hunter World Walkthrough & Guides Wiki
Fire Emblem Heroes (FEH) Walkthrough & Guides Wiki
Pokemon Brilliant Diamond and Shining Pearl (BDSP) Walkthrough & Guides Wiki
Super Smash Bros. Ultimate Walkthrough & Guides Wiki
Diablo 4: Vessel of Hatred Walkthrough & Guides Wiki
Cyberpunk 2077: Ultimate Edition Walkthrough & Guides Wiki
Yu-Gi-Oh! Master Duel Walkthrough & Guides Wiki
Elden Ring Shadow of the Erdtree Walkthrough & Guides Wiki
The Legend of Zelda: Tears of the Kingdom Walkthrough & Guides Wiki
Persona 3 Reload Walkthrough & Guides Wiki


All rights reserved
Game Copyright©Pan Studio All Rights Reserved.
The content we provide on this site were created personally by members of the Game8 editorial department.
We refuse the right to reuse or repost content taken without our permission such as data or images to other sites.
©Pan Studio (Provider)
What does "Wildswarm’s Sword Mechapuppet I x2 Shield Rune x3 Shield - HP Rune x3" even mean? Each unit can carry max 2 runes. Doesn't make any sense.