Chapter 4: Journey Across the Lands Story Walkthrough and Guide
★ Tier Lists: Characters | Weapons | Demon Wedges
★ Builds: Kezhou | Fushu | Fina | Lynn | Psyche
★ Version 1.2 Summary | Characters: Zhiliu | Yuming
┗ Mechanics: Mount | Gifting | Reputation | Accessory Customization
★ How to Get Characters | Mystic Maze | Redeem Codes
This is a walkthrough guide for Chapter 4: Journey Across the Lands in Duet Night Abyss. Read on to learn how to complete Journey Across the Lands, its quest rewards and objectives, dialogue impressions, and boss fights!
| ◄ Previous Chapter | Next Chapter ▶ |
|---|---|
| Noctoyager Act 2 | - |
List of Contents
Journey Across the Lands Story Walkthrough
- First Day in Huaxu
- Where the Tides Meet
- Roars of the Bi'an
- Reflections on the River of Forgetting
- Crowsong Hollow: The Stirring Flock
- Sacrilege to Bring Down Heaven
First Day in Huaxu
| First Day in Huaxu Objectives | |
|---|---|
| 1 | 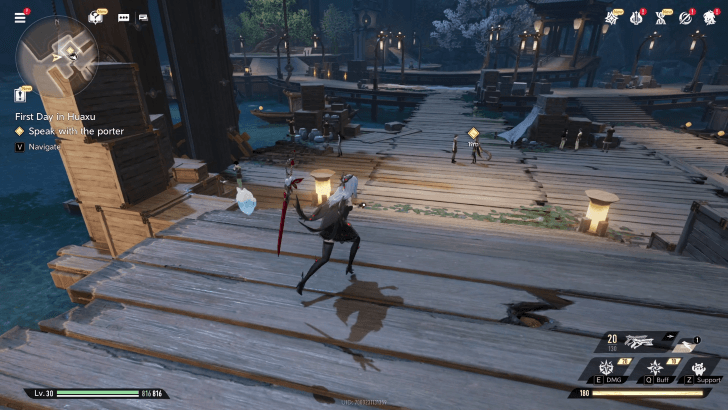 Speak with the Porter Leave the ship and head straight to the dock to find the porter. Zhiliu's contact, Du Li, hasn't shown up yet, so she suggests that the Phoxhunter and Snow could take a look around the market. |
| 2 | 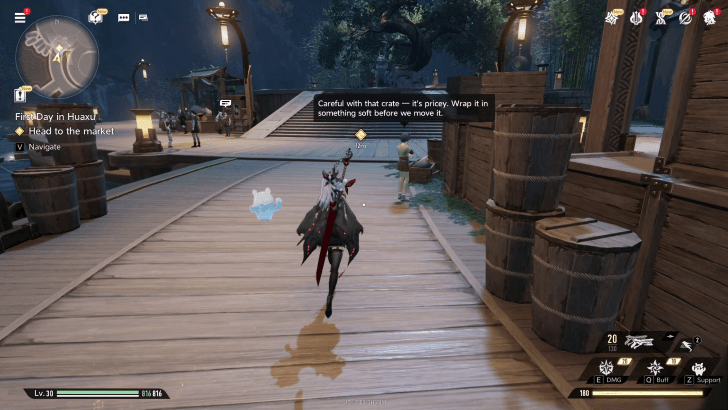 Head to the Market As soon as the cutscene ends, the location of the market will be marked on your map. Make your way to the market, which is located further inside and to the left of your current position. |
| 3 | Look around the Area 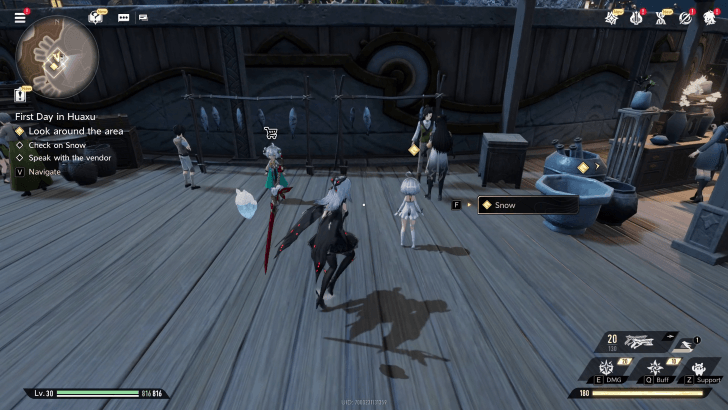 Check on Snow. She will be past the vendor and Zhiliu. While this objective is optional, it's possible to miss if you speak with the vendor and Zhiliu first. 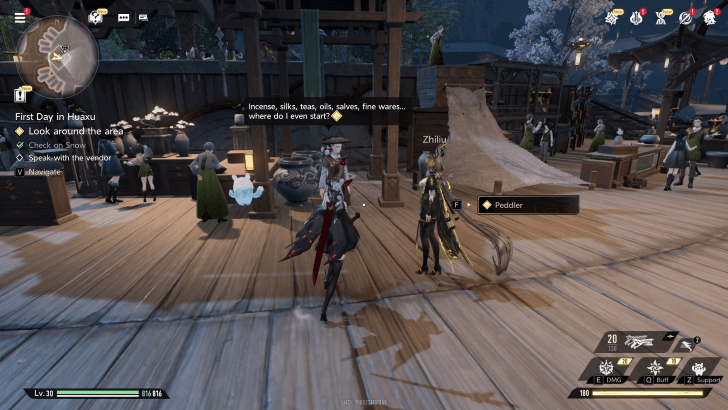 Speak with the vendor Zhiliu is with. The proprietress will offer to pay for all your expenses in Huaxu. |
| 4 | 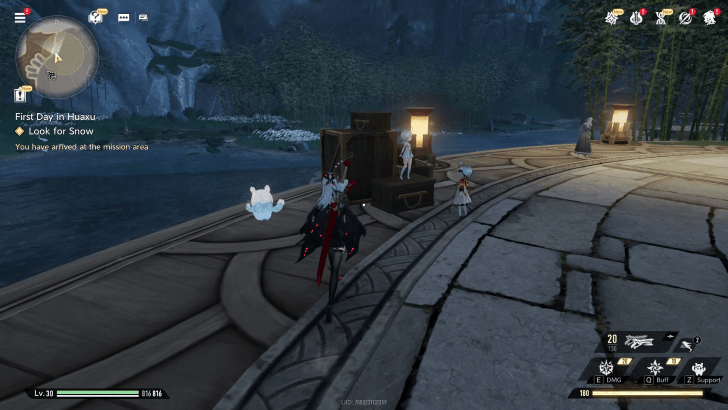 Look for Snow The Phoxhunter will be wondering where Snow has gone off to. Head straight and further to the left of the market to find Snow conversing with the Luno, Lunocarp. |
| 5 |  Rejoin Zhiliu After the conversation with Snow and Lunocarp, head to Zhiliu's location. She will be standing in a plaza with a tree at its center. A cutscene will play upon reaching her. |
| 6 | 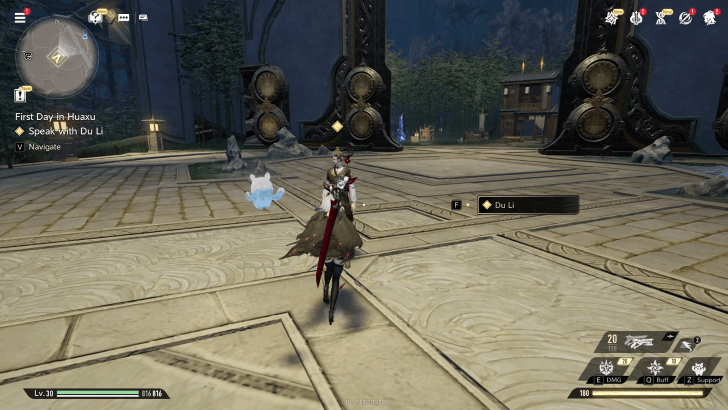 Speak with Du Li As soon as the cutscene ends, find Zhiliu's contact, Du Li, and speak with him. He will be standing in front of the grand archway, near the plaza. Du Li will inform Zhiliu of a matter she must attend to, so she bids you farewell. Lunocarp promised to walk you through the Nine Admonitions, rules that Zhiliu says are important for all newcomers in Huaxu to know. |
| 7 | 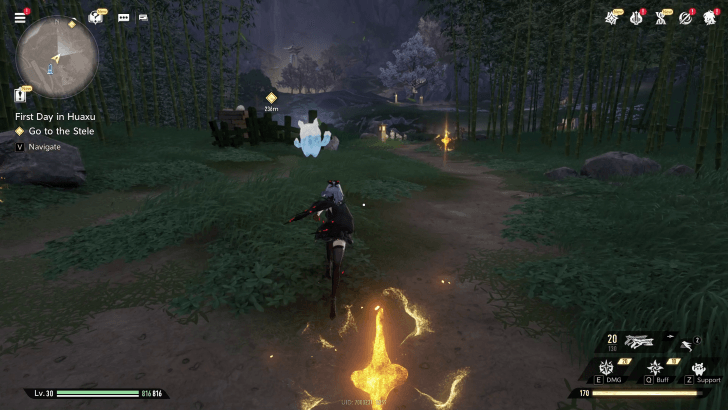 Go to the Stele Head to the stele, which will be marked on your map. Exit through the grand archway, turn left, and follow the path to reach the stele. There will be enemies in certain sections outside the path, so be ready for some combat if you decide to explore. You should find Lunocarp already ahead of you at the stele's location. Approach her to progress the quest. |
| 8 | 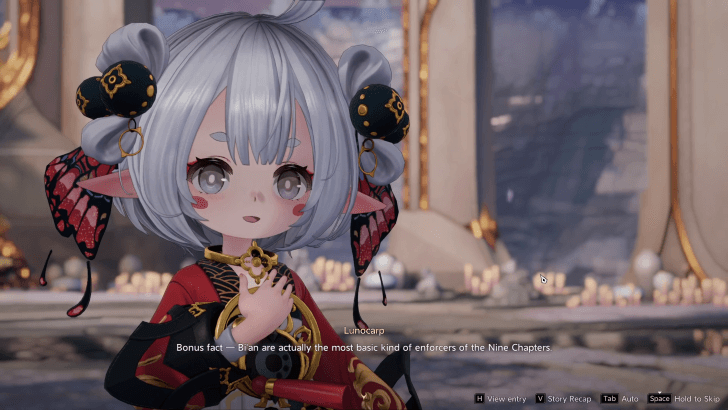 Interact with the Stele As Lunocarp is about to go to the next admonition, the Phoxhunter will begin to see visions of warriors along the path of the stele. Simply walk straight to the stele to trigger a cutscene and progress the quest. |
| 9 | 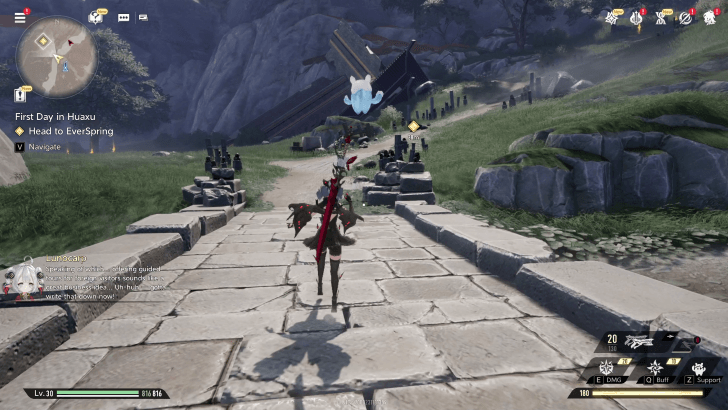 Head to EverSpring Leave the area and cross the small bridge nearby. You should reach a fork in the road, triggering a cutscene. |
| 10 | 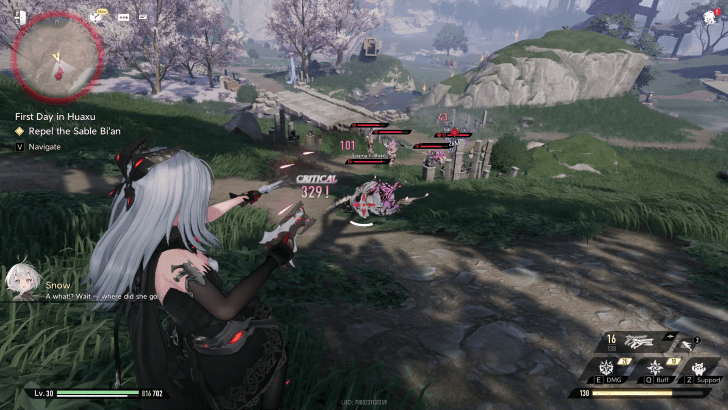 Repel the Sable Bi'an Defeat the Sable Bi'an and the other enemies that ambushed you. After, defeat the two Sable Bi'ans that will appear after taking down the first one. |
| 11 | 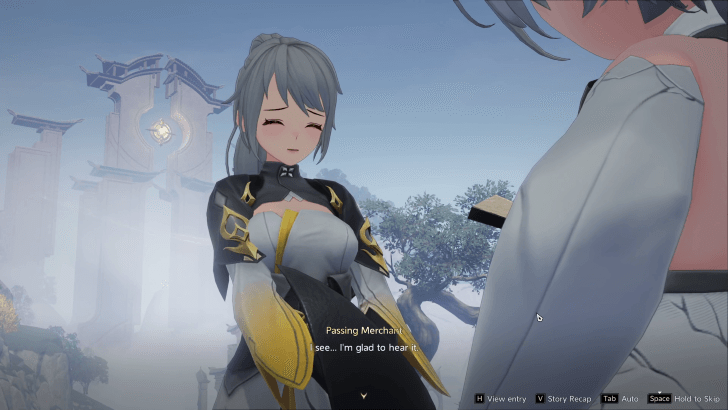 Speak with the Passing Merchant Speak with Yusheng, the passing merchant, who will be nearby with a set of statues along the road. She will inform you that your attackers are not enforcers of Huaxu, but mindless and violent versions of them born from a malevolent entity. This prompts Lunocarp to take you to the Argent Loong Temple to renew the incense that could protect the party from these Sable Bi'ans. |
| 12 | 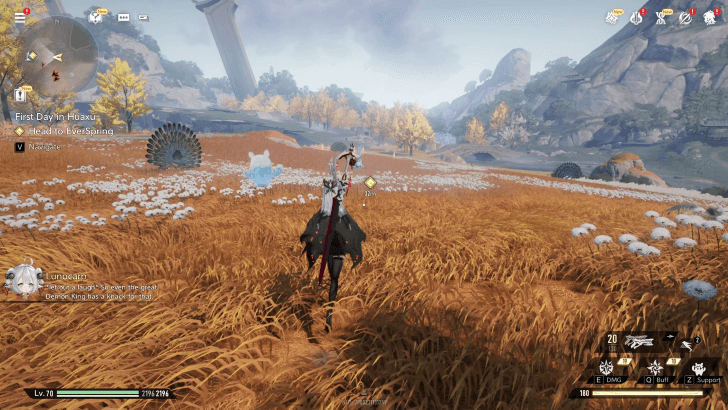 Continue on to EverSpring Continue further along the road until you reach a yellow field in the middle. A cutscene will then play, leading to the next quest. |
First Day in Huaxu Story Walkthrough and Guide
Zhiliu Full Dialogue (First Day in Huaxu)
| Prompt 1 | ||
|---|---|---|
| All your expenses here in Huaxu are under my care. Whatever catches your fancy, simply place it on EverSpring's tab. | ||
| Response | Impression | Points |
| That's very generous of you, but I couldn't possibly... | Morality | +3 |
| For real? I'm gonna shop EverSpring straight into bankruptcy! | Chaos | +3 |
Lunocarp Full Dialogue (First Day in Huaxu)
| Prompt 1 | ||
|---|---|---|
| They're called Bi'an! At least try to remember, their name! | ||
| Response | Impression | Points |
| They sound amazing... Can I take one back to Icelake and keep it? | Benefit | +3 |
| They punish evildoers? That makes them seem less like ordinary beasts. | Wisdom | +3 |
Snow Full Dialogue (First Day in Huaxu)
| Prompt 1 | ||
|---|---|---|
| I just had a crazy idea! What if... my Little Minion here is actually, like, the umpteenth-generation descendant of that legendary founder!? | ||
| Response | Impression | Points |
| Huh. Guess it's time — yes, I am Yang. I never died — I just got stuck in the Hyperborean Empire. | Chaos | +3 |
| I highly doubt that. | Morality | +3 |
Passing Merchant Full Dialogue (First Day in Huaxu)
| Prompt 1 | ||
|---|---|---|
| I'm fine. That beast's terrifying glare shook me a bit. I'll feel better after a short rest. But you seemed new to this place... I couldn't just stand by and leave you in danger. | ||
| Response | Impression | Points |
| Say you could've handled it alone | Benefit | +3 |
| Thank her | Empathy | +3 |
First Day in Huaxu Rewards
| Obtainable Rewards |
|
|
|
|---|---|---|
Where the Tides Meet
| Where the Tides Meet Objectives | |
|---|---|
| 1 |  Go to the Argent Loong Temple Head down from the field and climb up the steps after the dragon statue. This is the entrance of the Argent Loong Temple. |
| 2 | Head to Zhiliu's Location  2.1 Climb up the steps to head further inside the temple and approach Lunocarp to trigger a cutscene. 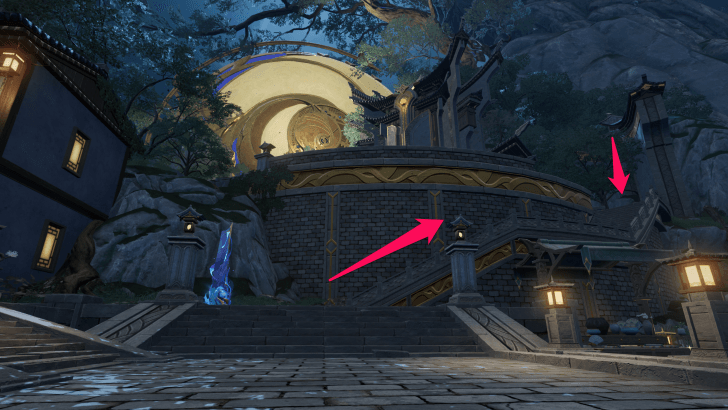 2.2 Climb up the stairs ahead. 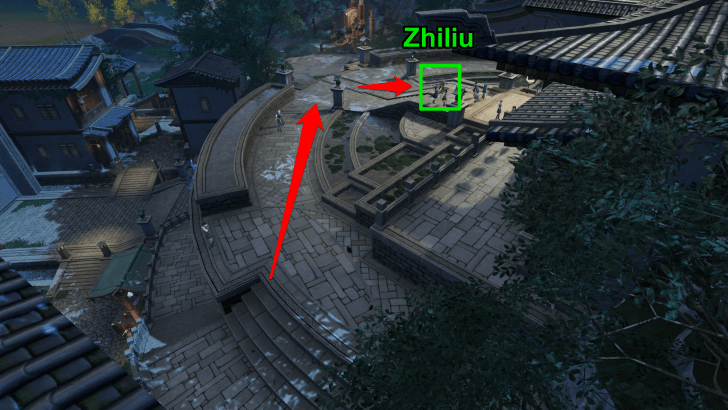 2.3 Turn left and then circle around to Zhiliu's location. 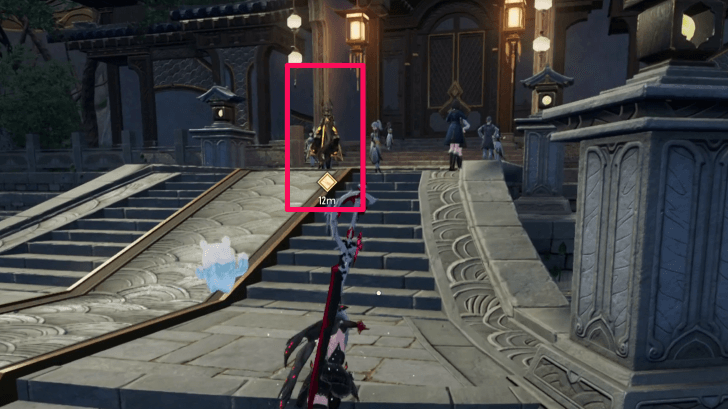 2.4 Approach Zhiliu, who will be standing in the middle of the area. |
| 3 | 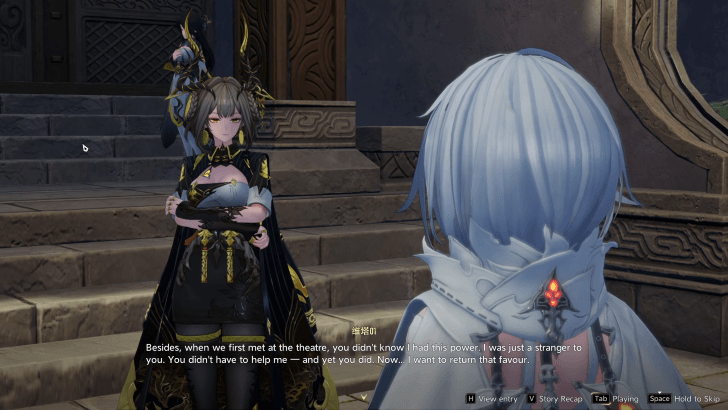 Speak with Zhiliu After the cutscene, walk straight and speak to Zhiliu, who is only a few meters from her original position. |
| 4 | 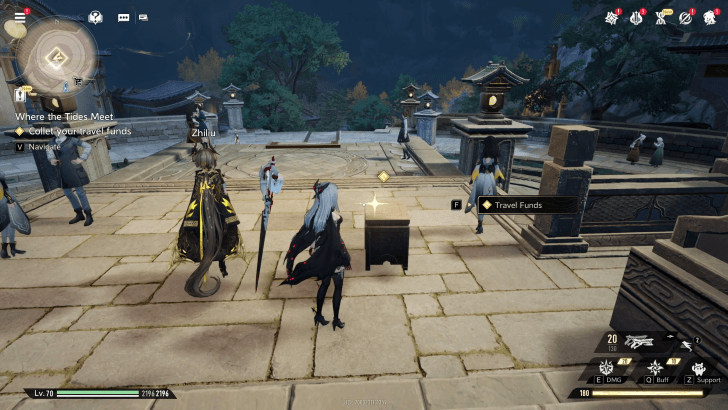 Collect your travel funds Interact with the Travel Funds placed on the table next to Zhiliu. Speak with her again to proceed with the quest. |
| 5 | Enter the Tidesong Cavern 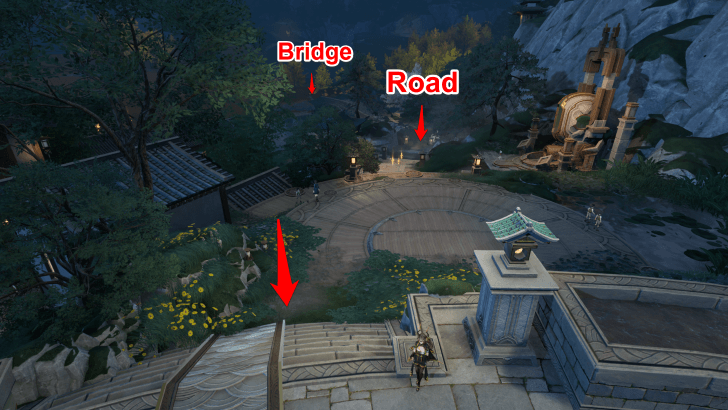 5.1 Leave via the stairs next to Zhiliu and continue to follow the steps and road until you reach a bridge to an open field.  5.2 After the dialogue, approach the large cavern opening and jump down. You can also activate the nearby Waypoint before heading down. 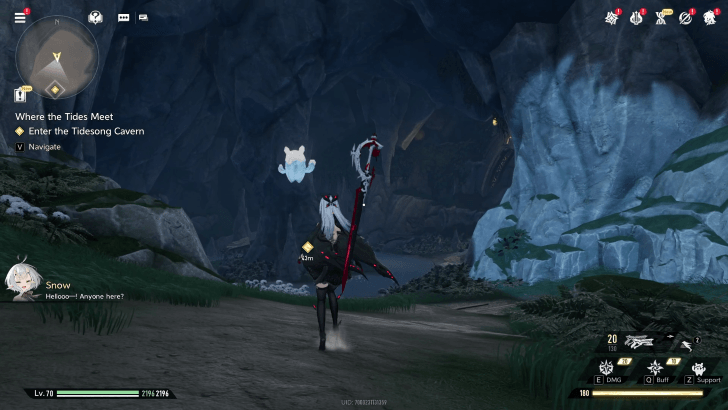 5.3 You should find yourself at the entrance of Tidesong Cavern. Walk straight ahead. |
| 6 |  Repel the Sable Bi'an Defeat the Sable Bi-an that appeared to progress through the mission. |
| 7 | 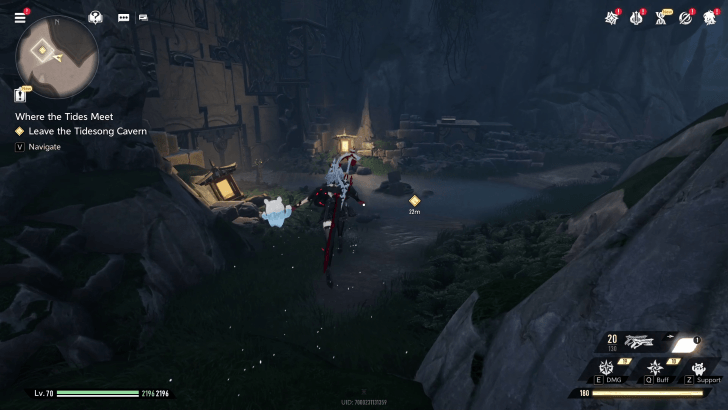 Leave the Tidesong Cavern After the cutscene, follow the location marker to try and leave Tidesong Cavern. |
| 8 | Check on the Magistrate of Yingtian 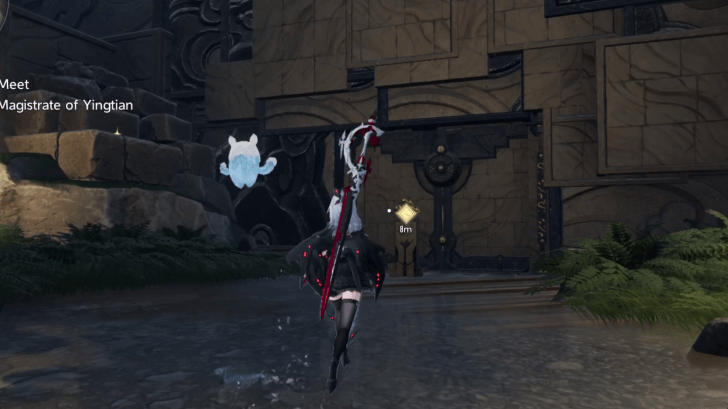 8.1 Interact with the device console in the room to open the door.  8.2 While the door is rotating, slip through either the left or right side before it finishes a full 180 spin. Interact with the console again if you missed your chance. 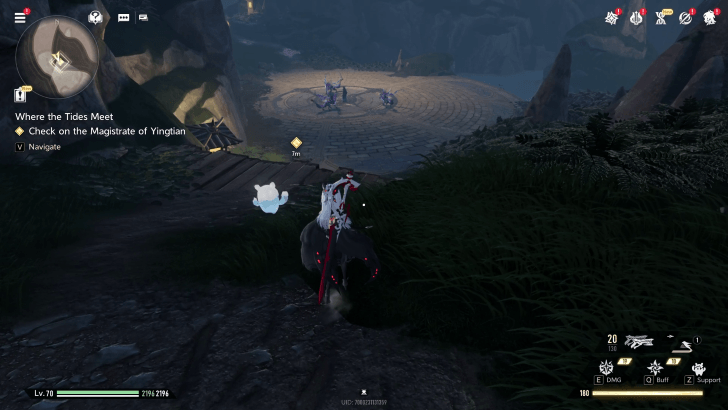 8.3 Walk further down until you find the magistrate and the Sable Bi'an fighting. |
| 9 | 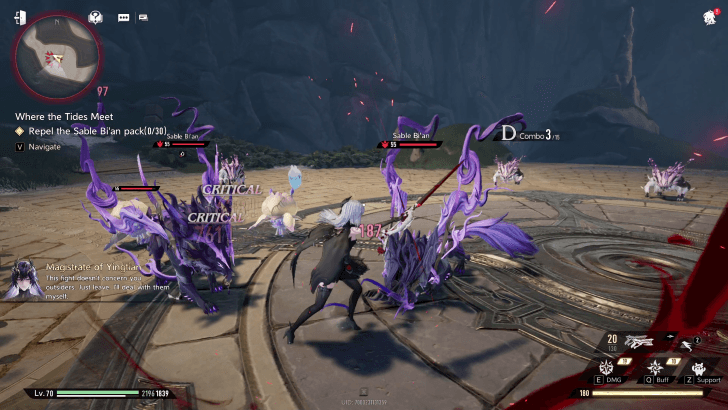 Repel the Sable Bi'an Pack Fight the Sable Bi'an pack. The pack will have you take down 30 weak variants and 2 strong variants to progress the quest. Beware of Ashblossom Filthoids, which will deal AoE damage upon death. |
| 10 | 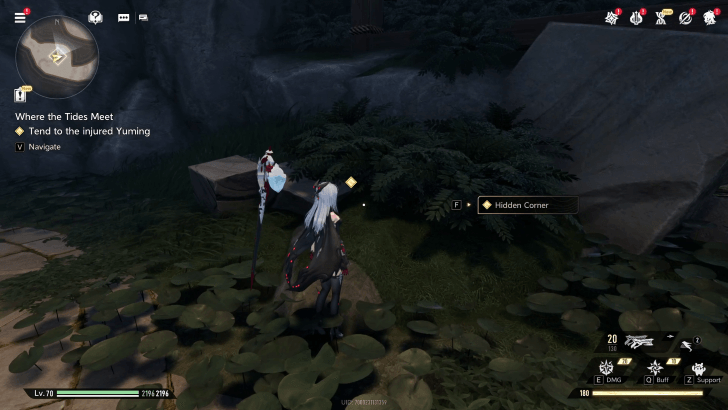 Tend to the injured Yuming After the cutscene, go over to the bushes to your front and interact with it. |
| 11 | Leave the Tidesong Cavern 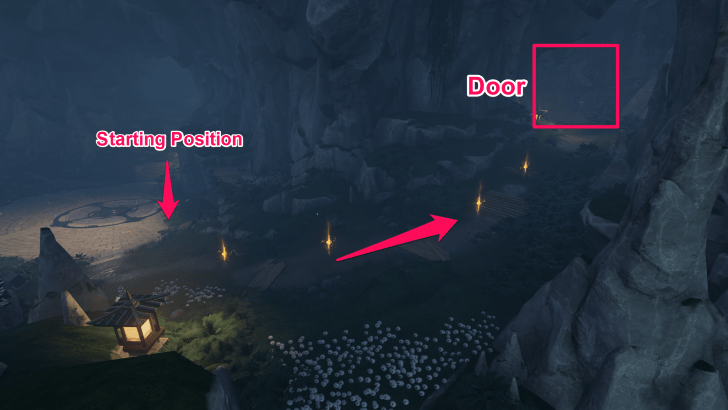 11.1 After the cutscene, follow the path to your front and Interact with the device console again to open the door. 11.2 While the door is rotating, slip through either the left or right side before it finishes a full 180 spin. Interact with the console again if you missed your chance. 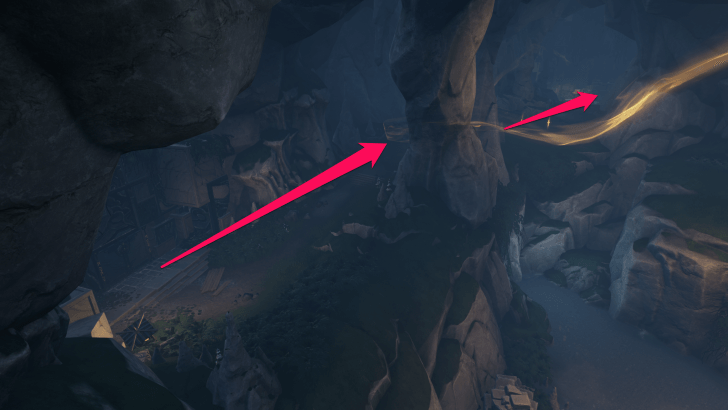 11.3 Follow the path until you find a small pond. 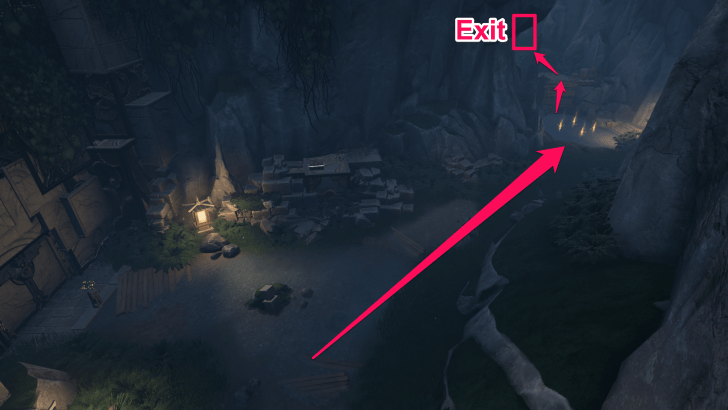 11.4 Climb over the collapsed bridge. 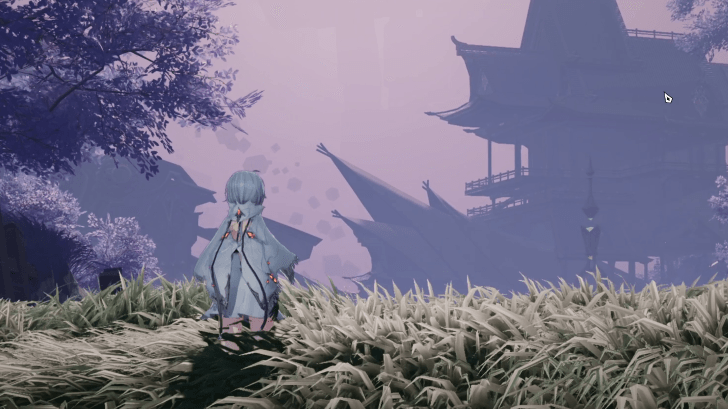 11.5 Walk outside to finish the quest. |
Where the Tides Meet Story Walkthrough and Guide
Phoxhunter Full Dialogue (Where the Tides Meet)
| Prompt 1 | ||
|---|---|---|
| I'm a Phoxhunter from a foreign land, Vita. And this is... | ||
| Response | Impression | Points |
| The Pure-White Redeemer Demon King of Light! | Chaos | +3 |
| Snow, Lunarian. | Morality | +3 |
Where the Tides Meet Rewards
| Obtainable Rewards |
|
|
|
|---|---|---|
Roars of the Bi'an
| Roars of the Bi'an Objectives | |
|---|---|
| 1 | 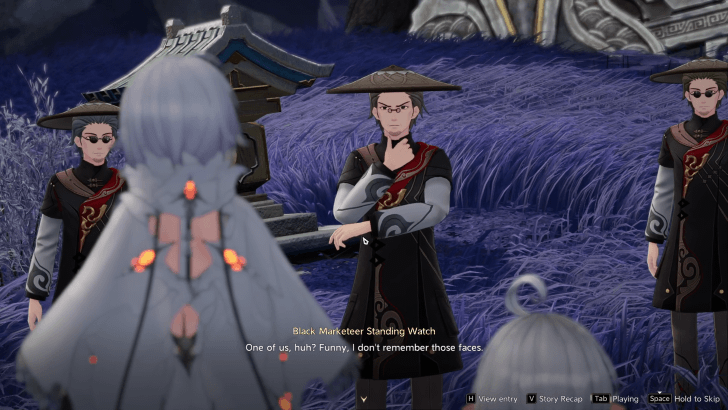 Make Contact with the Black Marketeer As soon as you exit the Tidesong Cavern, you will meet a trio of black marketeers. During a short cutscene, Snow will realize that both of you have lost the pendant you need in order to conduct business at the Haze Market. Because of this, the black marketeers will refuse to assist you. |
| 2 | 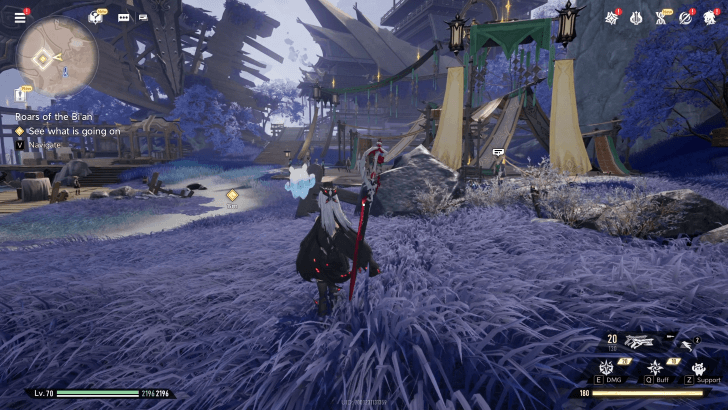 See What Is Going On Head straight toward the Haze Market where you and Snow will spot a commotion brewing in the distance. Follow the quest marker to the group of squabbling individuals to start a long cutscene between a black marketeer and a young woman whose father was tricked into a shady deal. At the end of the cutscene, a Bi'an will appear to deal a warning blow to the young woman, injuring her. |
| 3 | 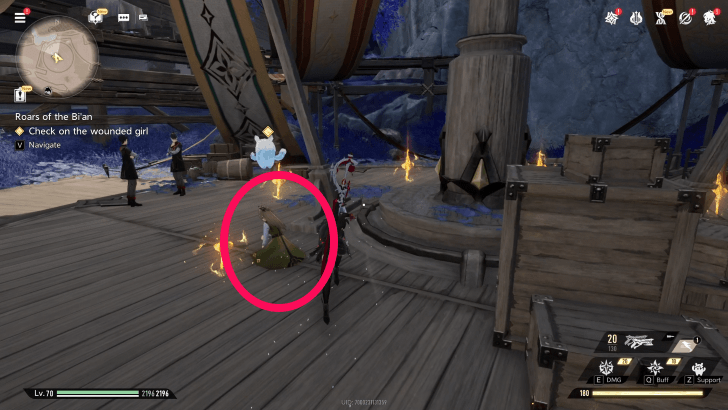 Check on the Wounded Girl Go to the young girl and see how she is doing. During the conversation, the merchant will return to provoke the girl once more. After a brief back-and-forth between the merchant and the Phoxhunter, the merchant and his group of thugs will attack. |
| 4 | 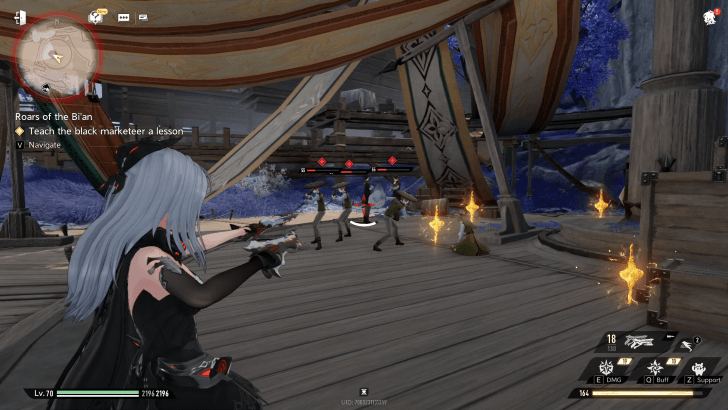 Teach the Black Marketeer a Lesson Defeat the three Haze Market thugs. This battle will be quick and easy as the enemies are weak and a mysterious man will soon intervene to stop the fight. The man will introduce himself as Feng Qiang, assistant to an influential man named Mr. Qiu, who seems to know Zhiliu. Feng Qiang will smooth out the conflict and invite you to come up to Mr. Qiu's workplace for a private discussion. |
| 5 | 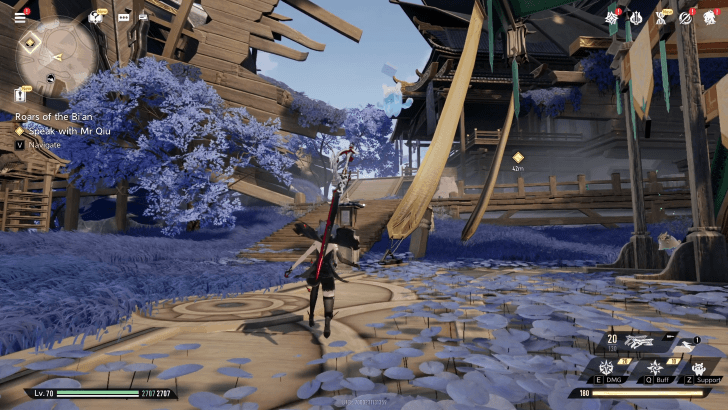
Speak with Mr. Qiu Follow the quest marker to the nearby shipwreck and into Mr. Qiu's office. Approach Mr. Qiu and talk to him to receive the Mechanical Nexus, the "special tool" needed to collect the Zhuyin Scales. You will also receive a white bamboo flute. |
| 6 | 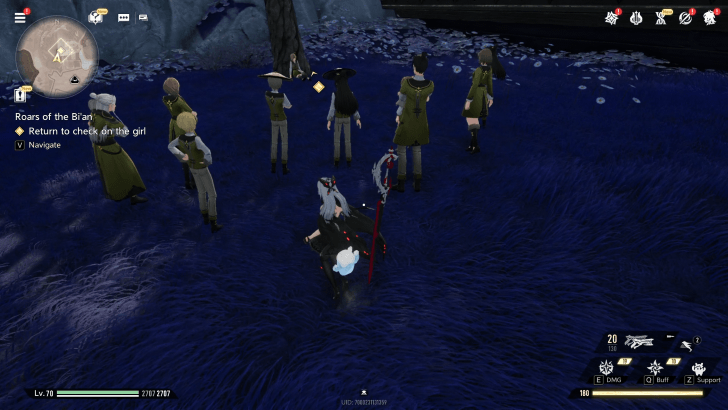 Return to Check on the Girl Leave Mr. Qiu's office and follow the quest marker out of Haze Market. The marker will lead you along the beach next to the shipwreck. Approach the injured young woman resting against a tree to start a cutscene where you will meet Fushu for the first time. Fushu will leave shortly after to find a proper cure for the young woman, leaving you free to move on and search for Master Gongshang. |
| 7 |  Find Master Gongshang Leave Haze Market and find Master Gongshang on an unnamed mountain near the shipwreck. Follow the marker to reach his location. 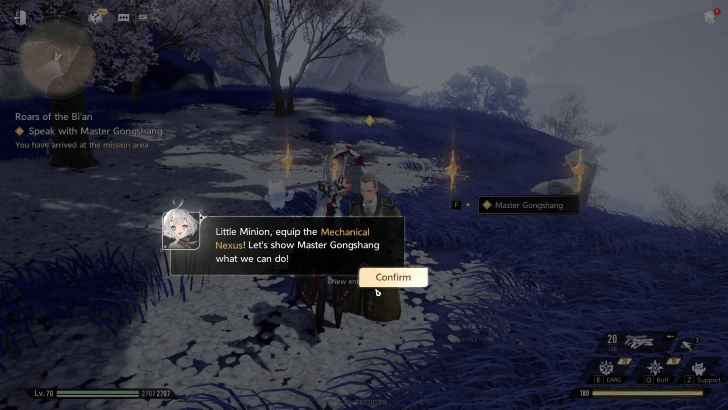 Prove Your Abilities to Master Gongshang Master Gongshang will ask you to demonstrate your abilities to him. This will begin a brief tutorial on how to use the Mechanical Nexus. Follow the in-game instructions to successfully equip the Mechanical Nexus using your Tactical Backpack. 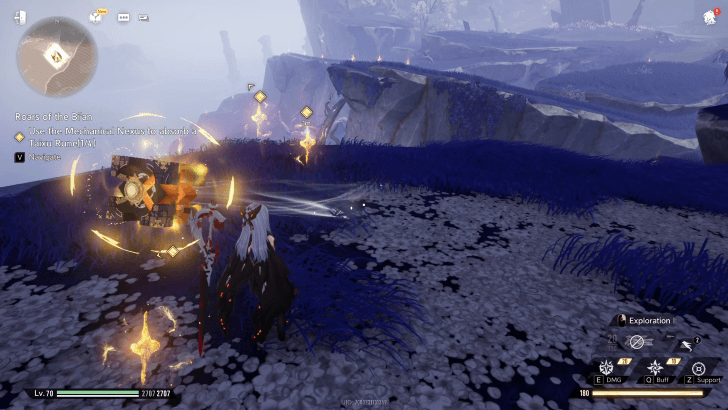 Once equipped, speak to Master Gongshang again. He will teach you how to use the Mechanical Nexus by instructing you how to collect Taixu Runes, the golden stars found in the overworld that cannot be collected through normal means. After successfully collecting the Taixu Runes, follow the quest marker to a chest covered in Gritblight a short distance away from where you found Master Gongshang. |
| 8 | Use the Mechanical Nexus to Neutralise Gritblight Use the collection method you learned earlier to neutralize the Gritblight and open the chest. There will be 2 other objects covered in Gritblight. One of them is another chest you can open while the other one is a Geniemon. Report back to Master Gongshang once you have cleared the Gritblight in the area. 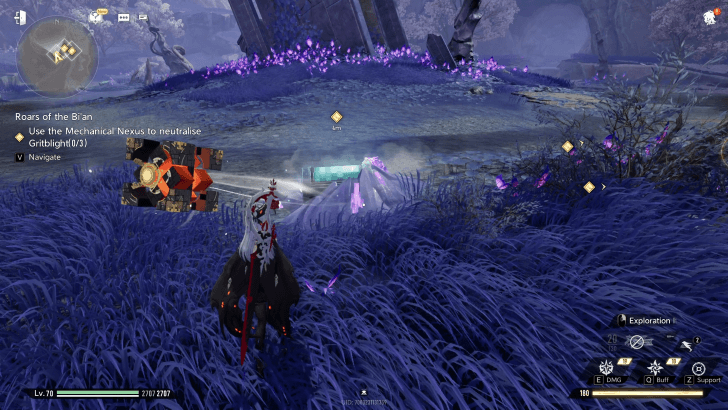 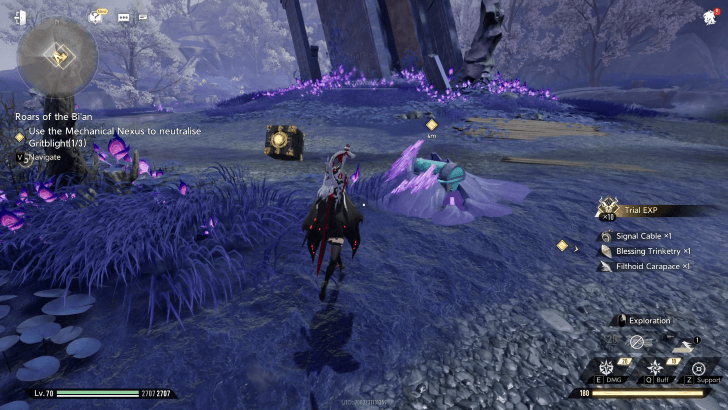 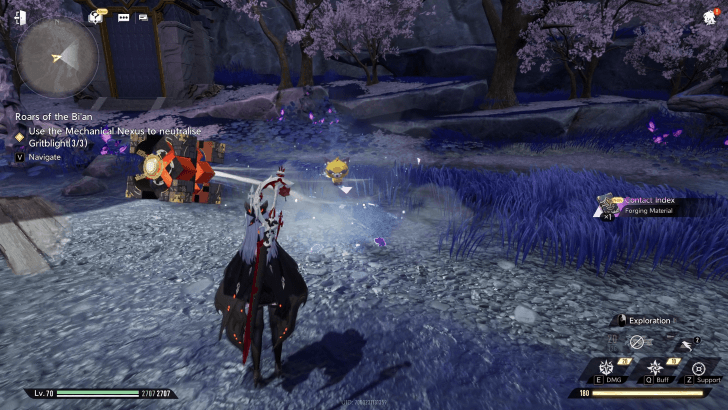 |
| 9 | 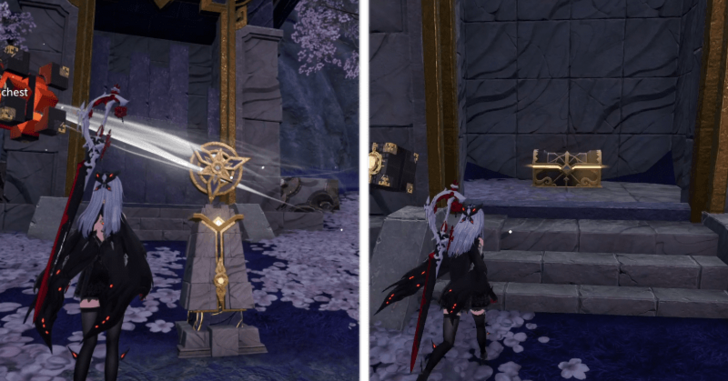 Solve the Puzzle and Claim the Chest Master Gongshang will then ask you to solve one last puzzle, a unique device that can be opened using the Mechanical Nexus. This puzzle is an easy solve; you only need to target the propeller in front of the structure and trigger the Mechanical Nexus to make it spin. After successfully obtaining the chest, talk to Master Gongshang again. He will dub you an Honorary Learner of the Jishu Sect for your efforts and lead you to the Gritblight Expanse, where you can collect Zhuyin Scales. |
| 10 | 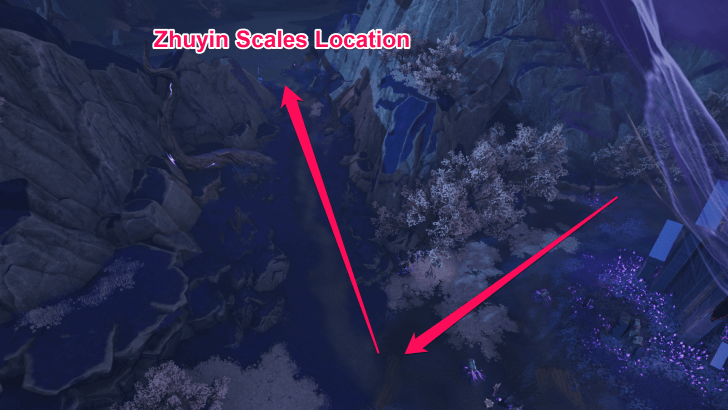 Head Deeper into the Gritblight Expanse Go past the cavern near Master Gongshang's final puzzle and find the winding path leading up to a giant tree. This will also unlock the Gritblight Expanse Avian Tower in the area. |
| 11 | Purify the Zhuyin Scales In this location you'll find a Zhuyin Scale buried in Gritblight. Approach the Zhuyin Scale and use the Mechanical Nexus to clear away the Gritblight. |
| 12 | 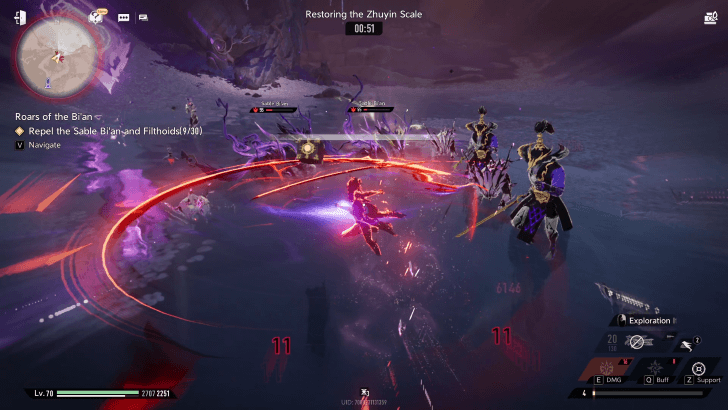 Fend off the Filthoids The purified Zhuyin Scale will attract nearby enemies. Defeat 30 Sable Bi'an and Filthoids to safely collect the Zhuyin Scales. There will be a 1-minute timer for this battle, it will be easy to clear these low-level enemies. Note that you won't be able to use ranged weapons with the Mechanical Nexus equipped. So unequip the Mechanical Nexus to use ranged weapons. |
| 13 | 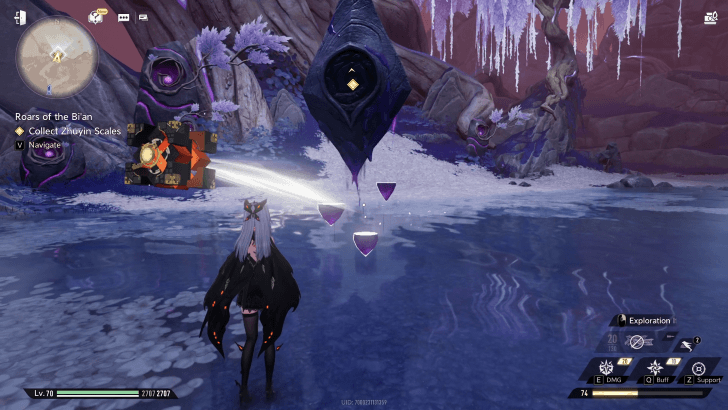 Harvest the Zhuyin Scales After defeating the Sable Bi'an and Filthoids, interact with the Zhuyin Scale to harvest it. Obtaining the Zhuyin Scale will trigger another dreamlike sequence similar to the activation of the stele in the First Day in Huaxu subquest. Keep following the quest marker further into the Gritblight Expanse to finish the sequence. 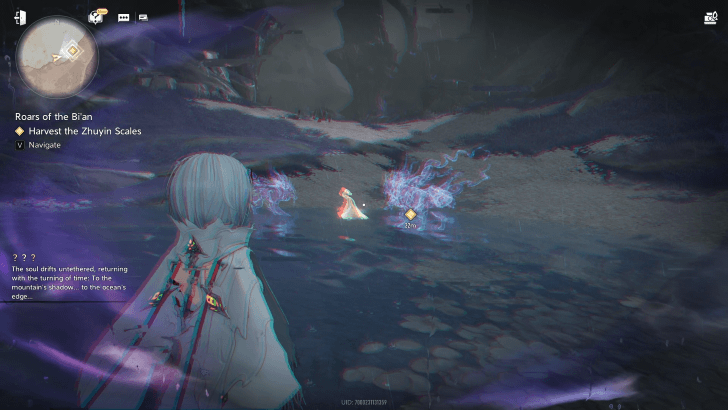 When the sequence ends, the Phoxhunter will receive a vision of Filthoids and Sable Bi'an overwhelming EverSpring. Determined to prevent the disaster, you and Snow set off for EverSpring. |
| 14 | 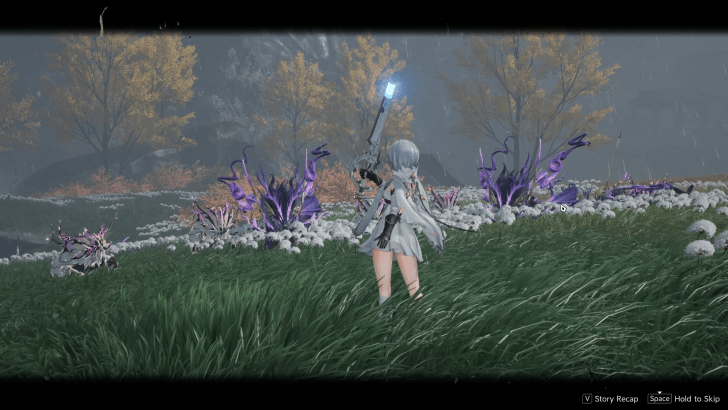 Clear the Area of Filthoids The next objective will take you immediately to the outskirts of EverSpring where a group of Sable Bi'an and Filthoids will ambush you. Defeat them and run to the bridge to EverSpring. |
| 15 | 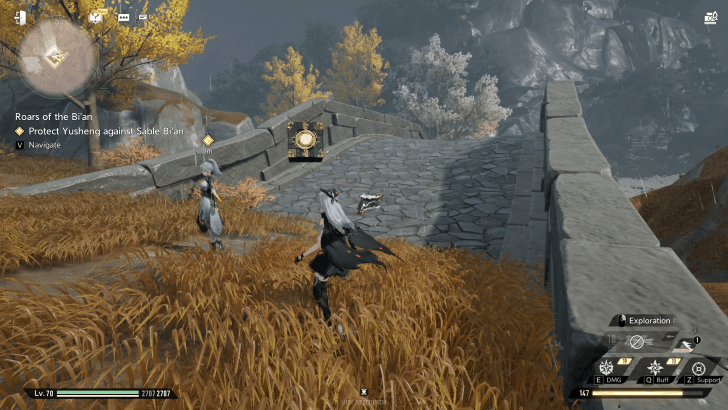 Protect Yusheng from the Sable Bi'an You will find that another group of Sable Bi'an have already reached the bridgewhere only one woman, Yusheng, stands between the enemies and the path to EverSpring. Help and protect Yusheng by defeating 8 of the Sable Bi'an . When you have successfully cleared the area, talk to Yusheng. She will tell you to find Zhiliu and help the other guards defending EverSpring. |
| 16 | 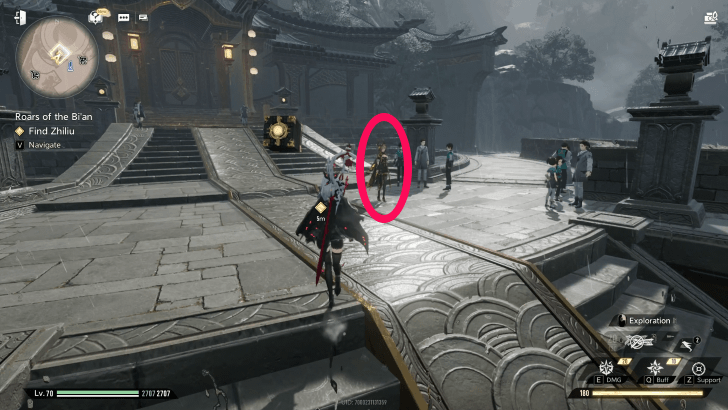 Find Zhiliu Cross the stone bridge and run past the Huaxu soldiers to make your way up to Zhiliu in EverSpring. You will find her at the top of the hill receiving updates on the crisis and giving out orders. Talk to Zhiliu after the brief cutscene. She will ask you to defend the front plaza by the Argent Loong Temple. Go down to the Argent Loong Temple at the base of the hill. |
| 17 | 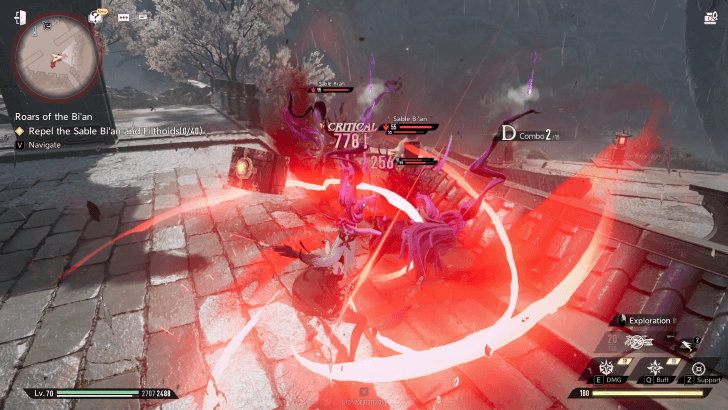 Repel the Sable Bi'an and Filthoids Along with the 4 NPCs defending the plaza with you, defeat 40 of the Sable Bi'an and Filthoids that are pouring in. The battle should be as easy as all of your previous encounters with the Sable Bi'an, but be prepared for a relatively long fight. After driving off 40 enemies, a cutscene will begin where the remaining Sable Bi'an are soundly defeated. |
| 18 | 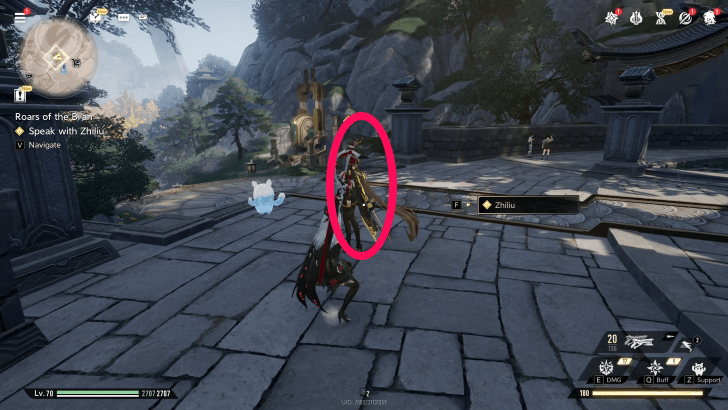 Speak with Zhiliu Return to Zhiliu and talk to her. Snow will hand over the Zhuyin Scales and the Phoxhunter will tell Zhiliu about the vision warning them of the attack on EverSpring. Zhiliu will dismiss your concerns and inform you that the condition of the injured girl from Haze Market seems to have worsened. She will instruct you to find Fushu at the Hall of Ephemerality. |
| 19 | 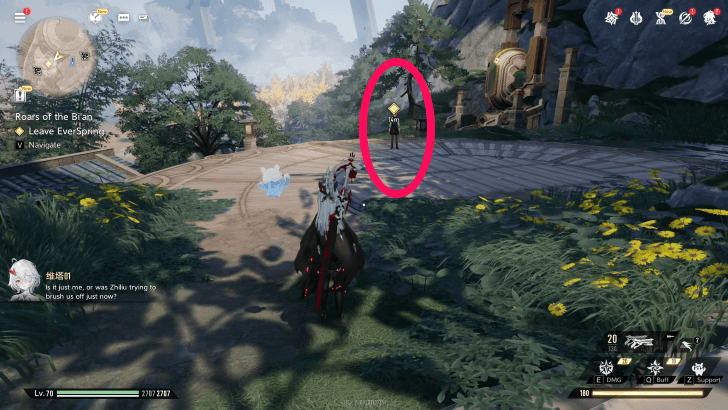 Talk to Feng Qiang Before leaving EverSpring, talk to Mr. Qiu's assistant Feng Qiang. He will inform you about a hunting expedition that Mr. Qiu wants the Phoxhunter to participate in. As the expedition was commissioned by Zhiliu, they agree to take on the request. Feng Qiang will leave you to consider your options shortly after. At this point, you will be free to decide whether you want to meet up with Fushu or find Mr. Qiu. This will determine which quest you will play next. |
Roars of the Bi'an Story Walkthrough and Guide
Black Marketeer Full Dialogue (Roars of the Bi'an)
| Prompt 1 | ||
|---|---|---|
| Damn it... what a shame — I was this close to cleaning up a little mess. And who the hell are you, sticking your nose in and messing with my business? | ||
| Response | Impression | Points |
| I'm the boss here, you hear me? | Chaos | +3 |
| I'm a Phoxhunter from Hyperborea. | Morality | +3 |
Fushu Full Dialogue (Roars of the Bi'an)
| Prompt 1 | ||
|---|---|---|
| If I might be so bold—would you part with it? I would repay you, by whatever means I may. | ||
| Response | Impression | Points |
| You eased my fatigue. It's only right that I give it to you. | Morality | +3 |
| If it once belonged to someone dear to you... then take it. | Empathy | +3 |
| Nothing comes free in this world! | Benefit | +3 |
Zhiliu Full Dialogue (Roars of the Bi'an)
| Prompt 1 | ||
|---|---|---|
| You heard everything, didn't you? | ||
| Response | Impression | Points |
| That was badass! He had it coming. | Chaos | +3 |
| He did seem... a little pitiful | Empathy | +3 |
| Maybe he was wrong, but it didn't feel right to cast him out like that. | Morality | +3 |
| Sometimes harsh measures are necessary to keep people in line. | Benefit | +3 |
Feng Qiang Full Dialogue (Roars of the Bi'an)
| Prompt | ||
|---|---|---|
| So—what's the plan? Should we check in on Fushu first, or see what Mr. Qiu's up to? Your call, Little Minion! | ||
| Response | Effect | |
| Let's go check on Fushu first. | Empathy +3 Unlocks Reflections on the River of Forgetting |
|
| Let's have a look at Mr. Qiu's commission. | Benefit +3 Unlocks Crowsong Hollow: The Stirring Flock |
|
Roars of the Bi'an Rewards
| Obtainable Rewards |
|
|
|
|---|---|---|
|
|
|
Thought: Phoxhunter - Lumino x30 |
Reflections on the River of Forgetting
| Reflections on the River of Forgetting Objectives | |
|---|---|
| 1 | 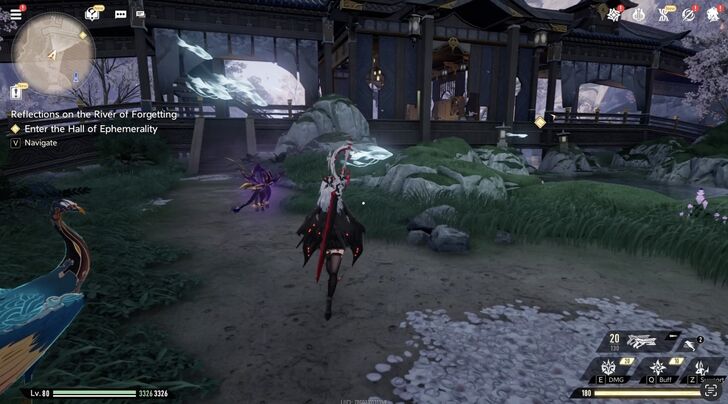 Go to the Hall of Ephemerality The Hall of Ephemerality can be found in a high mountain. You can teleport there if you have already unlocked the Hall of Ephemerality Avian Tower. Enter the Hall of Ephemerality and keep following the quest marker until you reach the zheng. |
| 2 | Find Fushu in the Second Floor Follow the quest marker up to the second floor. You can use the stairs next to the zheng you and Snow just investigated to find Fushu tending to the injured woman from the Roars of the Bi'an sub quest. |
| 3 | 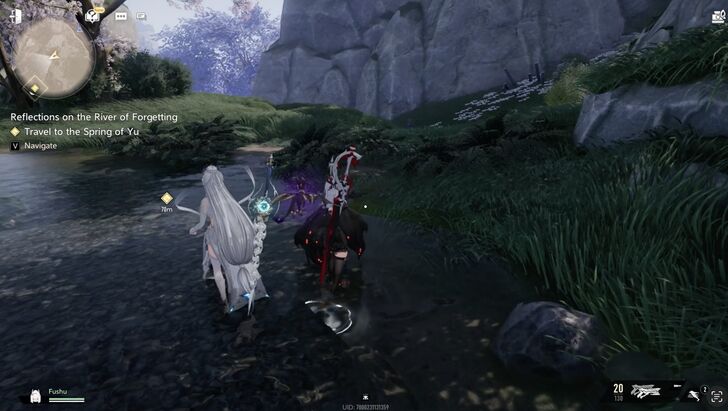 Travel to the Spring of Yu Leave the Hall of Ephemerality and follow the dirt path down the mountain to reach the Twilight Ravine where the Spring of Yu is also located. During this time, Fushu will join your party. |
| 4 | Cleanse the Gritblight The quest marker will lead you to an object covered in Gritblight. Use the Mechanical Nexus to clear the Gritblight to free a Wishen, a little spirit that was separated from its family. |
| 5 | 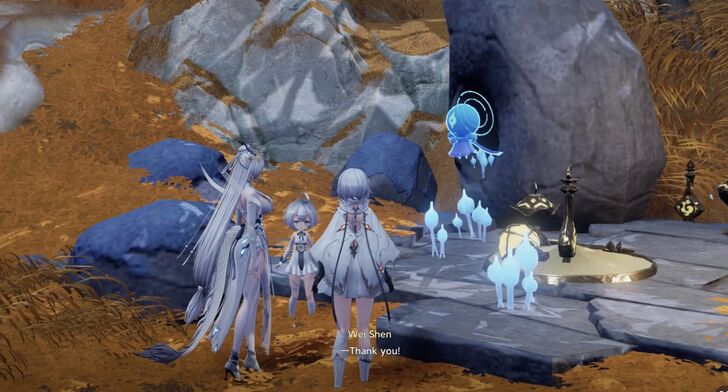 Escort the Young Wishen to the Altar Bring the Wishen to the altar to let it rest. Simply follow the quest marker to the giant tree at the heart of the Twilight Ravine near the place you rescued the Wishen. Doing so will start another cutscene in which Fushu will explain the nature of the Wishen. |
| 6 | 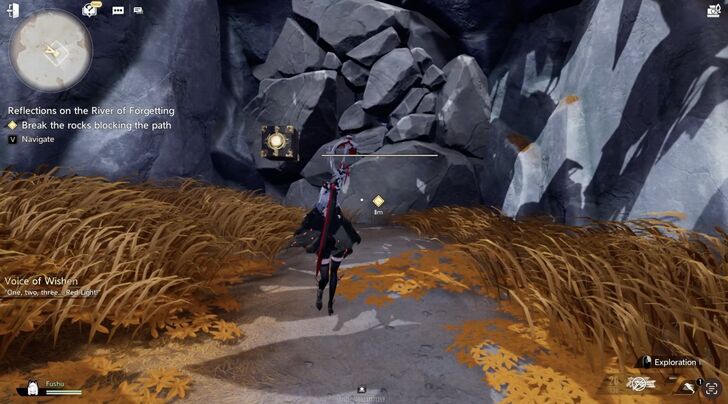 Search for the Second Wishen The game will then guide you to another area in the ravine near a bridge. |
| 7 | Continue to Search Break the Rocks Blocking the Path When you arrive at your next location, you will trigger a brief tutorial on how to destroy rocks. Attack the rocks to open a path ahead and into a cavern. Destroy the Three Foul Buds to Purify the Area 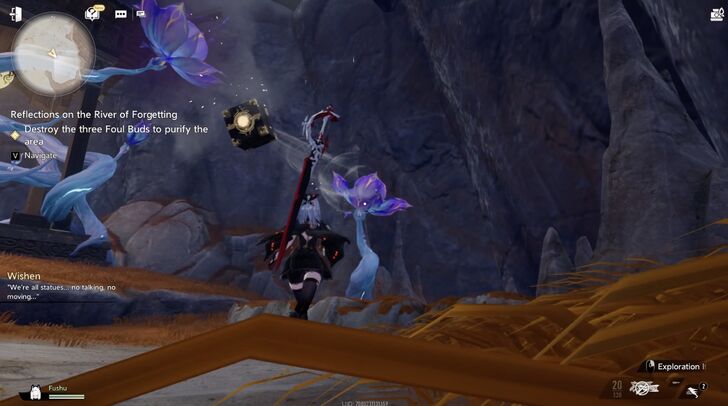 When you enter the cavern you'll find three giant purple buds. The game will then show you how to clear these buds and rescue the second Wishen. Use the Mechanical Nexus to clear the foul buds. You only need to point the Nexus at the Buds themselves from a distance; you won't have to get close to the Buds themselves. Clearing the buds will free the Wishen and reveal a hidden chest. Repel the Filthoids After obtaining your reward, circle back out of the cave and toward the giant tree where the altar stands. Defeat the Filthoids that have congregated in the area. |
| 8 | 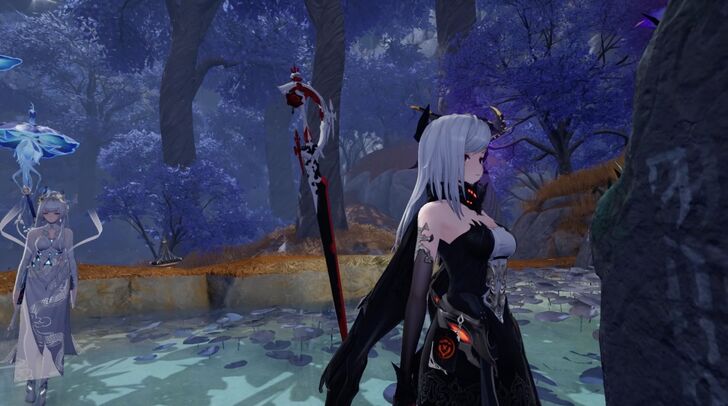 Search for the Third Wishen The third Wishen can be found near a stele just a few meters behind the giant tree. Next to the stele you will find a gazebo covered by Foul Buds. Interact with the stele first to read what is written on it. |
| 9 | Destroy the Three Foul Buds From Top to Bottom The stele will contain instructions on how to properly clear the three Foul Buds. Make sure to use the Mechanical Nexus to clear the topmost Foul Bud first, the middle one second, and the bottom one last in order to successfully remove them from the area and free the third Wishen. As with the Foul Buds from before, you do not need to get close to the Buds themselves to clear them. |
| 10 | 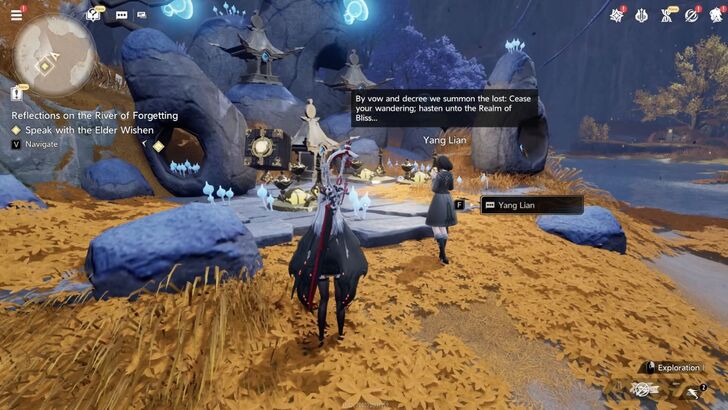 Solve the Wishen's Riddle Return to the altar at the base of the giant tree to start the next cutscene where you, Snow, and Fushu solve a riddle that will open up the Spring of Yu to the Phoxhunter and their companions. |
| 11 | 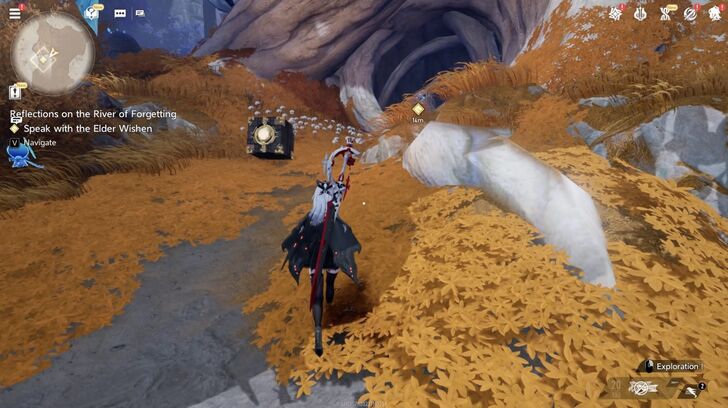 Speak with the Elder Wishen Go up to the tree hollow to speak with the Elder Wishen, who will direct you to a spot where you can obtain the medicinal herbs needed for the injured young woman's treatment. The Elder Wishen will also enlist your help in rescuing more trapped Wishen at the same waterfall where the herbs are located. |
| 12 | Gather 4 Wangyou Herbs 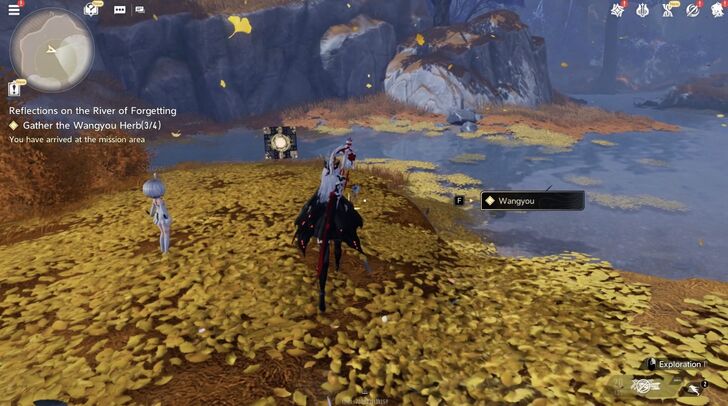 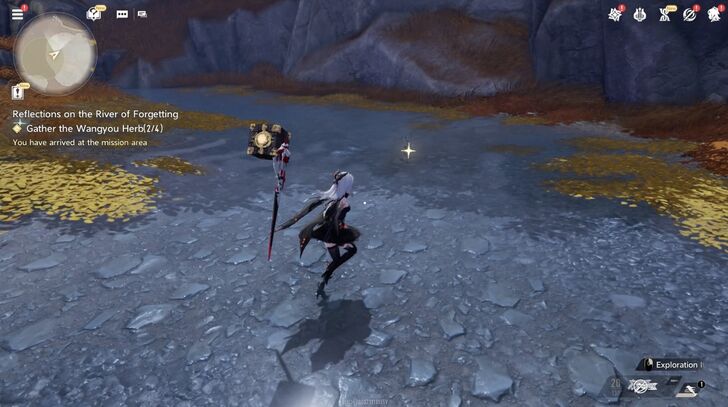 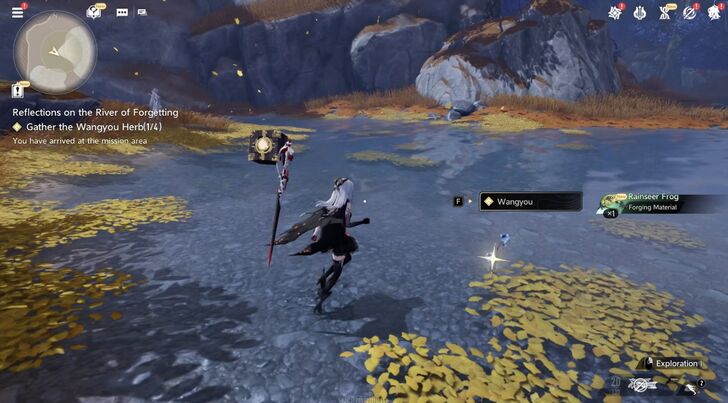 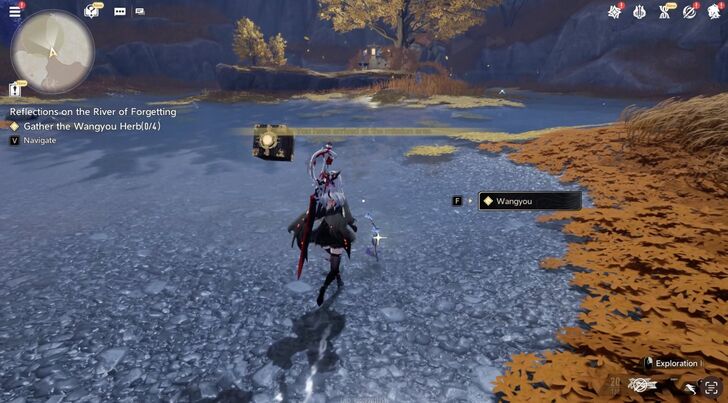 Go to the waterfall to the northern area of the ravine and collect the Wangyou herbs in the area. Wangyou herbs will gleam a light yellow. Collect the items that have a yellow light. |
| 13 | Enter the Oblivion Rift Upon collecting the last herb, a violet rift will open up from which the Phoxhunter will hear the voice of a woman begging to be rescued. Enter the Oblivion Rift with Snow when the cutscene ends to begin the next part of the quest. |
| 14 | Keep Moving Forward 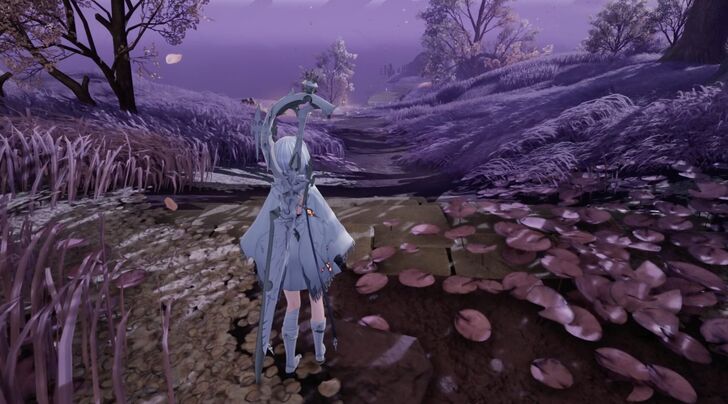 There will be no map to use as a guide inside the Oblivion Rift. Moreover, be mindful that the hostile environment of the Oblivion Rift will drain your HP at a relatively rapid rate. You will fail the quest and start from the first checkpoint upon your entry into the Rift if your HP is fully depleted. 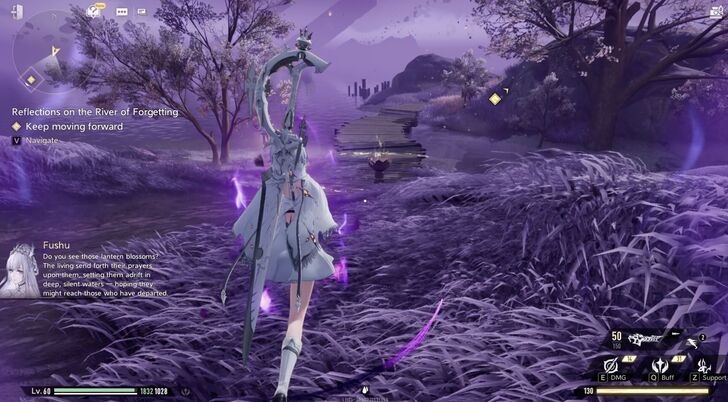 To progress through the area, simply press onward for the duration of this section. Make sure to avoid the water and run to the Lantern Blossoms to heal your HP and shield the Phoxhunter from the effects of the Rift. |
| 15 | Continue Moving Forward Repel the Filthoids under the Lantern Blossom's Protection. You will run into Filthoids on your way forward. Fend them off while staying close to a Lantern Blossom to keep your HP up. Find the First Providence Chime. After defeating the Filthoids, keep moving forward until you reach a familiar figure standing by a large chime. Talk to Berenica for a brief moment before interacting with a chime to open another path forward. |
| 16 |  Cross the River of Forgetting Ringing the Providence Chime will awaken the Lantern Blossoms ahead, allowing you to safely cross the River of Forgetting without losing HP. Repel the Filthoids under the Lantern Blossom's Protection. Keep moving forward until you run into more Filthoids. Similar to the earlier encounter with enemies, stay close to the Lantern Blossoms to keep your HP up. |
| 17 | 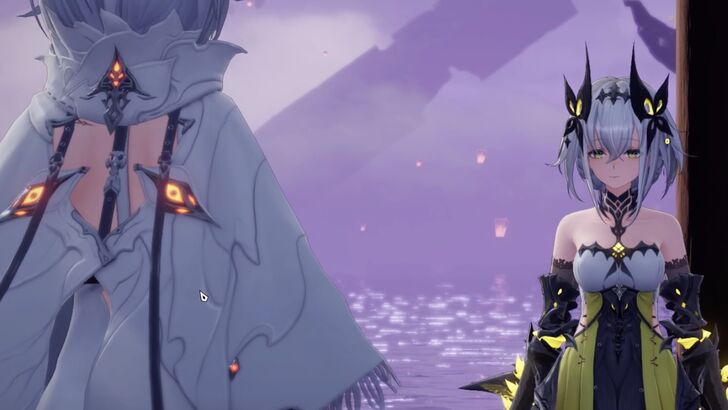 Ring the Second Providence Chime There will be another familiar figure by the next Providence Chime. Talk to Psyche and ring the Providence Charm. Instead of Lantern Blossoms, a canoe will appear to allow you to cross the deep Waters of Forgetting. |
| 18 | Steer the Canoe Jump onto the canoe and interact with it to start steering the canoe. For this portion, there is no actual steering involved; you only need to stay standing on the canoe as it will automatically bring you to one of the gates in the Oblivion Rift. Once you reach the shore, run towards the gate to move on to the next part of the quest, where you will play through the journey out of Oblivion Rift as Fushu. |
| 19 | 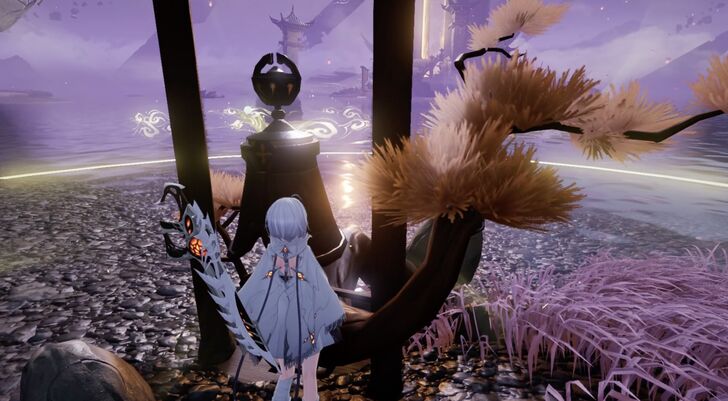 Find the Providence Chime Run forward to the quest marker until you reach the River of Forgetting. You will arrive at the River of Forgetting. 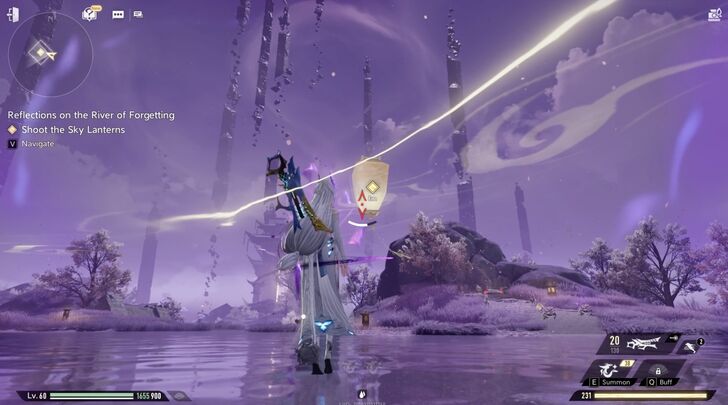 Shoot the Sky Lanterns. On your way to the Providence Charm, you will encounter Sky Lanterns floating over the River of Forgetting. Shoot them down with the Exiled Thunderwyrm to activate the Lantern Blossoms inside and grant you safe passage across. Check on the Wishen. Go toward the Wishen floating by a Lantern Blossom. You as Fushu will accompany the Wishen to a safe location. Repel the Filthoids. More Filthoids will attack as soon as you move forward with the Wishen. Defeat them to proceed. Ring the Third Providence Chime. Go up to the Providence Chime and interact with it to start a brief cutscene in which Fushu notices that something is amiss with the Oblivion Rift gate up ahead. Interact with the Providence Chime again to ring it and activate the Lantern Blossoms ahead. |
| 20 | 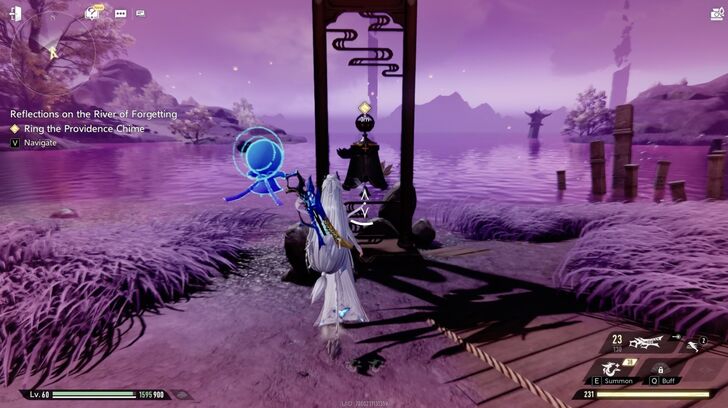 Go to the Next Providence Chime Then, cross the river to the Providence Chime ahead. The stretch of water will be longer than usual, so it is recommended that you also shoot down the Sky Lanterns to activate more Lantern Blossoms and avoid depleting your HP. Repel More Filthoids. There will be a longer battle up ahead against 15 Filthoids. Defeat them while staying within range of any nearby Lantern Blossom. 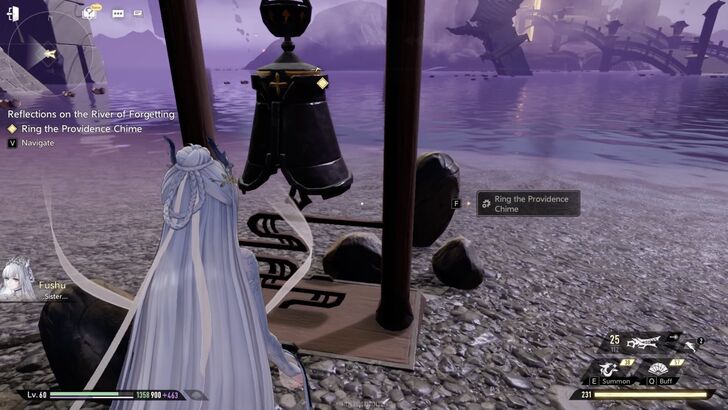 Ring the Fourth Providence Chime. Go up to the Providence Chime to interact with it. The chime will fail to ring for Fushu, but the Wishen by her side will use its powers to activate the canoe. |
| 21 | 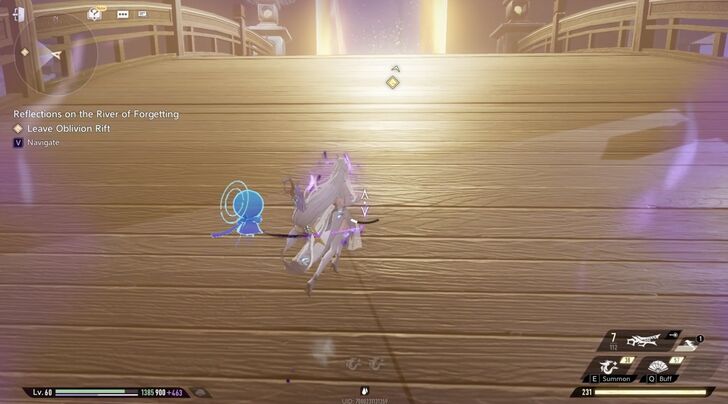 Find a Way Out of the Oblivion Rift Ride the canoe with the Wishen to make your way to the exit. Filthoids will appear on the water's surface to attack you. During this short battle, make sure that you stay on the canoe so as not to be affected by the Waters of Forgetting. At this point, Fushu's Ultimate Attack will be locked. You may use her Combat Skill and the Exiled Thunderwyrm AoE beam to defeat the wave of enemies without accidentally leaving the canoe. |
| 22 | Clear the Path Forward with Fushu's Ultimate Skill The canoe will stop at one point front of overgrown roots in the water. Use Fushu's Ultimate Skill to take out the roots and proceed to the exit. More Filthoids will attack you on the way. This time, you can use Fushu's Ultimate Skill on top of her Combat Skill and Ranged Weapon to easily defeat the oncoming enemies. |
| 23 | Ring the Last Providence Chime Run toward the last Providence Chime to trigger a cutscene with Fufeng, Fushu's sister. Afterwards, ring the Providence Chime to activate the Lantern Blossoms leading you to the exit. Run the rest of the way to the Oblivion Rift gate. Shoot down the Sky Lanterns to trigger more Blossoms on the way. Note: Open the three chests in front of the bridge to receive additional rewards before leaving Oblivion Rift. |
| 24 | Leave the Cave and Solve the Puzzle As Fushu, you and the Phoxhunter will find yourselves inside a cave after successfully leaving Oblivion Rift. Follow the Luminous Jades to find your way out. On the way to the exit, you will hear the cries of a Wishen. Follow the sound to a Wishen floating by a waterfall. Fend off the Filthoids and save the Wishen. It will enlist your help to find and rescue the rest of the Wishen that are trapped inside. The Wishen will then join you and provide an additional exploration mechanic. Use its powers like you would a Geniemon's support skill. Use the Wishen's Support Skill to light the two Luminous Jades ahead and open a path forward. |
| 25 | 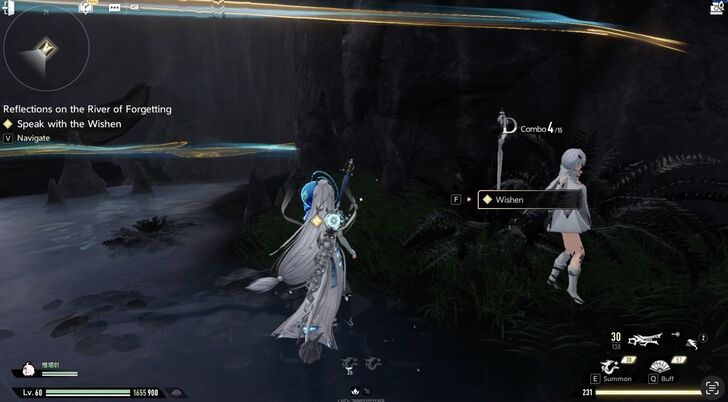 Leave the Cavern and Speak with the Wishen Ahead As soon as you exit the cavern, go to the group of Wishen floating near a wooden bridge and accompany them to the place where the other Wishen are trapped. |
| 26 | 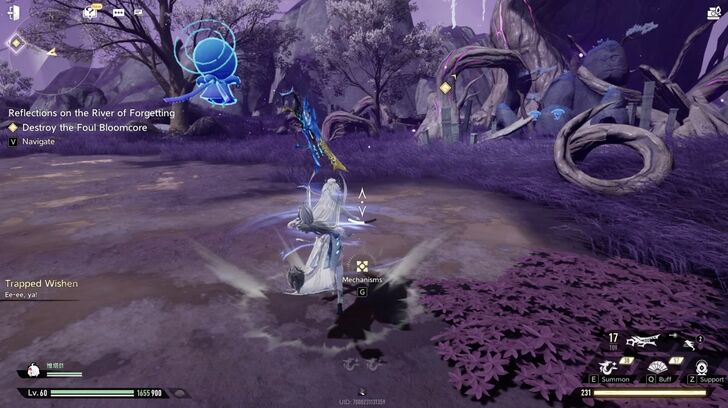 Destroy the First Foul Bloomcore Follow the quest marker forward to the giant Foul Bloomcore. You can collect the Acceleration Runes to move faster. Defeat the Filthoids standing in your way. Open up the Foul Bloomcore by hitting it with a Ranged Weapon or using the Wishen's skill. Afterwards, Filthoids will spawn as soon as the Bloomcore's petals unfurl. Clear the area of 50 Filthoids to progress the quest. You will then need to purify the Bloomcore after defeating the Filthoids. Use the Wishen's Skill to purify the Foul Bloomcore, and then talk to the Wishen. |
| 27 | Destroy the Second Foul Bloomcore Arrive at the mission area and defeat 50 Filthoids. Afterwards, move forward and locate the Foul Bloomcore, and then purify the Bloomcore using the Wishen. Be prepared to fight The Devourer up ahead! |
| 28 | 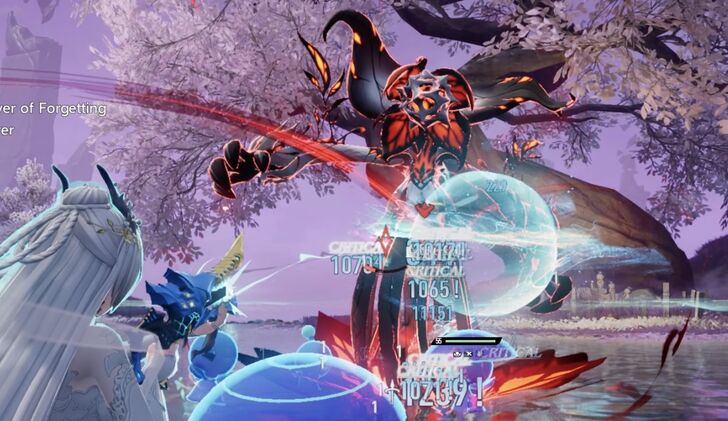 Defeat the Devourer You will once again face The Devourer, a powerful Filthoid that first appeared in The Scarlet Land quest. The Devourer can fire beams and multiple energy orbs as projectiles that you will have to dodge on top of fighting surrounding Filthoids. |
Reflections on the River of Forgetting Story Walkthrough and Guide
Reflections on the River of Forgetting Rewards
| We're still investigating the rewards for this Quest. Stay tuned for updates! |
Crowsong Hollow: The Stirring Flock
| Crowsong Hollow: The Stirring Flock Objectives | |
|---|---|
| 1 | 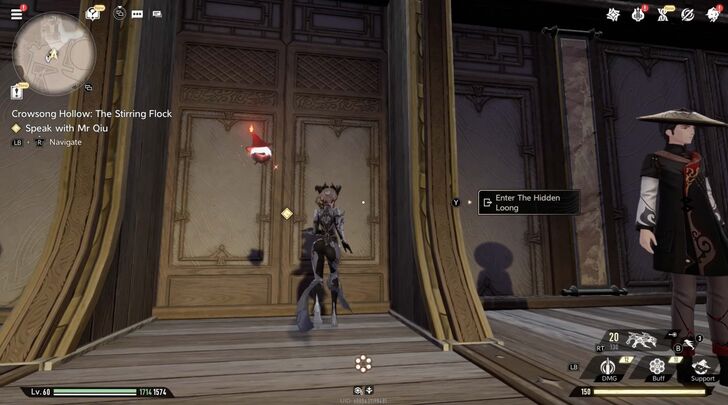 Speak With Mr Qiu Enter The Hidden Loong and find Mr Qiu at the other end of the room. After initial chatter, Mr. Qiu will keep talking to you and answer questions you may have on your mind over the communication line. |
| 2 | 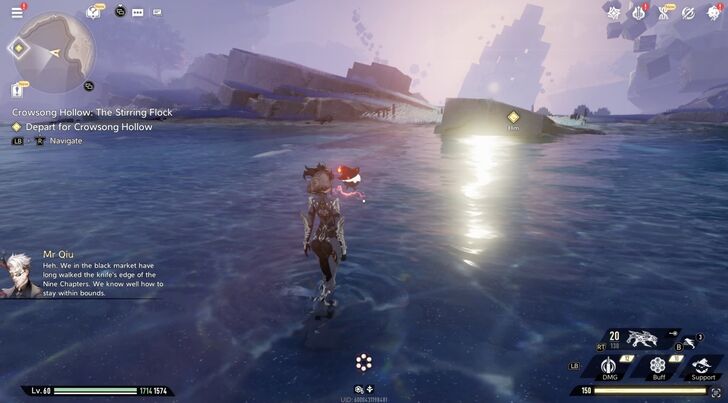 Depart for Crowsong Hollow Follow the quest marker and leave The Hidden Loong through the doorway. Afterwards, go right and keep moving straight out the waters until you reach Crowsong Hollow. |
| 3 | 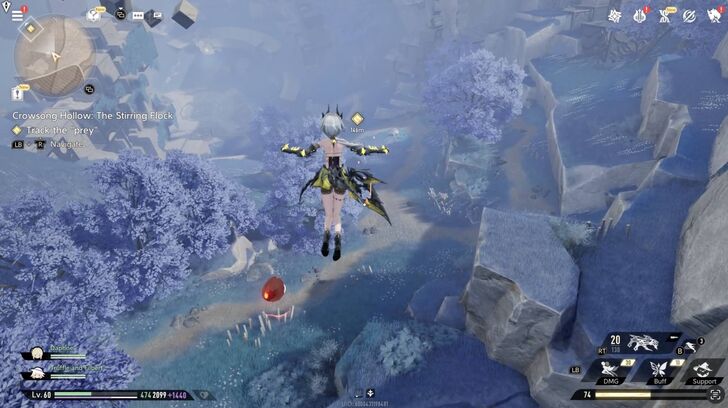 Track the “Prey” Jump down the cliff and follow the path downwards until you find a group of Black Market lackeys gathered together. Approach them to progress the quest. |
| 4 | Speak Again With Mr. Qiu Find Mr Qiu straight ahead and speak with him. Move forward amd climb up an ornate mystical ramp and crossing a bridge of levitating blocks until you find a structure called an Enlightenment Stele. |
| 5 | 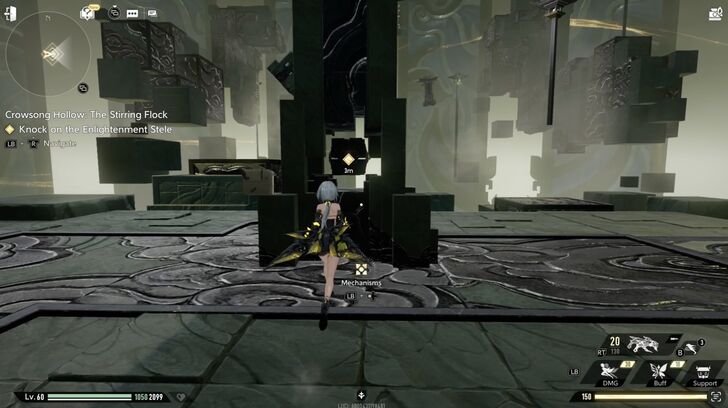 Knock on the Enlightenment Stele Interact with the Enlightenment Stele to knock it. An island and bridge of floating blocks will appear before you. |
| 6 | Solve the Enlightenment Stele Puzzle Climb up the steps to head further inside the temple and approach Lunocarp to trigger a cutscene. Climb up the stairs ahead. Turn left and then circle around to Zhiliu's location. Approach Zhiliu, who will be standing in the middle of the area. Memorize the sequence pattern of the blocks in the bridge lighting up. Cross the bridge while performing the sequence to open the path to the next islands. If you miss it, you can always interact with the Enlightenment Stele to trigger the sequence again, or refer to the steps in the puzzle walkthrough for each puzzle's pattern and mechanics. |
| 7 | 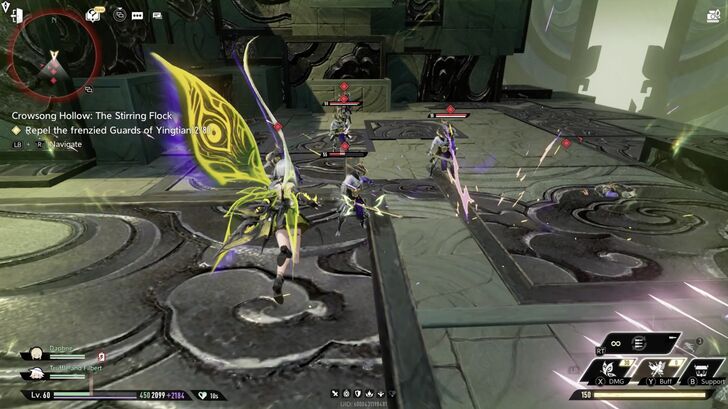 Repel the Frenzied Guards of Yingtian Defeat 8 frenzied Guards of Yingtian to progress the quest. It's recommended to use AoE attacks to quickly repel the guards. |
| 8 | 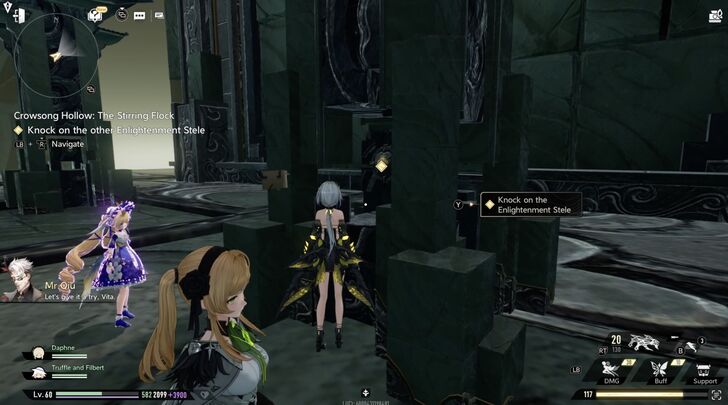 Knock on the Other Enlightenment Stele After defeating the frenzied guards, use the grappling hook to advance through the map and get to the marked location. Upon getting atop the platform, approach the Enlightenment Stele and interact with it to knock on it. |
| 9 | 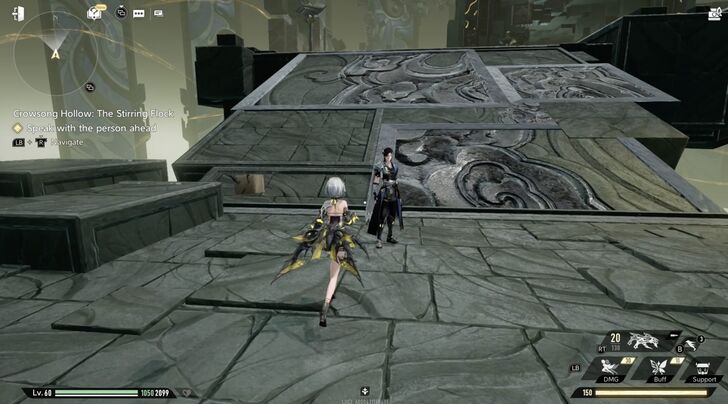 Speak With the Person Ahead After interacting with the Enlightenment Stele, go up ahead and talk to Kezhou, the man standing in front of you. Repel the frenzied Guards of Yingtian After speaking with Kezhou, go to the mission area and repel the groups of frenzied guards in the area. Use the grappling hook to advance through the map. |
| 10 | Use the Mechanical Nexus to Solve the Puzzle 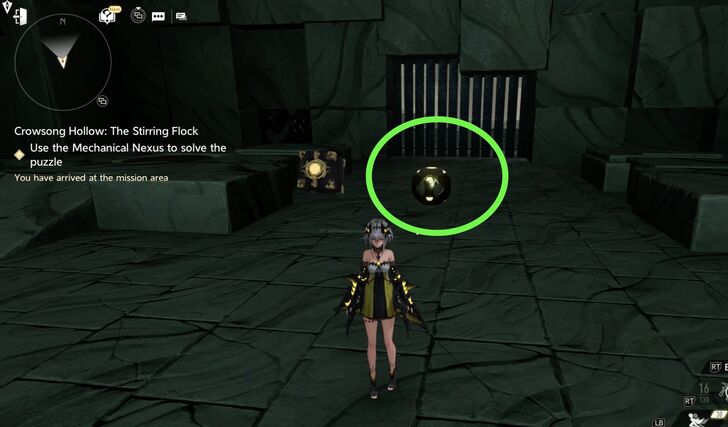 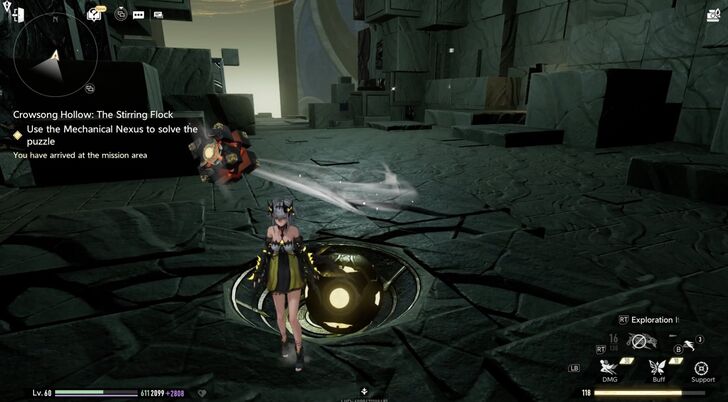 A
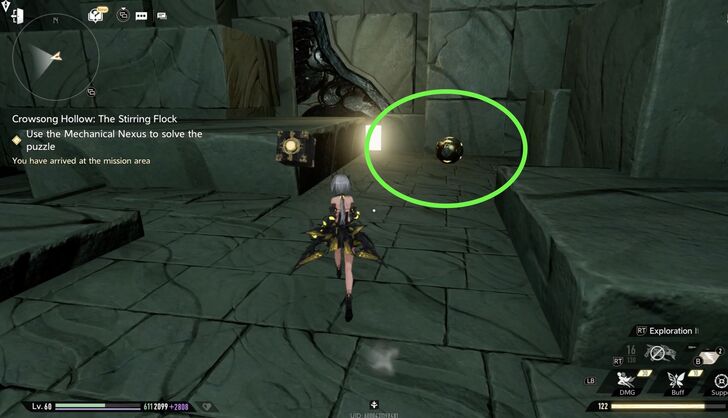 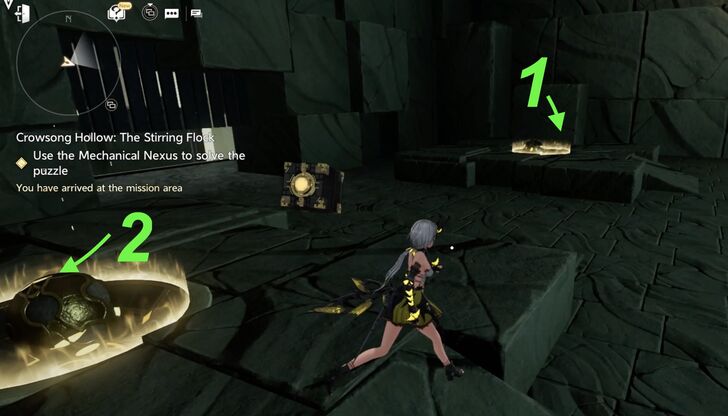 B
Eliminate the enemies in the mission area before attempting to solve the puzzle. Once the area is clear, approach the black spheres and move them to the corresponding pits to solve the puzzle using the Mechanical Nexus. Move the two spherical objects to the stone pits located near the closed gate. Place them in the center of the pits to trigger the gate to open. |
| 11 | Defeat Frenzied Guards and Solve the Puzzle Move forward to the marked location and prepare to defeat frenzied guards and solve a series of puzzles to progress the quest. 3x3 Tile Puzzle Solution
The first puzzle you encounter will be a 3x3 tile grid and can be solved by crossing diagonally going from bottom-left, center, and then top-right. Move forward to reach the next floating platform and puzzle. 4x5 Tile Puzzle Solution
Defeat the enemies upon reaching the platform and continue to cross the bridge to get the other platform. You will reach the mission area and solve a 4x5 puzzle tile grid. Be prepared for battle up ahead! |
| 12 | 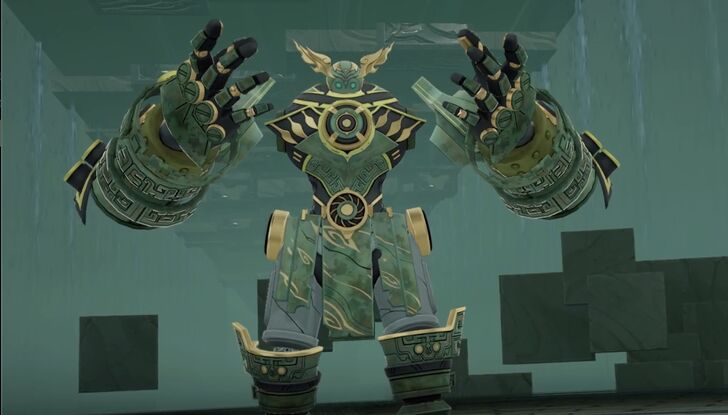 Defeat Colossus Threshold You will encounter Colossus Threshold as a story boss upon proceeding with the challenge. Use long-range attacks to your advantagel and be actively mobile and constantly move around to dodge Colossus Threshold's attacks. |
| 13 | 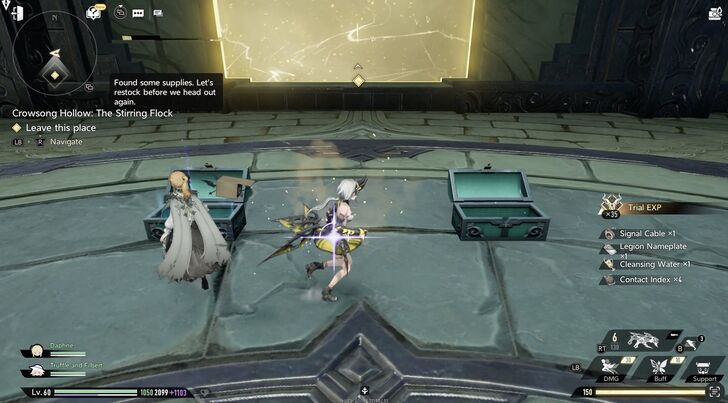 Leave the Place After defeating Colossus Threshold, claim rewards in the treasure chest and leave the place to progress the story. A cutscene featuring Mr. Qiu and Yuming will play. Before you leave, it's highly recommended to prepare for the battle up ahead! |
| 14 | 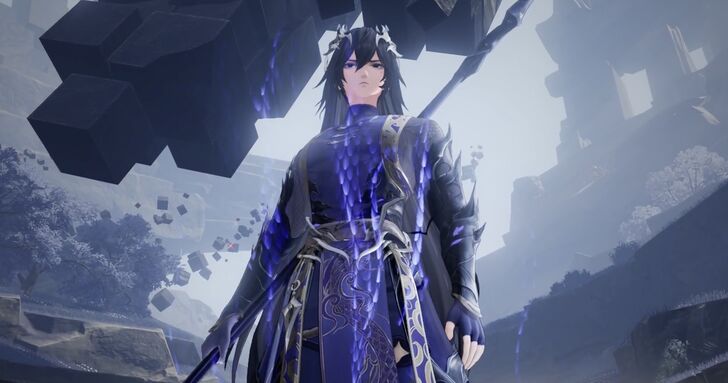 Defeat Yuming Yuming makes use of tracking attacks, AoE attacks, and dash attacks. Make sure you evade and dodge these attacks to survive. Moreover, Yuming has a slow walking animation that leaves him vulnerable to attacks, so it's recommend to take attak him when he's taking steps. The fight will be interrupted and end when Kezhou arrives on the scene. |
| 15 | 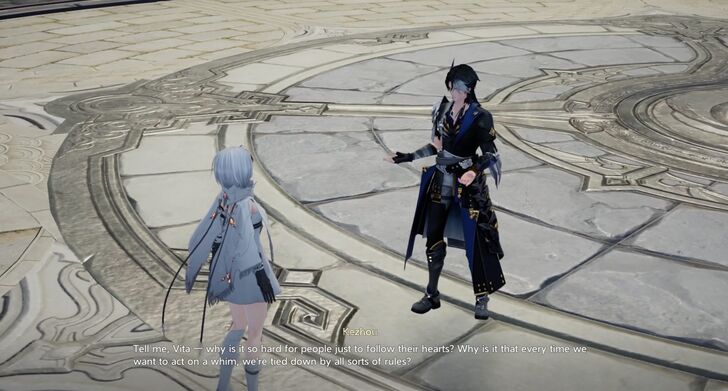 Speak With Kezhou Once the cutscene ends, go talk to Kezhou to complete the quest. |
Crowsong Hollow: The Stirring Flock Story Walkthrough and Guide
Crowsong Hollow (Feng Qiang) Full Dialogue
| Prompt 1 | ||
|---|---|---|
| Uh... well... | ||
| Response | Impression | Points |
| They were just trying to help. | Morality | +3 |
| Dock three days' pay from each of them! | Chaos | +3 |
Crowsong Hollow: The Stirring Flock Rewards
| We're still investigating the rewards for this Quest. Stay tuned for updates! |
Sacrilege to Bring Down Heaven
| Sacrilege to Bring Down Heaven Objectives | |
|---|---|
| 1 | 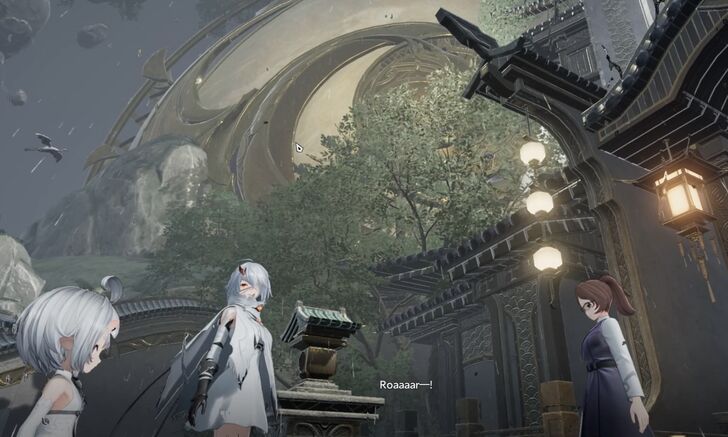 Return to EverSpring Exit the plaza and follow the quest marker. Go up the stairs and approach the woman in the marked location. Afterwards, a cutscene will play. |
| 2 | 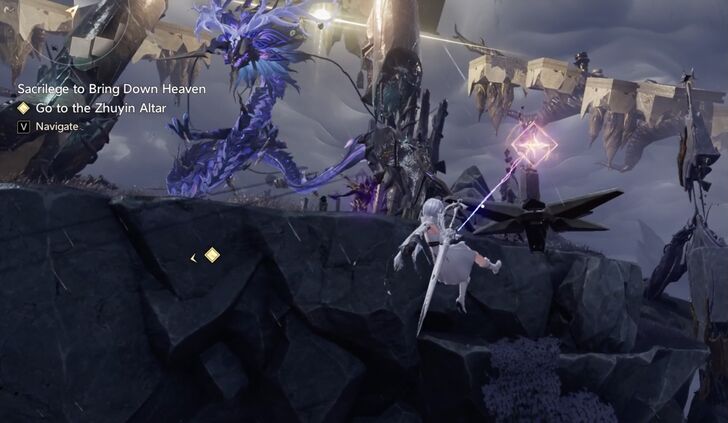 Go to the Zhuyin Altar Move up northeast to the marked location and continue following the quest marker up until you reach the top of the hill. Continue following the quest marker. Use the grappling hook to cross the area. |
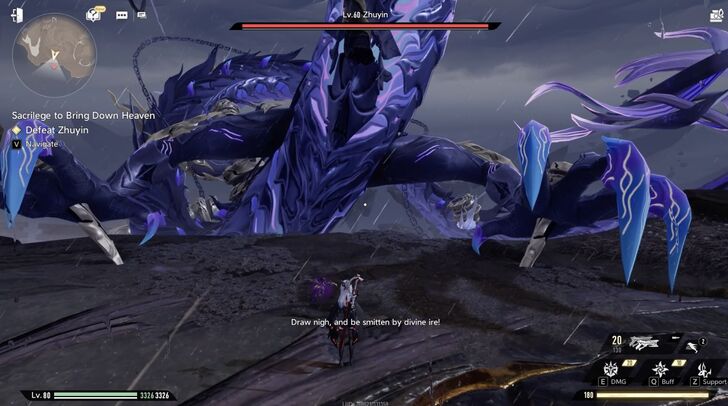
| 3 | 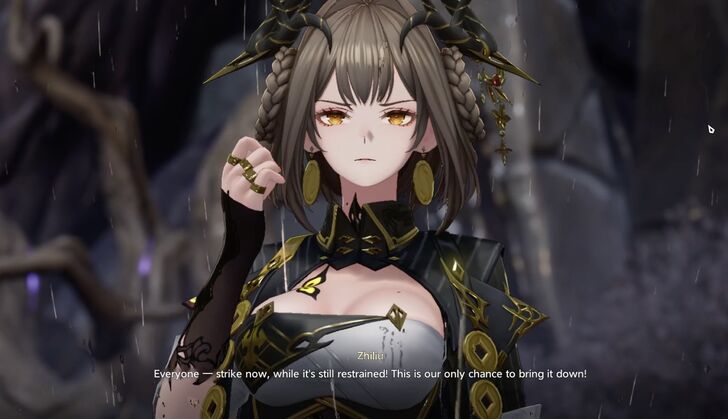 Help Zhiliu Stabilize the Seal After the cutscene plays upon reaching the altar, follow the quest marker and continue moving forward. When you reach the marked location, another cutscene will play that will lead up to a boss fight. Zhiliu decides that it is the moment to strike Zhuyin. Prepare to battle Zhuyin before proceeding to the next portion of the quest! |
| 4 | 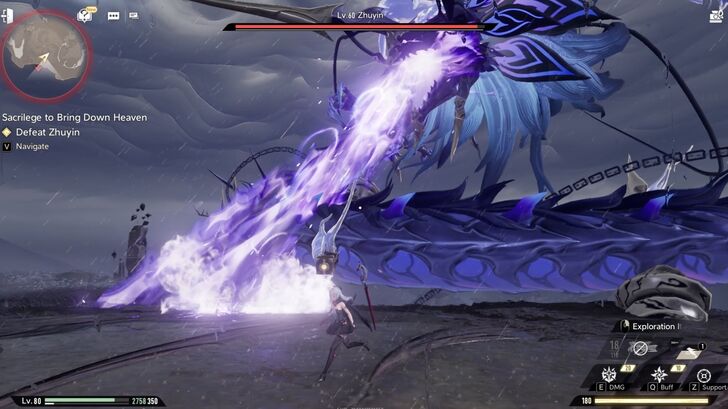 Defeat Zhuyin Zhuyin is a durable story boss that tries to overwhelm players with its versatile, relentless attacks. It can summon animates, deal barrages of projectile attacks, as well as AoE attacks. It's recommend to actively move around the battlefield and dodge Zhuyin's attacks. Zhuyin moves ocassionally and slowly. You can use this to your advantage and find openings to land your attacks. |
| 5 | 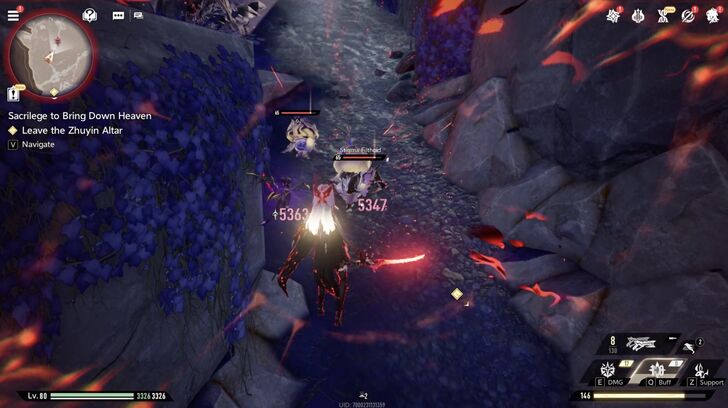 Leave the Zhuyin Altar Lengthy significant cutscenes will play after defeating Zhuyin. After this, you must head to leave the Altar while fending off Filthoids. The quest concludes once you reach the marked location. |
Sacrilege to Bring Down Heaven Story Walkthrough and Guide
Sacrilege to Bring Down Heaven (Kezhou) Full Dialogue
| Prompt 1 | ||
|---|---|---|
| And what about you? | ||
| Response | Impression | Points |
| I don't want to stand by and watch Huaxu fall apart. I want to see what I can do. | Empathy | +3 |
| Too much has happened today... I just want to go back to Icelake. | TBA | TBA |
Sacrilege to Bring Down Heaven Rewards
| We're still investigating the rewards for this Quest. Stay tuned for updates! |
Journey Across the Lands Boss Guide
The Devourer
Actively dodge and move around the battlefield to not get hit byThe Devourer's projectiles, energy beams, and orb attacks. There is also a chance to stun The Devourer by unleashing non-stop barrages of combo attacks.
Colossus Threshold

You can shut down Colossus Threshold's offense and avoid taking damage by observing its attack motions. Most of Colossus Threshold's can be predicted by the power-up motion it does to wind up its attack. Be evasive, and use long range attacks to get around and fight Colossus Threshold.
Yuming
Withstand Yuming's projectiles, melee attacks, tracking attacks, AoE attacks, and dash attacks by moving actively around the field. Don't stay for too long in one place, and actively be on the offense to smother Yuming.
Zhuyin
Zhuyin possesses a wide arsenal of attacks, including summoning its own allies, projectile attacks, as well as has AoE attacks. To defeat Zhuyin, exploit his lack of movement and keep dealing significant damage and attack combos.
Journey Across the Lands Previous and Next Chapter
| ◄ Previous Chapter | Next Chapter ▶ |
|---|---|
| Noctoyager Act 2 | - |
Duet Night Abyss Related Guides

All Quest Types
| All Quest Types | |
|---|---|
| Main Quests | Side Quests |
| Special Side Quests | Dynamic Quests |
| Event Quests | |
All Main Quests
 Prologue
 Chapter 1: Noctoyager Act 1
 Chapter 2: Twilight Act 1
 Chapter 3: Noctoyager Act 2
Comment
Author

Chapter 4: Journey Across the Lands Story Walkthrough and Guide
Rankings
- We could not find the message board you were looking for.
Gaming News


![Forza Horizon 6 Review [Preview] | Beautiful Roads With a Whole Lot of Oversteer](https://img.game8.co/4460981/a7254c24945c43fbdf6ad9bea52b5ce9.png/thumb)
Popular Games

Genshin Impact Walkthrough & Guides Wiki
Crimson Desert Walkthrough & Guides Wiki
Umamusume: Pretty Derby Walkthrough & Guides Wiki
Honkai: Star Rail Walkthrough & Guides Wiki
Monster Hunter Stories 3: Twisted Reflection Walkthrough & Guides Wiki
Wuthering Waves Walkthrough & Guides Wiki
The Seven Deadly Sins: Origin Walkthrough & Guides Wiki
Pokemon TCG Pocket (PTCGP) Strategies & Guides Wiki
Pokemon Pokopia Walkthrough & Guides Wiki
Zenless Zone Zero Walkthrough & Guides Wiki


Recommended Games
Monster Hunter World Walkthrough & Guides Wiki
Fire Emblem Heroes (FEH) Walkthrough & Guides Wiki
Pokemon Brilliant Diamond and Shining Pearl (BDSP) Walkthrough & Guides Wiki
Super Smash Bros. Ultimate Walkthrough & Guides Wiki
Diablo 4: Vessel of Hatred Walkthrough & Guides Wiki
Cyberpunk 2077: Ultimate Edition Walkthrough & Guides Wiki
Yu-Gi-Oh! Master Duel Walkthrough & Guides Wiki
Elden Ring Shadow of the Erdtree Walkthrough & Guides Wiki
The Legend of Zelda: Tears of the Kingdom Walkthrough & Guides Wiki
Persona 3 Reload Walkthrough & Guides Wiki


All rights reserved
Game Copyright©Pan Studio All Rights Reserved.
The content we provide on this site were created personally by members of the Game8 editorial department.
We refuse the right to reuse or repost content taken without our permission such as data or images to other sites.
©Pan Studio (Provider)