Reckoning Easter Egg Walkthrough and Steps
★ Reckoning Easter Egg Walkthrough
☆ Reckoning Interactive Map
★ Terminus Calculator | Raven Sword Code

This is the Reckoning easter egg walkthrough for Call of Duty Black Ops 6 (BO6) Zombies. Learn all the Reckoning steps and a full guide for the main quest easter egg.
| Reckoning Guides | |
|---|---|
| Easter Egg Walkthrough | Interactive Map |
List of Contents
Reckoning Easter Egg Walkthrough
| Reckoning Easter Egg Steps | |
|---|---|
| 1 | Activate the Particle Accelerator |
| 2 | Unlock the T2 Teleportation Lab |
| 3 |
Prepare the T2 Teleportation Lab ┣ Deliver the Brain to the Lab ┣ Obtain the 4-Digit Lab Code ┗ Activate the Lab Facilities |
| 4 |
Obtain the Gorgofex Wonder Weapon ┣ Unlock the T1 Bioweapons Lab ┣ Obtain the Cyst ┣ Power Up the Cyst ┣ Prepare Franken Klaus ┣ Initiate the Power Surge ┣ Awaken Franken Klaus ┗ Obtain the Gorgofex from the Forsaken |
| 5 | Lead Franken Klaus to T2 Teleportation Lab |
| 6 | Charge the Gorgofex to Destroy the Crystals |
| 7 | Upgrade the Gorgofex ┣ Gorgofex Upgrade C ┗ Gorgofex Upgrade N |
| 8 | Collect and Charge the Fungal Head |
| 9 | Find and Charge 4 Vacuum-Seal Devices |
| 10 |
Enter the Boss Portal ┣ Activate the Portal and Choose the Boss ┗ Reach the Boss Room |
| 11 | Defeat S.A.M or Uber Richtofen |
Activate the Particle Accelerator
| 1 |  To start, you'll want to make your way to the T1 Executive Suite. The easiest way to route this run would be to unlock the elevator to the T1 Mutant Research Lab. |
|---|---|
| 2 | 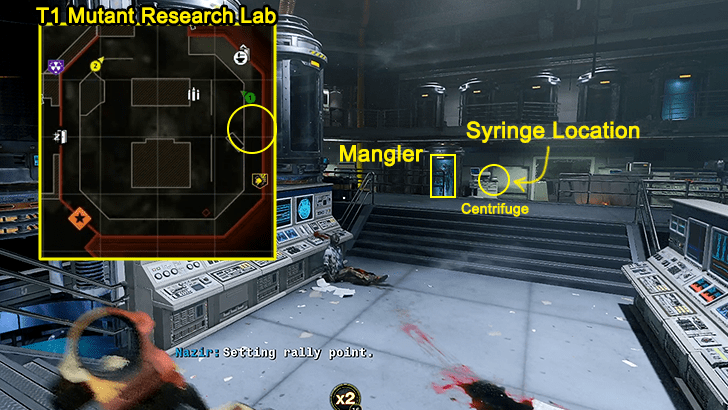 Once at the lab, head over to the area between the Crafting Table and the Deadshot Daquiri machine. You should see a small centrifuge with 2 green lights perched on top of a metal table. Interact with it to get the Syringe key item before you leave. |
| 3 | 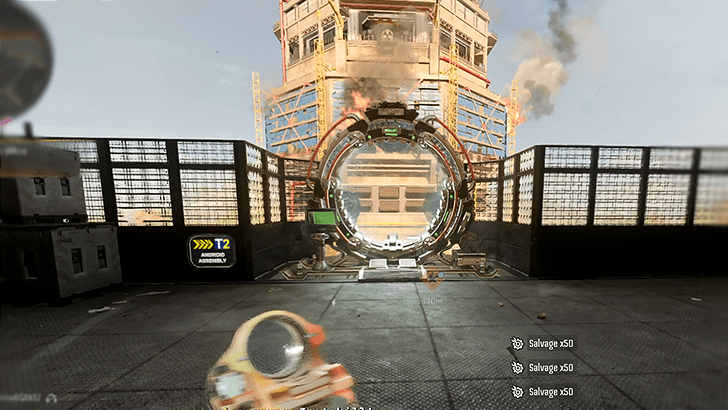 With the Syringe secure, unlock the door that leads to the Anti-Grav Personnel Launcher. Use it to launch yourself over to T2 Android Assembly. |
| 4 | 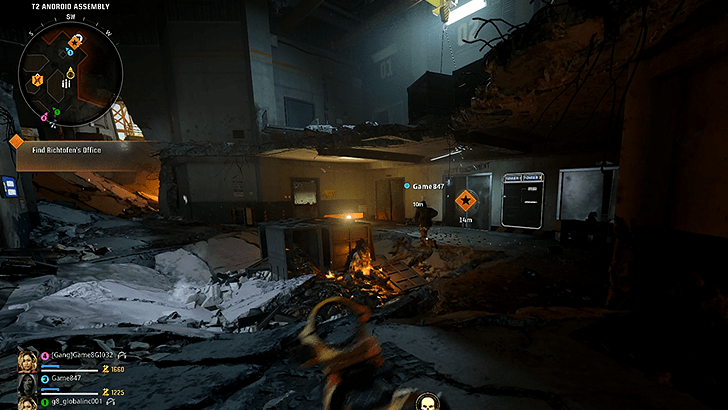 Next, unlock the elevator in T2 Android Assembly and use it to go up to T2 Dark Entity Containment. |
| 5 | 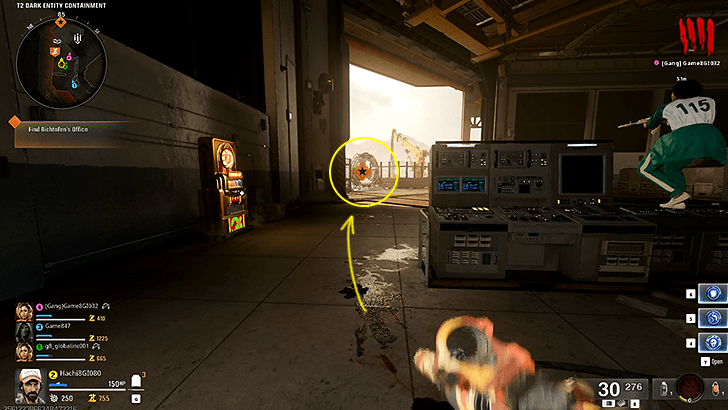 At T2 Dark Entity Containment, use the Anti-Grav Personnel Launcher again to cross over back to T1. Upon landing, you should find yourself in T1 Executive Suite. |
| 6 | 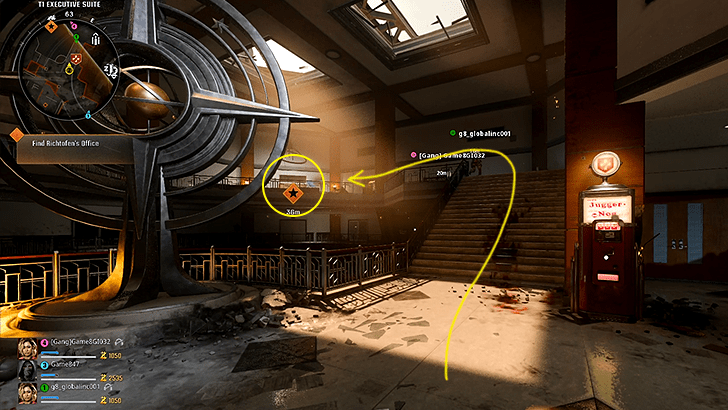 From here, simply go up the stairs and use Essence to plant a bomb that blows open the doors to the Director's Office. |
| 7 | 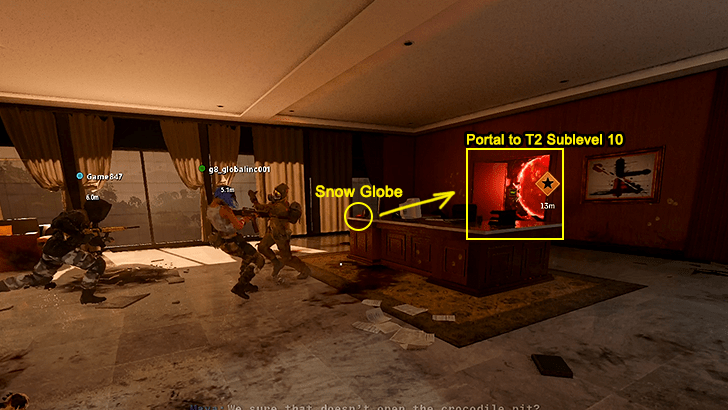 Head over to the Director's desk and interact with the Snow Globe. This should reveal a red button that opens up the doors behind the desk. |
| 8 | 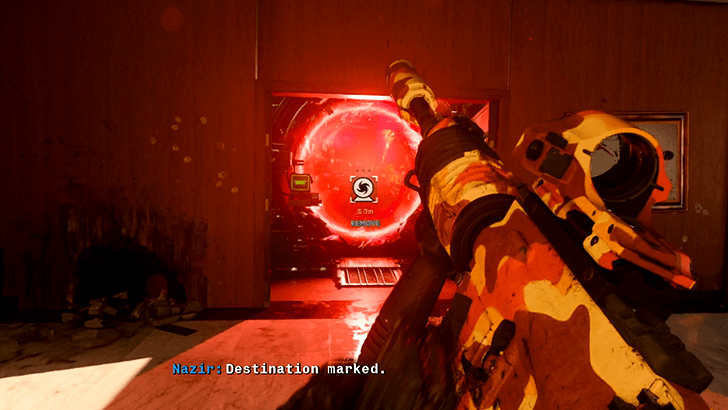 In the open doorway, you'll see the teleporter that leads to T1 Sublevel 10. Use it to reach the particle accelerator that Richtofen wants you to reactivate. |
| 9 | 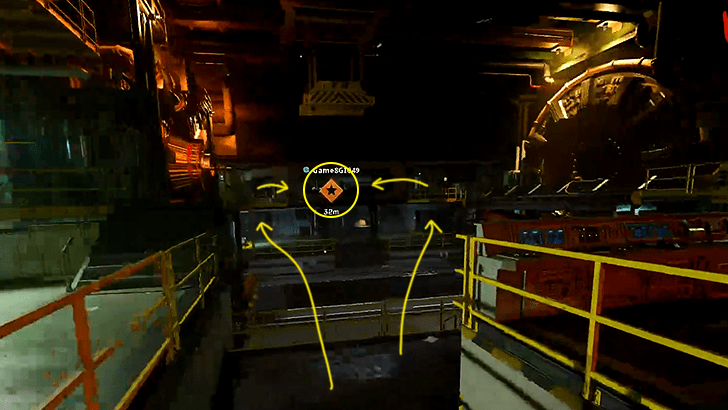 Once at Sublevel 10, simply cross over to the other side of the room and interact with the large panel to Turn Power On. |
| 10 | 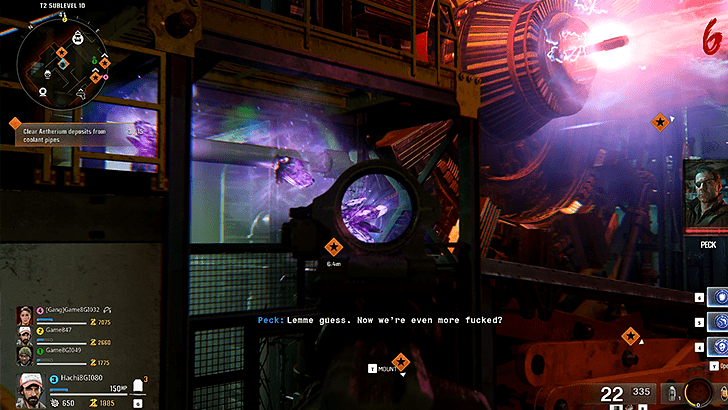 After the particle accelerator turns on, you'll encounter a slight hiccup. Destroy the Aetherium crystals that formed on the coolant pipes to complete the machine's activation sequence. There are 12 Aetherium crystals you have to shoot in order to progress. |
Unlock the T2 Teleportation Lab
| 1 | 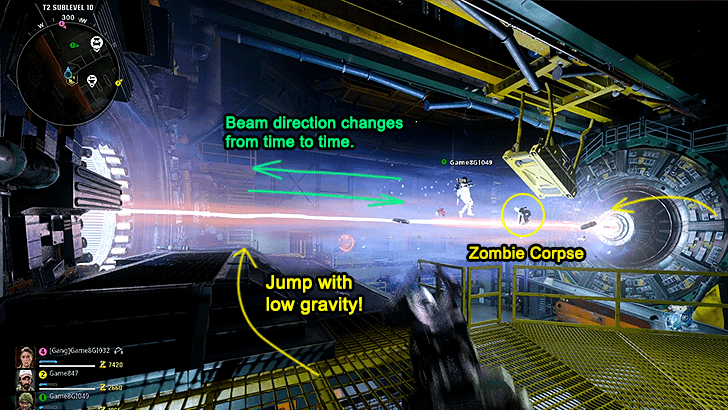 With the particle accelerator active, you should see a zombie corpse floating along the particle accelerator beam. Hop on either end of the particle accelerator beam and collide with the zombie corpse. This should push it down onto the ground. |
|---|---|
| 2 |  Once the zombie corpse is on the ground, interact with it to get the Blood Sample. Note: It is recommended that you Pack-A-Punch your gun before proceeding. A PaP machine can be found inside the particle accelerator room. |
| 3 | 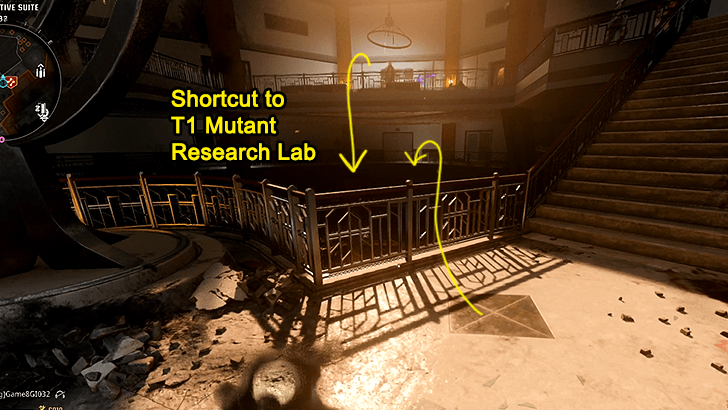 Next, make your way back to the T1 Mutant Research Lab. The easiest way to do this is to teleport back to T1 Executive Suite then jump off the central balcony. You should be able to parachute your way down safely into the lab. |
| 4 | 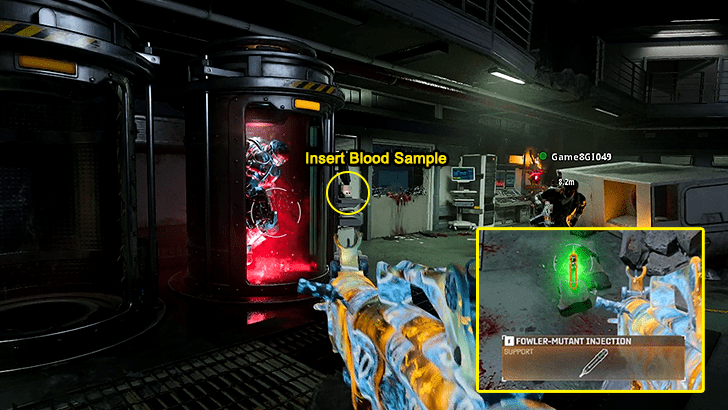 At the lab, interact with the centrifuge again to insert the blood sample. This triggers a mini-boss fight against the Fowler-Mangler. Defeat the Fowler-Mangler and pick up the Fowler Mutant Injection that it drops. |
| 5 | 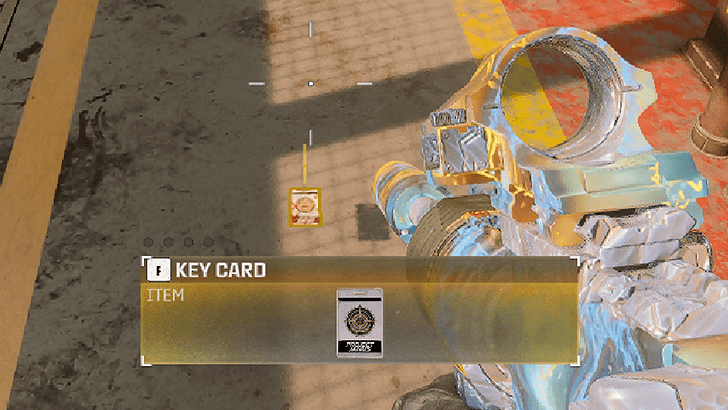 Since you'll likely have fought multiple zombies in the T1 Mutant Research Lab, you more than likely also killed the Geneticist Zombie. Since it only spawns on this floor, look around until you find the Key Card item and make sure to pick it up. |
| 6 |  Next, head over to the doorway next to the PhD Flopper machine. Look for a rectangular fixture that looks like a fridge. Use the Key Card to open it and retrieve the DNA key item from inside. |
| 7 | 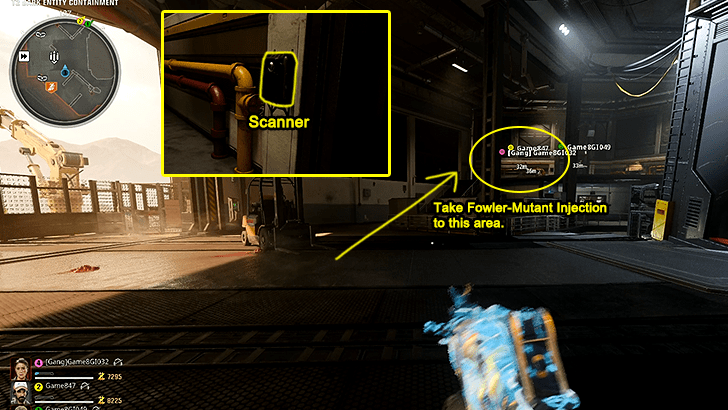 After securing the DNA, head back up to T2 Dark Entity Containment. Once there, make your way to the east side of the room (up the stairs). You should see a set of closed double doors with a black retinal scanner on its left side. Have the player who picked up the Fowler Mutant Injection stand in front of the scanner before proceeding. |
| 8 | 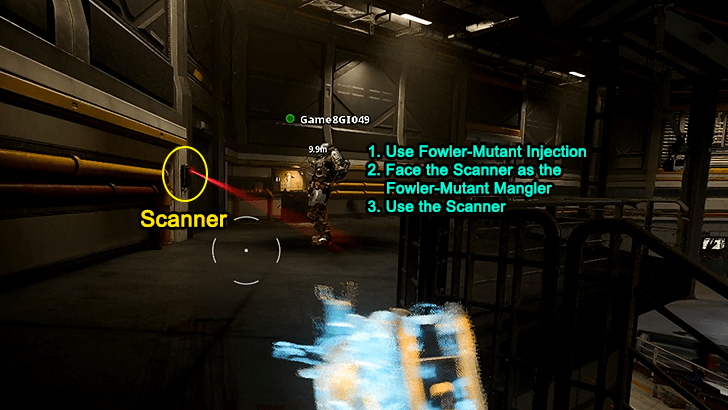 When ready, interact with the scanner. It should start emitting red scanning lines once you do. Immediately activate the Fowler Mutant Injection to verify the former scientist's credentials. If successful, the double doors will open, allowing you access to the teleporter down to the T2 Teleportation Lab. |
Deliver the Brain to T2 Teleportation Lab
First on your checklist is delivering a brain to the empty receptacle in the T2 Teleportation Lab. Start by making your way over to T1 Quantum Computing Core. Once there, drink a Melee Macchiato and punch the Janus Console to open it.
This next step is a timed segment. If you fail it, you'll have to progress to the next round in order to re-attempt the step. Interact with the purple brain to pick it up. Then, run to T2 Teleportation Lab and slot the brain into the inactive Janus Terminal.
Obtain the 4-Digit T2 Teleporation Lab Code
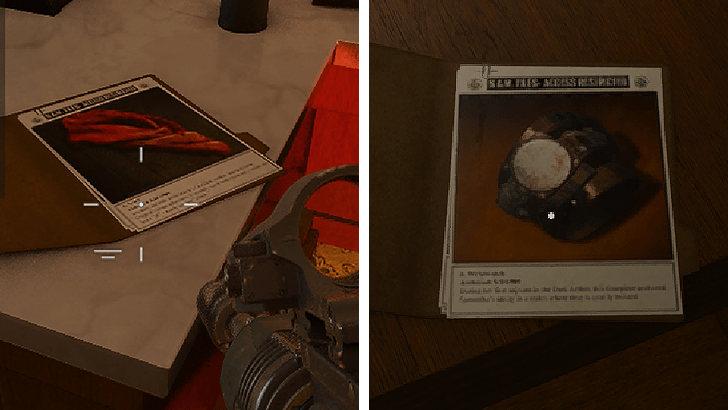
Next on the list is getting the 4-Digit Code to activate the Lab's facilities. To get the code, you'll need to find 4 archival folders and take note of the numbered items they show as well as the dates these items were archived.
| # | Item | Date |
|---|---|---|
| 6 | BND Badge | 6/28/1985 |
| 1 | Notso's Collar | 7/15/1985 |
| 3 | Scarf | 8/21/1985 |
| 4 | Wristwatch | 9/2/1985 |
| 5 | Combat Goggles | 10/12/1985 |
| 2 | Katana | 12/8/1985 |
| Aligned: 6, 1, 3, 4, 5, 2 You can use the alignment above and cross out folders which are not found in your Zombie match instance. |
||
One folder will spawn in T2 Teleportation Lab, and the other 3 folders will be found scattered in T1 Executive Suite and the Director's Office. To figure out the code, simply sort the items by the date they were archived. The number of each item (after being ordered) makes up the 4-digit code (or you can use the table above based on the folders you got).
Activate the T2 Teleportation Lab Facilities
Once you have the code, head back to T1 Executive Suite and use the teleporter in the Director's Office to return to T2 Teleportation Lab. Upon arriving, look to your left and you should see a small computer. Enter your 4-Digit Code to activate the Lab's facilities.
Unlock the T1 Bioweapons Lab
Next on your laundry list of steps is getting the Gorgofex wonder weapon. To do this, you'll need access to the T1 Bioweapons Lab in T1 Mutant Research Lab.
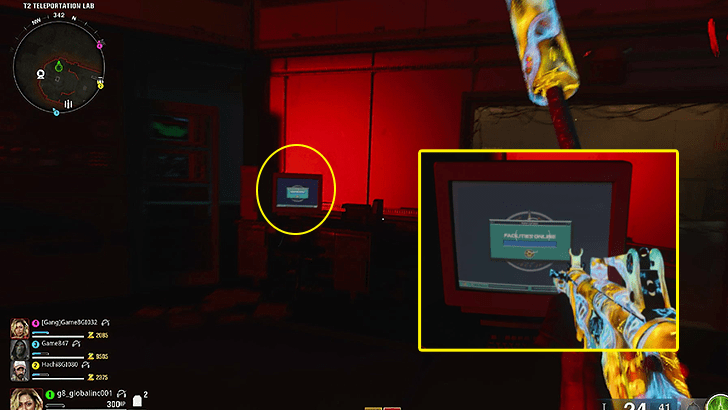
| 1 | 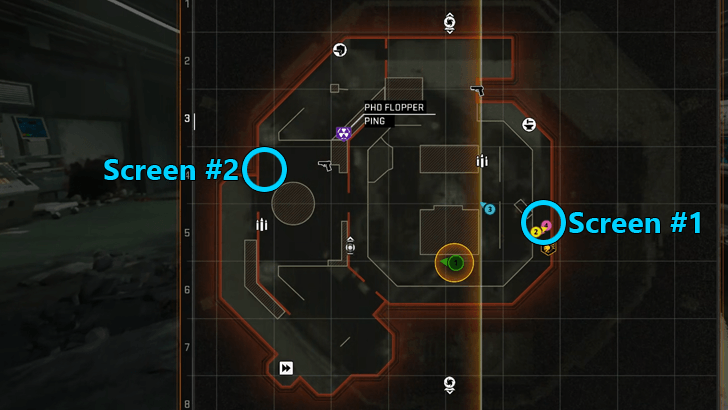 At the T1 Mutant Research Lab, look for 2 computer screens that show static. The first one will be near the centrifuge, while the second will be directly opposite the fridge where you got the DNA from earlier in the run. |
|---|---|
| 2 | 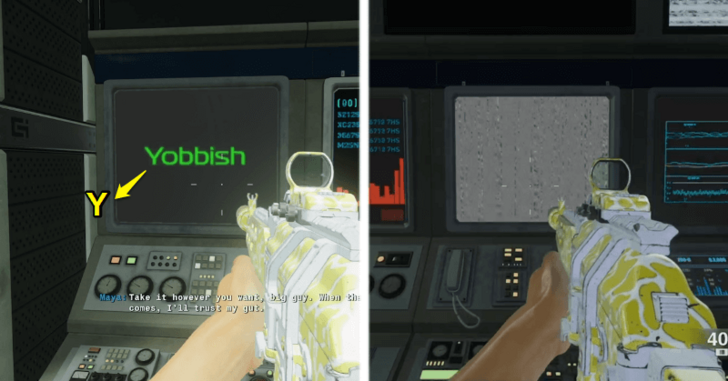 Pay attention to these screens. They will flicker momentarily, revealing a word that you'll want to take note of. Take the first letter of each word and stitch them together. For example, during the team's run, the words that appeared were: ① NETTLESOME - First letter is N. ② INHUMANE - First letter is I. |
| 3 | 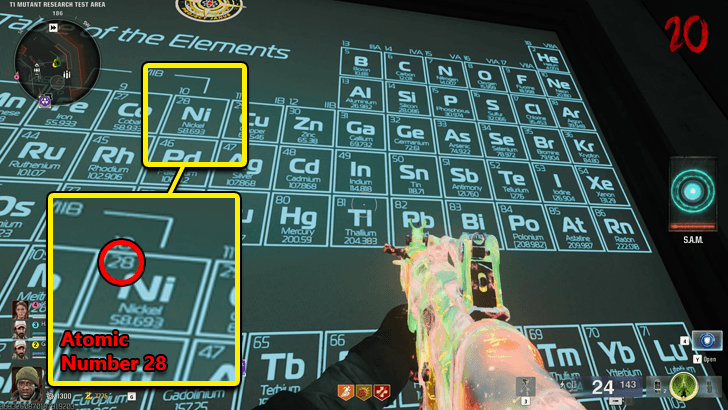 After taking note of the words, combine the first letters to form the shorthand of an element found in the Periodic Table of Elements. You'll find one in the same room as the second monitor (near the PhD Flopper). Look for the element that corresponds with your set of words and take note of its atomic number (top left). For the team, it was Ni (Nickel), so our number was 28. |
| 4 |  The element’s atomic number (top left) will be the code for the Bioweapons Lab door. If it has fewer than three digits, add leading zeroes (for example, 007 for atomic number 7 or 028 for atomic number 28). |
Obtain the Cyst from the T1 Bioweapons Lab
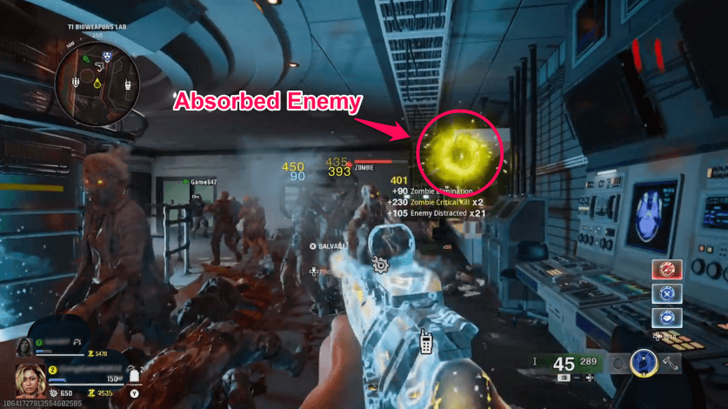
Upon entering the T1 Bioweapons Lab, you'll find the container holding the Cyst. You will need to lure and shoot 3 Vermin and 3 Zombies near it so that they get absorbed by the Cyst. Once all 6 are absorbed, the container will open allowing you to loot the Cyst.
Do note that the Cyst will only be able to absorb one zombie/vermin at a time (and they need to be very close to it to get absorbed). Take your time and loop back into the room to give the Cyst time to ready itself for another pass.
Power Up the Cyst in T1 Quantum Computing Core

After getting the Cyst, head on down to T1 Quantum Computing Core. Look for glowing yellow mushrooms (that have spores dropping from them) and stand underneath them to charge the Cyst.
You'll know the Cyst is charging if you pull it out and the mushroom's HP bar appears on the left side of the screen. Once Aetheric Flora's Health drops to zero, move on to the next one until all 3 mushrooms have been drained.
Prepare Franken Klaus
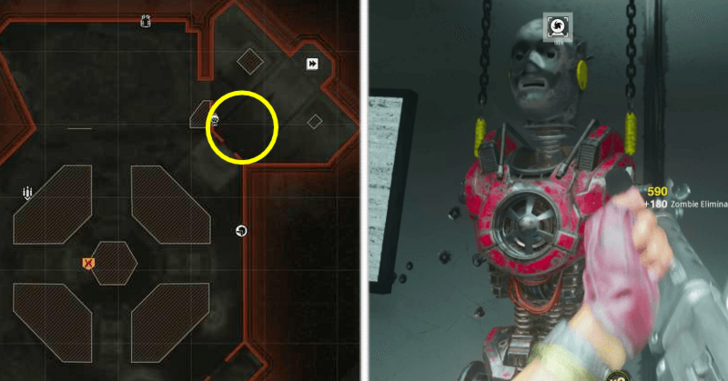
To make the most out of us forcing an Uber Klaus spawn, you'll want to prepare Franken Klaus over in T2 Android Assembly for activation.
Take the launcher in T1 Quantum Computing and you should arrive right in front of the limbless Franken Klaus. It's body parts can be obtained using the following methods:
| Left and Right Arms | 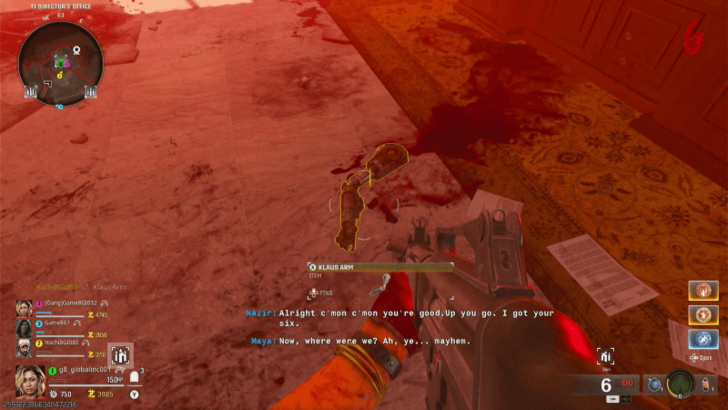 Obtained during Round 5/6 and Round 11/12. Shoot the Kommando Klaus enemies that spawn during these rounds to get them to drop one of each arm. |
|---|---|
| Left and Right Legs | 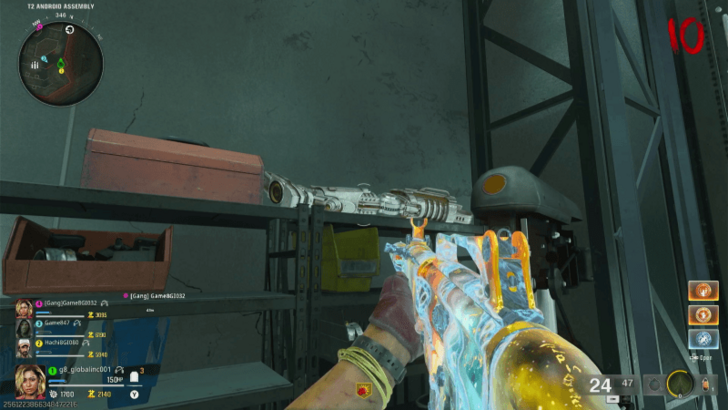 Boths legs spawn at random locations in T2 Android Assembly. Make sure to keep a sharp eye out since they are unmarked even if you're right next to them (unlike the arms). |
Initiate the Power Surge to Spawn Uber Klaus
With everything ready, head on up to T2 Dark Entity Containment. Look for a computer screen with big green text saying INITIATE POWER SURGE. Interact with it then move around the room to find and activate the other 3 terminals with this text.
If done correctly, an Uber Klaus enemy will spawn in. If the power surge fails, simply re-do the sequence until you get it right (the sequence is timed, so activate the computers fast).
Awaken Franken Klaus Using Uber Klaus
Instead of going straight for the Gorgofex easter egg, lead Uber Klaus back down to T2 Android Assembly (use the elevator). Once there, lead him to the assembled body of Franken Klaus and have him shoot it with his electric projectile attack.
If done correctly, Franken Klaus should say a voiceline and activate itself. You'll know Franken Klaus is prepped for the next step once it starts typing on the nearby console.
Obtain the Gorgofex from the Forsaken
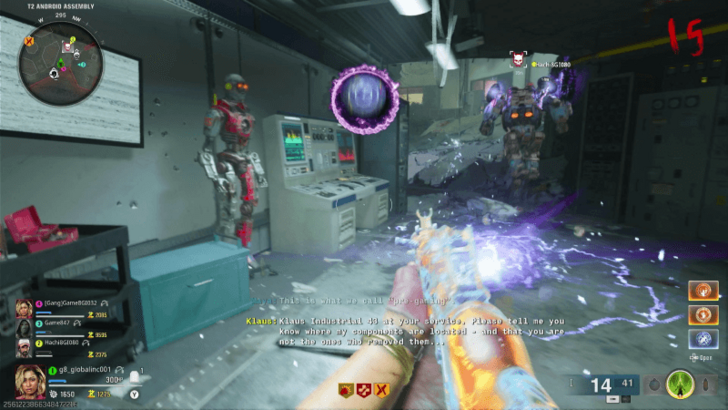
After activating Franken Klaus, lead Uber Klaus back up to T2 Dark Entity Containment before starting.
| 1 |  Once Uber Klaus appears back in T2 Dark Entity Containment, start shooting his pauldrons (shoulder guards). Once both are destroyed, his shields will go down. |
|---|---|
| 2 | 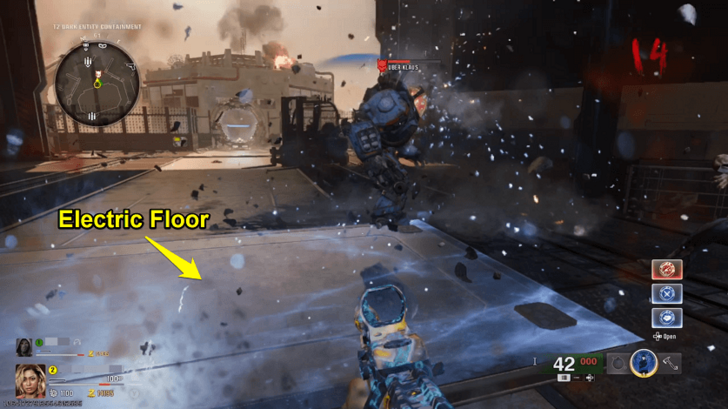 Next, lead the now shieldless Uber Klaus to the electrified platform in front of the cube in T2 Dark Entity Containment. This will power him up, turning him into The Forsaken mini-boss. |
| 3 | Defeat The Forsaken. When it dies, it will have a 2nd phase as a Kommando Klaus. Defeat this 2nd phase to spawn in a purple orb. |
| 4 | 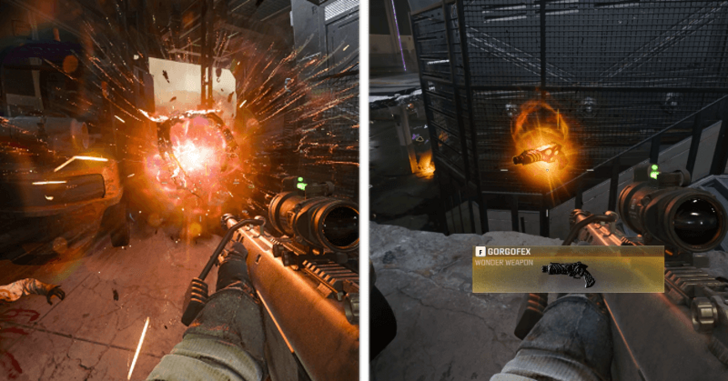 Go next to the purple orb then interact with it to insert your charged Cyst. The Gorgofex wonder weapon will pop out after a short animation. |
Lead Franken Klaus to T2 Teleportation Lab

With the Forsaken dealt with, you'll want to return to Franken Klaus. If you progressed the round during the Forsaken boss fight, Franken Klaus should now also be in T2 Dark Entity Containment (right in front of the SAM Trial).
Start the SAM Trial and complete it (doesn't matter if you meet the required score or not). Once it finishes, escort Franken Klaus through the nearyb teleporter and he should appear in T2 Teleportation Lab (typing next to the brain console).
Charge the Gorgofex and Destroy the Portal Crystals
Your next order of business is preparing the purple portal in T2 Teleportation Lab. In order to get rid of the Aetherium crystals blocking the portal, head over to Sublevel 10 (where the PaP machine and particle accelerator are).
| 1 | 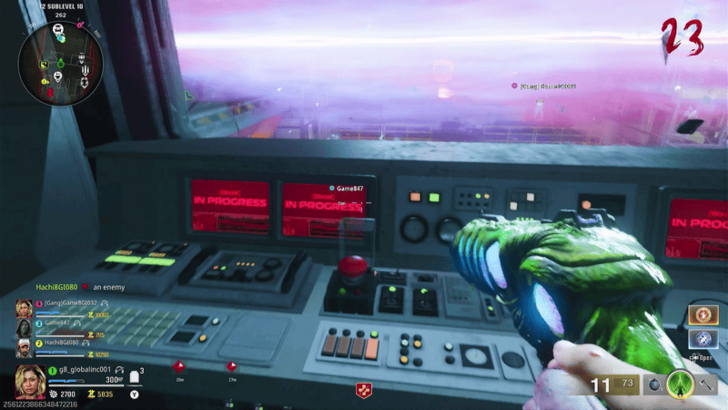 Once at SubLevel 10, you'll find a new red button on the left side of the console that you initially used to power the accelerator. Push the button to start a soul box event that you can do once per round. |
|---|---|
| 2 | 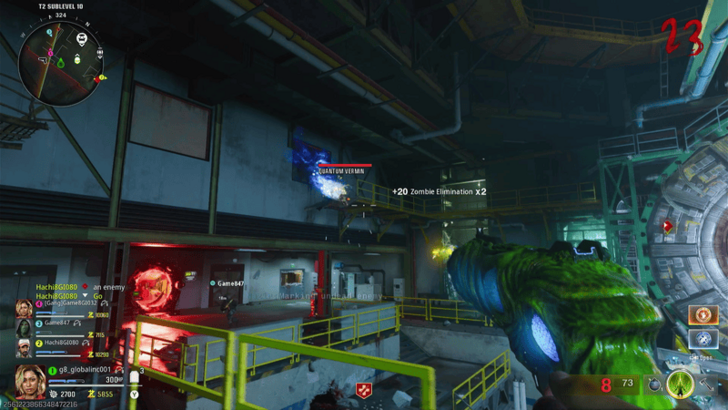 When the soul box event starts, Quantum Vermin will appear at the upper rafters of the area. Kill these enemies first using the Gorgofex, then kill any zombies in the center area. Their souls should be going to the orb beside the red button on the second floor. |
| 3 | 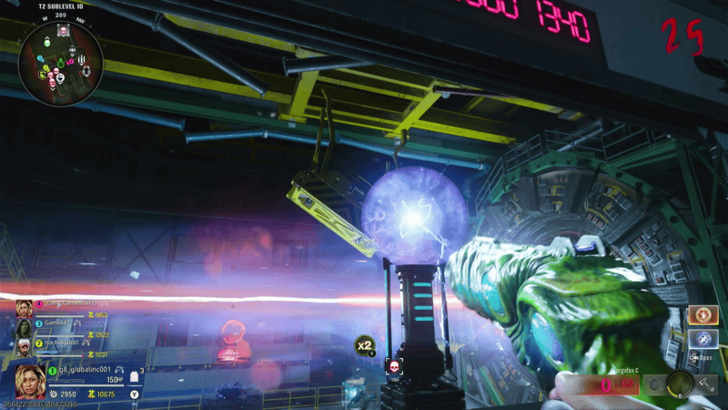 When the event is done, interact with the orb in order to get a powered charge shot. Once you have it charged do not shoot the Gorgofex until you reach the T2 Teleportation Lab. |
| 4 | Take your charged wonder weapon to the portal with purple crystals in the T2 Teleportation Lab. Use the charged shot on the teleporter to break off the crystals and partially open the portal. |
Upgrade the Gorgofex
| Gorgofex Update Starting Point | |
|---|---|
 Do note that you can only choose 1 upgrade type when upgrading the Gorgofex. |
|
| Gorgofex Upgrade Walkthroughs | |
| Gorgofex C Upgrade | Gorgofex N Upgrade |
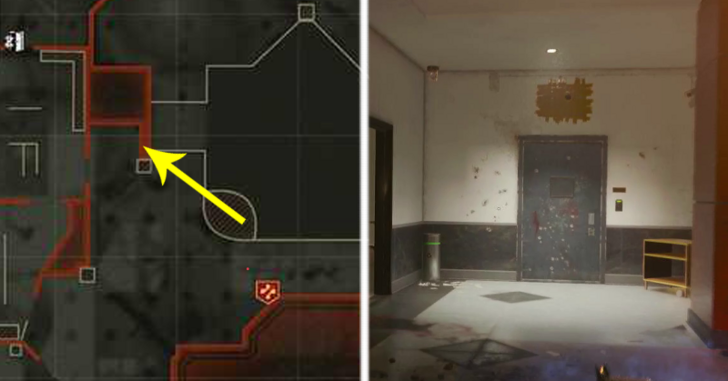
Once you've cleared the crystals from the portal, you can now look to upgrade your Gorgofex. To start, head over to T1 Executive Suites and look for a locked door. Interact with it to speak to Blanchard and trigger the next objectives for upgrading the Gorgofex to C or N.
Get the Gorgofex C Upgrade from Panos
| 1 | 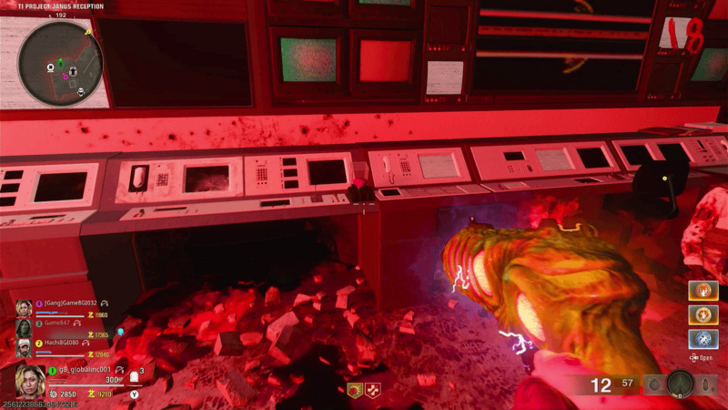 To trigger the Gorgofex C upgrade, drop down to the lobby / Project Janus Reception (spawn area) and press the button near the red teleporter closest to spawn. This will trigger an elevator shutdown carried out by Maintenance Klaus. |
|---|---|
| 2 | 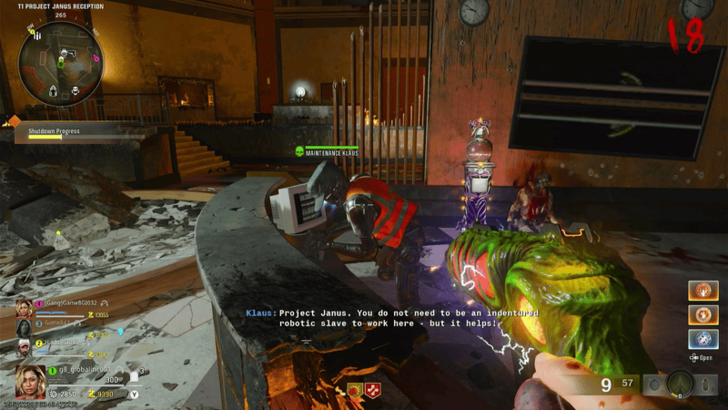 Wait for the elevator to be shut down by Maintenace Klaus, which you can monitor by the progress bar on the left. |
| 3 |  The elevator going up to the T1 Quantum Computing Core will shut down and you can enter the elevator shaft without teleporting up. |
| 4 | 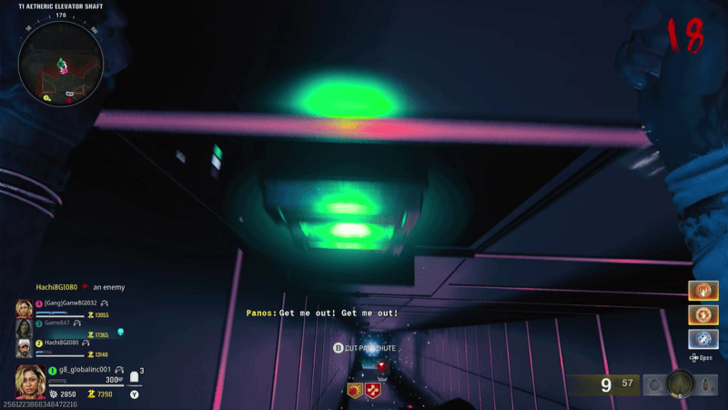 You'll see there are 3 switches along the wall of the elevator shaft. You have to activate those switches by going up the other elevator then parachuting from the top of the shut-down elevator shaft. You have to interact with the switches as you slowly descend using your parachute. |
| 5 | 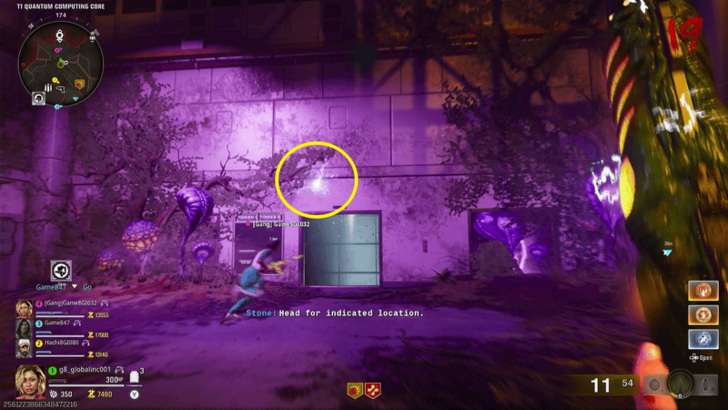 Once you complete this, the elevator will start working again. You and a light blue ball will be transported to the T1 Quantum Computing Core level. Interact with the light blue ball and it will split off into three, moving around the whole area. |
| 6 | 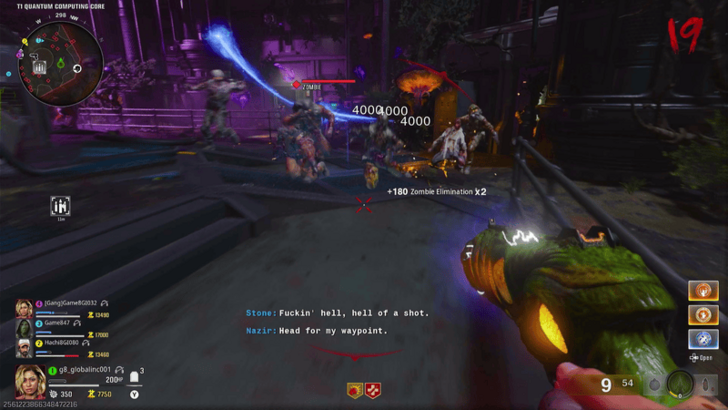 When there are zombies around, the light blue beam will possess certain zombies. Kill these zombies with the Gorgofex. You'll know it's working when light blue energy transfers from them into the center console. |
| 7 | 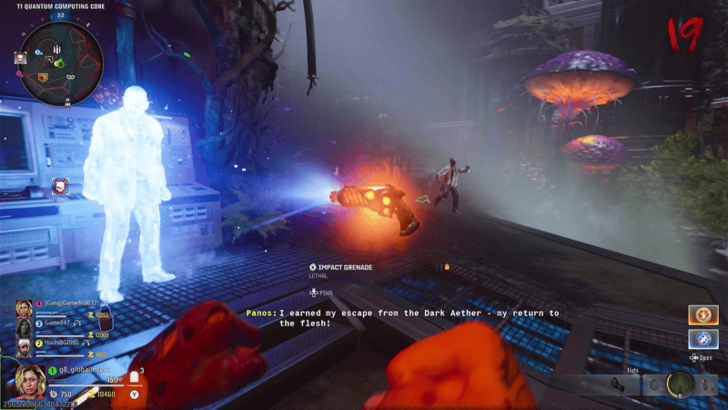 After killing enough zombies, Panos will appear. Interact with him to get the Gorgofex C Upgrade. |
Get the Gorgofex N Upgrade by Helping Blanchard
| 1 | To get the Gorgofex N upgrade, head down to T1 Quantum Computing Core and retrieve the Strauss Counter from the center console in the main room. When you do, it will replace your currently equipped tactical. |
|---|---|
| 2 | Once you have the Strauss Counter, head over to any area in T2 (Tower 2) and pull it out. You'll want to look for an area in T2 where the counter reaches a red reading (9+). Usually, this will be an opening along the walls where zombies spawn from. |
| 3 | At the opening with the high counter reading, use a charged Gorgofex shot to destroy the box that contains the Life Drain Serum key item. If you don't get it, shoot the objects around the room until you get it. |
| 4 | 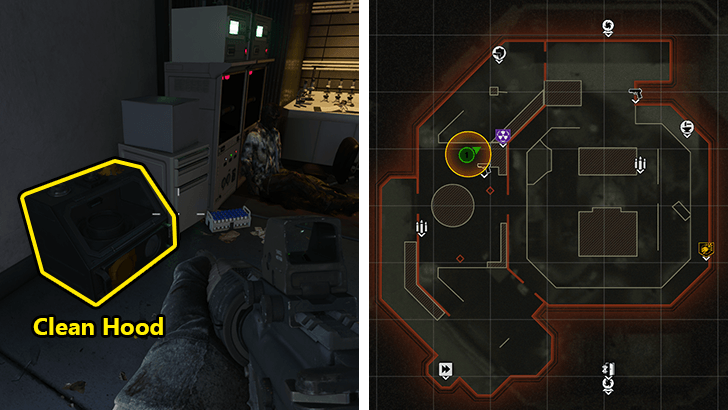 Next, you'll need to collect items to build the Essence Extractor for Blanchard. The first item is the Clean Hood which you get from the T1 Bioweapons Lab in T1 Mutant Research Lab (where you got the Cyst from). |
| 5 | 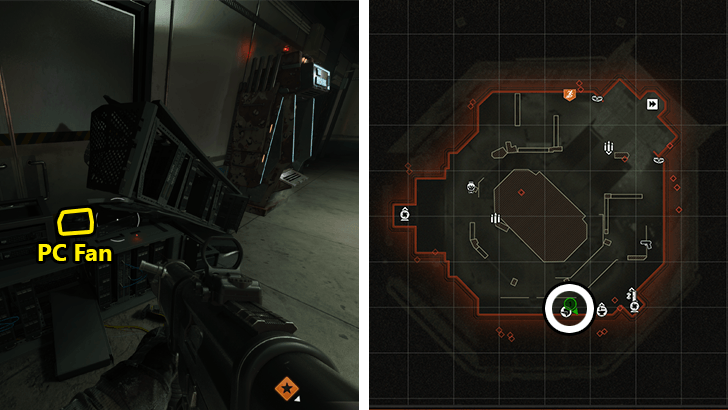 Next, you'll want to get the PC Fan which you can find on the overturned computer stack next to the Arsenal in T2 Dark Entity Container. |
| 6 | 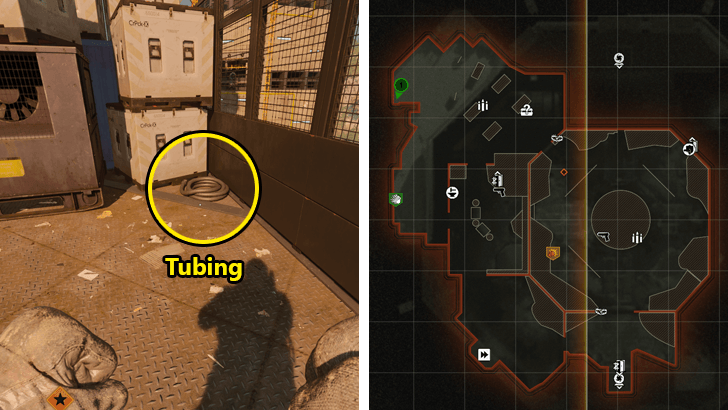 Finally, you'll want to get the Tubing which is found in the outer platforms of T1 Quantum Computing Core. It will be near the area where the Mystery Box and Ammo Crate initially spawn. |
| 7 | With all 4 items collected, head back to Blanchard's door in T1 Executive Suite and assemble the Essence Extractor on the small table next to it. |
| 8 | This will trigger a lockdown. Defend the Ether Extractor from Zombies for 1 minute and 30 seconds. Once it's over, collect Blanchard's Life Essence from the top of the extractor. |
| 9 | Blanchard's Life Essence will slowly drain the HP of the player carrying it. Take it to T1 Bioweapons Lab and place it into the container next to where you got the Cyst. You can drop the life essence canister if your health is too low. Pick it back up again after you regain HP. |
| 10 | Once Blanchard's Life Essence is inside the container, the player with the Gorgofex will need to interact with it to craft the Gorgofex N. |
Collect and Charge the Fungal Head
Now we're reaching the endgame. To continue prepping the boss portal for activation, you'll need to collect and charge the Fungal Head from T1 Quantum Computing Core.
| 1 | 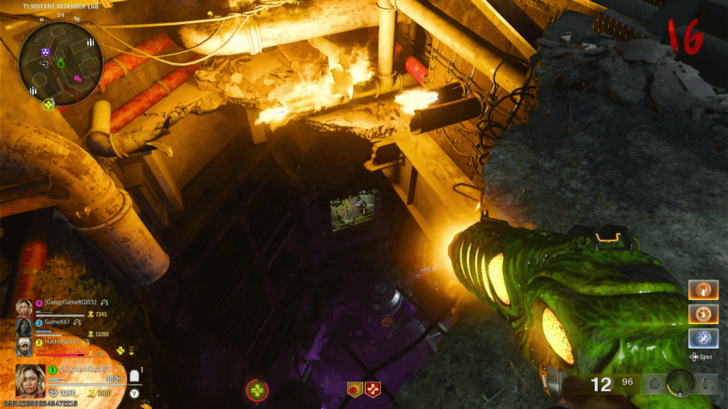 Taking a detour to collect the Fungal Head key item, head to the T1 Mutant Research Lab. Look through the hole in the floor going down to the T1 Quantum Computing Core. Use the Gorgofex's charged shot on the spore on the ledge that you can see. It will drop the Fungal Head. |
|---|---|
| 2 | Next, go around the map and look for active sprinklers. You'll know you're in the right spot if your screen starts getting water droplet effects. Some likely locations for these sprinklers are T1 Project Janus Reception (spawn area) and T2 Android Assembly (near Franken Klaus's original location). |
| 2 | 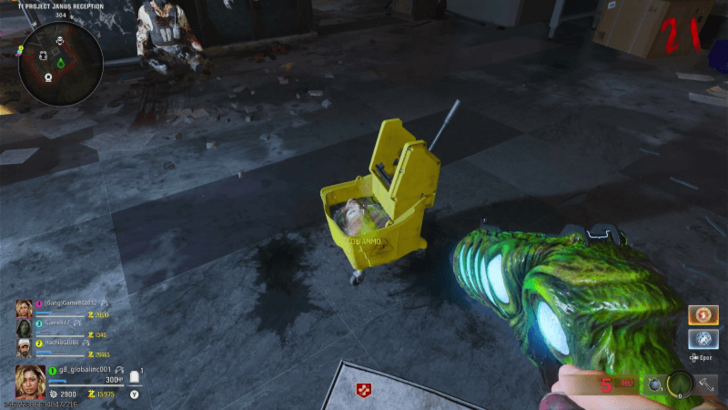 After locating the area with active sprinklers, look for a nearby yellow mop bucket. You'll need to melee it until it's placed directly under the active sprinklers. You'll know you did it correctly if it starts filling up with water. |
| 3 | Once the mop bucket is full, place the Fungal Head inside by interacting with it. After the bit of dialogue, pick up the Fungal Head again and it should now start a soul box challenge (the head being the soulbox). |
| 4 | 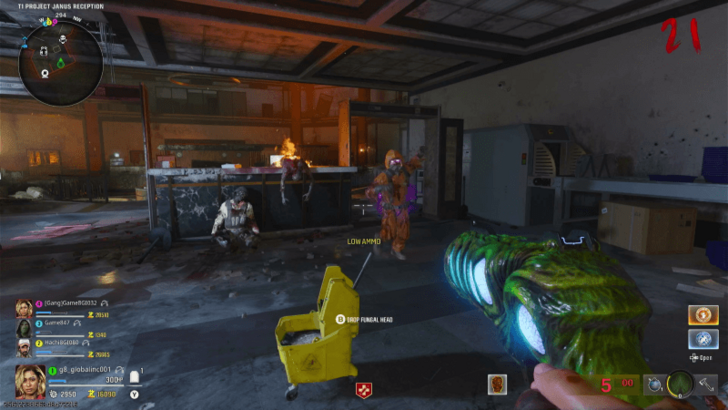 Zombies will turn purple as they come near you holding the head. Killing these zombies harvests their souls for the Fungal Head (notice its icon will change in your inventory). |
| 5 | Once the Fungal Head is fully charged (no more souls going into the head after killing zombies), take this charged Fungal Head back to T2 Teleportation Lab. Interact with the purple portal to place the head and complete your preparations. |
Find and Charge 4 Vacuum-Seal Devices

With the portal partially ready, you'll notice that the Janus Boxes scattered throughout the map will now be unlocked. Collect 4 Vacuum-Seal Devices (one from each of the boxes) and use them to capture floating purple objects scattered around the map.
Since the Vacuum-Seal Devices replace your equipped tactical, simply throw them at the purple objects to "capture" them. Once you have 4 captured objects, head back to T2 Teleportation Lab.
Vacuum-Seal Device Container Locations
Activate the Portal and Choose the Boss
Slot each of the Vacuum-Seal Devices into the receptacle in front of the purple portal. This triggers a lockdown that has you hold out until 3 switches are flipped inside T2 Teleporation Lab. Look for green switches and flip them until the portal fully opens (they activate one after the other, so you'll have to wait and hold out until they do).
Upon arriving at the boss room, interact with the Sentinel Artifact to choose the boss you want to fight during the final showdown.
Reach the Boss Room
Now, all that's left is to activate the central lift to reach the top of the building where the boss is. Do note that in T3 Dark Aether Elements Vault 1 there will be Arsenals allowing you to get upgrades if you haven't done so already.
| 1 | After the elevator takes you to T3 Dark Aether Elements Vault 1, you'll need to fill up 3 canisters in the area. Kill zombies next to each one to fill it up. |
|---|---|
| 2 | Once all of the canisters are charged, you'll get a voiceline from S.A.M or Richtofen. Return to the elevator and, if all the monoliths on the it are glowing purple, you'll be taken up to T3 Dark Aether Elements Vault 2. |
| 3 | Once you reach T3 Dark Aether Elements Vault 2, you'll need to check out the purple lights lining the ceiling. Some of these lights will have dark aether crystals blocking the current of energy from flowing. Destroy all the crystal blockages to progress. |
| 4 | Once all crystals are destroyed, return to the elevator and it should take you up to the boss area. |
Defeat S.A.M or Uber Richtofen
Finally, defeat the final boss you chose when you first reached Tower 3. Defeat either S.A.M. or Uber Richtofen to complete the Reckoning Easter Egg.
Black Ops 6 Related Guides

Zombies Guide: Everything You Need to Know
All Zombies Mode Guides
Zombies Easter Eggs
Comment
Author

Reckoning Easter Egg Walkthrough and Steps
Rankings
- We could not find the message board you were looking for.
Gaming News


Popular Games

Genshin Impact Walkthrough & Guides Wiki
Umamusume: Pretty Derby Walkthrough & Guides Wiki
Pokemon Pokopia Walkthrough & Guides Wiki
Honkai: Star Rail Walkthrough & Guides Wiki
Monster Hunter Stories 3: Twisted Reflection Walkthrough & Guides Wiki
Arknights: Endfield Walkthrough & Guides Wiki
Wuthering Waves Walkthrough & Guides Wiki
Zenless Zone Zero Walkthrough & Guides Wiki
Pokemon TCG Pocket (PTCGP) Strategies & Guides Wiki
Monster Hunter Wilds Walkthrough & Guides Wiki


Recommended Games
Fire Emblem Heroes (FEH) Walkthrough & Guides Wiki
Diablo 4: Vessel of Hatred Walkthrough & Guides Wiki
Cyberpunk 2077: Ultimate Edition Walkthrough & Guides Wiki
Yu-Gi-Oh! Master Duel Walkthrough & Guides Wiki
Super Smash Bros. Ultimate Walkthrough & Guides Wiki
Pokemon Brilliant Diamond and Shining Pearl (BDSP) Walkthrough & Guides Wiki
Elden Ring Shadow of the Erdtree Walkthrough & Guides Wiki
Monster Hunter World Walkthrough & Guides Wiki
The Legend of Zelda: Tears of the Kingdom Walkthrough & Guides Wiki
Persona 3 Reload Walkthrough & Guides Wiki


All rights reserved
© 2024 Activision Publishing, Inc. ACTIVISION, CALL OF DUTY, CALL OF DUTY LEAGUE, MODERN WARFARE, CALL OF DUTY BLACK OPS, CALL OF DUTY WARZONE, and CALL OF DUTY VANGUARD are trademarks of Activision Publishing, Inc. All other trademarks and trade names are the property of their respective owners.
The copyrights of videos of games used in our content and other intellectual property rights belong to the provider of the game.
The contents we provide on this site were created personally by members of the Game8 editorial department.
We refuse the right to reuse or repost content taken without our permission such as data or images to other sites.