Nathan Boss Guide

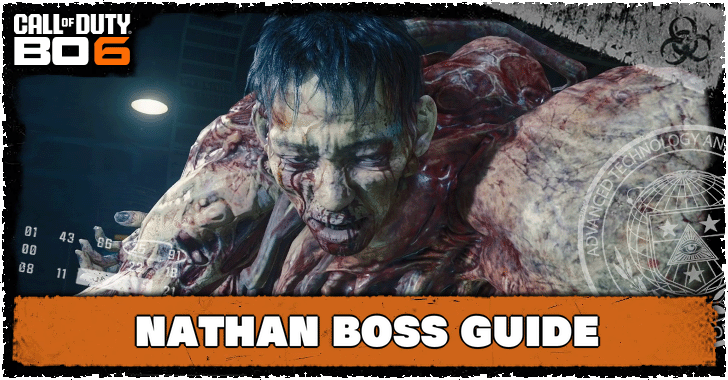
Nathan is a boss in the Terminus map of Zombies mode in Call of Duty: Black Ops 6 (BO6). Check here for tips on how to beat Nathan!
List of Contents
How to Beat Nathan
| How to Beat Nathan |
|---|
|
|
Bring Cymbal Monkeys or Decoy Grenades
Nathan's health regenerates over time so it's extremely crucial that you and your team focus on damaging him and ignoring the horde as much as possible. You can lure zombies away from Nathan by tossing Cymbal Monkeys or Decoy Grenades to an area far away from him.
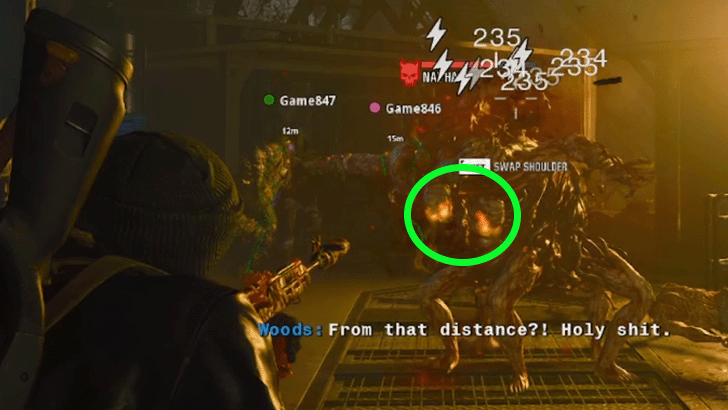
Aim for the Yellow Glowing Spots

To beat Nathan, aim and shoot at the yellow glowing spots on his body as these are his weakest points. You can effectively deal more damage to him by equipping Ammo Mods such as the Dead Wire, as well as drinking a Deadshot Daiquiri perk to boost critical damage.
Transform Into a Mangler and Use Melee
Transform into a Mangler using a Mutant Injection and then melee Nathan to inflict an enormous amount of damage. On average, you'll be able to deal about 5,000 damage per melee attack.
As a Mangler, you'll also be able to tank his attacks since you'll be invulnerable while in this form.
Equip a High Rarity Weapon with Level 3 Pack-a-Punch
Upgrade your weapon to Red Rarity (or at least Purple) and then Pack-a-Punch it to Level 3 to greatly increase the damage you can deal to Nathan.
We highly recommend that you upgrade the ASG-89 since this fully automatic shotgun has a good damage output by default, and upgrading its stats even further can speed up the boss fight with Nathan.
Terminus Easter Egg Walkthrough
Black Ops 6 (BO6) Related Guides

Zombies Guide: Everything You Need to Know
All Zombies Mode Guides
Zombies Challenges and Enemies
| BO6 Zombies Enemies | |
|---|---|
| Special and Elite Zombies | Amalgams |
| Abominations | Manglers |
| Parasites | Armored Zombies |
| Doppelghasts | Shock Mimics |
| Elder Disciples | - |
| Zombies Boss Guides | |
| Nathan | Patient 13 |
| The Guardian | Sentinel Artifact |
| Z-Rex | - |
| Zombies Challenges Guides | |
| All Zombies Medals | Immolate Medals |
| Necromancer Medals | Voltaic Medals |
| Slow Down Medals | Slaughter Medals |
| Alchemist Medals | SAM Trial Mastery Target |
| Electric Damage Kills | Fire Damage Kills |
| Frost Damage Kills | Toxic Damage Kills |
| Shadow Damage Kills | - |
Comment
Author
improvement survey
03/2026
improving Game8's site?

Your answers will help us to improve our website.
Note: Please be sure not to enter any kind of personal information into your response.

We hope you continue to make use of Game8.
Rankings
- We could not find the message board you were looking for.
Gaming News
Popular Games

Genshin Impact Walkthrough & Guides Wiki

Honkai: Star Rail Walkthrough & Guides Wiki

Umamusume: Pretty Derby Walkthrough & Guides Wiki

Pokemon Pokopia Walkthrough & Guides Wiki

Resident Evil Requiem (RE9) Walkthrough & Guides Wiki

Monster Hunter Wilds Walkthrough & Guides Wiki

Wuthering Waves Walkthrough & Guides Wiki

Arknights: Endfield Walkthrough & Guides Wiki

Pokemon FireRed and LeafGreen (FRLG) Walkthrough & Guides Wiki

Pokemon TCG Pocket (PTCGP) Strategies & Guides Wiki
Recommended Games

Diablo 4: Vessel of Hatred Walkthrough & Guides Wiki

Cyberpunk 2077: Ultimate Edition Walkthrough & Guides Wiki

Fire Emblem Heroes (FEH) Walkthrough & Guides Wiki

Yu-Gi-Oh! Master Duel Walkthrough & Guides Wiki

Super Smash Bros. Ultimate Walkthrough & Guides Wiki

Pokemon Brilliant Diamond and Shining Pearl (BDSP) Walkthrough & Guides Wiki

Elden Ring Shadow of the Erdtree Walkthrough & Guides Wiki

Monster Hunter World Walkthrough & Guides Wiki

The Legend of Zelda: Tears of the Kingdom Walkthrough & Guides Wiki

Persona 3 Reload Walkthrough & Guides Wiki
All rights reserved
© 2024 Activision Publishing, Inc. ACTIVISION, CALL OF DUTY, CALL OF DUTY LEAGUE, MODERN WARFARE, CALL OF DUTY BLACK OPS, CALL OF DUTY WARZONE, and CALL OF DUTY VANGUARD are trademarks of Activision Publishing, Inc. All other trademarks and trade names are the property of their respective owners.
The copyrights of videos of games used in our content and other intellectual property rights belong to the provider of the game.
The contents we provide on this site were created personally by members of the Game8 editorial department.
We refuse the right to reuse or repost content taken without our permission such as data or images to other sites.


![Monster Hunter Stories 3 Review [First Impressions] | Simply Rejuvenating](https://img.game8.co/4438641/2a31b7702bd70e78ec8efd24661dacda.jpeg/thumb)


