This survey will take about 1 minute.
Your answers will help us to improve our website.
Call of Duty Black Ops 6 (BO6)
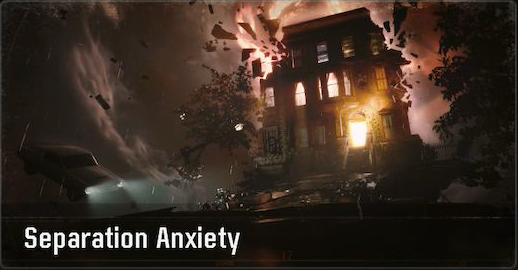
Separation Anxiety and Checkmate Mission Walkthrough
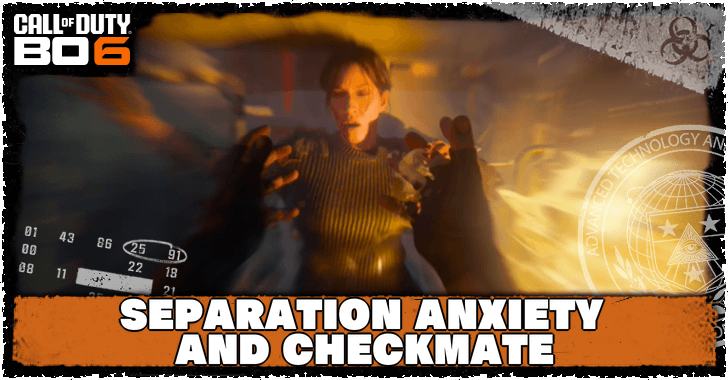
Separation Anxiety and Checkmate are the last two campaign missions in Call of Duty: Black Ops 6 (BO6). Read on to see a complete walkthrough of Separation Anxiety and Checkmate including info on their Dark Ops challenge, completion rewards, and achievements.
Separation Anxiety and Checkmate Walkthrough
| Separation Anxiety and Checkmate will have multiple missions that happen at the same time. This guide will take you through all the missions in order, as listed below. | |
| All Final Missions | |
|
① Separation Anxiety ② Checkmate ③ Separation Anxiety: Lies ④ Checkmate: Detonation ⑤ Separation Anxiety: Truth ⑥ Checkmate: Black Sea |
|
Separation Anxiety
| 1 | Talk to the Child (Jane) |
|---|---|
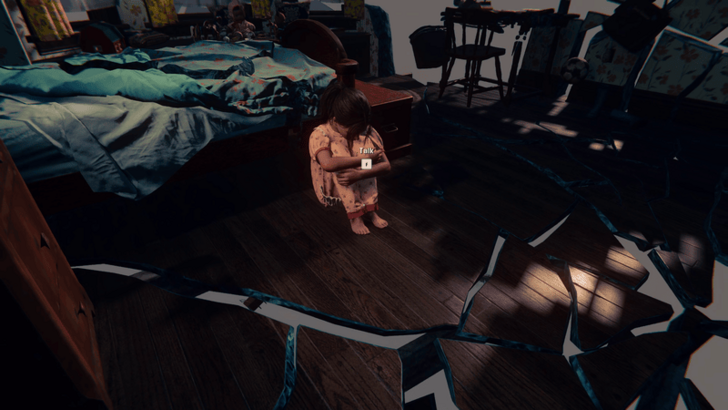 A whole scene with Adler injecting Jane with the Separation drug will play. Afterward, the setting will shift, and you will be playing as Jane inside her own mind. Head inside the run-down house and talk to the child version of Jane by the bed. |
|
| 2 | Open the Door and Hide Under the Bed |
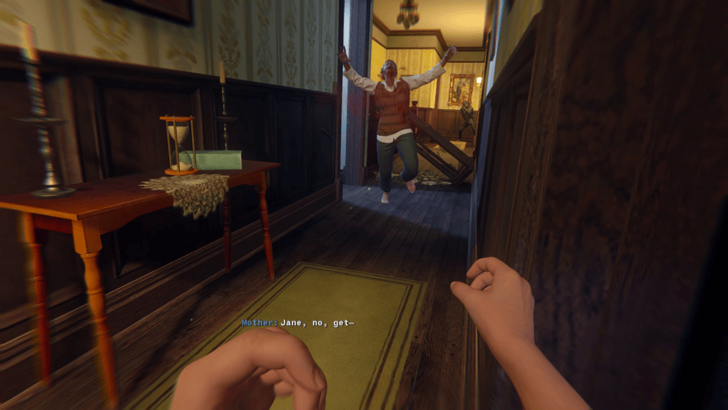
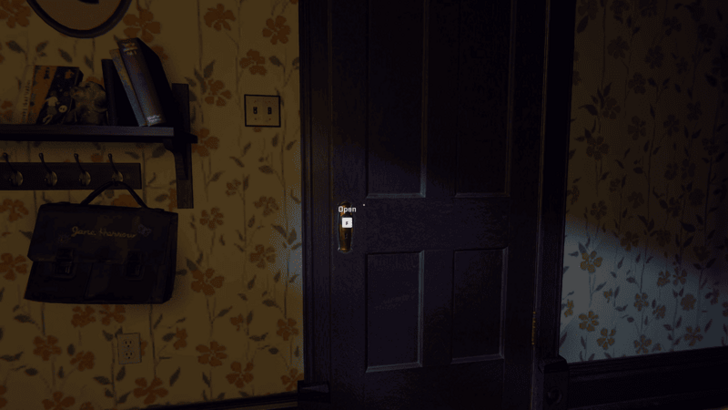 A flashback will ensue, and the setting will change again to Jane's room, but this time, it is not broken-down. Open the door, and a short cutscene will play. Jane's mom will tell you to get under the bed. Listen to her and make your way under the bed. |
|
| 3 | Inspect Jane's Mirror |
 The scene will change again, and you will be transported back to the broken-down room. Inspect Jane's mirror, and a cutscene will play where the mirror gets shattered by Jane's alter-ego. You will then be taken to a foggy version of Vorkuta. |
|
| 4 | Read Jane's Scavenger Hunt |
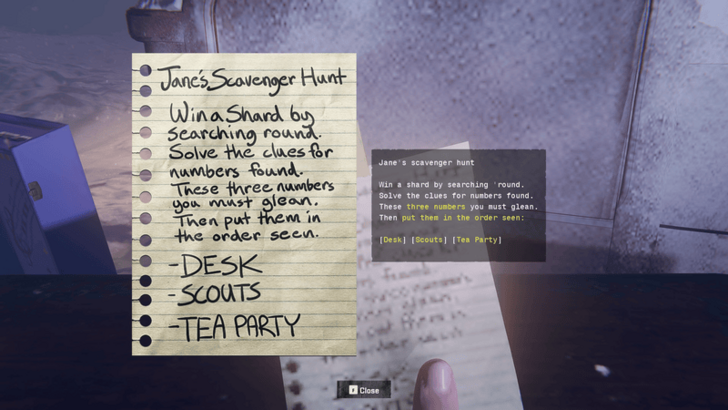 A short cutscene will play with Jane as a child, witnessing the first mirror shard get locked in a box. You will then proceed to pick up a note on a gravestone with instructions on how the numbers should be ordered. Tip: If you're in it for completion and not the story, you can safely skip steps 5~7 by inputting 9 1 8 to open Jane's locked box. Jump to step 9 if you decide to use this method. |
|
| 5 | Get the Number for the Desk |
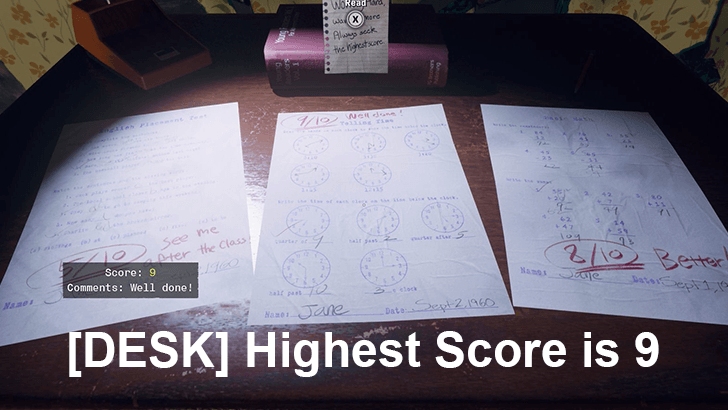 Follow the quest markers to find the entrances to each clue area. For the Desk clue, the answer will be 9 since that is the highest score among the three test papers you find. |
|
| 6 | Get the Number for the Tea Party |
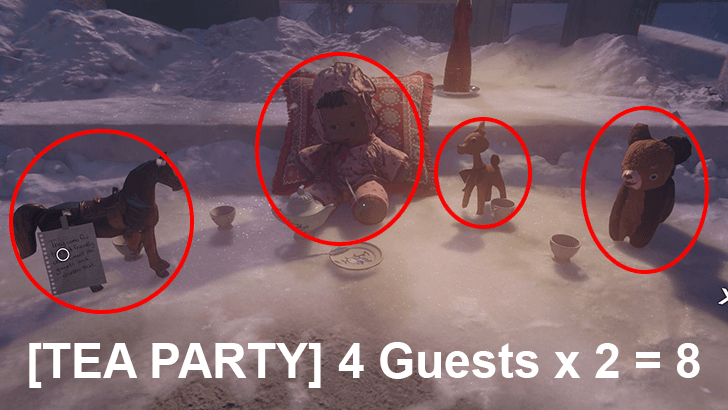 For the Tea Party clue, the answer will be 8. There are 4 guests in Jane's imaginary tea party. Double that (according to the Scavenger Hunt rules) to get 8. |
|
| 7 | Get the Number for the Scouts |
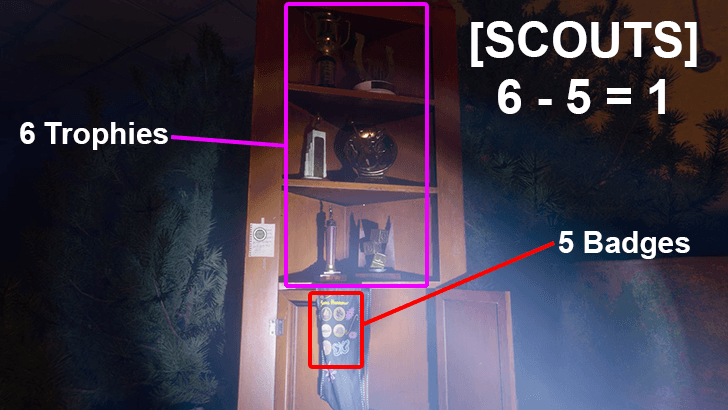 Finally, for the Scouts clue, the answer will be 1. Subtract the number of badges (5) from the number of trophies (6) to get 1. |
|
| 8 | Input the Code 9 1 8 |
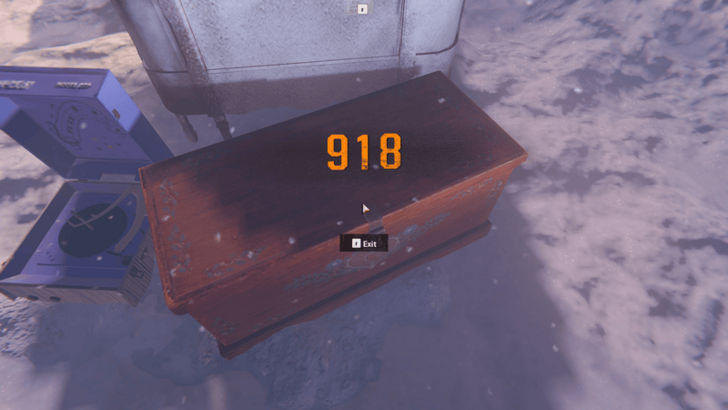 With all 3 numbers secure, head back to the locked box and arrange your obtained numbers according to the rules in the Scavenger Hunt paper: Desk, Scouts, Tea Party. Input 9 1 8 to solve Jane's puzzle. The box will open, giving you the first of three mirror shards and triggering a new cutscene. |
|
| 9 | Open the Door and Witness the Scene |
 Get out from under the bed and open the door. You will witness Jane's mom getting shot and Jane's dad putting her inside the wardrobe. Another cutscene will play in which Jane is watching Pantheon soldiers moving the bio-weapon. The scene will cut to black, and you will be prompted to open your flashlight. |
|
| 10 | Attempt to Obtain the Shard |
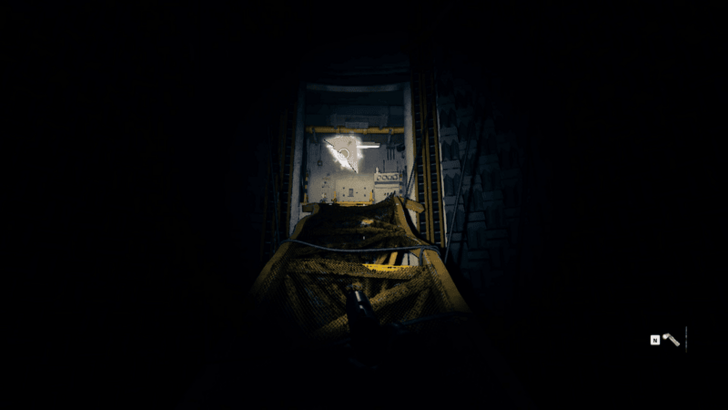 Open the door in front of you and walk to the rickety-looking bridge where the shard is. The bridge will collapse. From there, press the red button for the lift in the middle of the room. Jane will realize that there is no power. |
|
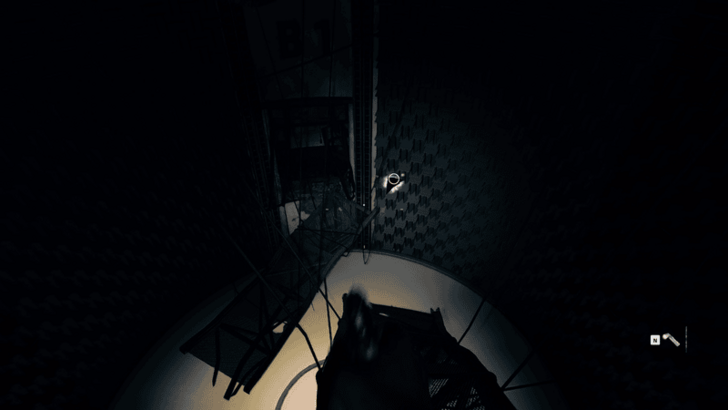
| 11 | Power up the Generators |
 Power up the four generators by following the markers for each. Do note that as you power each generator, zombie Janes will spawn and start chasing you. Keep your head on a swivel and kill them as they spawn to avoid getting mobbed. |
|
| 12 | Take the Lift Up and Collect the Shard |
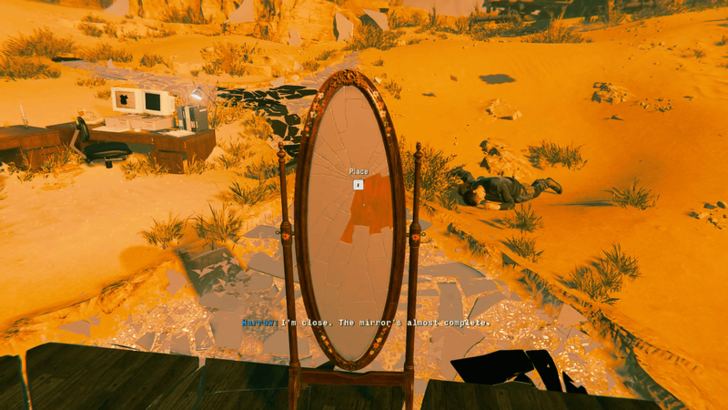
 Press the red button in the middle of the room to bring the lift up and climb the ladder to collect the shard. You will be taken back again to the run-down house with Jane's mirror. Place the second shard in the mirror. |
|
| 13 | Transition into Checkmate |
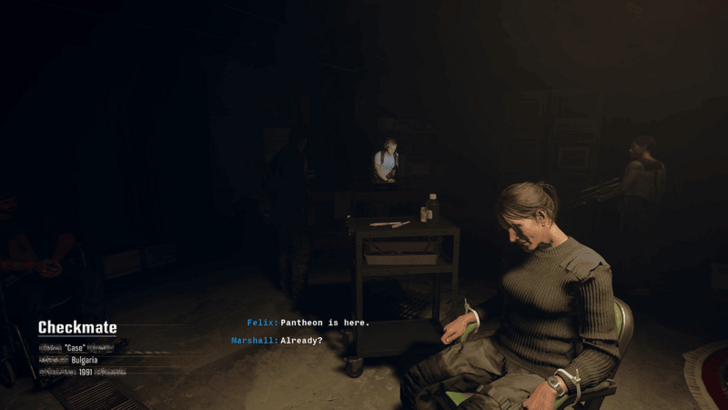 After placing the second shard, a cutscene will play. Jane will witness her father getting killed. From there, the setting will snap back to reality with Case's PoV. You will now be in the Checkmate mission. |
Checkmate
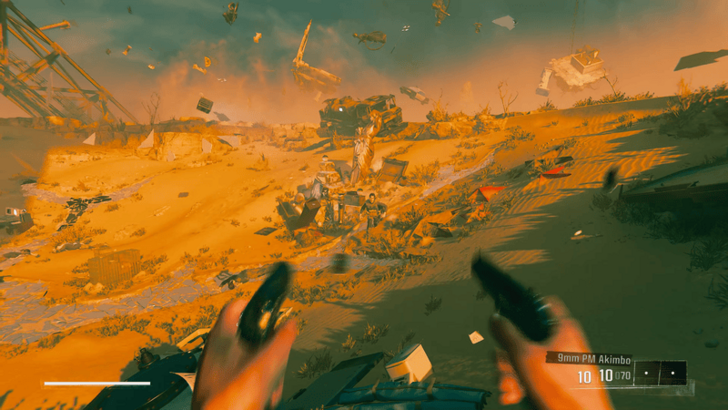
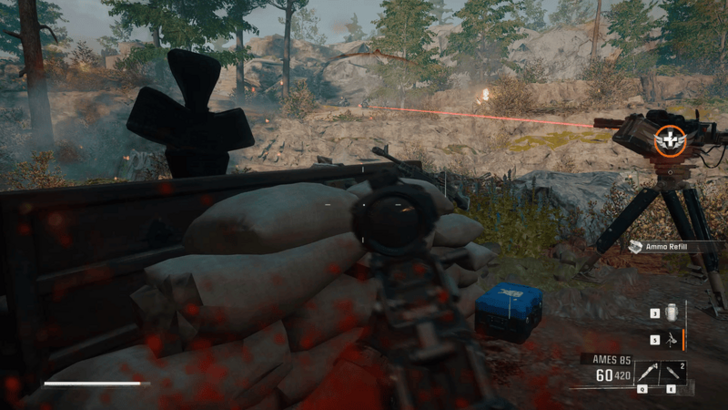
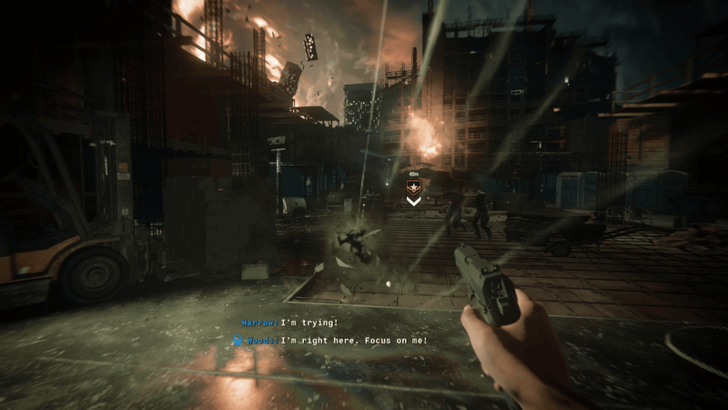
| 1 | Take out the Waves of Pantheon Soldiers |
|---|---|
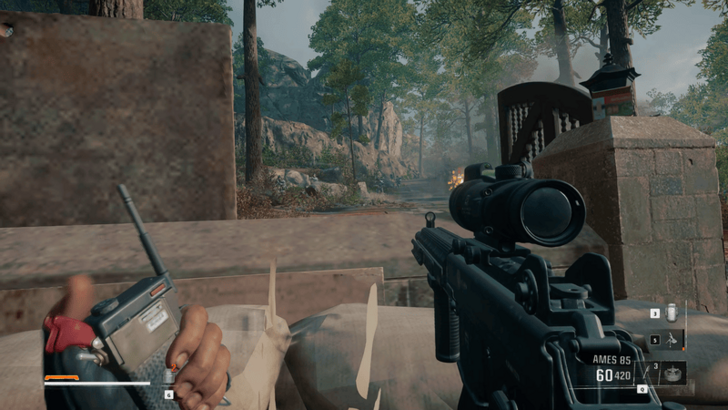 Gear up and make sure you have all the possible equipment you can stack up to use in the fight. There will be a lot of Pantheon Soldiers and Pantheon Elites attacking the team relentlessly. Be sure to utilize the initial C4s attached to the rocks to deal with the first wave more easily. |
|
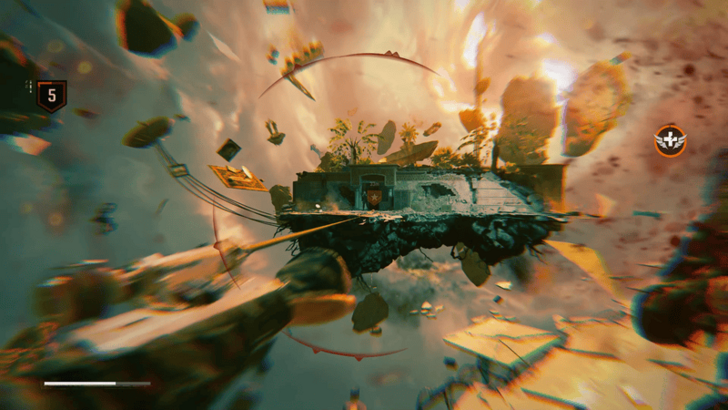
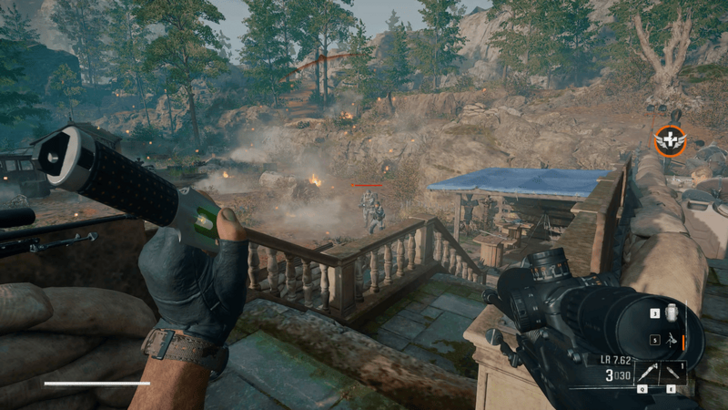
| 2 | Destroy the APC |
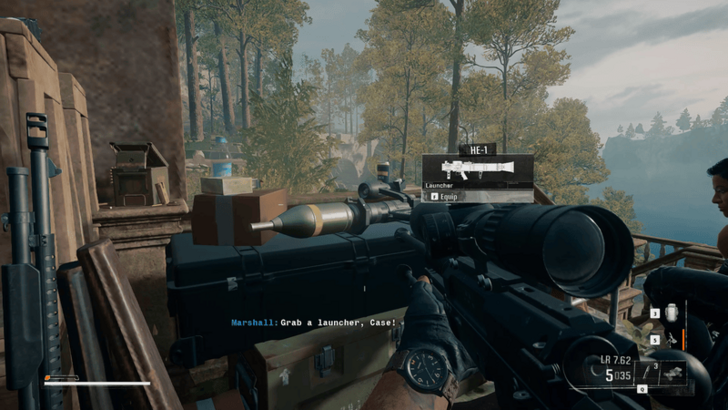 Grab the Rocket Launcher (HE-1) on the patio right beside where Sev is and use it to take out the APC. After destroying it, Woods will say that Jane is finally coming to and the mission will transition back to Separation Anxiety. |
Separation Anxiety: Lies
| 1 | Attempt to Enter Jane's Office |
|---|---|
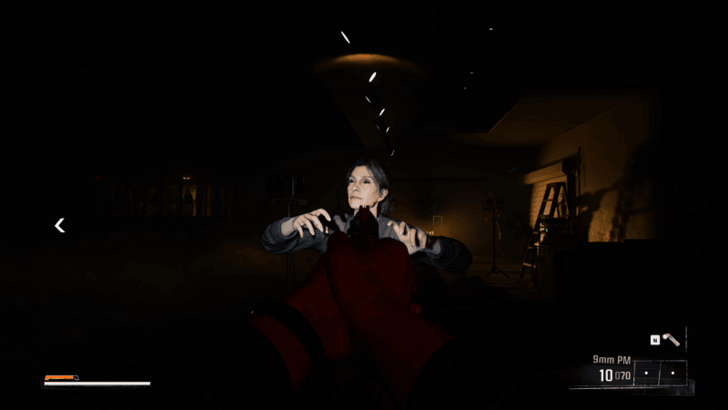
 You will be back in the broken-down room with the mirror. Open the door, and the scene will transition to the CIA area. Attempt to enter Jane's office to progress. Jane's alter-ego will grab her and kick her down. |
|
| 2 | Get to Jane's Office Within 30 Seconds |
 Take the path to the left, where the stone hand is, and enter the building with a hole and red barrels in it. Jump over the cupboard on the right, then crouch under the first set of barrels. For the second set of barrels, you are going to have to prone to get through. Make your way through the white pipes and ignore the gunfire of Jane's alter-ego. Finally, grab the Grappling Hook, which should be in a box after you cross the pipes. Then, grapple your way to the ledges until you reach Jane's Office. |
|
| 3 | Take the Floppy Disk |
 After reaching Jane's office, there will be a bit of dialogue before a floppy disk is slid under her office door. Take the floppy disk. |
|
| 4 | Find Out What's on the Disk |
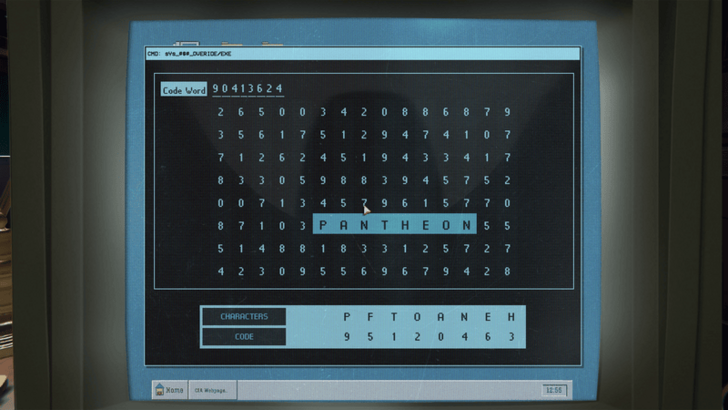 Go to Jane's computer and insert the disk. You will have to solve a codeword puzzle to access the files on the disk and progress the mission. The word is: Pantheon. After this, you will go back to the scene with Jane as a child. |
|
| 5 | Check on Jane's Dad and Follow Her Alter-Ego |
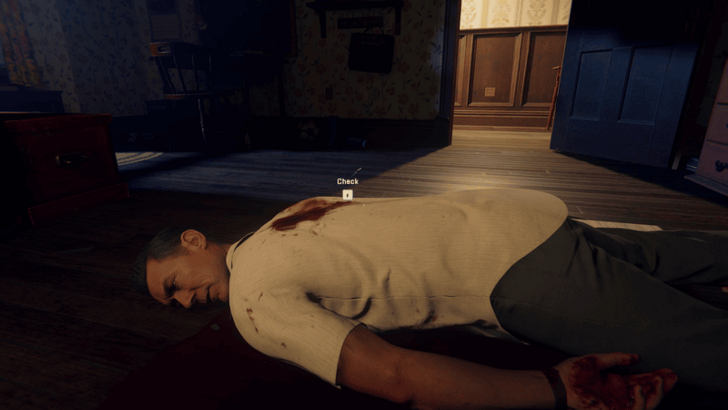
After the cutscene, check the corpse of Jane's dad. You will then transition back to the office, where you will have to follow Jane's alter-ego to the elevator as she talks. Another cutscene will play where Jane gets confused about whether or not it was Adler who killed her parents. |
|
| 6 | Finish the Quick Time Event |
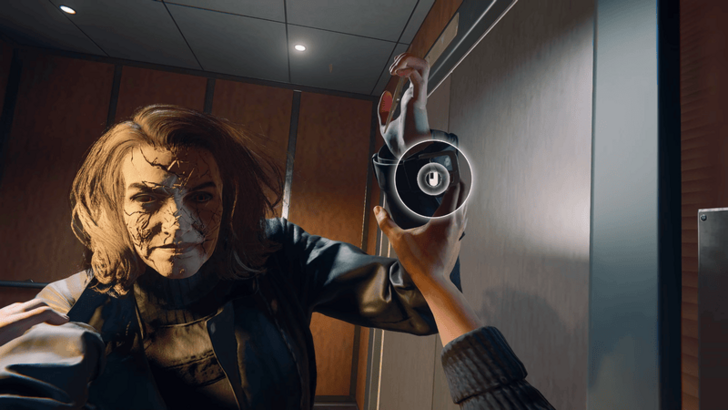 Jane's alter-ego will try to stab you with the mirror shard in the elevator. There will be a quick time event to prevent her from doing so. Press the corresponding button in time. |
|
| 7 | Kill the Jane Clones/Zombies |
 You will be transported to yet another area. Here, you will be chased and attacked by Zombie/Clone versions of Jane. Take them all out. Be careful with the final wave, as they will be strapped with explosives that deal a lot of damage. You will also only have pistols. |
|
| 8 | Place the Final Shard in the Mirror |
 After killing all the Jane Zombies, you will be able to obtain the final shard of the mirror. Place it, and a cutscene will play. From here, the mission will transition back to Checkmate and Case's PoV. |
Checkmate: Detonation
| 1 | Deploy the Sentry Turrets |
|---|---|
 Keep taking out the Pantheon Soldiers until you get prompted to deploy the Sentry Turrets. Push forward with Adler towards the shed in front of you, and place the Sentry Turrets that you find there. Make sure to take out and deploy all three Sentry Turrets in the shed to progress. |
|
| 2 | Take Out the Mini-gun Elites |
 Continue to fight your way through the waves of Pantheon Soldiers. They will eventually throw smokes, and two Mini-gun Elites will emerge from the smokes. Take them out to progress. |
|
| 3 | Kill the Pantheon Soldiers inside the House |
 There will be a handful of Pantheon Soldiers, including Gas-throwing Elites that you will have to take care of inside the house. |
|
| 4 | Destroy the Bridge |
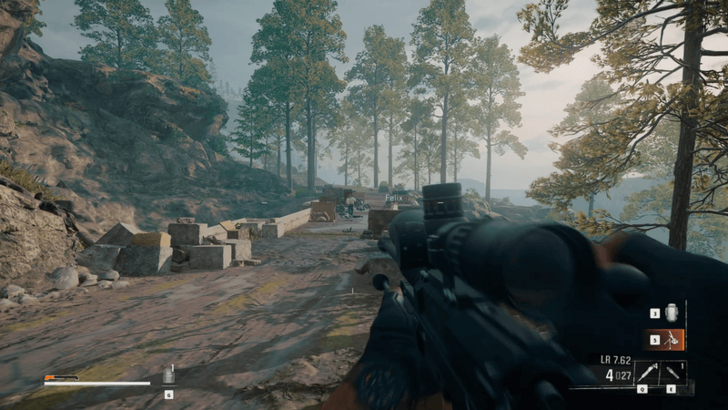 Make your way outside and push towards the bridge while taking out more of the hostiles. Assist Felix as he plants the C4s on the bridge by taking out the Pantheon Soldiers swarming the area. |
|
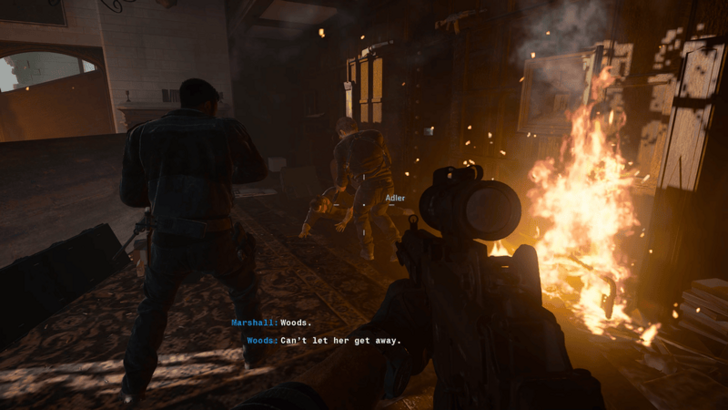
| 5 | Drag Felix Out of the Bridge Area |
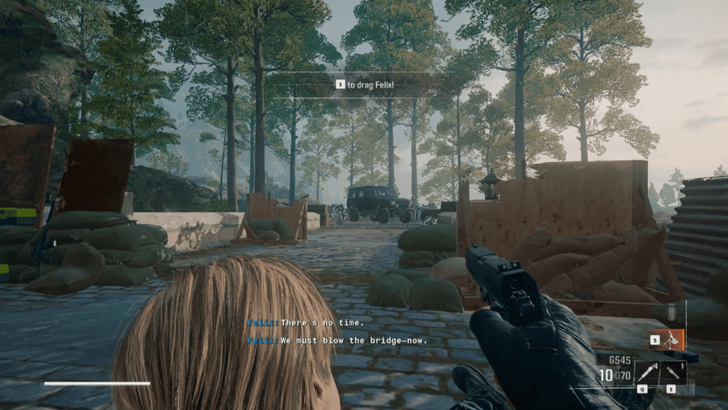 After setting up the C4s, Felix will get shot and grounded. Drag him out of there. After this sequence, the mission will transition back to Separation Anxiety and Jane's PoV. |
Separation Anxiety: Truth
| 1 | Look Into the Mirror |
|---|---|
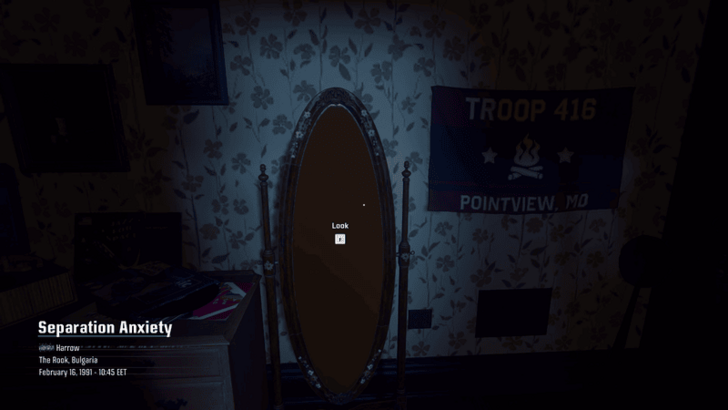 You will find yourself back in Jane's room with the mirror intact. Interact with the mirror. |
|
| 2 | Take Out Jane's Clones and Alter-Ego |
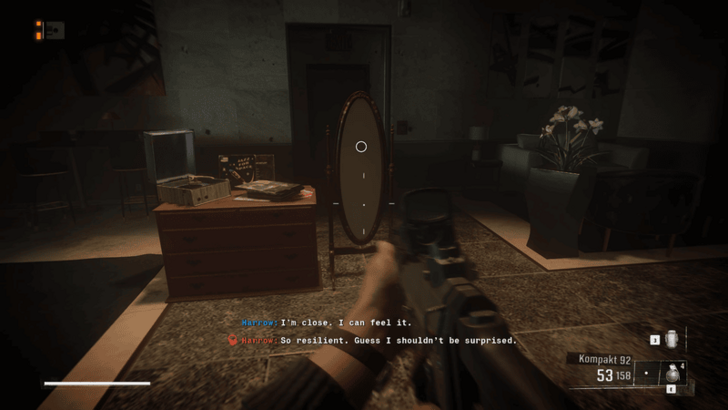 After looking into the mirror, you will be transported into some sort of compound. There will be multiple Jane clones and her alter-ego here. Take them all out and interact with the mirror once more. |
|
| 3 | Get to Frank's Helicopter |
 The scene abruptly shifts to Jane hanging by a rope on a helicopter. Take out the Jane clones chasing after you. Eventually, your rope will get snagged, and there will be a quick time event. Press the corresponding button in time to cut the rope. From there, make your way to Frank's Helicopter. After this sequence, the mission will transition back to Checkmate. |
Checkmate: Black Sea
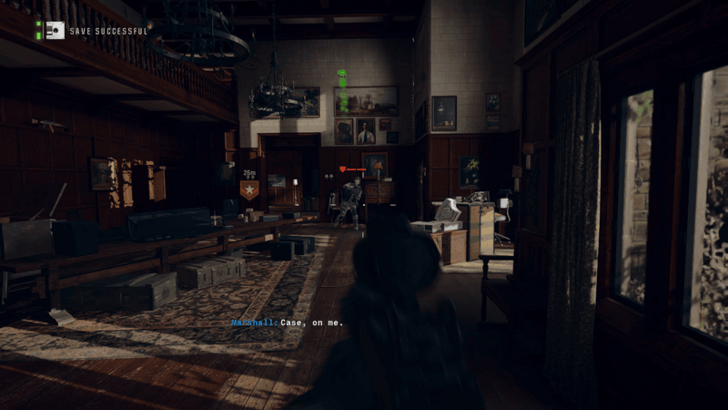
| 1 | Rescue Woods |
|---|---|
 Fight through the Pantheon Soldiers and Pantheon Elites to return to the house and rescue Woods. |
|
| 2 | Go After Jane |
 After securing Woods, Marshall will ask you to help him move a shelf. He will spot Jane and take a shot, and a Pantheon Soldier will shoot an RPG towards the house, grounding Marshall. Chase after Jane's Helicopter. |
|
| 3 | Take Out the Soldiers and Confront Jane |
 As you try to board Jane's helicopter, there will be three quick time events. Make sure to press the button in time for all of them. From there, the pilot will get shot accidentally, and the helicopter will crash. There will be one final quick time event to pick up the cradle. Afterward, listen to the voice telling you to keep attacking Jane until you eventually lose control of Case. This marks the end of the Checkmate mission. |
Separation Anxiety and Checkmate Rewards
Completion Rewards
| Mission | Completion Reward |
|---|---|
| Checkmate: Black Sea | 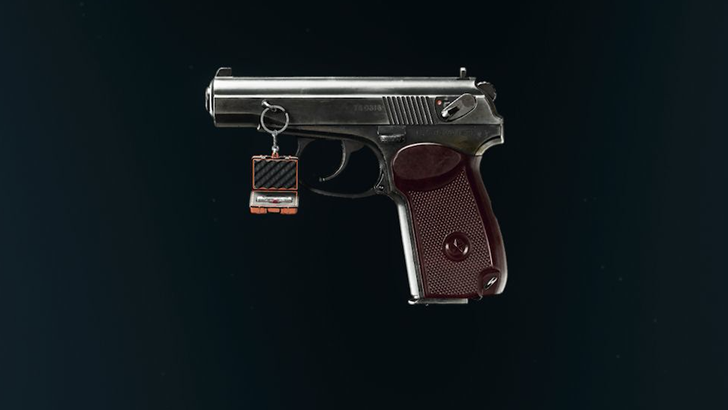 |
Dark Ops Challenge Reward
| Challenge | How to Complete |
|---|---|
 Kineticist |
Complete the time trial in a single run in Separation Anxiety. |
Separation Anxiety: Lies will have a secret Dark Ops Mastery Challenge during the time trial sequence of the mission. Reach Jane's office within 30 seconds on the first try to get the secret Calling Card, Kineticist.
Note: Resetting to the last checkpoint will not work. If you fail, the only way to re-attempt this hidden challenge is to restart the entire mission.
Separation Anxiety and Checkmate Achievements
Mission Achievements
| Achievement | How to Complete |
|---|---|
| Capitol Punishment | Complete Separation Anxiety in Campaign on any difficulty. |
| Buried at Sea | Complete Checkmate in Campaign on any difficulty. |
| David vs Goliath | In Checkmate, destroy the APC using an RC-XD. |
Separation Anxiety and Checkmate Mission Info
Separation Anxiety Mission Details
| Separation Anxiety | |
|---|---|
 |
|
| Mission Overview | I never thought it would come to this with Jane. Adler's plan may be risky, but we've got nothing to lose at this point. |
| Location | The Rook, Bulgaria |
| Date & Time | February, 16, 1991 - 10:05 EET |
| Playable Character | Jane Harrow, William "Case" Calderon |
Checkmate Mission Details
| Checkmate | |
|---|---|
 |
|
| Mission Overview | Pantheon was able to track us all the way to the Rook. Thought we had more time, but whatever. Gonna leave it all on the field. |
| Location | The Rook, Bulgaria |
| Date & Time | February, 16, 1991 - 10:20 EET |
| Playable Character | William "Case" Calderon |
Separation Anxiety and Checkmate Previous and Next Mission
| ◄ Previous Mission | Next Mission ▶ |
|---|---|
| The Rook: Interrogation | - |
Black Ops 6 (BO6) Related Guides

Campaign Missions List and Walkthrough
All Campaign Guides
Comment
1  Anonymous over 1 year
You can start at separation anxiety: Lies. You don’t have to start from the beginning
Author

Separation Anxiety and Checkmate Mission Walkthrough
Please participate in our site
improvement survey
03/2026
improvement survey
03/2026
Would you assist in
improving Game8's site?
improving Game8's site?

×
We are listening to our users' valuable opinions and discussing how to act on them.
The information collected through this survey will be used for the purpose of improving our services. In addition, the information will only be disclosed a part of a statistic in a format that will not allow identification of personal information.
Begin Survey
Not Now
×
Please rate each item regarding Game8.co's Advertisements.
Amount of Ads
Very Dissatisfied
Somewhat Dissatisfied
Fine
Somewhat Satisfied
Highly Satisfied
Placement of Ads
Timing of Ad Display
Ad Loading Speed
Safeness of Ads
Content of Ads
×
Please rate each item regarding Game8.co's Quality of Articles.
Amount of information
Very Dissatisfied
Somewhat Dissatisfied
Fine
Somewhat Satisfied
Highly Satisfied
Frequency of updates
Speed of new information
Accuracy of articles
Understandibility of articles
Readability of sentences
×
Please rate each item regarding Game8.co's Usability of the Site.
Ease of finding information
Very Dissatisfied
Somewhat Dissatisfied
Fine
Somewhat Satisfied
Highly Satisfied
Loading Speed
Use of Color
Font Size
Visibility of Images
Easy to Understand Layout
×
Please rate each item regarding Game8.co's Message Boards, Comments.
Ease of Writing
Very Dissatisfied
Somewhat Dissatisfied
Fine
Somewhat Satisfied
Highly Satisfied
Readability
Ease in Finding Information
Comment Quality
Comment Quantity
Admin Response
×
Please rate each item regarding Game8.co's Site's new design.
Please rate our site's new design
Very Dissatisfied
Somewhat Dissatisfied
Fine
Somewhat Satisfied
Highly Satisfied
Do you think that the website's design change makes the site easier to use?
Has the new design made it easier for you to find information on the site?
Has the new design improved the overall visual appeal of the site?
How would you rate your overall satisfaction with the new design of the site?
×
How likely are you to recommend Game8 to someone you know?
Very Unlikely
0
1
2
3
4
5
6
7
8
9
10
Very Likely
If you have other opinions regarding potential improvement to the website, please share them with us. We would appreciate your honest opinion.
Note: This is a free response section, so you can proceed without entering anything.
Note: Please be sure not to enter any kind of personal information into your response.
Note: Please be sure not to enter any kind of personal information into your response.
×
Thank You
×
Thank you for participating in our survey! Your answers will help us to improve the quality of our website and services.
We hope you continue to make use of Game8.
We hope you continue to make use of Game8.
Close
Rankings
- We could not find the message board you were looking for.
Gaming News


![Monster Hunter Stories 3 Review [First Impressions] | Simply Rejuvenating](https://img.game8.co/4438641/2a31b7702bd70e78ec8efd24661dacda.jpeg/thumb)
Popular Games

Genshin Impact Walkthrough & Guides Wiki
Honkai: Star Rail Walkthrough & Guides Wiki
Umamusume: Pretty Derby Walkthrough & Guides Wiki
Pokemon Pokopia Walkthrough & Guides Wiki
Resident Evil Requiem (RE9) Walkthrough & Guides Wiki
Monster Hunter Wilds Walkthrough & Guides Wiki
Wuthering Waves Walkthrough & Guides Wiki
Arknights: Endfield Walkthrough & Guides Wiki
Pokemon FireRed and LeafGreen (FRLG) Walkthrough & Guides Wiki
Pokemon TCG Pocket (PTCGP) Strategies & Guides Wiki


Recommended Games
Diablo 4: Vessel of Hatred Walkthrough & Guides Wiki
Cyberpunk 2077: Ultimate Edition Walkthrough & Guides Wiki
Fire Emblem Heroes (FEH) Walkthrough & Guides Wiki
Yu-Gi-Oh! Master Duel Walkthrough & Guides Wiki
Super Smash Bros. Ultimate Walkthrough & Guides Wiki
Pokemon Brilliant Diamond and Shining Pearl (BDSP) Walkthrough & Guides Wiki
Elden Ring Shadow of the Erdtree Walkthrough & Guides Wiki
Monster Hunter World Walkthrough & Guides Wiki
The Legend of Zelda: Tears of the Kingdom Walkthrough & Guides Wiki
Persona 3 Reload Walkthrough & Guides Wiki


All rights reserved
© 2024 Activision Publishing, Inc. ACTIVISION, CALL OF DUTY, CALL OF DUTY LEAGUE, MODERN WARFARE, CALL OF DUTY BLACK OPS, CALL OF DUTY WARZONE, and CALL OF DUTY VANGUARD are trademarks of Activision Publishing, Inc. All other trademarks and trade names are the property of their respective owners.
The copyrights of videos of games used in our content and other intellectual property rights belong to the provider of the game.
The contents we provide on this site were created personally by members of the Game8 editorial department.
We refuse the right to reuse or repost content taken without our permission such as data or images to other sites.
you can get this by just restarting from last checkpoint. How about play the game instead of feeding lies to people trying to use your guide. 👎