This survey will take about 1 minute.
Your answers will help us to improve our website.
Call of Duty Black Ops 6 (BO6)
The Tomb Easter Egg Walkthrough and Steps

This is the Tomb easter egg walkthrough for Call of Duty Black Ops 6 (BO6) Zombies. Read on for a full, step-by-step guide of the Tomb Main Quest and learn how to complete the Tomb easter egg.
| The Tomb Guides | |
|---|---|
| Easter Egg | Interactive Map |
List of Contents
The Tomb Easter Egg Walkthrough
| The Tomb Easter Egg Steps | ||||||
|---|---|---|---|---|---|---|
| 1 | Open the Door to Nowhere | |||||
| 2 | Get the Monocle for the Staff of Ice | |||||
| 3 | Get the Headpiece of the Staff of Ice Roman Numerals Puzzle #1 |
|||||
| 4 | Get the Staff Part of the Staff of Ice Roman Numerals Puzzle #2 |
|||||
| 5 | Assemble the Staff of Ice | |||||
| 6 | Upgrade the Staff of Ice | |||||
| 7 | Complete the 4 Statue Trials | |||||
| 8 | Defeat the Sentinel Artifact (Final Boss) | |||||
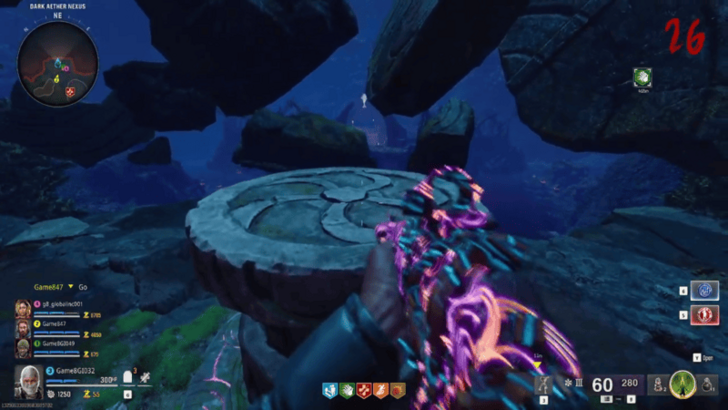
Open the Door to Nowhere
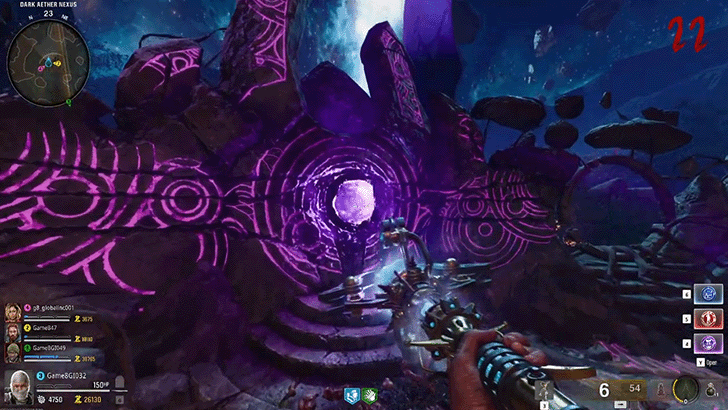
The first part of the The Tomb Easter Egg Main Quest requires you to Open the Door to Nowhere. This is done by opening up the level's doors until you reach a pedestal in the Subterranean Temple (eastern section of the map) and interacting with it to open the portal to the Dark Aether Nexus.
| 1 | Reach the Subterranean Temple |
|---|---|
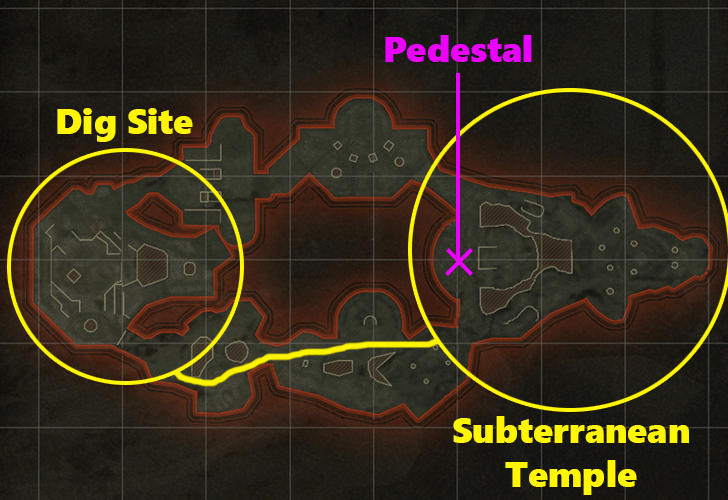 You and your squad will start the match by spawning at the Dig Site (the westernmost area of the map). Spend Essence to open doors until you reach the eastern end of the Tomb called the Subterranean Temple. |
|
| 2 | Interact with the Pedestal |
 Once you reach the Subterranean Temple, look for a pedestal in front of a large stone slab. Interact with the crystal placed on top of the pedestal to activate the portals that allow you to teleport into the Dark Aether Nexus. |
Get the Monocle for the Staff of Ice
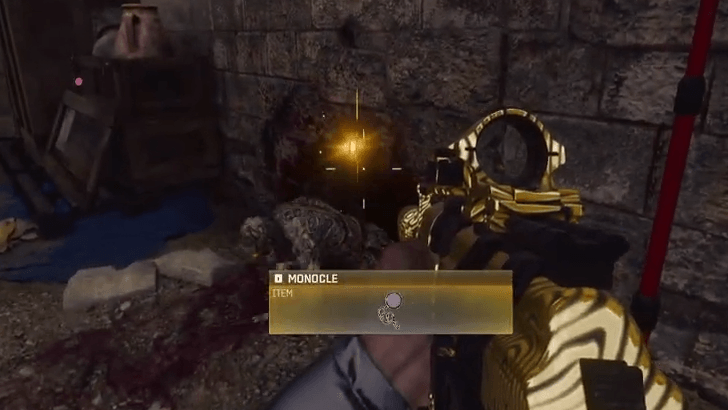
After activating the portals, your next order of business is to reach Round 8. Once you get to Round 8, kill the Shock Mimic that spawns to get the Monocle quest item. This is the first of three parts that you have to collect in order to assemble the Staff of Ice.
Get the Headpiece of the Staff of Ice
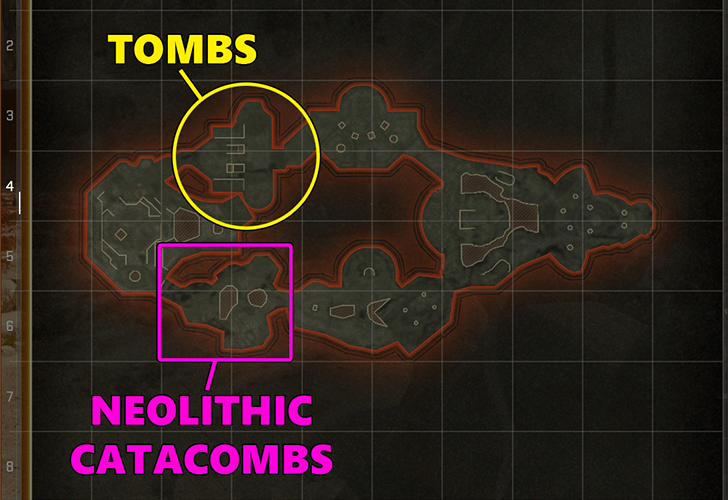
The Headpiece of the Staff of Ice will spawn after you solve the Archer Mural puzzle in the Neolithic Catacombs area.
| 1 | Locate the Archer Mural |
|---|---|
 Look for the Archer Mural in the Neolithic Catacombs area, where the Deadshot Daiquiri machine and a Crafting Table can be found. |
|
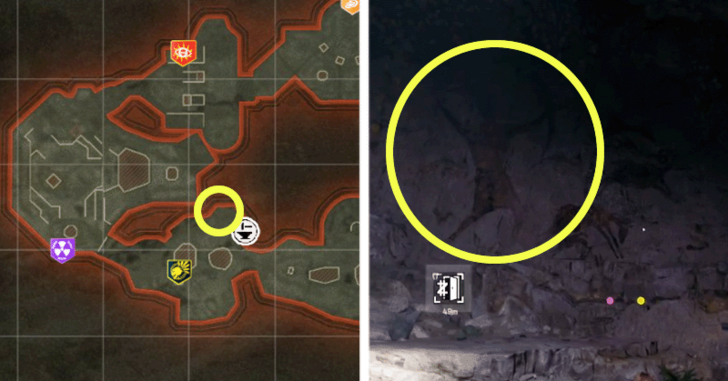
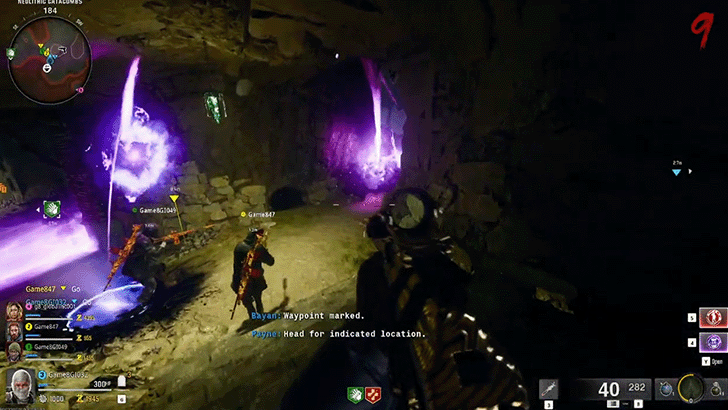
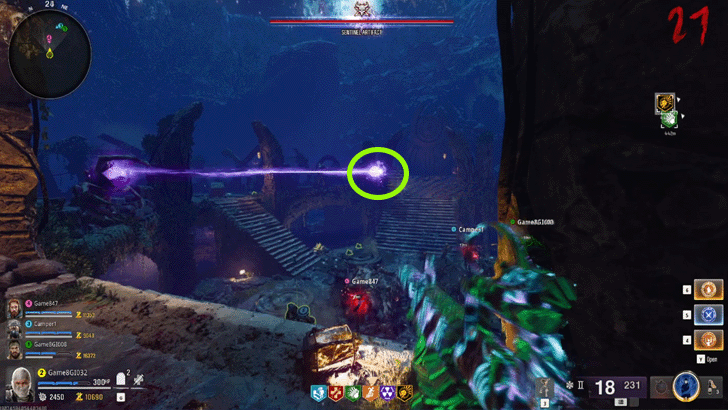
| 2 | Light Up the Lantern Above the Mural |
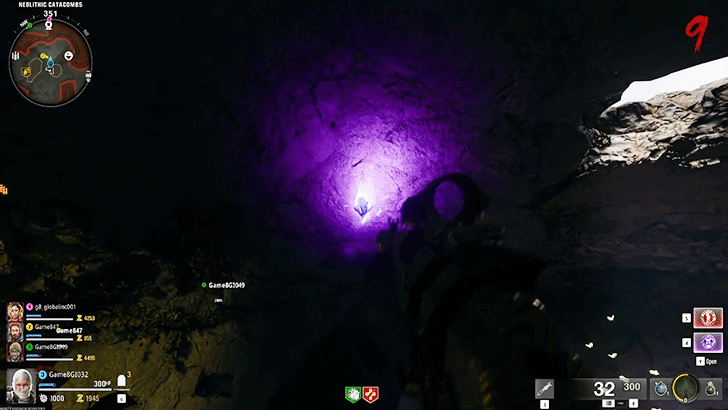 You will have to light up the lantern above the Archer Mural. To do this, go around the Tomb and shoot the lanterns with purple flames. Each time you shoot a lantern, its purple flame will move to a different lantern around the map. Keep shooting the lanterns until the purple flame moves to the lantern near the Archer Mural. |
|
| 3 | Shoot the Roman Numerals in Ascending Order |
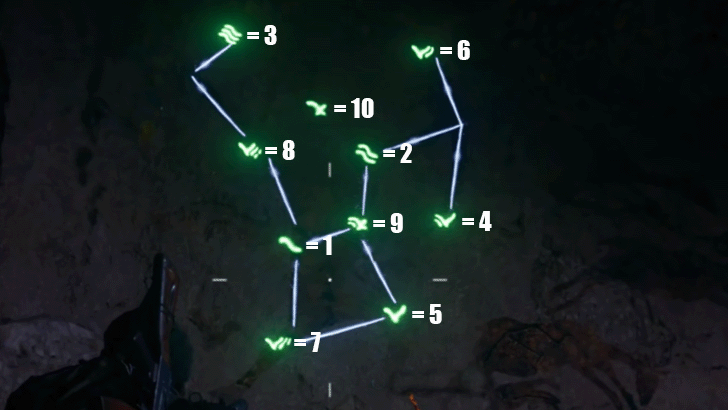 Once the lantern above the Archer Mural is lit up, roman numerals will appear on the mural itself. Shoot the roman numerals in ascending order (1 to 10). Note: Number 7 and 8 look identical to each other; just keep in mind that number 8 has a broken line in one of its strokes. ▶ Tomb Roman Numerals Guide |
|
| 4 | Defeat Waves of Zombies |
 An orb will fly out of the Archer Mural and create a lockdown within the surrounding area where you will have to defeat waves of zombies. |
|
| 5 | Pick Up the Headpiece |
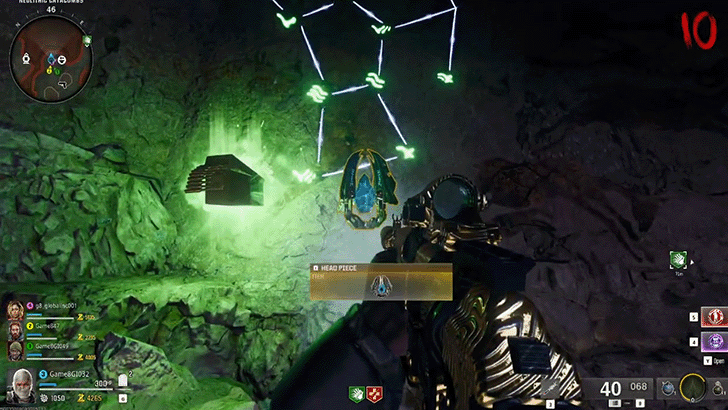 After successfully fending off the horde, a nuke will pop out and kill every zombie in the area. The Headpiece will then appear in front of the Archer Mural along with a Max Ammo powerup. |
Get the Staff Part of the Staff of Ice
With both the Monocle and Headpiece in hand, the final piece to secure will be the actual Staff. To get it, you'll be following the same steps as getting the Headpiece but this time, you'll be doing your puzzle solving in the Tombs area (north) rather than the Neolithic Catacombs (south).
| 1 | Go to the Tombs Area |
|---|---|
 After getting the Headpiece at the Neolithic Catacombs, make your way to the northern section of the map. You'll need to reach the Tombs area to start the next part of the Tombs main quest (the room with the Death Perception vending machine). Note: If you haven't yet, make sure to unlock the rest of the doors in the Tomb to make it easier to navigate later during the quest. |
|
| 2 | Shoot the Lantern to Reposition It |
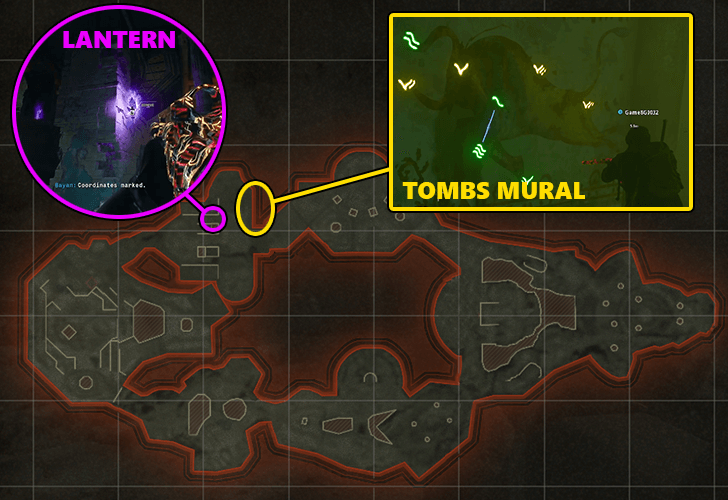 At the Tombs, check to see where the Purple Lantern has spawned. If it isn't right next to the Mural, shoot it to get the flames to jump to a different Lantern in the room. Repeat this until the Purple Lantern next to the Mural lights up. You'll know you did it right if the symbols light up on the mural itself. |
|
| 3 | Shoot the Roman Numerals from 1-8 |
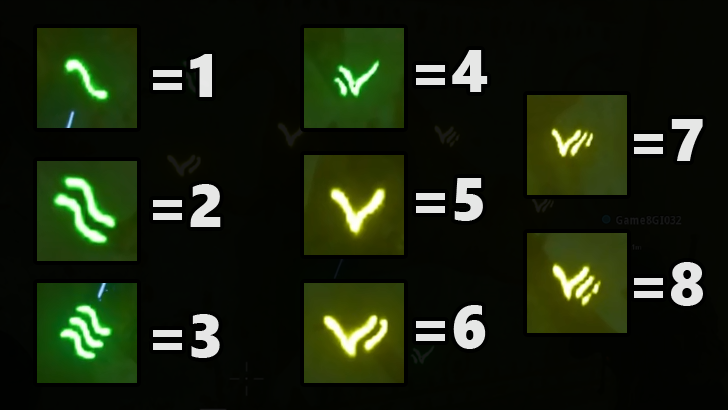 With the Roman Numerals visible, start shooting them from 1 to 8. Be careful of the symbols for 7 and 8 since they look very similar. If done correctly, a Purple Orb will spawn, signalling the start of the wave defense segment. Note: If you get the order wrong, the incorrect symbol will flash red. However, it will not reset the puzzle, allowing you to continue shooting after a short delay. ▶ Tomb Roman Numerals Guide |
|
| 4 | Kill All Zombies Spawned by the Orb |
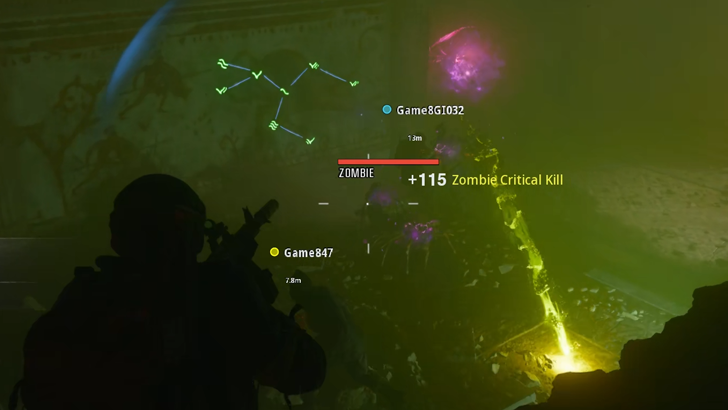 Once the Purple Orb appears, prepare for a fight. It will start flying around the room, spawning multiple Zombies including Armored Zombies, Parasites, and Doppelghasts. Kill everything until the Purple Orb returns back to the Mural. |
|
| 5 | Retrieve the Staff Piece |
 When the room is finally clear of enemies, a white flash of light will fill your screen signalling the end of combat. Return to the Mural to get the Staff quest item as well as a free Max Ammo Powerup. |
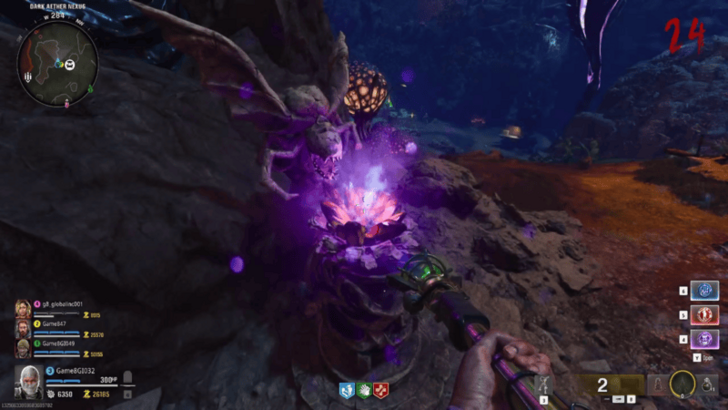
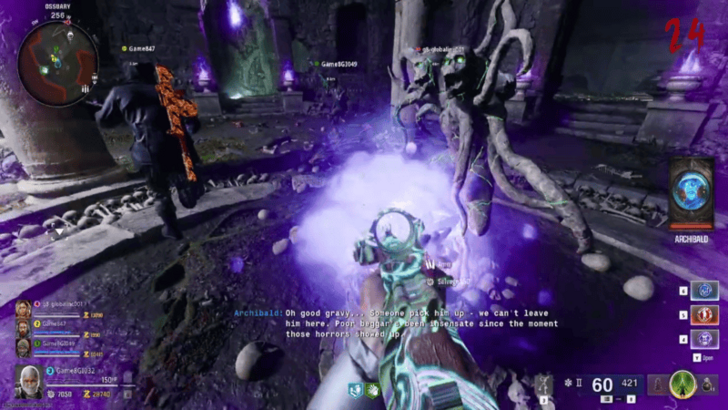
Assemble the Staff of Ice in the Dark Aether Nexus
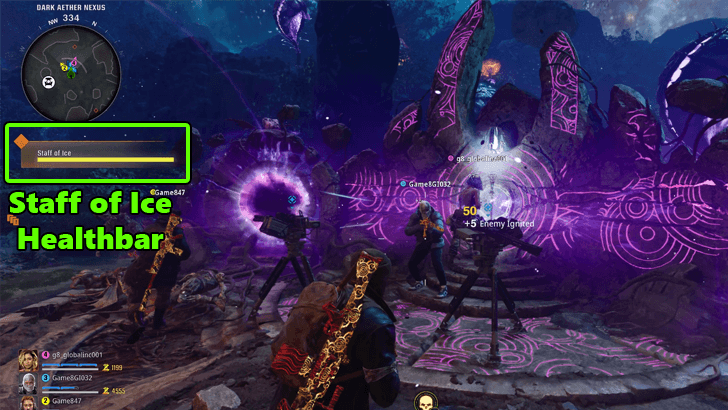
With all three pieces of the Staff of Ice secure, use any of the 4 portals in the Tomb to go to the Dark Aether Nexus. Once there, head to the large altar at the center and deposit the Staff of Ice's parts. Do note that this will trigger a wave defense segment where you have to protect the Staff of Ice as it gets assembled.
Pay attention to the Staff of Ice healthbar on the left side of your screen. If it drops to 0, you'll have to play till the next round before you can repeat the entire sequence. If you're having a tough time defending the Staff of Ice (especially when playing with a squad), you can set-up Sentry Turrets (1~2) to make it easier.
Once you defeat all of the spawned Zombies, a white flash will brighten your screen, signalling the end of the sequence. Pick up the assembled Staff of Ice to continue the Tombs main quest.
Kill Zombies with Glowing Purple Eyes First

Zombies and Vermin that have glowing purple eyes will attack the Staff of Ice. Kill with them first to prevent the staff HP from dropping to 0. If playing in a squad, you can have one or two members train the regular Zombies while you deal with the glowing enemies.
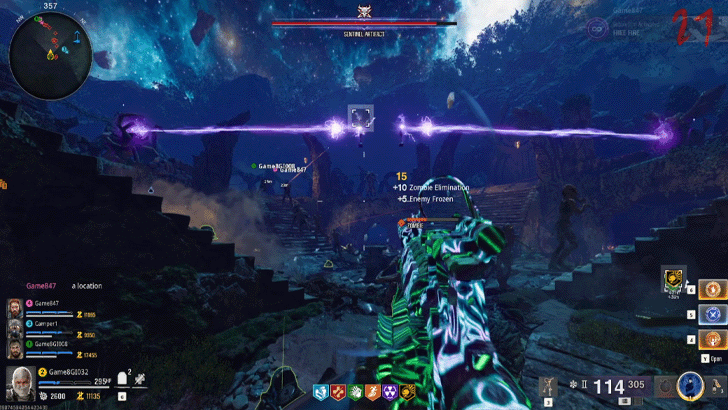
Upgrade the Staff of Ice
| 1 | Shoot Three Purple Lanterns Within a Short Timeframe |
|---|---|
 Using the Staff of Ice, you will have to shoot three purple flamed lanterns within a short amount of time. It's better if you can find three lit lanterns that are right beside each other to not waste time. |
|
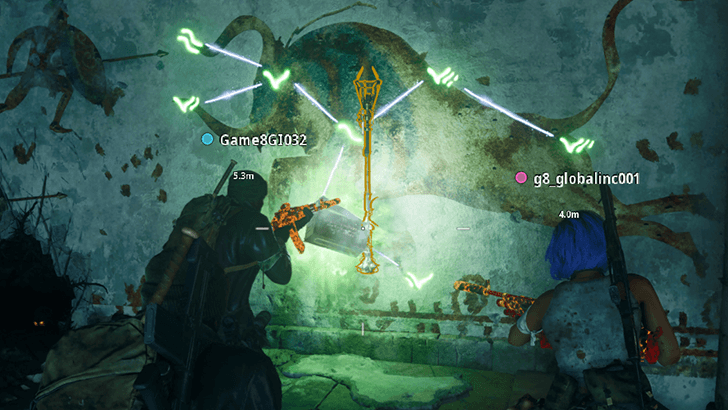
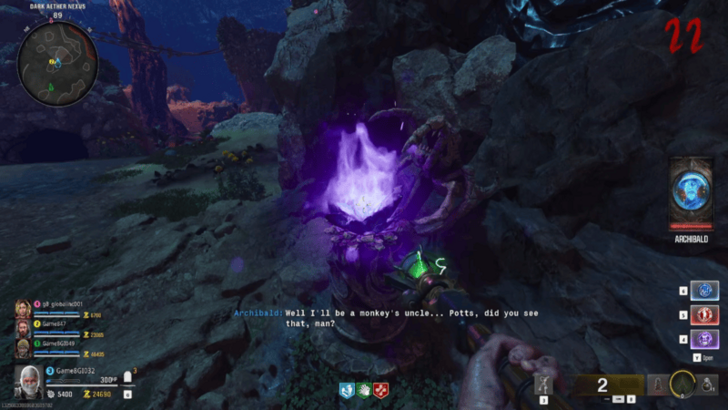
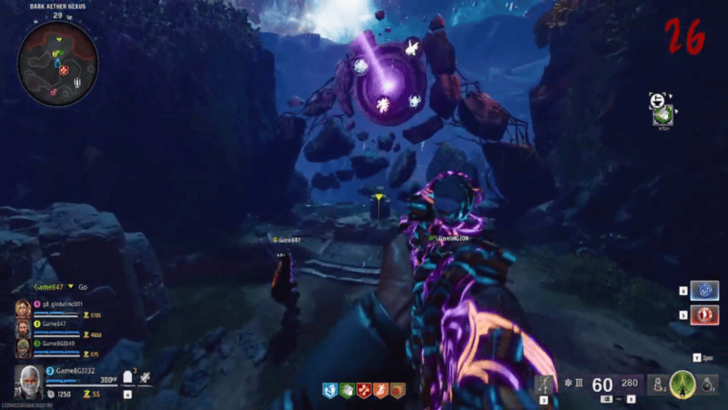
| 2 | Take Note of the Rune Symbols in Dark Aether Nexus |
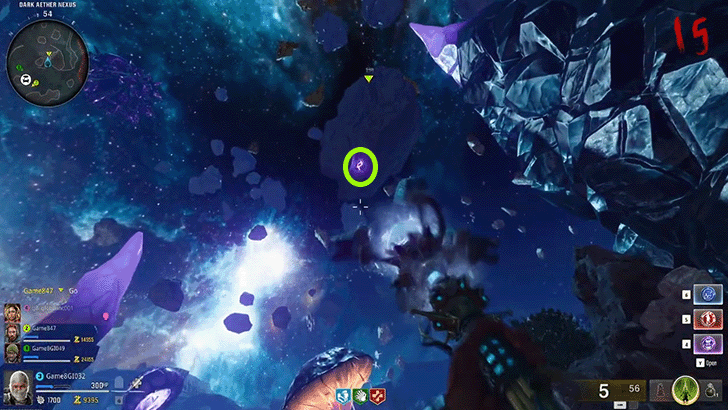 Head back to Dark Aether Nexus and locate three rune symbols engraved on the floating rocks. Using the Staff of Ice again, shoot the symbols to activate them and lower the rocks down. At this point, take note of the three Rune Symbols either by noting them down on your personal notes or simply taking a screenshot. |
|
| 3 | Shoot the Rune Symbols to Unlock the Portal |
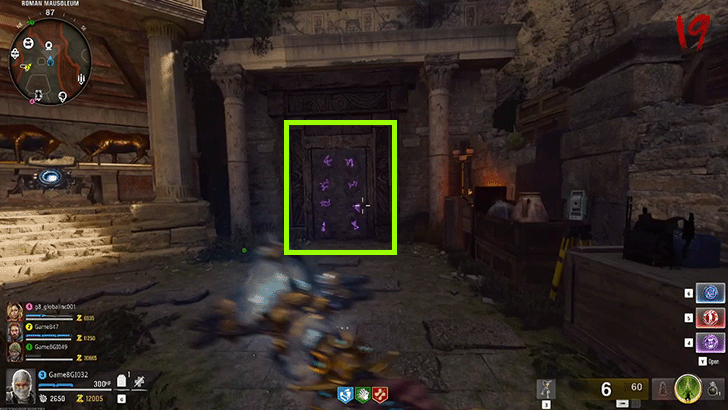 Check each of the four fast travel teleporters around the map and locate the one with a door with Rune Symbols on it. Again, use the Staff of Ice to shoot the three Rune Symbols that were engraved on the rocks earlier in the Dark Aether Nexus. This will unlock the door, leading up to a portal back to the Dark Aether Nexus. |
|
| 4 | Activate and Follow the Orb |
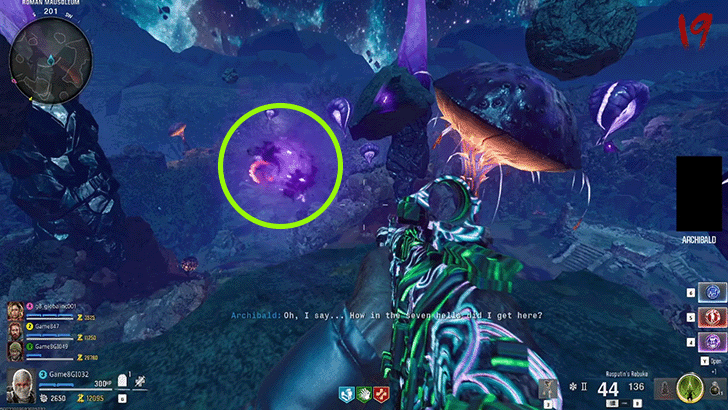 Enter the portal and you'll find yourself on a rock in the Dark Aether and an Orb right in front of you. Interact with the Orb and follow it while killing the zombies that it will spawn out. Be sure that your whole squad stays near the orb, as leaving the orb's vicinity will cause the challenge to fail. While doing the challenge, don't use the Time Out GobbleGum and the Nuke powerup since you need zombies to kill to feed the orb with souls. |
|
| 5 | Collect the Ull's Arrow |
 The Orb will eventually make its way back to the altar. From here, equip the Staff of Ice and then interact with the orb on the altar to transform it into the Ull's Arrow, which is the upgraded version of the staff. |
Complete the 4 Statue Trials
After upgrading the Staff of Ice, you will use it to activate the 4 different statue trials that unlock the boss fight area.
| 1 | Activate the Vermin Statue (Dark Aether) |
|---|---|
 The first statue is located southeast of the center of the Dark Aether Nexus. It's the statue of a Vermin. To activate the statue, you have to switch the mode of the staff to Sekhmet's Vigor by pressing B (keyboard) or the left D-pad (controller). Afterward, use the primary fire button when aiming at the statue. The activated statue should turn purple. |
|
| 2 | Activate the Vermin Statue (Timed Trial) |
 With the statue activated, head out through the blue portal to the starting area Dig Site. There's an identical statue underneath the Rampage Inducer. Interact with it to start a timed trial where you have to kill a certain amount of Vermin before 1 minute expires. |
|
| 3 | Return the 1st Amulet Energy |
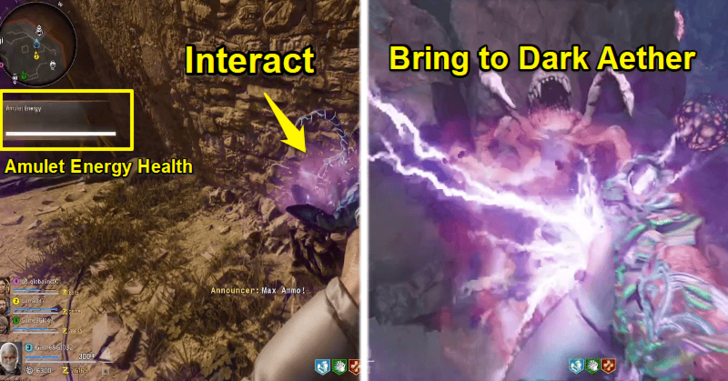 A white flash will signal that the trial was completed successfully. Afterward, you can interact with the statue again to pick up the Amulet Energy. You must bring this back to the original Vermin statue in the Dark Aether Nexus as quickly as possible. Be aware that the Dark Aether portal closest to you (in this case, the blue one) will be closed and you'll have to enter through any of the other 3. Also note that taking hits by zombies will destroy the Amulet Energy (its health bar is indicated on the left side of the screen). If the Amulet Energy is destroyed or you don't bring it back to the Dark Aether statue in time, then you'll have to go back and repeat this step of the process. |
|
| 4 | Activate the Parasite Statue (Dark Aether) |
 After completing the Vermin statue, you'll move on next to the Parasite statue, found southwest of the Dark Aether Nexus central area/Pack-a-Punch Machine. These next few steps essentially follow the same flow as the previous Vermin step. |
|
| 5 | Activate the Parasite Statue (Timed Trial) |
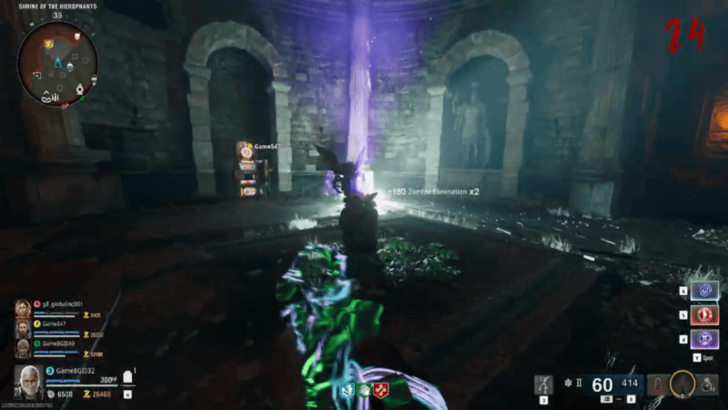 Activate the Parasite statue the same way and then head through the yellow portal to its counterpart in the Shrine of Hierophants. The Parasite statue is in front of the Stamin-Up machine. |
|
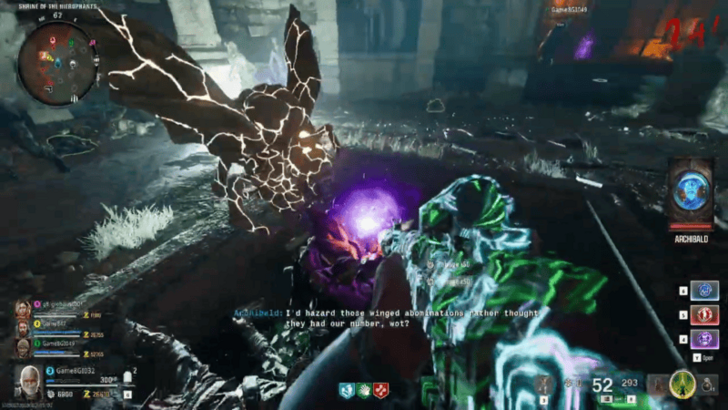
| 6 | Kill Parasites and Pick Up Orbs |
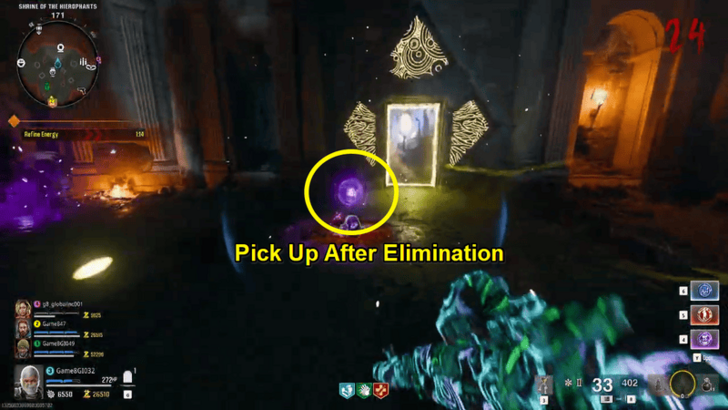 Interact with the statue to start a similar timed trial, wherein you'll have to eliminate those flying Parasites. The difference is that you have to pick up the purple orbs they drop and carry them over to the Parasite statue, in order to complete the trial. It's not just about killing Parasites. |
|
| 7 | Return the 2nd Amulet Energy |
 Completing this activates the statue. Interact with it to acquire another dose of Amulet Energy. Same as before; bring the Amulet Energy back to the original Parasite statue as quickly as you can and without taking enough hits to destroy the amulet energy. |
|
| 8 | Activate the Doppelghast Statue (Dark Aether) |
 After this, the third statue will be the Doppelghast statue. This statue is located northwest of the central area of the Dark Aether Nexus (just behind the central altar in the middle). Activate this statue as well with Sekhmet's Vigor. |
|
| 9 | Activate the Doppelghast Statue (Timed Trial) |
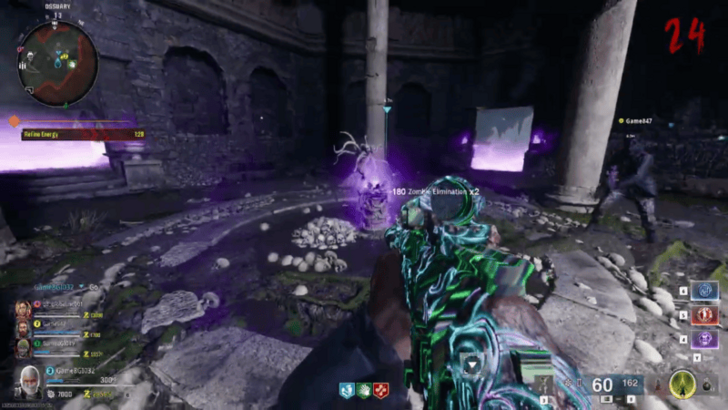 Next, head out through the green portal to find the Doppelghast statue's counterpart in the Ossuary, near the Speed Cola machine. |
|
| 10 | Eliminate All Zombies |
 Interact with this statue for another timed trial. However, this trial pits you against regular zombies and a few Doppelghasts within a pretty enclosed space, so best to prepare Decoys, Monkey Bombs, Sentry Turrets or any other equipment that help you with crowd control. Eliminate all the zombies before the timer runs out to proceed. |
|
| 11 | Return the 3rd Amulet Energy |
 You know the drill; interact with the statue again to get Amulet Energy. Bring the Amulet Energy back to the original Doppelghast's statue in the Dark Aether quickly and without being destroyed. |
|
| 12 | Activate the Amalgam Statue (Dark Aether) |
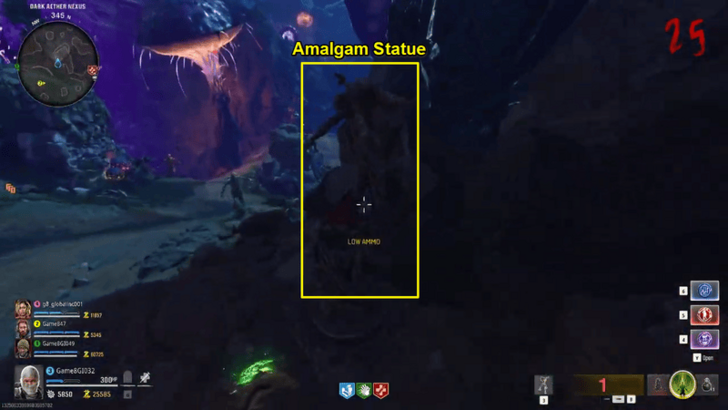 The fourth and last statue to activate is the Amalgam statue. It's actually found across the Doppelghast statue in the Dark Aether Nexus. Activate it with the Staff of Ice's green firing mode as usual. |
|
| 13 | Activate the Amalgam Statue (Timed Trial) |
 Head out the red portal to the Subterranean Temple. The Amalgam statue counterpart is found deeper within the cavern, in the Deep Excavation, in front of the Quick Revive machine. |
|
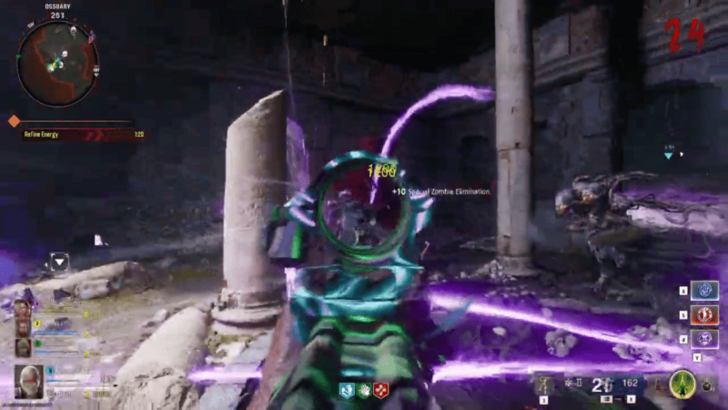
| 14 | Defeat the Amalgam Mini-Boss |
 Interact with this last statue for the final and most difficult timed trial. You will have to defeat a mini-boss Amalgam, which has the unique ability to be immune to damage while its feeding off the other special and elite zombies in the vicinity. To remove its immunity, simply eliminate the zombies that you see are tethered to thee mini-boss Amalgam via a purple beam. Tip: a Sentry Turret and Mutant Injection are very useful here. |
|
| 15 | Return the 4th and Final Amulet Energy |
 Finally, after succesfully completing this timed trial, you can bring the last of the Amulet Energy back to the statue in the Dark Aether Nexus. Completing this will trigger a purple beam to shoot at the area blocking the path to the final boss of The Tomb. |
|
| 16 | Interact with the Pedestal |
 At the location above, interact with the pedestal to create the bridge to the final boss fight. |
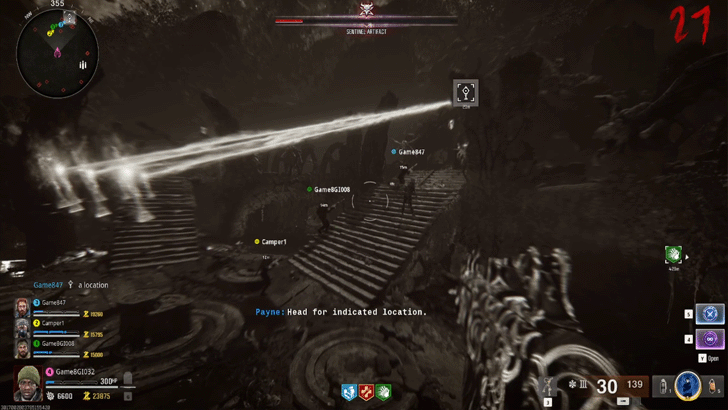
Challenge the Sentinel Artifact
After completing the above steps, you would have unlocked access and bridged the gap to the final area for the boss fight against the Sentinel Artifact. When it comes to the boss fight, below are the recommended equipment to survive, as well as the steps on how to beat the boss.
Recommended Items to Bring
| Recommended Loadout Items | |
|---|---|
| Weapons | ・ ASG-89
・ Ice Staff |
| GobbleGums | ・ Idle Eyes
・ Cache Back ・ Power Keg ・ Free Fire |
| Field Upgrades | ・ Aether Shroud
・ Frenzied Guard |
| Throwables | ・ Cymbal Monkey |
| Scorestreaks | ・ Sentry Turret |
| Perks | ・ Jugger-Nog
・ Speed Cola ・ Deadshot Daiquiri |
| Ammo Mods | ・ Cryo Freeze |
For weapons, a Level 3 pack-a-punched ASG-89 on Legendary Rarity would be the best main source of damage. The Ice Staff should come in second as the crowd control weapon when dealing with zombies. Other items such as Cymbal Monkeys and GobbleGums are also recommended to distract the horde.
For perks, Jugger-Nog, Speed Cola, and Deadshot Daiquiri should be more than enough to increase your chances of survivability during the fight.
Wait for the Artifact to Turn Purple
At the start of the boss fight, wait for the Sentinel Artifact to turn Purple since that's the only time it will be vulnerable to damage. In the meantime, try to avoid its laser attacks by taking cover behind walls or by running up the first and second floors of the arena.
Once the artifact turns Purple, you'll need to shoot it until it gets destroyed. Successfully destroying one will reduce the boss's HP bar. You'll only have a short amount of time to destroy it, otherwise it will return back to its immunity phase and you'll need to wait for it to turn Purple again.
When it Multiplies, Focus on One Artifact
Each time an Artifact gets destroyed, it will split into several more Artifacts. Wait for them to turn Purple again and then ask your team to focus on gunning down only one Artifact, since targeting multiple artifacts may take longer to destroy and your team will most likely fail to destroy at least one due to the Artifacts' absurd amount of HP.
At this point, it may be wise to finally use Cymbal Monkeys or activate the Aether Shroud field upgrade so that zombies won't attack you while dealing with the Artifacts.
Eliminate the Possessed Zombies
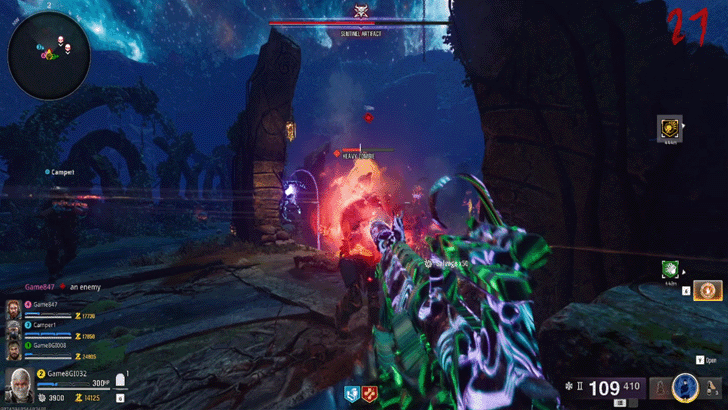
Once the Sentinel Artifact splits into four or more, it will start to possess zombies such as Amalgams, Doppelghasts, and Heavy Zombies. These possessed zombies have a unique name beside their HP bar or have a red glowing aura around them.
Kill these possessed enemies to reveal the artifact and then shoot the artifact to destroy it. This phase will go on until the boss's health bar reduces down to a quarter.
Destroy the Last Artifact (Time-Limited)
After reducing Sentinel Artifact's health down to almost zero, one of its artifacts will begin to hover over to the large doorway. Once that Artifact attaches itself on the door, you will need to destroy it within a certain time limit, otherwise your whole squad will face a complete wipe and fail the whole main quest easter egg.
Black Ops 6 (BO6) Related Guides

Zombies Guide: Everything You Need to Know
All Zombies Mode Guides
Zombies Easter Eggs
Comment
Author

The Tomb Easter Egg Walkthrough and Steps
Please participate in our site
improvement survey
03/2026
improvement survey
03/2026
Would you assist in
improving Game8's site?
improving Game8's site?

×
We are listening to our users' valuable opinions and discussing how to act on them.
The information collected through this survey will be used for the purpose of improving our services. In addition, the information will only be disclosed a part of a statistic in a format that will not allow identification of personal information.
Begin Survey
Not Now
×
Please rate each item regarding Game8.co's Advertisements.
Amount of Ads
Very Dissatisfied
Somewhat Dissatisfied
Fine
Somewhat Satisfied
Highly Satisfied
Placement of Ads
Timing of Ad Display
Ad Loading Speed
Safeness of Ads
Content of Ads
×
Please rate each item regarding Game8.co's Quality of Articles.
Amount of information
Very Dissatisfied
Somewhat Dissatisfied
Fine
Somewhat Satisfied
Highly Satisfied
Frequency of updates
Speed of new information
Accuracy of articles
Understandibility of articles
Readability of sentences
×
Please rate each item regarding Game8.co's Usability of the Site.
Ease of finding information
Very Dissatisfied
Somewhat Dissatisfied
Fine
Somewhat Satisfied
Highly Satisfied
Loading Speed
Use of Color
Font Size
Visibility of Images
Easy to Understand Layout
×
Please rate each item regarding Game8.co's Message Boards, Comments.
Ease of Writing
Very Dissatisfied
Somewhat Dissatisfied
Fine
Somewhat Satisfied
Highly Satisfied
Readability
Ease in Finding Information
Comment Quality
Comment Quantity
Admin Response
×
Please rate each item regarding Game8.co's Site's new design.
Please rate our site's new design
Very Dissatisfied
Somewhat Dissatisfied
Fine
Somewhat Satisfied
Highly Satisfied
Do you think that the website's design change makes the site easier to use?
Has the new design made it easier for you to find information on the site?
Has the new design improved the overall visual appeal of the site?
How would you rate your overall satisfaction with the new design of the site?
×
How likely are you to recommend Game8 to someone you know?
Very Unlikely
0
1
2
3
4
5
6
7
8
9
10
Very Likely
If you have other opinions regarding potential improvement to the website, please share them with us. We would appreciate your honest opinion.
Note: This is a free response section, so you can proceed without entering anything.
Note: Please be sure not to enter any kind of personal information into your response.
Note: Please be sure not to enter any kind of personal information into your response.
×
Thank You
×
Thank you for participating in our survey! Your answers will help us to improve the quality of our website and services.
We hope you continue to make use of Game8.
We hope you continue to make use of Game8.
Close
Rankings
- We could not find the message board you were looking for.
Gaming News


![Monster Hunter Stories 3 Review [First Impressions] | Simply Rejuvenating](https://img.game8.co/4438641/2a31b7702bd70e78ec8efd24661dacda.jpeg/thumb)
Popular Games

Genshin Impact Walkthrough & Guides Wiki
Honkai: Star Rail Walkthrough & Guides Wiki
Umamusume: Pretty Derby Walkthrough & Guides Wiki
Pokemon Pokopia Walkthrough & Guides Wiki
Resident Evil Requiem (RE9) Walkthrough & Guides Wiki
Monster Hunter Wilds Walkthrough & Guides Wiki
Wuthering Waves Walkthrough & Guides Wiki
Arknights: Endfield Walkthrough & Guides Wiki
Pokemon FireRed and LeafGreen (FRLG) Walkthrough & Guides Wiki
Pokemon TCG Pocket (PTCGP) Strategies & Guides Wiki


Recommended Games
Diablo 4: Vessel of Hatred Walkthrough & Guides Wiki
Cyberpunk 2077: Ultimate Edition Walkthrough & Guides Wiki
Fire Emblem Heroes (FEH) Walkthrough & Guides Wiki
Yu-Gi-Oh! Master Duel Walkthrough & Guides Wiki
Super Smash Bros. Ultimate Walkthrough & Guides Wiki
Pokemon Brilliant Diamond and Shining Pearl (BDSP) Walkthrough & Guides Wiki
Elden Ring Shadow of the Erdtree Walkthrough & Guides Wiki
Monster Hunter World Walkthrough & Guides Wiki
The Legend of Zelda: Tears of the Kingdom Walkthrough & Guides Wiki
Persona 3 Reload Walkthrough & Guides Wiki


All rights reserved
© 2024 Activision Publishing, Inc. ACTIVISION, CALL OF DUTY, CALL OF DUTY LEAGUE, MODERN WARFARE, CALL OF DUTY BLACK OPS, CALL OF DUTY WARZONE, and CALL OF DUTY VANGUARD are trademarks of Activision Publishing, Inc. All other trademarks and trade names are the property of their respective owners.
The copyrights of videos of games used in our content and other intellectual property rights belong to the provider of the game.
The contents we provide on this site were created personally by members of the Game8 editorial department.
We refuse the right to reuse or repost content taken without our permission such as data or images to other sites.