This survey will take about 1 minute.
Your answers will help us to improve our website.
Call of Duty Black Ops 6 (BO6)
Emergence Mission Walkthrough
Emergence is the tenth campaign mission in Call of Duty: Black Ops 6 (BO6). Read on to see a complete walkthrough of Emergence including how to get all Director Keycards as well as its completion, challenge, and achievement rewards.
List of Contents
Emergence Walkthrough and Objectives
| Emergence Mission Objectives |
|---|
|
① Locate Entrance to Biotechnology ② Obtain Four Director Keycards ┣ Advanced Combat Research Keycard ┣ Administration Keycard ┣ Joint Projects Keycard ┗ Cognitive Research Keycard ③ Kill the Executive Director |
Locate Entrance to Biotechnology
| 1 | Hop On the Elevator |
|---|---|
| This mission starts off with you and Marshall entering the facility via a rundown elevator shaft. Follow Marshall before watching the cutscene where you fall down into the depths of the facility. At the bottom, you'll officially start the mission. Explore the are until you reach a locked door. | |
| 2 | Find a Tool to Open the Door and Pry it Open |
 Go back to where you came from and get the Hatchet stuck to the mannequin on the floor. Afterward, head back to the door and pry it open with the hatchet. |
|
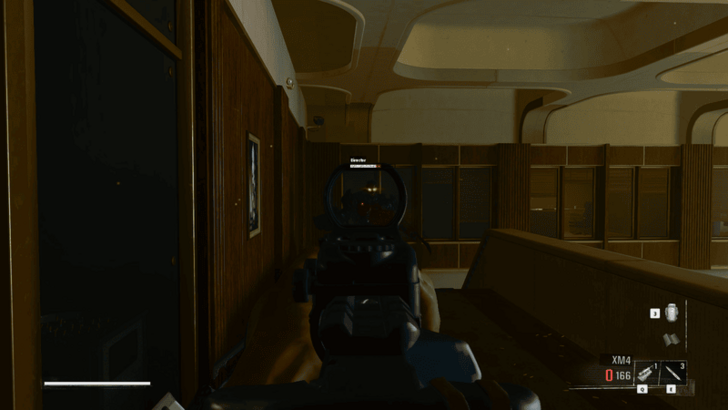
| 2 | Interact with the Biotechnology Elevator |
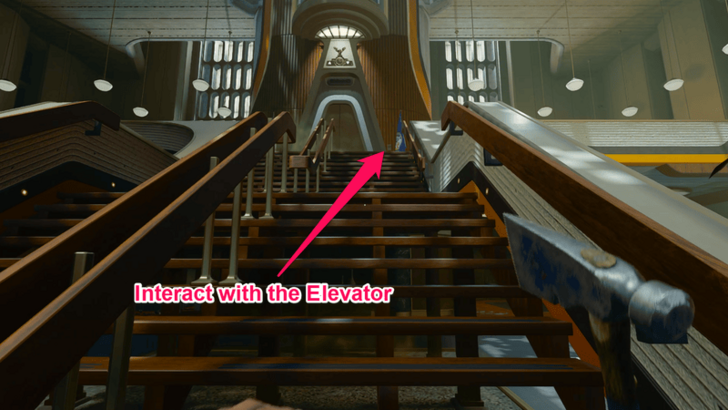 Head up the stairs in the main hall, as seen in the image above and interact with the elevator. You will then be attacked by zombies, take them out with your Hatchet. |
|
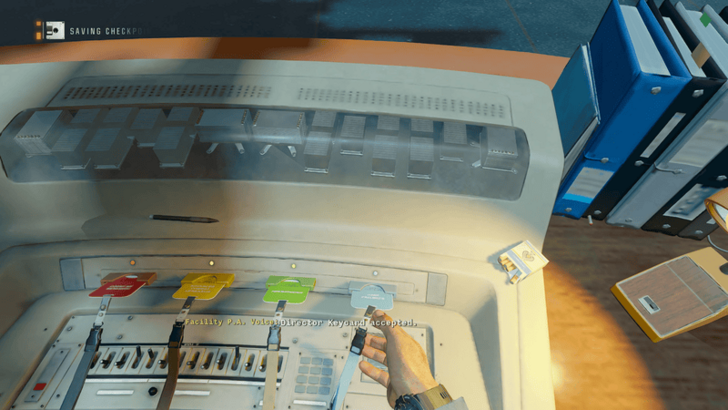
| 3 | Answer the Telephone in the Main Hall |
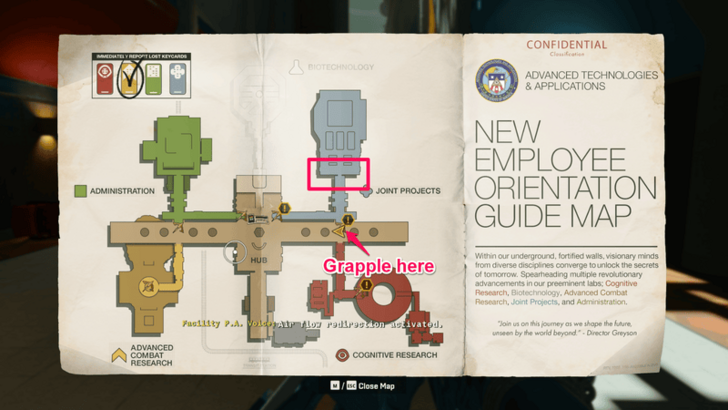
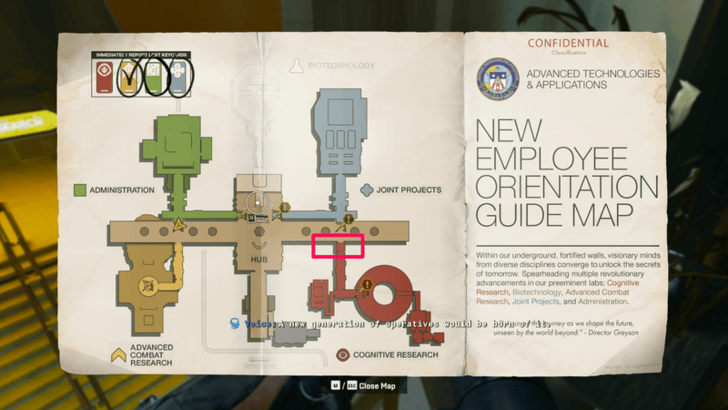
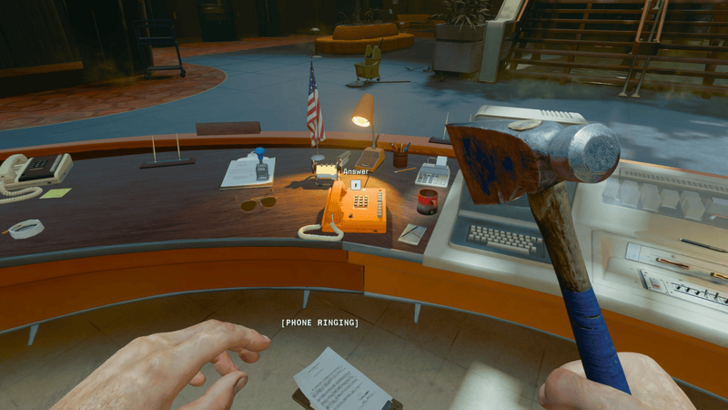 Answer the orange telephone in the main hall to progress the mission and obtain the Facility Map. |
Obtain Four Director Keycards
Collect the four Director keycards below to progress the mission. Do note that after getting the keycard from the Advanced Combat Research area, you can obtain the rest of the keycards in any order.
- Advanced Combat Research Keycard
- Administration Keycard
- Joint Projects Keycard
- Cognitive ResearchKeycard
Click on a link to jump to a specific keycard guide!
Advanced Combat Research Keycard
| 1 | Go to the ACR Wing and Hack the Computer |
|---|---|
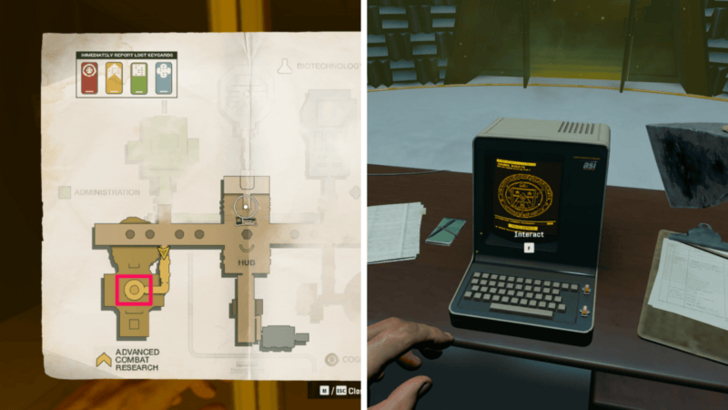 Head to the ACR Wing and hack the computer, as seen in the image above. To hack the computer, match the numbers with the corresponding letters to form a word. The words are Lift and Access. After hacking the computer, the lift will move down. |
|
| 2 | Equip the Grappling Hook |
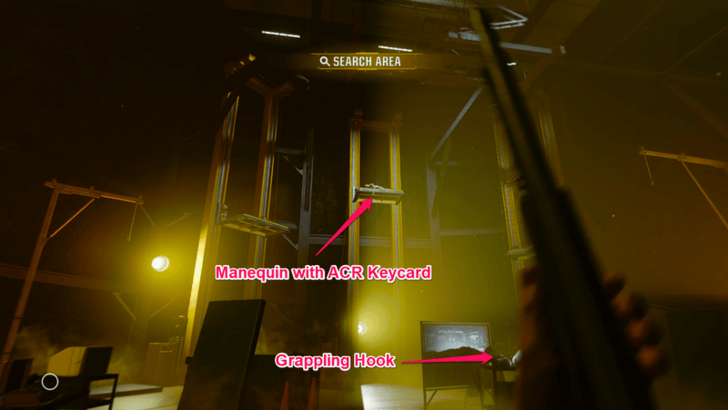 Go further into the room until you see the mannequin holding the ACR Keycard. The Grappling Hook should be on a dead scientist's arm by the blackboard nearby. Tip: Getting the Grappling Hook will trigger a boss fight. It might be a good idea to place the Sentry Turrets in the middle of the room to deal with the boss faster before grabbing the Grappling Hook. |
|
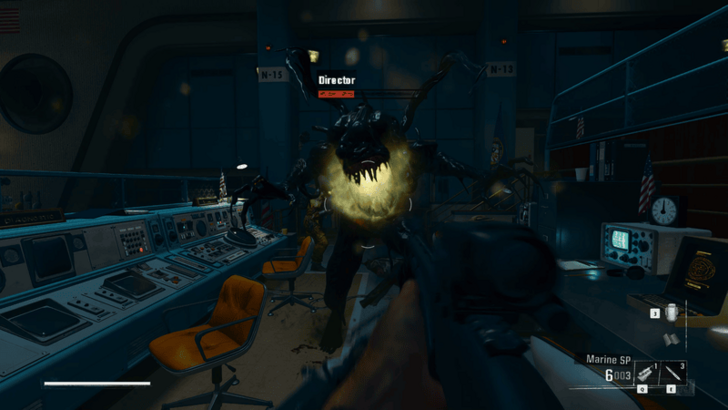
| 3 | Kill the ACR Director to Get the Keycard |
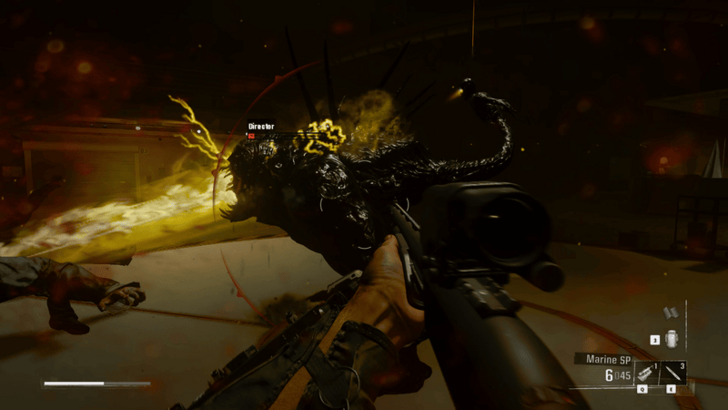 Putting both Sentry Turrets in the middle of the room will make quick work of the ACR Director (now turned into an Abomination). Be careful of his long-range mouth attack. When it does this, get behind cover to avoid taking significant damage. He will also teleport away whenever he takes a certain amount of damage. During this time, kill as many of the zombies as you can to avoid getting swarmed when the Director comes back. |
|
| 3 | Grapple Out of the ACR Wing |
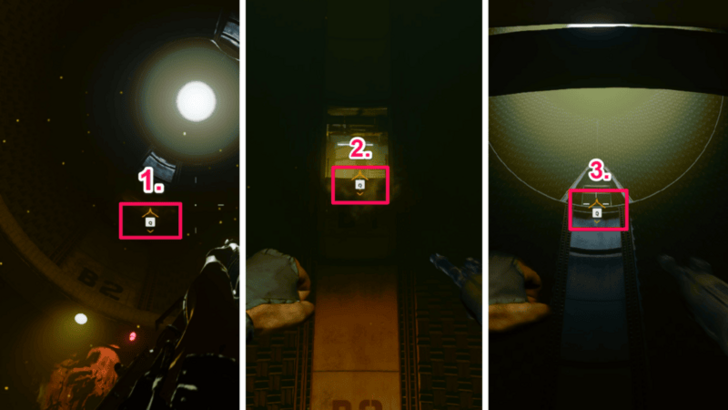 Go to where the lift is and look up. Grapple out of there, by using the ledges along the elevator shaft. |
Administration Keycard
| 1 | Go the Administration Wing |
|---|---|
 Once you emerge from the ACR Wing, you'll find yourself in a hallway leading to a balcony opposite the Administration Wing. Reach the Administration Wing by grappling across to the opposite balcony. |
|
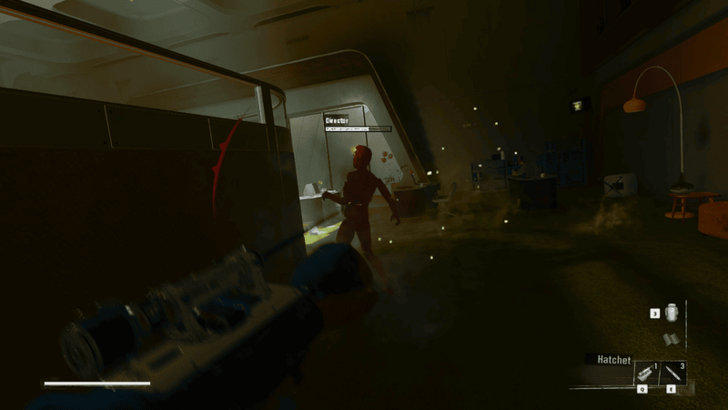
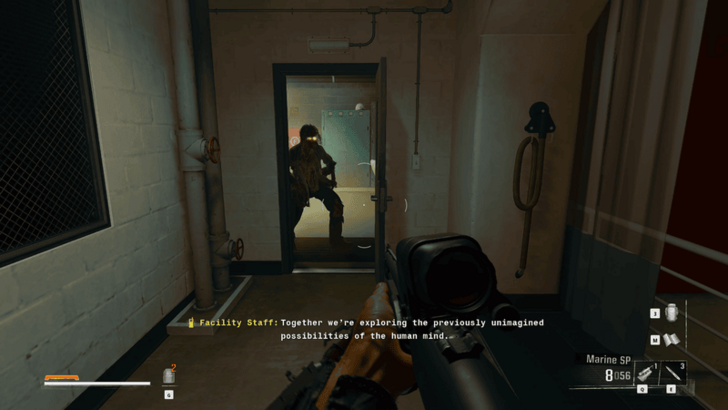
| 2 | Open the Door with the Red Mannequin |
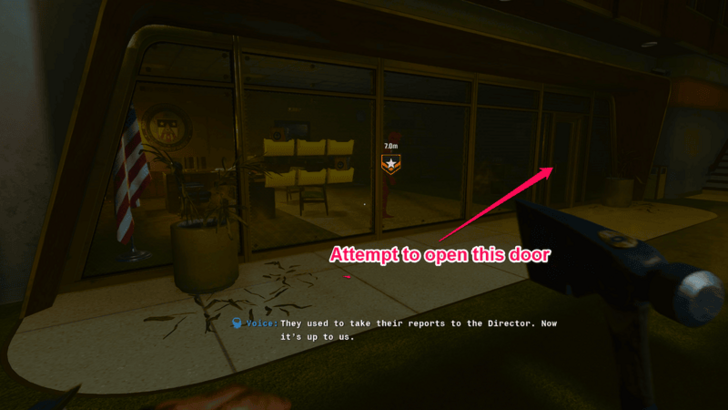 Once inside the Administration Wing, attempt to open the door with the red mannequin (Director) to progress the mission. |
|
| 3 | Find the Missing Reports (1) |
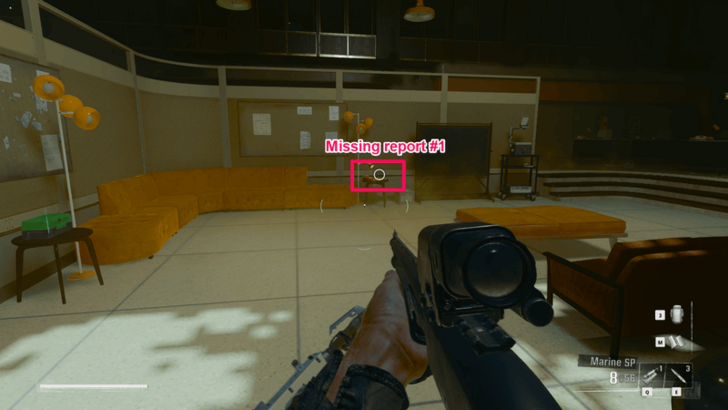 The first missing report is in the middle of the room, on a table by a lamp. After picking it up, place it outside where the red mannequin is. |
|
| 4 | Find the Missing Reports (2) |
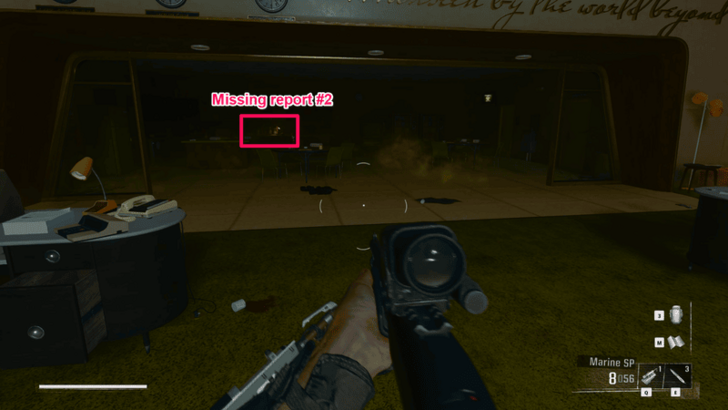 The second missing report is in the dark kitchen area, with some dishes and a lamp. Warning: After getting the second missing report, the mannequins will start moving whenever they are not in your line of sight. Shoot them all to prevent taking more damage. |
|
| 4 | Find the Missing Reports (3) |
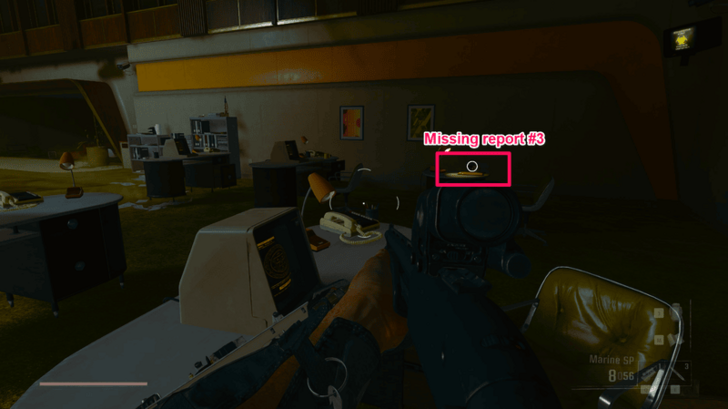 The third missing report is on one of the desks with computers on them in the corner of the room (left corner if your back is toward the stairs, right corner if you're facing the stairs). Once you pick it up, Mannequins will just start going after you. Defeat them before picking up a new report. |
|
| 5 | Find the Missing Reports (4) |
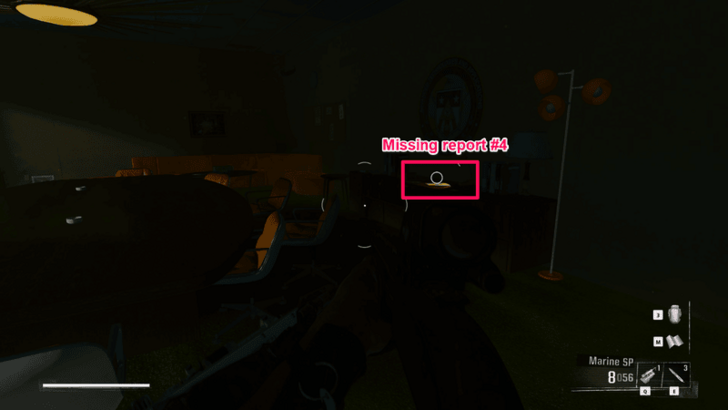 The last missing report is on a drawer by a lamp in the conference room. More mannequins will go after you once you pick up the report. If you feel like you are getting overwhelmed, equip your hatchet to run faster and go to the stairs as you can funnel them there. |
|
| 6 | Keep Grappling the Director |
 After you submit all 4 reports, the Red Director Mannequin will reanimate and start running away. Use your Grappling Hook to keep grappling the Director until you deplete its health. Make sure that there are no obstacles between you and the Director when you grapple it to get some damage in. |
|
| 7 | Kill the Mangler (Director) to Get the Keycard |
 Once the Red Mannequin loses most of its health, it will transform into a Mangler. Be careful of its long-range cannon attack. Take it out to collect the Administration Keycard. Tip: Expose the Mangler's head by damaging it with headshots. The Mangler will take significantly more damage from headshots once its head is exposed. |
Joint Projects Keycard
| 1 | Go to the Joint Projects Wing |
|---|---|
 With two keycards in hand, return to the hallway where you first entered Administration. Upon exiting, turn towards the longer hallways and go to the end of it. Use your grappling hook to grapple across to Joint Projects. |
|
| 2 | Attempt to Take the Keycard on the Camera |
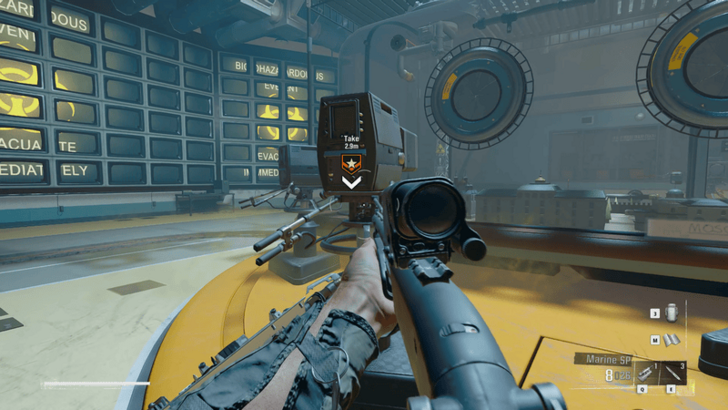 Once you're inside Joint Projects, head to the back of the room and interact with the keycard hanging from one of the large cameras. This will lure out the Mimic (Director). |
|
| 3 | Kill the Mimic (Director) To Get the Keycard |
 Kill the Mimic to get the Keycard. Whenever the Mimic takes a certain amount of damage, it will transform into one of the objects in the room and zombies will start spawning in. Look for an object that is shaking erratically and shoot it to reveal the Mimic. Tip: Avoid getting too close to the Mimic as it has a grab attack that deals a significant amount of damage. |
Cognitive Research Keycard
| 1 | Go to the Cognitive Research Wing |
|---|---|
 Finally, head over to the Cognitive Research Wing by using the Grappling Hook to reach its balcony entrance. |
|
| 2 | Attempt to Open the Bathysphere |
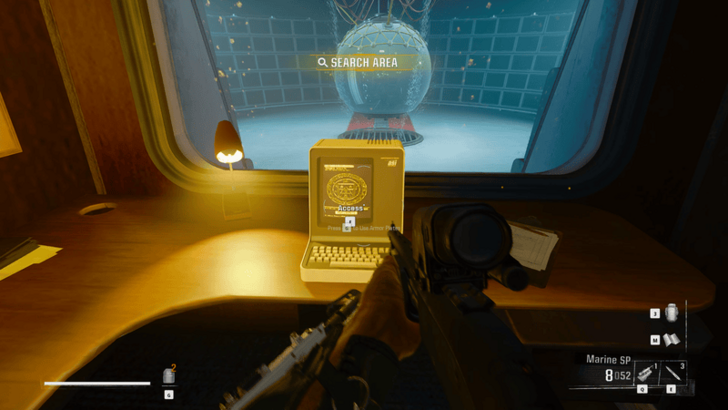 Access the computer in the Cognitive Research Wing and attempt to open the Bathysphere. |
|
| 3 | Head to the Drainage Area |
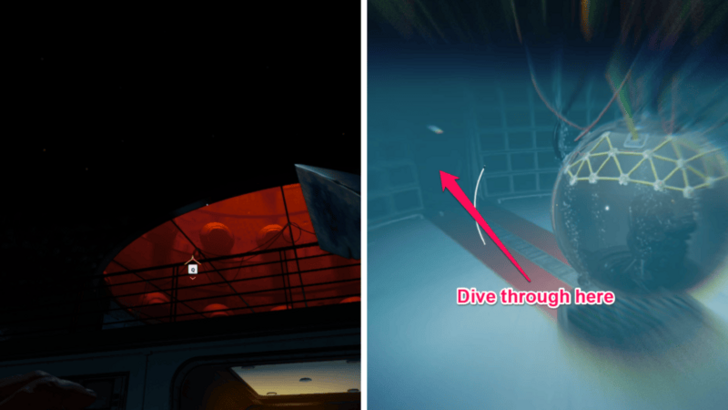 In the same room where the computer is, look up to get the prompt to grapple and get access to the Bathysphere. Afterward, dive down and swim into the red tunnel. |
|
| 4 | Interact with the Locked Door and Wait |
 Interact with the locked door in the drainage area and wait for a zombie to open it. |
|
| 5 | Decrypt the Keypad to Unlock the Door |
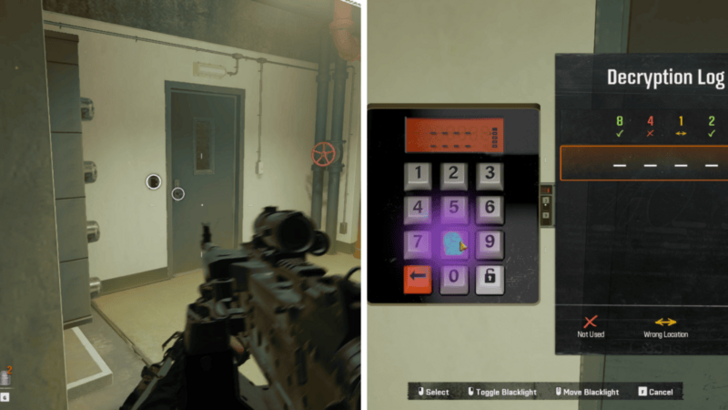 Immediately after entering the door that the zombie opened, there will be another blue door to your left locked by a keypad. Decrypt it. Tip: Use the blacklight to get an idea of what the most commonly pressed numbers are. |
|
| 6 | Initiate the Drain Switch Override |
 Head to the room just across from where you solved the keypad and access the computer to initiate the drain switch override. |
|
| 7 | Pull Three Drain Switches in 25 Seconds |
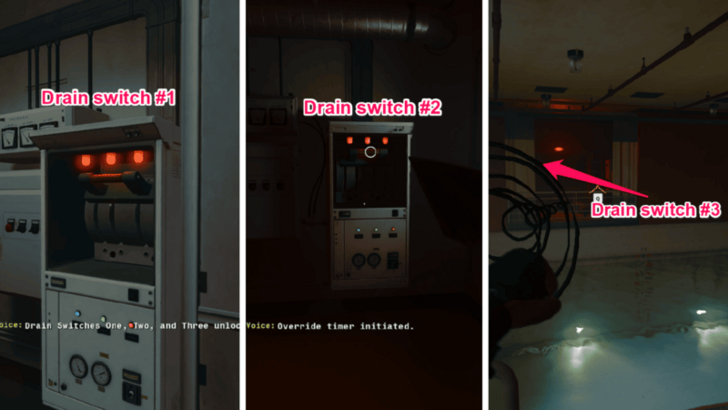 After initiating the drain switch override, you will have to pull three drain switches within 25 seconds to progress. The first one is just behind you, in the same room where the computer is. The second one is in the room that you opened by decrypting the keypad. The last one is on the other side of the drainage area, by the water. You will have to grapple to get to the other side. |
|
| 8 | Kill the Mangler (Director) to Get the Keycard |
 Go back to the Bathysphere, and you will find the keycard in the broken glass. Interact with it to initiate combat with the Mangler (Director). Be careful of its long-range cannon attack as it deals a significant amount of damage. Take it out to collect the Cognitive Research Keycard. Tip: The Director takes significantly more damage from headshots. |
Kill the Executive Director
| 1 | Insert all the Director Keycards |
|---|---|
 With all Keycards secure, return to the central hall and insert all the Director Keycards into the terminal. Head up to the elevator and press the button to go to the Biotechnology level. A few zombies will spawn before the elevator opens. |
|
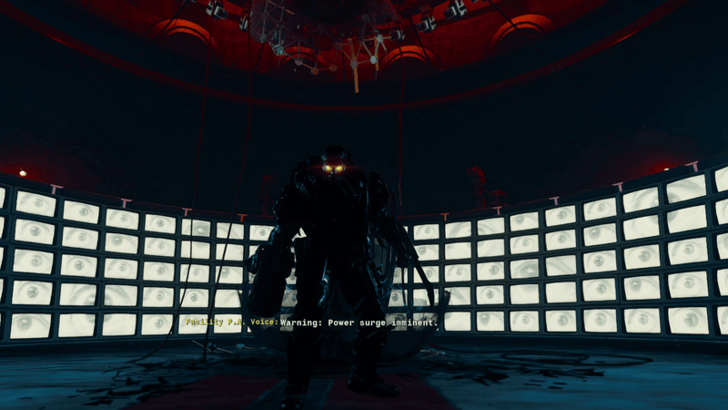
| 2 | Kill the Executive Director |
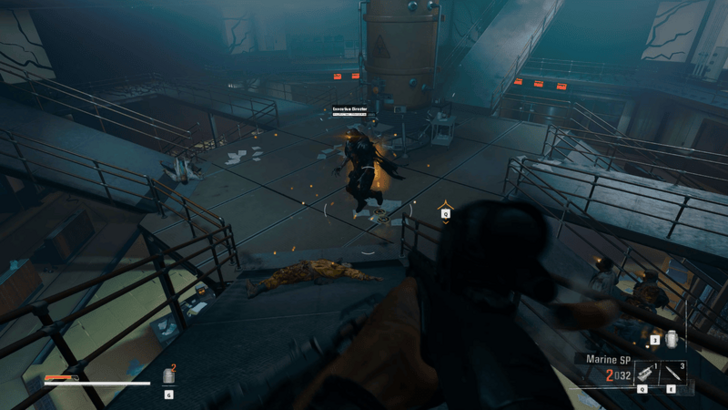 At the Biotechnology level, take out the Executive Director (in the form of a Prophet) and a cutscene will play before the missions concludes. Tip: Take the stairs and get to the highest point of the rafters to avoid getting swarmed and see the zombies easier. |
Emergence Rewards
Completion Reward
| Mission Rewards | 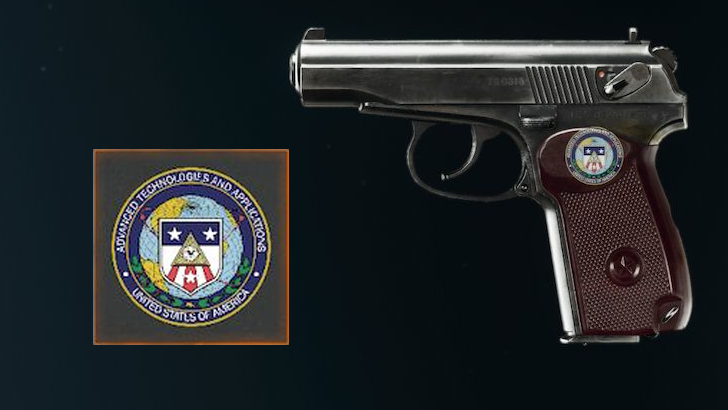 Allied Effort Sticker |
|---|
Challenge Reward
| Challenge | How to Complete |
|---|---|
 Collect Calls |
Answer every phone inside the Advanced Technologies and Applications building. |
During the mission, when discovering the locations of the different parts of the facility, telephones will ring. They are hard to miss especially if you have sound on. Make sure to answer all five of them to clear the Collect Calls Challenge.
Mission Achievements
| Achievement | How to Complete |
|---|---|
| Head Games | Complete Emergence in Campaign on any difficulty. |
Emergence Mission Info
Mission Details
| Emergence | |
|---|---|
 |
|
| Mission Overview | Uncle Sam was cooking up something special in Kentucky before the secret recipe got out. We're getting boots on the ground to find out what's going on. |
| Location | Kentucky, Advanced Technologies and Applications |
| Date & Time | February 7, 1991 - 08:49 EST |
| Playable Character | William "Case" Calderon |
Emergence Previous and Next Mission
| ◄ Previous Mission | Next Mission ▶ |
|---|---|
| The Rook: Reconciliation | The Rook: Recovery |
Black Ops 6 (BO6) Related Guides

Campaign Missions List and Walkthrough
All Campaign Guides
Author

Emergence Mission Walkthrough
Please participate in our site
improvement survey
03/2026
improvement survey
03/2026
Would you assist in
improving Game8's site?
improving Game8's site?

×
We are listening to our users' valuable opinions and discussing how to act on them.
The information collected through this survey will be used for the purpose of improving our services. In addition, the information will only be disclosed a part of a statistic in a format that will not allow identification of personal information.
Begin Survey
Not Now
×
Please rate each item regarding Game8.co's Advertisements.
Amount of Ads
Very Dissatisfied
Somewhat Dissatisfied
Fine
Somewhat Satisfied
Highly Satisfied
Placement of Ads
Timing of Ad Display
Ad Loading Speed
Safeness of Ads
Content of Ads
×
Please rate each item regarding Game8.co's Quality of Articles.
Amount of information
Very Dissatisfied
Somewhat Dissatisfied
Fine
Somewhat Satisfied
Highly Satisfied
Frequency of updates
Speed of new information
Accuracy of articles
Understandibility of articles
Readability of sentences
×
Please rate each item regarding Game8.co's Usability of the Site.
Ease of finding information
Very Dissatisfied
Somewhat Dissatisfied
Fine
Somewhat Satisfied
Highly Satisfied
Loading Speed
Use of Color
Font Size
Visibility of Images
Easy to Understand Layout
×
Please rate each item regarding Game8.co's Message Boards, Comments.
Ease of Writing
Very Dissatisfied
Somewhat Dissatisfied
Fine
Somewhat Satisfied
Highly Satisfied
Readability
Ease in Finding Information
Comment Quality
Comment Quantity
Admin Response
×
Please rate each item regarding Game8.co's Site's new design.
Please rate our site's new design
Very Dissatisfied
Somewhat Dissatisfied
Fine
Somewhat Satisfied
Highly Satisfied
Do you think that the website's design change makes the site easier to use?
Has the new design made it easier for you to find information on the site?
Has the new design improved the overall visual appeal of the site?
How would you rate your overall satisfaction with the new design of the site?
×
How likely are you to recommend Game8 to someone you know?
Very Unlikely
0
1
2
3
4
5
6
7
8
9
10
Very Likely
If you have other opinions regarding potential improvement to the website, please share them with us. We would appreciate your honest opinion.
Note: This is a free response section, so you can proceed without entering anything.
Note: Please be sure not to enter any kind of personal information into your response.
Note: Please be sure not to enter any kind of personal information into your response.
×
Thank You
×
Thank you for participating in our survey! Your answers will help us to improve the quality of our website and services.
We hope you continue to make use of Game8.
We hope you continue to make use of Game8.
Close
Rankings
- We could not find the message board you were looking for.
Gaming News


![Monster Hunter Stories 3 Review [First Impressions] | Simply Rejuvenating](https://img.game8.co/4438641/2a31b7702bd70e78ec8efd24661dacda.jpeg/thumb)
Popular Games

Genshin Impact Walkthrough & Guides Wiki
Honkai: Star Rail Walkthrough & Guides Wiki
Umamusume: Pretty Derby Walkthrough & Guides Wiki
Pokemon Pokopia Walkthrough & Guides Wiki
Resident Evil Requiem (RE9) Walkthrough & Guides Wiki
Monster Hunter Wilds Walkthrough & Guides Wiki
Wuthering Waves Walkthrough & Guides Wiki
Arknights: Endfield Walkthrough & Guides Wiki
Pokemon FireRed and LeafGreen (FRLG) Walkthrough & Guides Wiki
Pokemon TCG Pocket (PTCGP) Strategies & Guides Wiki


Recommended Games
Diablo 4: Vessel of Hatred Walkthrough & Guides Wiki
Cyberpunk 2077: Ultimate Edition Walkthrough & Guides Wiki
Fire Emblem Heroes (FEH) Walkthrough & Guides Wiki
Yu-Gi-Oh! Master Duel Walkthrough & Guides Wiki
Super Smash Bros. Ultimate Walkthrough & Guides Wiki
Pokemon Brilliant Diamond and Shining Pearl (BDSP) Walkthrough & Guides Wiki
Elden Ring Shadow of the Erdtree Walkthrough & Guides Wiki
Monster Hunter World Walkthrough & Guides Wiki
The Legend of Zelda: Tears of the Kingdom Walkthrough & Guides Wiki
Persona 3 Reload Walkthrough & Guides Wiki


All rights reserved
© 2024 Activision Publishing, Inc. ACTIVISION, CALL OF DUTY, CALL OF DUTY LEAGUE, MODERN WARFARE, CALL OF DUTY BLACK OPS, CALL OF DUTY WARZONE, and CALL OF DUTY VANGUARD are trademarks of Activision Publishing, Inc. All other trademarks and trade names are the property of their respective owners.
The copyrights of videos of games used in our content and other intellectual property rights belong to the provider of the game.
The contents we provide on this site were created personally by members of the Game8 editorial department.
We refuse the right to reuse or repost content taken without our permission such as data or images to other sites.
you didn't put the safe code details