Indigo Memories: The Trapped Walkthrough and How To Unlock

This is a guide on Indigo Memories: The Trapped, a Side Mission in Stranger of Paradise: Final Fantasy Origin. Read on to see a detailed walkthrough of the mission, including its rewards and how to unlock them!
List of Contents
Indigo Memories: The Trapped Overview
Basic Information
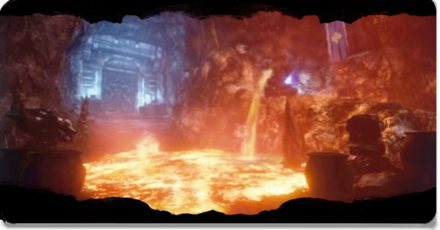
 Indigo Memories: The Trapped Indigo Memories: The Trapped
|
|
| Mission Level | 54 |
|---|---|
| How to Unlock | Unlocks after completing Memories of Fire. |
| First Completion Rewards |
・Anima Shard (x1/x1/x1)
・Flawless Magicite (x10/x15/x20)
・Flawless Materia (x10/x15/x20)
・Flawless Sphere (x10/x15/x20)
|
| Repeating Completion Rewards |
・Anima Shard (x1/x1/x1)
・Shining Magicite (x5/x5/x10)
・Shining Materia (x5/x5/x10)
・Shining Sphere (x5/x5/x10)
|
Certain rewards are only eligible in non-story difficulties. Quantities of items such as Anima Shards also vary depending on which difficulty you're on.
How to Unlock Indigo Memories: The Trapped
Complete Memories of Fire
This Side Mission can be unlocked by first completing the Main Mission Memories of Fire. Indigo Memories: The Trapped can be started in the same location as that of Memories of Fire in the World Map.
Memories of Fire Walkthrough and Rewards
Indigo Memories: The Trapped Walkthrough
| Objectives | |
|---|---|
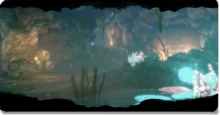
| 1 | 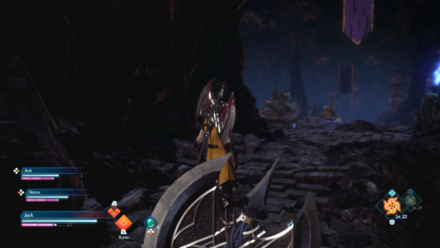 ・Defeat the First Master Tonberry The primary objective of this Side Mission is to find and eliminate 3 Master Tonberries scattered around the level. Although simple sounding, this task is actually incredibly difficult due to how powerful these Tonberries are. To get to the first Tonberry, run forward from the starting area until you reach the cavern outside – make a left at the bend just past of the pyres with blue flames and up into a cave with stairs leading into it from the outside. There will be a Bloody Bat in the area where you'll find the first Tonberry doing laps going up and down a short flight of stairs, so take care of that first and fight the Tonberry next. |
| 2 | 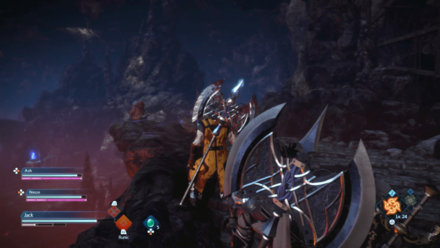 ・Defeat the Second Master Tonberry After defeating the first Tonberry, drop down from the "cliff" the first Tonberry hangs around in. Look left to see a path going up to the right and a central path leading to the next area. Head down the central path and then take a left – defeat the enemies here and move past the stone archway to fine an Ogre. Defeat it, and then move to the path on the right (not the path heading upwards). You can find the second Master Tonberry on a cliff directly ahead of you here. |
| 3 | 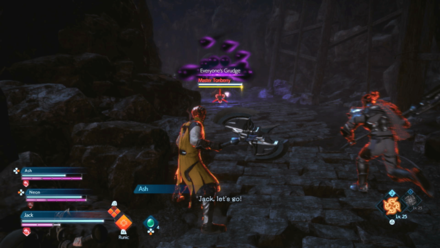 ・Defeat the Third Master Tonberry After Defeating the Third Tonberry, head back to the previous area and take the path heading up this time. Follow the path until you reach a cave with the last Master Tonberry to beat. |
Tips and Strategies
Use Your Party Members

Regular Tonberries are some of the most damage resistant and annoyingly powerful creatures there are in the game, with Master Tonberries being its more powerful form. Capable of defeating you in two simple moves or a quick burst of Magic, having distance between you and the Tonberry is key to victory.
Use your Allies to damage the creature up close and make use of Magic or Lance throws against the Tonberry to score hits from afar. Alternatively, you can use White Mage to buff up your party members and let them completely take care of the creature.
How to Beat Master Tonberry: Locations and Strategies
Stranger of Paradise: Final Fantasy Origin Related Guides

All Side Missions and How to Unlock
Side Missions
 Azure Memories: The Believer
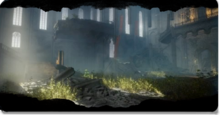 Azure Memories: The Betrayer
 Azure Memories: The Overconfident
 Azure Memories: The Rebel
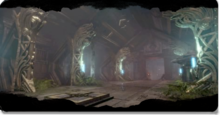 Azure Memories: The Sacrifice
 Azure Memories: The Stymied
 Bound by Crimson Memories
 Coral Memories: The Avenger
 Coral Memories: The Greedy
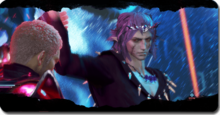 Ebon Memories: The Guided
 Ebon Memories: The Power-Hungry
 Ebon Memories: The Soul Seeker
 Ebon Memories: The Tragic Cynic
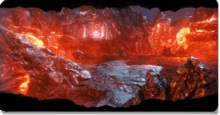 Ebon Memories: The Truthseeker
 Ebon Memories: The Warrior
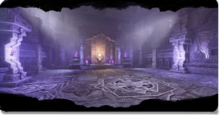 Ebon Memories: The Yearner
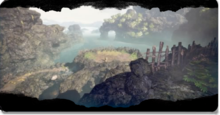 Indigo Memories: The Damned
 Indigo Memories: The Deceived
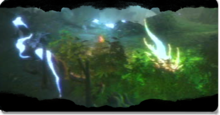 Indigo Memories: The Humiliated
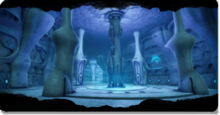 Indigo Memories: The Stabbed
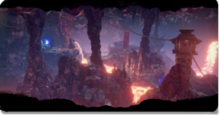 Indigo Memories: The Trapped
 Scarlet Memories: The Erudite
 Scarlet Memories: The Fallen
 Scarlet Memories: The Savior
Author

Stranger of Paradise: Final Fantasy Origin Walkthrough & Guides Wiki
Indigo Memories: The Trapped Walkthrough and How To Unlock
Rankings
- We could not find the message board you were looking for.
Gaming News

![Death Stranding 2: On The Beach Review [PC] | A Port That Delivers](https://img.game8.co/4447392/15310a0c9aa1b6843bb713b2ea216930.jpeg/show)

![Warframe Review [Switch 2] | Old Ninjas Can Learn New Tricks](https://img.game8.co/4455326/d5811d4c48e5fa4bbc3250cc4c10aedc.png/thumb)

Popular Games

Genshin Impact Walkthrough & Guides Wiki
Umamusume: Pretty Derby Walkthrough & Guides Wiki
Crimson Desert Walkthrough & Guides Wiki
Monster Hunter Stories 3: Twisted Reflection Walkthrough & Guides Wiki
Honkai: Star Rail Walkthrough & Guides Wiki
Pokemon Pokopia Walkthrough & Guides Wiki
The Seven Deadly Sins: Origin Walkthrough & Guides Wiki
Wuthering Waves Walkthrough & Guides Wiki
Zenless Zone Zero Walkthrough & Guides Wiki
Arknights: Endfield Walkthrough & Guides Wiki


Recommended Games
Fire Emblem Heroes (FEH) Walkthrough & Guides Wiki
Diablo 4: Vessel of Hatred Walkthrough & Guides Wiki
Cyberpunk 2077: Ultimate Edition Walkthrough & Guides Wiki
Yu-Gi-Oh! Master Duel Walkthrough & Guides Wiki
Super Smash Bros. Ultimate Walkthrough & Guides Wiki
Pokemon Brilliant Diamond and Shining Pearl (BDSP) Walkthrough & Guides Wiki
Elden Ring Shadow of the Erdtree Walkthrough & Guides Wiki
Monster Hunter World Walkthrough & Guides Wiki
The Legend of Zelda: Tears of the Kingdom Walkthrough & Guides Wiki
Persona 3 Reload Walkthrough & Guides Wiki


All rights reserved
© 2022 KOEI TECMO GAMES/SQUARE ENIX CO., LTD. All Rights Reserved. CHARACTER DESIGN: TETSUYA NOMURA LOGO ILLUSTRATION: ©2021 YOSHITAKA AMANO
The copyrights of videos of games used in our content and other intellectual property rights belong to the provider of the game.
The contents we provide on this site were created personally by members of the Game8 editorial department.
We refuse the right to reuse or repost content taken without our permission such as data or images to other sites.