A Familiar Place Walkthrough and Rewards
This is the Main Mission Guide for A Familiar Place in Stranger of Paradise. Read on to learn about the mission rewards, enemies, and a detailed walkthrough.
| Previous Main Mission | Next Main Mission |
|---|---|
| Natural Distortion | Memories of Wind |
List of Contents
A Familiar Place Overview
Basic Information
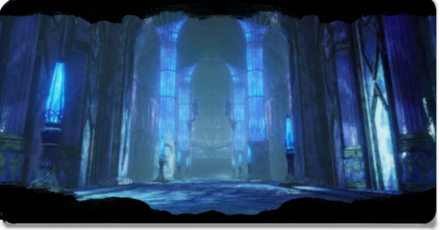 A Familiar Place A Familiar Place
|
|
| Mission Level | 33 |
|---|---|
| First Completion Rewards |
・Anima Shard (x3/x3/x3)
|
| Repeating Completion Rewards |
・Anima Shard (x3/x3/x4)
|
Certain rewards are only eligible in non-story difficulties. Quantities of items such as Anima Shards also vary depending on which difficulty you're on.
A Familiar Place Walkthrough
| Objectives | |
|---|---|
| 1 | 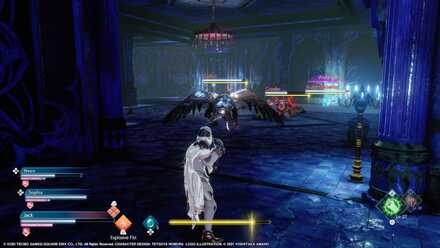 ・Climb to the top Go up the stairs ahead and turn left. Go up the spiral staircase. In the corridor, go straight to the end and turn right in the room at the end, then go up the stairs. You'll reach a room with a Griffon; go left and go up the stairs. |
| 2 |  ・Defeat the Mad Ogre ・Use the Warp In the next room, you must defeat the Mad Ogre. Get the Core that it drops and use it on the panel to access the warp pad to the next area. |
| 3 | 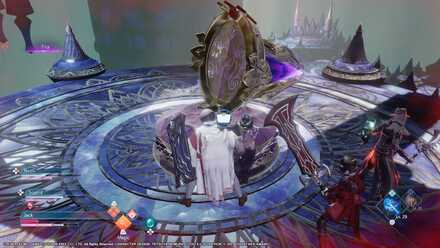 ・Use the Magic Prism In the next area, touch the cubes. Take note of the elevator here as you can use it to return once you've advanced upwards. Ahead, you'll find a Magic Prism. Interact with the small circular button on the base to rotate it. You won't be able to rotate it if it is already firing, so if the Fire Elemental has already cast Fira and activated it, wait until it stops. Rotate the Magic Prism once and either let the Fire Elemental hit it or cast a Spell on it to activate, creating a bridge. If you accidentally kill the Fire Elemental and use all your MP, you can regain MP by holding R2 with the Mage to charge up. |
| 4 | ・Break the Dark Vent Continue ahead to reach the Ground Floor. Past the Griffon you'll find the first elevator door, which you can return via if you die. Break the Dark Vent at the top. Lure the monsters down the stairs and then go back up to have a free shot at the Dark Vent. |
| 5 | 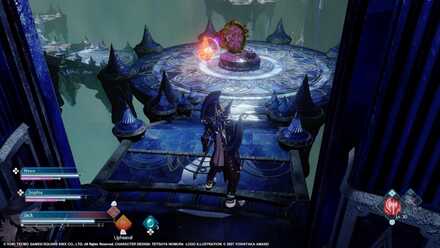 ・Use the Magic Prism In the next room, rotate the Magic Prism and activate its laser. Go back through the room you came in, and there will be a new bridge up opposite you. The next Magic Prism is optional, so continue ahead and past the Griffin to reach the Top Floor. |
| 6 | 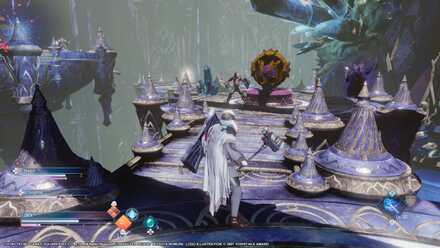 ・Use both Magic Prisms When you reach the area with two Magic Prisms, rotate the one you reach first and activate its laser to create a bridge to the next Prism. Rotate this prism and activate its later to create a bridge to the next area. There are invisible bridges across to the isolated platform. If you get stuck on a platform without a way to get back, look for the blue outline; you will be able to walk across here. |
| 7 | 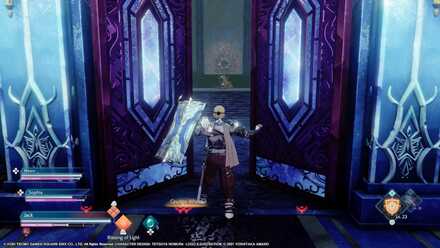 ・Break the Dark Vent ・Fight the Chimera On reaching The Conduit, go up the stairs. Turn right and go through the doors at the end. Break the Dark Vent to go through. In the next room, go through the door to fight the Chimera. If you go left at the top of the stairs instead, you'll encounter a Tonberry. |
| Previous Main Mission | Next Main Mission |
|---|---|
| Natural Distortion | Memories of Wind |
Tips and Strategies
Keep Distance from the Mad Ogre
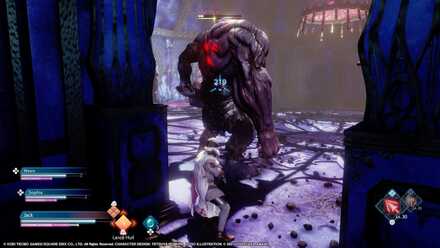
Although the Mad Ogre has a few attacks where it can charge and catch you off guard, in general, it's slow-moving and can be handled from a distance. If you really want to cheese the fight, you can stand in the hallway where it won't be able to advance and poke it with a Lance or Black Magic.
Activate Every Elevator You Pass
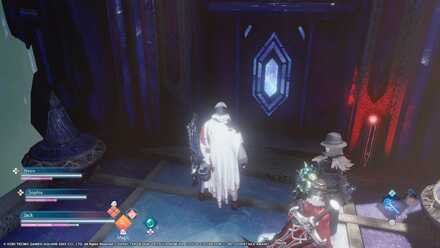
In the tower area, you won't find a new set of cubes for a long time, but if you die, you can use the elevator on the right at the start to proceed to a higher floor if you've reached it and activated already. If you don't interact with an elevator when you reach it, you won't be able to skip back there, so be sure to interact with elevator doors each time you find them to allow the elevator door back at the bottom to reach that level.
Tonberry Location
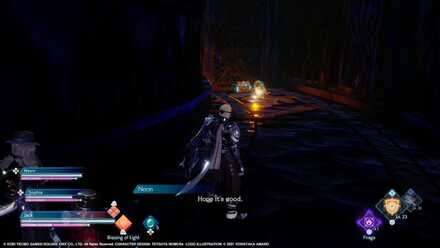
There is a Tonberry found to the left at the top of the staircase in The Conduit, near the end of the level. Tonberries give high EXP and multiple equipment drops if you want to challenge it, but remember that it's a dangerous foe.
Chimera Boss Fight
Strengths and Weaknesses
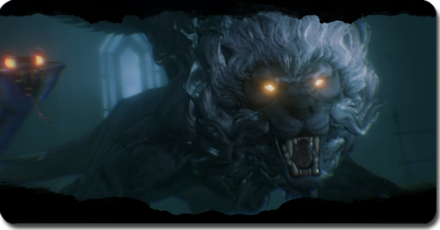 Chimera Chimera
|
|
| Difficulty | ★★ |
|---|---|
| Weaknesses | Ice |
| Resistances | None |
How to Beat Chimera: Locations and Strategies
Stranger of Paradise: Final Fantasy Origin Related Guides

List of All Main Quests (Story Walkthrough)
All Main Missions
| No. | Mission | Mission Level |
|---|---|---|
| 1 |
 A Desperate Struggle A Desperate Struggle
|
1 |
| 2 |
 Illusion at Journey's End Illusion at Journey's End
|
5 |
| 3 |
 The Journey Begins The Journey Begins
|
12 |
| 4 |
 Audience with the Dark Elf Audience with the Dark Elf
|
19 |
| 5 |
 Natural Distortion Natural Distortion
|
26 |
| 6 |
 A Familiar Place A Familiar Place
|
33 |
| 7 |
 Memories of Wind Memories of Wind
|
40 |
| 8 |
 Memories of Poison Memories of Poison
|
46 |
| 9 |
 Memories of Fire Memories of Fire
|
50 |
| 10 |
 Phantoms of the Past Phantoms of the Past
|
46 |
| 11 |
 Memories of Earth Memories of Earth
|
50 |
| 12 |
 To Remember To Remember
|
62 |
| 13 |
 Memories of Water Memories of Water
|
74 |
| 14 |
 The False Warriors The False Warriors
|
74 |
| 15 |
 Schemes of the Past Schemes of the Past
|
88 |
| 16 |
 Remembering Home Remembering Home
|
100 |
| 17 |
 The Suffering of Fools The Suffering of Fools
|
112 |
| 18 |
 Strangers of Paradise Strangers of Paradise
|
120 |
| 19 |
 Warriors of Calamity Warriors of Calamity
|
118 |
Author
Stranger of Paradise: Final Fantasy Origin Walkthrough & Guides Wiki
A Familiar Place Walkthrough and Rewards
Rankings
- We could not find the message board you were looking for.
Gaming News
Popular Games

Genshin Impact Walkthrough & Guides Wiki

Umamusume: Pretty Derby Walkthrough & Guides Wiki

Crimson Desert Walkthrough & Guides Wiki

Monster Hunter Stories 3: Twisted Reflection Walkthrough & Guides Wiki

Honkai: Star Rail Walkthrough & Guides Wiki

Pokemon Pokopia Walkthrough & Guides Wiki

The Seven Deadly Sins: Origin Walkthrough & Guides Wiki

Wuthering Waves Walkthrough & Guides Wiki

Zenless Zone Zero Walkthrough & Guides Wiki

Arknights: Endfield Walkthrough & Guides Wiki
Recommended Games

Fire Emblem Heroes (FEH) Walkthrough & Guides Wiki

Diablo 4: Vessel of Hatred Walkthrough & Guides Wiki

Cyberpunk 2077: Ultimate Edition Walkthrough & Guides Wiki

Yu-Gi-Oh! Master Duel Walkthrough & Guides Wiki

Super Smash Bros. Ultimate Walkthrough & Guides Wiki

Pokemon Brilliant Diamond and Shining Pearl (BDSP) Walkthrough & Guides Wiki

Elden Ring Shadow of the Erdtree Walkthrough & Guides Wiki

Monster Hunter World Walkthrough & Guides Wiki

The Legend of Zelda: Tears of the Kingdom Walkthrough & Guides Wiki

Persona 3 Reload Walkthrough & Guides Wiki
All rights reserved
© 2022 KOEI TECMO GAMES/SQUARE ENIX CO., LTD. All Rights Reserved. CHARACTER DESIGN: TETSUYA NOMURA LOGO ILLUSTRATION: ©2021 YOSHITAKA AMANO
The copyrights of videos of games used in our content and other intellectual property rights belong to the provider of the game.
The contents we provide on this site were created personally by members of the Game8 editorial department.
We refuse the right to reuse or repost content taken without our permission such as data or images to other sites.


![Death Stranding 2: On The Beach Review [PC] | A Port That Delivers](https://img.game8.co/4447392/15310a0c9aa1b6843bb713b2ea216930.jpeg/show)

![Warframe Review [Switch 2] | Old Ninjas Can Learn New Tricks](https://img.game8.co/4455326/d5811d4c48e5fa4bbc3250cc4c10aedc.png/thumb)


