Swordfighter Best Builds
Swordfighter is one of the basic Jobs that can be accessed in Stranger of Paradise: Final Fantasy Origins. Read on to find out more about this Job, its best builds, and which Equipment Effects to go after to maximize Jack's potential!
| Swordfighter Guides | |
|---|---|
|
|
|
List of Contents
Counter Attack Build
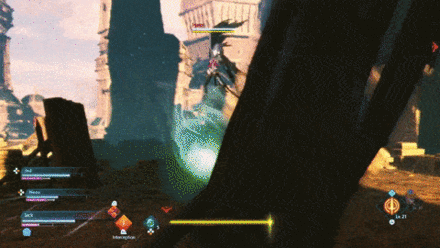
The Swordfighter Job is a naturally defensive Job, allowing players to make use of a "sword and shield" set up with their gear. Harnessing the defensive nature of the Job allows players to gradually build their MP while still dealing damage against foes through quick counter-attacks that can stun-lock enemies all while shrugging off any of their attacks.
Best Abilities Loadout
Combo Ability Setup
| No. | Ability | Button Commands |
|---|---|---|
| 1 |
 Interception Interception
|
|
| 2 |
 Slash & Soar Slash & Soar
|
|
| 3 |
 Cross Slash Cross Slash
|
Command Ability Setup
| Best Commands | |||
|---|---|---|---|
 Shield Bash Shield Bash
|
 Counter Counter
|
 Reinforce Reinforce
|
|
- Shield Bash: As a counterattacking build, the Shield Bash is a useful ability to get from the Swordfighter Job Tree. This makes it possible for players to perform a quick counterattack when raising their shield against enemy strikes, allowing them to "attack" with the shield itself.
- Counter: Counter is a command ability that can be unlocked in the Pugilist Job Tree. It reduces the break cost of a successful soul shield while also increasing MP restored.
- Reinforce: Reinforce is one of the command abilities that you can pick up in the Job Tree for Swordsman. The Ability decreases the chances of staggering from enemy attacks, giving players enough time to think about a way to effectively counter or respond to enemy attacks.
Passive and Effect Priorities
| Best Passives and Effects | ||
|---|---|---|
 Interception Mastery Interception Mastery
|
 All Damage -4.5% All Damage -4.5%
|
Potion Recovery Amount +17.9%
|
- Interception Mastery: Interception Mastery boosts the effects of Interception, which is the primary Action Ability for the Swordfighter Job.
- All Damage -4.5%: Reduces the amount of received damage from enemy attacks. As a defense focused build, this ability can allow players to last longer on the field, capably receiving more hits from enemies with reduced damage intakes.
- Potion Recovery Amount +17.9%: Despite being a defense oriented build, it is functionally impossble to completely avoid 100% of enemy attacks. When using Potions to recover, this ability is useful as it can increase the amount of HP recovered per use of a Potion.
Recommended Equipment Effects
| Equipment Effects |
|---|
| ・Physical Damage Taken ( - ) ・Physical Break Damage Taken ( - ) ・Action Ability MP Cost ( - ) |
Running a defensive oriented build with the Swordfighter Job is a rewarding task that unfortunately exposes the player to plenty of potential dangers, particularly against stronger enemies that are particularly difficult to deal with such as Tonberries or Cactuars.
Counterattacking against such enemies requires that you hit hard to make attacks worth it, so supplement your counter attacks (Abilities) with a reduced MP Cost to offset any MP uses that you may have with the Interception and Shield Bash Abilities, and spam any offensive skills that you may have in your moveset until you need to recover your MP once more.
Offense Heavy Build
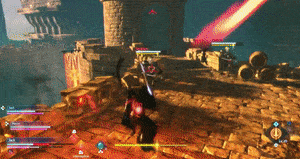
Choosing to go with an offensive heavy build while using the Swordfighter Job will allow players to more quickly chain attacks together through the use of the Job's quick and easy attack Abilities that are supplemented by damage dealing stat bonuses.
Provided that players are starting off with a full MP gauge when fighting against enemies, chaining together attacks accessed through the Swordfighter Job can more than adequately deal with some of the stronger enemies found in-game.
Best Abilities Loadout
Combo Ability Setup
| No. | Ability | Button Commands |
|---|---|---|
| 1 |
Slash & Soar
|
|
| 2 |
Cross Slash
|
|
| 3 |
 Dayflash Dayflash
|
Command Ability Setup
| Best Commands | |||
|---|---|---|---|
|
Shield Bash
|
Reinforce
|
 Swayback Swayback
|
|
- Shield Bash: Despite being an ability more oriented to counterattacks, Shield Bash is a useful ability to have in cases of emergency. Use it when enemies are particularly being difficult or are on the verge of depleting your Break Gauge.
- Reinforce: Reinforce is one of the command abilities that you can pick up in the Job Tree for Swordsman. The Ability decreases the chances of staggering from enemy attacks, giving players enough time to think about a way to effectively counter or respond to enemy attacks.
- Swayback: Swayback is a command ability unlocked in the Lancer Job Tree. Use it to jump back from enemies that are close to depleting your break gauge – successful uses of this ability allows the player to counter attack with a full break gauge against enemies.
Passive and Effect Priorities
| Best Passives and Effects | ||
|---|---|---|
|
Ability Damage +3.1%
|
All Damage -4.5%
|
Potion Recovery Amount +17.9%
|
- Ability Damage +3.1%: Increased Ability Damage can allow enemies to be vanquished faster through chained uses of the Combo Abilities.
- All Damage -4.5%: Reduces the amount of damage received from enemy attacks. Due to the free flowing attack nature of this build, having the attack damage of enemies reduced is a good way to last longer in conflicts.
- Potion Recovery Amount +17.9%: Similar to how players can't completely be devoid of any taken damage while on the defensive, this ability makes it so that much more aggressive players can offset any damage taken by having more of their HP return to them when using potions.
Recommended Equipment Effects
| Equipment Effects |
|---|
| ・Soul Shield: MP Recovery ( + ) ・Physical Damage Dealt ( + ) ・Damage Dealt at Max Break ( + ) |
Owing to the heavy usage of MP for a heavy offense oriented build with this Job, MP recovery is an essential part of this build to allow players to chain more Attack Abilities together more frequently.
This not only reduces the time players will have to wait until their MP replenishes with the use of basic attacks, but also helps to defeat stronger enemeis faster with the supplemental bonuses that is added with Equipment Effects affecting dealt Physical Damage, Damage Dealt on Max Break, and the Support Abilities that can be unlocked in the Swordfighter Job page.
Best Job Synergies and Pairings
Mage
 Mage Mage
|
Available Weapon(s) | Shield? |
|---|---|---|
|
Mace |
Can use shields | |
| Basic Info | The Mage is a job that relies on the use of magic to deal considerable damage to enemies. This class utilizes both maces and shield, making it a capable melee fighter when it runs out of MP. | |
There are plenty of elemental enemies that can be found in the many different areas players will have to go through during Main and Side Missions. Taking these enemies out fast unfortunately cannot be done with a pure Swordfighter build due to the close-ranged combat the Job employs.
Having a Mage build as the secondary Job in your armament can help deal with these threats faster by exploiting their weaknesses, allowing players to close in on them for quick attacks up close. You can even exploit this synergy by moving on to upgraded forms of the Mage Job, such as the Red or Black Mage.
Lancer
 Lancer Lancer
|
Available Weapon(s) | Shield? |
|---|---|---|
|
Lance |
Cannot use shields | |
| Basic Info | The Lancer is a mid-range fighter that specializes in using lances and halberds. With its ability, the Lancer can target enemies from a distance by hurling their weapon in the direction of the enemy. | |
One glaring weakness that players will notice early on with the Swordfighter build is its lack of range when attacking enemies. Although it is not a significant problem overall, this vulnerability can get exposed when dealing with flying enemies such as Leech Bats, which often fly just outside of a player's range.
The Lancer can help deal with these threats, and with its ability to throw Lances at enemies for critical hits, they can allow players to deal with flying targets first before engaging in close quarters combat against grounded enemies.
Lancer Guide: How to Use Lancer
Swordfighter Job Info
General Info
| Swordfighter Info | |
|---|---|
 Swordfighter Swordfighter
|
|
| Info | The Swordfighter is a lot similar to your Swordfigher, with the exception that it offers more mobility in exchange to a drop in damage output. Swordfighters can intercept enemy attacks with a successful guard, nullifying the enemy's attack and dealing counter damage in the process. |
| Job Action | Interception: A counterattack that deals slashing damage. While active, damage from blockable attacks is nullified and will trigger a counterattack. Effect ensds after a period of time, or after triggering once. |
| Level | Basic |
| Usable Weapon |
Sword |
| Shield? | Can use Shields |
Swordfighter Guide: How to Use Swordfighter
Stranger of Paradise Related Guides

All Builds
| Basic Jobs | ||
|---|---|---|
| Advanced Jobs | ||
| Expert Jobs | ||
This section is currently under construction. Check back later for updates!
Author

Stranger of Paradise: Final Fantasy Origin Walkthrough & Guides Wiki
Swordfighter Best Builds
Rankings
- We could not find the message board you were looking for.
Gaming News


![Warframe Review [Switch 2] | Old Ninjas Can Learn New Tricks](https://img.game8.co/4455326/d5811d4c48e5fa4bbc3250cc4c10aedc.png/thumb)
Popular Games

Genshin Impact Walkthrough & Guides Wiki
Umamusume: Pretty Derby Walkthrough & Guides Wiki
Crimson Desert Walkthrough & Guides Wiki
Monster Hunter Stories 3: Twisted Reflection Walkthrough & Guides Wiki
Honkai: Star Rail Walkthrough & Guides Wiki
Pokemon Pokopia Walkthrough & Guides Wiki
The Seven Deadly Sins: Origin Walkthrough & Guides Wiki
Wuthering Waves Walkthrough & Guides Wiki
Zenless Zone Zero Walkthrough & Guides Wiki
Arknights: Endfield Walkthrough & Guides Wiki


Recommended Games
Fire Emblem Heroes (FEH) Walkthrough & Guides Wiki
Diablo 4: Vessel of Hatred Walkthrough & Guides Wiki
Cyberpunk 2077: Ultimate Edition Walkthrough & Guides Wiki
Yu-Gi-Oh! Master Duel Walkthrough & Guides Wiki
Super Smash Bros. Ultimate Walkthrough & Guides Wiki
Pokemon Brilliant Diamond and Shining Pearl (BDSP) Walkthrough & Guides Wiki
Elden Ring Shadow of the Erdtree Walkthrough & Guides Wiki
Monster Hunter World Walkthrough & Guides Wiki
The Legend of Zelda: Tears of the Kingdom Walkthrough & Guides Wiki
Persona 3 Reload Walkthrough & Guides Wiki


All rights reserved
© 2022 KOEI TECMO GAMES/SQUARE ENIX CO., LTD. All Rights Reserved. CHARACTER DESIGN: TETSUYA NOMURA LOGO ILLUSTRATION: ©2021 YOSHITAKA AMANO
The copyrights of videos of games used in our content and other intellectual property rights belong to the provider of the game.
The contents we provide on this site were created personally by members of the Game8 editorial department.
We refuse the right to reuse or repost content taken without our permission such as data or images to other sites.