Best Jobs Tier List
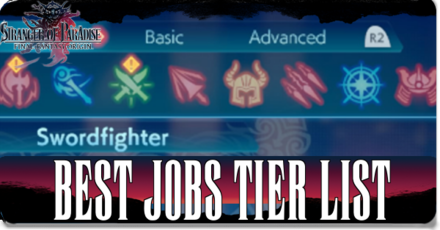
This is a guide to the best Jobs to choose in Stranger of Paradise: Final Fantasy Origin, with a full tier list of the strongest and weakest Jobs in the game. Learn which Jobs to use, and which are best suited for each situation!
List of Contents
Best Jobs Tier List for Endgame (Expert Jobs)
Tier List Explanation
SS Tier
| Job | Tier | When to Use |
|---|---|---|
 Liberator Liberator
|
Bosses | |
| Defensively and Offensively Great | ||
| The Liberator is able to use all weapons, making it adaptable to a variety of playstyles with some of the best defensive and offensive potential for each. With the Liberator, you don't have to sacrifice damage to be a tank.
Not only is Mighty Guard an incredible defensive Action costing modest MP for its effect, but it has powerful combos which pair with its Combo Ability Effects to restore HP on hitting. In particular, it boasts one of the most powerful Combos for the Axe, Orbital Collision. Its Parry Bonus Affinity Bonuses increase its parry window, matching with its Combo Ability Effects which allow it to cancel enemy resistances on a succesful parry to action combo. |
||
S Tier
| Job | Tier | When to Use |
|---|---|---|
 Cyclic Warrior Cyclic Warrior
|
Bosses or Mobs | |
| Chaos Incarnate | ||
| The Cyclic Warrior is a bit situational because its main draw, Soul of Chaos, relies on having 3 bars of MP locked and loaded, but the result makes up for the cost with both physical and break damage in a large area of effect when you are able to execute it.
Pairing the Cyclic Warrior with a Job class that is excellent at recovering MP, like the Samurai, and equipping the Lunatic and Blood Weapon Commands on it turns it into an elemental force of nature. This combo allows it to recover its HP and MP while dealing a lot of physical damage and setting up for its actual attack with the Soul of Chaos. |
||
 Tyrant Tyrant
|
Bosses or Mobs | |
| Master of Exploiting Weakness | ||
| The Tyrant is able to use its Job Ability Enchant to place any element on its weapon, allowing it to easily stack up Vulnerabilities on enemies. This stacks with its Combo Ability Effects and Affinity Bonuses which increase accumulation of status effects, making it even easier to inflict weaknesses and deal heavy damage. The Tyrant's Combo Ability Effects also recover its break gauge, increasing your potential to use Soul Shield and recover MP. |
||
 Breaker Breaker
|
Mobs | |
| King of Mob Cleanup | ||
| The Breaker is built around combos which Soul Break enemies automatically and recover the MP used on them, starting with its Job Ability Zantetsuken. Its Affinity Bonuses further increase the MP gained from Soul Bursts, allowing it to continue chaining. Lance Combos like Dragon Claws and Dragon Fang which allow you to continue attacking after finishing an enemy pair well with it, allowing you to finish multiple enemies while auto-Soul Breaking each of them. | ||
 Sage Sage
|
Bosses or Mobs | |
| Reinvents the Mage | ||
| The Sage takes all the advantages of both the White Mage and Black Mage with no disadvantages, effectively replacing all other Mages. Further improving on those before it, the Sage becomes quicker to cast Spells the more it casts, making it able to overcome the slow nature of Mages. Ultima is incredibly powerful and while it takes time to set up, casting 6 Spells will come naturally and it costs no additional MP to use, giving it essentially a free mega-attack without a lot of specific action needed from the user. |
||
A Tier
| Job | Tier | When to Use |
|---|---|---|
 Ninja Ninja
|
Bosses | |
| Elemental Attacker with a Mixed Bag of Tricks | ||
| The Ninja, like the Tyrant, is built around inflicting Elemental Vulnerabilities on enemies, and its Affinity Bonuses have the unique effects of restoring MP when attacking while one is inflicted. However, its has the disadvantage of not being able to inflict elemental damage with its basic attacks.Its Ninjutsu allows it to use a variety of effects which are useful but not world-shattering, and too limited in quantity to effectively set up an Elemental Vulnerability. Pairing it with a Job which can boost its potential, like the Tyrant to Enchant its weapon with an element, can allow it to better take advantage of its variety of elemental combos. |
||
 Paladin Paladin
|
Mobs | |
| A Safer Version of Dark Knight | ||
| Don't mistake Paladin for a way to restore your low health, as Holy Fang restores minimal HP for high MP cost. Instead, Paladin is effectively a safe version of Dark Knight which trades buffs at low health for buffs at max health. Paladin can be a fair choice for those confident in keeping their HP full as Holy Fang allows it to deal heavy bonus Holy damage at max, and its Passives and Vigor Bonus Affinity Bonuses provides strong damage buffs and break damage increases. Compared to the Dark Knight, the Paladin is useful against mobs as Holy Fang Mastery allows it to regain HP for each Soul Break. |
||
B Tier
| Job | Tier | When to Use |
|---|---|---|
 Dark Knight Dark Knight
|
Bosses | |
| For Daredevils Only | ||
| The damage increase from the Dark Knight's Souleater Ability is significant, racking up about an extra 25% damage on every hit while also building up a vulnerability to Dark. Its Adrenaline Bonus Affinity Bonuses pair well with the kamikaze nature of Souleater to further boost its damage near death, while Souleater Mastery makes Souleater's MP cost free as well when near death. To play Dark Knight effectively, you'll want to be battling at 1 HP remaining to get the full effects of its boosts, a tall order for most players. For those confident enough, Dark Knight has an extremely high damage potential, but its danger cannot be overstated. |
||
 Assassin Assassin
|
Bosses | |
| Useful in Crit-Friendly Situations | ||
| The Assassin's Combos and Combo Ability Effects are built around inflicting critical hits, allowing it to set up its Assassinate Job Ability. Unfortunately, while Assassinate is cool, it just doesn't do enough damage or break to make it a self-sufficient tactic except with slow-moving bosses like Dragon Zombie, and even then, you're probably better off simply using a Job which can inflict high DPS on its own like the Liberator or Berserker. | ||
C Tier
| Job | Tier | When to Use |
|---|---|---|
 Void Knight Void Knight
|
Mobs | |
| Runic is Too Niche | ||
| The Void Knight's Runic Job Ability is focused on absorbing Magic cast by enemies and either absorbing it or throwing it back at them. This effect does not work for all Abilities, only those classified as Magic, so it's difficult to execute its potential against most enemies. Its great Runic Protection Command allows you to take damage in MP instead of HP, and it has a strong Inferno combo for the Greatsword, but overall you're best taking these and using them more productively on a different Job. |
||
Best Jobs Tier List for Mid Game (Advanced Jobs)
Tier List Explanation
SS Tier
| Job | Tier | When to Use |
|---|---|---|
 Samurai Samurai
|
Bosses or Mobs | |
| Top-Tier MP Recovery and Weapon | ||
| The Samurai's Action Ability Meikyo-Shisui allows it to recover MP simply by attacking, making it perfect to pair with any other Job which relies on MP for damage output. Meikyo-Shisui can even be passed on to another Job as long as you do not get hit. | ||
 Berserker Berserker
|
Bosses or Mobs | |
| Insane DPS and Bulk | ||
| The Berserk Ability ramps up the damage you can deal to let you smash through mobs and hit bosses hard. Although you lose the ability to use Potions during Berserk, the Berserker Job Affinity boosts Stamina and HP significantly to mitigate this and make it a bulky attacker that can dish out DPS when needed. | ||
S Tier
| Job | Tier | When to Use |
|---|---|---|
 Warrior Warrior
|
Bosses | |
| A Strong All-Rounder | ||
| The Warrior is able to use almost all of the weapons in the game, and shines as an improved user of the Greatsword, a hard-hitting weapon useful in Boss battles where you'll rarely find the time to execute a combo or spam small hits. This pairs well with its War Cry ability which provides healing over time, allowing it to last longer in Boss fights. The Warrior also brings the powerful Retribution combo, which has a rather short wait time but can do big Break damage if it guards an attack successfully. | ||
 Knight Knight
|
Bosses or Mobs | |
| An Improved Swordfighter | ||
| Although the Swordfighter's Interception is extremely safe, automatically blocking attacks, the Knight is a solid upgrade for those confident in their Soul Shield timing. The Knight's Blessing of Light has a fixed time length during which multiple blocked attacks can be parried, a clear improvement Interception's single-use limitation. A Job which requires skill to use but can pay off. | ||
 Dragoon Dragoon
|
Mobs | |
| High Break Damage Potential | ||
| The Dragoon has a number of Combos which when used effectively, can chop down enemies' Break bar. Crippling Strike and Run Through are bonuses which can stack onto Wild Thrust to boost its Break. These abilities, or Piercing Blow can be used to achieve Wall Splat and push Break up more. The classic Jump can be used not only to avoid attacks, but can combine easily with Combos or even itself to smash a Break bar down fast with no hassle. | ||
A Tier
| Job | Tier | When to Use |
|---|---|---|
 White Mage White Mage
|
Mobs | |
| A Variety of Useful Buffs | ||
| The White Mage stands out as the strongest Mage class among the Advanced Jobs due to its potent buffs, and its ability to set them up before a battle. While Black Mages must attempt to simultaneously charge Spells and avoid attacks, White Mages can prep buffs on the whole party before a battle and switch Jobs before going in while still keeping their buffs. | ||
B Tier
| Job | Tier | When to Use |
|---|---|---|
 Black Mage Black Mage
|
Bosses | |
| Powerful Magic, but at a Price | ||
| The Black Mage has some of the most powerful spells in the game, but the time it takes to charge the spell without being able to move makes the Job difficult to use effectively, so using your party members to draw aggro is recommended. While the spells do hit hard, they don't have high Break damage and won't one-shot enemies as consistently as a combo from the Samurai or Berserker. | ||
 Monk Monk
|
Mobs | |
| Focus is Underwhelming | ||
| The Monk's Focus ability sounds useful on paper with its HP regain and boosted Break damage, but it provides lackluster healing and although the Break boost provided can stack up to 3 times for the cost of 2 MP bars, our team's tests were not able to identify significant increases in Break damage regardless of the level of Focus used. In addition, the new Combos available to the Monk are overall weaker than the Pugilist's Explosive Fist and Takedown. It has a helpful status-healing Command Ability, Chakra, which you should unlock and use on a different Job. | ||
C Tier
| Job | Tier | When to Use |
|---|---|---|
 Thief Thief
|
Mobs | |
| Lack of Significant Gains | ||
| Compared to the Duelist Basic Job, the improved version of the Thief doesn't have much to back up its status as an Advanced Job. The Steal skill is a neat idea, but enemies use Instant Abilities frequently anyway and it's easy enough to grab them when used and save your MP. The Combos introduced in the Thief tree like Bisect and Sneak Attack deal low Break damage and are not worth investing in. | ||
 Red Mage Red Mage
|
Mobs | |
| Master of None | ||
| The Red Mage can use a few of the attacking spells of the Black Mage and a few of the buffing spells of the White Mage, but their effects are not as strong even when charged. The Chainspell ability is a fun idea that ends up costing multiple bars of MP to accomplish what a single combo or even a Lance Hurl could have. If nothing else, the Tempest combo in its tree has fairly good Break damage. | ||
Best Jobs Tier List for Early Game (Basic Jobs)
Tier List Explanation
S Tier
| Job | Tier | When to Use |
|---|---|---|
 Swordfighter Swordfighter
|
Bosses | |
| Parry with Ease | ||
| The Swordfighter's Interception mechanic makes it one of the strongest early Jobs in the melee-focused game. Particularly on harder difficulties, Bosses and Enemies will attack you relentlessly with heavy melee attacks, and being able to parry these with an easy and safe counterattack makes them significantly easier to handle. | ||
 Ronin Ronin
|
Mobs | |
| Katana User with Break Potential | ||
| The Ronin is the first user of the Katana unlocked – as one of the most powerful Weapon types, you'll want to take advantage of the Ronin as soon as it is available. Its Iai-Giri is a fast move which rushes forward and inflicts heavy Break damage, generally being a free hit when well-timed, and when you pull off a Soul Break it can pay for itself. | ||
 Marauder Marauder
|
Bosses and Mobs | |
| High Damage With Debuffs | ||
| Among all the weapon types, the Marauder's Axe has the highest damage output with its standard attack. Combined with its ability to inflict debuffs with Upheaval, which can also be charged up to maximize damage, the Marauder is a reliable class for dealing solid damage to both Bosses and mobs. | ||
A Tier
| Job | Tier | When to Use |
|---|---|---|
 Swordsman Swordsman
|
Bosses | |
| Slow and Bulky Hitter | ||
| The Swordsman is a good choice in the early game against Bosses to get in single big hits when timed well. However, its Spinning Slash is long and locks the player into an unescapable combo during which they are vulnerable, so it's better to spend your MP on Combos and Command Abilities like Lightbringer when using it. | ||
 Duelist Duelist
|
Mobs | |
| High Break Potential | ||
| The Duelist's Weak Spot action ability can be used to inflict a critical hit regardless of the enemy's position. Usually, critical hits can only be delivered from behind, but Weak Spot allows for critical hits from any position, allowing you to deal heavy break damage to enemies. High job affinity for Duelist also increases the amount of break damage of critical hits, making for an even better lead-in. | ||
 Lancer Lancer
|
Mobs | |
| High Break Potential and Range | ||
| The Lancer's Lance Hurl is a reliable entry to battle which can deal heavy Break damage, allowing you to get in a Soul Break right away and recover the MP used for the attack. It's also one of the few options which can hit enemies out of reach and often take them out completely. | ||
B Tier
| Job | Tier | When to Use |
|---|---|---|
 Pugilist Pugilist
|
Mobs | |
| Good for Handling Mobs | ||
| The Pugilist's standard attacking combo with the Knuckles can lock in weak mobs and spam them to death, making this a useful Job for clearing rooms without letting foes get a hit in. However, it's not as useful against stronger enemies which are not stunned and will simply stomp you during your combo. Explosive Fist is also unremarkable, so it's best to use other Combos in its place. | ||
 Mage Mage
|
Bosses or Mobs | |
| Magic with Free MP Charging | ||
| Compared to the more offensive Jobs, Mages are situational. Mages can be effective when using Resonance to allow other party members to draw aggro. It's also a great Job to pair with, as while charging a Spell, it's able to restore MP for free to a maximum of 2 bars. Consider pairing it with a primary attacking Job to get some MP charge when you run low. Note: Although the Mace used by the Mage is stated to recover “ample MP”, it's actually the same rate of MP recovery as other weapons, so it stands out less than expected in this regard. |
||
Job Tier List Criteria
Explanation of Tier Ranking
| Criteria for Job Builds | |||
|---|---|---|---|
| Damage Output | Synergy Potential | Investment Value | Ease of Use |
- Damage Output: Simply put, Jobs which are able to put out more damage at a faster rate will be evaluated higher. Sources of damage can include the weapons useable by the Job, its Job Ability, the combos available to it, and buffs from the Job Tree and Job Affinity.
- Synergy Potential: A Job which can pair well with other Jobs, such as through buffs or abilities that can benefit another Job on switch-in, can merit a higher ranking in the list.
- Investment Value: Although Combo Abilities are accessible to all Jobs that can use the matching Weapon, and Command Abilities are usable by any Job, this Tier List takes into account the value of leveling up the Job to unlock its Combos, Commands, Ability Effects, and Passives.
- Ease of Use: Even if a Job has high potential damage output, it is not as useful if that potential cannot be executed. Jobs which are easier to use and can be applied more flexibly to different situations will be considered more effective than those which are strong only in a limited context.
Stranger of Paradise: Final Fantasy Origin Related Links

Beginner's Guide: Tips and Tricks
Tier Lists
| All Tier Lists | |
|---|---|
| Best Jobs | Best Weapon Types |
Tips and Tricks
Comment
Mage should be way higher and it's absurd all these tier lists rate it so lowly. In a game that is balanced around MP management, this is the only class that lets you recover MP from afar and completely cheese regular enemy encounters. Pair it with any class that can heal and you have infinite sustain as well. It's also great for bosses since you can focus entirely on not dying. Its only weakness is enemies that rush you, but that goes for every casting class.
Author
Rankings
- We could not find the message board you were looking for.
Gaming News
Popular Games

Genshin Impact Walkthrough & Guides Wiki

Umamusume: Pretty Derby Walkthrough & Guides Wiki

Crimson Desert Walkthrough & Guides Wiki

Monster Hunter Stories 3: Twisted Reflection Walkthrough & Guides Wiki

Honkai: Star Rail Walkthrough & Guides Wiki

Pokemon Pokopia Walkthrough & Guides Wiki

The Seven Deadly Sins: Origin Walkthrough & Guides Wiki

Wuthering Waves Walkthrough & Guides Wiki

Zenless Zone Zero Walkthrough & Guides Wiki

Arknights: Endfield Walkthrough & Guides Wiki
Recommended Games

Fire Emblem Heroes (FEH) Walkthrough & Guides Wiki

Diablo 4: Vessel of Hatred Walkthrough & Guides Wiki

Cyberpunk 2077: Ultimate Edition Walkthrough & Guides Wiki

Yu-Gi-Oh! Master Duel Walkthrough & Guides Wiki

Super Smash Bros. Ultimate Walkthrough & Guides Wiki

Pokemon Brilliant Diamond and Shining Pearl (BDSP) Walkthrough & Guides Wiki

Elden Ring Shadow of the Erdtree Walkthrough & Guides Wiki

Monster Hunter World Walkthrough & Guides Wiki

The Legend of Zelda: Tears of the Kingdom Walkthrough & Guides Wiki

Persona 3 Reload Walkthrough & Guides Wiki
All rights reserved
© 2022 KOEI TECMO GAMES/SQUARE ENIX CO., LTD. All Rights Reserved. CHARACTER DESIGN: TETSUYA NOMURA LOGO ILLUSTRATION: ©2021 YOSHITAKA AMANO
The copyrights of videos of games used in our content and other intellectual property rights belong to the provider of the game.
The contents we provide on this site were created personally by members of the Game8 editorial department.
We refuse the right to reuse or repost content taken without our permission such as data or images to other sites.


![Warframe Review [Switch 2] | Old Ninjas Can Learn New Tricks](https://img.game8.co/4455326/d5811d4c48e5fa4bbc3250cc4c10aedc.png/thumb)


Or you could, you know, get to know the game a little bit better, and use Warrior's second link bonus with Sentinel for invulneratbility windows. Instead of spreading bs, I mean.