Warriors of Calamity Walkthrough and Rewards

This is the Main Mission Guide for Warriors of Calamity in Stranger of Paradise. Read on to learn about the mission rewards, enemies, and a detailed walkthrough.
| Previous Main Mission | Next Main Mission |
|---|---|
| Strangers of Paradise | - |
List of Contents
Warriors of Calamity Overview
Basic Information
 Warriors of Calamity Warriors of Calamity
|
|
| Mission Level | 118 |
|---|---|
| First Completion Rewards |
・Anima Shard (x2/x2/x2)
・Lionheart's Sword (Dark Knight)
|
| Repeating Completion Rewards |
・Anima Shard ( x2/x2/x2)
|
Certain rewards are only eligible in non-story difficulties. Quantities of items such as Anima Shards also vary depending on which difficulty you're on.
Warriors of Calamity Walkthrough
| Objectives | |
|---|---|
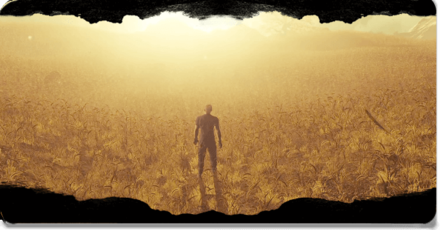
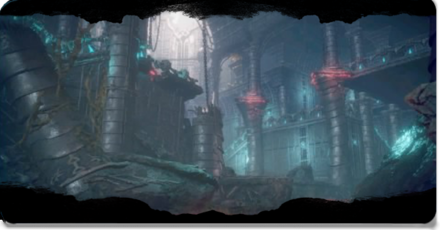
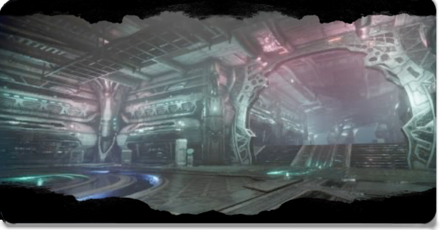
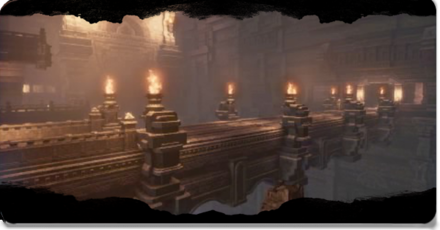
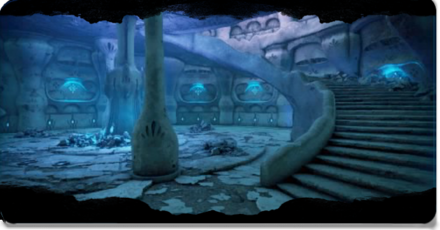
| 1 |  ・Explore the Chaos Shrine The start of the mission puts you in the Chaos Shrine, the location of the first main mission. Proceed to the path to the left and follow the stairs until you reach a ladder that you can climb up. Immediately go to the left path and to the tower. Go up the tower and cross the bridge, fight the enemies there until you reach a cube. Keep pushing forward until you reach a hall. In the hall, enter the big doors in the center and enter another set of big doors to the next objective. |
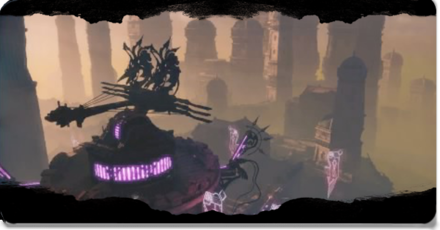
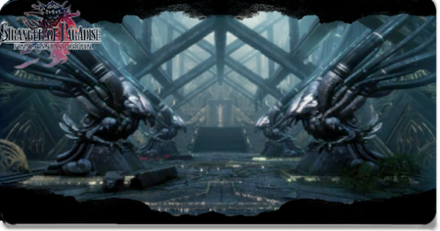
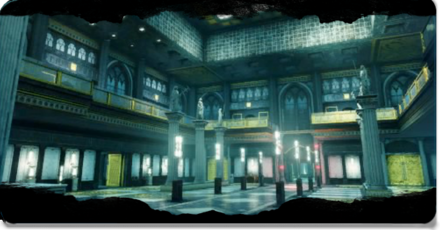
| 2 |  ・Punch the Crystals After entering the hall, you will be transported into another dimension and get locked it inside a crystal chamber. All you have to do is to keep attacking and breaking the crystals until you reach the large one in the center. Attack that to proceed to the next objective. |
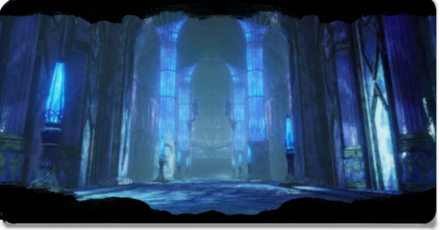
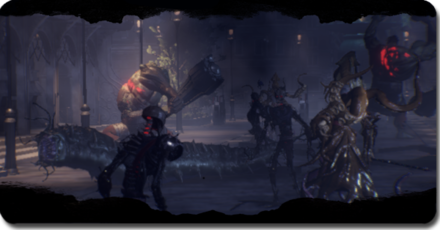
| 3 |  ・Defeat the Darkness Manifest After breaking the crystals, you will face the Darkness Manifest. Defeat the Darkness Manifest to complete the mission and the main story. |
| Previous Main Mission | Next Main Mission |
|---|---|
| Strangers of Paradise | - |
Tips and Strategies
Use Lunatic and Blood Weapon Against the Darkness Manifest
The final boss is a tough fight, but a combination of Lunatic and Blood Weapon are some of the best ability combinations for this fight. Lunatic increases attack speed, while Blood Weapon allows you to restor HP after each hit. Using weapons like daggers or fists with this combination can quickly take down the Darkness Manifest.
Darkness Manifest Boss Fight
 Darkness Manifest Darkness Manifest
|
|
| Difficulty | ★★★★ |
|---|---|
| Weaknesses | None |
| Resistances | None |
How to Beat Darkness Manifest: Locations and Strategies
Stranger of Paradise: Final Fantasy Origin Related Guides

List of All Main Quests (Story Walkthrough)
All Main Missions
| No. | Mission | Mission Level |
|---|---|---|
| 1 |
 A Desperate Struggle A Desperate Struggle
|
1 |
| 2 |
 Illusion at Journey's End Illusion at Journey's End
|
5 |
| 3 |
 The Journey Begins The Journey Begins
|
12 |
| 4 |
 Audience with the Dark Elf Audience with the Dark Elf
|
19 |
| 5 |
 Natural Distortion Natural Distortion
|
26 |
| 6 |
 A Familiar Place A Familiar Place
|
33 |
| 7 |
 Memories of Wind Memories of Wind
|
40 |
| 8 |
 Memories of Poison Memories of Poison
|
46 |
| 9 |
 Memories of Fire Memories of Fire
|
50 |
| 10 |
 Phantoms of the Past Phantoms of the Past
|
46 |
| 11 |
 Memories of Earth Memories of Earth
|
50 |
| 12 |
 To Remember To Remember
|
62 |
| 13 |
 Memories of Water Memories of Water
|
74 |
| 14 |
 The False Warriors The False Warriors
|
74 |
| 15 |
 Schemes of the Past Schemes of the Past
|
88 |
| 16 |
 Remembering Home Remembering Home
|
100 |
| 17 |
 The Suffering of Fools The Suffering of Fools
|
112 |
| 18 |
 Strangers of Paradise Strangers of Paradise
|
120 |
| 19 |
Warriors of Calamity
|
118 |
Author

Stranger of Paradise: Final Fantasy Origin Walkthrough & Guides Wiki
Warriors of Calamity Walkthrough and Rewards
Rankings
- We could not find the message board you were looking for.
Gaming News

![Star Savior Review [First Impressions] | Engaging, Entertaining, and Expensive](https://img.game8.co/4447603/8f500e9bf666bdb8adb1af478e9dfdbd.png/show)

![Warframe Review [Switch 2] | Old Ninjas Can Learn New Tricks](https://img.game8.co/4455326/d5811d4c48e5fa4bbc3250cc4c10aedc.png/thumb)

Popular Games

Genshin Impact Walkthrough & Guides Wiki
Umamusume: Pretty Derby Walkthrough & Guides Wiki
Crimson Desert Walkthrough & Guides Wiki
Monster Hunter Stories 3: Twisted Reflection Walkthrough & Guides Wiki
Honkai: Star Rail Walkthrough & Guides Wiki
Pokemon Pokopia Walkthrough & Guides Wiki
The Seven Deadly Sins: Origin Walkthrough & Guides Wiki
Wuthering Waves Walkthrough & Guides Wiki
Zenless Zone Zero Walkthrough & Guides Wiki
Arknights: Endfield Walkthrough & Guides Wiki


Recommended Games
Fire Emblem Heroes (FEH) Walkthrough & Guides Wiki
Diablo 4: Vessel of Hatred Walkthrough & Guides Wiki
Cyberpunk 2077: Ultimate Edition Walkthrough & Guides Wiki
Yu-Gi-Oh! Master Duel Walkthrough & Guides Wiki
Super Smash Bros. Ultimate Walkthrough & Guides Wiki
Pokemon Brilliant Diamond and Shining Pearl (BDSP) Walkthrough & Guides Wiki
Elden Ring Shadow of the Erdtree Walkthrough & Guides Wiki
Monster Hunter World Walkthrough & Guides Wiki
The Legend of Zelda: Tears of the Kingdom Walkthrough & Guides Wiki
Persona 3 Reload Walkthrough & Guides Wiki


All rights reserved
© 2022 KOEI TECMO GAMES/SQUARE ENIX CO., LTD. All Rights Reserved. CHARACTER DESIGN: TETSUYA NOMURA LOGO ILLUSTRATION: ©2021 YOSHITAKA AMANO
The copyrights of videos of games used in our content and other intellectual property rights belong to the provider of the game.
The contents we provide on this site were created personally by members of the Game8 editorial department.
We refuse the right to reuse or repost content taken without our permission such as data or images to other sites.
I feel there something missing in this walkthrough as trying to following the guide I realize somehow the guide skipped a bunch of stuff after finding that first ladder. Once you climb the ladder and go left, you'll circle back around to the start of the dungeon.