Dragoon Best Builds
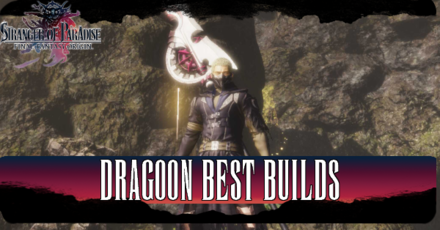
Dragoon is one of the advanced Jobs that can be accessed in Stranger of Paradise: Final Fantasy Origins. Read on to find out more about this Job, its best builds, and which Equipment Effects to go after to maximize Jack's potential!
| Dragoon Guides | |
|---|---|
|
|
|
List of Contents
All-Out Attack Build

This build maximizes the Dragoon's potential as a DPS juggernaut. Its long reach with the Lance is supported with a cast of commands, passives, and equipment effects that bolster its break gauge depleting capabilities.
Best Abilities Loadout
Combo Ability Setup
| No. | Ability | Button Commands |
|---|---|---|
| 1 |
 Cyclone Cyclone
(Lancer Ability) |
|
| 2 |
 Vanquish Vanquish
|
|
| 3 |
 Aerial Break Aerial Break
|
Command Ability Setup
| Best Commands | |||
|---|---|---|---|
 Lunatic Lunatic
|
 Blood Weapon Blood Weapon
|
 Swayback Swayback
|
|
- Lunatic: Greatly increases attack speed at the cost of break gauge auto recovery while the buff is active. This is an excellent command ability for Dragoons as all combo abilities have long combos.
- Blood Weapon: Blood Weapon is a good way to restore HP through offense, as the restored HP is based on damage dealt during the buff's duration.
- Swayback: A great compliment to Lunatic. Swayback lets you regain your Break Gauge despite having Lunatic on, allowing you to maintain the buff and offensive at the same time.
Passive and Effect Priorities
| Best Passives and Effects | ||
|---|---|---|
 Crippling Strike Crippling Strike
|
 Run Through Run Through
|
 Soul Shield: MP Recovery +19.9% Soul Shield: MP Recovery +19.9%
|
- Crippling Strike: Crippling Strike enhances your Link 1 combo by increasing the break damage dealt. This makes Cylone absolutely shred even the toughest of break gauges when used during Lunatic's duration.
- Run Through: A straightforward passive that affects your forward attack combo. This passive greatly reduces the enemy's max break gauge, improving your Jump or Wild Thrust's effectiveness.
- Soul Shield: MP Recovery +19.9%: Aggressive builds will always require players to stay within melee range during fights, which often leads to high Soul Shield usage. Bolster it's MP recovery by grabbing this passive as soon as possible.
Recommended Equipment Effects
| Equipment Effects |
|---|
| ・Physical Damage Dealt ( + ) ・Soul Shield: MP Recovery ( + ) ・Break Damage Dealt ( + ) ・MP Recovery Rate with Normal Attack ( + ) |
We recommend going all-out on offensive stats to compliment the Dragoon's aggressive playstyle. This effect setup ensures that your damage maintains an optimal level regardless of the target. MP Regeneration through normal attacks and soul shields results in increased DPS as well, as they allow you to activate combo and command abilities more often.
Best Job Synergies and Pairings
Berserker Job
 Berserker Berserker
|
Available Weapon(s) | Shield? |
|---|---|---|
|
Greatsword Axe |
Cannot use shields | |
| Basic Info | The Berserker is one the tankiest damage output with access to both the greatsword and the axe. They also have the Berserk ability that temporarily increases their strength even further at the expense of the ability to use potions. | |
Berserker is an amazing compliment to the Dragoon as both encourage aggressive playstyles with their damage-focused abilities. Transitioning between both jobs is seemless as they both only have one objective: Deplete Break Gauges as fast as possible.
Berserker Guide: How to Use Berserker
Monk Job
 Monk Monk
|
Available Weapon(s) | Shield? |
|---|---|---|
|
Knuckles Mace Lance |
Cannot use shields | |
| Basic Info | The Monk is a combination of the Pugilist and the Lancer. A specialized hand-to-hand combatant; the Monk has the ability to recover HP and refill their break gauge at the cost of MP. | |
Pairing Dragoon with the Monk results in a more balanced build overall. Its Focus ability lets you regain Break Gauge and a bit of HP. It's high-speed attacks with Knuckles helps out with regaining MP at a solid rate as well.
Monk Guide: How to Use Monk
Dragoon Job Info
General Info
| Dragoon Info | |
|---|---|
 Dragoon Dragoon
|
|
| Info | The Dragoon is a master of evasion and heavy damage. This job class allows you to jump high in the air to evade enemy attacks and then land on the enemy dealing greater damage. |
| Job Action | Jump: Leap high into the air, then descend quickly and deal piercing damage. |
| Level | Advanced |
| Usable Weapon |
Greatsword Lance Axe |
| Shield? | Cannot use Shields |
Dragoon Guide: How to Use Dragoon
Stranger of Paradise Related Guides
All Builds
| Basic Jobs | ||
|---|---|---|
| Advanced Jobs | ||
| Expert Jobs | ||
This section is currently under construction. Check back later for updates!
Author
Stranger of Paradise: Final Fantasy Origin Walkthrough & Guides Wiki
Dragoon Best Builds
Rankings
- We could not find the message board you were looking for.
Gaming News
Popular Games

Genshin Impact Walkthrough & Guides Wiki

Umamusume: Pretty Derby Walkthrough & Guides Wiki

Crimson Desert Walkthrough & Guides Wiki

Monster Hunter Stories 3: Twisted Reflection Walkthrough & Guides Wiki

Honkai: Star Rail Walkthrough & Guides Wiki

Pokemon Pokopia Walkthrough & Guides Wiki

The Seven Deadly Sins: Origin Walkthrough & Guides Wiki

Wuthering Waves Walkthrough & Guides Wiki

Zenless Zone Zero Walkthrough & Guides Wiki

Arknights: Endfield Walkthrough & Guides Wiki
Recommended Games

Fire Emblem Heroes (FEH) Walkthrough & Guides Wiki

Diablo 4: Vessel of Hatred Walkthrough & Guides Wiki

Cyberpunk 2077: Ultimate Edition Walkthrough & Guides Wiki

Yu-Gi-Oh! Master Duel Walkthrough & Guides Wiki

Super Smash Bros. Ultimate Walkthrough & Guides Wiki

Pokemon Brilliant Diamond and Shining Pearl (BDSP) Walkthrough & Guides Wiki

Elden Ring Shadow of the Erdtree Walkthrough & Guides Wiki

Monster Hunter World Walkthrough & Guides Wiki

The Legend of Zelda: Tears of the Kingdom Walkthrough & Guides Wiki

Persona 3 Reload Walkthrough & Guides Wiki
All rights reserved
© 2022 KOEI TECMO GAMES/SQUARE ENIX CO., LTD. All Rights Reserved. CHARACTER DESIGN: TETSUYA NOMURA LOGO ILLUSTRATION: ©2021 YOSHITAKA AMANO
The copyrights of videos of games used in our content and other intellectual property rights belong to the provider of the game.
The contents we provide on this site were created personally by members of the Game8 editorial department.
We refuse the right to reuse or repost content taken without our permission such as data or images to other sites.


![Star Savior Review [First Impressions] | Engaging, Entertaining, and Expensive](https://img.game8.co/4447603/8f500e9bf666bdb8adb1af478e9dfdbd.png/show)


![Warframe Review [Switch 2] | Old Ninjas Can Learn New Tricks](https://img.game8.co/4455326/d5811d4c48e5fa4bbc3250cc4c10aedc.png/thumb)


