Monk Best Builds
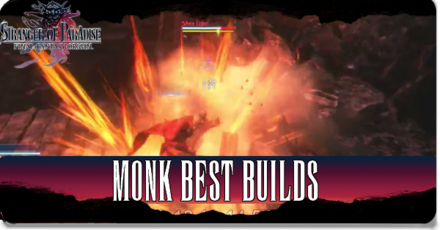
Monk is one of the advanced Jobs that can be accessed in Stranger of Paradise: Final Fantasy Origins. Read on to find out more about this Job, its best builds, and which Equipment Effects to go after to maximize Jack's potential!
| Monk Guides | |
|---|---|
|
|
|
List of Contents
HP and MP Recovery Build

While Monk provides ample abilities that allow players to recover their HP, thus limiting their use of Potions and saving them up for greater circumstances that require them, it is fairly limited in the amount of MP that it can recover.
This build is more gear oriented in the sense that it covers for this general gap by making use of MP Recovery Rate with Normal Attack buffs from Equipment Effects – more armor or weapon pieces with this buff is ideal, with effect upgrades from the Smithy acting as a means to keep Equipment Effects effective beyond the granted level of the equipment.
Best Abilities Loadout
Combo Ability Setup
| No. | Ability | Button Commands |
|---|---|---|
| 1 |
 Focus Focus
|
|
| 2 |
 Glide Kick Glide Kick
|
|
| 3 |
 Aerial Hook Aerial Hook
(Pugilist Ability) |
Command Ability Setup
| Best Commands | |||
|---|---|---|---|
 Venom Venom
|
 Reinforce Reinforce
|
 Zanshin Zanshin
|
|
- Venom: Unlocked in the Duelist Job Tree. Inflicts Poison against enemies with every landed attack – this effect accumulates until the enemy is inflicted with the Poison Status Ailment, draining their HP gradually.
- Reinforce: Unlocked in the Swordsman Job Tree, this ability reduces the time it takes to charge certain abilities, as well makes it harder for enemies to cause players to stagger.
- Zanshin: Unlocked in the Samurai Job Tree, this ability reduces the amount of MP used with combo abilities.
Passive and Effect Priorities
| Best Passives and Effects | ||
|---|---|---|
 Focus Mastery Focus Mastery
|
 Buff Duration +7.3% Buff Duration +7.3%
|
 Damage Dealt at Max Break +4.0% Damage Dealt at Max Break +4.0%
|
- Strike Cancel: Useful ability unlocked in the Monk Job Tree. Enhances abilities assigned to the 2nd Combo Ability Link. This ability enables earlier dodging, but is only applicable if players are making use of Knuckle-type weapons. When using Lancer Weapons, you can make use of Lancer Cancel instead.
- Buff Duration +7.3%: Drastically increases the amount of time players will stay buffed. Two are unlockable in the Monk Job Tree.
- Damage Dealt at Max Break +4.0%: Enhances a player's ability to cause damage against enemies when their Break Gauge is filled.
Recommended Equipment Effects
| Equipment Effects |
|---|
| ・MP Recovery Rate with Normal Attack ( + ) ・Damage Dealt at Max Break ( + ) ・Stamina ( + ) ・Silence Resistance ( + ) |
The primary focus of this build is both MP and HP Recovery. Due to MP recovery not being covered by abilities in the Monk Job Tree, players will have to supplement this heavily with MP Recovery Rate with Normal Attack buffs from Equipment.
Make heavy use of the Smithy to upgrade this buff, and try to make use of armor pieces to provide your character with multiple copies of this buff to get as much MP Recovery as you can when attacking enemies normally.
Brawler Build

This build can best be described as taking all the offensive tools of the Monk Job and applying it a fierce and aggressive playstyle. HP recovery here is still a priority to keep you in the fight more, but by and large the build is dedicated only to those who love to string combos together.
Best Abilities Loadout
Combo Ability Setup
| No. | Ability | Button Commands |
|---|---|---|
| 1 |
 Focus Focus
|
|
| 2 |
 Steel Peak Steel Peak
|
|
| 3 |
 Punch Rush Punch Rush
|
|
| 4 |
 Glide Kick Glide Kick
|
Command Ability Setup
| Best Commands | |||
|---|---|---|---|
 Chakra Chakra
|
 Reinforce Reinforce
|
 Zanshin Zanshin
|
|
- Chakra: Cures and then raises the player's resistance to status ailments. Useful for this build due to the focus on fighting enemies rather than being cautious about their own forms of attacks, which may make players more vulnerable to intercepting hits more than normal.
- Reinforce: Decreases the chance for a player to get staggered when being attacked by enemies, allowing them to counterattack with ease. Also decreases the charge time of any charged attacks (in this case, Focus). Unlocked in the Swordsman Job Tree.
- Zanshin: Unlocked in the Samurai Job Tree, this Command Ability reduces the amount of MP spent when using Combo Abilities. Out of all Command Abilities on this list, ths is the most important as it allows you to use more Combos with less MP.
Passive and Effect Priorities
| Best Passives and Effects | ||
|---|---|---|
 Focus Mastery Focus Mastery
|
 Action Ability MP Cost -7.3% Action Ability MP Cost -7.3%
|
 Damage Dealt at Max Break +2.2% Damage Dealt at Max Break +2.2%
|
- Focus Mastery: Extremely good ability to have when making heavy use of the Focus ability, as it makes it so that players are "buffed" by three levels when the ability becomes fully charged.
- Action Ability MP Cost -7.3%: Reduces the MP cost of action abilities, in this case Focus, which leaves players with more MP to spend on other useful abilities like combo (combat) abilities.
- Damage Dealt at Max Break +2.2%: Increases a player's damage output when Break Gauge is at its maximum value.
Recommended Equipment Effects
| Equipment Effects |
|---|
| ・MP Recovery Rate with Normal Attacks ( + ) ・Critical Damage Dealt ( + ) ・Physical Damage Dealt ( + ) |
Best Job Synergies and Pairings
Knight
 Knight Knight
|
Available Weapon(s) | Shield? |
|---|---|---|
|
Greatsword Sword |
Can use shields | |
| Basic Info | The Knight is an advanced job. Knights use their ability Blessing of Light to unleash a shockwave of light that damages enemies whenever a successful guard is completed. | |
For a Job that has a good mix of offense and defense, the Knight is a good secondary to play with, offering great defense against an enemy's magical attacks. Knights also are good for crowd control, capable of inflicting good staggers against groups of enemies with wide swings when using a Greatsword.
You can swap this Job out for the Warrior instead if you wish, particularly if you wish to use a good Greatsword and want to take the benefits that the Warrior offers that Monk does not.
Knight Guide: How to Use Knight
White Mage
 White Mage White Mage
|
Available Weapon(s) | Shield? |
|---|---|---|
|
Mace |
Can use shields | |
| Basic Info | The White Mage is a specialization of the Mage job class suited for support. White Mages have the ability to cast white magic which allows them to heal and revive fallen allies. | |
The White Mage is another good pairing for the Monk, particularly in instances where getting too close to an enemy becomes a problem for the close-ranged fighting style of the Monk.
With White Mage, or any other magic-based Job, you can exploit enemy weaknesses at a safe distance, weakening enemies enough to allow you to come close with fast hits.
Monk Job Info
General Info
| Monk Info | |
|---|---|
 Monk Monk
|
|
| Info | The Monk is a combination of the Pugilist and the Lancer. A specialized hand-to-hand combatant; the Monk has the ability to recover HP and refill their break gauge at the cost of MP. |
| Job Action | Focus: Hold Ability to recover HP and refill your break gauge at the cost of MP. In addition, sustaining this ability long enough will also grant you a temporary increase in the amount of break damage dealt to enemies. |
| Level | Advanced |
| Usable Weapon |
Knuckles Mace Lance |
| Shield? | Cannot use Shields |
Stranger of Paradise Related Guides
All Builds
| Basic Jobs | ||
|---|---|---|
| Advanced Jobs | ||
| Expert Jobs | ||
This section is currently under construction. Check back later for updates!
Author
Rankings
- We could not find the message board you were looking for.
Gaming News
Popular Games

Genshin Impact Walkthrough & Guides Wiki

Umamusume: Pretty Derby Walkthrough & Guides Wiki

Crimson Desert Walkthrough & Guides Wiki

Monster Hunter Stories 3: Twisted Reflection Walkthrough & Guides Wiki

Honkai: Star Rail Walkthrough & Guides Wiki

Pokemon Pokopia Walkthrough & Guides Wiki

The Seven Deadly Sins: Origin Walkthrough & Guides Wiki

Wuthering Waves Walkthrough & Guides Wiki

Zenless Zone Zero Walkthrough & Guides Wiki

Arknights: Endfield Walkthrough & Guides Wiki
Recommended Games

Fire Emblem Heroes (FEH) Walkthrough & Guides Wiki

Diablo 4: Vessel of Hatred Walkthrough & Guides Wiki

Cyberpunk 2077: Ultimate Edition Walkthrough & Guides Wiki

Yu-Gi-Oh! Master Duel Walkthrough & Guides Wiki

Super Smash Bros. Ultimate Walkthrough & Guides Wiki

Pokemon Brilliant Diamond and Shining Pearl (BDSP) Walkthrough & Guides Wiki

Elden Ring Shadow of the Erdtree Walkthrough & Guides Wiki

Monster Hunter World Walkthrough & Guides Wiki

The Legend of Zelda: Tears of the Kingdom Walkthrough & Guides Wiki

Persona 3 Reload Walkthrough & Guides Wiki
All rights reserved
© 2022 KOEI TECMO GAMES/SQUARE ENIX CO., LTD. All Rights Reserved. CHARACTER DESIGN: TETSUYA NOMURA LOGO ILLUSTRATION: ©2021 YOSHITAKA AMANO
The copyrights of videos of games used in our content and other intellectual property rights belong to the provider of the game.
The contents we provide on this site were created personally by members of the Game8 editorial department.
We refuse the right to reuse or repost content taken without our permission such as data or images to other sites.


![Star Savior Review [First Impressions] | Engaging, Entertaining, and Expensive](https://img.game8.co/4447603/8f500e9bf666bdb8adb1af478e9dfdbd.png/show)


![Warframe Review [Switch 2] | Old Ninjas Can Learn New Tricks](https://img.game8.co/4455326/d5811d4c48e5fa4bbc3250cc4c10aedc.png/thumb)


