Swordsman Best Builds
Swordsman is one of the basic Jobs that can be accessed in Stranger of Paradise: Final Fantasy Origins. Read on to find out more about this Job, its best builds, and which Equipment Effects to go after to maximize Jack's potential!
| Swordsman Guides | |
|---|---|
|
|
|
List of Contents
Tank Build
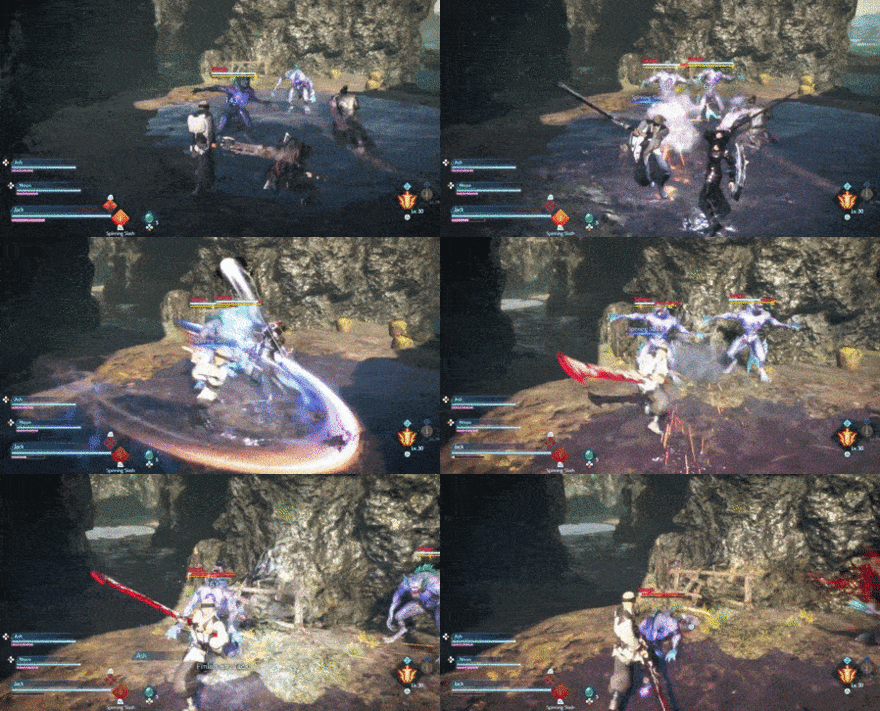
The Swordsman Job is an excellent Basic Job that players will start out with. Many of the Abilities and nodes in its Job Tree include increases to a player's Slash Damage – harness the power of these stat boosting abilities, players can find it easy to activate the base Spinning Slash Ability.
Holding down on its button will cause Jack to spin widlly with increasing speed, easily a spammable move with enough MP that can defeat larger and much more difficult enemies.
Best Abilities Loadout
Combo Ability Setup
| No. | Ability | Button Commands |
|---|---|---|
| 1 |
 Spinning Slash Spinning Slash
|
|
| 2 |
 Highbringer Highbringer
|
|
| 3 |
 Piercing Thrust Piercing Thrust
|
Command Ability Setup
| Best Commands | |||
|---|---|---|---|
 Reinforce Reinforce
|
 Venom Venom
|
 Swayback Swayback
|
|
- Reinforce: Reinforce is one of the command abilities that you can pick up in the Job Tree for Swordsman. The Ability decreases the amount of time required to charge attacks and makes the chances of being staggered when attacked low.
- Venom: Serves as the central focus of this build. It allows players to get enemies to gradually accumulate Poison overtime, with them eventually getting the status ailment once they have received enough hits. As a Tank build, you can easily just cause your opponent to be rendered with the ailment and stand back to wait as they're affected.
- Swayback: Useful ability that you can get from the Lancer, giving you an agile move where you can avoid enemy attacks and replenish your Break Gauge at the same time.
Passive and Effect Priorities
| Best Passives and Effects | ||
|---|---|---|
 All Damage -5.5% All Damage -5.5%
|
 Ever Stronger Ever Stronger
|
 Slash Damage +2.9% Slash Damage +2.9%
|
- All Damage -5.5%: Increases all forms of damage that you can receive from opponents, allowing you more longetivity against enemies who can easily hit you.
- Ever Stronger: Increases physical damage dealt of Greatsword abilities assigned to the Guard Attack Link. In particular, Highbringer is affected by this ability as it is the only Ability that can be assigned to the Link.
- Slash Damage +2.9%: Increases slash damage for players – this ability is particularly useful for players who like to spam the Spinning Slash Action Ability.
Recommended Equipment Effects
| Equipment Effects |
|---|
| ・Magic Resistance ( + ) ・MP Recovery Rate with Normal Attacks ( + ) ・Physical Damage Dealt ( + ) ・Critical Damage Dealt ( + ) |
By running a Tanky build for the Swordsman Job, players can expect plenty of MP consumption coupled with many open opportunities for your enemies to attack and cause you to stagger.
Having equipment that can supplement and cover these needs, sustained by the Reinforce ability to reduce charge time for attacks and Spinning Slash Mastery for reduced MP consumption when using the spinning slash, can help keep you in the fight for much longer without having to pull back whenever your MP or HP runs low.
Balanced Attacker Build
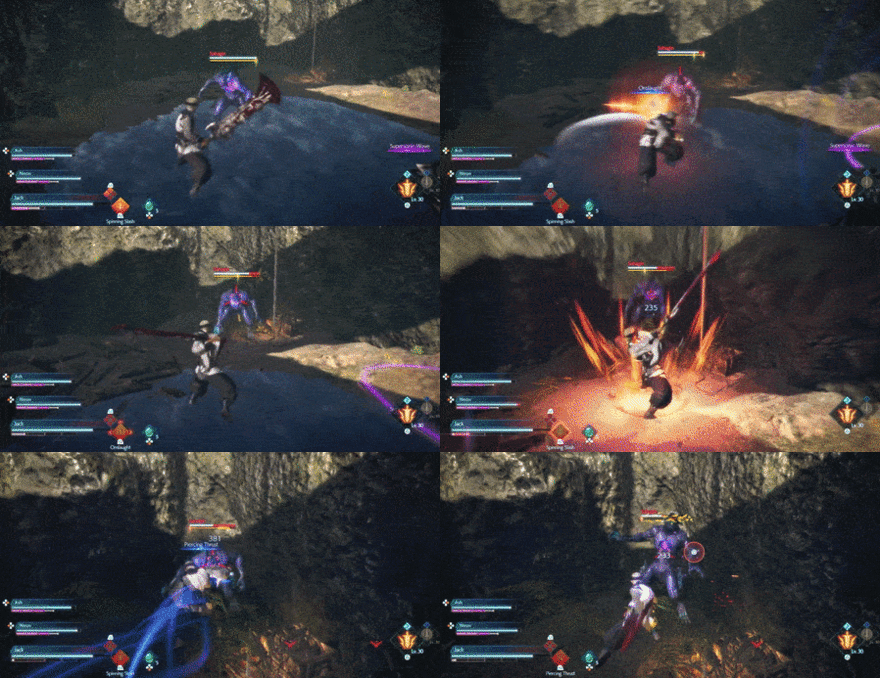
This second build relies more on the many different abilities that the Swordsman Job offers, with the primary focus being a player's ability to mix and match attacks with both long and short wind ups in their arsenal.
Due to the slow nature of attacks under the Swordsman Job, chaining together strings of Ability Attacks can be difficult, but ultimately rewarding when paired alongside regular attacks that can easily stunlock enemies into submission.
Best Abilities Loadout
Combo Ability Setup
| No. | Ability | Button Commands |
|---|---|---|
| 1 |
 Onslaught Onslaught
|
|
| 2 |
 Highbringer Highbringer
|
|
| 3 |
 Piercing Thrust Piercing Thrust
|
Command Ability Setup
| Best Commands | |||
|---|---|---|---|
 Reinforce Reinforce
|
 Venom Venom
|
 Swayback Swayback
|
|
- Reinforce: Reinforce is one of the command abilities that you can pick up in the Job Tree for Swordsman. The Ability decreases the amount of time required to charge attacks and makes the chances of being staggered when attacked low.
- Venom: Serves as the central focus of this build. It allows players to get enemies to gradually accumulate Poison overtime, with them eventually getting the status ailment once they have received enough hits. Although the effects of the status ailment are slow, they do provide bonus damage at the very least against enemies.
Alternatively, you can swap Venom out for Flee, which can be unlocked in the Thief Job Tree. This increases movement speed as well as Break Gauge recovery, allowing you restrategize while in engagements. - Swayback: Useful ability that you can get from the Lancer, giving you an agile move where you can avoid enemy attacks and replenish your Break Gauge at the same time.
Passive and Effect Priorities
| Best Passives and Effects | ||
|---|---|---|
 Ever Stronger Ever Stronger
|
 Warrior's Ward Warrior's Ward
|
 All Damage -5.5% All Damage -5.5%
|
- Ever Stronger: Increases physical damage dealt of Greatsword abilities assigned to the Guard Attack Link. In particular, Highbringer is affected by this ability as it is the only Ability that can be assigned to the Link.
- Warrior's Ward: Decreases taken damage when using an ability assigned to the Charged Attack Link.
- All Damage -5.5%: Increases all forms of damage that you can receive from opponents, allowing you more longetivity against enemies who can easily hit you.
Recommended Equipment Effects
| Equipment Effects |
|---|
| ・Slash Damage Dealt ( + ) ・Damage Reduction While Attacking ( - ) ・Critical Damage Dealt ( + ) ・MP Recovery Rate with Normal Attacks ( + ) |
Making use of the many attack abilities for the Swordsman Job can easily drain players of their MP if they're not managing their gauge properly. Having gear or equipment with Equipment Effects that particularly boost Jack's attack damage will help to end fights fast.
In unlikely circumstances where a player's MP goes out, they can instead opt to attack with regular attacks to build their MP up at a faster rate.
Best Job Synergies and Pairings
Mage
 Mage Mage
|
Available Weapon(s) | Shield? |
|---|---|---|
|
Mace |
Can use shields | |
| Basic Info | The Mage is a job that relies on the use of magic to deal considerable damage to enemies. This class utilizes both maces and shield, making it a capable melee fighter when it runs out of MP. | |
The Swordsman Job suffers from many of the same shortcomings as that of the Swordfighter Job. One of these is its inability to cast any magical attacks that can exploit magical weaknesses on enemies.
The Mage Job, and later on the Red and Black Mages respectively, solves this problem. These Jobs provide the player with a way of casting magic, making it an almost essential Job Pairing for Swordsman.
Duelist
 Duelist Duelist
|
Available Weapon(s) | Shield? |
|---|---|---|
|
Daggers |
Cannot use shields | |
| Basic Info | The Duelist is dual wielding rogue-type combatant. Equipped with daggers, it relies on quick attacks and agile dodges to land critical hits on enemies. | |
Swordsman attacks tend to be very slow in exchange for increased attack power – however, you may find this to be an issue when coming up against enemies, particularly bosses, that have a significant speed advantage over you.
Switching out to Duelist, which is a Job that has faster attack speed, can help to offset speedy enemies at the cost of a reduced attack damage.
Swordsman Job Info
General Info
| Swordsman Info | |
|---|---|
 Swordsman Swordsman
|
|
| Info | The Swordsman is a warrior that utilizes a Greatsword as the primary weapon. Swordsman offers high damaging blows while sacrificing mobility and agility due to the size of their weapon. |
| Job Action | Spinning Slash: A spinning, slash-type attack. Hold Ability to continue spinning and gradually pick up speed. Switch to a charged attack by pressing Attack, or and enhanced guard by pressing Guard. |
| Level | Basic |
| Usable Weapon |
Greatsword |
| Shield? | Cannot use Shields |
Swordsman Guide: How to Use Swordsman
Stranger of Paradise Related Guides
All Builds
| Basic Jobs | ||
|---|---|---|
| Advanced Jobs | ||
| Expert Jobs | ||
This section is currently under construction. Check back later for updates!
Author
Stranger of Paradise: Final Fantasy Origin Walkthrough & Guides Wiki
Swordsman Best Builds
Rankings
- We could not find the message board you were looking for.
Gaming News
Popular Games

Genshin Impact Walkthrough & Guides Wiki

Umamusume: Pretty Derby Walkthrough & Guides Wiki

Crimson Desert Walkthrough & Guides Wiki

Monster Hunter Stories 3: Twisted Reflection Walkthrough & Guides Wiki

Honkai: Star Rail Walkthrough & Guides Wiki

Pokemon Pokopia Walkthrough & Guides Wiki

The Seven Deadly Sins: Origin Walkthrough & Guides Wiki

Wuthering Waves Walkthrough & Guides Wiki

Zenless Zone Zero Walkthrough & Guides Wiki

Arknights: Endfield Walkthrough & Guides Wiki
Recommended Games

Fire Emblem Heroes (FEH) Walkthrough & Guides Wiki

Diablo 4: Vessel of Hatred Walkthrough & Guides Wiki

Cyberpunk 2077: Ultimate Edition Walkthrough & Guides Wiki

Yu-Gi-Oh! Master Duel Walkthrough & Guides Wiki

Super Smash Bros. Ultimate Walkthrough & Guides Wiki

Pokemon Brilliant Diamond and Shining Pearl (BDSP) Walkthrough & Guides Wiki

Elden Ring Shadow of the Erdtree Walkthrough & Guides Wiki

Monster Hunter World Walkthrough & Guides Wiki

The Legend of Zelda: Tears of the Kingdom Walkthrough & Guides Wiki

Persona 3 Reload Walkthrough & Guides Wiki
All rights reserved
© 2022 KOEI TECMO GAMES/SQUARE ENIX CO., LTD. All Rights Reserved. CHARACTER DESIGN: TETSUYA NOMURA LOGO ILLUSTRATION: ©2021 YOSHITAKA AMANO
The copyrights of videos of games used in our content and other intellectual property rights belong to the provider of the game.
The contents we provide on this site were created personally by members of the Game8 editorial department.
We refuse the right to reuse or repost content taken without our permission such as data or images to other sites.


![Death Stranding 2: On The Beach Review [PC] | A Port That Delivers](https://img.game8.co/4447392/15310a0c9aa1b6843bb713b2ea216930.jpeg/show)

![Warframe Review [Switch 2] | Old Ninjas Can Learn New Tricks](https://img.game8.co/4455326/d5811d4c48e5fa4bbc3250cc4c10aedc.png/thumb)


