The Crisis of Juntian Story Walkthrough and Guide
★ Tier Lists: Characters | Weapons | Demon Wedges
★ Builds: Kezhou | Fushu | Fina | Lynn | Psyche
★ Version 1.2 Summary | Characters: Zhiliu | Yuming
┗ Mechanics: Mount | Gifting | Reputation | Accessory Customization
★ How to Get Characters | Mystic Maze | Redeem Codes
Here you'll find a walkthrough for the main quest The Crisis of Juntian in Duet Night Abyss (DNA). Read on to learn how to complete The Crisis of Juntian, quest rewards and objectives, dialogue impressions, and more information!
| ◄ Previous Quest | Next Quest ▶ |
|---|---|
| Beyond the Mountains | A Storm Approaches |
The Crisis of Juntian Story Walkthrough
| The Crisis of Juntian Objectives |
|---|
|
1. Investigate the Commotion Outside 2. Defeat the Magistrates of Yingtian 3. Defeat Yuming 4. Speak with Su Yi 5. Solve the Puzzle 6. Move Forward 7. Defeat the Filthoids 8. Solve the Puzzle 9. Move Forward 10. Defeat Terracolossus 11. Inspect the Treasure 12. Move Forward 13. Find the way to the Tower 14. Repel the Guards 15. Inspect the Stele 16. Move Forward 17. Repel the Guards atop the Tower 18. Defeat the Sentinels of Juntian with the Heavenwrought Cannon 19. Speak with Everyone |
Investigate the Commotion Outside
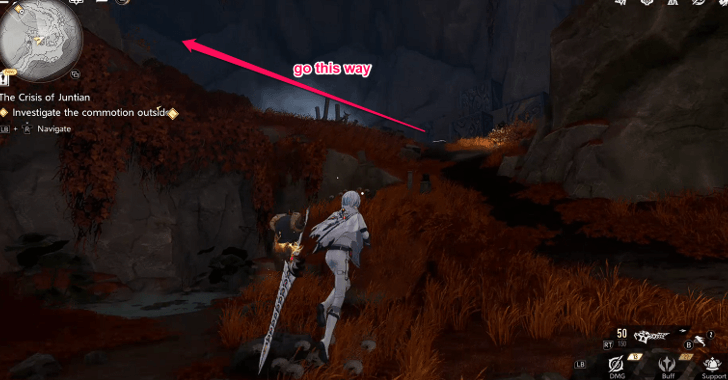
Go to the quest marker. You will find the Magistrates of Yingtian inside the Outer Peaks.
Defeat the Magistrates of Yingtian
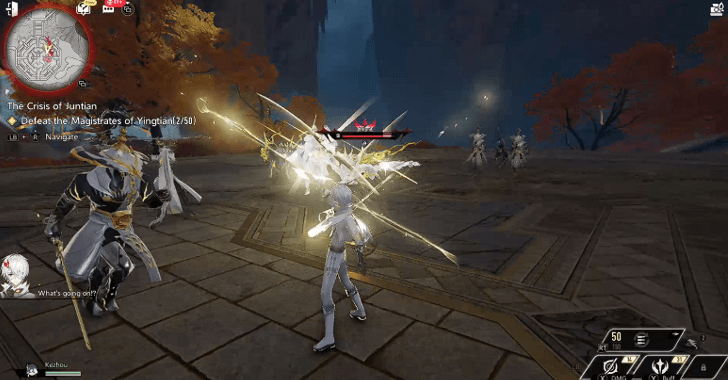
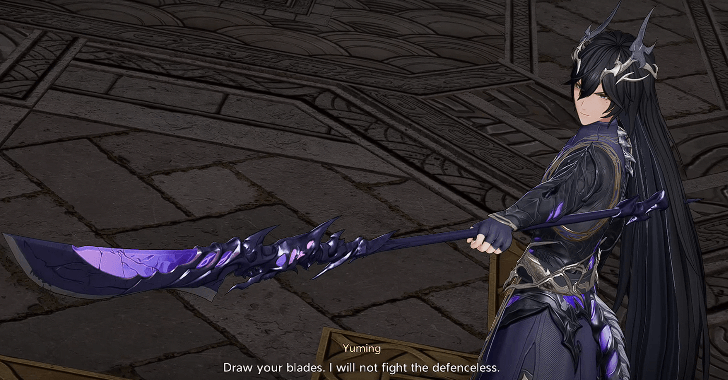
Defeat 50 Magistrates of Yingtian. Afterward, a cutscene plays. Yuming tells them he is there under orders, and the Drifters call him a traitor.
Defeat Yuming
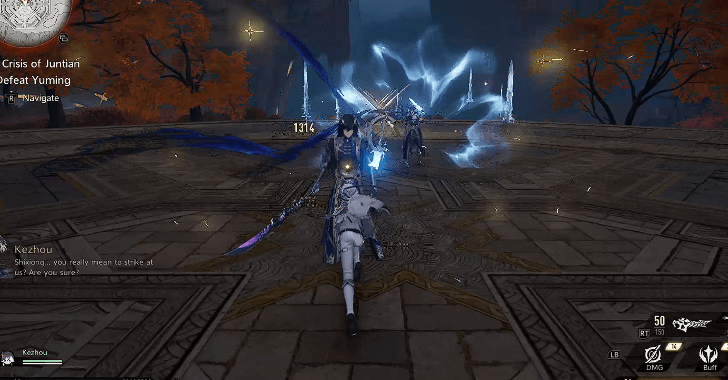
Kezhou tries to persuade Yuming to return, but Yuming becomes angry and insists they fight. Help Kezhou defeat him.
When Yuming's HP is halved, a cutscene plays. Yuming speaks about the Deteriorators. Su Yi leads you higher in the Outer Peaks.
Speak with Su Yi
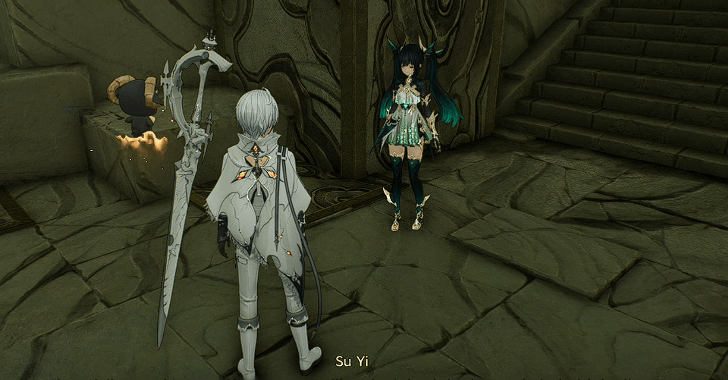
Su Yi brings you to the Labyrinth of Yanyin to recover the ancient mechanism hidden by her Jishu sect ancestors.
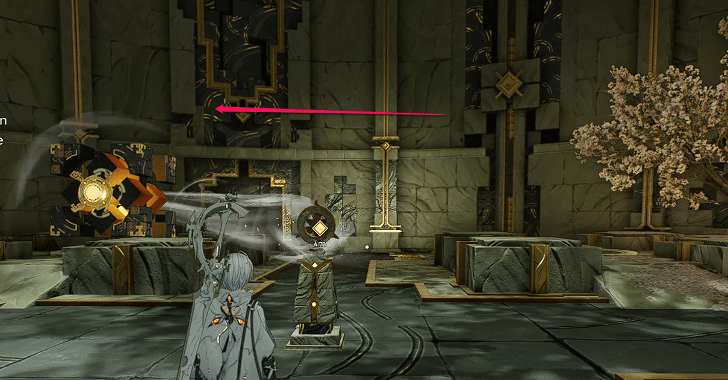
Solve the Puzzle
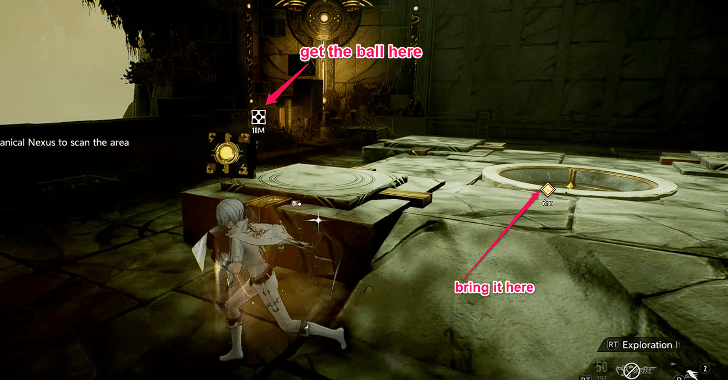
Use the Mechanical Nexus to scan for the ball. Use the vacuum to bring the ball to the ball pit.
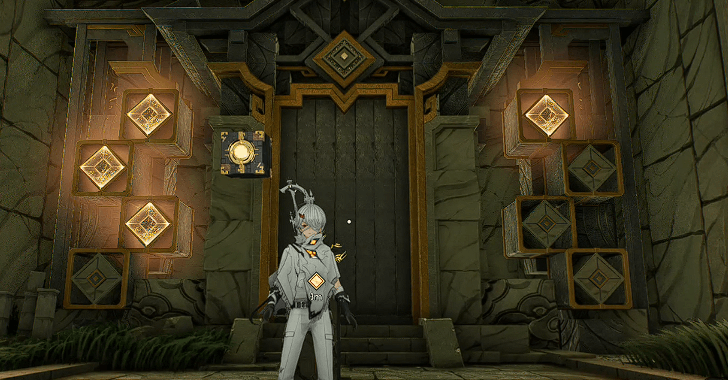
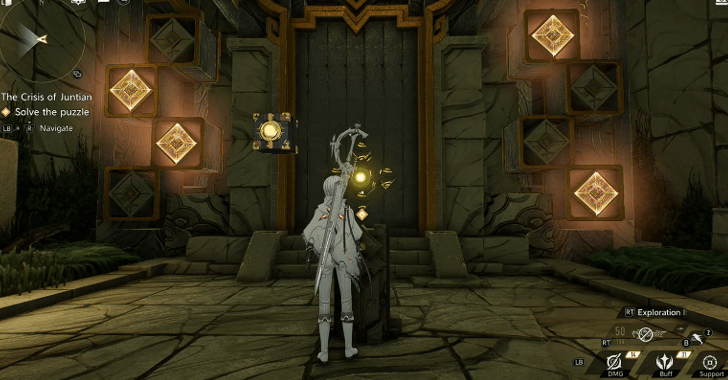
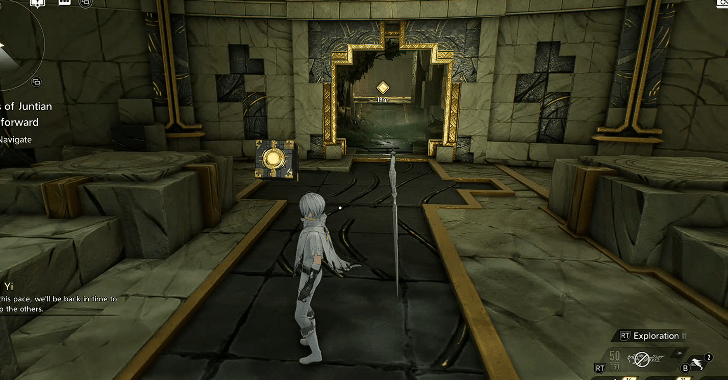
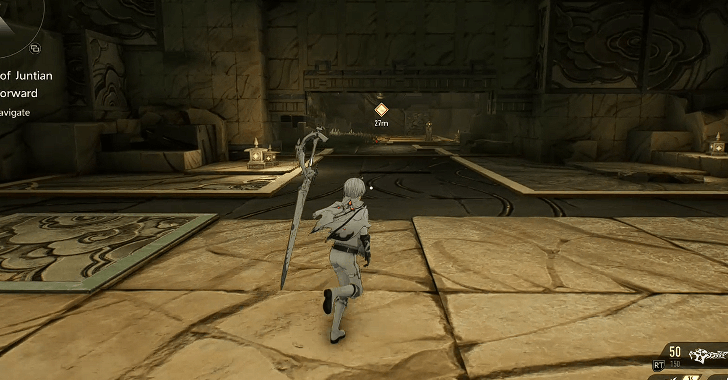
Move Forward
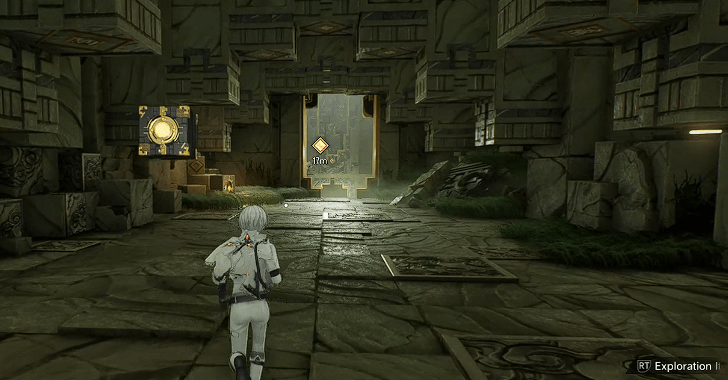
After placing the ball, a door opens. Go through it. At the corridor's end, you will find Filthoids.
Defeat the Filthoids
Defeat 12 Filthoid Mechapuppets to proceed.
Solve the Puzzle
Use the Mechanical Nexus vacuum to rotate the walls clockwise and counterclockwise using the Dual-Shape Propeller.
Puzzle 1
| Puzzle | Device |
|---|---|
 |
Vacuum it the device facing the wall so it goes counter-clockwise. |
When the entrance opens on the left, go there to solve another puzzle and get the ball for the ball pit near the entrance.
Vacuum the stone blocks after the glow goes out to open the door where the ball for the pit will be located. Bring the ball to the ball pit. Return to the Dual-Shape Propeller for the next puzzle.
Puzzle 2
| Puzzle | Device |
|---|---|
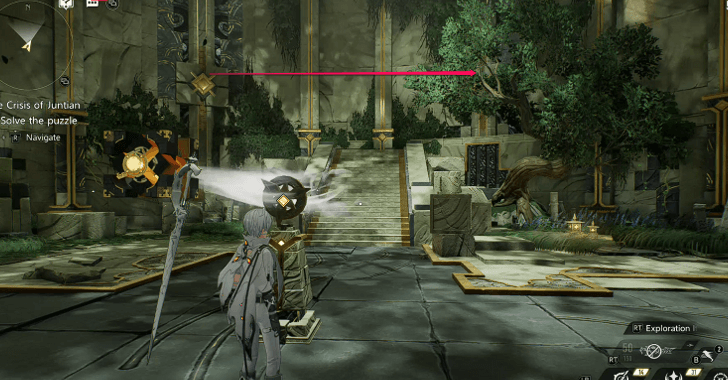 |
Vacuum the device facing the stairs so it goes clockwise. |
Once the entrance on the left opens, go there to solve another puzzle and get the ball for the ball pit near the entrance.
Vacuum the illuminated blocks after they stop glowing to open the door and get the next ball. Place it in the ball pit.
Move Forward
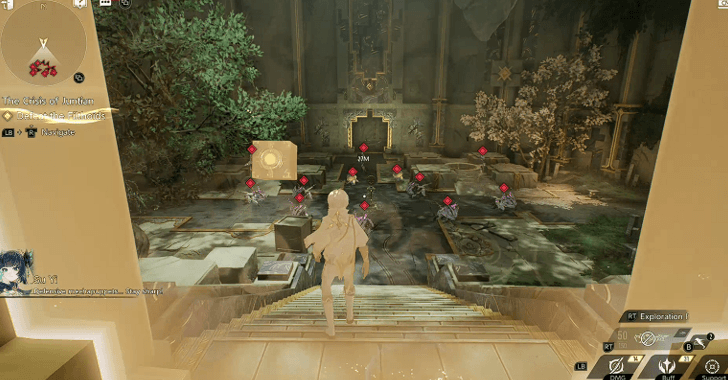
The entrance between the ball pits opens. Follow the quest marker to a wide space. When you reach the center, a Terracolossus will appear.
Defeat Terracolossus
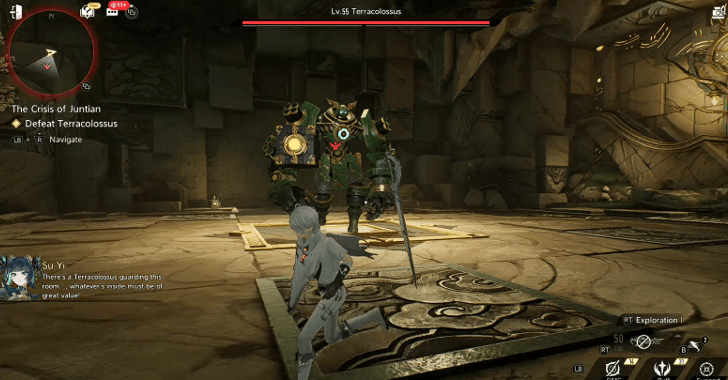
Attack the Terracolossus' arms to weaken it quickly. When it's defeated, a new Mechanical Nexus appears.
Inspect the Treasure
Go to the treasure to get a new Mechanical Nexus. The Mechanical Nexus: Evilbane emits a light beam that activates Jishu constructs.
Move Forward
Head behind the treasure and take the platform up. At the top, you'll see the Labyrinth of Yanyin.
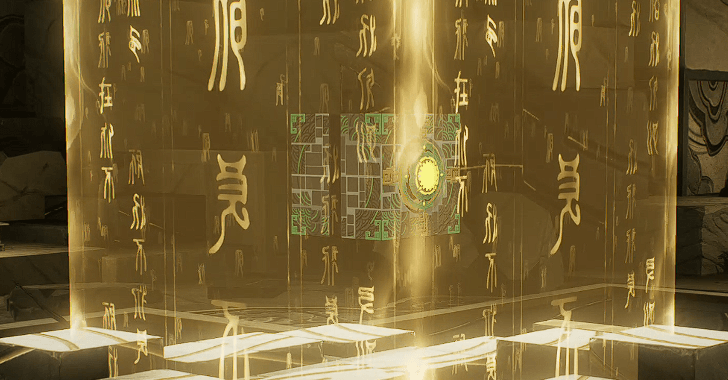
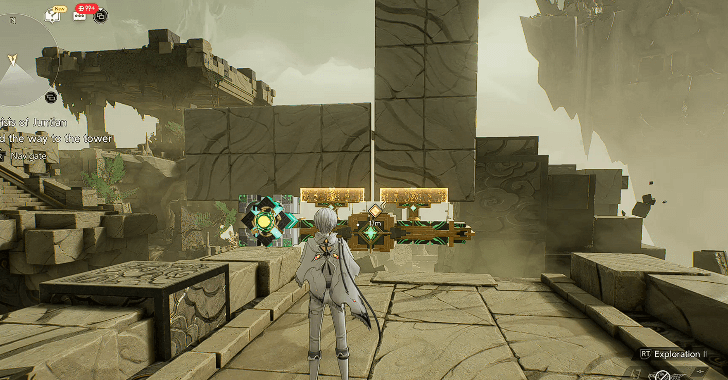
Find the way to the Tower
Go straight to the Enlightenment Stele and interact with it. This will show the Jishu mechanisms called the Mechanical Puzzle Board.
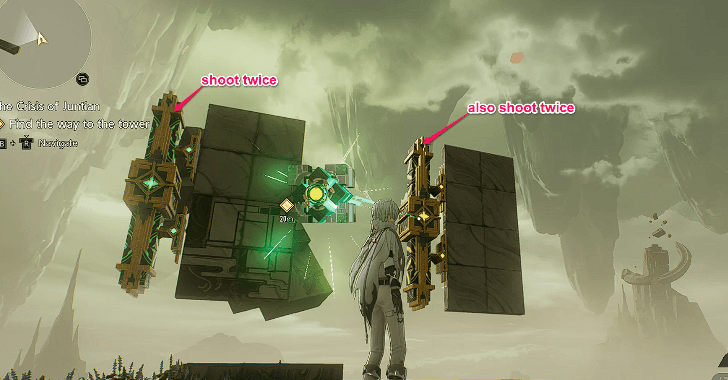
Puzzle 1
Hit the puzzle board twice to create a platform for the next location.
Puzzle 2

Hit the left puzzle board twice, then the center board once, to reach the next location.
Puzzle 3
Wait for the ball to fall. Hit the puzzle boards to time its fall into the ball pit.
Puzzle 4
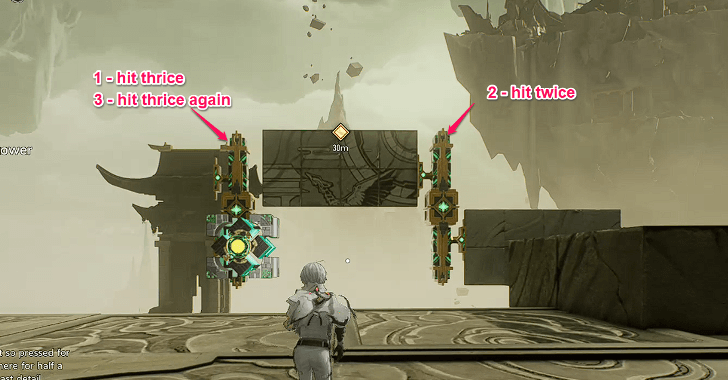
Hit the left puzzle board twice and the central puzzle board three times to reach the next ledge.
Hit the puzzle board on your left three times, the central board twice, then the right board twice again.
When you arrive, defeat the Filthoid mechapuppets. The next Enlightenment Stele appears.
Puzzle 5
Hit both puzzle boards twice to complete the image. Anchor points appear for the next location.
Puzzle 6
Complete the puzzle. The Mech Bird appears and takes you to a new location.
Repel the Guards
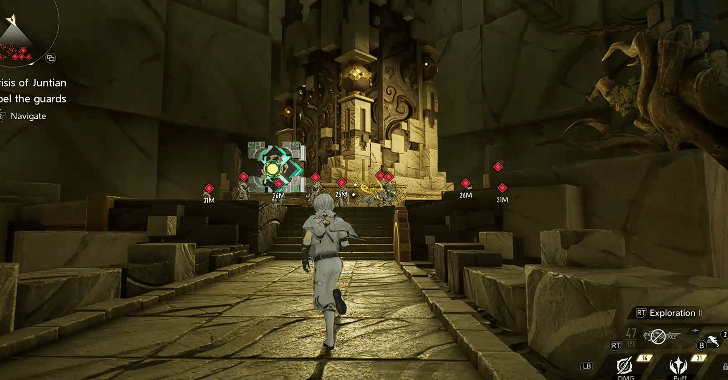
The Mech Bird takes you to a new area. Defeat guards on the platform to reveal a Stele.
Inspect the Stele
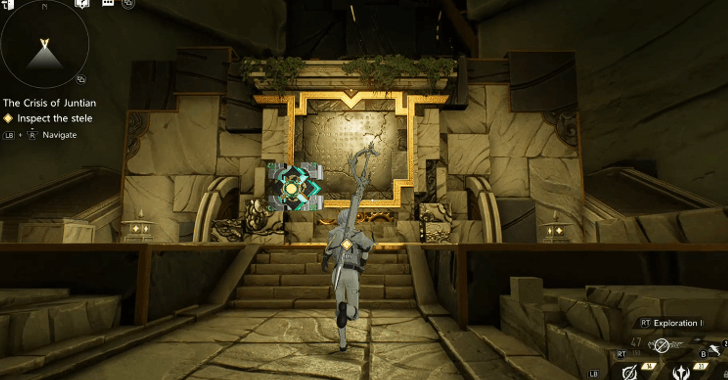
Go to the Stele and inspect it. It will then show them the instructions on what to do next.
Move Forward
Jump over the Stele and interact with the Enlightened Stele to start the next puzzle.
Puzzle 1
Complete the puzzle. Hit the lower right puzzle board once and then the center left puzzle board once. Hit the lower center puzzle board once to raise the whole puzzle and lastly, the upper center to show the picture. Anchor points appear and guide you to climb the higher platform for the next puzzle.
Puzzle 2
Avoid grouping pieces on a single board to prevent simultaneous switching.
Puzzle 3
| Part 1 | Part 2 |
|---|---|
Make sure the smaller squares fit into the larger parts. Ensure each side forms a U-shape. Fly with the Mech Bird again to reach a higher part of the Labyrinth.
Repel the Guards atop the Tower
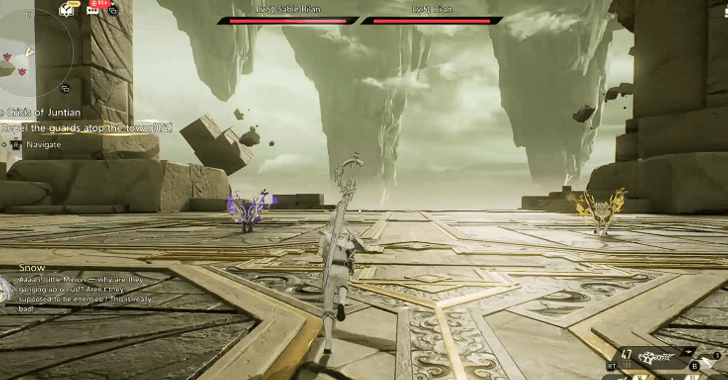
When you reach the center of the platform, the Sable Bi’an and Argent Bi’an will attack you. After that, a Stele will be raised from the ground, showing half of the Jade and a gadget that looks like a key.
Defeat the Sentinels of Juntian with the Heavenwrought Cannon
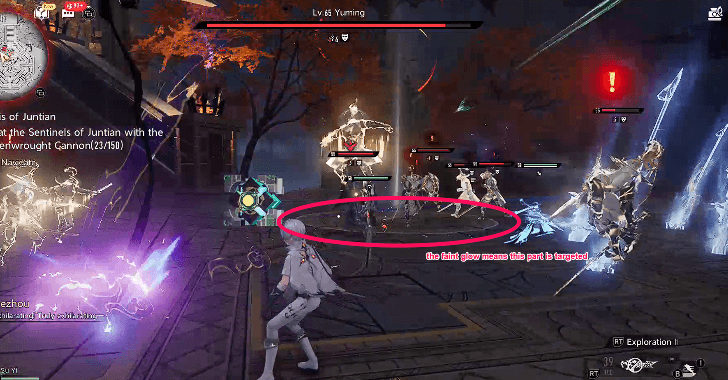
Return to battle. Use the Mechanical Nexus: Evilbane to target the Magistrates of Yingtian. Defeat Yuming and the Magistrates with this weapon.
Speak with Everyone
After the cutscene of the Sentinels of Juntian retreating, you will then talk to Su Yi and the Drifters. You had another headache, which led you to visit the unknown plane to meet Zhiliu again. She will then explain the second prophecy.
The Crisis of Juntian Bosses
Yuming
| Yuming Boss Information | |
|---|---|
 |
|
| Level | 65 |
You will have to deal with Yuming twice in this quest. In the initial one, you don't need to defeat him fully and will go through a cutscene. On the latter, you need to use the Mechanical Nexus: Evilbane to target Yuming.
Terracolossus
| Terracolossus Boss Information | |
|---|---|
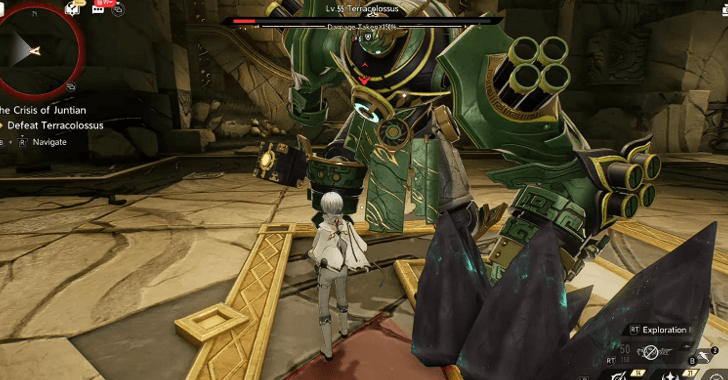 |
|
| Level | 55 |
The Terracolossus has ranged attacks and has AoE abilities when it hits the ground. It is recommended to attack its arms so that its weakness gets exposed.
The Crisis of Juntian Rewards
| We're still investigating the rewards for this Quest. Stay tuned for updates! |
The Crisis of Juntian Previous and Next Quests
| ◄ Previous Quest | Next Quest ▶ |
|---|---|
| Beyond the Mountains | A Storm Approaches |
Duet Night Abyss Related Guides

All Quest Types
| All Quest Types | |
|---|---|
| Main Quests | Side Quests |
| Special Side Quests | Dynamic Quests |
| Event Quests | |
All Main Quests
 Prologue
 Chapter 1: Noctoyager Act 1
 Chapter 2: Twilight Act 1
 Chapter 3: Noctoyager Act 2
 Chapter 4: Journey Across the Lands
Comment
Author

The Crisis of Juntian Story Walkthrough and Guide
Rankings
- We could not find the message board you were looking for.
Gaming News


![Forza Horizon 6 Review [Preview] | Beautiful Roads With a Whole Lot of Oversteer](https://img.game8.co/4460981/a7254c24945c43fbdf6ad9bea52b5ce9.png/thumb)
![Borderlands Mobile Review [Playtest] | The Same Borderlands Made Easy](https://img.game8.co/4465500/aac0c880a39ec5cd46073e49d18f3ed5.png/thumb)
Popular Games

Genshin Impact Walkthrough & Guides Wiki
Crimson Desert Walkthrough & Guides Wiki
Umamusume: Pretty Derby Walkthrough & Guides Wiki
Honkai: Star Rail Walkthrough & Guides Wiki
Monster Hunter Stories 3: Twisted Reflection Walkthrough & Guides Wiki
Wuthering Waves Walkthrough & Guides Wiki
The Seven Deadly Sins: Origin Walkthrough & Guides Wiki
Pokemon TCG Pocket (PTCGP) Strategies & Guides Wiki
Pokemon Pokopia Walkthrough & Guides Wiki
Zenless Zone Zero Walkthrough & Guides Wiki


Recommended Games
Fire Emblem Heroes (FEH) Walkthrough & Guides Wiki
Pokemon Brilliant Diamond and Shining Pearl (BDSP) Walkthrough & Guides Wiki
Super Smash Bros. Ultimate Walkthrough & Guides Wiki
Diablo 4: Vessel of Hatred Walkthrough & Guides Wiki
Cyberpunk 2077: Ultimate Edition Walkthrough & Guides Wiki
Yu-Gi-Oh! Master Duel Walkthrough & Guides Wiki
Elden Ring Shadow of the Erdtree Walkthrough & Guides Wiki
Monster Hunter World Walkthrough & Guides Wiki
The Legend of Zelda: Tears of the Kingdom Walkthrough & Guides Wiki
Persona 3 Reload Walkthrough & Guides Wiki


All rights reserved
Game Copyright©Pan Studio All Rights Reserved.
The content we provide on this site were created personally by members of the Game8 editorial department.
We refuse the right to reuse or repost content taken without our permission such as data or images to other sites.
©Pan Studio (Provider)