Ruin E-02 Walkthrough and Treasure Chest Locations
Please note that the Tower of Fantasy Team has stopped covering the game as of Update 2.0. Information on certain pages may not be up-to-date. Thank you for continuing support!
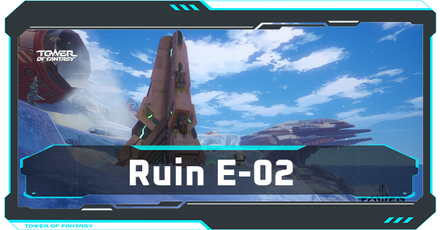
Ruin E-02 is one of the Ruins that you will encounter in Tower of Fantasy. Read on to learn about Ruin E-02's level requirements, rewards, secret chest locations, how to beat the boss, and other strategies to clear it.
| All Warren Ruins Walkthroughs | ||
|---|---|---|
 Ruin E-01 Ruin E-01 |
 Ruin E-02 Ruin E-02
|
 Ruin E-03 Ruin E-03 |
List of Contents
Ruin E-02 Secret Chest Locations
 |
|
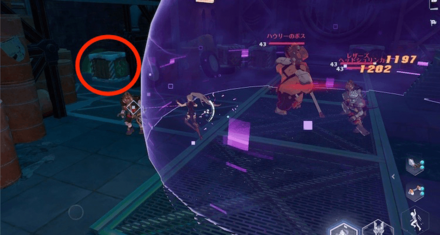
| Secret Chest 1 (Easy) | At the entrance of the ruins, find the treasure chest near the wooden box. |
|---|---|
 |
|
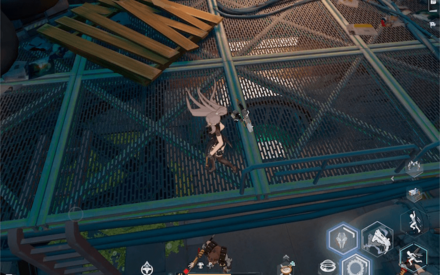
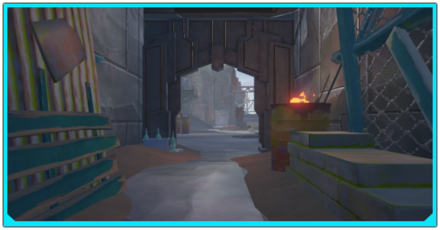
| Secret Chest 2 (Easy) | After watching the cutscene, find the treasure chest under the wire mesh scaffolding. |
| Secret Chest 3 (Normal & Hard) | On a small gap left of the stairs. |
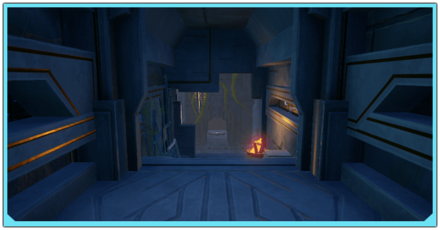
| Secret Chest 4 (Normal & Hard) | Behind a table on the left side of the room with the lever. |
Ruin E-02 Walkthrough
| 1 | Defeat the enemies in the area and proceed to the back of the area. Open the treasure chest (1) near the wooden box. |
|---|---|
| 2 | Climb the ladder behind the broken bricks to reach the next area. |
| 3 | After watching the cutscene, defeat the enemies and activate the leftmost and rightmost levers. Find the treasure chest (2) under the wire mesh scaffolding. (Normal mode) Head to the room on the left side of the lever and find the treasure chest (4) behind the table. |
| 4 | Defeat the boss to complete the ruin. |
Ruin E-02 Tips and Strategies
Activate the Leftmost and Rightmost Levers
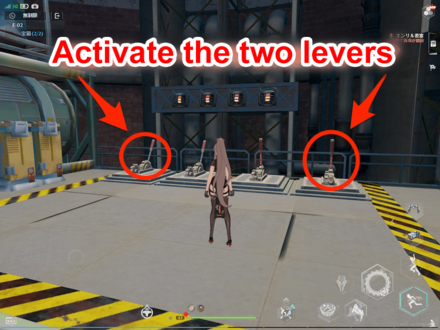
The puzzle in Ruin E-02 involves activating the correct set of levers to open the boss room. You only need to pull the leftmost lever and rightmost levers to solve the puzzle.
Leave the ruins to reset the puzzle
If you messed up the puzzle, you can leave the ruins and come back to reset the levers.
Ruin E-02 Location and Rewards
Map and Location
 |
Level Requirements and Rewards
| Difficulty Level | Details |
|---|---|
| Easy |
Required Level: 43 Possible Rewards: • EXP x61,600 • Gold x6,600 • Colossus Arm Shard x5 • Potent Omnium Crystal x1 • Energy Crystal Dust x200 • Astra Exploration Points x40 |
| Normal | Required Level: 59 Possible Rewards: • EXP x255,000 • Gold x10,600 • Colossus Arm Shard x10 • Potent Omnium Crystal x2 • Energy Crystal Dust x300 |
| Hard | Required Level: 69 Possible Rewards: • EXP x436,700 • Gold x13,600 • Colossus Arm Shard x15 • Potent Omnium Crystal x3 • Energy Crystal Dust x300 |
Volt weapons and long range weapons are recommended
| Volt Weapons | |
|---|---|
 Dual EM Stars Dual EM Stars
|
 Venus Venus
|
 Thunderblades Thunderblades
|
 Thunderous Halberd Thunderous Halberd
|
| Long Range Weapons | |
 Icewind Arrow Icewind Arrow
|
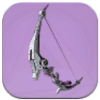 Nightingale's Feather Nightingale's Feather
|
When entering the ruins at Normal or Hard mode, all enemies will receive additional 75% damage when hit by a Volt weapon. In addition, the boss in this ruins uses close range attacks, so it is recommended to use long range weapons to attack from a safe distance.
How to Defeat Ruin E-02 Boss
Sweetie Boss Overview
| Sweetie | ||||
|---|---|---|---|---|
 |
||||
| Difficulty | HP | Level | Element | Weakness |
| Easy | 3 Gauges | 43 | Grievous | None |
Avoid Fighting at Close Range
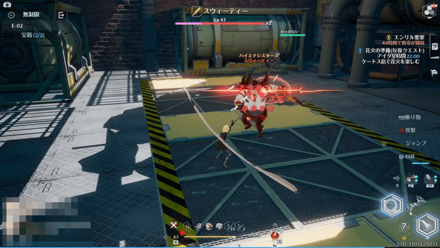
Most of Sweetie's attacks are close range, so it is best to use a long range weapon to fight at a distance and avoid her attacks.
Dodge Sweetie's Close Range Attacks

Sweetie will attack if you are at close range. Many of these can be easily avoided by dodging once the red beam of light appears.
It is recommended to focus on dodging her attacks to trigger a Phantasia and get free hits.
Use a Shieldbreaker Weapon to Destroy Sweetie's Shield

When Sweetie's health is low, she will activate her shield and maximum meter at the same time. Use a shieldbreaker weapon such as the Rosy Edge or Pummeler to quickly destroy her shield before the maximum gauge fills up.
Run away when Sweetie uses her special attack
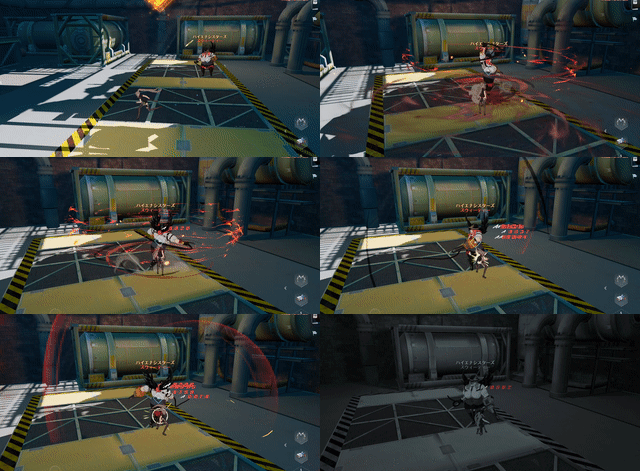
If the maximum meter fills up, Sweetie will create a tornado that sucks you in before performing a multi-hit attack that may lead to a one-hit KO. You can avoid this attack by moving away from the red circle once it appears on the ground.
Tower of Fantasy Related Guides

List of Ruins and Walkthroughs
All Ruins Guides
| List of All Ruins | ||
|---|---|---|
 Ruin A-01 Ruin A-01 |
 Ruin A-02 Ruin A-02 |
 Ruin A-03 Ruin A-03 |
 Ruin B-01 Ruin B-01 |
 Ruin B-02 Ruin B-02
|
 Ruin B-03 Ruin B-03 |
 Ruin C-01 Ruin C-01 |
 Ruin C-02 Ruin C-02
|
 Ruin C-03 Ruin C-03 |
 Ruin D-01 Ruin D-01 |
 Ruin D-02 Ruin D-02
|
 Ruin D-03 Ruin D-03 |
 Ruin E-01 Ruin E-01 |
 Ruin E-02 Ruin E-02
|
 Ruin E-03 Ruin E-03 |
Comment
Hard Mode Chest 2 is found in the final room under the bridge
Author
Ruin E-02 Walkthrough and Treasure Chest Locations
improvement survey
03/2026
improving Game8's site?

Your answers will help us to improve our website.
Note: Please be sure not to enter any kind of personal information into your response.

We hope you continue to make use of Game8.
Rankings
- We could not find the message board you were looking for.
Gaming News
Popular Games

Genshin Impact Walkthrough & Guides Wiki

Honkai: Star Rail Walkthrough & Guides Wiki

Umamusume: Pretty Derby Walkthrough & Guides Wiki

Pokemon Pokopia Walkthrough & Guides Wiki

Resident Evil Requiem (RE9) Walkthrough & Guides Wiki

Monster Hunter Wilds Walkthrough & Guides Wiki

Wuthering Waves Walkthrough & Guides Wiki

Arknights: Endfield Walkthrough & Guides Wiki

Pokemon FireRed and LeafGreen (FRLG) Walkthrough & Guides Wiki

Pokemon TCG Pocket (PTCGP) Strategies & Guides Wiki
Recommended Games

Diablo 4: Vessel of Hatred Walkthrough & Guides Wiki

Cyberpunk 2077: Ultimate Edition Walkthrough & Guides Wiki

Fire Emblem Heroes (FEH) Walkthrough & Guides Wiki

Yu-Gi-Oh! Master Duel Walkthrough & Guides Wiki

Super Smash Bros. Ultimate Walkthrough & Guides Wiki

Pokemon Brilliant Diamond and Shining Pearl (BDSP) Walkthrough & Guides Wiki

Elden Ring Shadow of the Erdtree Walkthrough & Guides Wiki

Monster Hunter World Walkthrough & Guides Wiki

The Legend of Zelda: Tears of the Kingdom Walkthrough & Guides Wiki

Persona 3 Reload Walkthrough & Guides Wiki
All rights reserved
TOWER OF FANTASY©HOTTA STUDIO, A PERFECT WORLD COMPANY. ALL RIGHTS RESERVED.
©2022 PROXIMA BETA PTE, LTD. ALL RIGHTS RESERVED
The copyrights of videos of games used in our content and other intellectual property rights belong to the provider of the game.
The contents we provide on this site were created personally by members of the Game8 editorial department.
We refuse the right to reuse or repost content taken without our permission such as data or images to other sites.


![Monster Hunter Stories 3 Review [First Impressions] | Simply Rejuvenating](https://img.game8.co/4438641/2a31b7702bd70e78ec8efd24661dacda.jpeg/thumb)


One of the E-2 Hard Mode chests is in the final room (after you defeat Sweetie, go through the opened tunnel door). Go to the bridge closest to the final pyramid chest; then jump down and look under the bridge.